Working on this one while I wait for a replacement sprue for my F-4B project.
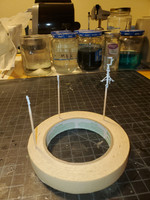
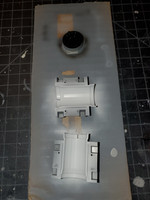
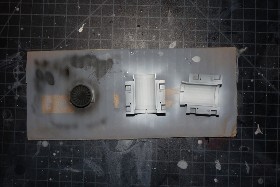
Nose gear parts painted white:
(boarding ladder box in upper right corner of this shot)
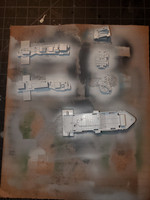
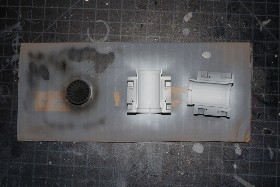
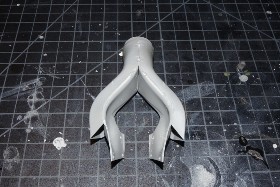
Lower-forward fuselage white portions painted:
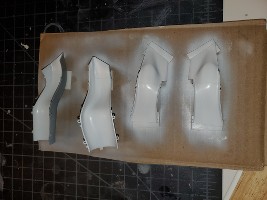
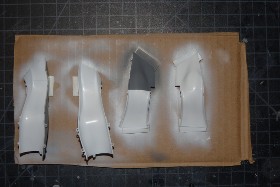
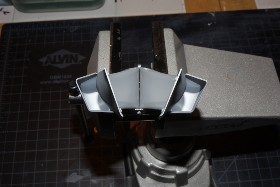
Intake tubes. Second attempt at painting looks better than the first. Shooting at 20 PSI resulted in grainy paint in the narrow sections. Reduced pressure to 10 PSI after stripping them, and now they’re nice and smooth:
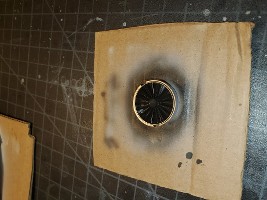
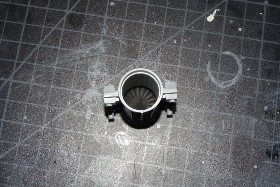
Inlet fan. Gloss black fan blades and chrome fan hub:
Working on the base coats for the engine exhaust next…
I will be following this build with great interest, Eaglecash. I built the Hasegawa 1/72 scale F-35A a couple of years ago in memory of my youngest brother Gerry, Buzz to the family. Buzz was a systems engineer on the F-35 program at Ft. Worth until he passed after suffering a stroke at age 52. I plan on adding this Tamiya kit to my stash sometime after the first of the year and I hope to have it built by the end of 2023 to honor Buzz’s memory. Thanks for posting your W.I.P.
Welcome, Frank! Thanks for following along. You did a fantastic job on your F-35! As I’m finding out, the paint work on these is quite complicated. Heh…I was pulling my hair out, trying to find a good painting guide for the post-2017 Z-13 scheme for it. Finally thought to look at the back of the painting poster for the early F-35 in the kit, and…there it was! [smacks forehead] Heh…even says (Z-13 overcoat) right at the top in big, bold letters. Having a little trouble masking the insides of the intakes. Even my trusty Tamiya masking sticker sheet stuff is not wanting to settle down into the sharp bends. Normally I don’t use liquid maskers much because of the lack of a sharp, clean edge. But, I think that might actually do the trick here, since the two different-colored areas inside the intakes have a nice, engraved line between them. Got the grey color wrong for the Z-13 scheme, so I’ll try the liquid mask and paint over that grey with the right color. Only tried one intake tunnel half, so the rest are still a pristine white all the way through. As long as the messed up one ends up looking like the others, I’ll go with it. Don’t want to have to strip and re-paint that one again.
The liquid mask produced a satisfactory result on my test shot, so I’m going to move forward on the other 3 pieces. I know I say it a lot, but this MRP paint is awesome. So nice to only have to wait an hour for it to cure.
Did the Alclad painting of the burner. Really messed up by picking the wrong color to begin with, and then my airbrush started having tip dry issues (had my pressure set too high). But, I couldn’t be happier with how it looked in the end. Sometimes accidents lead to good things. Exhaust tube clearcoated with matt clearcoat. Now I just have to streak it to make it look like there has been a fire in there.
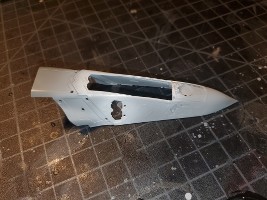
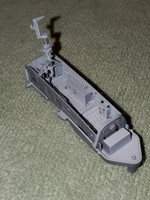
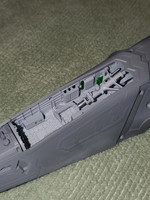
I went with the liquid mask method on everything, and I still can’t say I’d recommend it for much, as there still wasn’t a sharp, clean edge. That being said, with the angles and the way the intake tunnels on the F-35 twist and turn, the small imperfections aren’t even visible when everything is put together. The seams are also hidden by the twists and turns, so Tamiya did a great job with how they designed this to go together. Here is the completed intake sub-assembly:
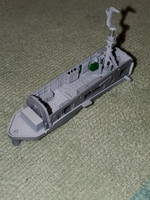
Engine exhaust sub-assembly is done. From all of the pics I have been able to find of the F135 engine, it looks like its a pretty clean-burning engine, so just used a little grey and a little grime Flory to streak the exhaust tube. The streaks help the seams blend in with the rest of the structure.
Got the nose gear assembly done. Tamiya designed the nose gear with a little retaining mechanism to keep the gear retracted until later in the assembly process where they have you cut that retaining mechanism to let it swing down. Kinda cool feature that keeps it stowed during construction handling so you don’t accidentally snap it off. Heh…but…I broke the retaining mechanism so the gear swings freely right now. I’ll probably just use a little blob of silly putty to temporarily lock it in the retracted position. No point in “repairing” something that is meant to be cut later anyway.
Edit: This one is the first gotcha I ran into on this build. So don’t make this same mistake. [There is no lens for the landing light in the kit that I could see, so I used some Bondic to make one.] See my later posts for details on this.
I hear ya on the antennas and pitot tubes, Brandon. The little machined metal ones from Master Model have saved me from myself more than once, and so far I have managed to not end up with one of those embedded in my fingers.
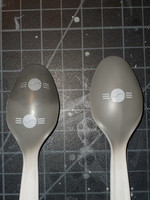
Did some spoon tests of different techniques for the Have Glass finish this afternoon, and I was almost ready to decide on doing the MRP280 base coat, with MRP278 clearcoat, followed by the decal, and MRP126 semi-matt clearcoat to seal the decal, but I wasn’t crazy about the sparkly appearance of the MRP278. I know the real thing might have that appearance, but I think these sparklies magnified by 48 times would end up looking like a metal flake paintjob on the full size aircraft. I tried a spur-of-the-moment idea on the upper half of the left spoon, and I really like how it looks. I tried rubbing it with some powdered graphite, and it gets the paint underneath a darker shade (which is good), and it has a metallic sheen to it now that isn’t sparkly. Just a matter of playing with different clearcoat techniques at this point.
Thanks Paul! The F-4B sprue is here, so I have been working on that as well. I may end up having to pause the F-35 after I have gotten it as far as I can, pending a Quinta cockpit set and Eduard wheels and masking kit (none of which have been released yet of course). Not sure how long it will be until those come out…hopefully soon. Just can’t deal with the kit cockpit stuff. Its got really good base detail, but the main details in it are done with Tamiya decals, and the ones they make for the interior stuff all kinda have a comic book appearance to them. If they’d advance their decal technology to the level of Furball Aero, they will have achieved perfection in their kits…they’re so close, but the decals are still kind of a letdown.
Its so odd Tamiya get the decals so wrong. They are recognized for superior models in fit and engineering but fail miserably with the decals. Another odd thing is the consistency of the adhesive mask across kit genres. When I built their 1/32 Corsair the kit included a canopy mask that you had to cut out. When I built one of their endurance race cars, a far less expensive kit, the wind shield mask were cut out for you. I always buy aftermarket decals or paint mask when building Tamiya.
Looking forward to seeing more of the F35 and F-4B.