Tamiya 1/48 Willys COMPLETE *Figures WIP*

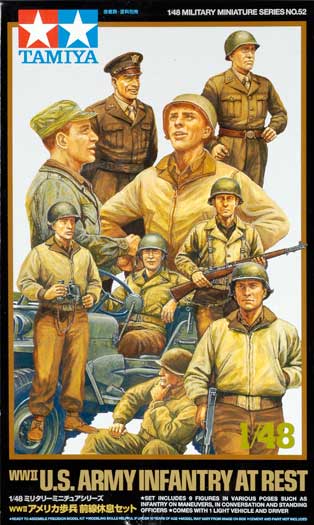
So I came down to my dad for Christmas, and on the 24th, which is Christmas eve here, I picked up the following kit from his LHS:

It’s a kit I’ve always wanted, and as I am just here for Christmas and new year (Going home on Saturday) I just wanted something quick too.

But now ofcourse, the happy holidays gave me not too much time to build, so things have benn going slow, but still alot quicker than I usually build at!

Now first I had to do the chassis, and the leaf suspension had some nasty ejector pinmarks:

They were easily taken care of by simply dragging the knife along the grooves and over the ejector pinmarks so they too got the grooves:

Now onto the body itself, it too had many nasty sinkmarks on the underside. But that was no fight for a stick with sand on it:

Now I did like the shape of the radiator alot, and decided to take a little stylished photo and edit it slightly, just for the fun of it. I like the look of it:

Now I am VERY proud of myself to tackle these thin parts so well! Here’s the different sticks for the floor:

Now, usual Tamiya, more sinkmarks. Here on the back of the seat (was on both seats). It was quickly fixed with a knife:

Here’s the three worst located ejector pinmarks. It was hard to get away, but with some extra time, they were gone!

Now I do lack a photo, but the three subassemblies (chassis, body, windshield) was sprayprimed with Citadels Chaos Black. And then they were brushpainted with Vallejo Modelcolour 70889 USA Olive Drab:

And all dryfitted:

Now as said, I am very proud I got all the thin parts all succsessfull. Here’s two of the handles on the body:

I did also want to add one extra passanger to the car. I went for the other sitting soldier included:

Now his pose doesn’t look very neatrual, does it well?

Now to fix this, I slice the foot that needs repositioning in three, and I drill a 1mm hole in all 4 ends:

I put him togheter using superglue and steel wire, so his limbs are moveable:

And then we reposition his leg:

Now at that, I have added putty to the huge gaps. It is currently drying, and I will hope that at the end it will look good. I am really enjoying this build, and I am looking forward for questions, advice, critics and comments! Please, bring 'em on!

-Lasse [t$t]

Comin’ along nicely so far Huxy. Does the kit include a clear windshield for the jeep?

(Funny thing is I’ve seen this kit many times at my LHS, but never read the label to see that it came with a jeep. I always though this was strictly a figure set.[:(DD])

Thanks Michael! And yes, it comes with clear windhields indeed. Even clear headlights!

I knew from the very beginning it came with a Jeep, and therefore I have always wanted it. It is badly labeled as Tamiya wanted to avoid any license fees to JEEP…

The kit also comes with a sprue of tarps, bags, fueldrums and jerrycans aswell! Quite a nice set!

-Lasse [:)]

Nice work so far. I’m currently working on the Tamiya 1/48 Jimmy, so I know what you meen about ejector pin marks [:(].

Regards, Rick

Hi Lasse,

That looks like a good kit there buddy-nice work so far.

I think my LHS have that kit in stock; if so I’ll buy it as I think it would lend itself to a nice diorama (I’m planning on doing a couple in 2010).

I’ve got my German Field Tank Maintenance Crew and 1/48 Tiger I, that will be my first little diorama and the one you have I’m thinking of a snow covered area in the rear at the bulge-perhaps the jeep with the guys taking it easy sat on it and some other US infantry walking by them saying hi as they head for the front.

Keep us posted.

Ben [t$t]

Thanks Rick! Yeah, Tamiya may be great kits, but their numerous ejector pinmarks can be a pain in the a$$… Hm, what’s a Jimmy?

Ben, thanks! This kit can make a very nice diorama of it’s own… Just don’t throw in all the men, as it will look too busy! [:)]

I am for sure looking forward for your diorama, Ben.

Be sure to give the Americans winter uniforms, if they are in Ardennes!

-Lasse [t$t]

Looks good Lasse. I like the rework of the GI’s leg. That will look cool.

A jimmy is just a nickname for the U.S. 21/2 ton 6x6 Cargo Truck.

Regards, Rick

Thanks Wingnut! Yeah, I hope the leg will add that little extra detail that makes the model all so better!

Rick, gotcha. I knew I had heard “Jimmy” before! I’ve always wanted to build that kit… How is it?

-Lasse

Looks like it is coming along well. Keep up the good work.

This is not the case. Tamiya has fully licensed their Jeep kits. The 1/35 version has the Jeep logo and trademark right on the packaging and it says it is licensed. Sounds like just bad marketing strategy.

Although the figures aren’t what I wanted (Tamiya screwed the pooch on these guys, they’re way too short), I had to snag a few of those Jeeps… I’d spent years looking for the Bandai 1/48th kits to no avail, so this kit was a Godsend…

Lasse, the Jimmy is an excellent kit & a fun build. Only issue is a plethora of ejector pin marks that need filling/removing. I dislike that kind of grunt work, but can’t be avoided.

Regards, Rick

Thanks all for the kind replies!

Hans: I know what you mean about the Bandai kits! My dad was lucky enough to actually find a Bandai one with the swastika printed on the box. This was a 1/48 Schwimmwagen found and bought at IPMS 2009!

Not too much of a progress right now, as school always comes first! But here’s a little one.

I drybrushed the entire vehicle to get some more variation in the colour, and to further more see the details better. The headlights were also painted, with Citadel’s Mithril Silver.

The seats are also well underway, painted in Vallejo German WWII Fieldgrey, with the straps painted bestal brown, also from Citadel. I think it looks great!

I also painted the tools in Vallejo Black Grey, and the wooden handels in Vallejo Buff in order to prepare for wood.

And then the last picture here, taken this morning after it dried overnight. The buff handels were simply streaked with a brush loaded with Raw Umber oilpaint. This creates a very nice wooden pattern! And I do have a more detailed tutorial for this here on the forum. The streaking on the shovel I will change to the other direction, as this is not the way it really goes!

Questions, comments and critics are all warmly welcome!!

-Lasse[t$t]

Top notch work as always Lasse!

I’m loving the woodgrain you’ve got going there-and on 1/48 as well! I’ll be giving that method a go methinks!

ATVB

Ben [Y]

Looking great Lasse. I really like the wood grain effecton the tool handles.

Regards, Rick

Thanks Ben! The method is indeed a very, very, very highly effective one - and so easy!!

Thanks you to too Rick!!

-Lasse

Thanks there, Hoffmann! You better go and complete a model! I remember before, when it was to simply rip the parts of, glue them together more or less after the instructions, and then shoot them outside! :smiley:

Of course, I am here to help you! [:D]

As the IPMS National competition is getting dangerously close, perhaps it is time to start building -a lot-…

Here’s a grouppicture of the spare wheel, the jerrycan, the chassis and all the wheels. Wheels were painted quite simple. Black undercoat and a quick drybrush of black grey. Olive Drab did the job for the middle parts.
The Jerrycan itself was painted German fieldgrey. What a sweet shade!
The engine was painted a little, tiny dab more blue (I found it better) than what is futured on a friend of mines Willys Jeep…
The muffler has an ugly red colour, but with some extra work it will look like rust! :slight_smile:

Closeup of the engine, where it has been weathered slightly with some sepia drawing ink:

I dryfitted the body, the chassis and the wheels to see how it looked (Dryfit = no glue), unt mein got!! It turned out to be an absolute great show in my opinion!

And here it is with the modified, not-yet-done foot:

Absolutely great so far. The windshield was not attached as it is healing up after an incident…!

questions, comments and critics are very, very welcome!!!

-Lasse [:)]

Hello stranger!

I’m loving this build Lasse-she’s looking great!

I nearly picked this very same kit up at a show on Sunday but ended up with the Tamiya 1/48 Hanomag. It was a very hard desicion but as my LHS don’t stock the halftrack and do stock this kit that factor decided it for me.

I’ll be picking this kit up on payday and if it’s ok I’ll be following your blog and maybe picking a bit of your brains too!

Kind regards,

Ben [:)]

Looking better all the time. Nice work Lasse.

Regards, Rick

Lasse,nice work,however I must point out that the straps on the seats should be the same color as the cushions.On the real cushions these are sewed to the cushion.They have metal snap buttons that mate to snaps on the metal seat frames.This is based on many pictures and the 1/1 scale 1943 Willys MB jeep I am restoring.Just for your info.Great work,Lester