Hello everyone. It’s been a while since I’ve had the chance hop on the FineScale. I did manage to sneak in some time here and there to wrap up a build that’s been on the to-do list for the past three years. Many thanks to Stikpusher who was kind enough to send me a set of hard to find decals for this build which without would’ve meant I might not have even embarked on building it at all since my time is so limited. So again, thanks Stik!!
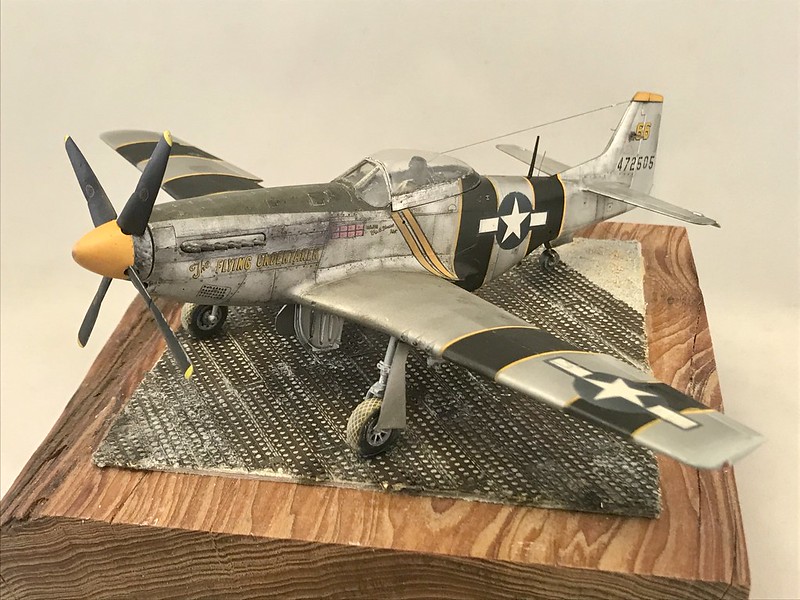
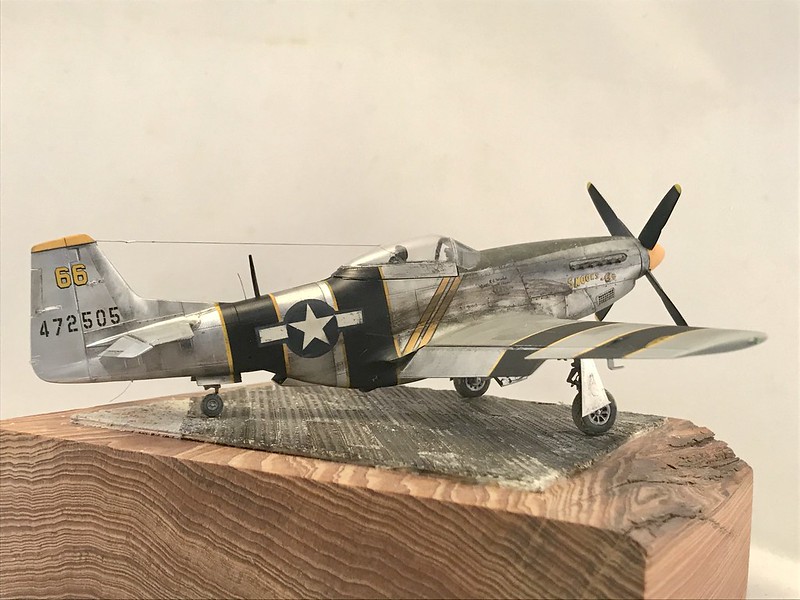
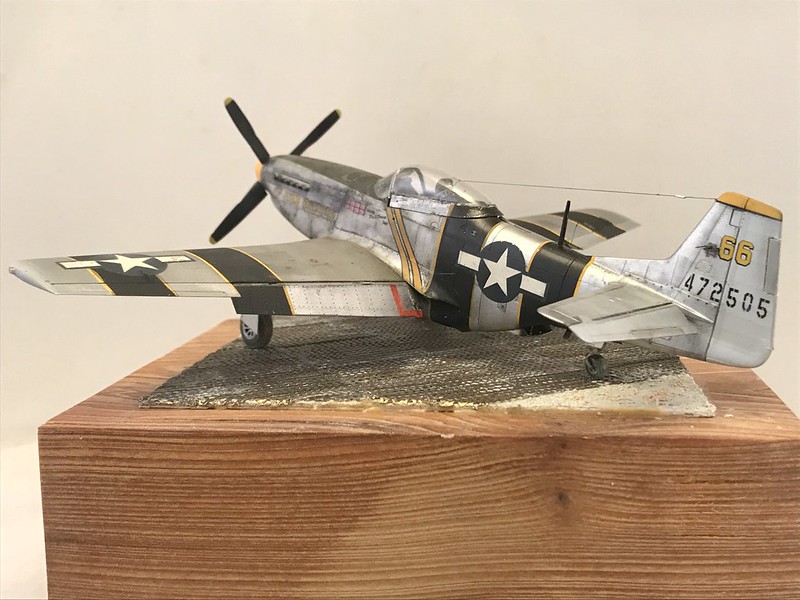
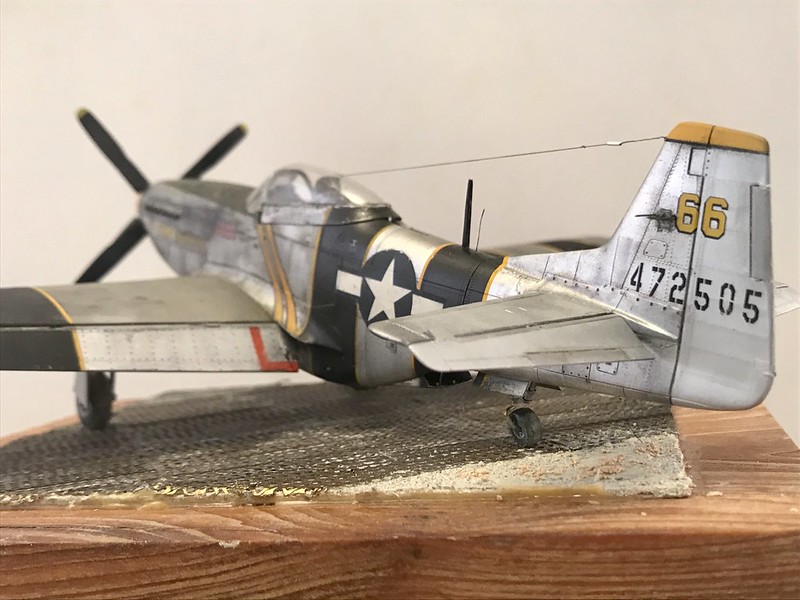
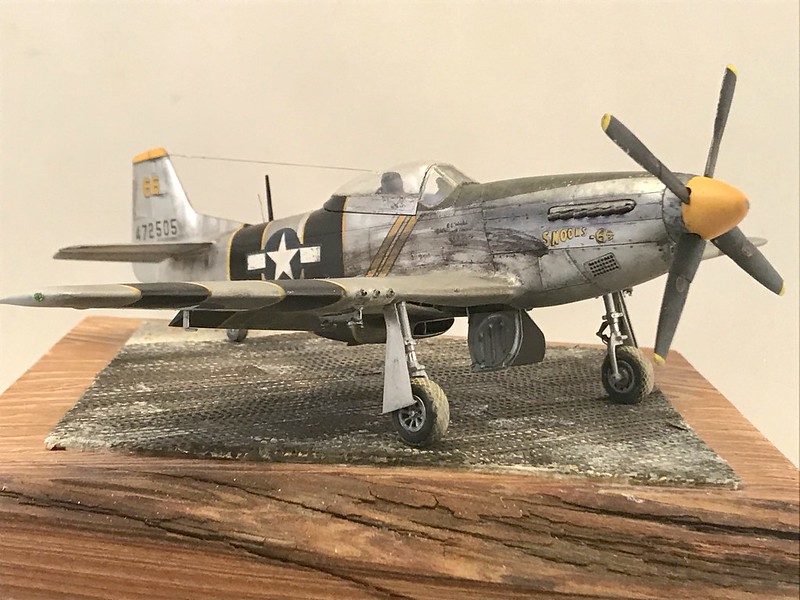
I had previousy built an F-6D recon mustang piloted by William Shomo during his MOH flight in the PTO for which he earned the named The Flying Undertaker. That particular plane was shot down shortly after with another pilot flying it and another plane was allocated to Shomo and dressed up for the press piece done about gutsy encounter with the japanese. This build represents the P-51 made famous in those photos.
 Untitled by Britt Vallot, on Flickr
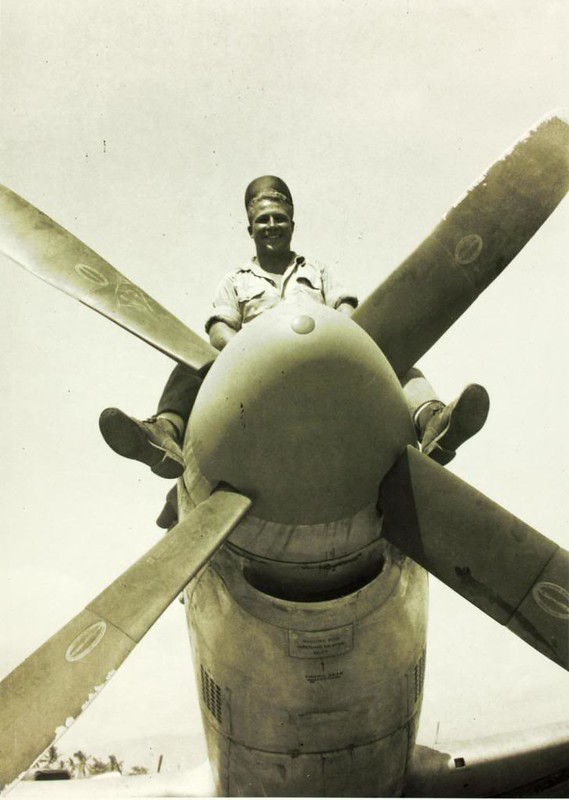
William Shomo
 Untitled by Britt Vallot, on Flickr
 Untitled by Britt Vallot, on Flickr
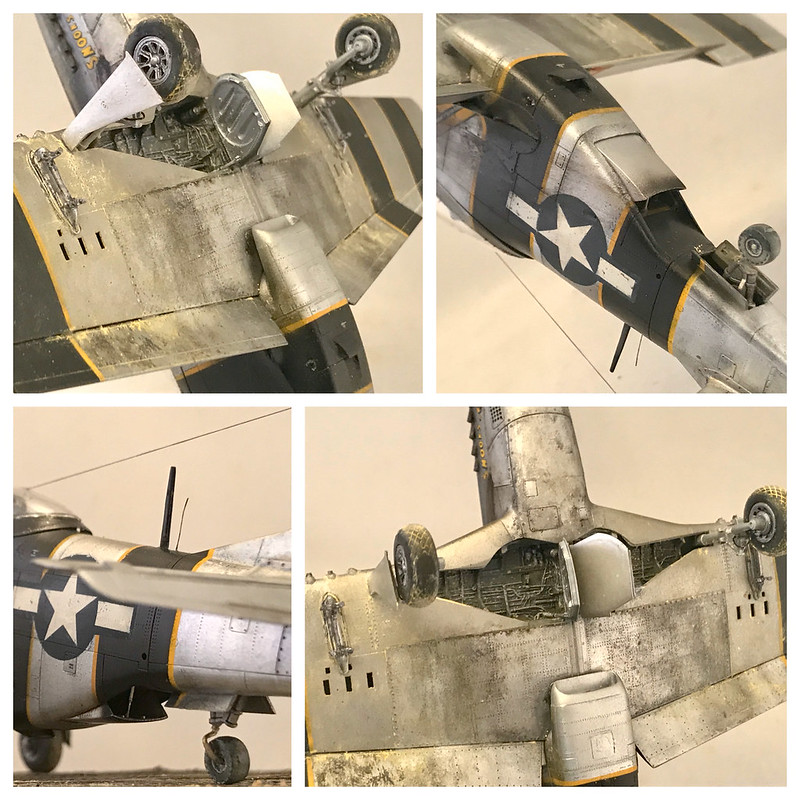
The man in the pictures below is Shomo’s Crew Chief, Ralph Winkel, who was a good friend of Shomo. It’s because of him there still exists most of these other photos. As I understand it he loved doing what he did and took excellent care of his aircraft. So, Ralph, you’ll have to forgive me for not locking up the landing gear doors on this build…I had to show off some the detail from that Aires landing gear bay. =]
 Untitled by Britt Vallot, on Flickr
 Untitled by Britt Vallot, on Flickr
I won’t do the background on this particular post since my time is limited, but I can drop a link to the other build where I went into some detail about Shomo’s and Lipscomb’s massive brass balls.
http://cs.finescale.com/fsm/modeling_subjects/f/2/t/176684.aspx
No WIP this time, but I did want to share a few pics of what was going on here and there as it’s naturally hard to see some of this once it’s closed up.
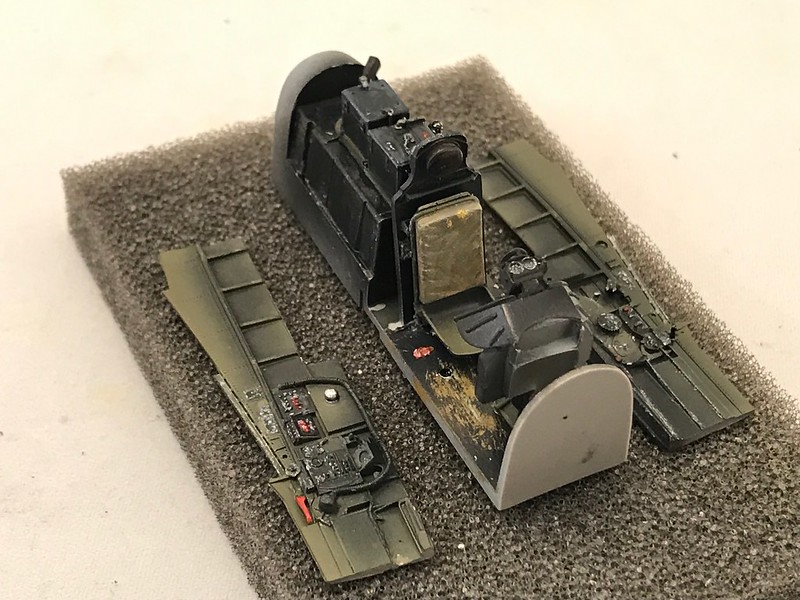
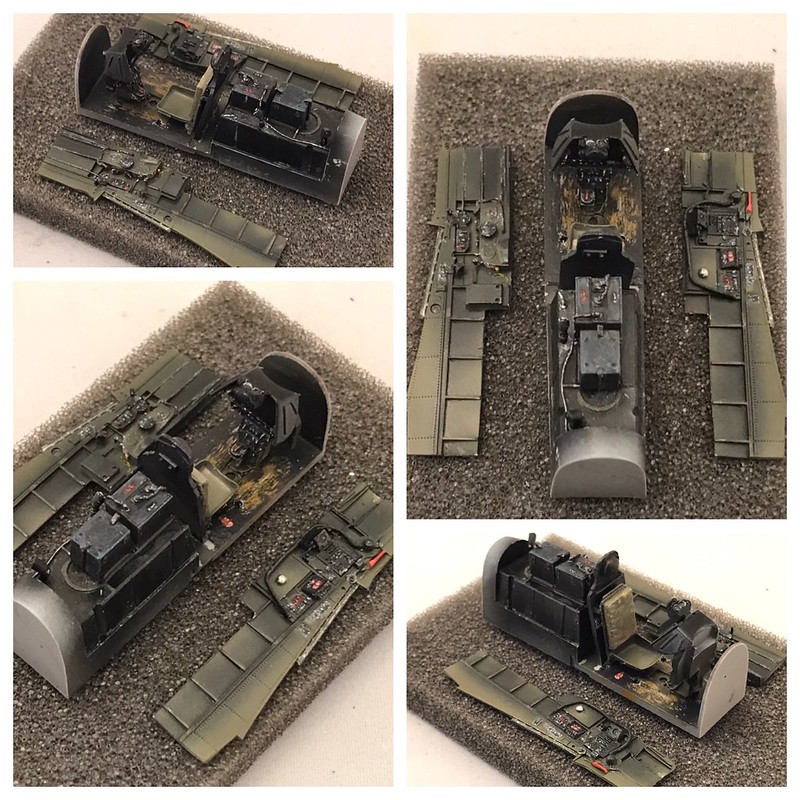
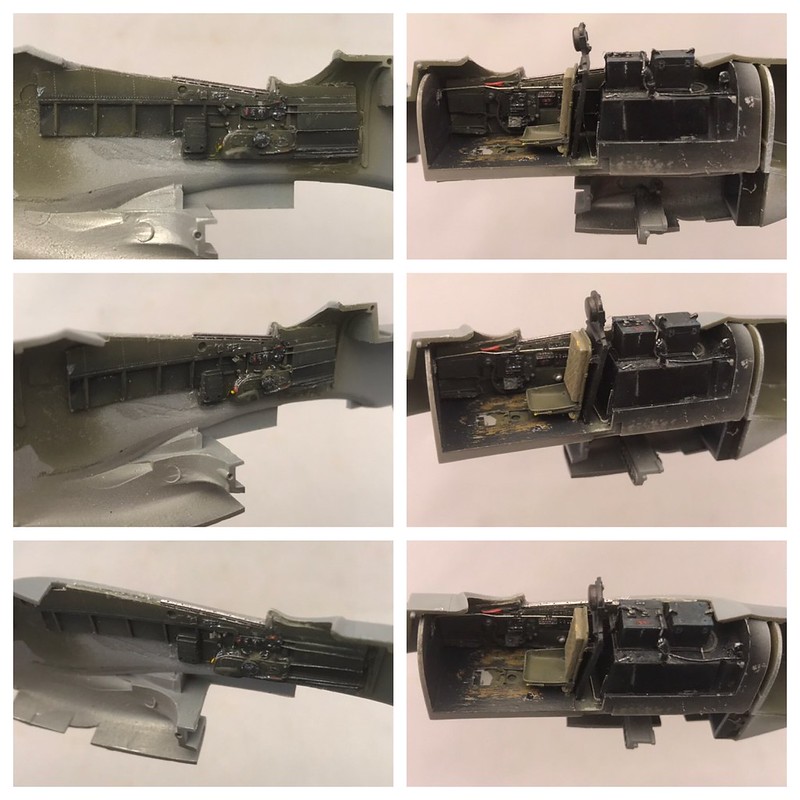
Cockpit
The cockpit is from Aires. The detail is beautiful of course. I added a few scratched parts to pick it up a bit. I originally intended to save myself some time by have a few AM sets to drop in so I wouldn’t be so tied up with scratchbuilding, but best intentions…
 Untitled by Britt Vallot, on Flickr
 Untitled by Britt Vallot, on Flickr
 Untitled by Britt Vallot, on Flickr
 Untitled by Britt Vallot, on Flickr
 Untitled by Britt Vallot, on Flickr
 Untitled by Britt Vallot, on Flickr
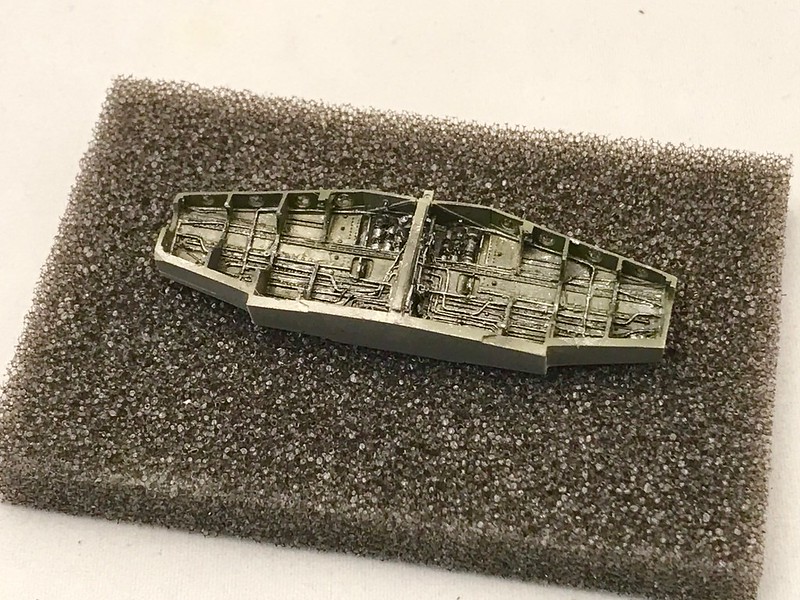
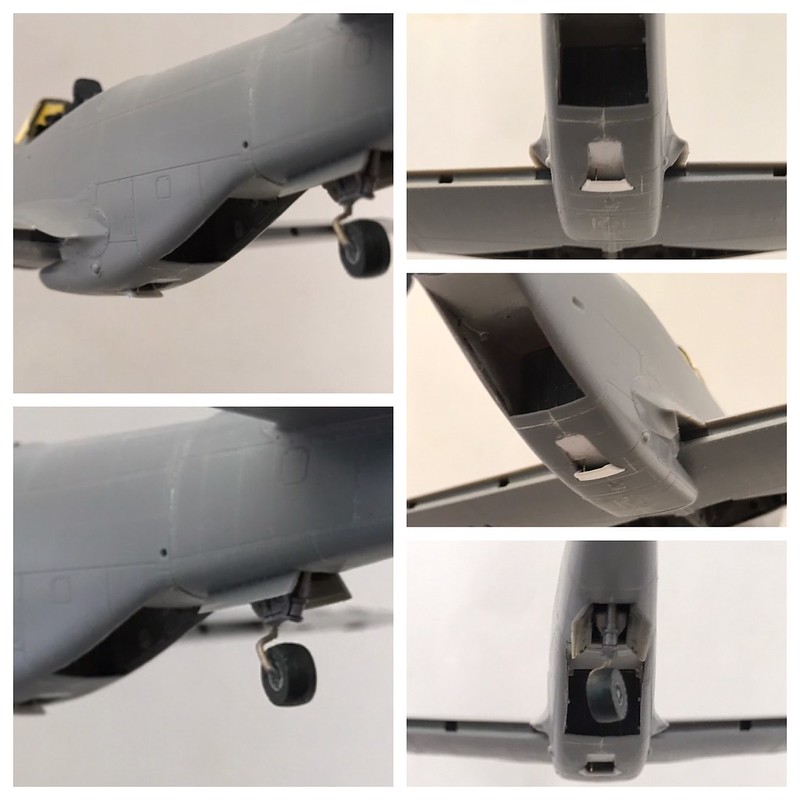
Landing Gear bay/Radiator
Another from Aires. Lots of detail. If you can find one affordably priced, it’s definitely worth it. I do want to try my hand at this on my own next time, but this did help me understand how to scale all the plumbing down to size for 1:48. Also, this was a bit difficult to pick out with painting and detailing.
 Untitled by Britt Vallot, on Flickr
 Untitled by Britt Vallot, on Flickr
 Untitled by Britt Vallot, on Flickr
Decided to not let that seam on the bottom push me around this time. Here I removed the kit part to the smaller vent door and made my own. I built up the space here as well and created the actuating rod for it also.
 Untitled by Britt Vallot, on Flickr
 Untitled by Britt Vallot, on Flickr
Much cleaner…
 Untitled by Britt Vallot, on Flickr
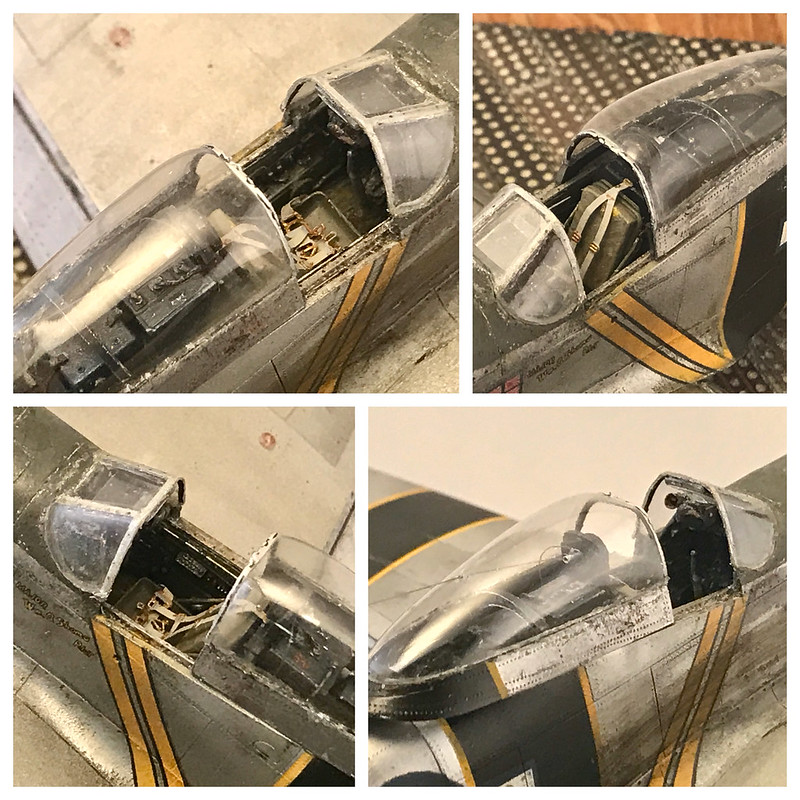
Windscreen/Canopy
 Untitled by Britt Vallot, on Flickr
Lead foil makes up the interior of the windscreen. I “rivet” the side to be glued to create the rivets seen from the interior. The windscreen and canopy are from Squadron. Slow and careful trimming make this AM part absolutely worth it. Not a huge fan of the Tamiya canopy, but what I’ve found is that by separating the molded canopy part from the Squadron vacuum mold I can add just the perspex canopy to the Tamiya kit part and marry the two so that the canopy fixes to the airframe better. I did a much better job this time. You’ll see this later.
 Untitled by Britt Vallot, on Flickr
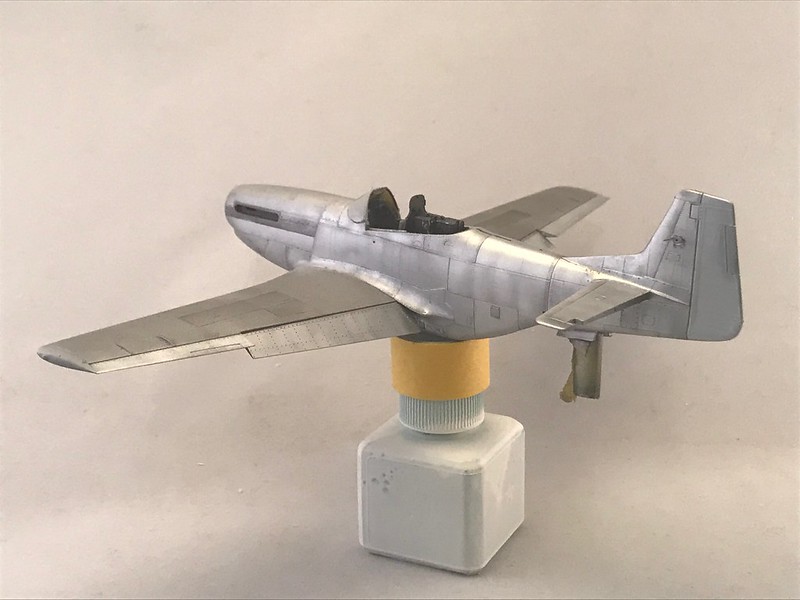
Here’s two quick pics of my priming for the this NMF paint job. Since this can be a tricky subject to paint, I wanted to offer one way to go about a mildly weathered NMF mustang. I painted this exclusively in Alclad paints save for the stripes and anti-glare… etc. The grey primer is pretty standard as a primer choice and works for the non-high shine alclads. Gloss Black must go down to correctly display high shine alclads. In studying pictures of mustangs in particular, I’ve noticed the back half end to generally stand out with higher shine as compared to the dirtier front end. For the purposes of this build and modeling a mildly weathered mustang that was photo op worthy, I laid down Aluminum on the front half of the fuselage (with some variation along the cowling) and Polished Aluminum on the back end of the fuselage. The Polished Aluminum requires Gloss Black to shine as it’s supposed to. For a harsher, more weathered look you could place the P. Aluminum over grey to tone it done considerably. Flaps and undersurfaces also saw a the P. Aluminum.
 Untitled by Britt Vallot, on Flickr
 Untitled by Britt Vallot, on Flickr
And here’s a couple views of that in bare NMF.
 Untitled by Britt Vallot, on Flickr
 Untitled by Britt Vallot, on Flickr
I’ll break here and post the completed pictures next. That way I don’t get lost in all the coding. =]