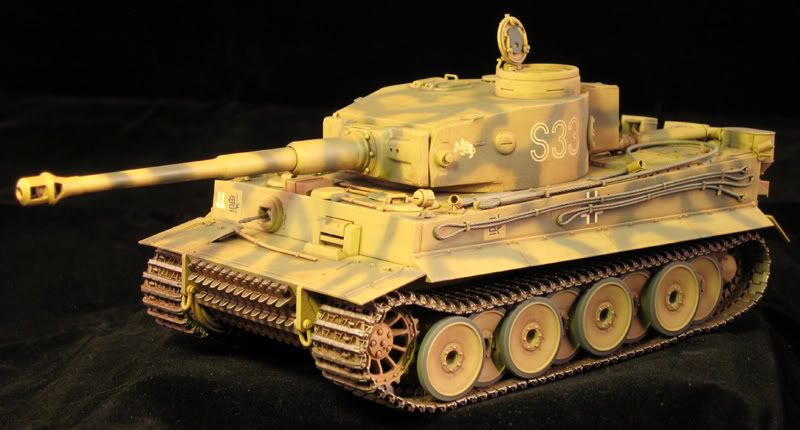
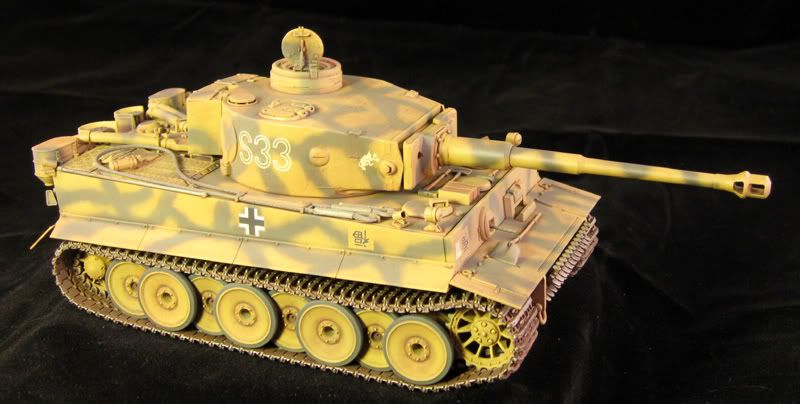
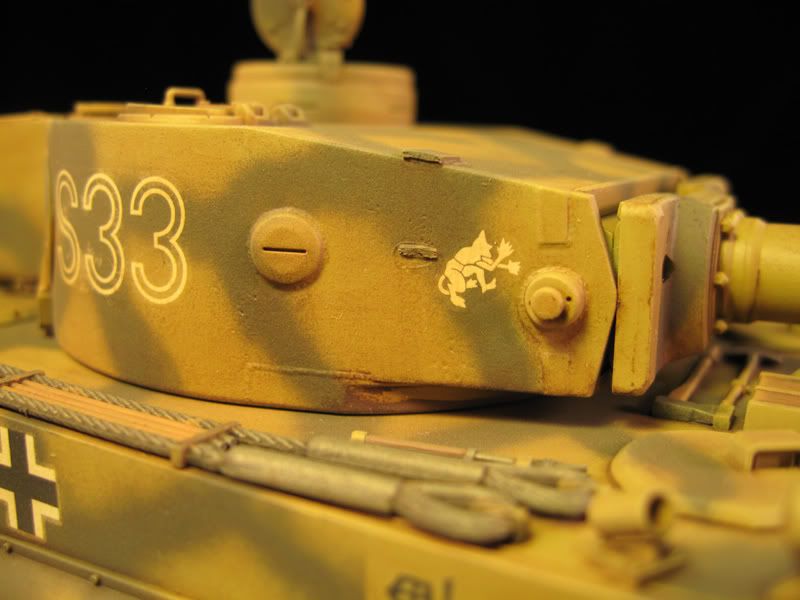
Here is my finished Tamiya 1/35 Tiger I Early fwhich I built for the Kursk Group Build. I did mine up as S33 with “Das Reich” as it appeared during the early phases of operation Zitadelle. [8D]
Tamiya’s Tiger I Early is a very nice kit, but I added a few extras to spruce it up:
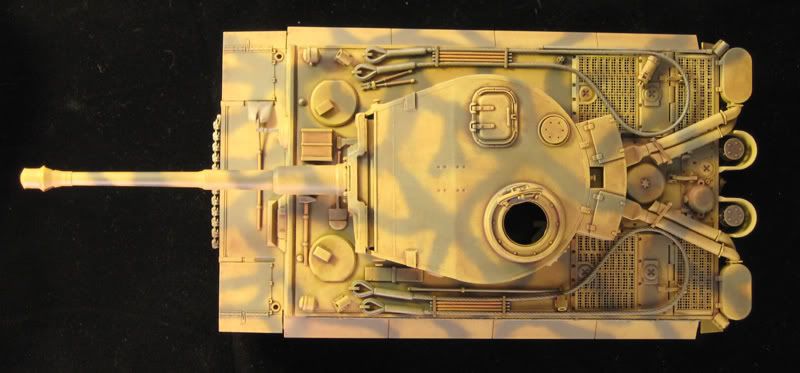
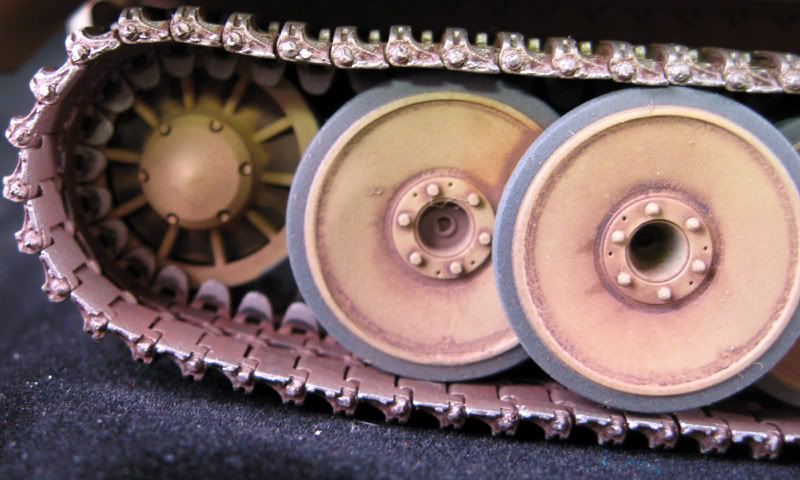
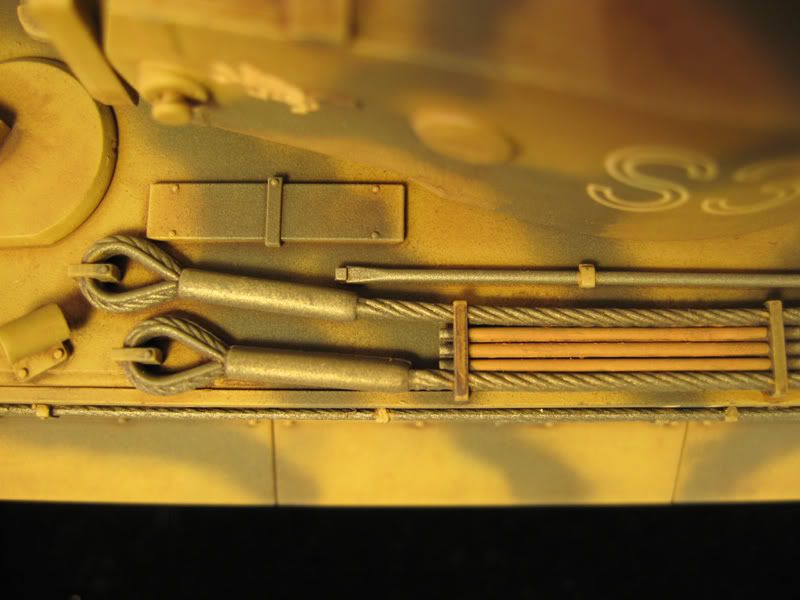
Friulmodel individual metal track links. I used small pins to link them together instead of the provided wire.
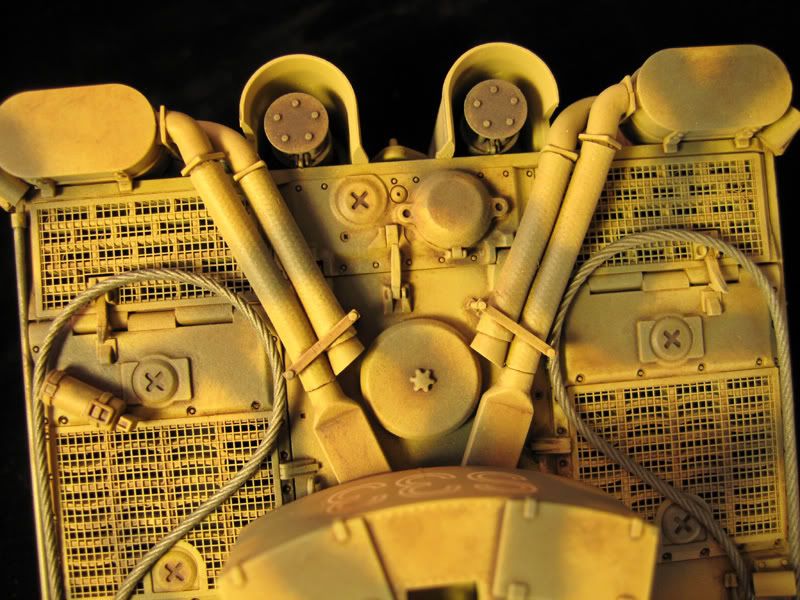
Tamiya grill screens for the engine deck
Eduard turned aluminum barrel
It was painted exclusively with Tamiya Acrylics and most of the weathering was accomplished with a series of oil washes. I applied a light dust coat before I applied the decals, and another when everything was finished for blending purposes. I also used Future before and after the decals were applied, and used Future mixed with Tamiya Flat Base for the final flat coat.
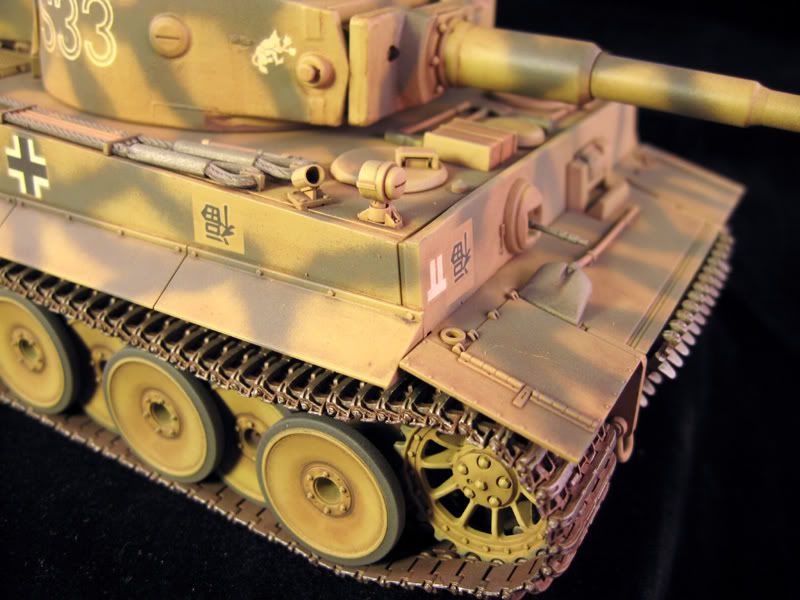
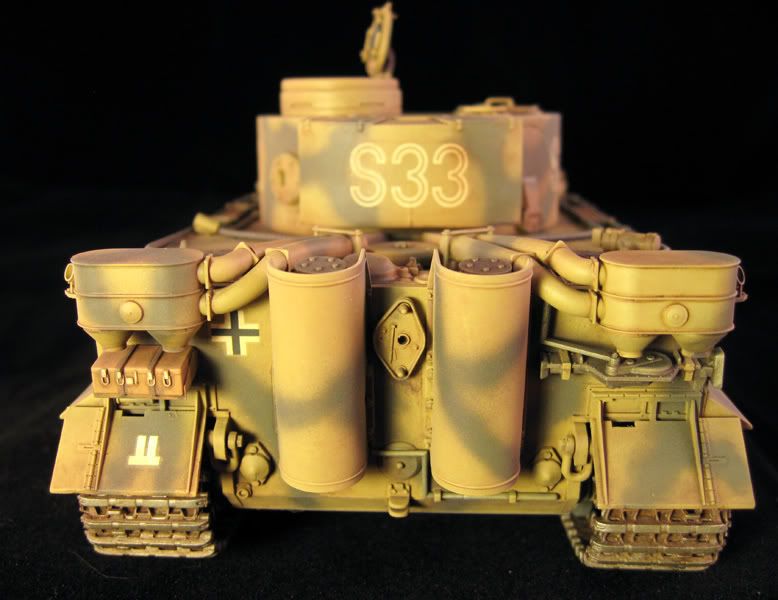
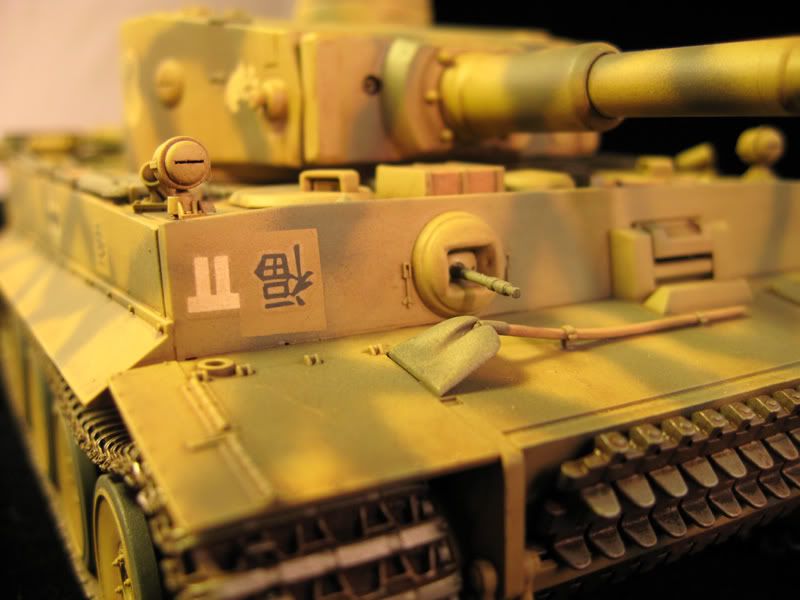
You’ll notice that the Smoke Grenade launchers have been cut off. It was fairly common, especially in Das Reich, to cut off the launchers with a cutting torch as they had a nasty habit of discharging if they were hit by small arms fire or shrapnel, this blinding the tank. I studied my reference photos to try to replicate what the metal stubs looked like.
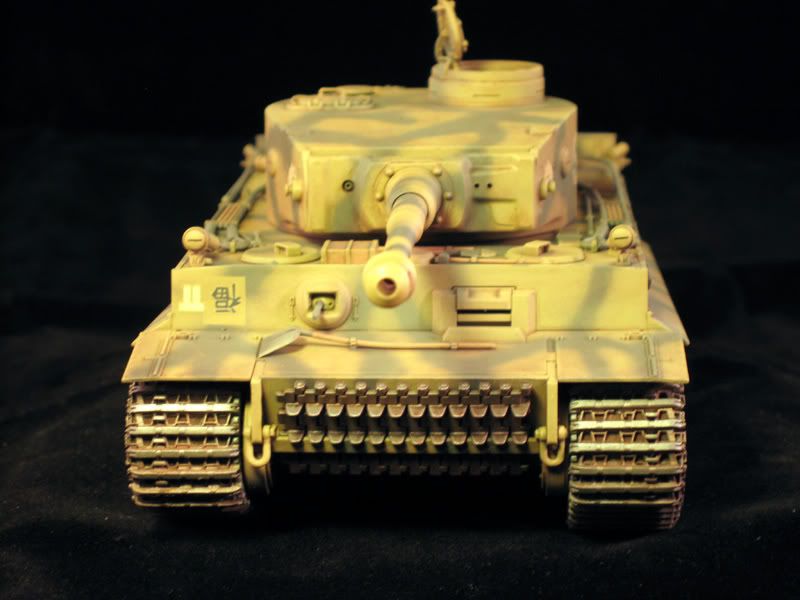
The symbol on the front and sides of the tank is the Chinese Kanji character for good luck applied upside-down. They got the idea from a signet ring.
I deviated from the Tamiya decal placement guide as it is incorrect. I have pictures of S33 during Zitadelle and the unit symbol for Das Reich was located on the right side of the front armor plate next to the Kanji character, not on the left as the instructions would have you place it.
I really enjoyed building this Tiger as it’s the first built one in my collection. It now has a place of honor on the top shelf of my display case along with my Panther V Ausf. A “GrossDeutschland” and PzKpfw IV Ausf. G with 15th PD in Tunisia. [8D]
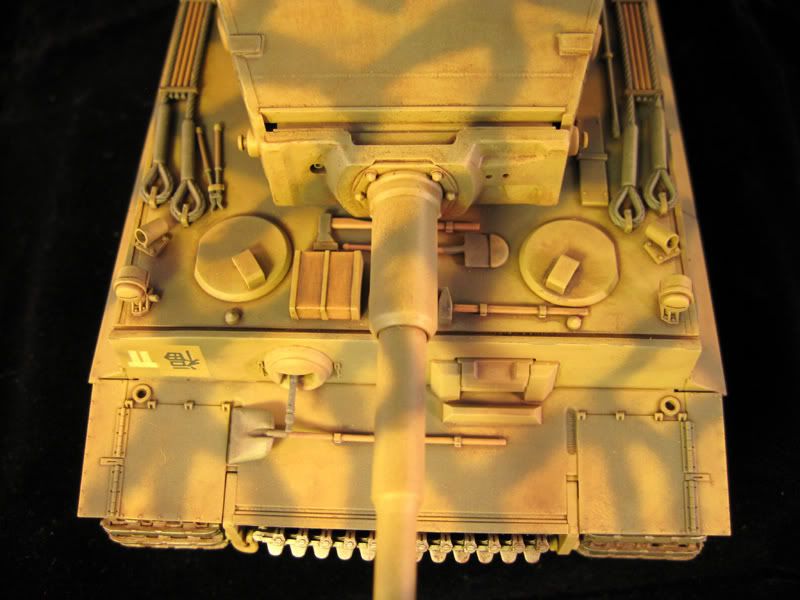
An exceptional build Scott ! I like everything about it. I particularly like the detailing of the pioneering tools and other attachments. That thing that looks like a small suitcase on the rear left side caught my eye because of the superb detail and color rendering. This Tiger is a real showpiece.
A mighty nice camo job too. I’ve attempted that pattern on my “test models” but have not been able to achieve it yet. You nailed it.
Wonderful job Scott ive been following this one on 3 different forums and i must say it turned out great, the details are very well done as is everything else. [:)]
Well Scott, I think the construction and paint are very good, and it’s hard to miss the build as it seems to be well documented on the web. I just don’t get the “wow” feeling when I look at this Tiger. It seems very “sterile” and reminds me of those “show box” builds that some makers put on the side of the box. I don’t mean this in a derogatory way at all, but, really, the weathering and sense of style that these kits need just seems to be missing.
I’m sure it is a matter of preference, But that “used” in service realism just isn’t there for me. I personally would like to see some wear and tear.
Thanks Steve, I really appreciate your honesty. I’ve also seen your builds, you know your stuff! [8D]
I worked really hard on the construction paying close attention to all the details to make sure I didn’t miss anything. I’d like to try entering some model contests and I know how important that is now. I think I’m getting pretty good with mixing paints and using my airbrush. I am starting to understand all the ins and outs of oil washes and dust coats, and lately with the dot method to add streaking (thanks Doog!). This is my fourth armor build in about 3 years and I’m finally beginning to feel comfortable with building armor. I’ve always been an aircraft guy before that. [:I]
I’d really like to keep pushing myself and learn the next “level” so to speak so I can give my builds the wear and tear look that really makes them come alive.
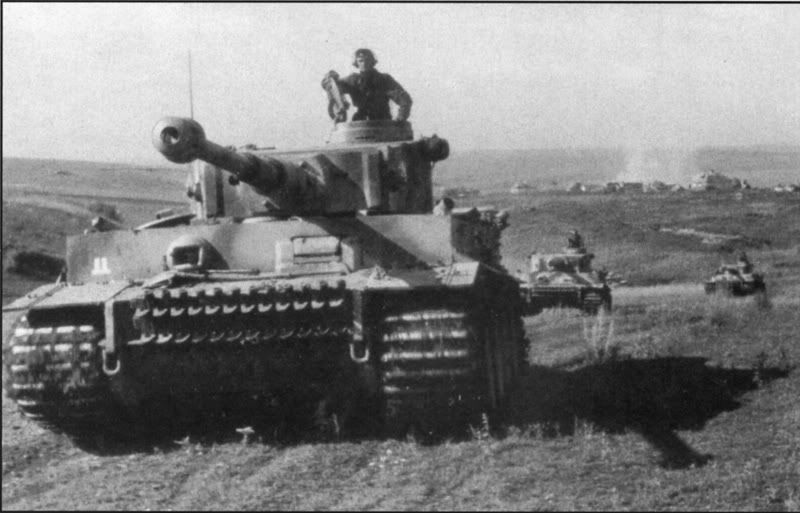
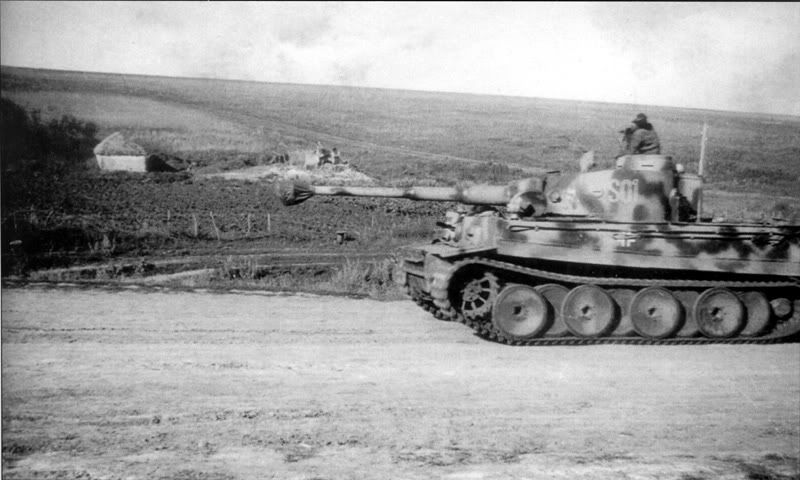
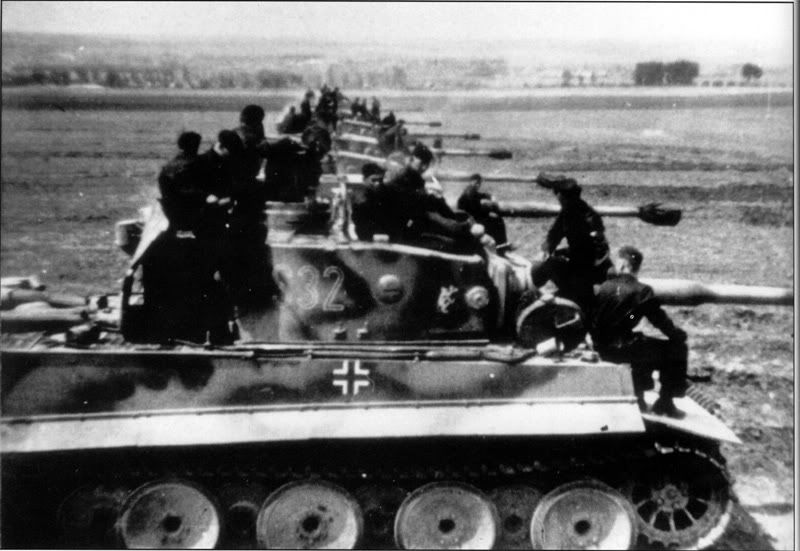
Whenever I build a model I always like to research it like crazy and model a particular tank or aircraft at a particular moment in time. Ideally, I build schemes that I have actual photos of. I used the pictures below as the inspiration for this build and used them as the target to aim for with weathering etc.
Based on these pics, what suggestions do you Steve, or any of you have that would help me get my Tiger to better represent the spirit of the pics below? I’d really appreciate any suggestions or ideas guys. I strive to be able to build like so many of you do (crocket, biffa, manstein and many, many others) and would be happy if I could even get just half as good. [bow]
I’m thinking right off the bat that I need to grubby up the tracks a bit more. The recesses of the tread pattern looks pretty decent, but the flat inner surfaces still seem a bit too clean to me.
edit: As a side note, during my research I discovered that all of the Das Reich Tigers (the 6 new Tigers that were delivered May 13th and the existing Tigers) were completely repainted, including the basecoat and camouflage patterns after May 13 but before May 20.
Scott, I like the beat up look but appreciate the clean builds, which this is. And an extremely fine one at that. If this was my ‘clean’ build I would do some dark brown pin washes around the hinges, bolts, welds, etc., add some light rust around the welds, and maybe some light scuffs where tree branches or whatever may have rubbed along the sides. The only thing I could think of to do with the inner track would be pastels/powders? The outer tracks look great. And the rear screens, not sure what I would do there, maybe a little drybrushing of steel? Not much help, just my thoughts. And again, if I had a build like that, I would be extremely proud.[tup]
I am certainly not a “know it all”, but, as a general rules go:
Weather with the airbrush: (that’s what it is for) ; Start experimenting with the airbrush. Establish the base color, then go in with lighter (or darker) shades to accent each panel, or the inside demarcation lines in cammo patterns. Paint the vehicle,figure, (whatever) as if the natural light were hitting it. You know, a little darker on the sides and lighter on the top. This automatically gives an impression of depth at scale:
Sweat the little details: Sometimes, (well, most of the time), these kits don’t go down to the level of detail that we painfully become aware of when we photograph our work. Fabricate nuts, bolts, fasteners, leave some tools missing or displaced, anything to break up the monotony. You will be suprised what you can “make” out of a paperclip!
Establish a style: Be unique, I think I can pick out a build from Ron Goins’, or Wild Bill, from a mile away. Do those things that you do well, and develop them. Use extra tools such as pigments and pastels (sparingly) to bring the model to life.
Scott, you have done some research, but it isn’t the “clinical” or methodical application that brings out excellence. It is the willingness to let your “artistic” side loose and create something visually stimulating and interesting. In my experience, this beats a hyper accurate presentation everytime.
Awesome, thanks for the tips James and Steve. Excellent advice!
I think I’ll try to push the envelope a bit with the upcoming War in the Desert GB and try my hand at a bit more wear and tear. I think I’ve got much of the technical aspects of armor modeling down, now I just need to expand the “artistic” side of it. I built my Tiger I early to represent my interpretation of what S33 looked like at the beginning of Zitadelle. It would be really fun to build another S33, but do it up as it may have looked like by the time Zitadelle was called off. [8D] A before and after vignette, so to speak.
Thanks for all the interest and suggestions gentlemen, I appreciate them! [:)]
I really like how your Tiger turned out. I think the subtle weathered effect is excellent. If your plan was to build this vehicle before it hit the battlefield, then you hit the mark perfectly.