I’ve finally managed to get the build underway after last weekends chronic migraine laid me out for two day preventing me starting it then.
It’s definately a very good kit I’ve heard some very positive things about it. None of my armour pices have had any figures yet so I’m pleased there are two crewmen to go with this one.
I’m still not sure about the vinyl tracks but my MIG pigment ‘mud’ kit that I ordered arrived last week so I’m planning a real ‘mucky’ build with the tracks being well clogged up.
I’ve got the base colour painted on the hull base, the suspension in place and working properly (it’s an articulated jobbie which is new to me) and the base colour painted on the road wheels. The dark grey for the rubber on the wheels will have to go on tomorrow and I’d like to get the turret assembled too-then the really tricky stuff starts!
I’ll be putting in a fair few hours on this one by the looks of it! I’m learning new tricks and techniques with every build and I’ve started to realise it’s not a race, there is no rush and I can only get better! I did rush a few bits on my last builds and only when I thought it was complete did I realise I’d omitted to do fit some pretty important parts! I’m not making the same mistake with this one!
This is my first 1/35 armour piece, all the others have been 1/48. I must admit 1/35 is a lot nicer to work with, not just because it is easier but fine detailing will definately be far easier, as will weathering and fixing small parts etc.
Enjoy! I know there isn’t much to see at present but at least the build is underway…
Enjoy! I know there isn’t much to see at present but at least the build is underway!
Very nice. I love Pershings. Are you going to finish it in Korean war colors or straight OD? Concorde Publishing ( I think) makes a great Armor of the Korean War.
May the ghost of Web Ellis smile upon you and your Pershing!
This one is going to be straight OD. I’ve got a Tamiya 1/48 Flakpanzer on order which will be cammo finished-I’m yet to venture into cammo painting, this is only my third ever build since I started modelling.
I’m surprised you know about Mr Ellis-I didn’ think Rugby was a big thing in the US?!
I played in college (USAFA) and for 10 years after for a couple of clubs. Greatest sport known to mankind! Lately though, I have become quite the football fan. Manchester United is my team and I love the city. I flew a lot of Manchester trips last summer. Meat pie at the Wellington for 6 pound 95 is cracking good!
Look for that Concorde book or other scources of Korean War armor. There are some very colorful paint jobs on the nose akin to bomber nose art. I think the DML/Dragon kits have those schemes on the box art.
One thing to note: if you are depicting a WW2 version, omit the rear telephone box and its mounting stub on the rear bulkhead. Fill the mounting holes too.
Satch - a Man Utd fan eh? They are my team too! I went to my first Man Utd game with my Grandad when I was five. They were playing away at Coventry at the time (Coventry is only 20 miles from where I live). I haven’t been to a game for years now but as you probably know Coventry aren’t the same team now as they were then and are currently in a lower division so Man Utd don’t play there very often and Manchester is a long way from Rugby so a visit to Old Trafford would be a very expensive day out! I’ll probably go next year as a couple of workmates support Man City and they want to go to the Manchester derby!
T26E4 & Redleg12 - I’m planning on a Korean War Pershing. I’ve tried looking for some nose art but all I can find is stuff on bombers etc? Have you guys got any links? I’d love to do something a bit different like nose art!
I painted the rubber on the wheels last night (I used Humbrol Tank Grey instead of black-it looks far more ‘rubbery’) and have just fitted them and the vinyl tracks.
Everything went fine as it goes. I found it easier to remove the rear drive wheel when fitting the tracks as I was worried the joint would give. I put the rear drive wheel in place on the tracks when the tracks were around the other wheels and pushed them on, worked a treat.
One thing that has me perplexed is the front suspension. Part H18 is the RHS suspension arm and H16 the LHS arm. The left arm is visibly shorter than the right arm, it even shows the difference in the picture on the instructions. As a result there is a noticeably bigger gap between the front two wheels on the RHS than on the LHS-why is this???
EDIT: After looking at a lot of Pershing pictures (models and the real thing) it would seem that my tank is correct and I’m worrying about nothing!
Nothing to worry about though, all going really well and the suspension works fine too which was the main concern that I had prior to assembly!
See if you can notice the gap between the wheels in the photos…
Suspension works!!!
LHS view-note road wheels are equispaced…
RHS view-note the gap between the two front road wheels…
Looks pretty good-I’m happy!
Any thoughts on why one suspension arm is longer than the other lads? Is it supposed to be like that? I’ve triple checked everything and my build is bang on accurate!
*NOTE: I have just noticed that the LHS track is on the wrong way-now corrected! (I don’t think you can see that in the photos though).
She’s coming along nicely and it looks like you haven’t had any significant issues.
Most likely it’s to do with the torsion bar suspension design.
You will find that all tanks using a torsion bar suspension will have an offset between the right and left sides. The suspension arms simply cannot be mounted directly opposite their counterparts on the other side due to the torsion bar which goes right across the chassis to the opposite hull side. If you look closely, you may notice that the rearmost road wheel on the left right side is slightly closer to the drive sprocket than the one on the right left side.
It’s interesting to note that on some tanks with torsion bar based suspension, eg. the Soviet T-55, the road wheels actually line up from one side to the other by mounting one set of suspension arms pointing “backwards” and the ones on the opposite side pointing “forwards”.
She is coming along nicely-I must say I’ve learnt a hell of a lot in the short time that I have been modelling. Obviously having had armour as one of my main interests for years helps but you guys are just superb! [bow]
No migraines to report of thank God-getting a screen filter for my work pc has really helped.
Phil_H, thanks for your info buddy. Has anyone else got any dedicated Pershing info on the gap between the front wheels that I have previously mentioned? The gap on the RHS being bigger between the two front wheels than on the LHS. Looking at various Pershing photos this seems to be the case but I can’t find any photos of the same tank that show a dead on side view from both sides, they are all from an angle.
It’s going to be a Korean War version definately-any nose art links much appreciated. I’ve searched but turned up nothing, only nose art on aircraft!
Picture one on this page shows the bottom of some nose art-it’s supposed to be a tiger’s face and the two bits you can see in this picture are it’s paws. There is another picture on the site showing the whole piece. I reckon I could do that?
Picture two shows the gap between wheels 2 and 3 (going back from the front of the tank) that I was wondering about.
The below link, picture one, shows the full Tiger art-looks pretty cool imo!
One comment on the Korean War “nose Art”… It really only belongs on tanks from the UN counteroffensive against the Chinese in early 1951. For most of the Korean Conflict the tanks were plain old OD with suitable dirt and wear. The famous “tiger faces” were a morale booster to help restore the fighting spirit of the 8th Army units that had been chased down the penninsula by the Chinese forces in the winter of 1950-51. The story was spread that the Chinese were superstitious and afraid of tigers and tank units started painting various tiger face schemes on their tanks with the winners undoutedly being the M46s of the 6th Tank Battalion. It doesn’t appear that the faces were reapplied as they wore off and they disappeared as tanks were repainted/repaired. You can use USMC green also as they took M26s to Korea with them (later replaced by M46s).
It was worth looking into. I’m not too keen on the Tiger face that I found in the link shown in my previous post and if that was the only ‘art’ the Pershing’s were adorned with I’ll think I’ll keep this build as standard.
Possibly something worth considering for a future build-a Vietnam era piece maybe?
I assume the Dragon Pershing has fixed wheels! Tbh unless the model is going to be mounted on a base or used in a diorama the ‘live’ suspension isn’t of much use imo-still looks pretty cool though!
Have you built your Pershing T.A.P.? I’d love to see a couple of photos!
I’ll be recommencing work on her tomorrow so I’ll have some nice new WIP photos to post. I still haven’t decide wether to use the figures or not yet. I’ve never painted figures before and if they turn out crap I’ll not use them (obviously) in which case I’ll keep the hatches shut so I’ll probably have a crack at figure painting before I start fixing hatches.
There is only one colour scheme for the crewmen uniforms. Would the Korean War crewmen have worn similar or the same uniforms as the WWII guys?
I’ve managed to get a good few hours solid build time in this afternoon and the M26 is coming along nicely.
Thanks to some helpful advice given to me on here earlier on I’ve painted the vinyl tracks to a standard that I’m very happy with given my current skill level! There won’t be much of the tracks left to see when this beast is finished as I’m planning a real ‘muddy’ build. I’ve got my mud effect pack of pigments from MIG to experiment with and a tub of Tamiya mud paint that a workmate gave me to try; I think it’s a new release of theirs-it looks very good!
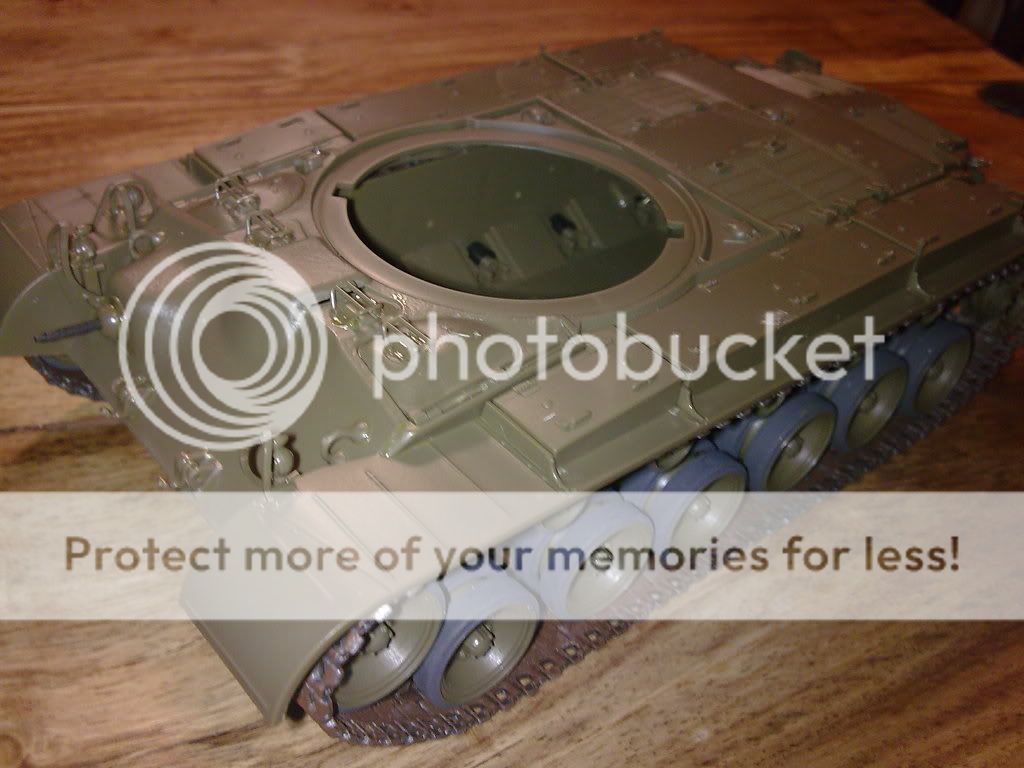
Anyway, Upper hull build in place and mounted and looking good-it really is a nice kit, it’s just fallen together so far. I’ll be painting the hull colour onto the upper hull tomorrow along with assembling and painting the turret. Then the fun starts! I’ve got two figures to paint which will be a first for me-I’m hoping they turn out ok as I’d love a couple of crewmen on one of my builds.
I haven’t fitted the side skirts yet as I want full access to the upper running gear when weathering and adding mud.
Sorry I haven’t more to show but I really want to get this one right and am really taking my time-I made daft mistakes on my previous builds due to rushing and not reading instructions carefully, it won’t be happening on this build.
As usual, all tips and advice greatly appreciated…
Thanks for looking and to everyone who has given me help on this build so far!