Hi everyone, I am typically an aircraft modeler, particularly WWII aircraft. But like most everyone else, I get a hankering to try something different, so here I am with the first of my two tank kits - Tamiya’s 1/35 M26 Pershing (the second will be Tamiya’s 1/35 King Tiger, the one marketed as the Ardennes Front with the motorcycle soldier).
Has anyone built this kit (the M26)? Are there any pitfalls I should be aware of? I’m not doing anything particularly difficult with this kit in terms of new techniques; I will be applying many of the techniques I usually employ building aircraft, although it appears that I’ll need to apply the decals before actually completing construction due to where some of the decals go, behind hand bars, track storage racks, etc.
So far I’ve painted the olive drab, gun metal and steel pieces (I did a mixture of those latter two paints for the tracks). I’ve just completed masking the road wheels so that I can airbrush the black “tire” portions rather than tediously hand painting those parts. I’ll post pictures as I proceed.
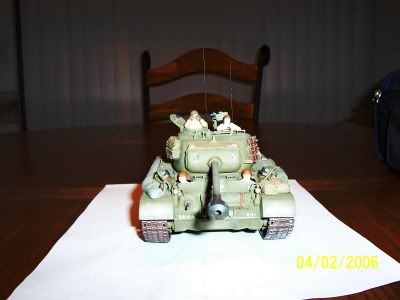
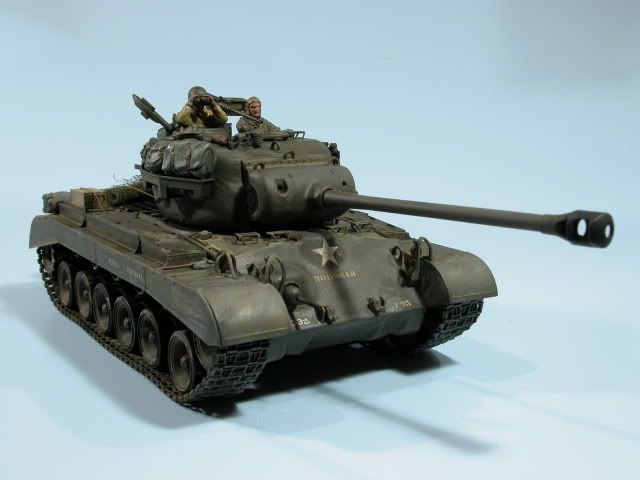
Welcome to the world of armor Aggie. I built this kit last year. All in all it went together pretty well. I would definately suggest replacing the kit barrel with a turned aluminum one. Also DO NOT try to model it with working suspension. While they provide springs for the front and rear road wheels, the others require cutting off locating pins and allowing them to move freely with no resistance. Not very realistic. Just glue the arms in place. Here are a few photos of mine.
The M26 builds up great. No constrcution issues that I had. The kit barrel is just fine as well, just take care to keep it round and fill any seams and it will be great. Good luck.
I built this model earlier this year. I took the time to build the working suspension and it turned out really well with no problems. I don’t know in what capacity I will need this suspension unless I place it in a diorama with very uneven terrain which might serve to show off the flex of the wheels. I used the stock gun barrel and think it looks just fine.
I built mine about a year ago as well, and it went together just fine. Depenging on what level of detail you want, you can replace the barell or various other fittings and tracks, but I think it looks fine just OOTB.
I built mine last year and it pretty much fell together. I rank it about a 9.5 out of 10 for building and such. onlt thing I didn’t like is cleaning up the minimal seam around the turret and replicating the cast detail lost but that happens on all cast turreted tanks. i killed mine with a spray can paint job being lazy![V] I’ll get another though and do her up right very nice casting on the petite details like brush guards and periscope gaurds also. You picked a winner to start with.
I’ve build that one recently and I liked it very much. No fit problem. Don’t worry about the decals, you can apply them at the final steps without any problem.
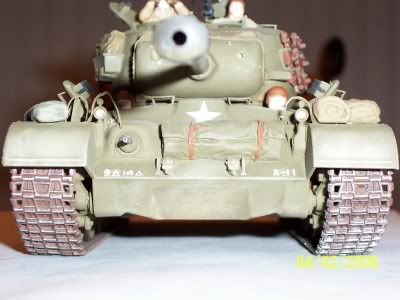
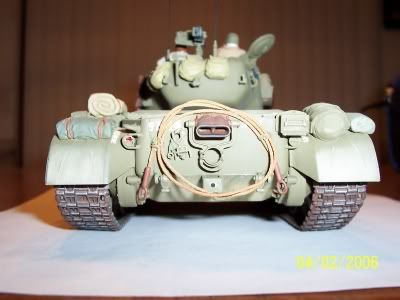
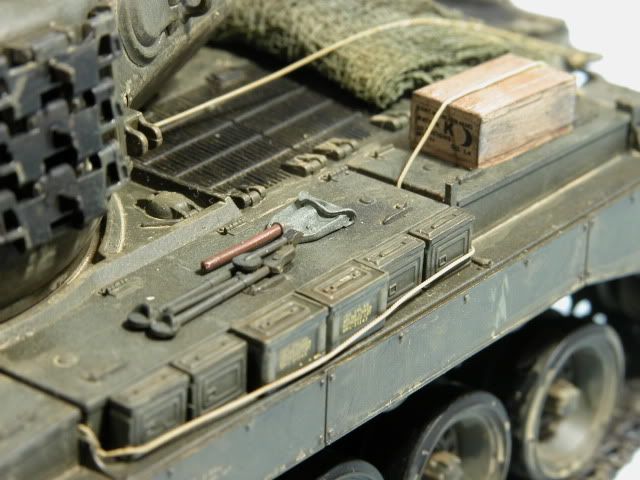
One important thing: If you want to model the late WWII model, do not glue the radio at the back of the hull cause it was not featured on those tanks at that time. Here’s a couple of shots of my build.
Just to echo what Yann said. The box on the upper right of the tail plate is an infantry phone – added postwar (omit if you’re doing WW2). It may may have appeared on the Okinawa ones – I’m not sure about that
Also don’t forget to add putty to where the shell ejection port meets the left turret wall. It’s a sweeet kit (and I had no issues with the kit’s gun tube either)
Hi, you couldn’t pick a better choice. built mine couple of years ago and had no probs at all. I even built the working suspension (not sure why). Turned alum gun tube is nice but not really necessary. I forgot to check my research so mine has European markings with the infantry telephone box installed. Should have remembered to leave that off but “who cares” Also got a DML M26 which isn’t too bad tho I think the Tamiya is better. I hate DML’s style of indy track link so I got a set of Tam. tracks for that one. Enjoy…BTW if ya want to try 1/48 armor the Tamiya M26 (Just out) looks great too…“Marty” Martin
Thanks for all the comments. Yann and Modelbuilder, your Pershings look fantastic.
I really like some of the extras I see in your builds, like the rolled whatever (?), tarps, and tools. I may have to get some detail set like that if I can find one.
You picked one of the best tank model Tamiya ever came out with. I would suggest that you get tips on painting the tracks. It would matter a lot to have a properly painted pair of tracks.
I am just starting that kit myself. Glad I read this and picked up on the tip relative to not installing the troop phone on the back. I am wondering if it needs a canvas gun mantlet cover? I also wonder which Tamiya color I should use for the base. I am thinking XF-62 but am not sure. Looks to be a great kit.
Trakz has a resin version of the mantlet cover and it comes in the WW2 version and the Korean version. I think it also includes a covered muzzle. Looks good!
If you do buy the detail sets, the ones I used were from Trax. One it the Pershing stowage set and the other is the mantlet covers. In that you get the WWII and Korean versions as well as a muzzle cover. I also used Royal Models photoetch set which comes with a very nice engine (which I am saving for future use). Eduard also has a set but If memory serves me correctly it does not come with the parts to model the securing snaps around the mantlet where the cover was attached. I also should have checked my references better as I installed the phone box on a WWII era vehicle. Other items I used were MV lenses for the head lights, Calibre 35 clear cupola and tail lights, various parts box items, Mini Mecca antena, Armor Research ammo cans. As others have stated, this is an excellant kit right out of the box but I had most of this stuff in the parts box and the rest I ordered when i ordered the kit.
[dinner] Ok, here’s a stupid question for you. As I said in my initial post, I have embarked upon construction of my first tank. So far it’s basically falling together, as I would expect of any Tamiya release (I’ve built a bunch of their WWII warbirds).
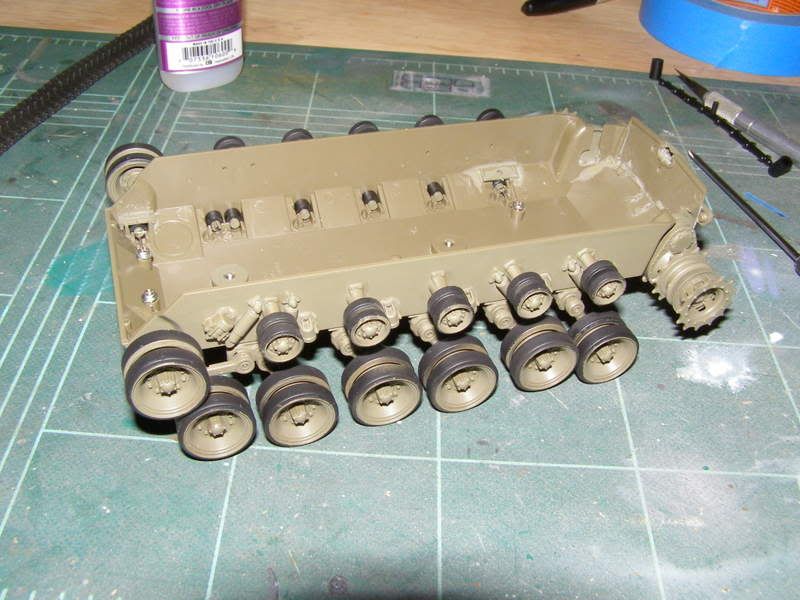
The instructions aren’t terribly clear to me in one area, but perhaps that’s because it’s getting late and I’ve been up since before 6 am and really just need some sleep … Any way, do you glue the roller wheels to the tank chassis (or whatever you call that bottom of the tank hull)? The road wheels include the poly caps so those obviously are not glued, but there’s no real instruction as to whether or not to glue the roller wheels.
Just wanting to get opinions from everyone on this board, experts all I’m sure, before I make a mistake.
The upper set of wheels are called the return rollers. On the Tamiya M26, they’re supposed to be glued on. The larger wheels that touch the ground are the road wheels. Their poly caps keep them able to spin.
The toothed sprocket is called the “drive sprocket” and the wheel at the opposite end is called the “idler” wheel.
Work in progress pictures. I’ve completed assembly on the underside hull and all the wheels are attached. One wheel doesn’t turn particularly well, so I’ll be addressing that shortly.
I’m am preparing to put down a coat of Future so that I can do a wash and other weathering before I put the tracks on and attach the upper hull structure.
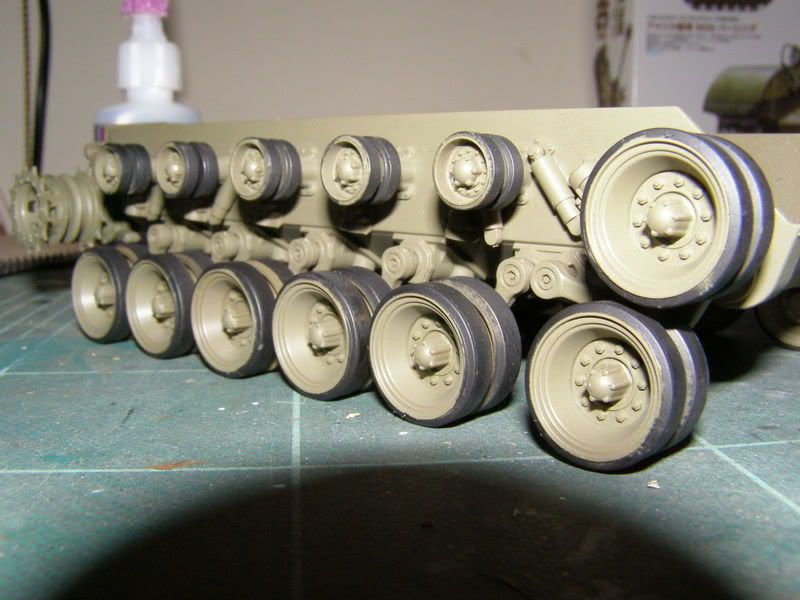
Aggie! Hold up! You’ve made a HUGE error! The arms that hold the roadwheels are about 90degrees too low, making the roadwheels too far off the hull. The road wheels should only be about 5mm from the return rollers.
The problem probably comes from mis aligning the “workable” front and rear roadwheels that are spring loaded.