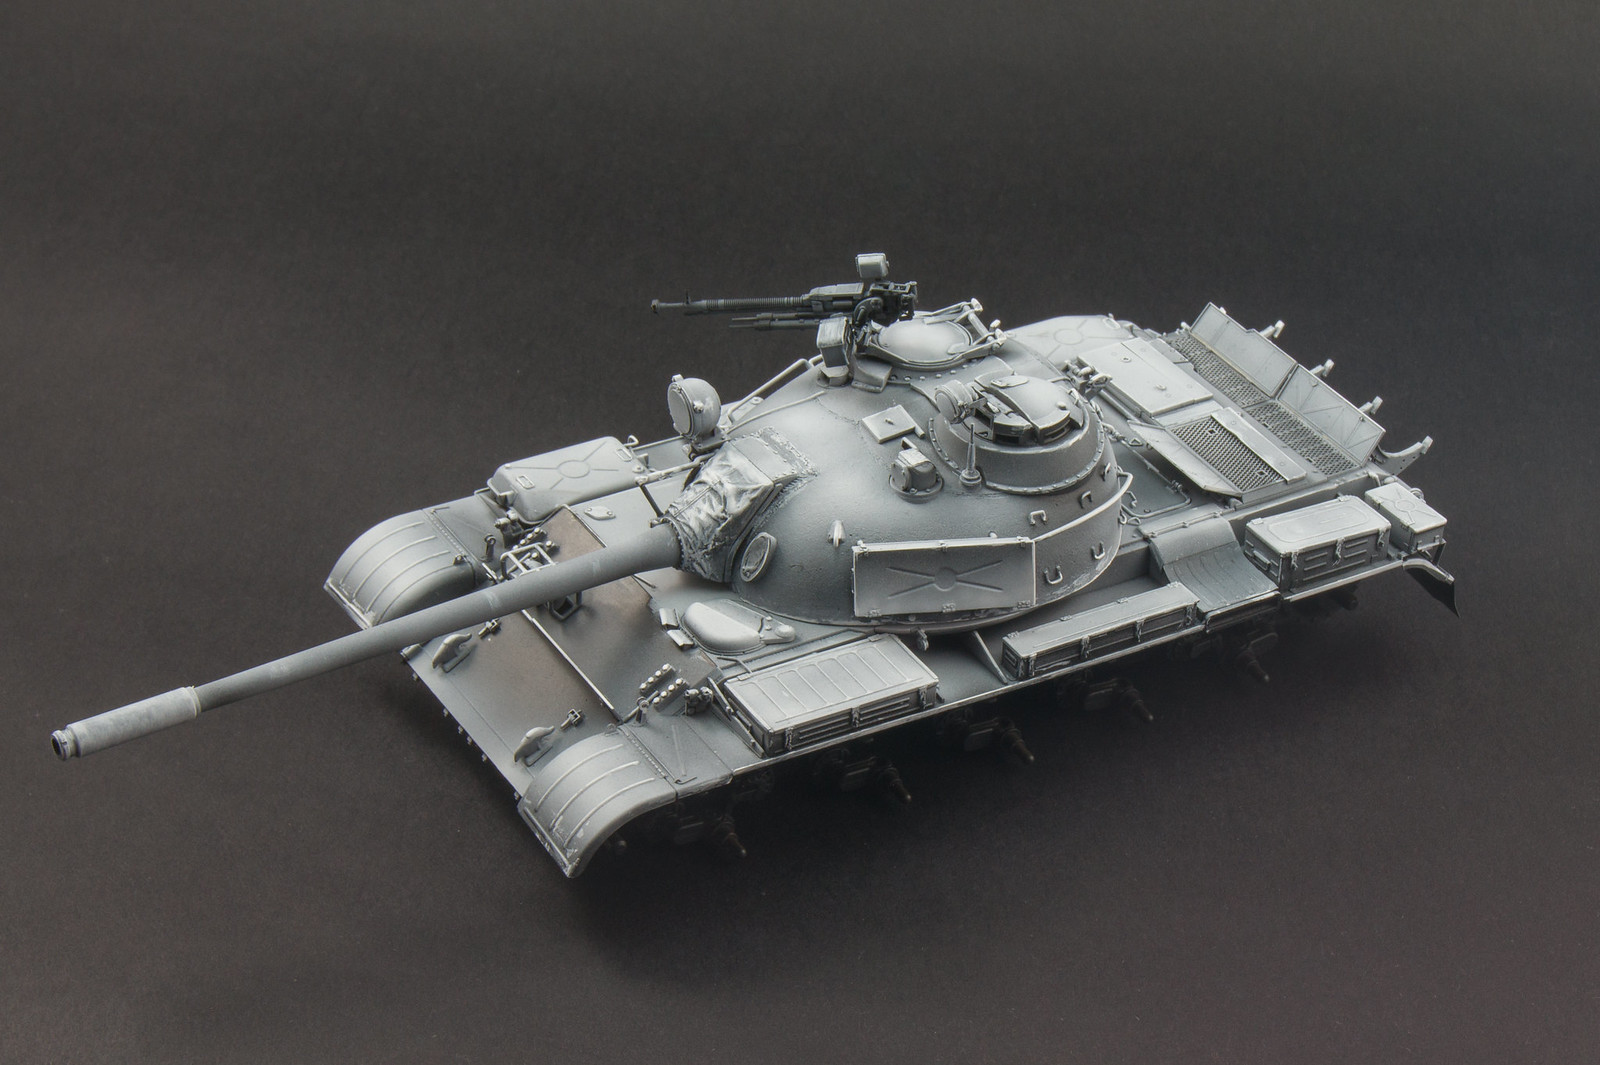
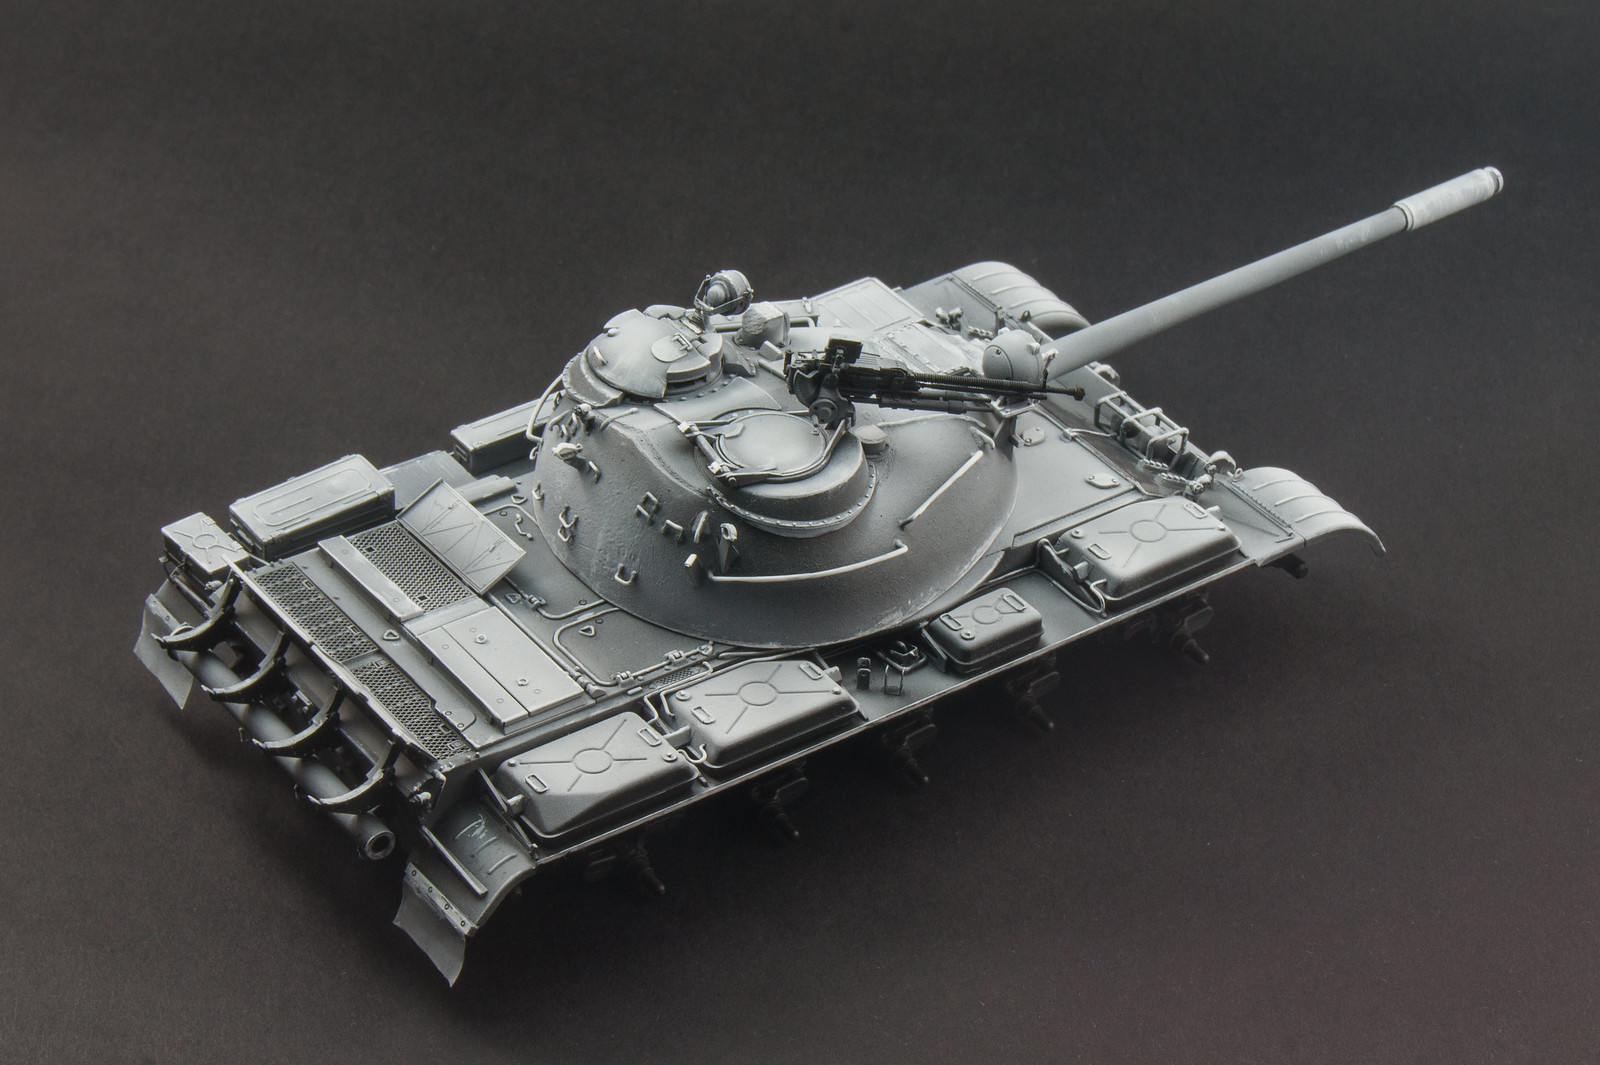
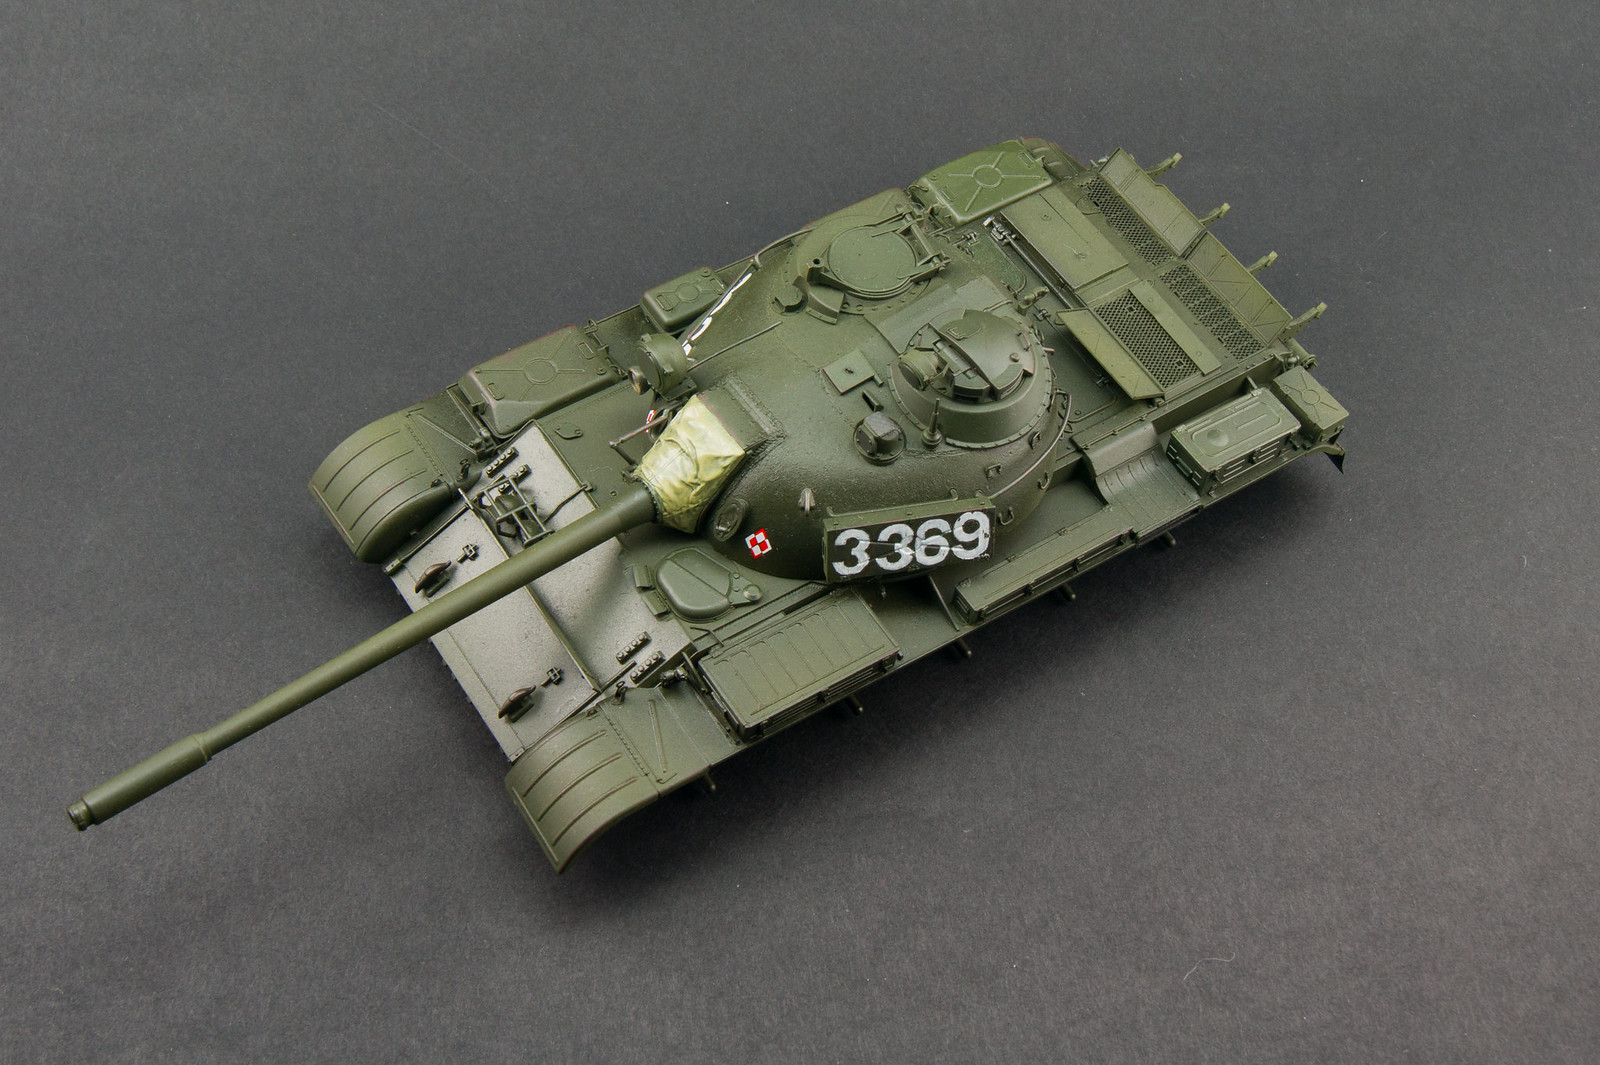
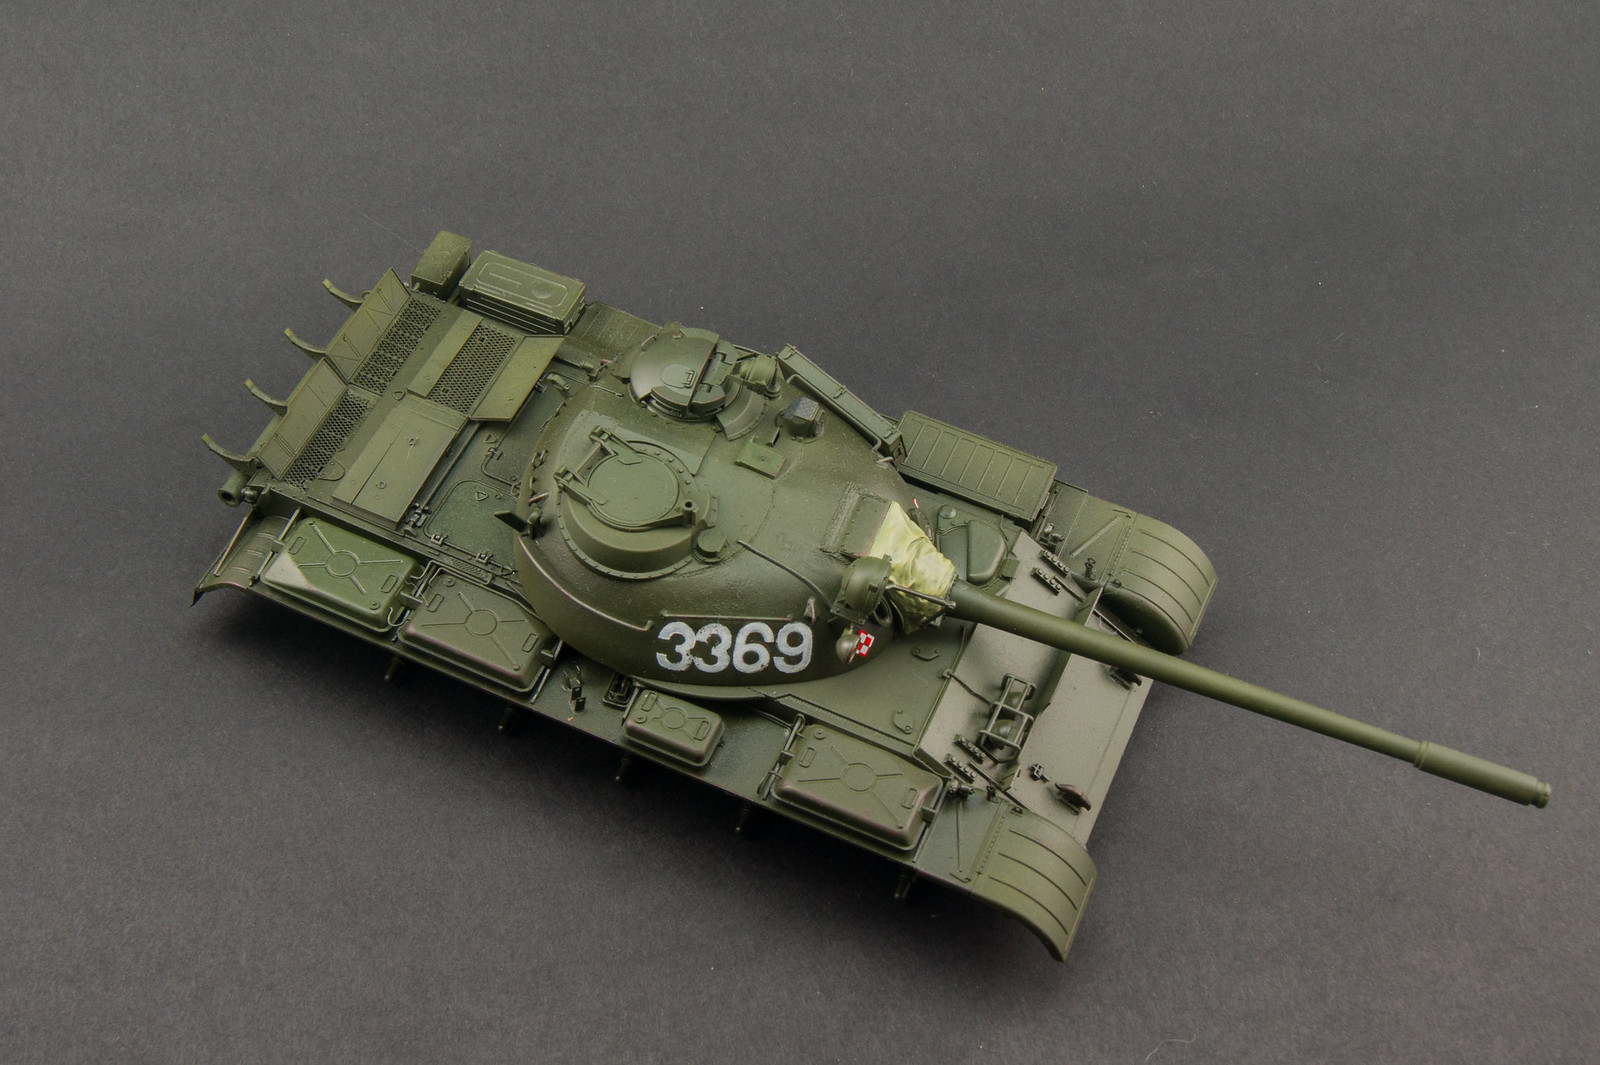
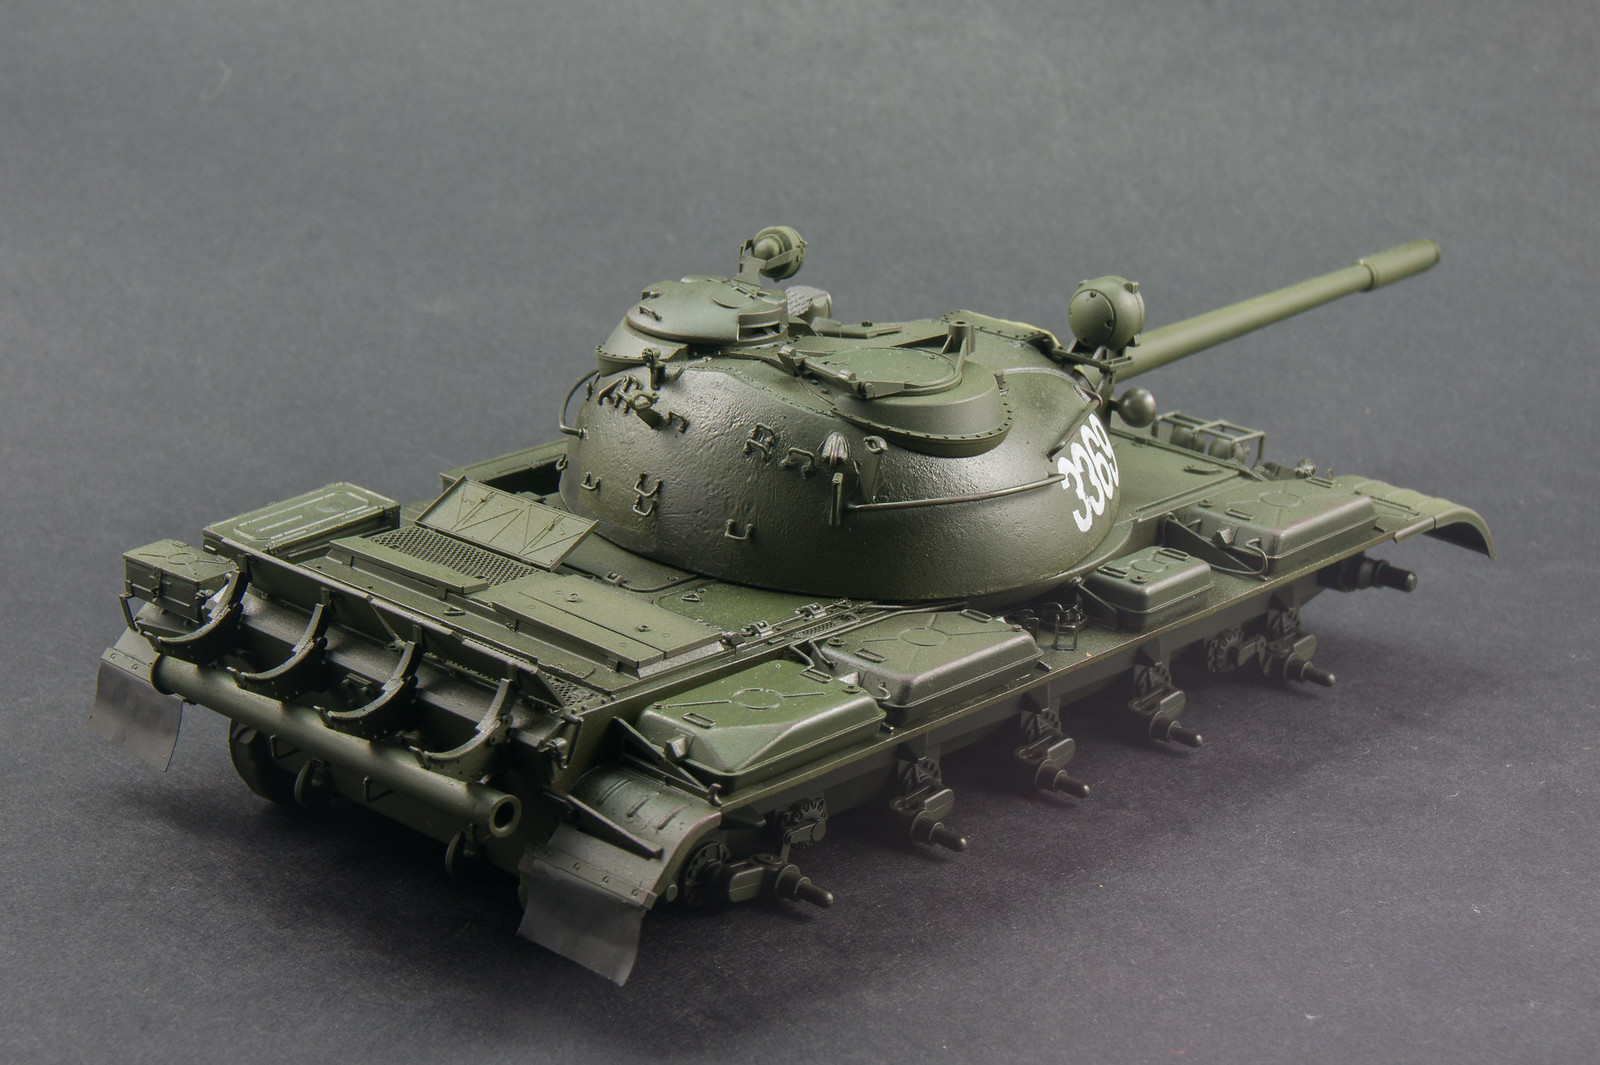
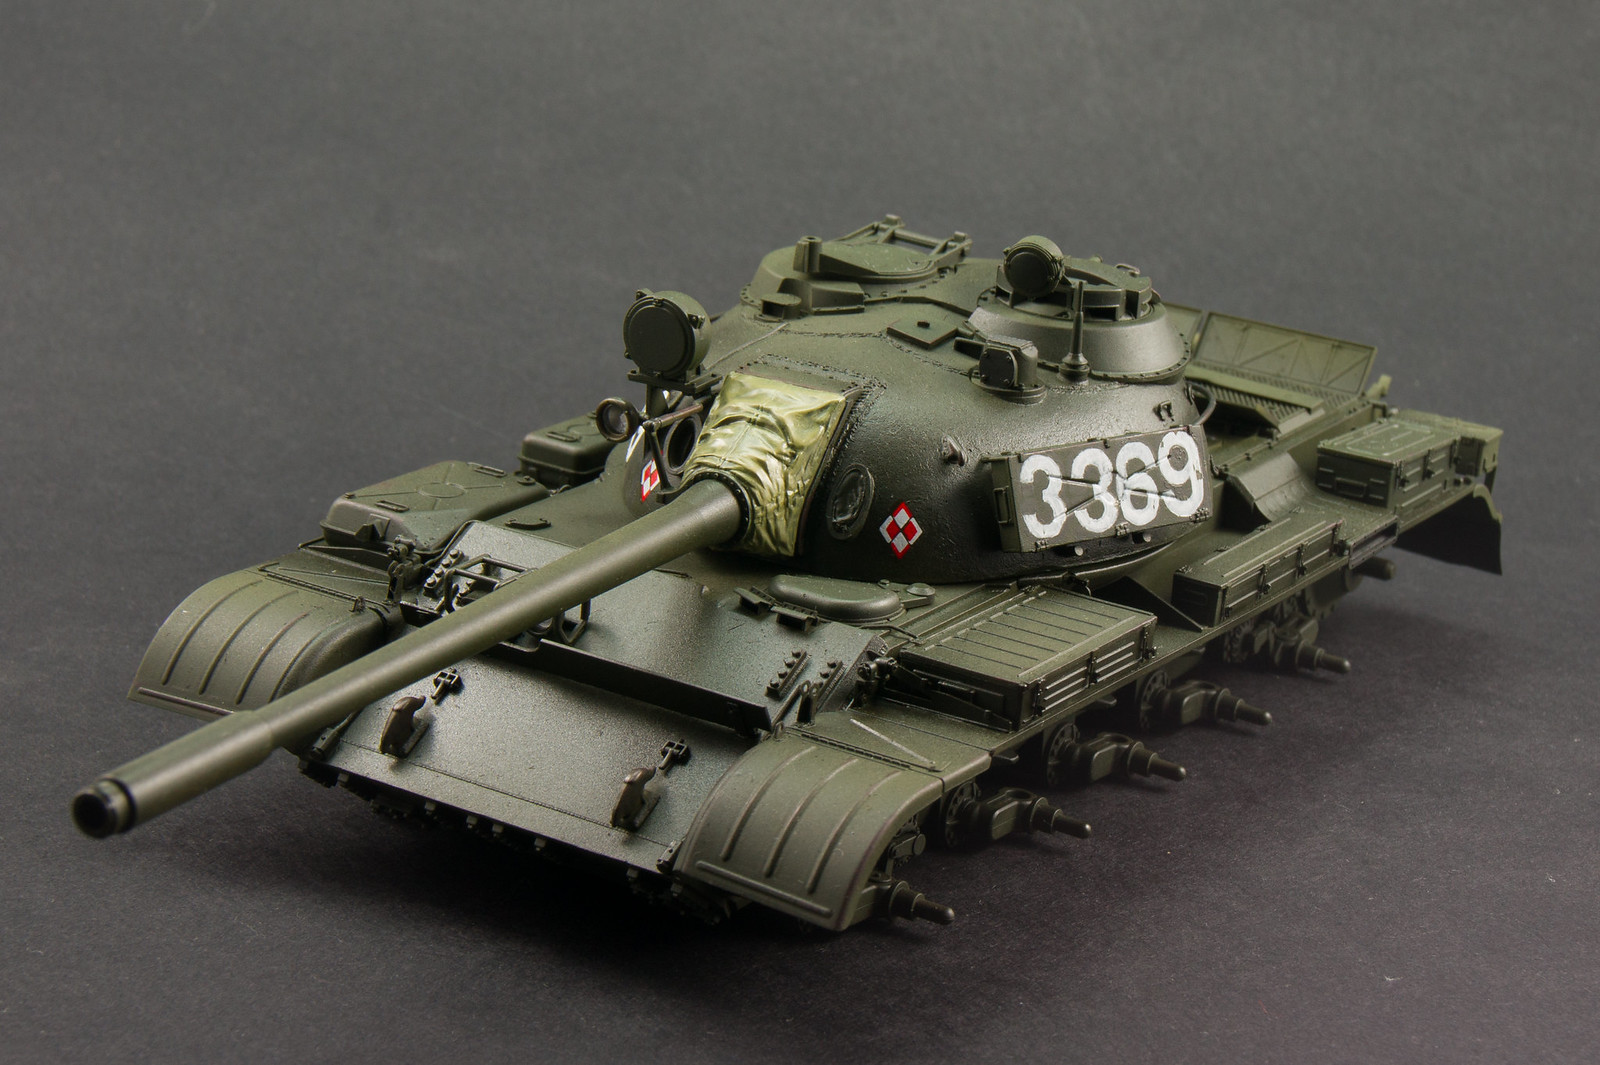
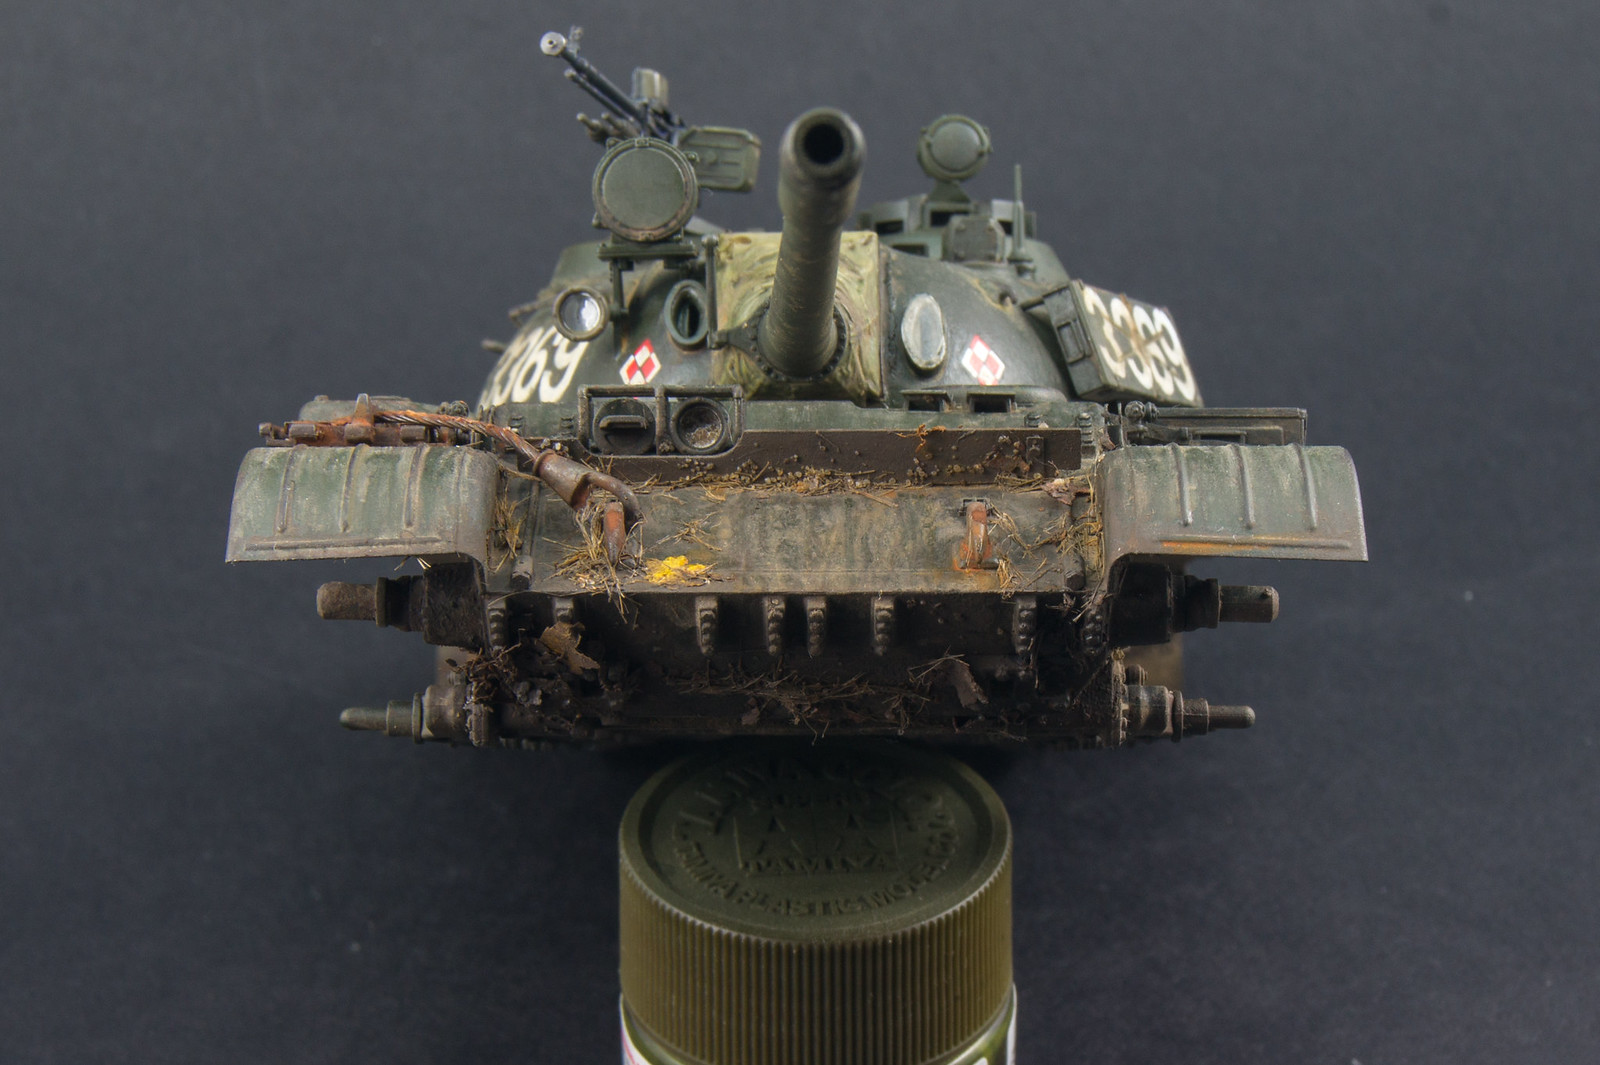
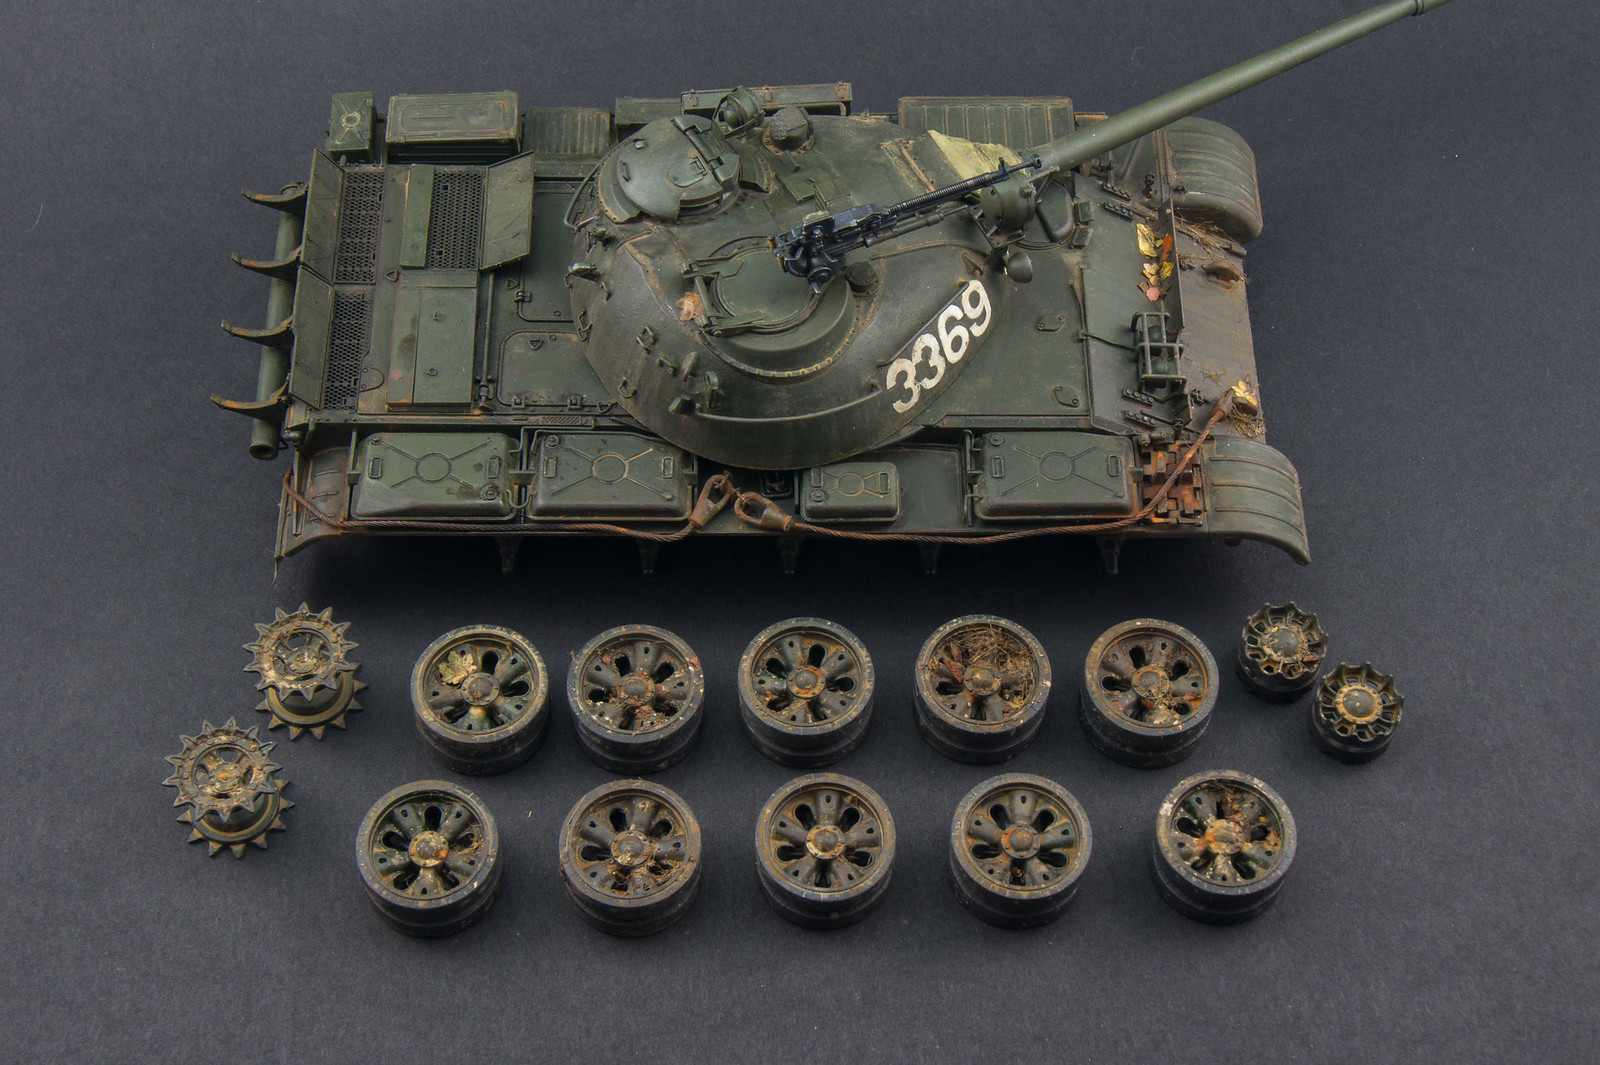
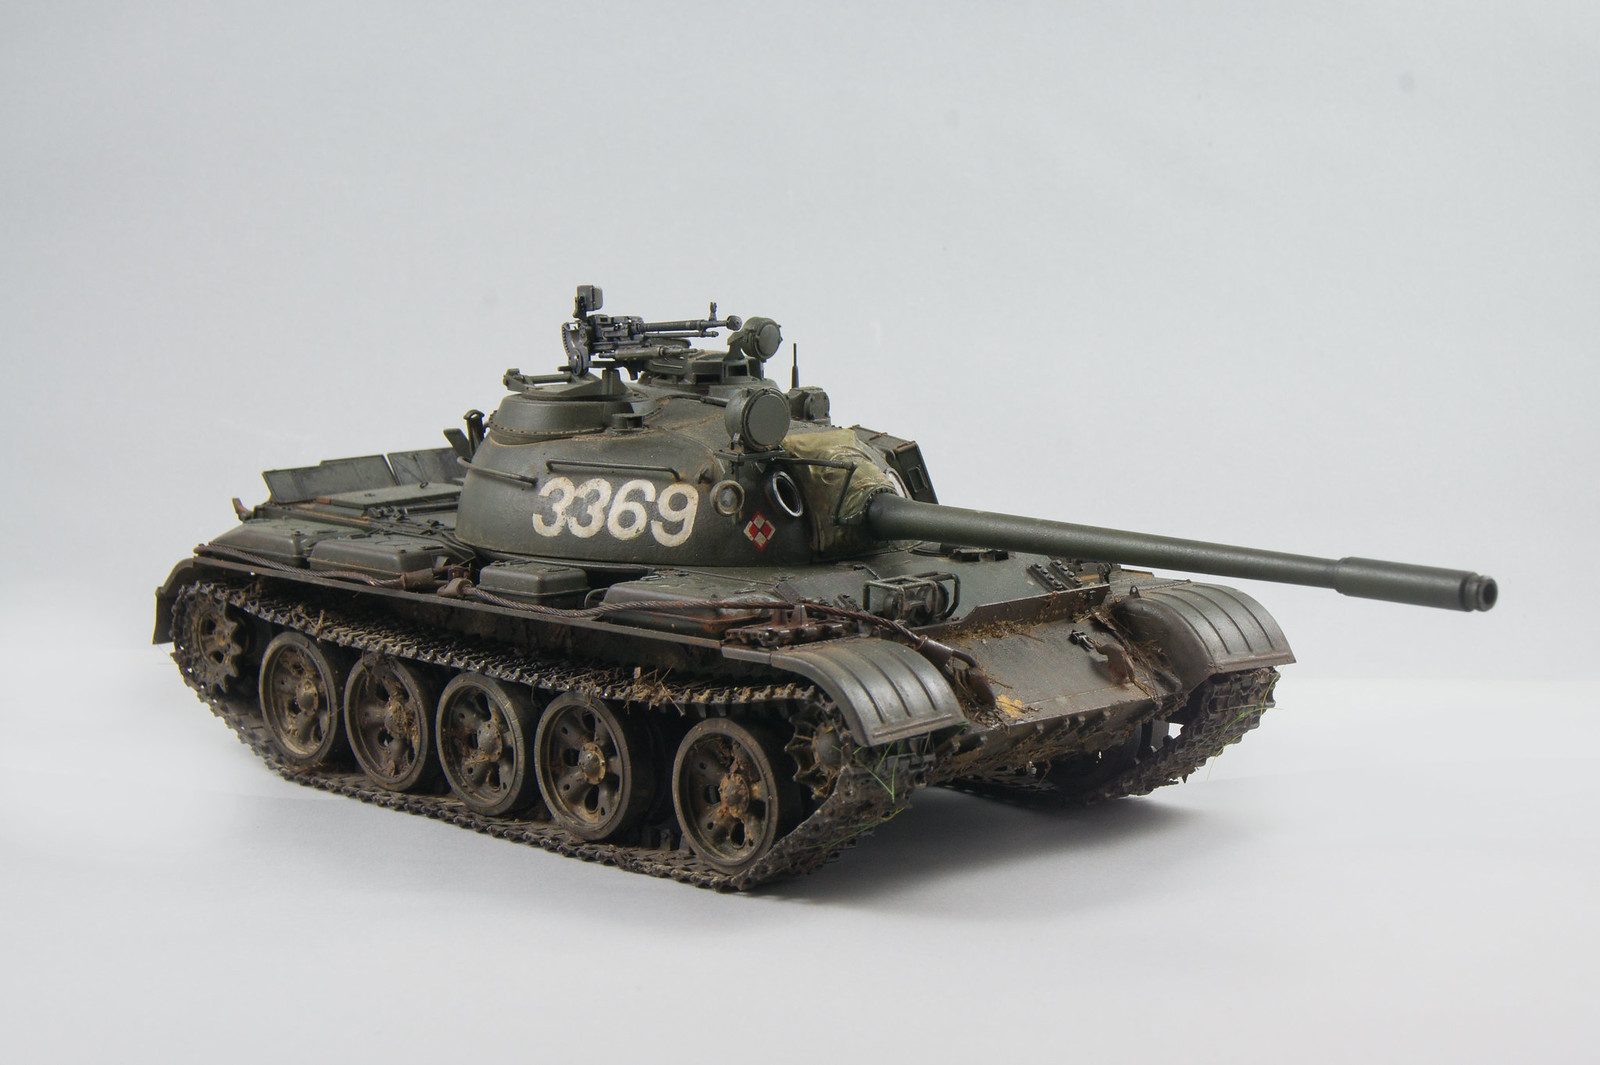
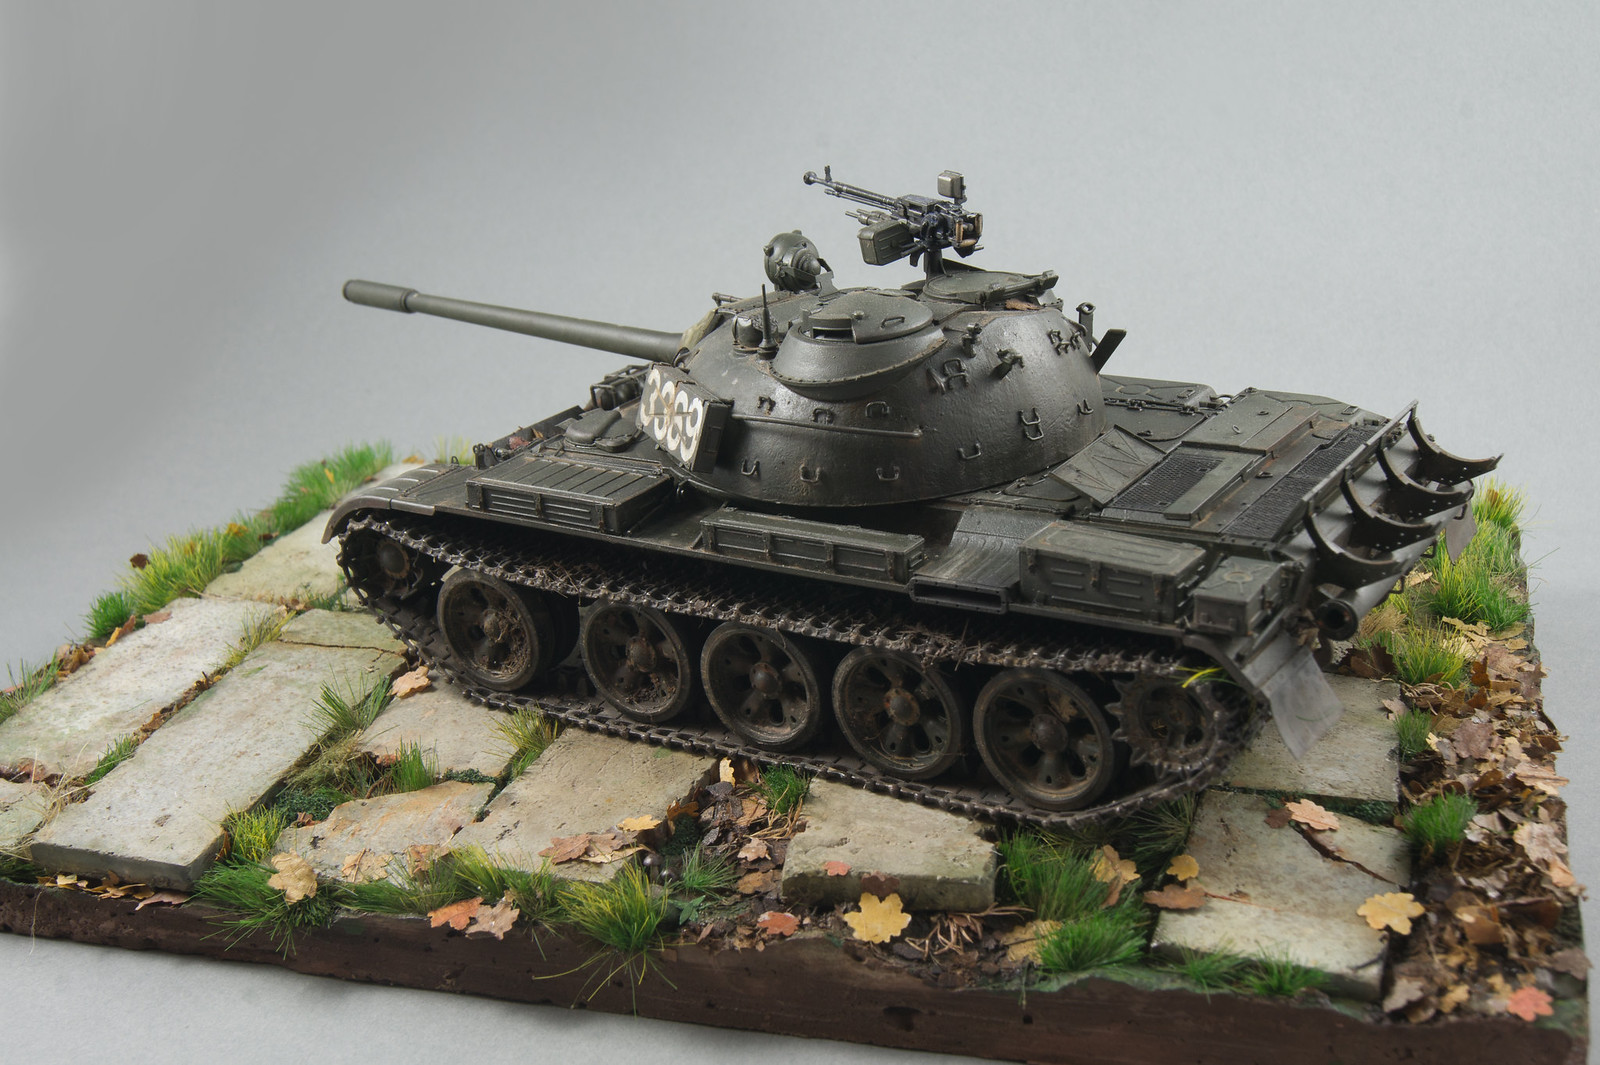
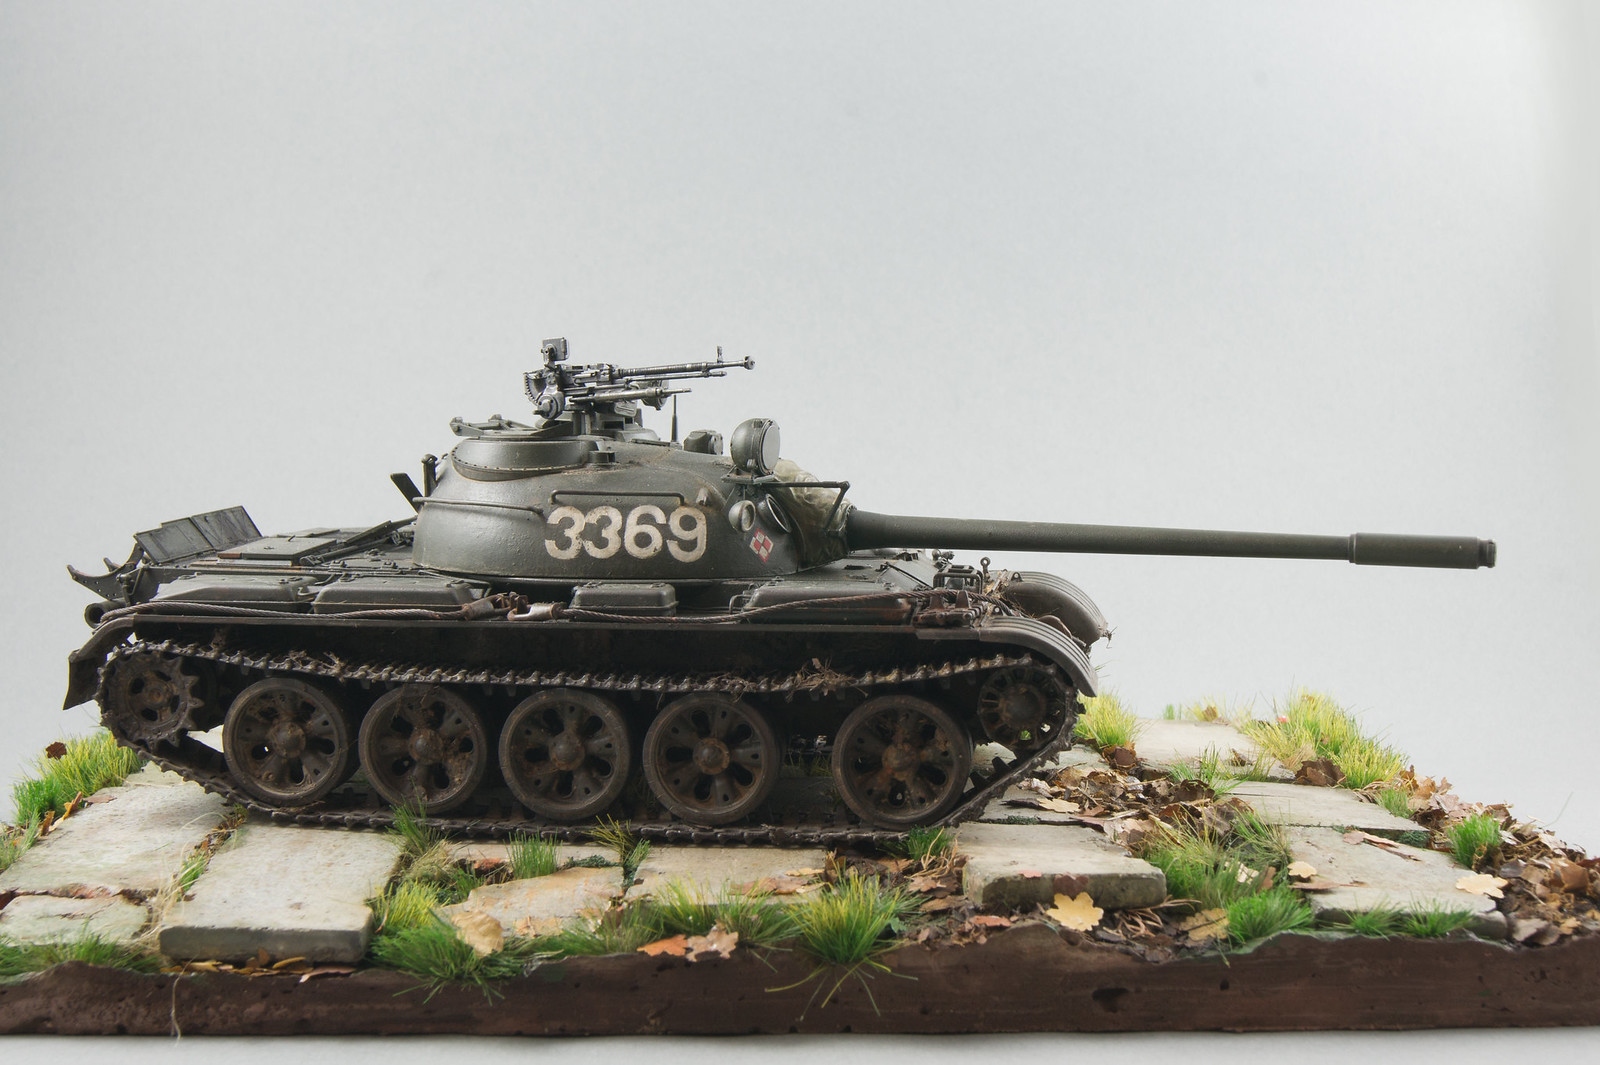
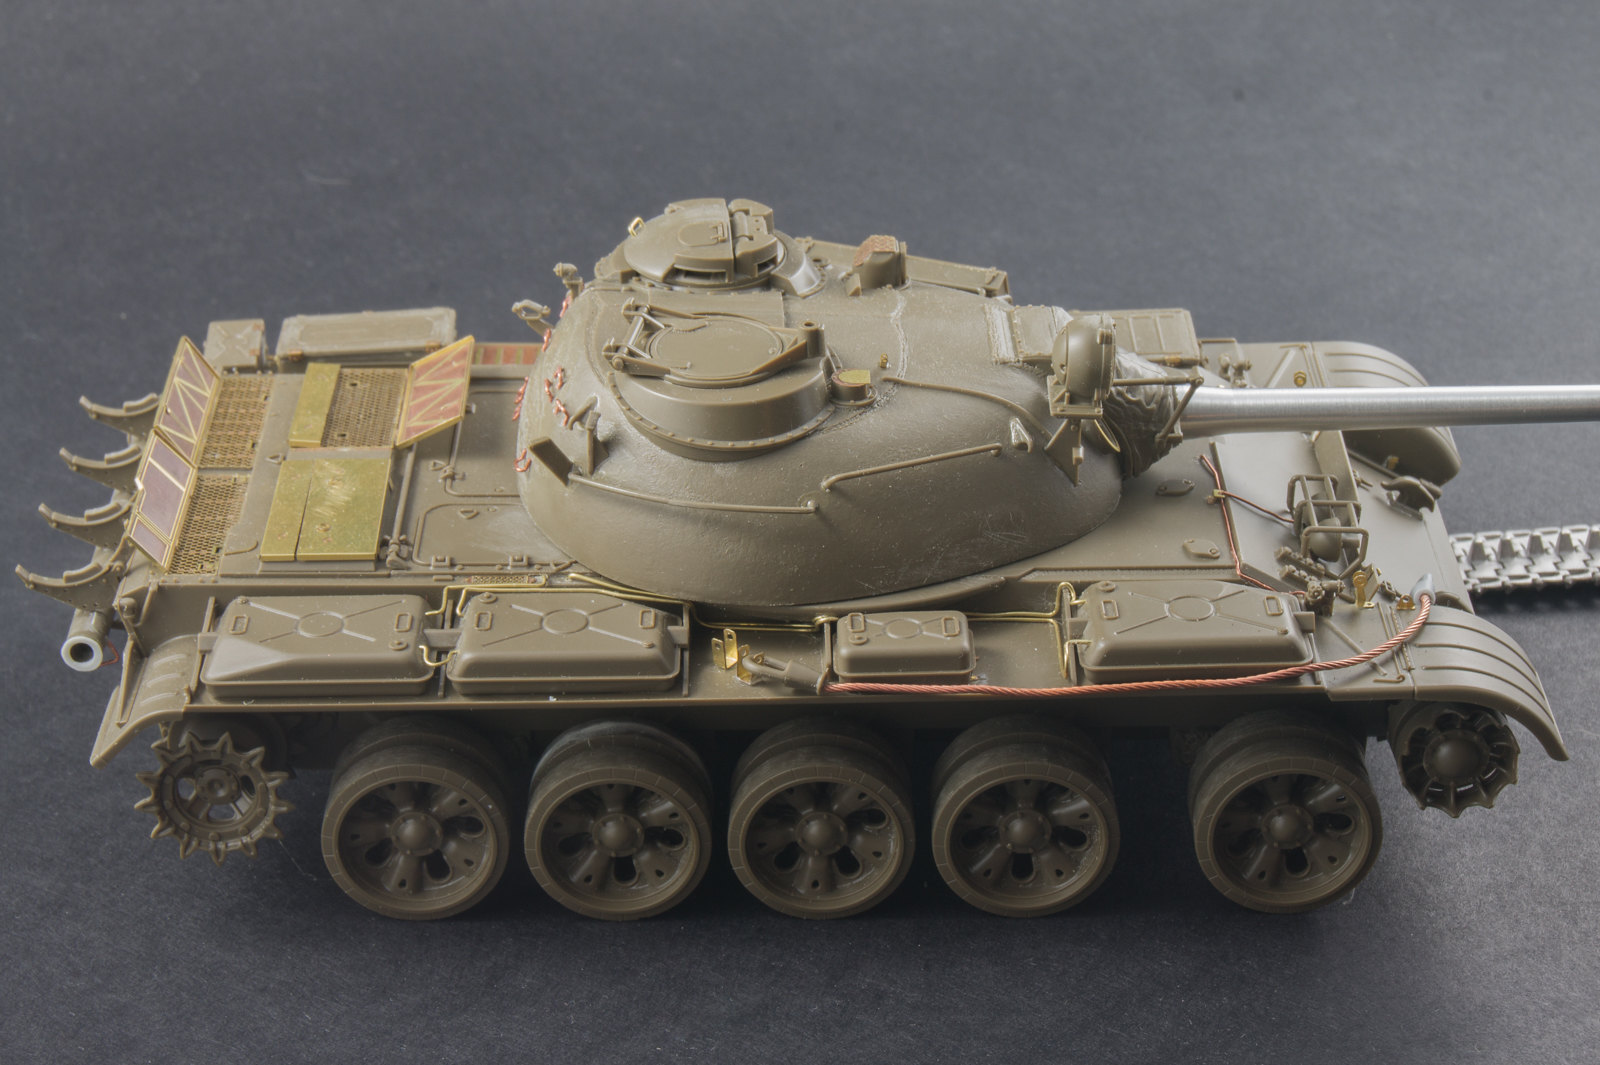
My latest build, Tamiya T-55, RB Model barell, PE set from Eduard, Friul tracks and Eureka XXL metal ropes.
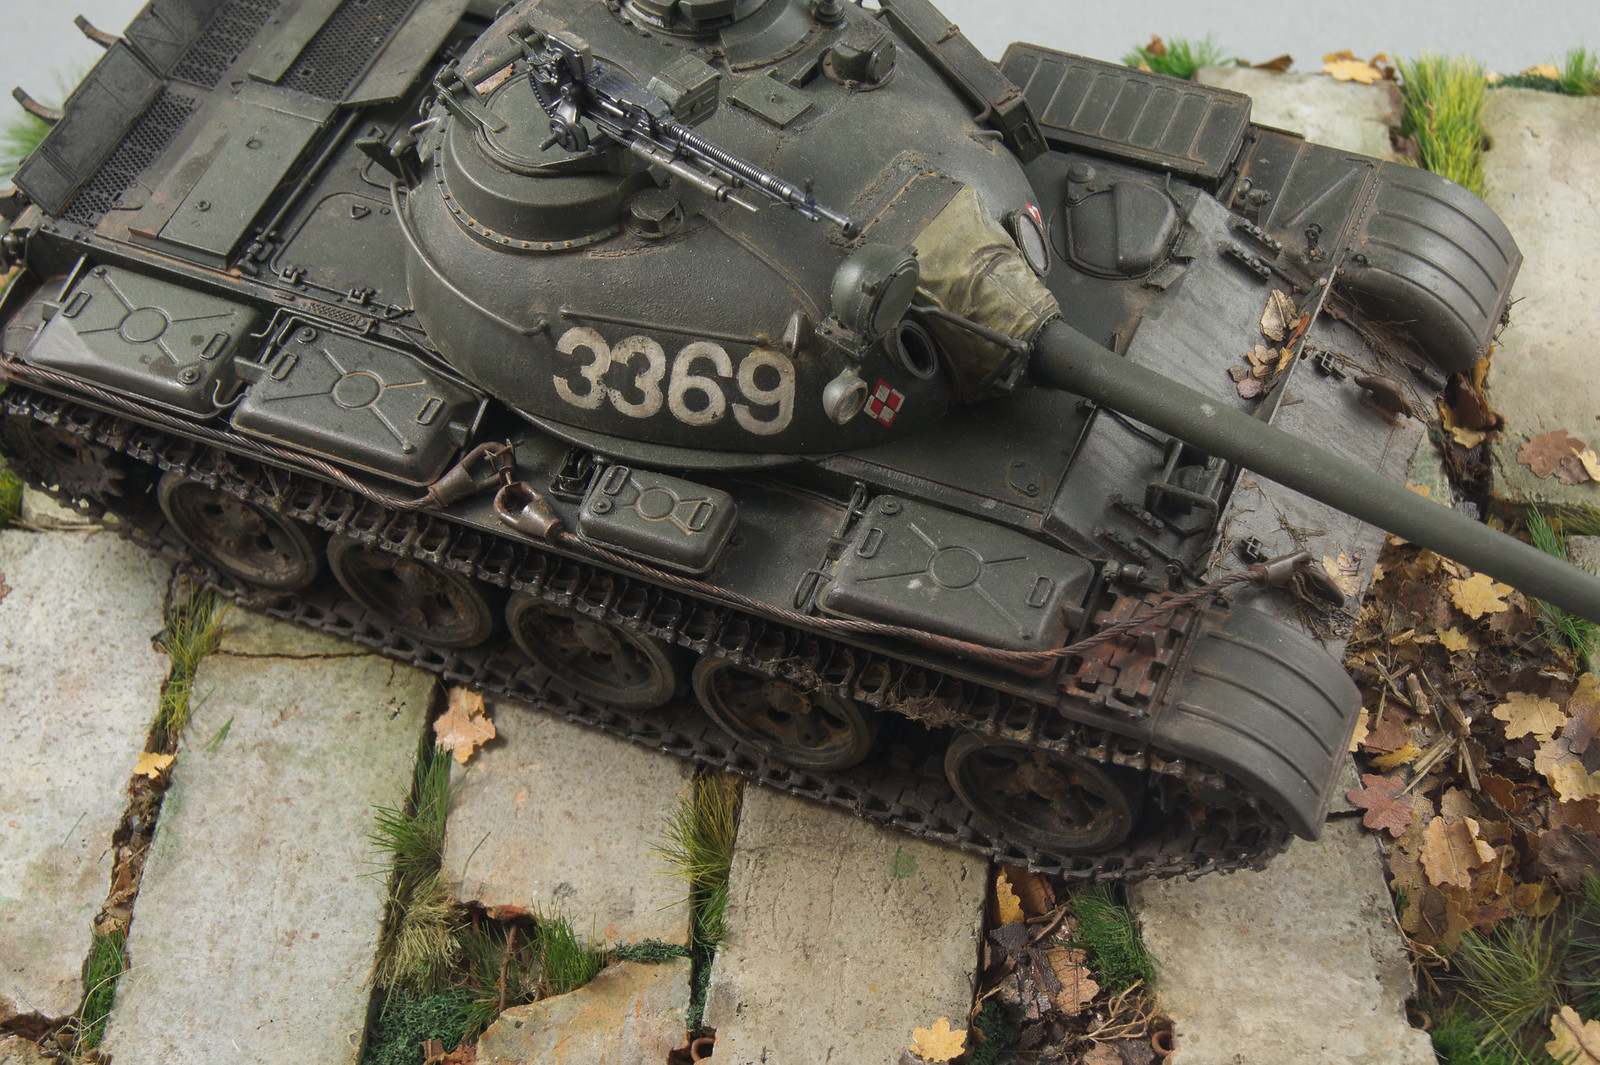
It’s comission work for my friend’s father, who served in Polish People’s Army in mid 60’s. They were receiving brand new T-55A’s from polish factory in Labedy, and that type of tank I am trying to model.
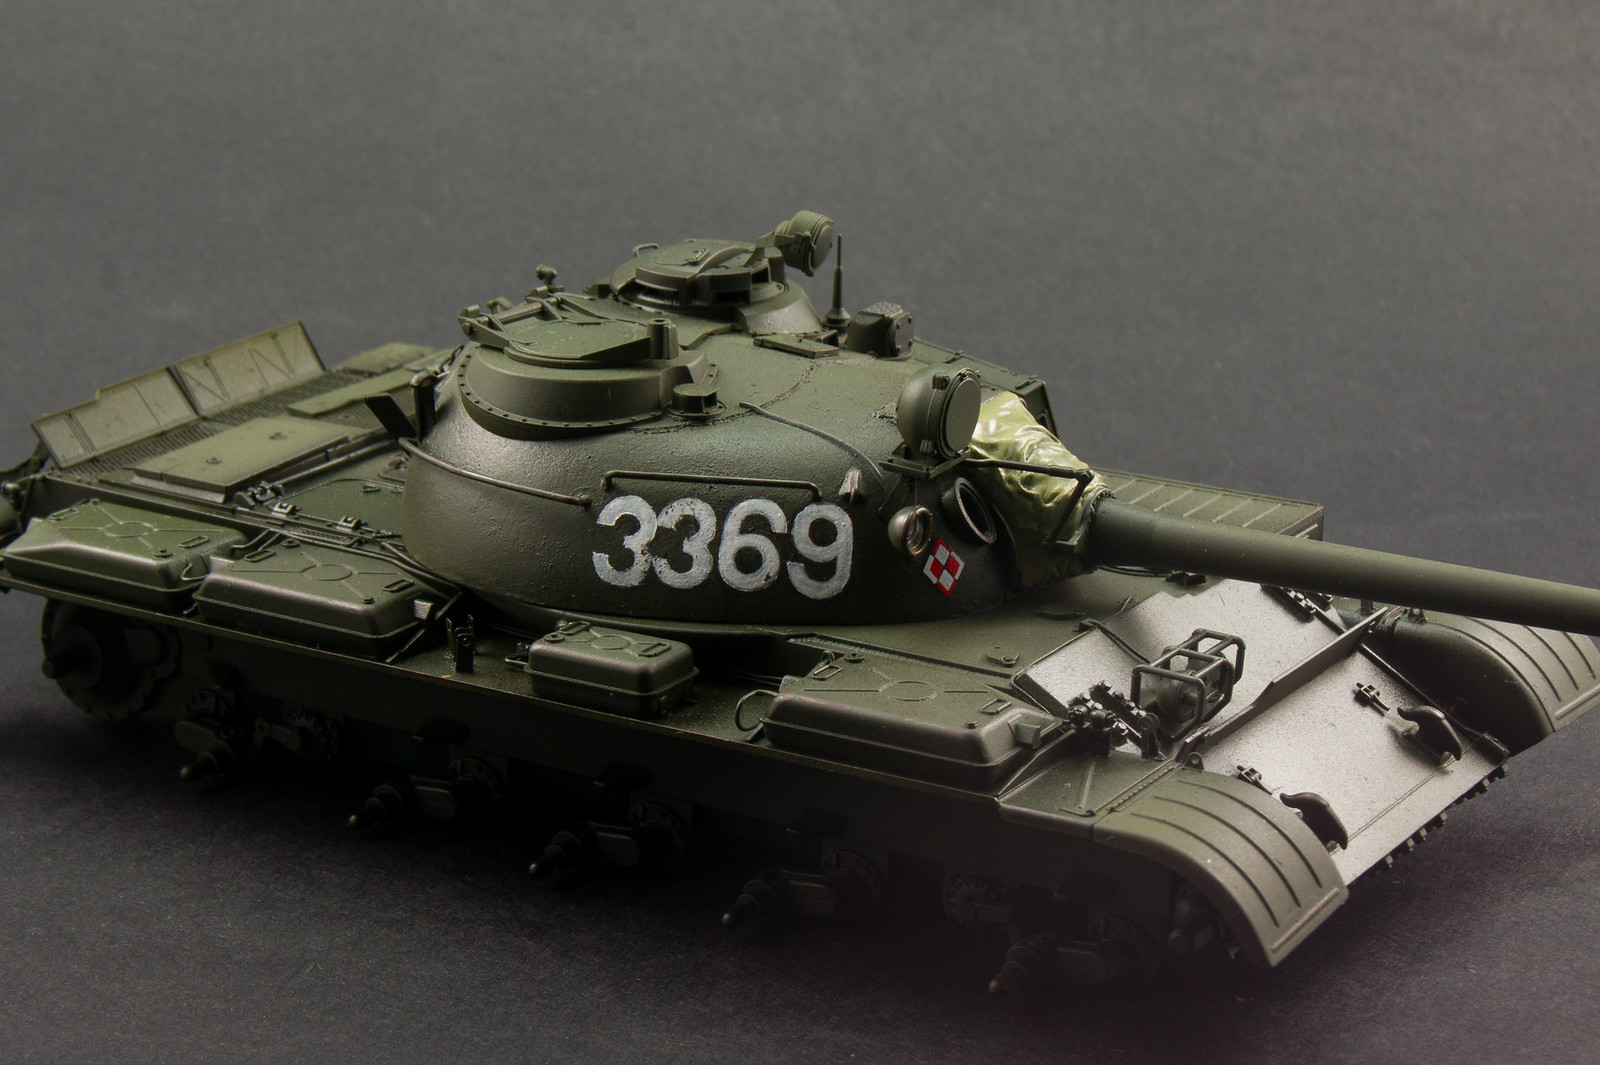
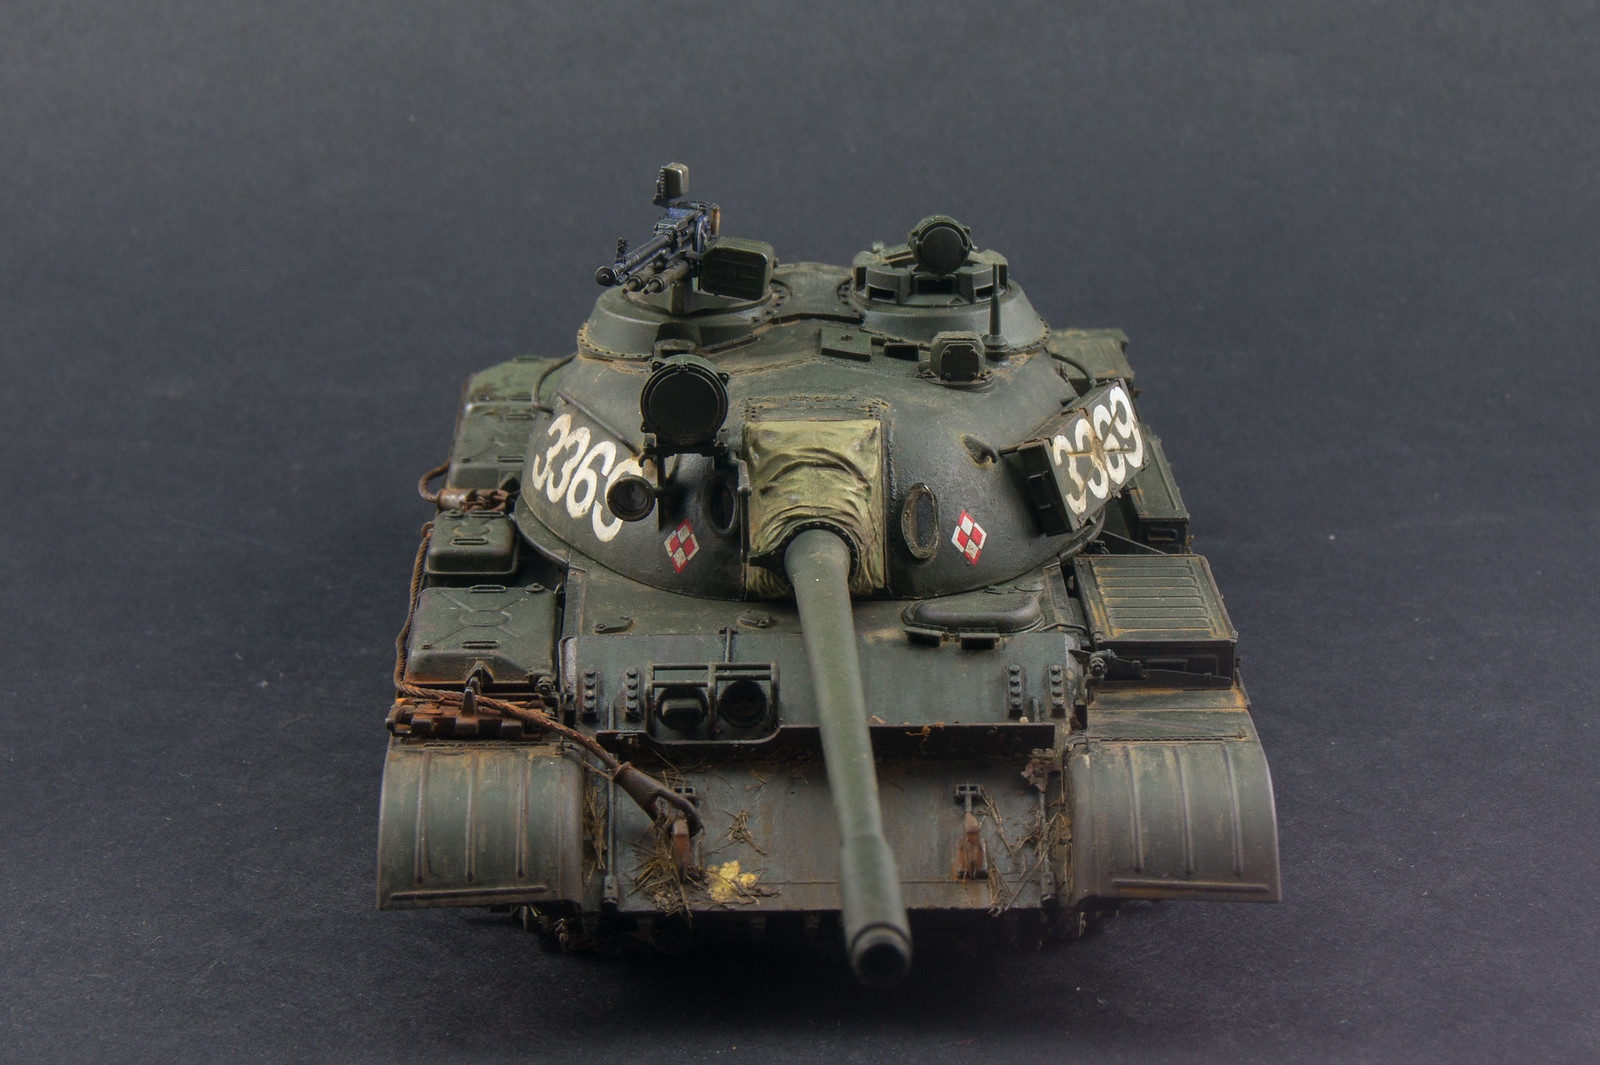
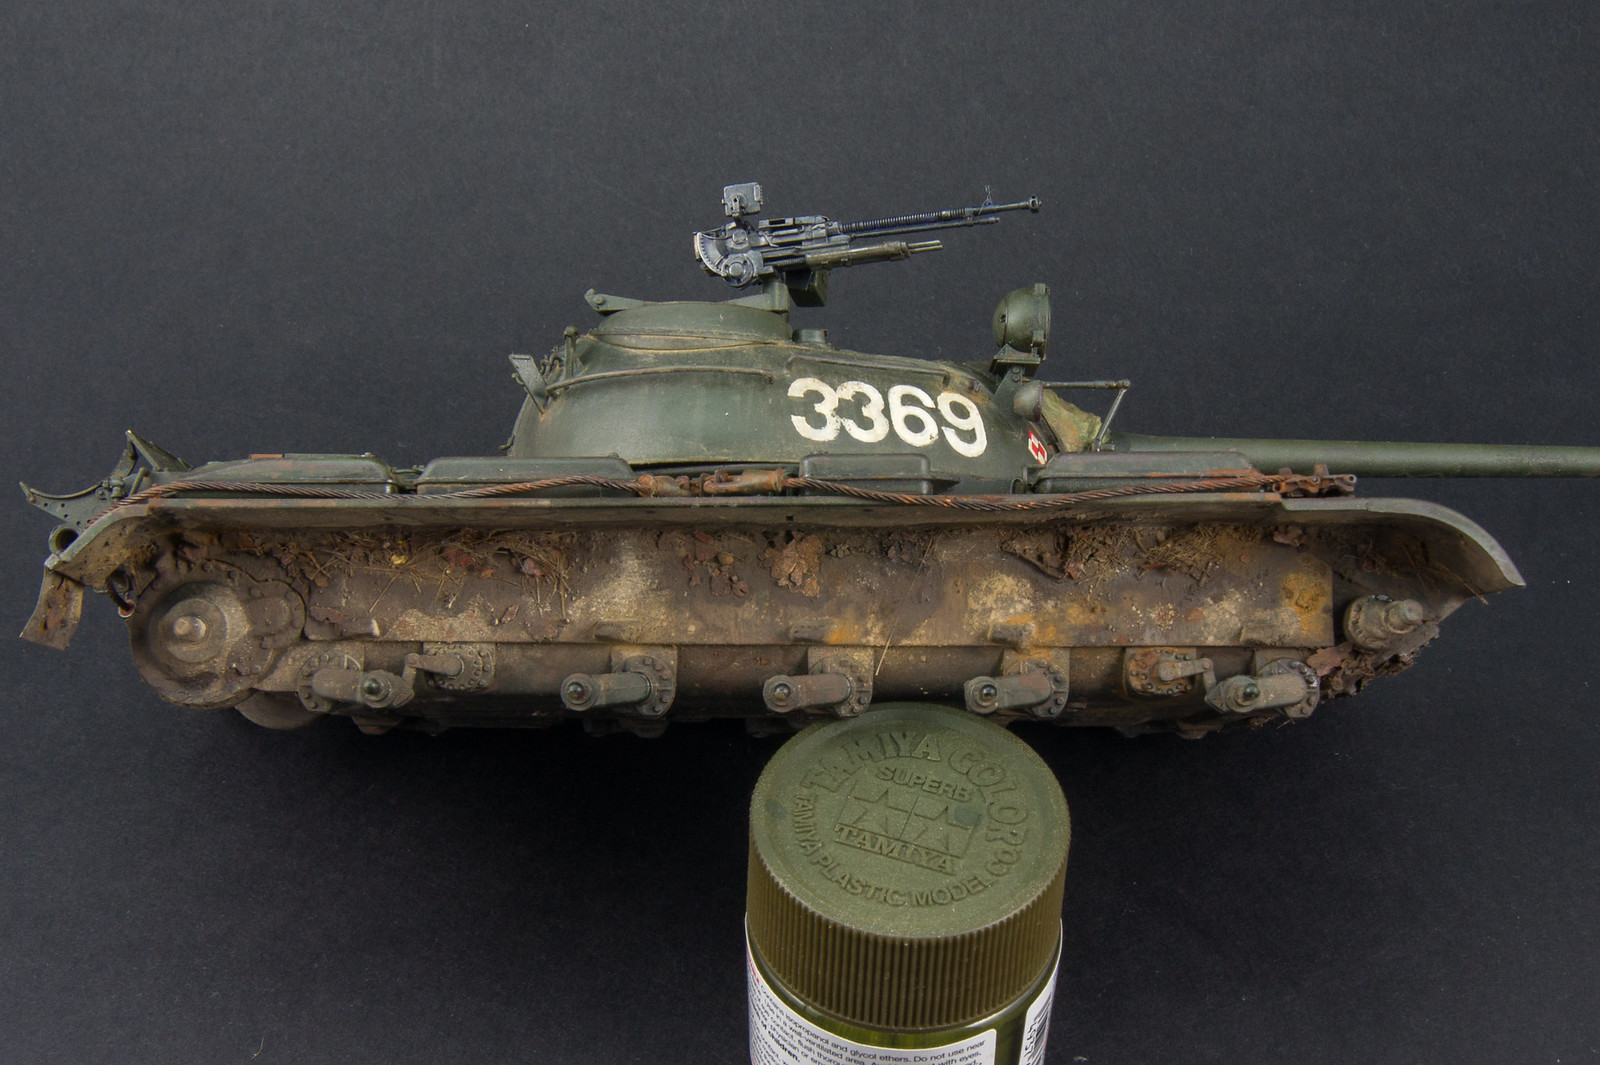
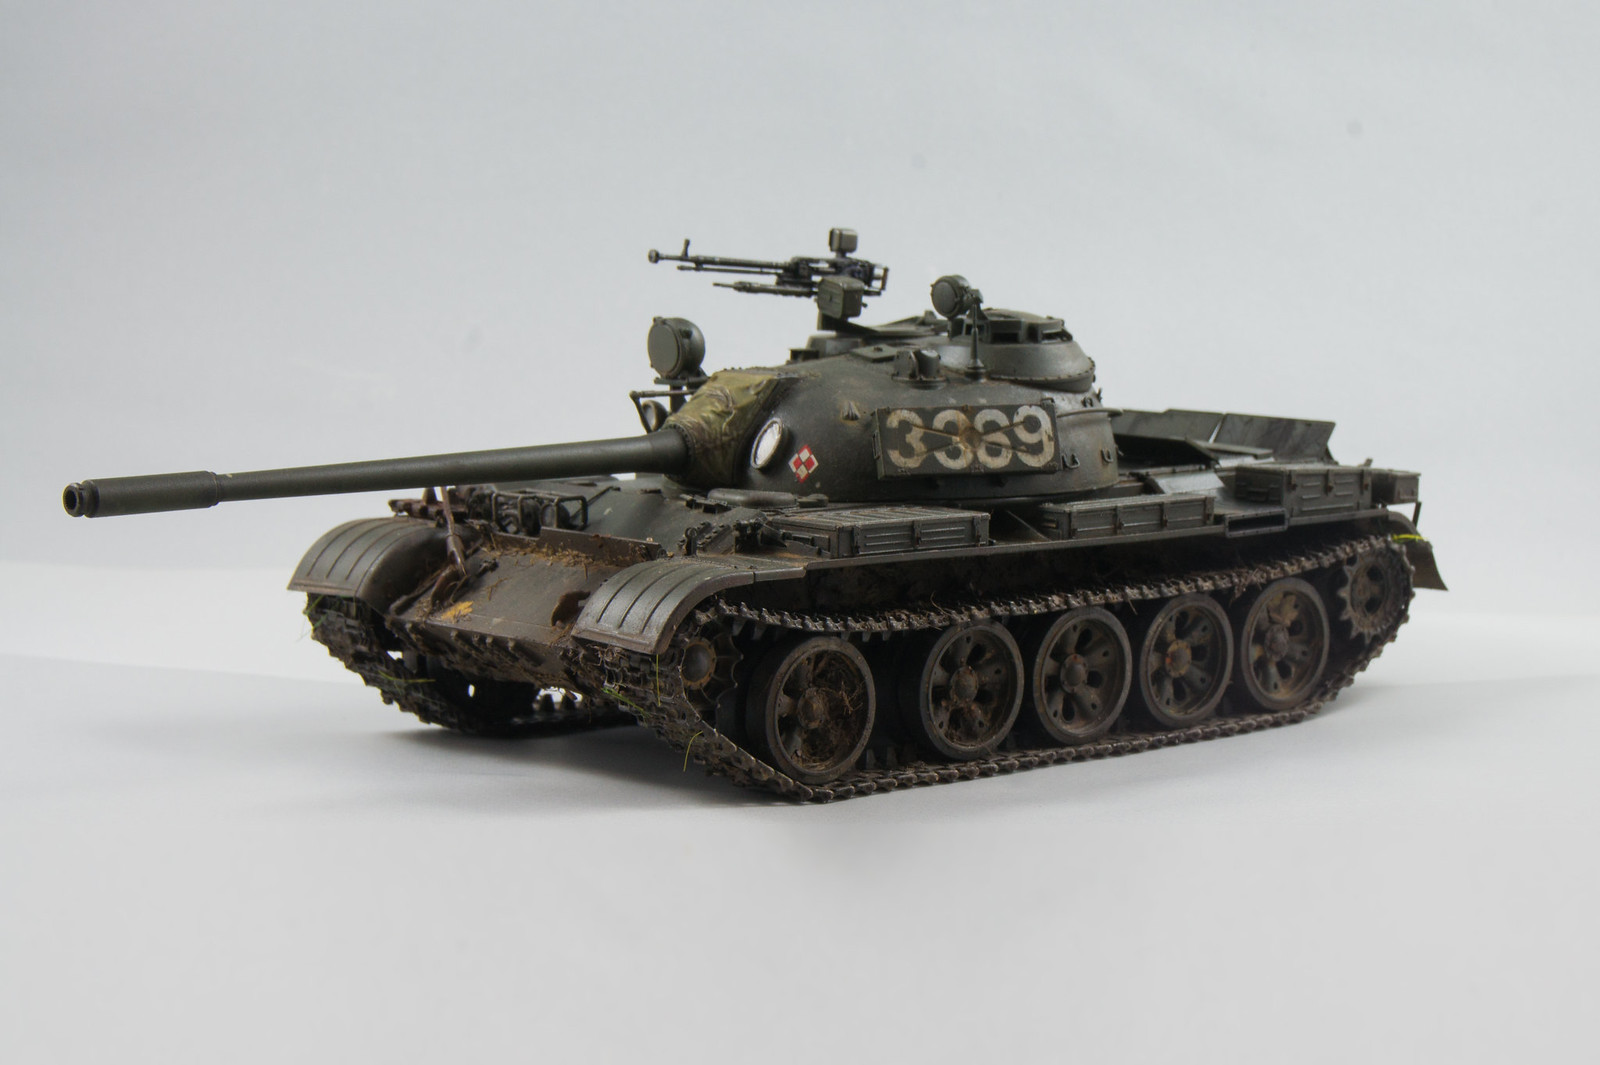
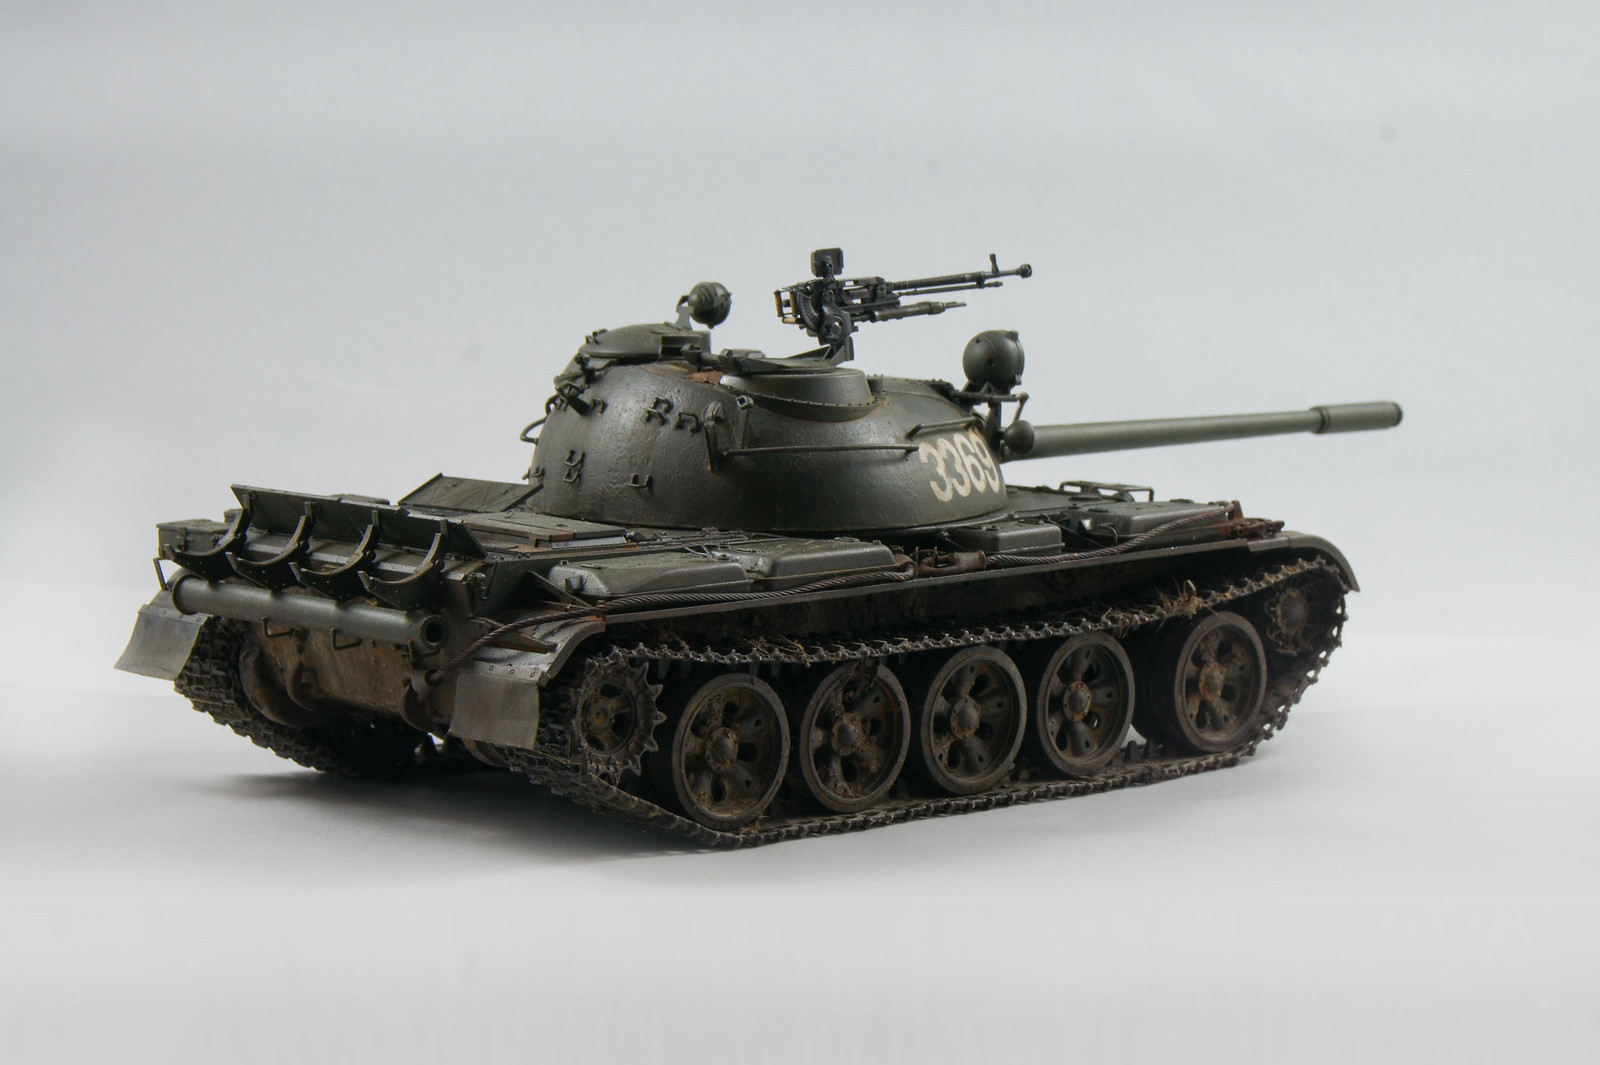
Fuel lines connecting fuel tanks, marker mount on the back, different pipe for crossing water obstacles are some of the features typical for polish T-55.
The build took me long time, I will start from the beginning.
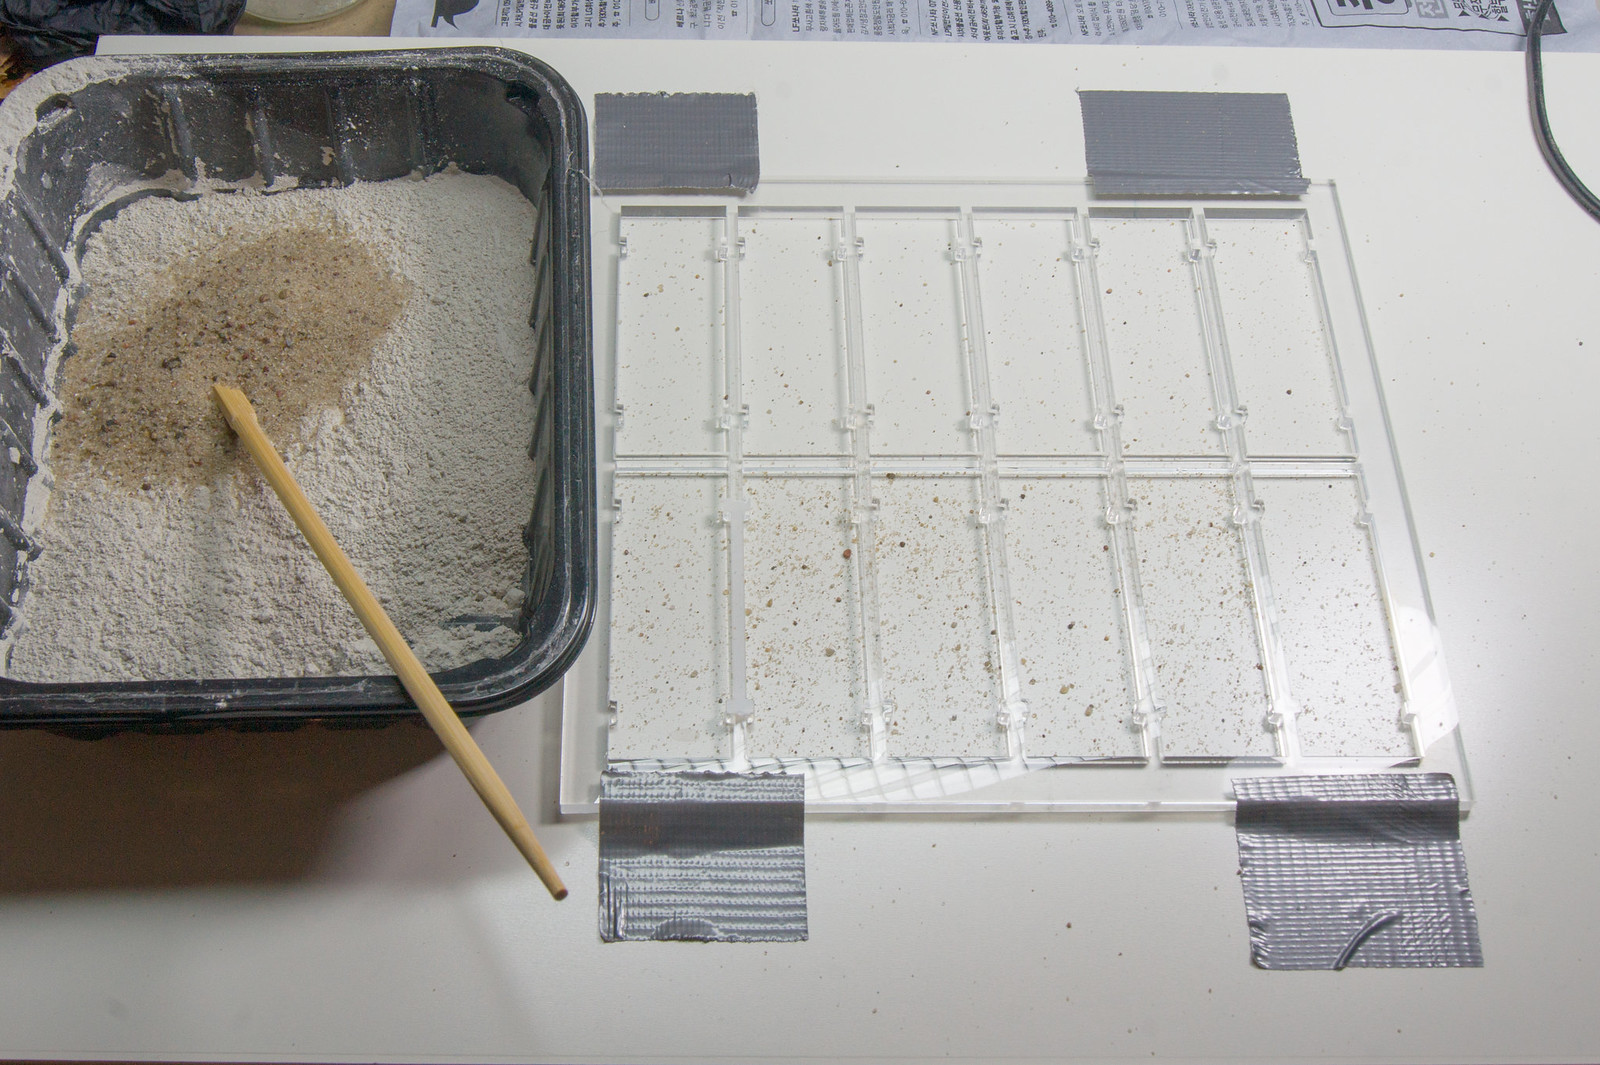
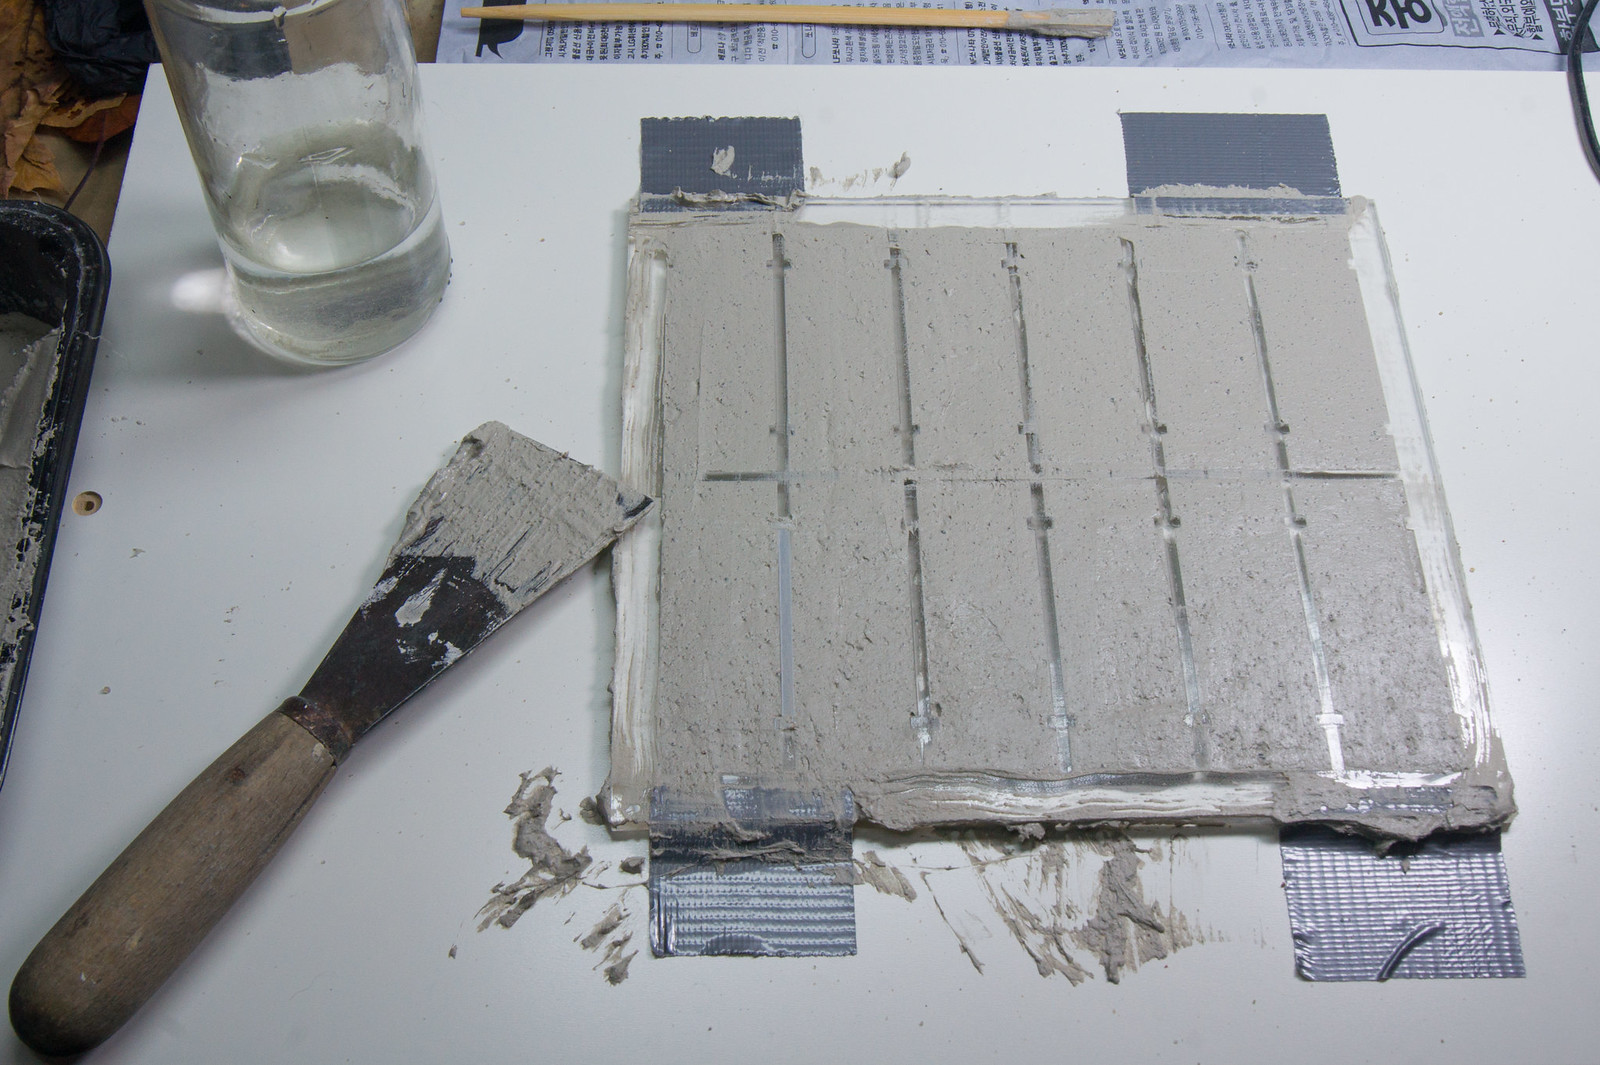
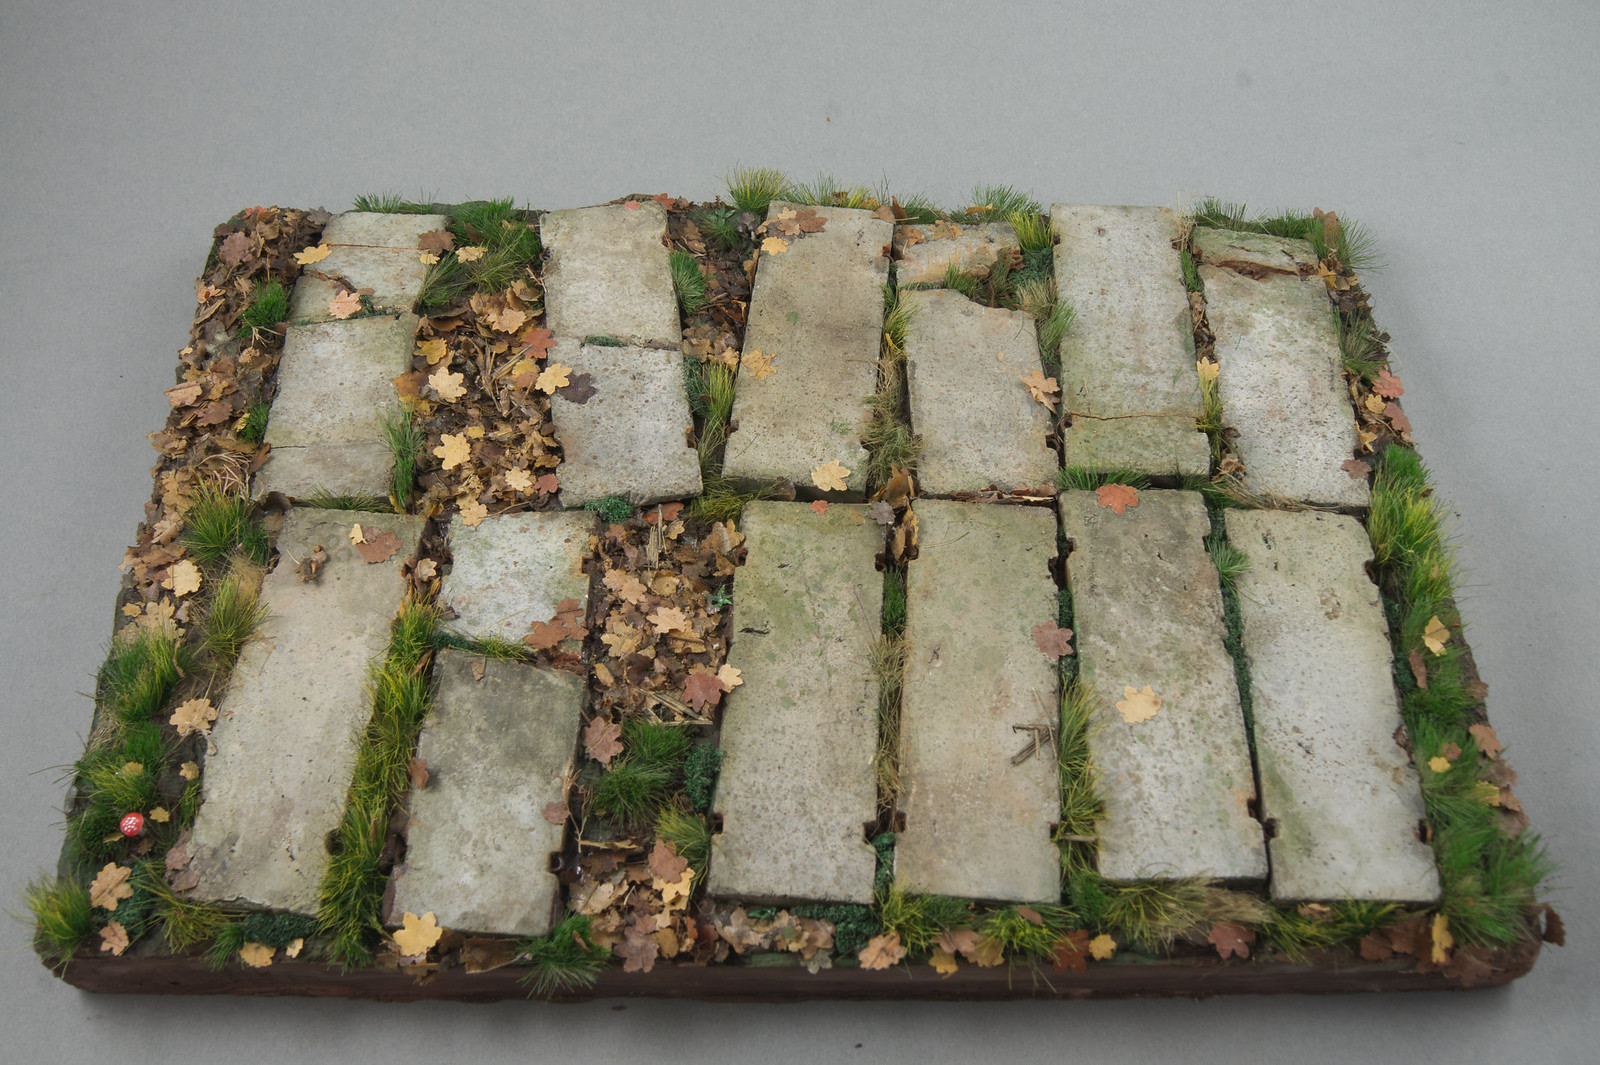
The tank needs a base, so I’ve decided to make one. Never did a diorama, but I came to an idea to replicate polish concrete slabs - MON type. I made vector drawing in scale and ordered laser cut frame from plexiglas. Then I’ve filled it with plaster mixed with some sand. Plaster was of casting (dentist) type, III grade, quite hard and quick drying.
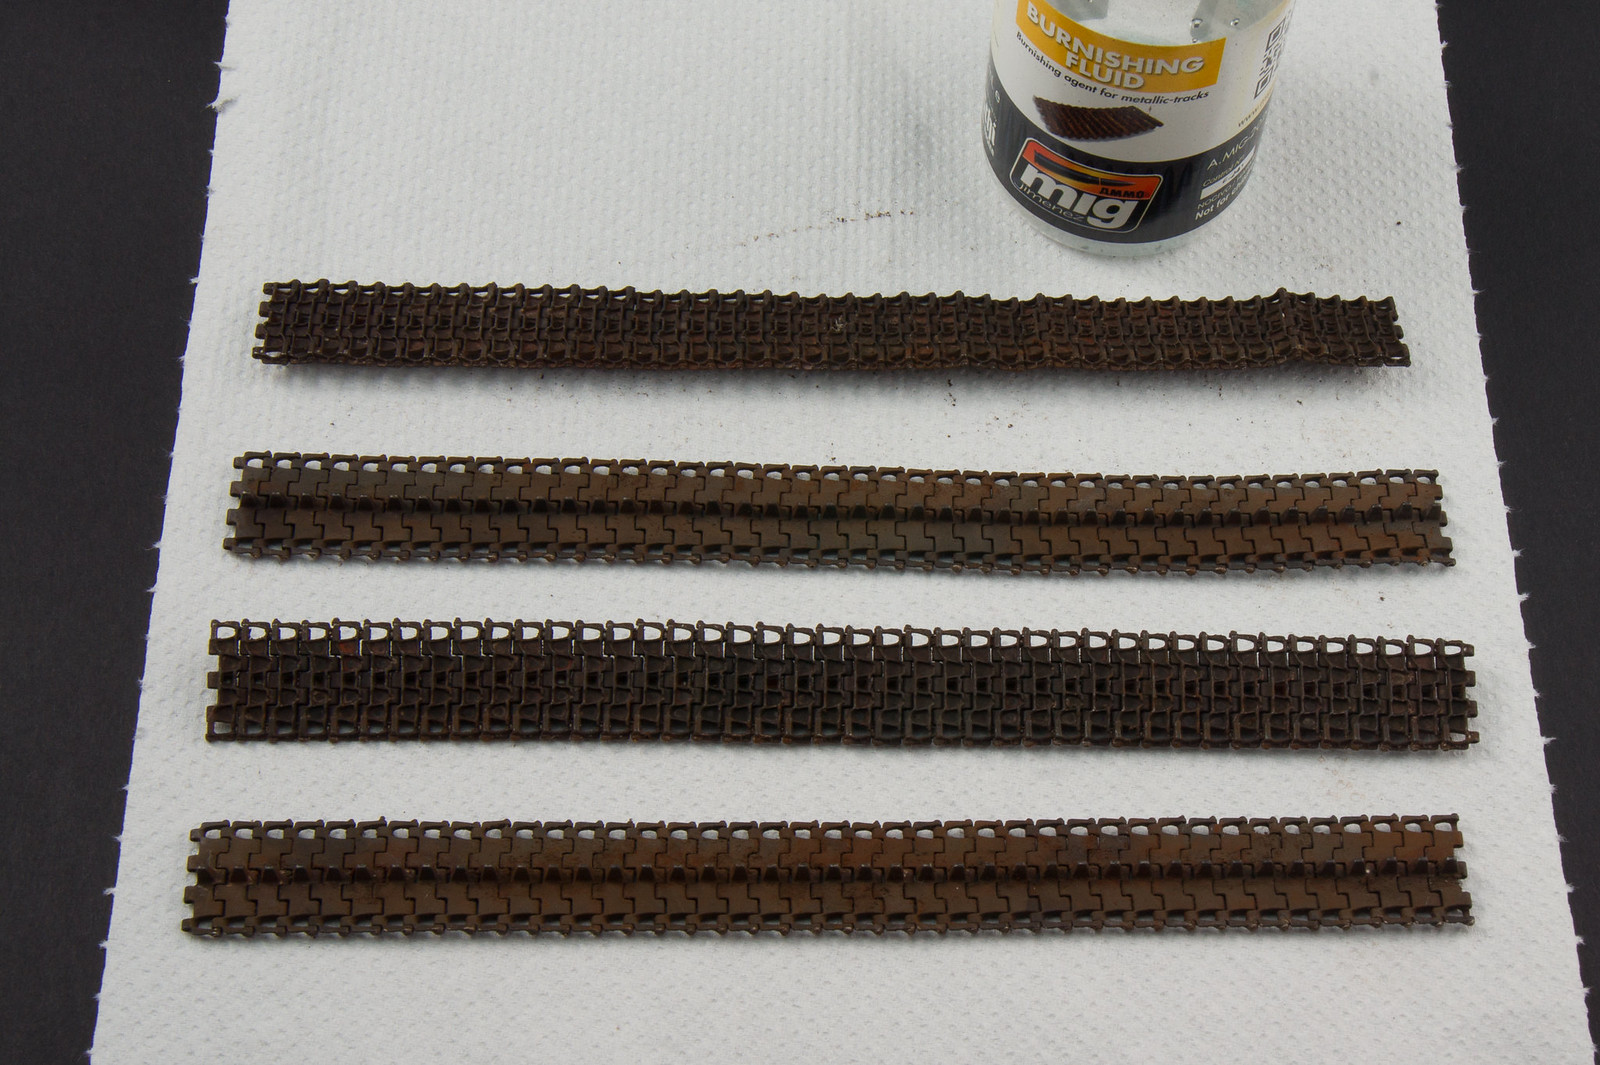
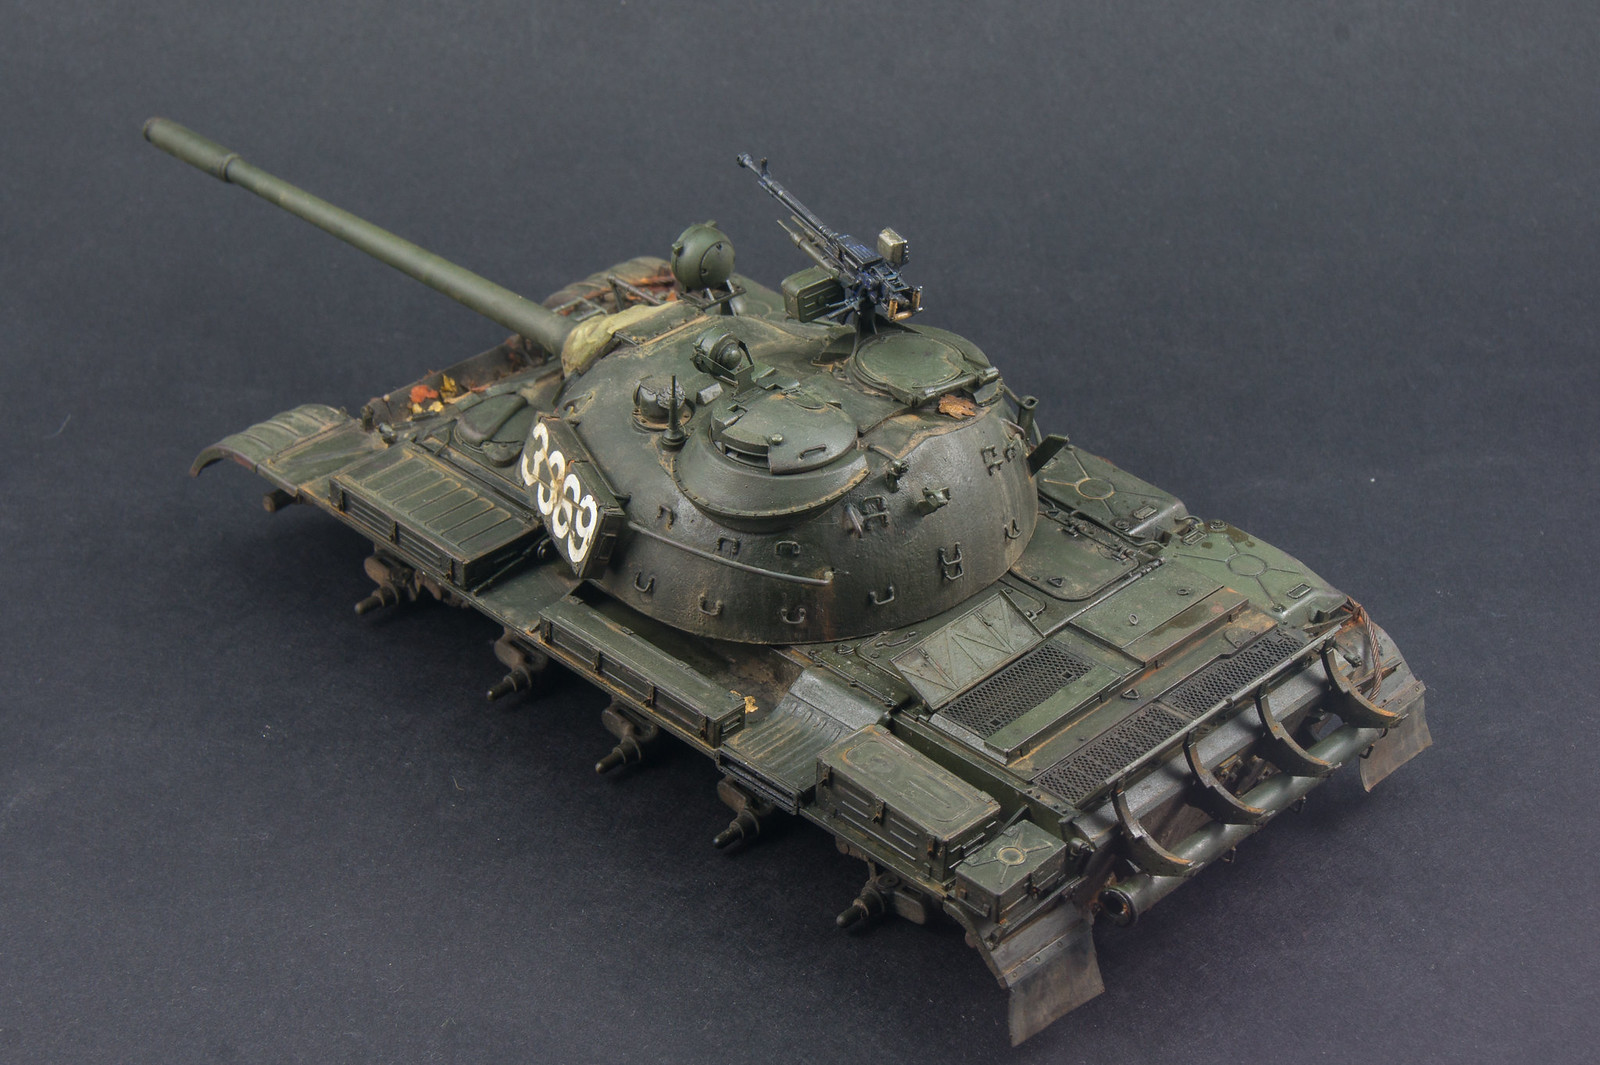
Interesting approach, not seen that black and white done before, but i am guessing its similar to black baseing. The inside of those tracks, have they been painted with rust or is that the burnishing liquid does that.
Burnishing fluid did that. But I’ve messed using steel container to burnish, so I had some spots of clear metal, drybrushing with acrylic rust colours here and there did the job.
wow really cool I just read a build log on a AT-AT walker that the builder used the black and white base coating on it and was planing on doing it on a AT-ST in my stash can’t wait to see what it does on something besides gray like this.
Nice! Love how the shading and modulation turned out. Looking forward to more.
PS: When you said the numbers are hand painted you mean you painted them with a brush instead of using a mask and spraying them? I’m again impressed, mine would have looked horrible.
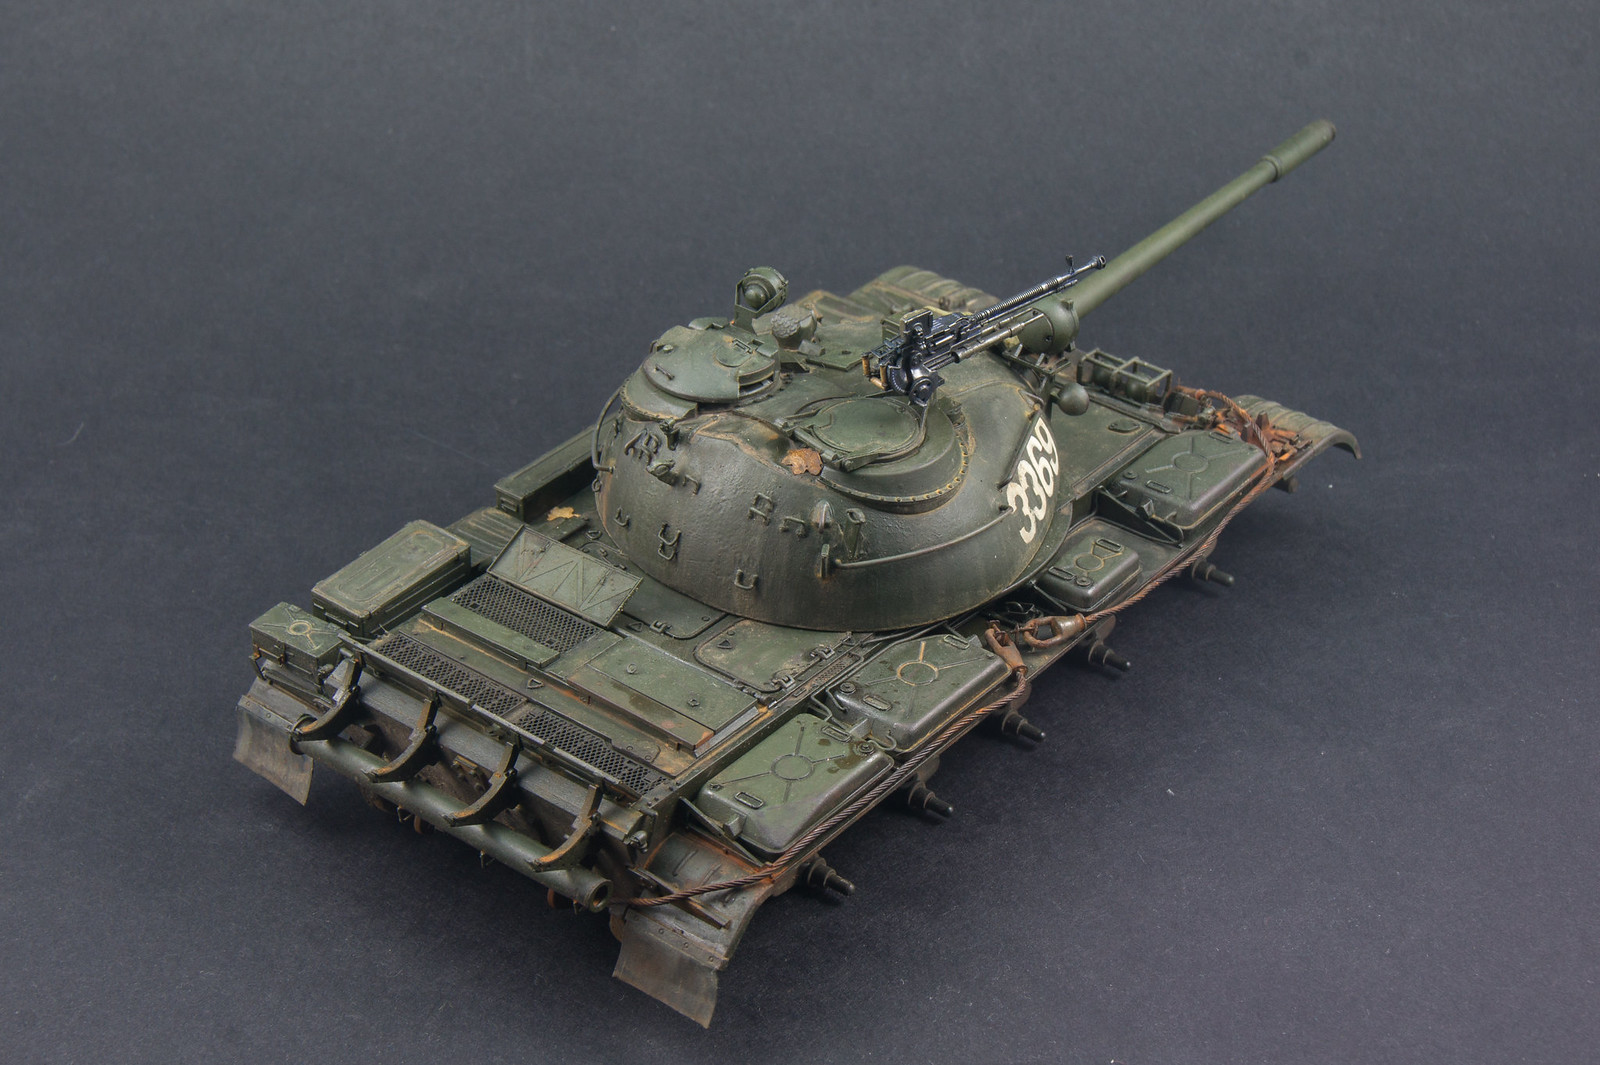
I do like that. After seeing the previous pics, i thought it would be more heavily modulated, i am really glad it isn’t. Nice job on the numbers as well.
Concrete took a lot of splatted Tamiya paints, some airbrushing, washes, oils, everything in random order - plaster is great because it soaks it all in minutes so work is fast and easy.
Same here, i much prefer realistic builds. And that is coming on very nice. Some really nice effects around the small raised pieces and really like what you have done on the lwer hull.
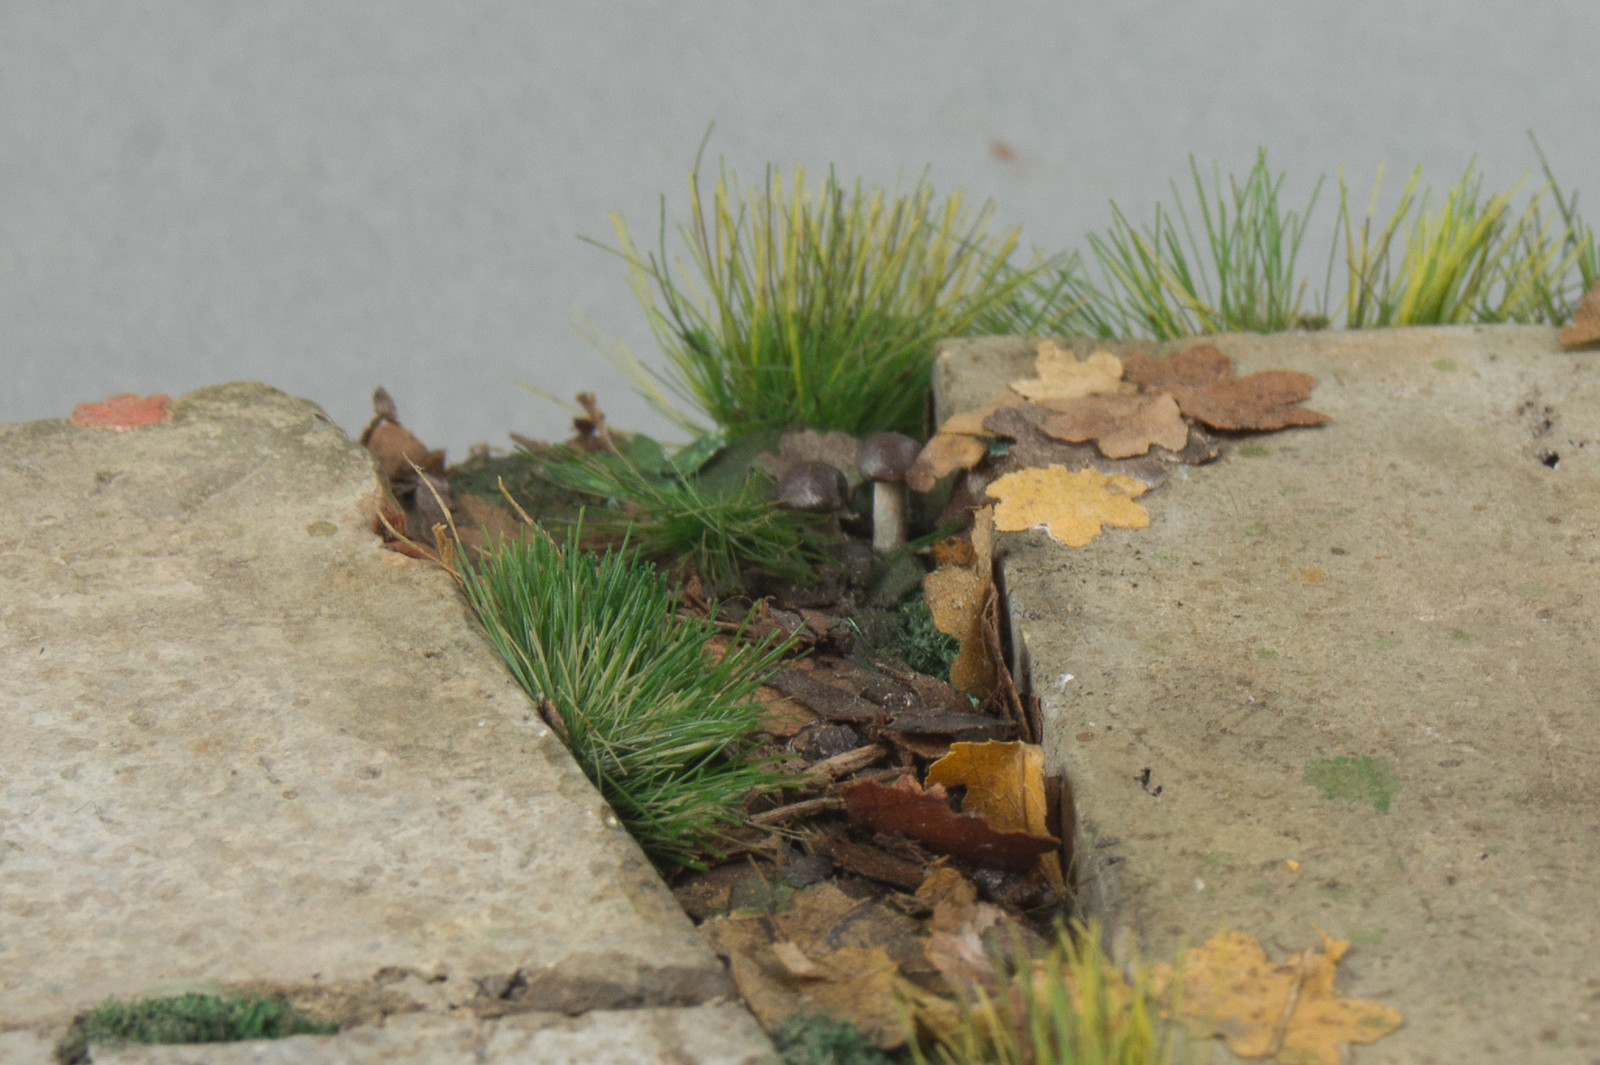
Thos concrete slabs are really nice as well. I do like that broken section with the reinforcing rods showing.
Project took me almost 4 months, but it was done from time to time, I am happy with the result, and see place for improvement, it also important that I’ve managed to finish it in 2017
 _DSC3638 by Adam Kozłowski, on Flickr
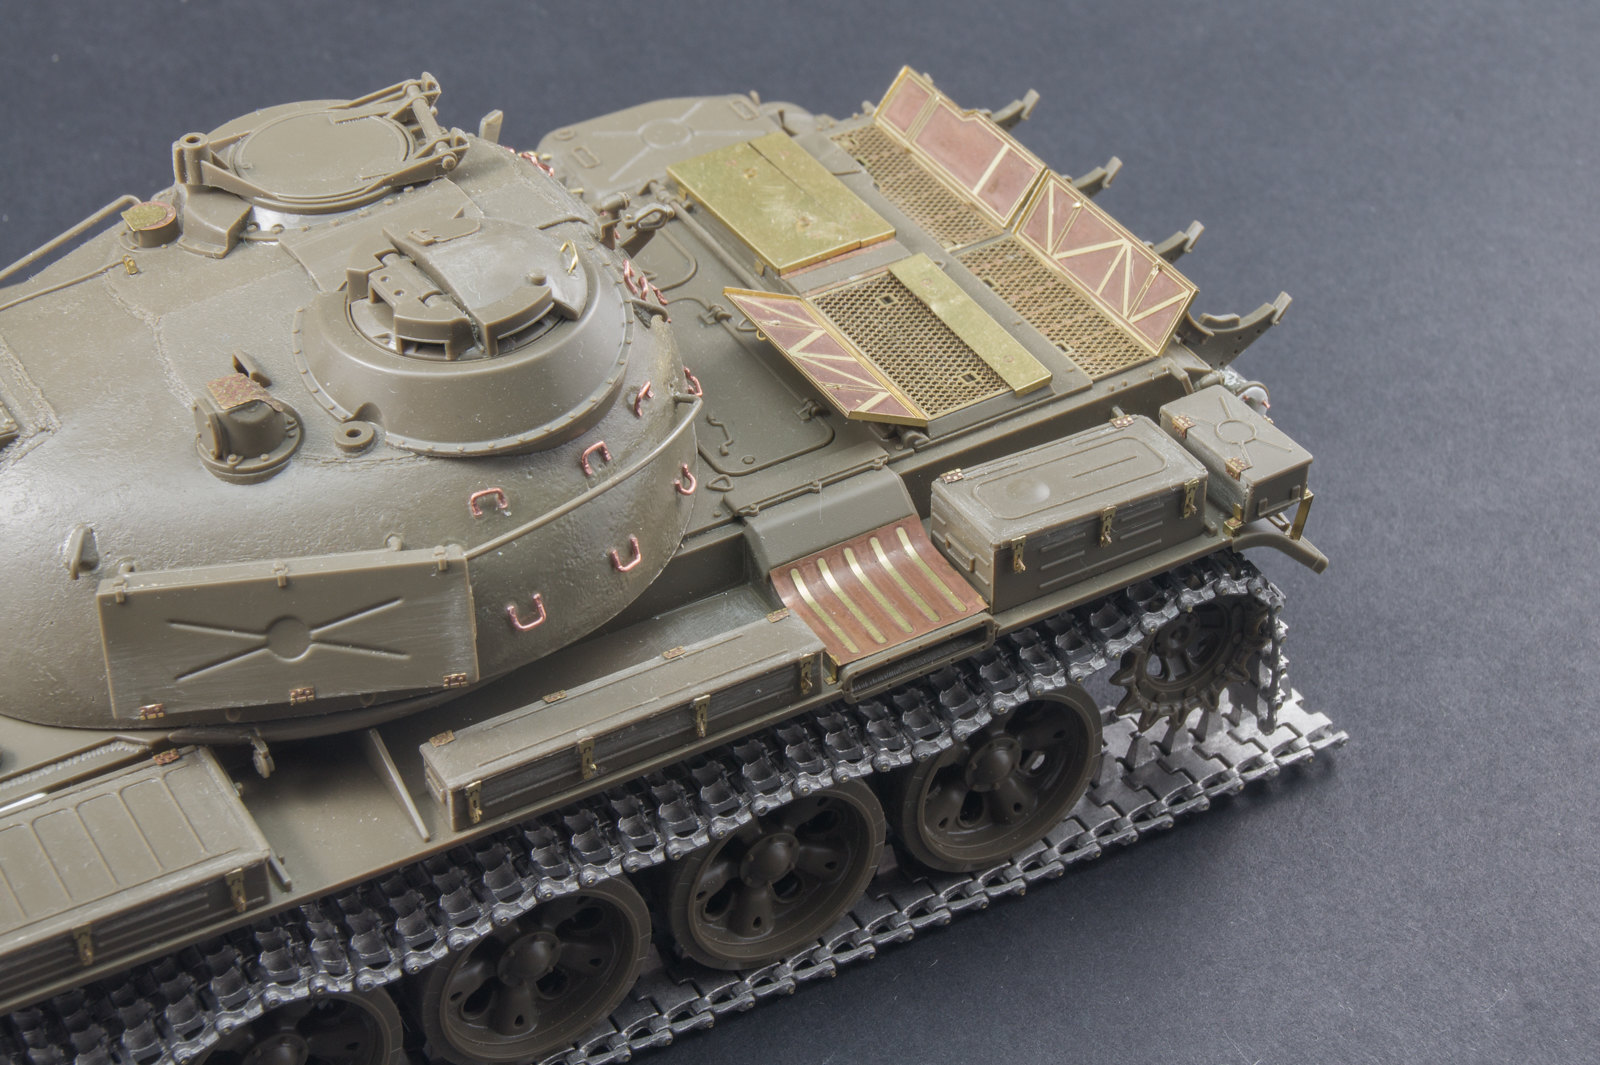 _DSC3642 by Adam Kozłowski, on Flickr
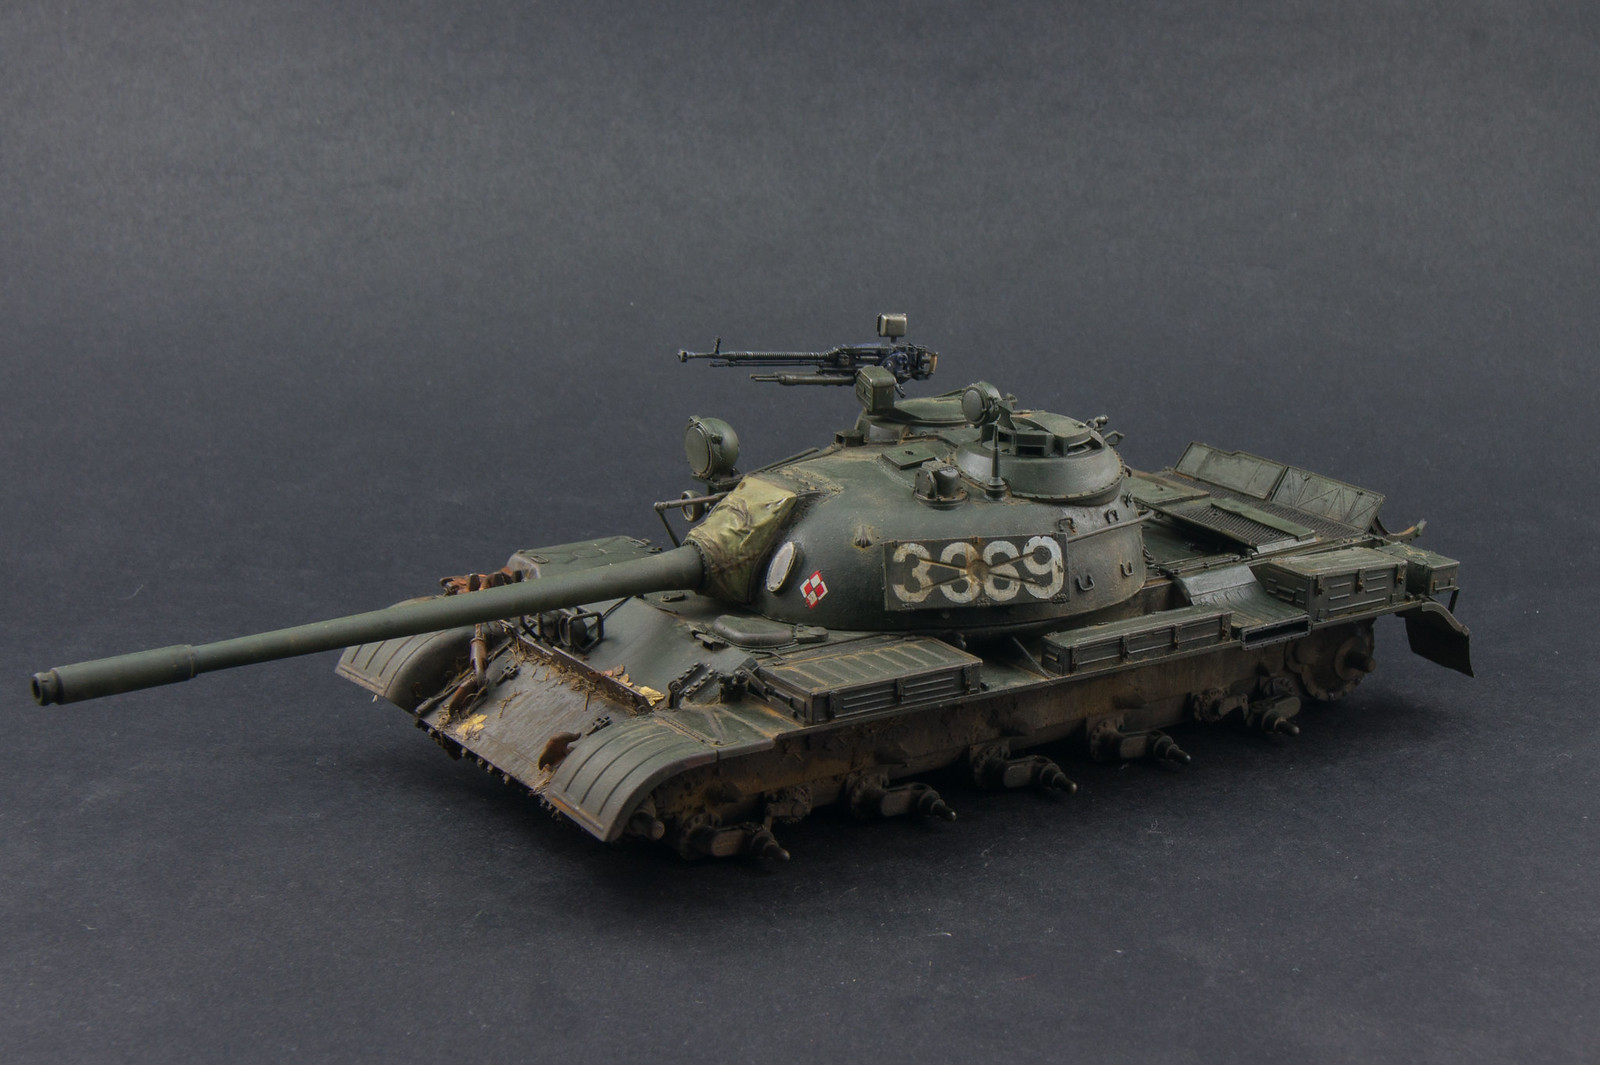
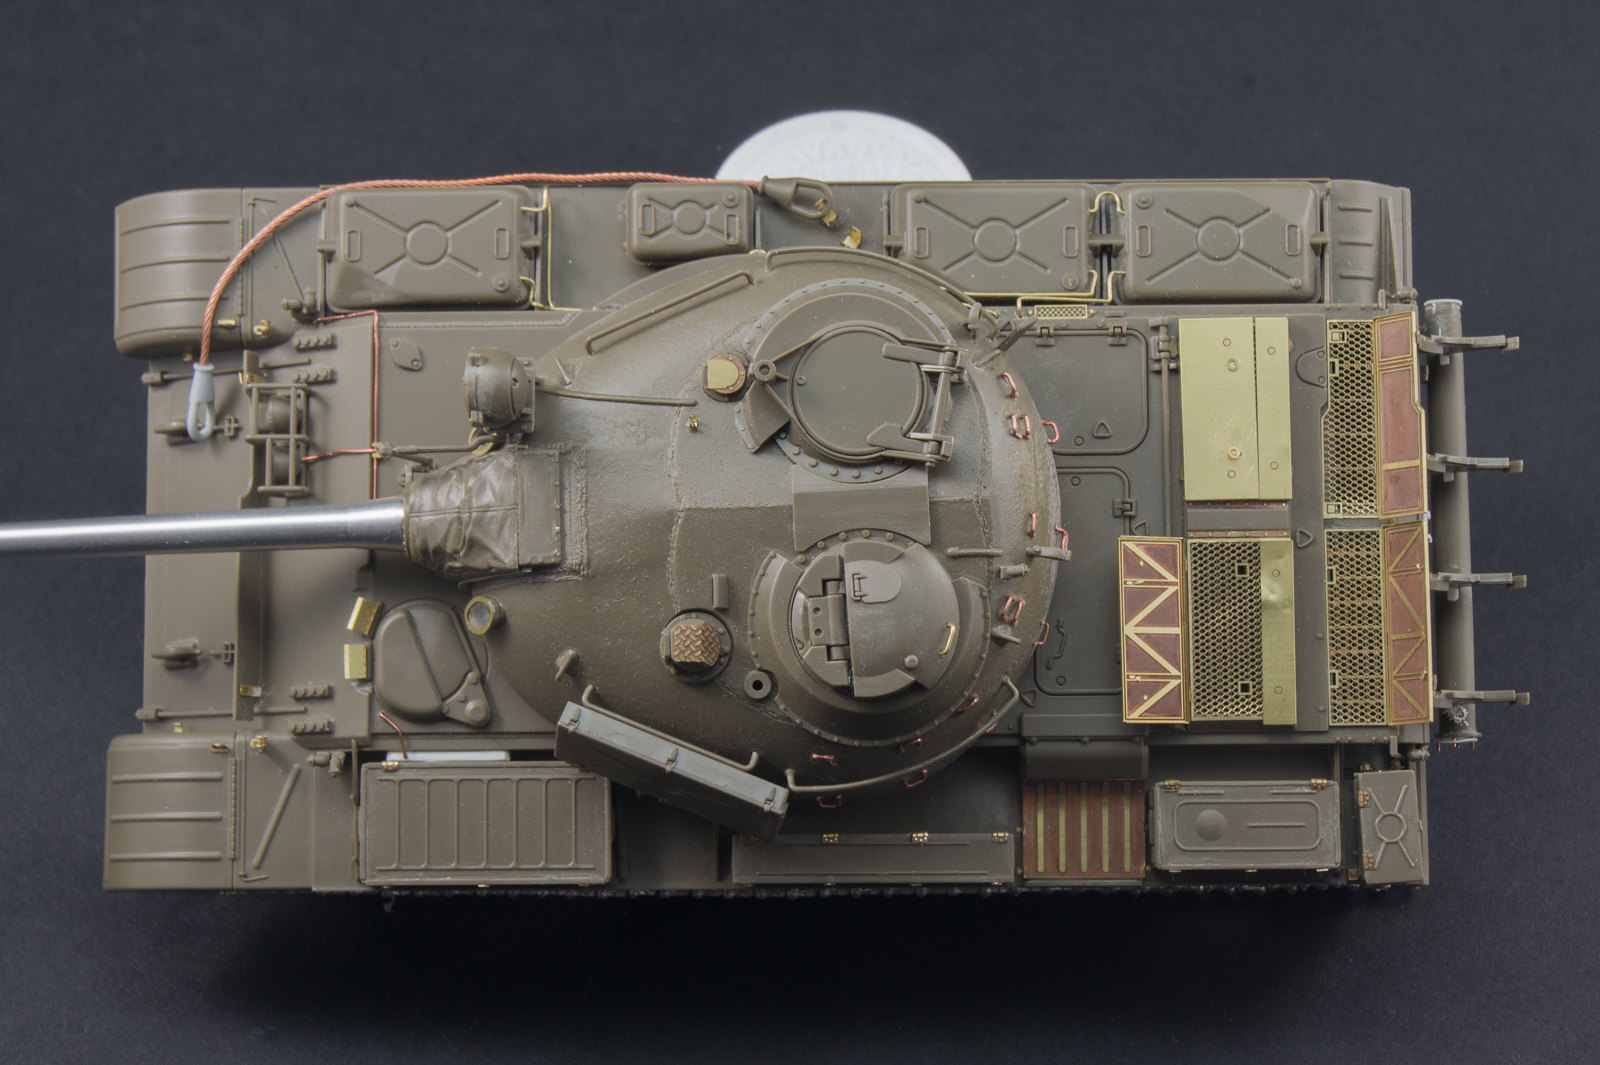 _DSC3645 by Adam Kozłowski, on Flickr
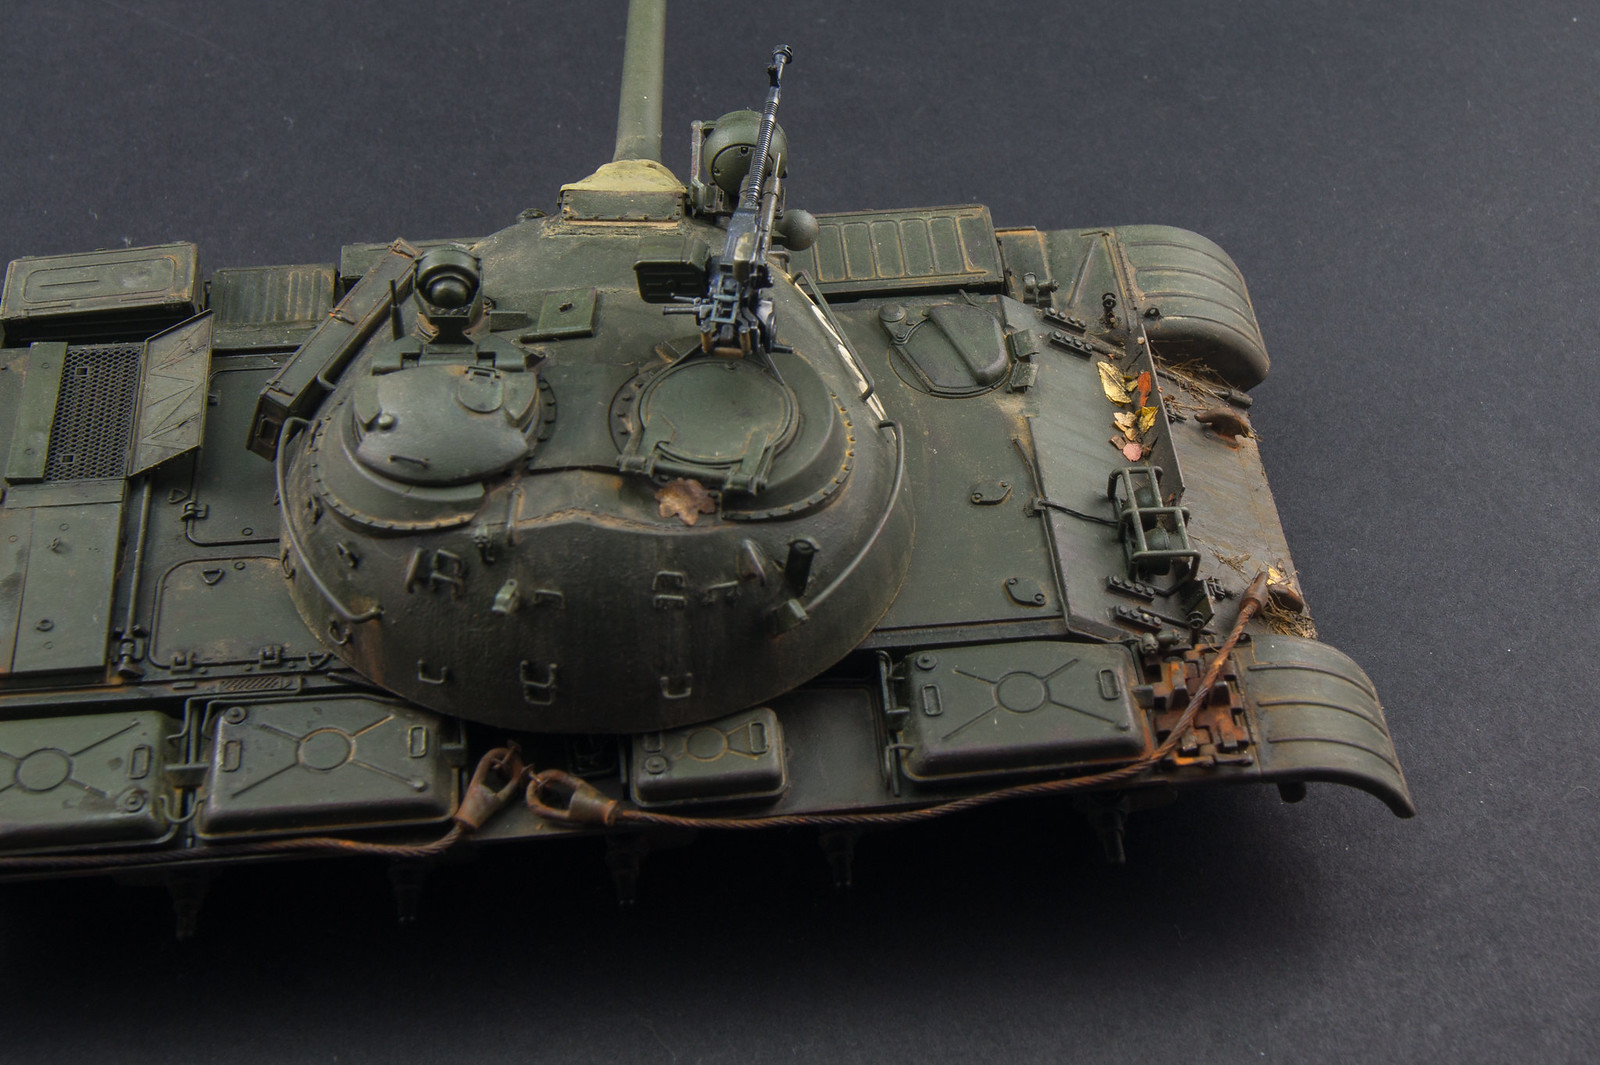
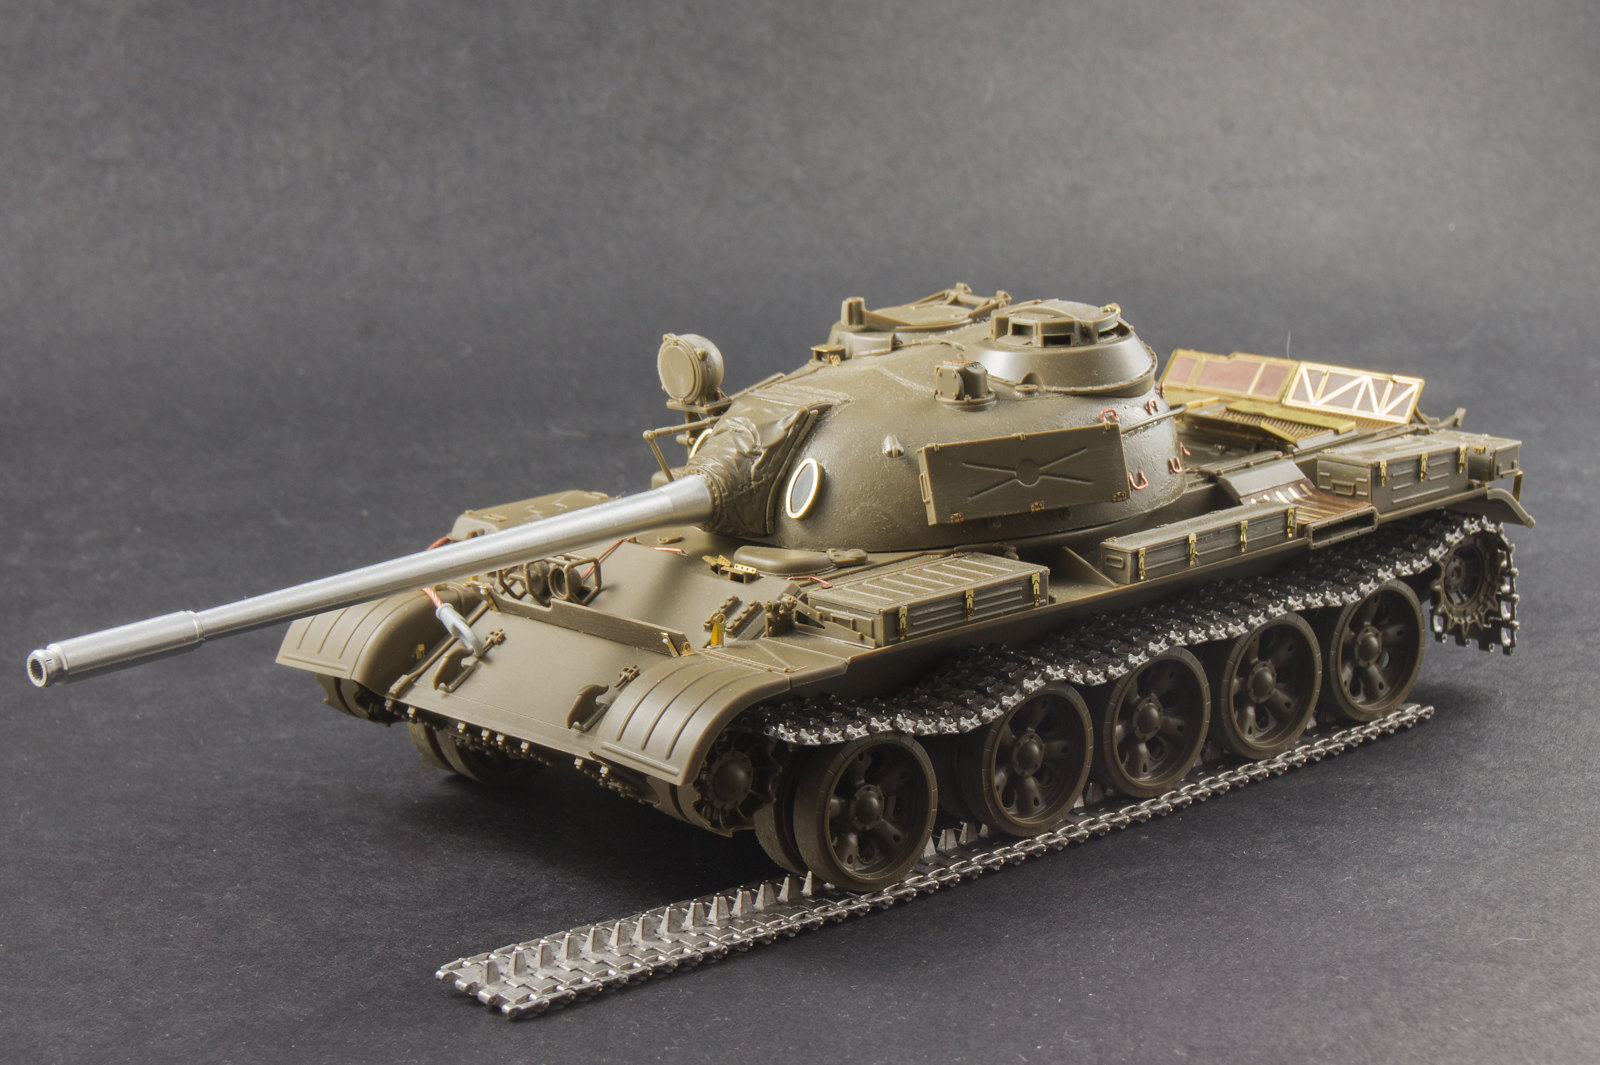 _DSC3629 by Adam Kozłowski, on Flickr