You’re making a bit of a fan of this tank out of me, my friend. It’s looking great!
Are you adding figures, or just building this one for the shelf?
You’re making a bit of a fan of this tank out of me, my friend. It’s looking great!
Are you adding figures, or just building this one for the shelf?
As I understand the S tank was inspired by assault gun/ tank destroyers like the Stug, Jadgpanzers, and SU-85 series.
She’s lookin’ great Pawel, please keep the updates coming!
Was part of it, but the Swedes were also trying to plan around a force that could be raised up quickly from Reserves. So, a two-man tank-killer had great appeal.
At the time, the hydralic technology looked mature enough to support using that to elevate and depress the gun tube. Having an attached dozer blade meant no having to wait for Engineer units to stand up in case of emergency. And, being able to dig in defilade just added to the protection.
And, when the traverse was executed by moving the vehicle, it almost makes sense to have the gunner be the driver, too.
The fixed gun tube really simplifies the geometry of the autoloader, too.
Now, whether the terrain in Sweden was suitable for the range of elevation provided, is quite a differnt question. The scheme also required much of the Reservists, to keep up skills so that they could go to their dispersed laagers and go face off the invading Soviet (or, worse yet, Norwegian) tank hordes.
It was designed as a purely defensive weapon system. As stated, a minimal crew can fight from prepared positions and the lower height allows greater survivability. Traditional tank battle positions require a “hull down” and “turret down” position. In turret down, nothing but the commander and turret optics are visible from the front. The tank then moves forward to a hull down position exposing the turret and main gun for engagement.
The Strv is useless in a traditional meeting engagement, i.e. two mobile forces meeting while traveling towards one another. However, in a deliberate attack, where the enemy positions are known; one set of tanks can overwatch from stationary positions and provide cover while another set of tanks can maneuver towards the enemy positions.
Hello everybody!
Mike - I’m becoming a fan myself, I’m admiring the Swedes for how determined they were to design something themselves as opposed to buying foreign stuff, and how well thought out the tank is.
Capn, Rob - thanks a lot for that theoretical discussion, I find it fascinating and I think it adds immensely to the thread. Did you read about the comparison tests the British and Germans have done on that baby and found that as long as you have to stop a tank for firing the turretless design has no disadvantages over turreted tanks?
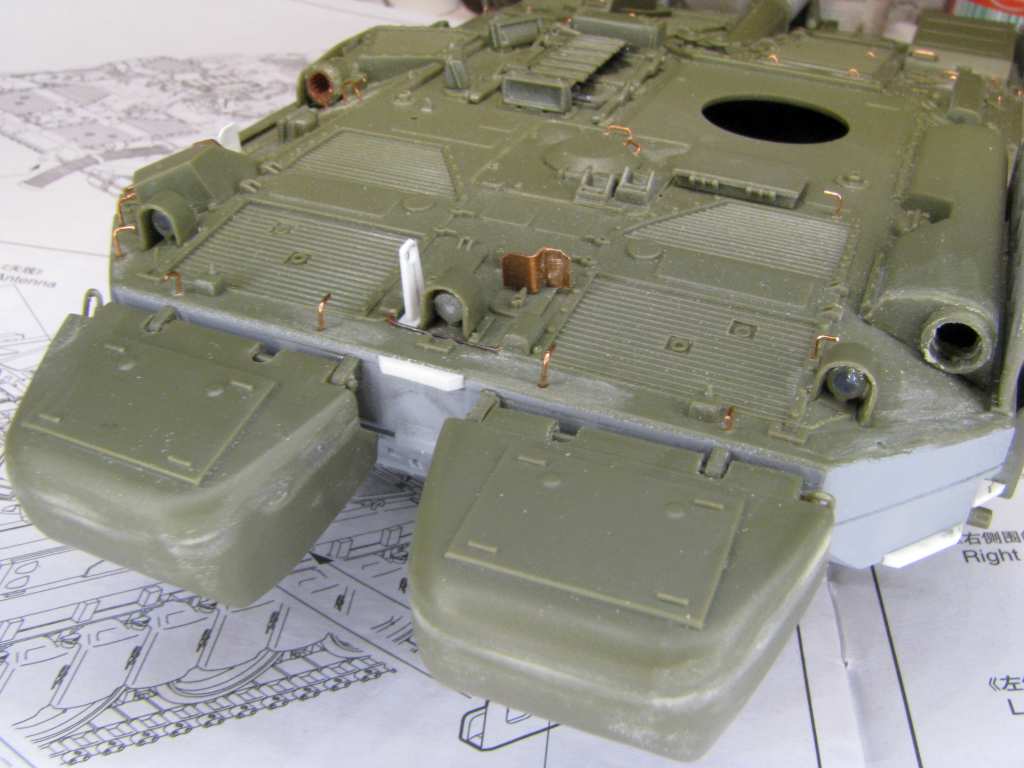
I, for myself, am building on. On one side I have test-fitted the jerry cans and the poles:
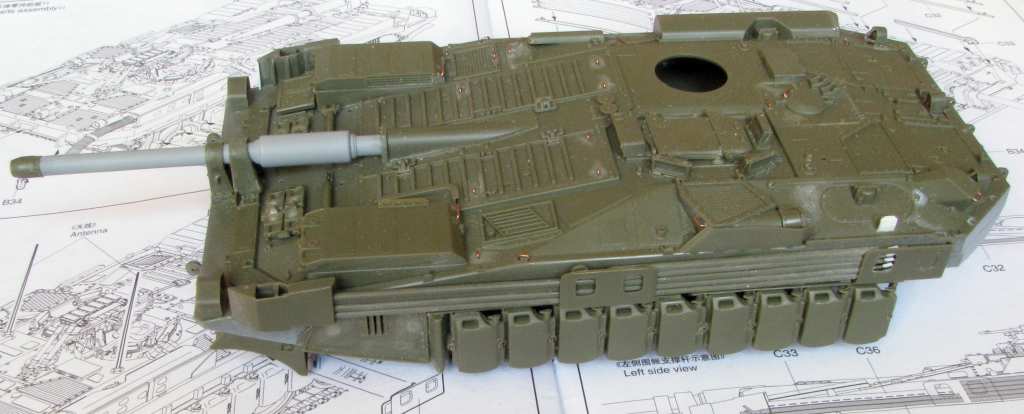
On the other side the jerry cans are not there yet, but I have fitted a reinforcement (white part) for the jerry can racks, I hope it will allow me to remove a whole jerry can “side” as one part after painting and before installing the runnng gear:
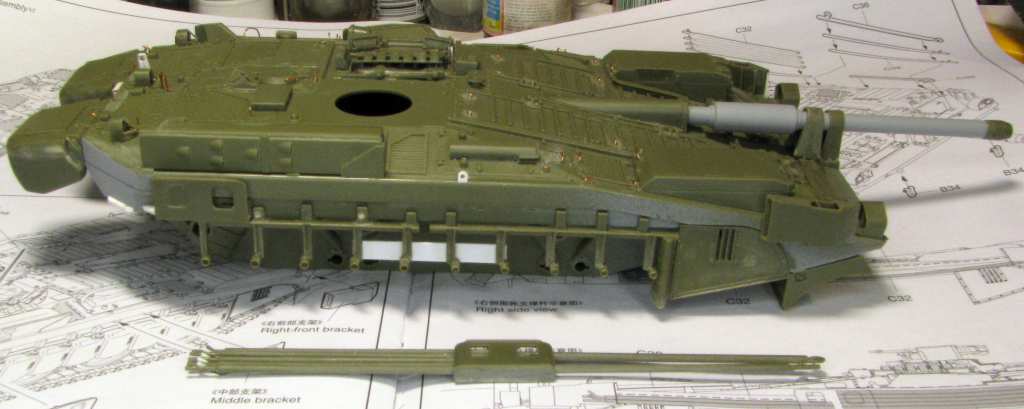
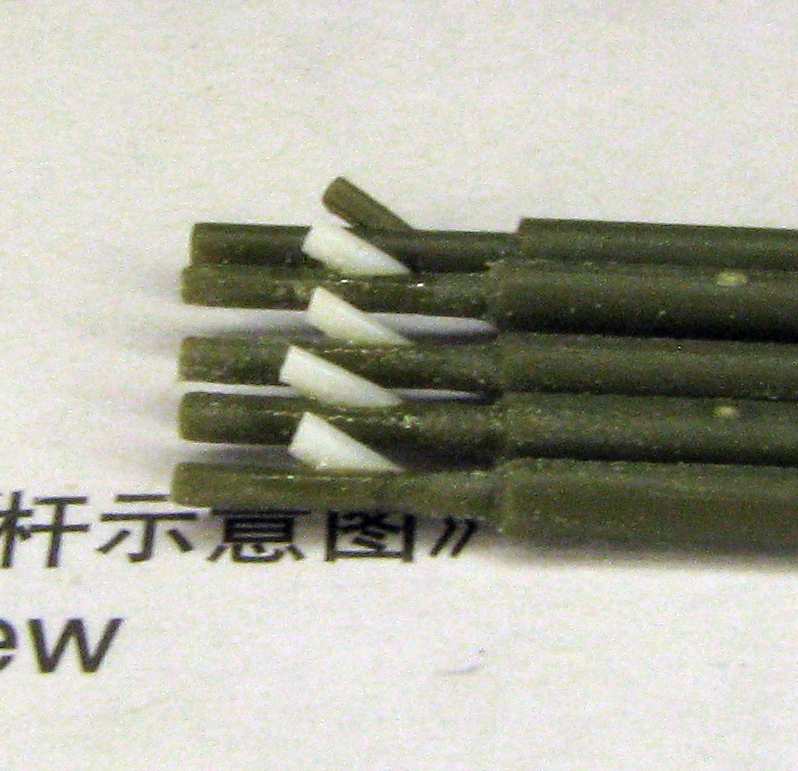
As you can see the poles are removable, too. The cleanup of them looked bad at first, because all 13 (bad luck!) of them have a prominent mold parting line. Some people are even building those poles from scratch, but I think I have found a cleanup method that saves a lot of work. I have cut off the diagonal stubs and sanded the poles round. After that I have glued new diagonal stubs on, made from stretched sprue:
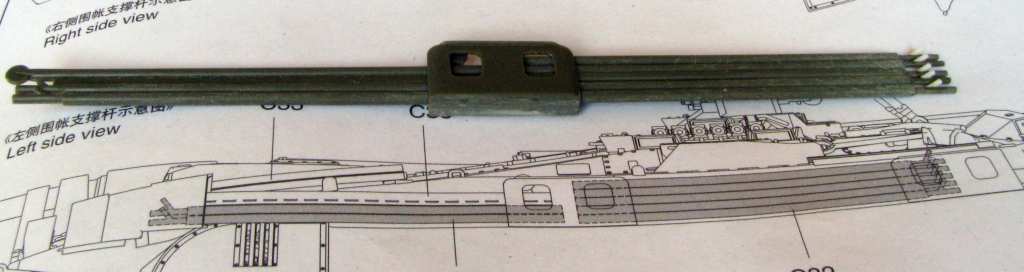
This doesn’t have to be done on all poles neither - at least the front pointing ones are hidden inside the brackets and the tips are not visible, so don’t bother with the cleanup too much.
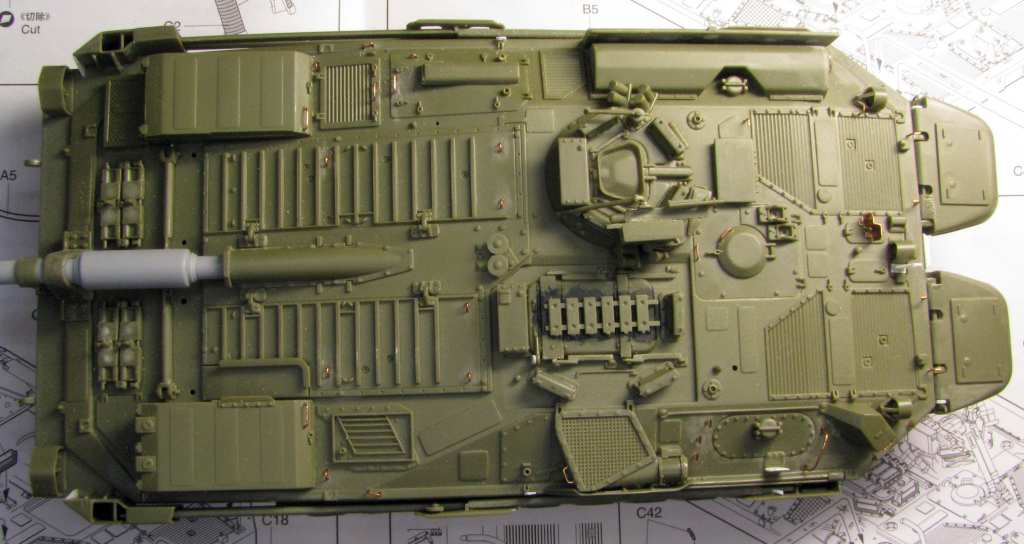
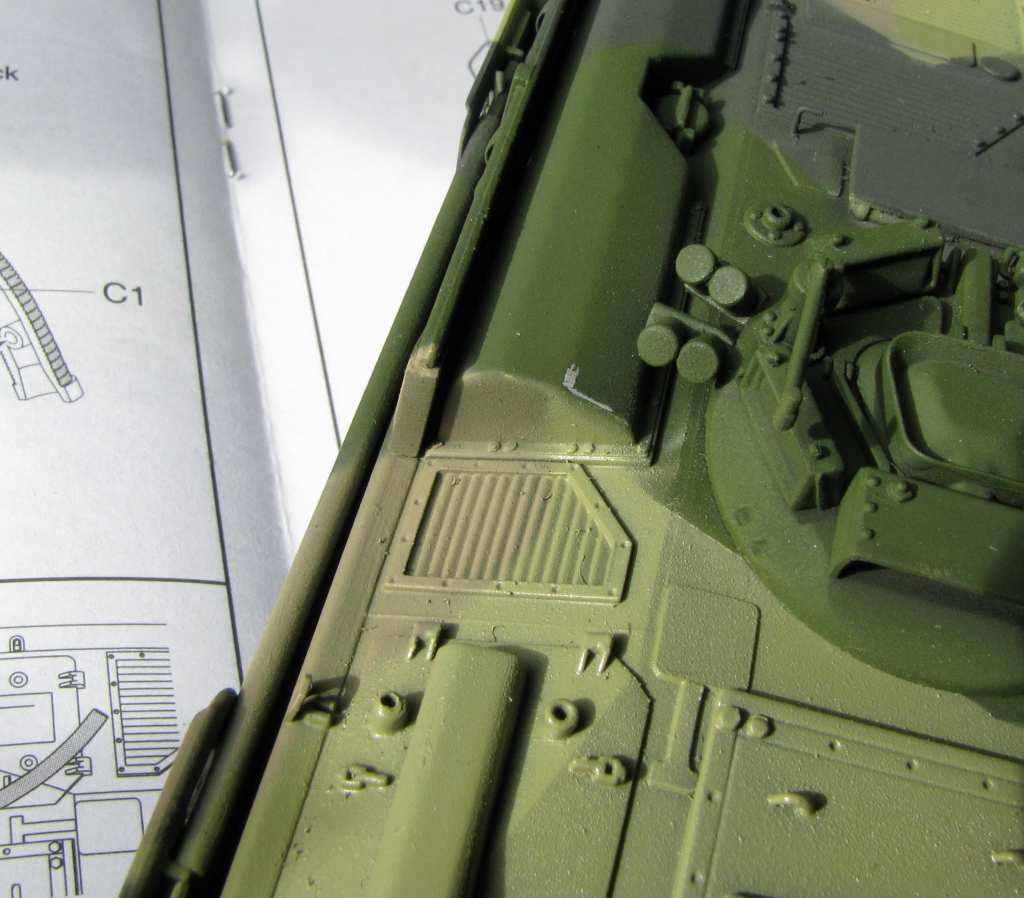
I have alo been adding and refining some detail on the hull:
But it’s hight time I start painting that baby soon, before my lady returns and starts complaining about the fumes again!
Thanks for looking and have a nice day
Paweł
Having spent a good deal of my life tanking, I find that utter bs. Target acquisition is the key to winning a tank battle. My first tank required a short halt to engage a target and we trained it on the 60 series and M1 series as well.
Stopping a tank to engage a target accurately requires skill and training. With a turretless tank, you can only engage, and see a tank to your direct front within a few degrees. With a turreted tank, you can continuously scan left and right independent of the direction of travel. You can traverse a turret much more quickly than you can try to adjust the direction of the tank to get an accurate lay of the main gun.
Any way, I am impressed at the amount of work you’ve done on a kit you intend to build OOB!
Hello Rob!
I respect your tanking experience a lot! I just wanted to add, that in my research I have read that in that S-Tank both the driver and the commander have very nice, big periscopes. Maybe that could help with target acquisition? I have also read that while turning the tank when stopped is slower than moving the turret, the S-tank could very quickly turn and stop simultaneously when on the move. That said it’s all theory as we all are lucky enough that we didn’t have the opportunity to test them in actual battle. And the Swedes also phase them babies out as soon as they felt that the fire-on-the-move capability is already there.
I’m glad you like my work! At the same time I’m happy with my build as I didn’t go into any aftermarket parts and I resisted any shots at serious modifications - that’s pretty OOB for me! And a little over a week after starting this I’m almost ready for painting.
Thanks for reading and have a nice day
Paweł
Pawel,
I’ve always been intersted in the S-tank and have even noticed them in 1/72 thaks to my intrest in this thread.
I have a question, for anyone, that I never noticed about the tank until watching your build. What are all the jerry cans for? they seem to be part of the camo as well. Are the used as armor as well as fluid containers?
Yes, add on armor to defeat HEAT type rounds and RPGs.
Pawel,
Great subject, and you are doing a great job. I look forward to the finished build. Enjoy friend!
She’s looking really good Pawel. For building her out of the box the little extra details really help!
Mac and Rob: Thanks for information. All I know about this AFV is what I’ve read here and there.
 Mif ib ummink ablng nikcle Oh, sorry, forgot to swallow my popcorn first; I said this is coming along very nicely. Great Job. [Y]
Hello everybody!
modelcrazy - like Rob said, they help protect the tank. at the same time they hold diesel fuel. Even if they ignite, that’s not as big a problem as a dirtect hit would be - the burning diesel would spill and the tank would move away.
All the museum tanks have them jerry cans camouflaged. I was wondering, too - say you take 'em all down to fill - and then you have to figure out the correct sequence to put them on, so as not to scramble the camo? Sounds unlikely, eh?
Then I thought - cold war tank. Most of the time they spent practicing and caring for their tanks. No actual combat - under these circumstances it actually could have been done. Then again - there are tanks that have all the removable stuff in NATO green - much more likely. In my model I’ll have them camouflaged, to show a cold war machine.
Hunter, Gamera, Duster - thanks a lot for your kind words!
Duster - hold my beer while I do another update!
Here’s what the machine looked like just yesterday - now it doesn’t look like that anymore:
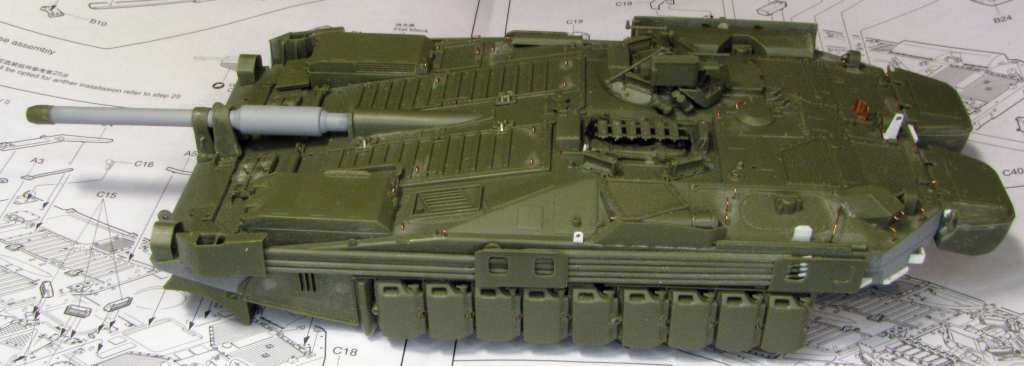
Now in primer:
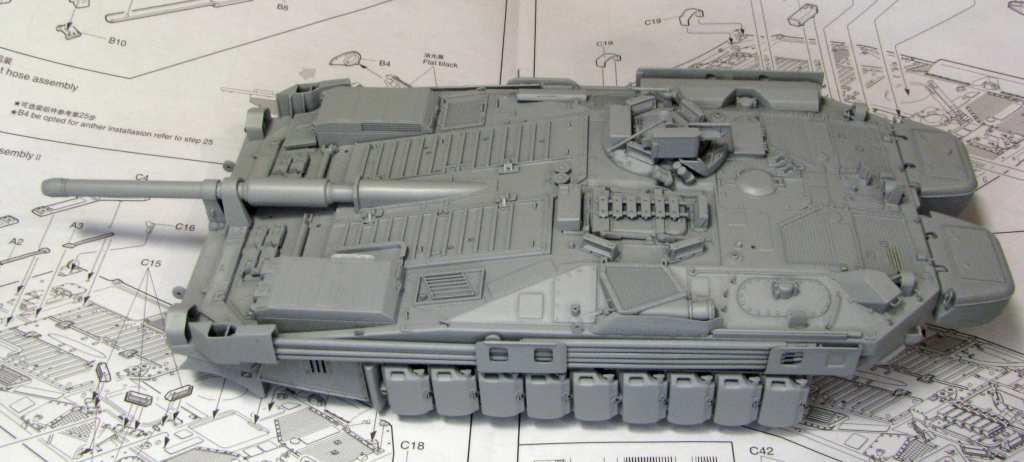
That’s Tamiya gray from a spray can. Now pre-shading:
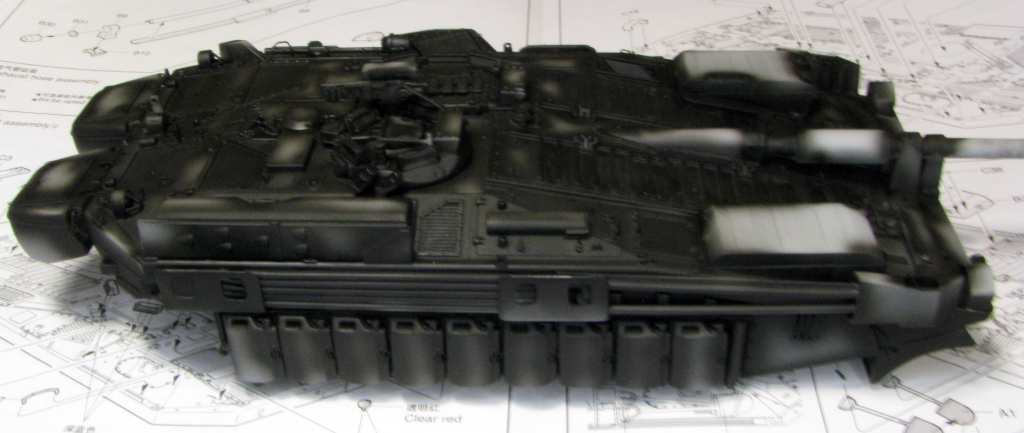
Sorry for the photo quality. That’s Humbrol 33 (matt black). The main goal was to cover all small crevices, so that they don’t show up on the ready model. The relatively flat and raised areas are left lighter. Now for the first colour:
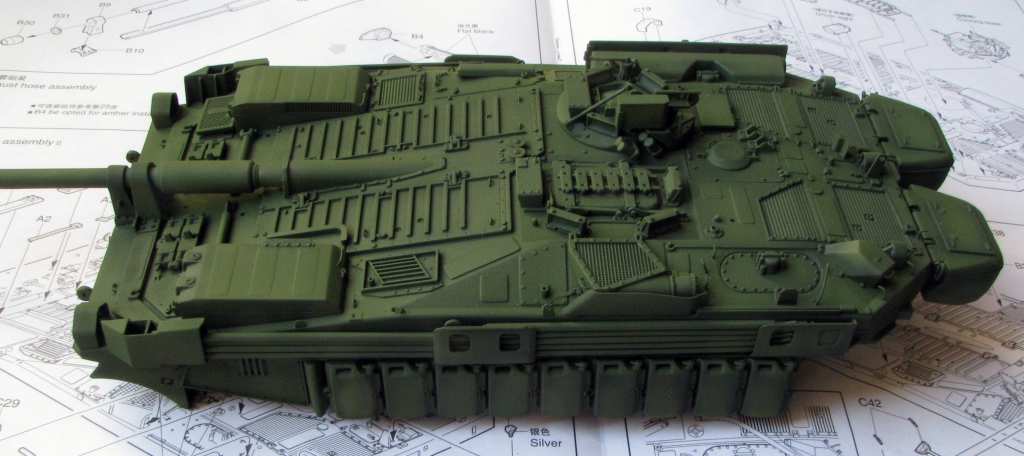
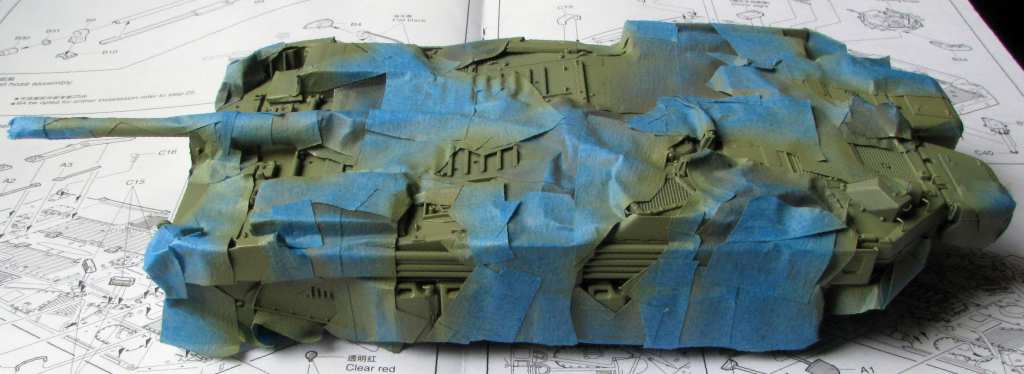
That’s Humbrol 117 - roughly NATO green. Now for the masking:
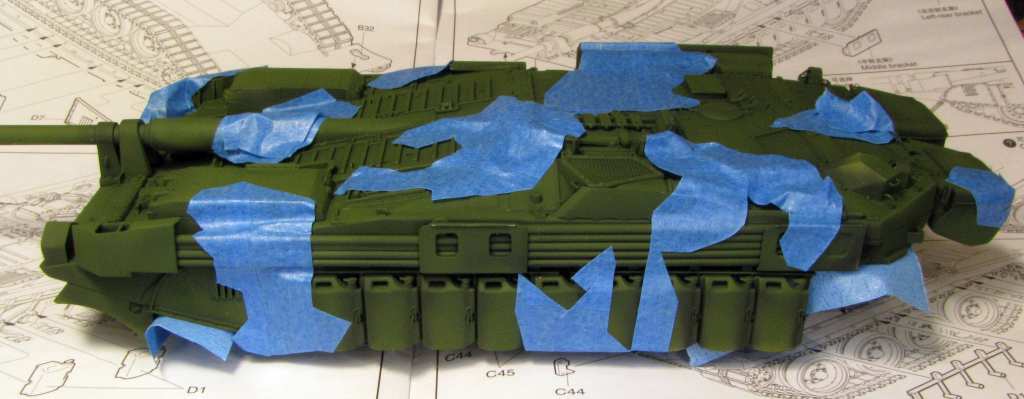
And the second colour - black:

Well, it’s actually not black but the Humbrol 32 - dark grey. I do this a lot to tone down the contrast a little - while the Swedish army often usus “true” black for camo, I think it would use to intense on this baby here. It’s important not to spray under the edge of the masks.
More is coming soon - or at least I hope so. Thanks for lookin’ and have a nice day
Paweł
Coming along nicely Pawel! [Y]
Ohhhh awesome, looking forward to seeing her with the masks removed.
Oh yeah, takin’ down the masks - that’s what I’m also waitin’ for!
Hello everybody!
And the moment has come!
But first I had to mask off the black:

Spray some tan - in this case Humbrol 119:
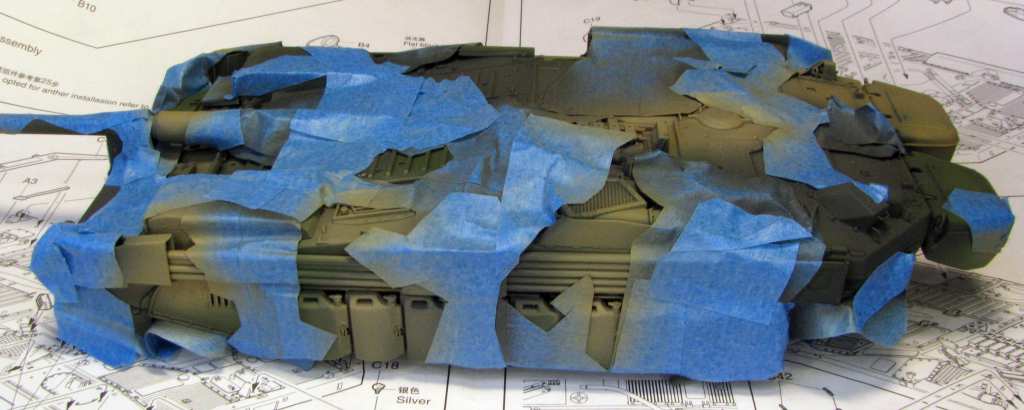
Then mask it off and spray some light green. Now this wasn’t easy to match - in the end I grabbed a can of Revell 362:
Now the thrill - that’s the magic moment! - remove the first masks…
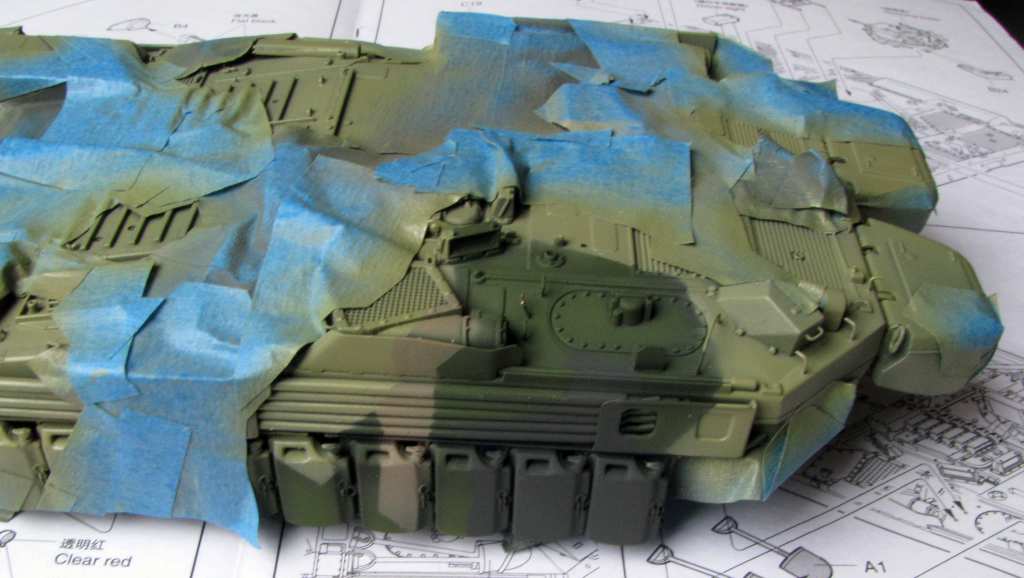
So far so good - yay! Let’s remove them all:
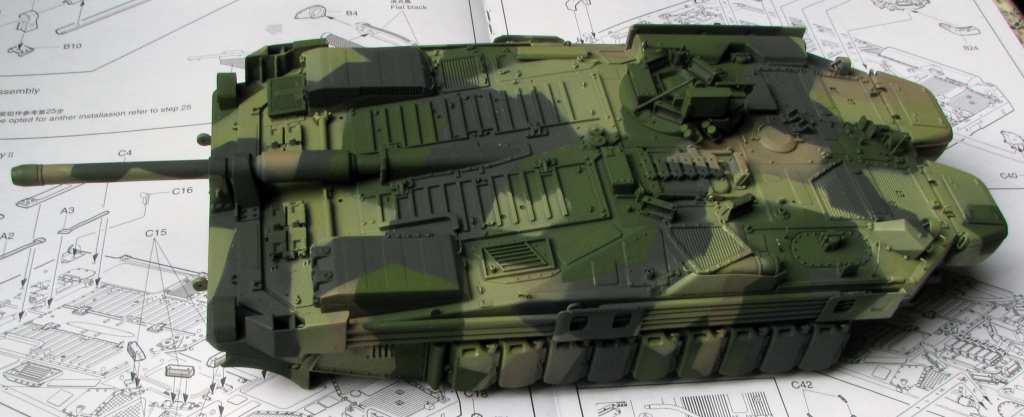
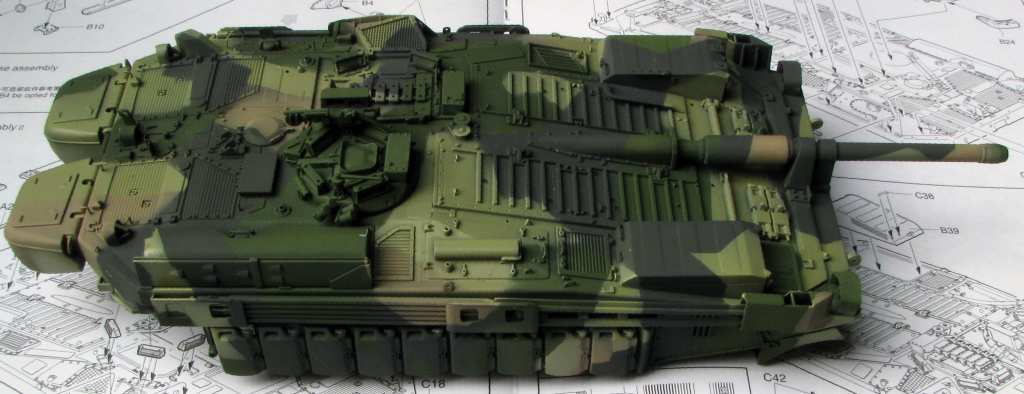

All right, no major bad surprises, nothing lifted, no bleed-under. Some touch-up will be needed, though:
I’t sworth noting, that after spraying dark green you can remove the commander’s cupola - I did and it helped the masking greatly.
Now if I may, I’d like to hear your tips on how to paint the rubber tracks, so that the paint doesn’t lift…
Thanks in advance and have a nice day
Paweł
Hello again!
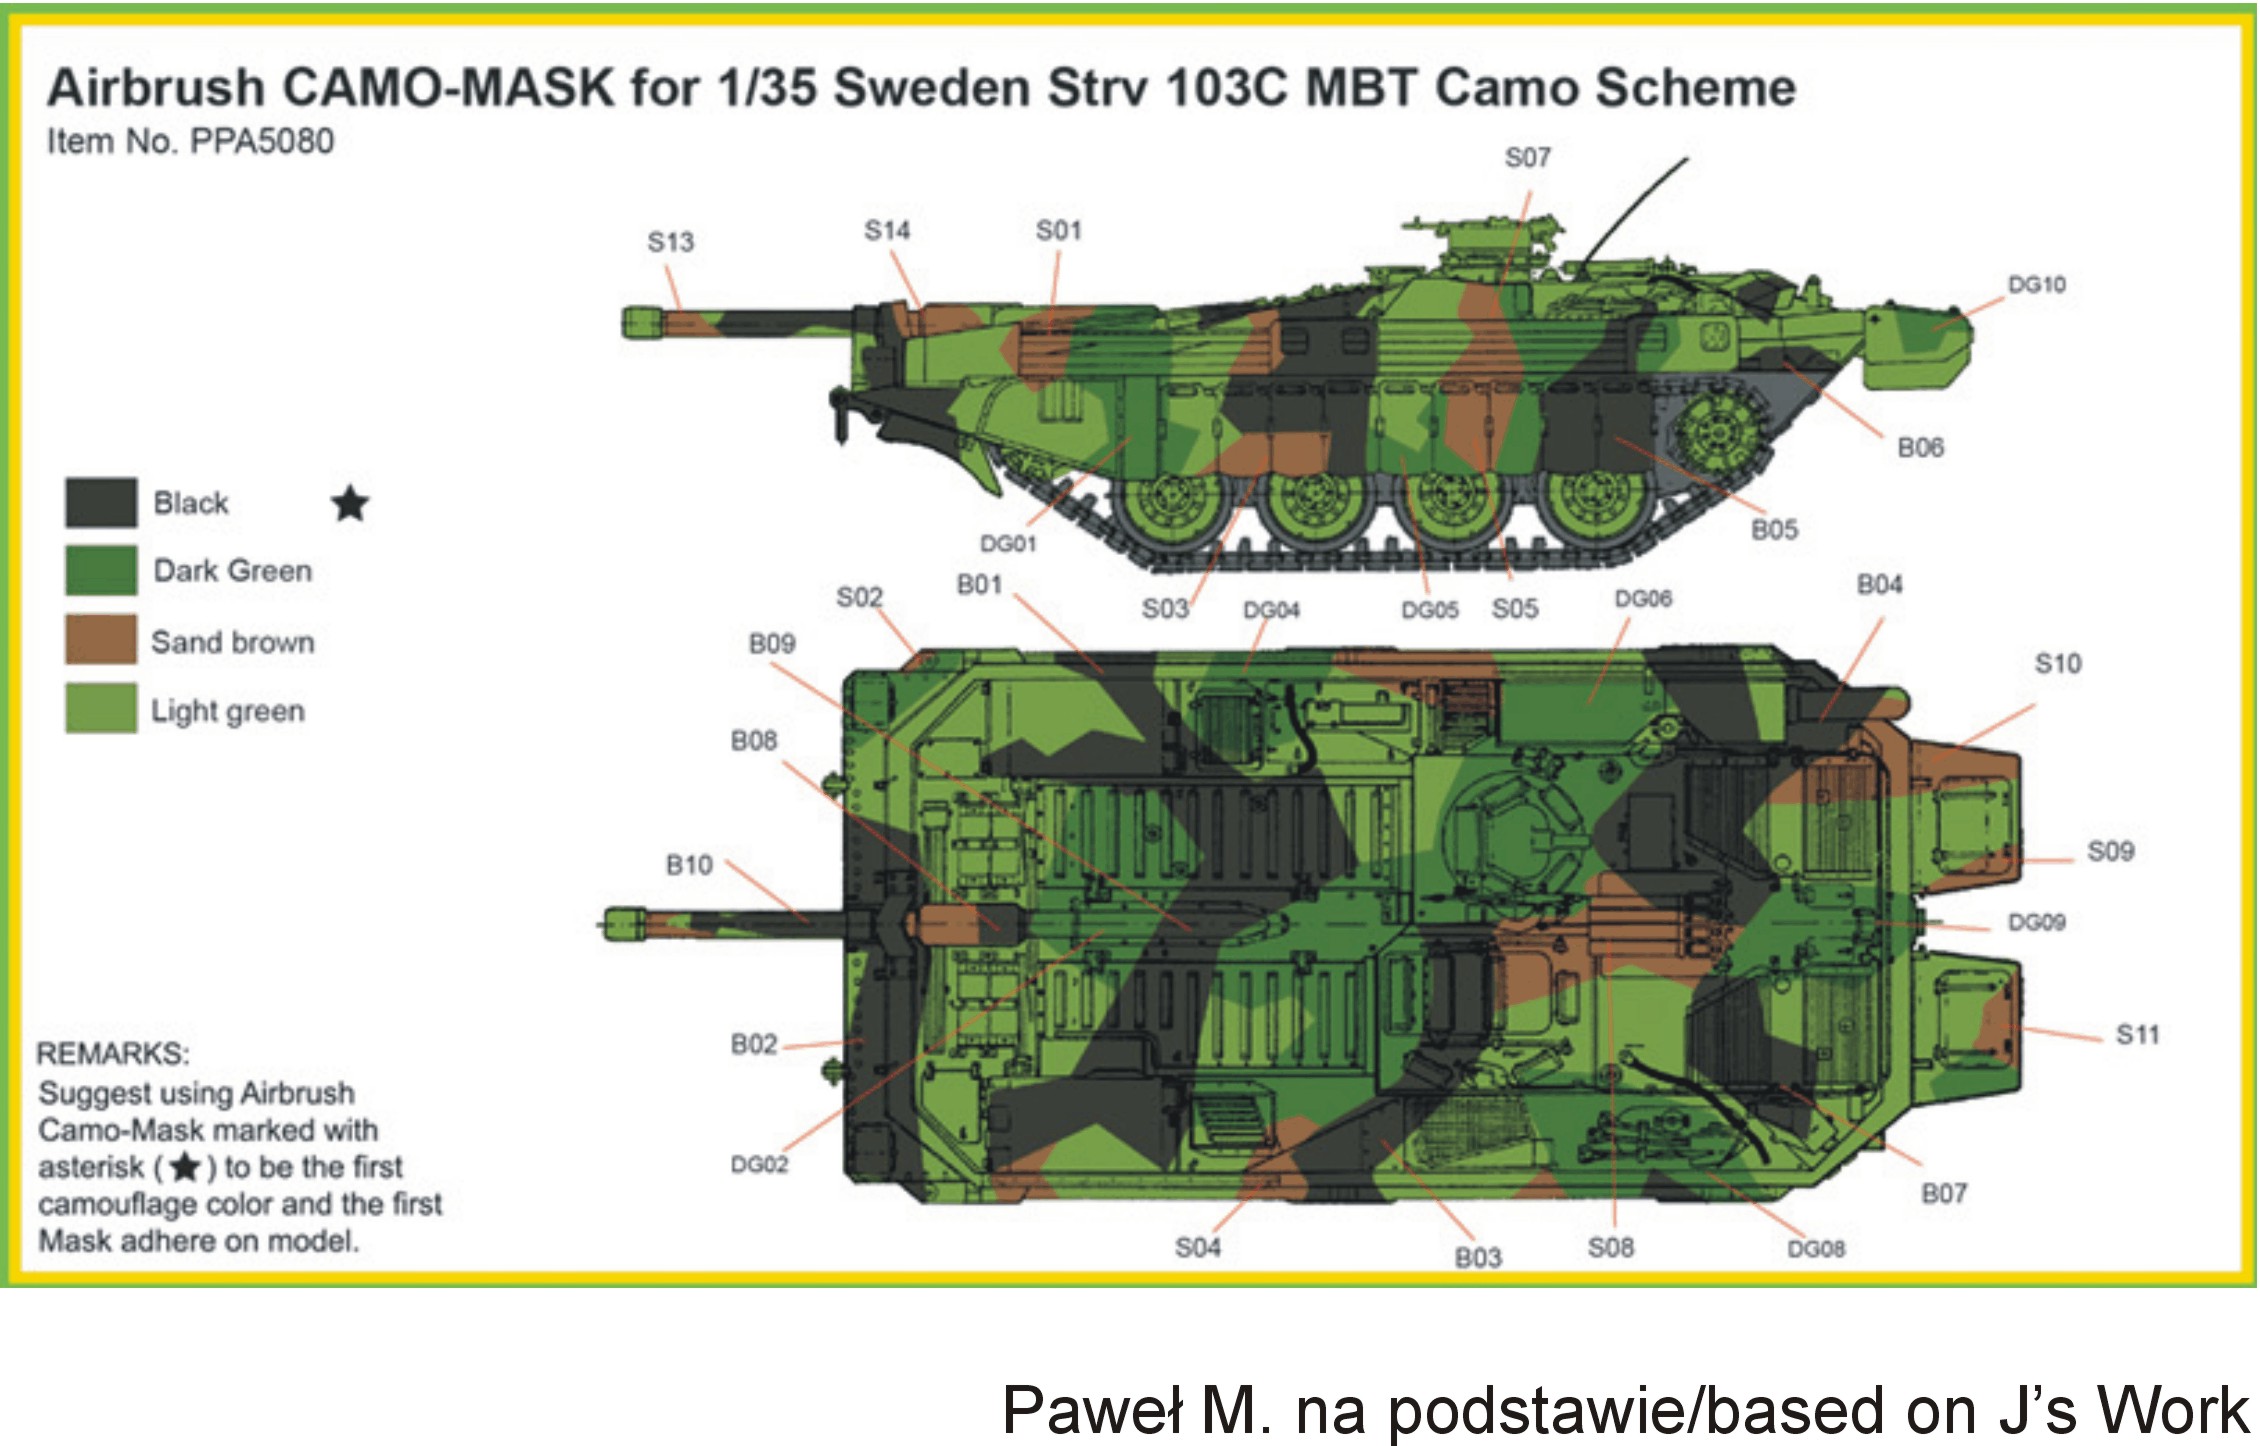
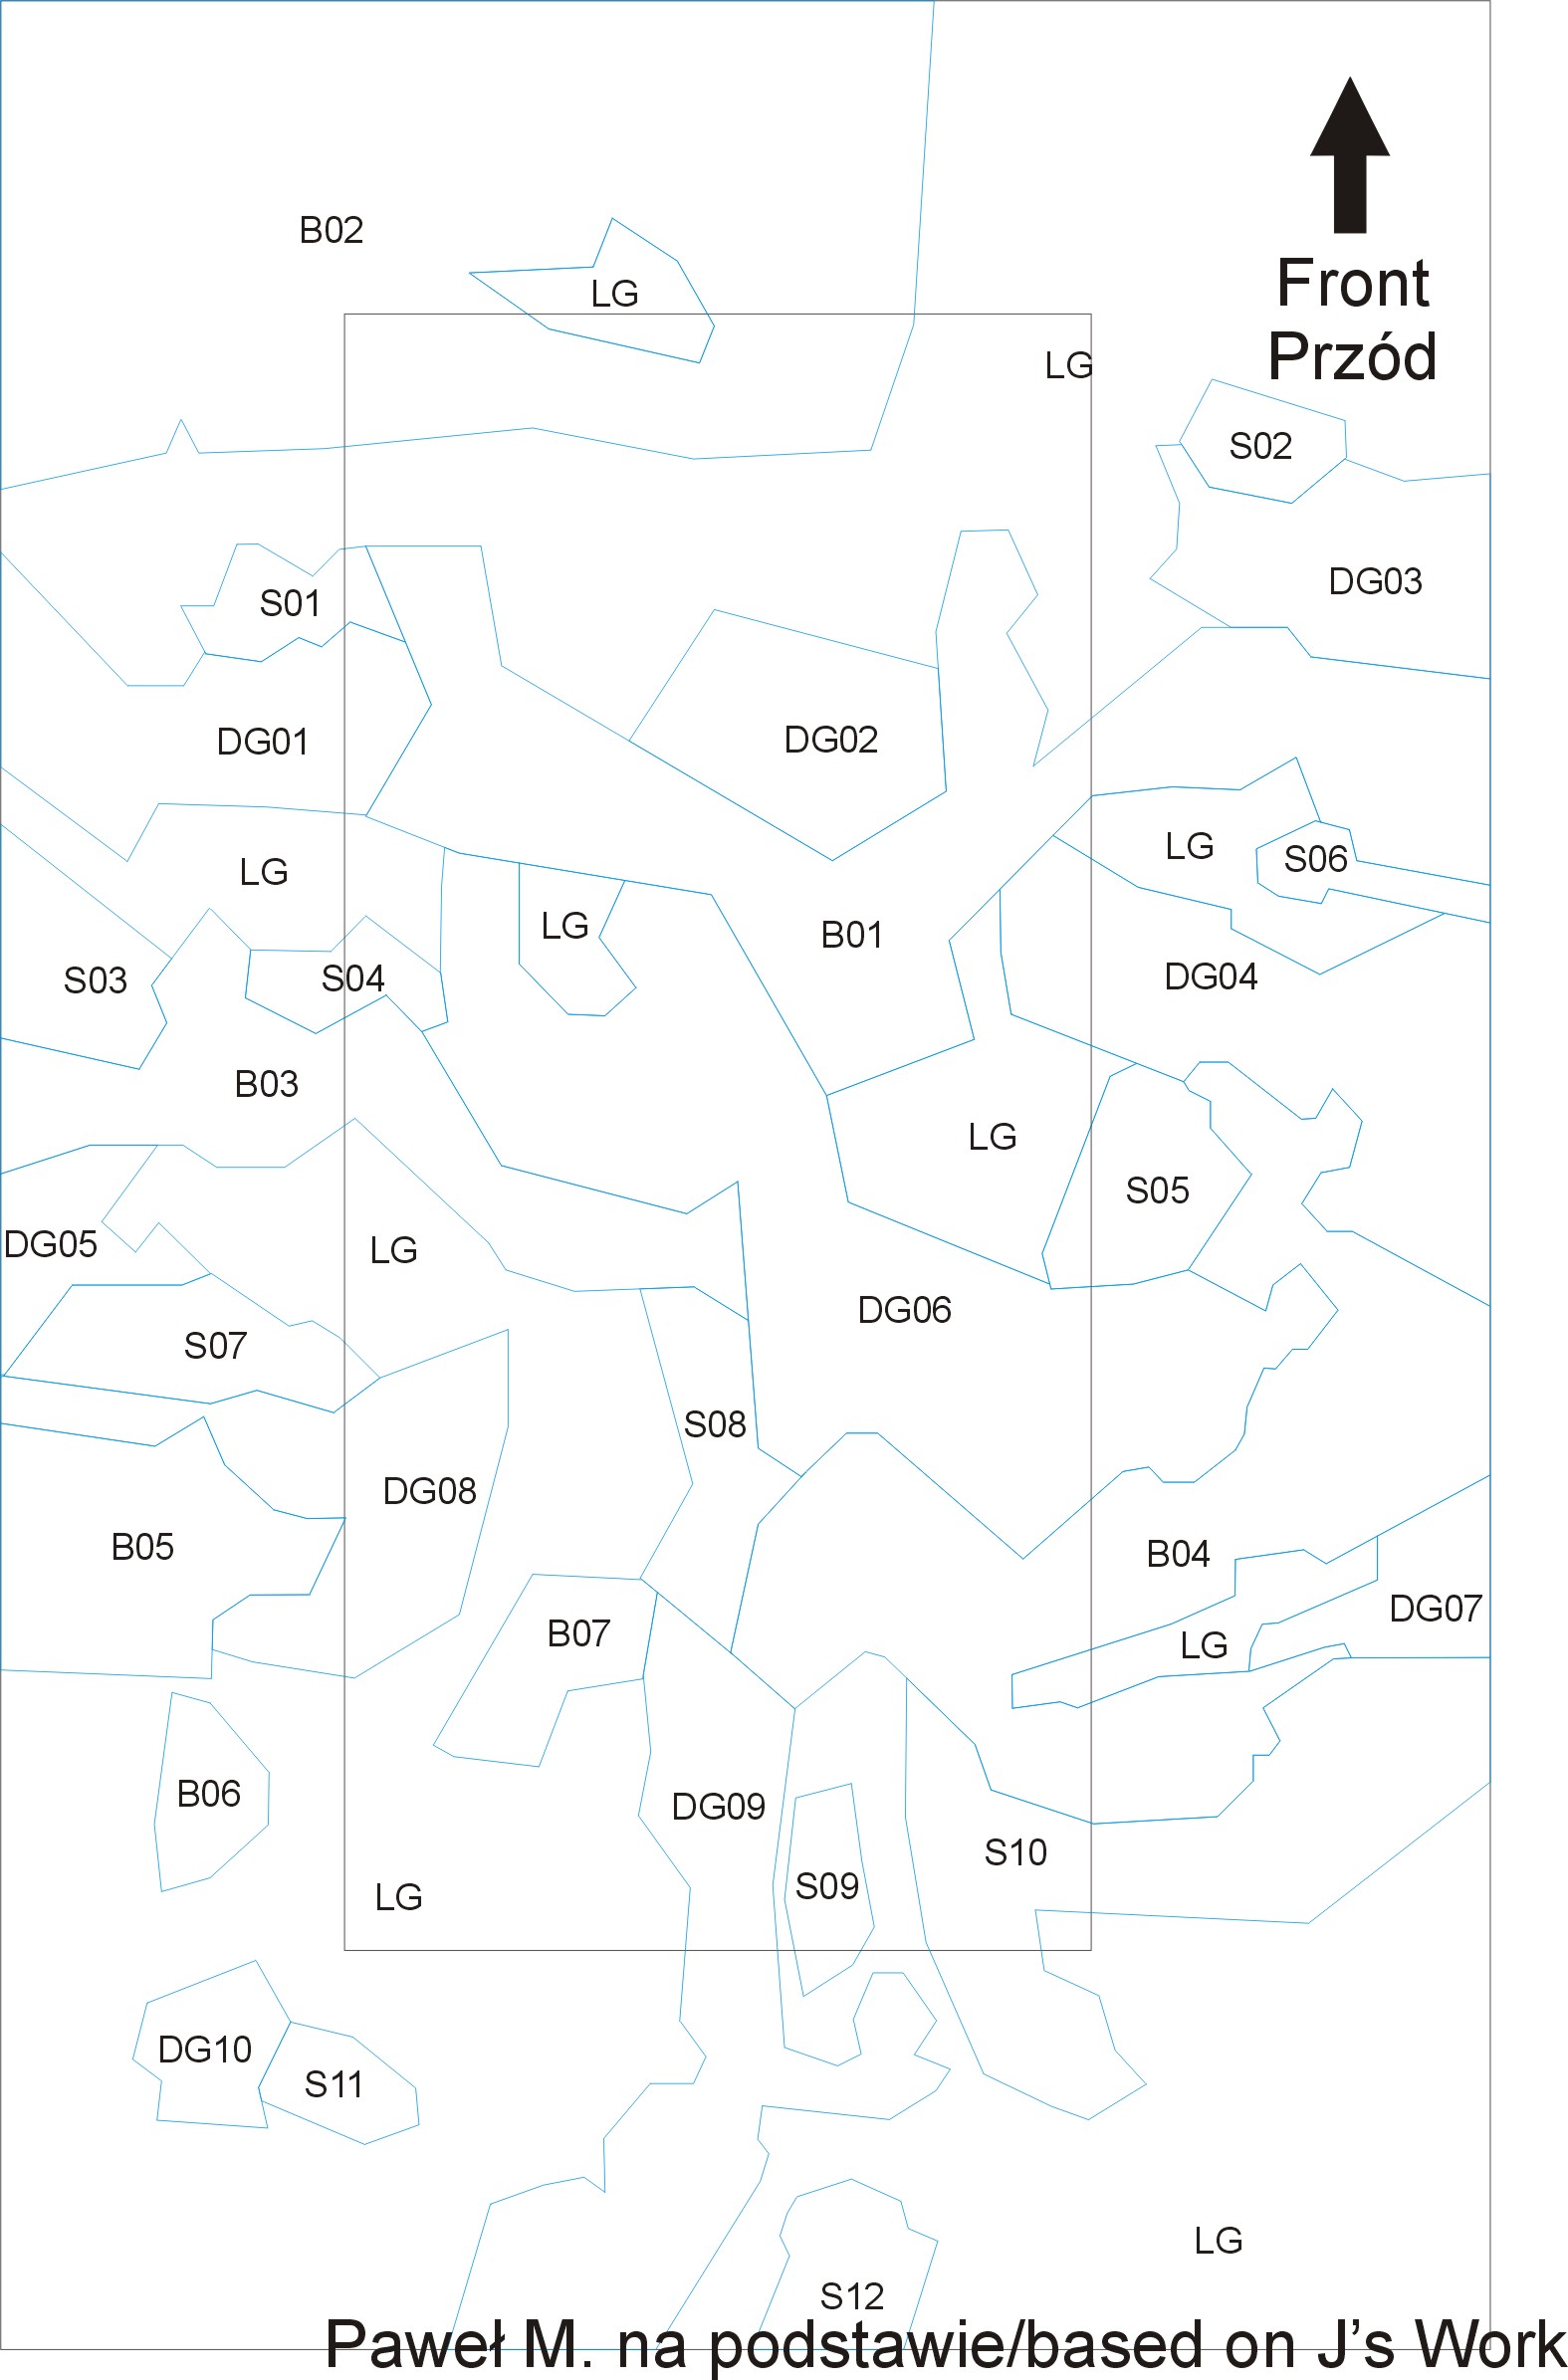
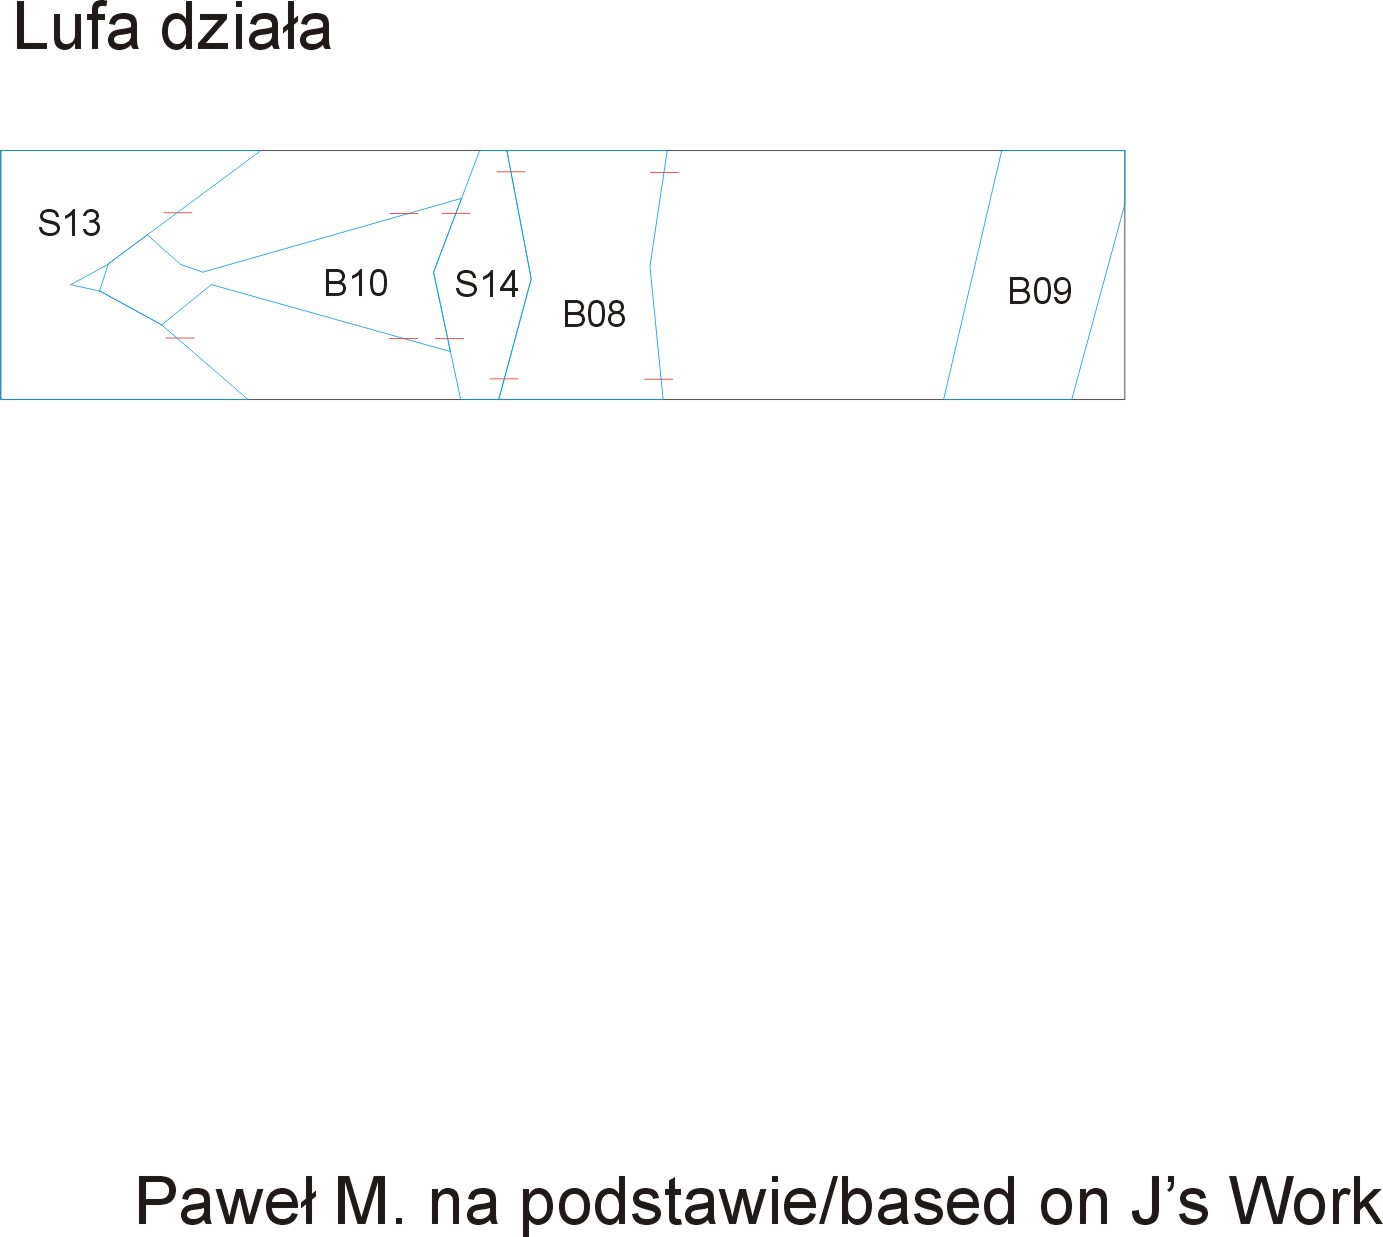
I thought maybe I can help those of you that would like to build their own model oft the swedish S tank. Here’s the masking plan that I have prepared for my work:
http://www.vietnam.net.pl/strv103/Strv103C mask 1-35 done.cdr
http://www.vietnam.net.pl/strv103/Strv103C mask 1-35 done 1.jpg
http://www.vietnam.net.pl/strv103/Strv103C mask 1-35 done 2.jpg
http://www.vietnam.net.pl/strv103/Strv103C mask 1-35 done 3.jpg
It’s best to print out the -2 at least two times. One copy is for reference, and you can cut the other copy up and use individual parts as templates for cutting out masks from masking tape - at least that’s how I did it.
I hope that helps - good luck and have a nice day
Paweł
Awesome paint work Pawel! And thanks for the masking links![t$t]
Wow fantastic Pawel!
And thanks for linking the masks in case I ever try one myself.
I always wash rubber tracks with lots of soap and detergent and give them a good scrubbing. Then prime them with ‘rubber bumper’ paint from the auto parts store. I’d think you should be able to find it in Poland. Anyway I’ve had a few flake on me but most times the paint seems to hold.