Sukhoi Su-27 Flanker B Trumpeter Scale 1:32 and what triggered this post and my presence here in forums.
I work with my friends on models for X-Plane flight simulator.
I will be working on the SU-27 UK for the mentioned above simulator and in order to make a realistic 3D model, I needed some materials more than just pictures as pictures do not show the details and the way aircraft is built.
There are shapes and places that even the best pictures cannot give one the idea how are they constructed/built.
That was the major contributing factor to buy Su-27 Flanker B Trumpeter Scale 1:32 kit and since I have it I will need to build it. [H]
I am a total newbie and I would like to ask very basic questions hoping for answers.
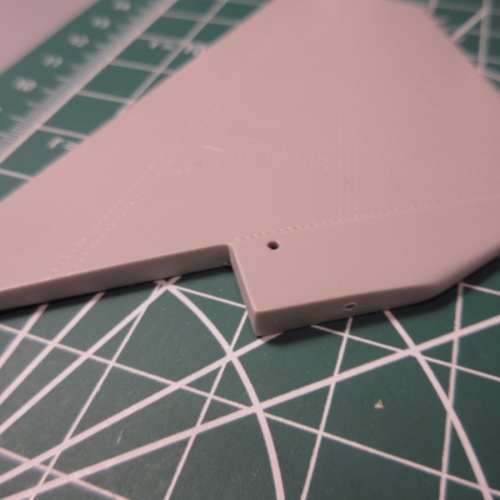
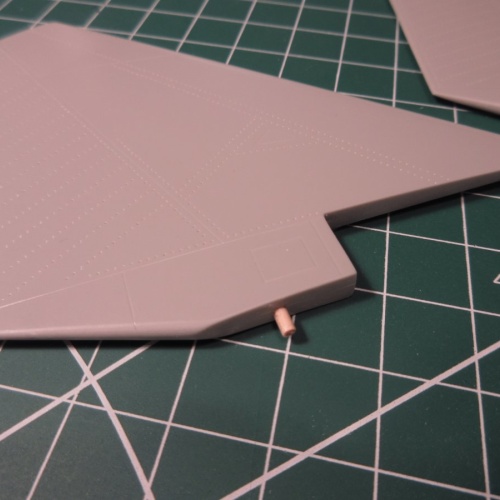
I built two of those last year, I replaced those nubs with music wire that fit well in to the stabs and filled the area in the tail with epoxy which I then drilled out to fit the pins. Trumpeter’s engineering there is way understrength. Make sure to install the little fairings that fit on top of the stabilators after you install the stabilators, if you glue them on first it is difficult to install the stabs.
I just looked at your SU-27s. Wow, they are a measterpiece. I am not a scale modeler but if I wanted to build and finish like that, it would take me years of trial and error. Awesome work!!!
You know I am building SU-27 for flight simulator called X-Plane so this build is kind of additional thing. I have to admit that it is very addictive, I mean making the scale model. I find it really relaxing and making mistakes is OK, it is a learning process.
Some mistakes are infixable, like my broken canopy, I tried to “open it up” and I broke it into 2 pieces and morecracks. I glued it back together and will sand and polish but the cracks will never go away. I have tried to find a new one but no luck.
Talking about SU-27 Stabilators, how did you glue them? I know there needs to be a gap around them as they move in real life. I assume that your piano wire was relatively long if it was the only piece holding them in place.
As long as you learn from your mistakes then they are not bad ones. We all have made them at some point or another. Like you said we are always learning new techniques.For someone new to this you are doing pretty good.
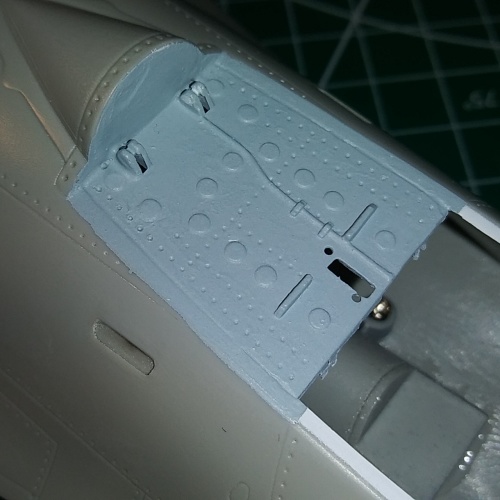
Yes, the piano wire was as long as I could make it as it was the only support. I filled the inside of the stabs and the aft fuselage attach areas with epoxy and then drilled them out to a close fit. Super glue was used to glue the pins into the stabs and then just white glue into the aft fuselage. That way if something bumps the stabs it is an easy fix.
Thank you for your nice words. To really enjoy the hobby an airbrush is a great tool, but some people are good enough with a brush to get very nice results. I’m not one of those people.
If this is the design of gluing in the stabilators, than it is a quite poor design. The original taps were small anyway and having them supporting all these big control surfaces in place is not a very proper design wise.
I might just do what you did, the trick is to feel that are in fuselage, will look into it later on.
I am thinking about airbrushing the vertical stabs with rudders as well as elevators and gluing them at the end. I am sure not very popular idea, what do you think?
I love airbrushing, I can not imagine brushing all these big surfaces by hand…
If the fit were better gluing those surfases on last would be a good idea, but you will likely find as I did that getting good alignment and fit with the vertical fins will make that difficult. Do lots of test fitting in that area.