 I never come to this side of the forum. I build mostly aircraft and decided to try something different. With a coupon at Hobby Lobby I got this kit for $12. Any advice for a modeler taking on this particular kit and armor in general? I decided on this one because I think it will be a hell of a lot of fun to weather.
Don’t fall in love too much with weathering,wear,and rusting techniques.While fun, it can be easy to over do a particular effect,especially rusting.More is less unless you are making a rusted out hulk.
Probably every modeler here has built this kit, Bish probably 100 of them.
It’s a great kit, one of Tamiyas earlier ones and far eclipsed now by kits with 1000 parts, but it’s a neat project and good looking.
The PG figs are super dated in detail but they work. Franz with his hand on the side jumping is on the Mt. Rushmore of old Tamiya figs, right next to the pointing tank commander.
Good choice!
Bill
Yeah Tojo I learned a model or two ago less is more with weathering. I was thinking faded paint and some post shading for this thing. Some chips and some subtle sand or mud techniques and call it a day.
Good to know GM. I think it’s good to get out your comfort zone from time to time and try something different. This will also be my first attempt at figures so that will be interesting too.
Cheers and thanks you two for the quick response.
No sense in nit-picking this trusty old steed, but you might want to toss out the water tank and putty up the mounting holes;

The model was based on the Bovington museum’s 251/8 ambulance version, (or what was left of it) and the “beer keg” doesn’t really belong in a standard 251/1. All other errors forgiven, due to it’s vintage heritage. Have fun!
Its a good kit, a little old, but its uncomplicated and builds up well. The figures on the otherhand… As for painting them the first question is what type of paints are you planning to use? I work in enamels and oils, have never used acrylics, so I cant offer you any advice if you are using this type of paint.
As for weathering the vehicle, I absoluteley agree with the advice from Tojo. Keep it simple. Some dust, worn metal where the crew and their passengers continually come into contact with the vehicle or equipment, some scratches, maybe some minor guard damage.
Have fun!
Dodgy
I airbrush Tamiya acrylics and MRP lacquers. I mostly detail paint with enamels and weather with oils.
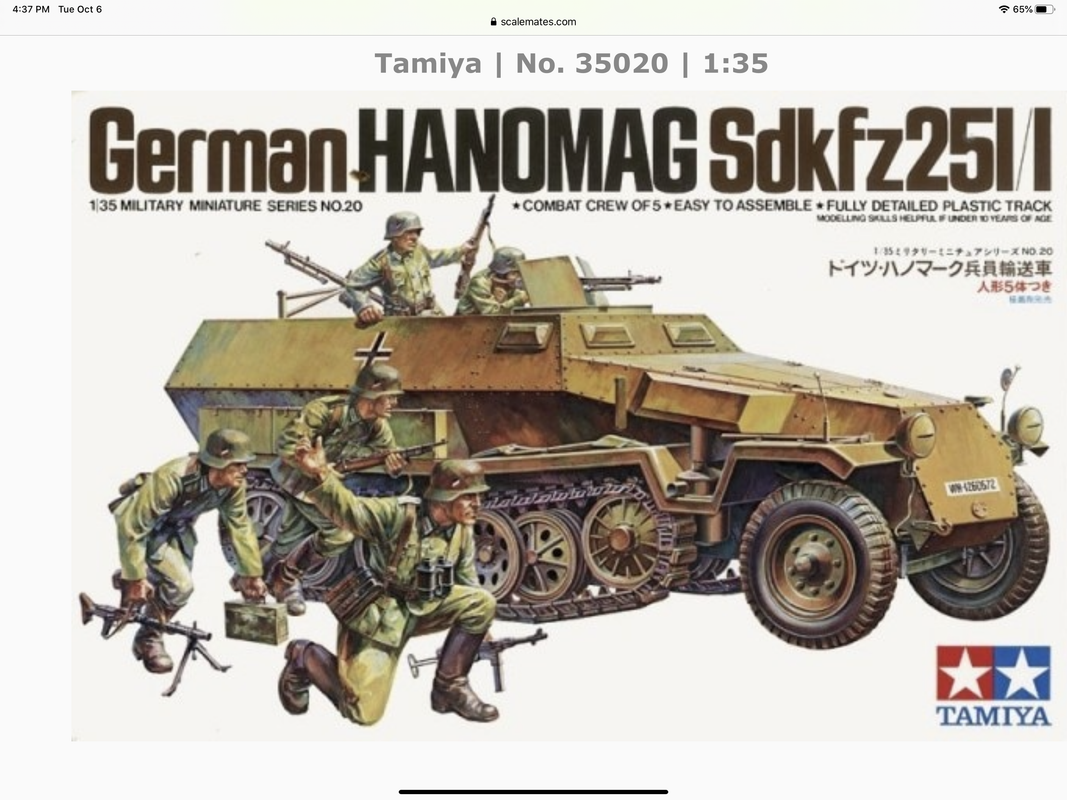
I can’t see the image, but going off GM’s post ui am guessing its tamiyas old 251, what they wrongly label as a Hanomag.
Accuracy wise, its not brilliant, especially the inside which is completly wrong. but as an intro to armour and something to practice on, i would say its as good as any. I did build it once, many many years ago, whenn i didn’t know any better. If i recall, it went together easily enough. But having built 6 251’s over the last few years, i basically treat it was 2 builds. paint, weather and assemble the inside first, once the hull is together, they do the same outside, weathering as appropriate.
Not sure if you want a realistic or artistic look. If its the forma, then as John say’s, more is less, especially with rust and chipping. I very raely apply rust and chipping is kept to a minimum. The only thing there will be plenty of is dust.
So that confirms what i thought. I didn’t know it was based on Bovvy’s 251. I don’t think they have it now do they. I am guessing it was an early version, Ausf A or B, which would explain the interiour on the kit.
Yep, build that kit back when I had a full head of hair (some decades ago).
Never finished mine, my sister’s stupid cat ate half of one of the ‘rubber band’ tracks. Don’t know if there even were aftermarket replacements back then in the late '80s - early '90s. In any case I’d have been too cheap to pay for them.
I think you’ve got a good choice of options as to how you paint it, from the early war ‘plain jane’ dark grey to the middle-late war mustard yellow with green or brown camo. Or so I think, you might ask Bish or one on the experts before you start painting.
The figures are good starter ones. I personally find the soft detail faces to be harder to paint. But I wouldn’t go out and start with expensive ones like Alpine either. Just watch some YouTube videos on painting figures and play around with them. Don’t worry if they don’t turn out the way you want. It takes practice, practice, and more practice…
The interior of the Bovington vehicle is completely gutted. Oddly enough, when originally captured in North Africa, the “beer keg” (actually a larger replacement), was mounted outside the vehicle, a hole was cut through the side armor next to it, presumably for a hose to the interior. The Tamiya engineers must have retro-fitted the keg back to it’s original position and size while designing the model, (not understanding that it didn’t belong on a 251/1). She’s still at Bovington, but apparently out of public view. Here’s a link to her history and current status;
https://www.pietvanhees.nl/251/08-251-p-bovington-8c-riv.htm
That model is so cheap, the most recent one I picked up provided the “rear end” for a souped up “Rommels Rod”.
Thanks for the link, i had not seen it on that site before. Its not listed on the Bovvy website and i didn’t recall seing it on my visits.
Probably next to Feldwebel Helmut, kneeling with his MP-40. Which Tamiya loved so much they recreated him in 1/16 as well [:)]
Am I remembering correctly that Tamiya’s version is not a Hanomag 251 at all?
Well it certainly is a 251. But I want to say that Hanomag was just one of several manufacturers of the actual vehicle, and the name was not part of the nomenclature.
The Tamiya Sdkfz 251 is also the riveted one. Most of them were done without them. Just a fun little factoid. The rivets are correct, but you can sand them to do a small variant of it. It takes me back, what does not. I first built this when it released in 1973 or 1974, and then did a few conversions it. I still have couple of them. Have fun with yours. It is a very nice, basic model. (Way back in the day, all my fellow modelers called them the Hannomag! We were such dopes!)
I might be the only early Tamiya armor dabbler that never built the Hanomag. That name was cooler sounding than ”Skiddlefritz 251”! [:P]
I loved those classic German figures! My fav was the MG34 team where one guy was holding the bipod legs while his comrade was firing over his shoulder. And the Fallschirmjager about to toss the stick grenade. Classics, all of them.
Correct. And according to the first Panzer Tracts eddition on the 251, if you had mentioned the word Hanomag to German troops, they would have thought you meant the heavy trucks or buses the company built.
Gamera’s advice is good. Figures take a lot of practice and there are some great tutorials on Utube. Even though I’m usually pleased with the result when I finish one these days, I’m always looking to improve.
As has been previously stated, the detail is soft, but you can do small things to improve them. Use the point of a modelling blade and slowly woek it under things like collars and pocket flaps. You dont need to go very far. All you are trying to do is to create a seperation line from the surrounding molding and then gently lift the edges. This gives more of a 3D effect and provides a good base for creating shadows when painting.
My basic process for painting figures is as follows:
1 Study the figure and your references before assembly and list what you want to do and in what order.
2 Assemble according to plan and undercoat.
3 I then paint the figure with enamels in the basic colours.
4 Let dry for 2 or 3 days and then work over the figure in oils thinned with white spirits using a cardboard pallette.
5 Leave for a week minimum and then run a pinwash for extra shadows if required. The thing with oils however is that you create the shadows and highlights within the painting process. Learning to blend the colours is the real trick. Practice, pratice, practice.
I usually start with face and other flesh areas. I paint the white of the eyes first and let that dry. I then paint the eyeball in by using a drop of colour on the end of a toothpick, noting where the figure will be looking, left, right, etc. I then take a darker flesh colour and paint from the nose to the edge of the cheekbone, just touching the edge of the eyeball. I do this on both top and bottom of the eye. The thing to remember is that you want to minimise the amount of white. When I am happy and all is thoroughly dry, (and it may take two or three attempts before I am happy), I apply a drop of gloss clear to the eyes.
As has already been stated the detail on these figures is soft making the faces somewhat challenging to paint, but have a crack, use whatever method works best for you and don’t get discouraged. Practice, practice, practice.
Any this is my system. Its not the only one, but it works for me.
Good luck, have fun and as Gamera said, spend some time watching the painting tutorials on UTube.
Thanks Dodgy. Very detailed instructions and it will certaintly come in handy. I bookmarked this page to reference when I’m ready to begin my plunge into armor.
Cheers
Paul