I am searching for the star trek models, to be exactly the Enterprise NCC-1701 A and D, i used to have those kits when i was boy but it fell apart [BH] so i am wondering where i can find those kits again. Im not sure if it still do make those kits at AMT. any help would be great appericate thanks
Round 2’s 1:350 1701 is indeed the refit from the movies
They are also working on getting out a 1:1000 version
The 1:537 that AMT released years ago is currently in limbo - might find one on E-bay
Other kits
Round 2 has released the 1701-E (NG-Movies) and that should be in stores now
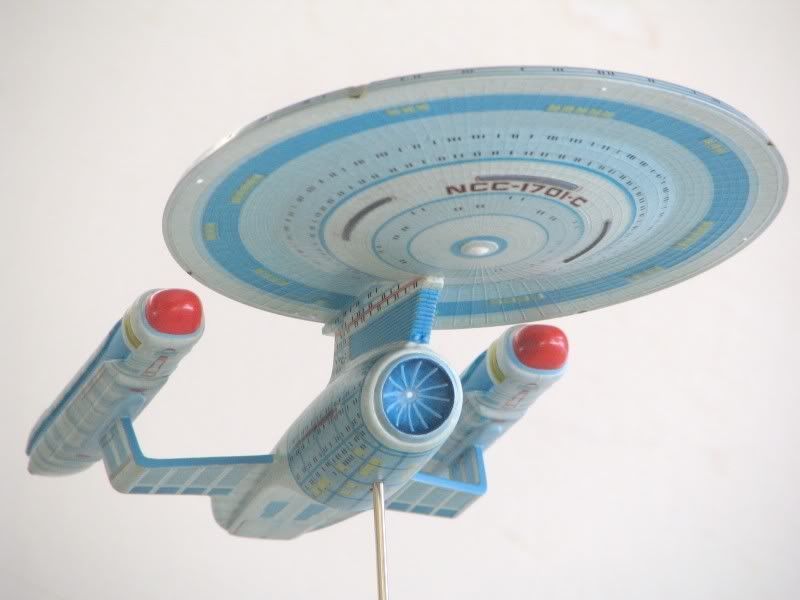
The 1701-D has ceased production from all makers, no idea if Round 2 is going to release it again - the 1701-C and the 1701-B/Excelsior models are in the same boat
The Generations version of 1701-B is also available from HLJ in the form of a Platz repop of the AMT kit. http://hlj.com/product/PLZUSS-01 (Somewhat cheaper than the 1701-D kit) According to the website, they have both kits in stock.
I saw the reissued (former Polar Lights) 1:1000 NCC-1071 Enterprise at Toys R Us on 2 May in Louisville, KY. They had several on the shelf (maybe 5 or 6).
Yes, they have re-released both the 1:1000 PL kit and the 1:650 AMT kit of the TOS-E
And a second run of the AMT kit in the “Collectors Tin Box” should be in stores by now as well (I picked up 2-PL, 1-Tin Box AMT, 2-Cardboard box AMT kits myself, as well as a pair of 1701-E’s)
thanks for all feedback on where i can find it. I wish they can keep on making more models of star trek instead of stop making it such as AMT/ERTL cuz i seem cant find it on squadron.com unless im looking at the wrong site. [%-)]
as some of you mention in scales, which one is the reasonable scale? prices doesnt matter to me, but i dont have enuff room in my home [(-D]. I might have to hang them up if needed.
I have seen the set of 3 enterprise (original, A , and D) i would like to know if it’s big or small since it say 1/25000 scale and i have no idea how big that is [#dots]. but its more likely i will get the A and D since its when i first time saw it.
one of you mentioned Federation model website, i did look thur it and seem like it but is it trustable website let me know. thanks again
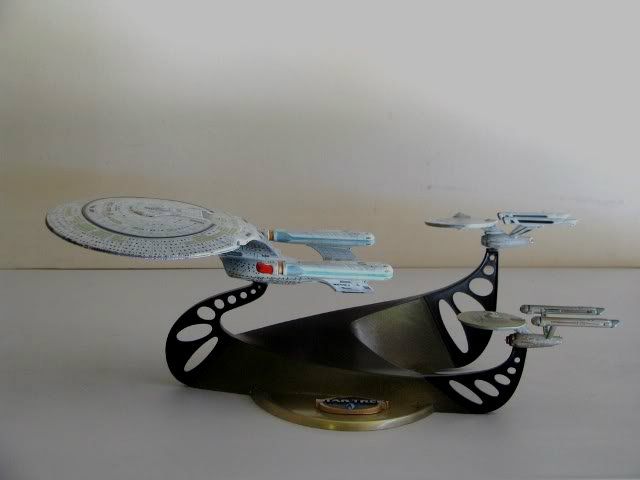
The 1/2500 sets are a good size if you are limited on space. The original is about 4.5 inches long, the A is about 4.75" long, and the D is about 9.75" long. The original needs a lot of work if you want it to be screen accurate, so does the A although to a lesser extent. The D is fairly accurate to the studio model. Absolute Models makes a wonderful decal set for both of the Enterprise 3 ship sets that include all the markings as well as the aztecing needed to make these little ships really shine. If you’re interested, I can send you a link to my Photobucket albums and you can see pics of all the 1/2500 ships in the sets; all built using the Absolute Models decals.
Regarding Federation models, I have made several purchases from them in the past with no problems.
you can send me a link so i can take a look to see what it looks like and does it comes with display stand too? let me know thanks and aslo you mentioned that the original needs alot of work what do u mean by that? so i can get the idea of it
The display stand in the kit holds all 3 ships; there are no individual stands:
If you do want to display it individually, there are acrylic display stands available for model airplanes that should work quite well. Or do what a lot of people do and use a section of brass or aluminum rod inserted into a length of plastic tubing mounted in the underside of the secondary hull near the front. Insert the other end into a block of wood or some of those wooden craft bases available at any craft store. These are just a few ideas for bases; I’m sure there are many others.
As far as the original needing a lot of work, if you can imagine a model with all of the inaccuracies of its 18" cousin but in 1/4th the size you’ll get some idea of what I was dealing with. I did the saucer, secondary hull and pylons, and nacelles as subassemblies. To summarize (ha ha) what I did:
The bridge (deck A) needed to be filed and sanded to a more rounded shape as the sides were too flat.
The B-C deck was too wide in back (needs to be more teardrop shaped) and also needed to be more rounded on the sides.
The angle of the saucer rim was too flat and needed filing and sanding to a more acute angle.
The gridlines needed to be sanded off the saucer. The Absolute Modesl decals included the gridlines as well as all the ship registration and other markings. I ended up toning down the gridlnes with silver pastel chalk so they are more subtle in appearance.
The 3 round indents in the lower saucer had to be filled in with putty and sanded smooth. I ended up sanding off the raised concentric circles too as I used the Absolute Models decals which had those circles.
I completely removed the deflector housing rings and replaced them with Evergreen plastic rings cut from tubing and a brass outer ring. Scratch built a new deflector dish from styrene sheet turning it in my dremel like a lathe. The center spike was redone using brass wire and tiny bits of styrene tubing for the base and tip of the spike. The front of the secondary hull was filed to at a 45 degree angle for a nice bevel where it meets the rear of the deflector housing.
The stern was too short so I extended the fantail with styrene strip about 1/8 inch. The hangar bay door detail is soft in the kit so I filed, scraped, and sanded the doors to a rounder shape and lightly scribed new door seams. I also dug out a lot of plastic out under the “cowling” and drilled a small hole in the top of the secondary hull stern down into the top centerline of the doors to insert a short length of plastic tubing (round on top) for the beacon above the doors.
The one piece nacelle pylon assembly was rather flimsy IMO so I scribed and filed out a shallow channel down the centerline and used a bent V-shaped section of brass rod glued in with CA for reinforcement down each strut and across the center section which fits in a slot in the hull strongback. I also left enough rod sticking out of the top of the struts to insert into the slots of the warp engines for added strength at the glue joint. I covered the slot with the brass rod with a thin piece of rectangular styrene cut to the size of each strut. It does make the struts thicker than the original but that’s the price I decided to pay for improved strength.
On the nacelles, there was a lot of soft detail especially with the control reactor loops at the front of the inboard slot. Basically they were just blobs of plastic. I cut them loose filing with my exacto knife and carved them to shape before reattachment. Photoetch screen was added beneath the loops and along the length of the inboard indent. The 3 flux constrictors as molded were the wrong shape so I added small sections of plastic strip to lengthen them then filed and sanded to shape. The intercoolers at the top rear of the engines needed a slot filed along the lower edge as they were flat along the sides. The end cap “balls” were removed and replaced with metal beads so they hung out a little more.
These were the major steps I took in accurizing this little beast. I could go into the details of painting, decaling, and how I achieved the bussard effect (two words- gel ink) but I won’t go into that yet as I fear your eyes may already be glazed over from what I’ve already written. That is unless of course somebody really wants to hear more about that. ;?)
Oh boy [:O] thats alot of work but sound so fun to do it [:)]. some of the star trek words u mention, Im not very familiar with it or no idea where it is. The only thing i know the deck A which is on the top of the um saucer. but Deck B,C and secondary hull, plyons, nacelles, no idea. [#oops] Im not 100% hardcore star trek but love the shows and the model as well. it would be nice if you explain what those words mean or where it is so i will know.
i was looking at ur finished pictures, for some reason i always thought the original and the A was in white color. what color did you use? since the color of the ships and the lights does stand out very well. you should publish ur work up in the FSM magizine [bow].
as i recalled mine enterprise D when i was young, i didnt paint or spray paint the ship same goes with the A. but overall i did good job on it but not like the master modeler yet. I just add yellow/black color for lights (some where on and some where off)
B-C decks: The teardrop section immediately beneath the bridge on top of the saucer.
Secondary hull: The engineering section below the saucer. Attached to the saucer (primary hull) by the connecting dorsal. Here’s a pic of my 18" Enterprise showing it:
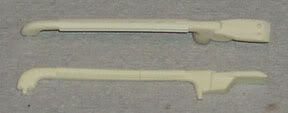
Pylons: The two long arms that attach the warp engines to the secondary hull (aka struts).
Nacelles: The long cylindrical warp engines.
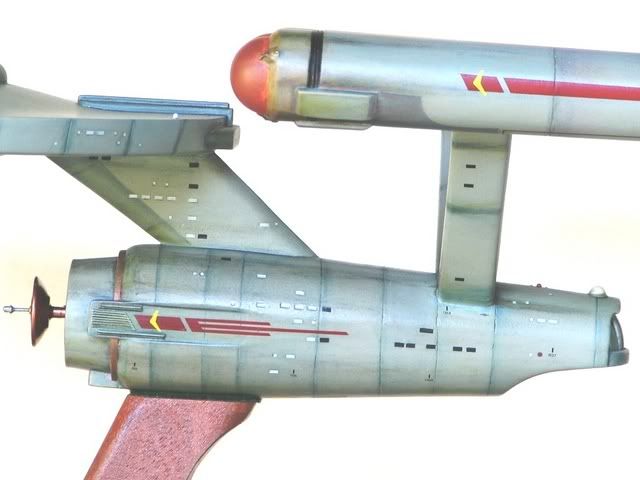
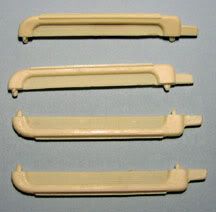
Control Reactor Loops: The two u-shaped arms inboard of the warp nacelles near the front. See this pic:
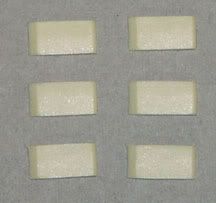
Flux Constrictors: The 3 flat rectangular shaped sections at the front of the warp nacelles under the round bussard domes. See this pic:
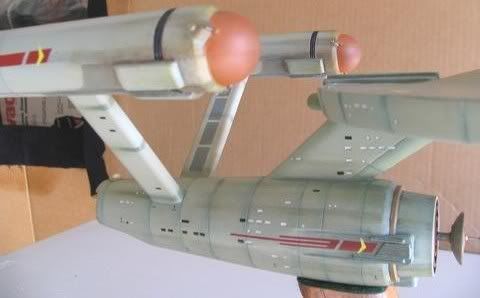
Intercoolers: The two rectangular “ears” at the rear of the warp nacelles. See this pic:
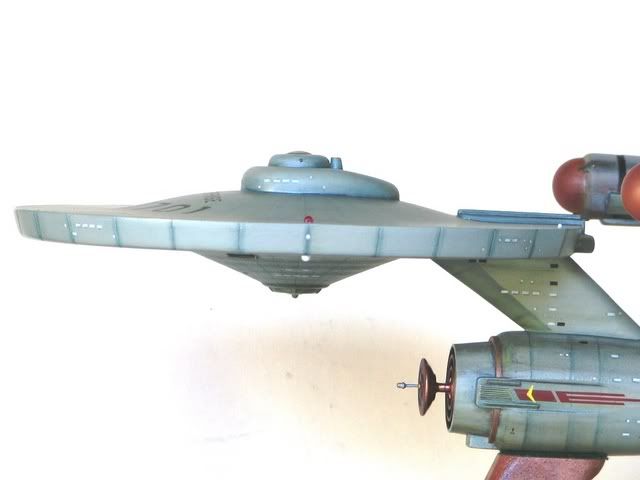
As far as the color, I used a light ghost gray as the basecolor and a slightly darker shade for the strip at the front of the dorsal, the impulse engines at the rear of the saucer, the end caps at the back of the warp engines, and the area at the front of the nacelles behind the flux constrictors. You can see this area in this pic of the 18 incher:
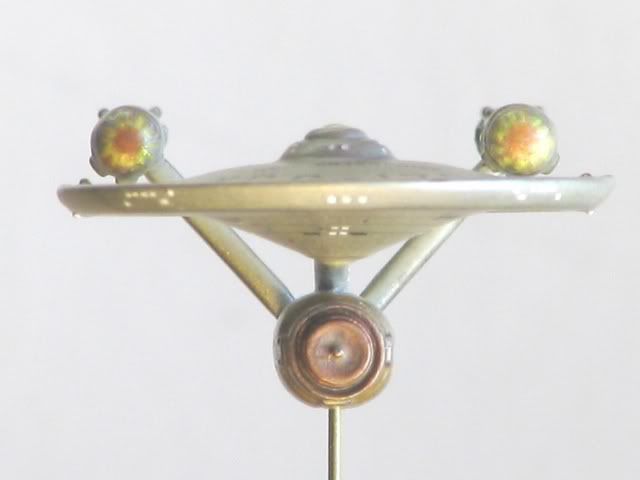
On the 1/2500 E, after the basecoat had dried, I applied a coat of Testors clear matte enamel (aka Dullcote) and brushed on a light coat of Tamiya silver pastel chalk which I then rubbed in with a Q-Tip and soft cloth. This gave the ship a metallic silver caste similar to the look of the “remastered” Enterprise. I then sprayed on a Testors clear gloss enamel (Glosscote) prior to applying the decals. Once those were dry I sprayed on more clear gloss and painstakingly cut tiny rectangular sections of white decal film and laid them over the top of the black windows that came with the Absolute Models decals with decal solution since aome windows are black and some are white. You’ll need a sharp exacto knife and some very fine pointed tweezers to do this. For round windows, I tapped the tip of a white gel ink pen to the black dots of the Absoute Models decals to make them white. After the windows were dry I spayed on more Glosscote followed by about 4 coats of Dullcote. Gel pens were also used to produce the multicolor look of the bussard domes at the front of the nacelles. It took quite a few steps to get them right.
what a fine looking enterprise you got. boy the painting sound difficult to me but worth to learn it. and thanks for explaining the terminology. sound like ill try to find the 1/2500 set of it. boy i would love to do the big one maybe one day i will who knows.
if i got the set which one shall i start with? i mean which one is the easy to do ill assume the Enterprise D since u mentioned its almost accurated than A and original? guess time for me to search and order it.
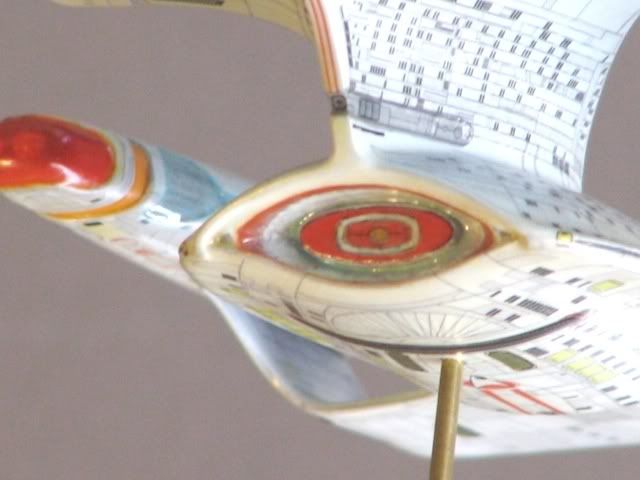
I would start with either the C or the D. The C comes in another 3 ship set which includes the B, C, and E Enterprises. I really didn’t do anything to accurize the C. The D corrections involved building out the small strip over the deflector dish in the lower hull where it runs up to the photon torpedo launcher in the neck. The photon torpedo opening should be recessed top and bottom from the flat surface that runs up the front of the neck. I think that was the only thing I changed. Some think the impulse engine at the base of the neck facing the rear needs to be accurized but I didn’t bother.
Here’s my C:
Detail of the D showing the deflector dish and forward photon torpedo launcher:
awesome! i just ordered the original, A and D set. they were out of B, C, and E set so hopefully i can find them which im sure i can find them someday.
Great ! You’ll have a lot of fun with these. Let me know when you start on the A. I had to make a few corrections on that one too although not as extensively as on the original. I spent most of my time accurizing the deflector dish, the impulse engines, and the stern.