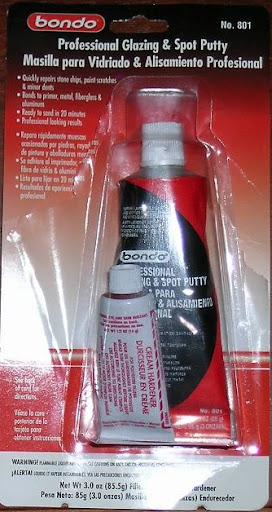
I was in need of some putty for the seams on my latest aircraft build. I could not find anyone that had the old standby of squadron putty, and no one was sure when they would be able to get any. There weren’t many places to check because hobby stores are almost non exisistant where I live. I purchased Bondo brand glazing and spot putty in a tube at the local auto parts store. It works great. In fact, I always felt that the squadron putty was too thick. This stuff goes on better, and sands easily. Many of you probably already new this, but for those that didn’t, keep it in mind.
try mixing the squadron putty with laquer thinner from tamiya trust me it works better make sure u mix it in a glass bottle or try tamiya liquid surface primer good luck
I’ve used the Red and Blue spot putty for years. Its good stuff. Also use some of the other hobby puttys too. Depends on the project. They all work great if used right.
Jim[4:-)]
I live in an area where the hobby stores are either out of supplies, or what they have is price-gouged so much it excludes those of us with other expensive hobbies besides modeling. Since I’m on an island, shipping can take some time too, so I’ve had to resort to being creative in other ways several times.
I’ve found an awesome standby for putty that takes some patience to produce, but the results are flawless. If you have access to “moon sand” (or mars sand, depending on the manufacturer) found in toy isles, and liquid cement (or acetone), you’re golden. Moon sand is powdered polystyrene plastic–mix it with some liquid cement or acetone (nail polish remover), and you have what can range from a glue-like paste to a thick putty depending on your mixing ratio. Mix it in a resealable glass container, and you can use it again and again. It sands and takes paint just fine once cured.
You can make the exact same thing and only need to purchase the acetone. You need a clean empty paint bottle w/lid, some acetone/glue, some old sprue and a set of dykes. Using the dykes, cut the sprue into pieces that are aprox the same length as its diameter. Fill the paint bottle about 1/2 full of the sprue pieces and then add acetone/thinner to the bottle until the sprue pieces are just covered. Put the lid on the bottle and let it set for 24 hrs. voila, liquid plastic! (if the concoction is too thin, add some sprue pellets. If it’s too thick add some acetone/thinner)
Liquid plastic eh? That sounds perfect!
… how does it affect the plastic you’re filling though - I mean the area on the model itself?
Is this the product you use?
Is it really harder to sand then Squadron putty? That’s what the manager at my LHS says.
I’ve used the 2-part automotive putty, not Bondo, specifically, (Bondo is actually just one brand-almost every auto parts chain has its own version), and found it more difficult to sand, but that was because I hadn’t mixed the putty and catalyst in the right proportions, so it was a little soft.
I’ve never had any problems sanding Squadron putty, at all. Did the manager at the store say any more about what kind of problems he had sanding it?
I also use the acetone trick, with the Squadron putty. I do it in one of two ways:
- To make what I call “home-made Mr Surfacer”, I squeeze a dollop of the putty into a well in a ceramic palette-though any non-reactive surface will do, like a paint bottle, or an old glass or glazed ceramic dish. Then I add acetone with an eye dropper, and stir it with a toothpick. I control the consistency by adding more liquid. I use the toothpick to spackle it on to the seam, or into the gap. I also have some dental tools with flat ends, like a spatula, and sometimes use those to apply the thinned putty.
The mixture dries quickly on the palette, because the acetone is volatile and evaporates quickly, but it can be brought back with more drops of the liquid.
- The other method is to apply the putty to the seam, again, with a toothpick or some other tool, and then to use a cotton swab soaked in acetone to smooth out the putty and remove the excess. I don’t use Q-Tips, because the shaft is plastic, and the acetone can melt it if it has enough time. I use generic cotton swabs with pressed paper shafts.
I can use the swab to pass over the seam, across it, not along the seam, just like cleaning up after applying a wash to panel lines. Going across leaves the material where I want it, going along the seam can remove it when I don’t want to.
I’ve found that method 2 has helped cut down on the amount of sanding afterwards, since most of the excess putty is removed in the swabbing process.
It worked beautifully on a particularly bad seam on the Eduard 1/48 P-39Q kit. On the underside, where the lower wing seam meets the seam between the two fuselage halves, there can be a step, where one side of the fuselage seam is lower than the other, and lower than the trailing edge of the lower wing piece. I applied the putty using method 1, built up a layer, then used the back edge of an X-Acto knife to level the surface, by holding the edge against the high sides of the seam (the one fuselage side and the trailing edge), scraping outward from the point where the two seams met. A couple of passes filled it and levelled it.
Once the putty dried, it sanded with no problems.
Regards,
Brad
The manager had said that using the Bondo brand puttys would be like sanding steel. I will try the acetone trick with the Squadron putty and see how that works.
Thanks,
Albert
3M Acryl Blue is far better than Squadron’s stuff and if you seal it good it will last a lifetime.
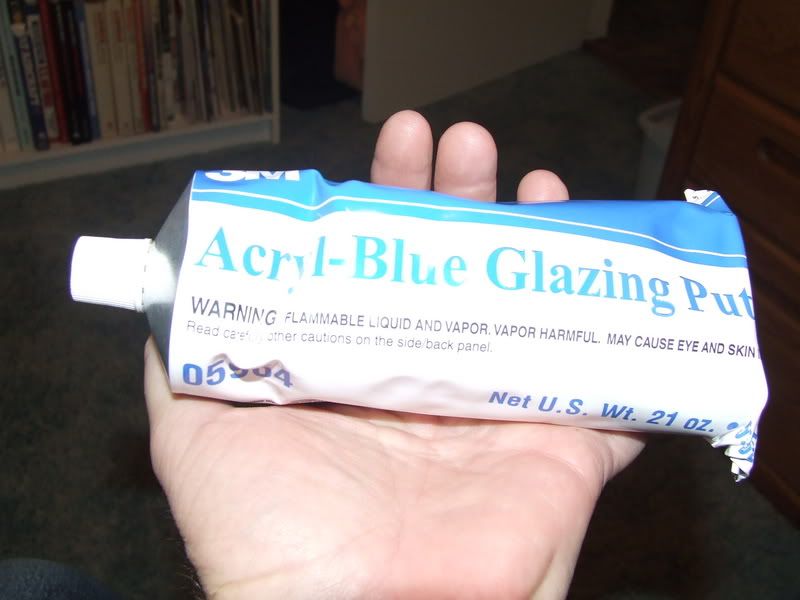
Mike, where you get it from. Was looking on the net for retailers.
Hi Mike,
Is that easier to sand than Squadron Putty?
–
Al
Your LHS owner is trying to protect his customer base from going elsewhere for modeling products, and he is full of hot air (or other warm steamy material).
Both Bondo Spot Glazing Putty (the red stuff) and Bondo two-part catalyzed body putty are excellent products for a modeler to work with. Both sand and feather well. The two-part putty has the advantage of hardening sufficiently within a half hour to allow you to continue working without an overnight delay for the solvents to evaporate. The Bondo Red is solvent based, but seems to evaporate more quickly than Squadron.
Bondo Red is very similar to Dr Microtools red putty, but is less expensive than Squadron or similar products with a hobby manufacturer’s logo. Less than 5 dollars buys you a large tube. My current tube is about 5 years old and still has a good amount to go. (Keep it capped tightly between uses.)
Bondo catalyzed putty was introduced to me by one of the professional model builders on staff at Lockheed. He needs stuff which is inexpensive, easy, and fast to work with.
Geez Alert - Back in the day, Testors had a cellulose based filler putty which was really rather coarse grained. The custom car modelers began using real auto body fillers which were finer grained for smoother appearances. Squadron, seeing the shift in the product, arranged for the manufacturer of the green putty then in vogue with the auto modelers to package their putty into smaller tubes with the Squadron label.
I think so Al. It sands really easy.
I don’t remember the place I bought it from online, sorry.
I just did a google search and bought it from the lowest price I found.
You can order it through Amazon. That’s where I got mine.
Amazon,huh? weird. how much?
Friday night at our club meeting, I learned that 3M’s putty can also be used with the acetone technique, just as I described above for Squadron putty. My cousin owns an auto-body shop and I’m going to see if he has any of the stuff on hand, to try it out.
Instead of acetone I’ve been using liquid cement to thin Squadron Putty. It’s doesn’t evaporate quite so fast and really helps bond the putty in smaller cracks and seams. Still sands beautifully. I haven’t tried the 3M brand because I don’t have to use much filler on my builds. With Tenax or Ambroid you can usually work along the seam in short lengths and keep from needing too much filler. I also use spacers inside wings at the root to line up offending molding problems. I always consider having to use filler as a last resort during the build. Don’t forget to use Thin CA over the top to get a better surface match to the adjacent styrene that won’t show under the paint as readily as these fillers can.