Yeah, it’s the “Greenhouse”, also sometimes referred to as the “Doghouse” too. The -F model has a more squat shape to it, and the rotorhead is in a slightly different position to the -G model. The part was on the LoneStarModels website, but that site is no longer active. I think the doghouse was a separate part than the other two sets. I have been able to design and print most of the interior and exterior parts with my 3D printer, but the complexity of the doghouse is a bit beyond my skill set. I don’t have a 3D scanner, either. If I did, I could probably scan the Kitty Hawk and Revell doghouses and then get one right for printing, but I have not been able to justify the cost of the scanner so far…
This post mentions the doghouse part from Cobra.
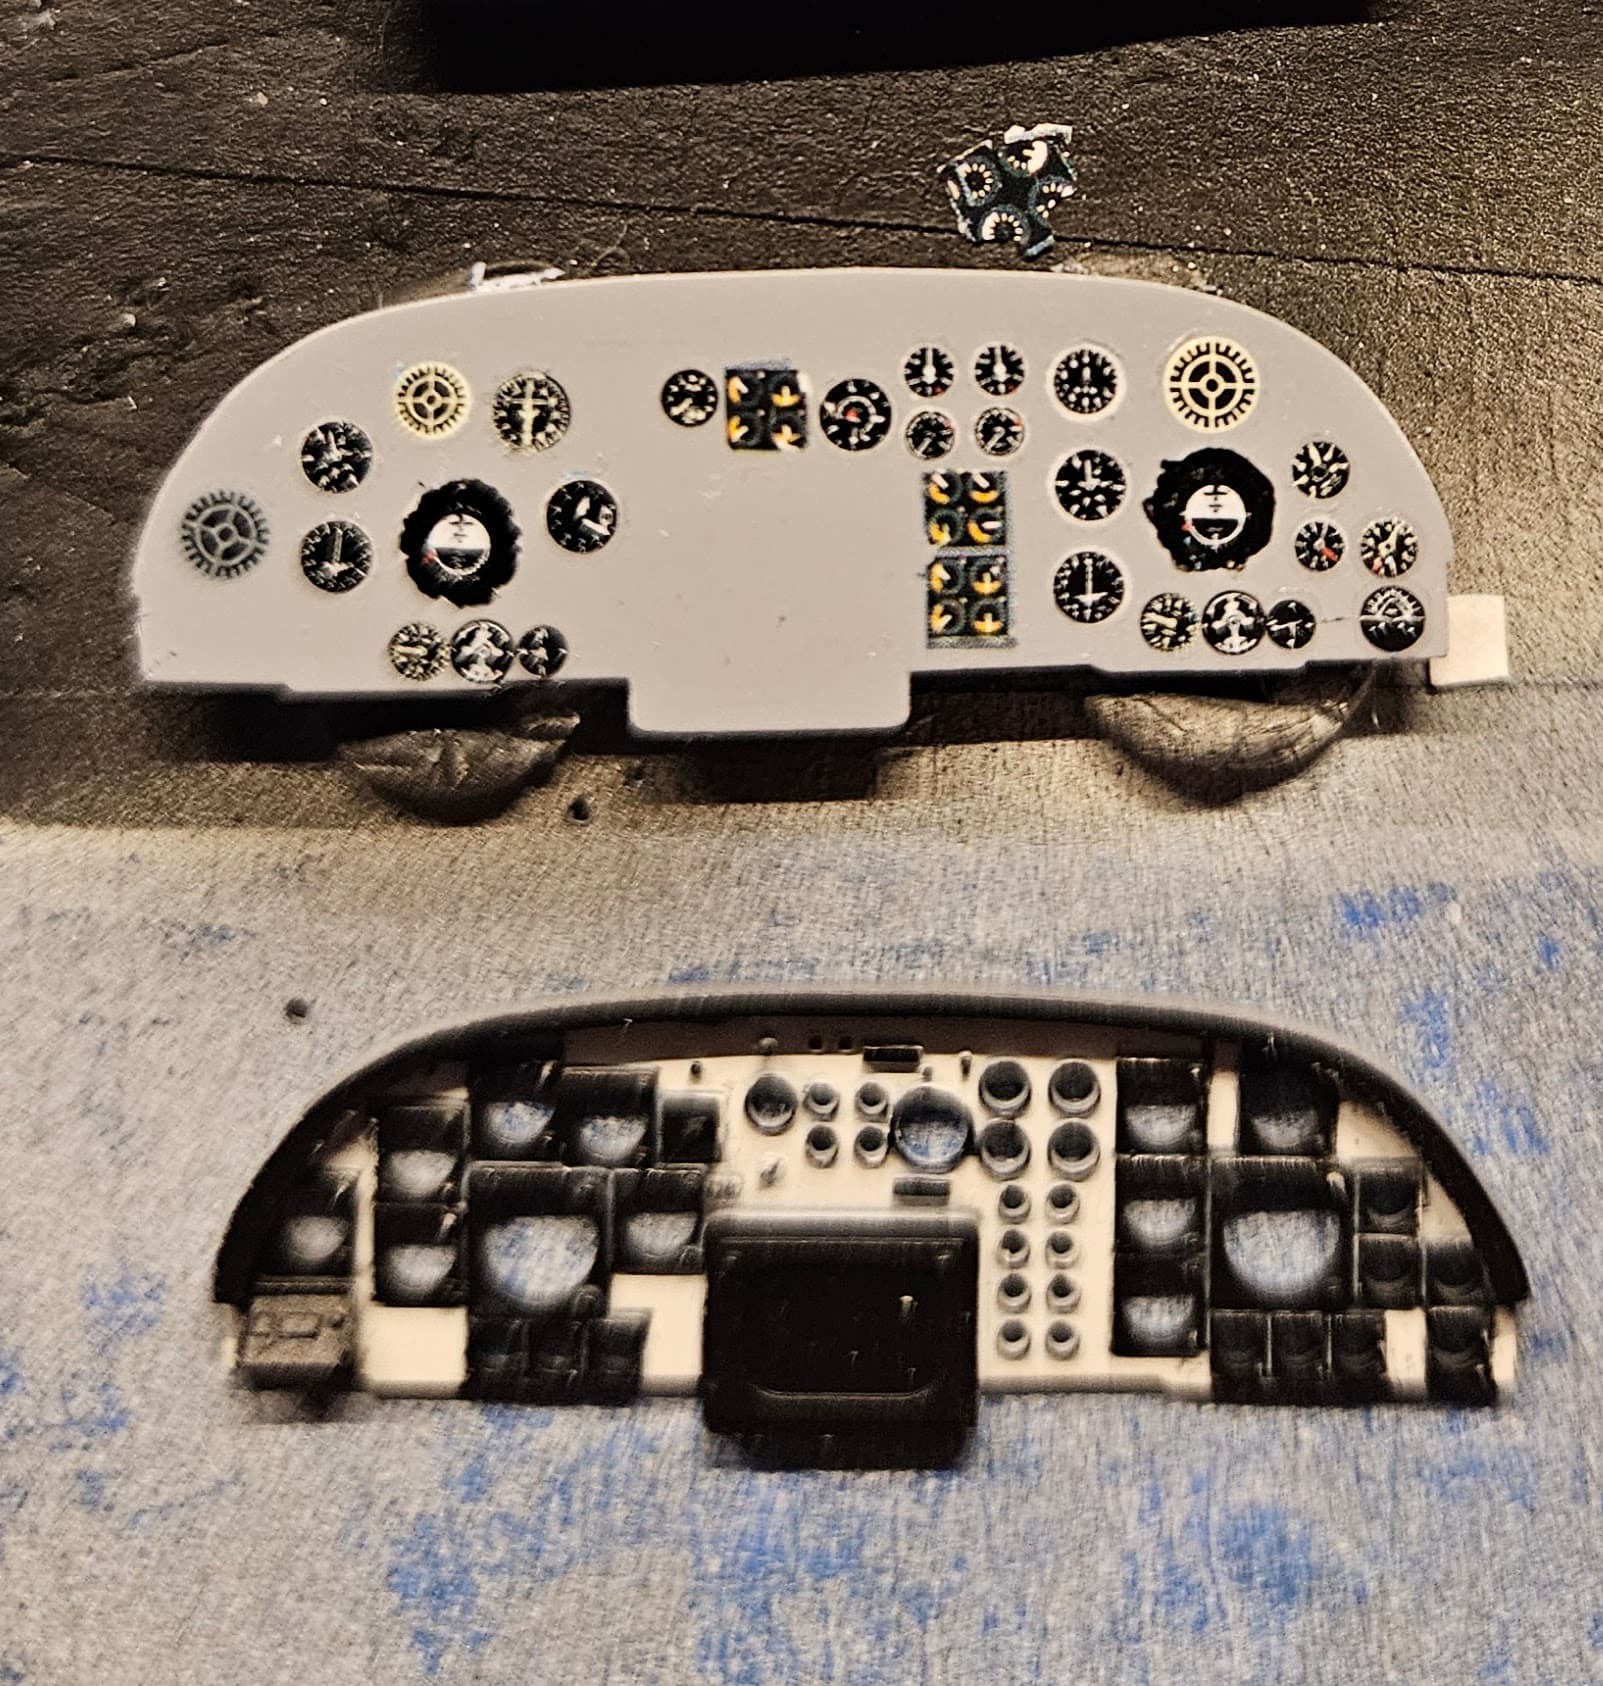
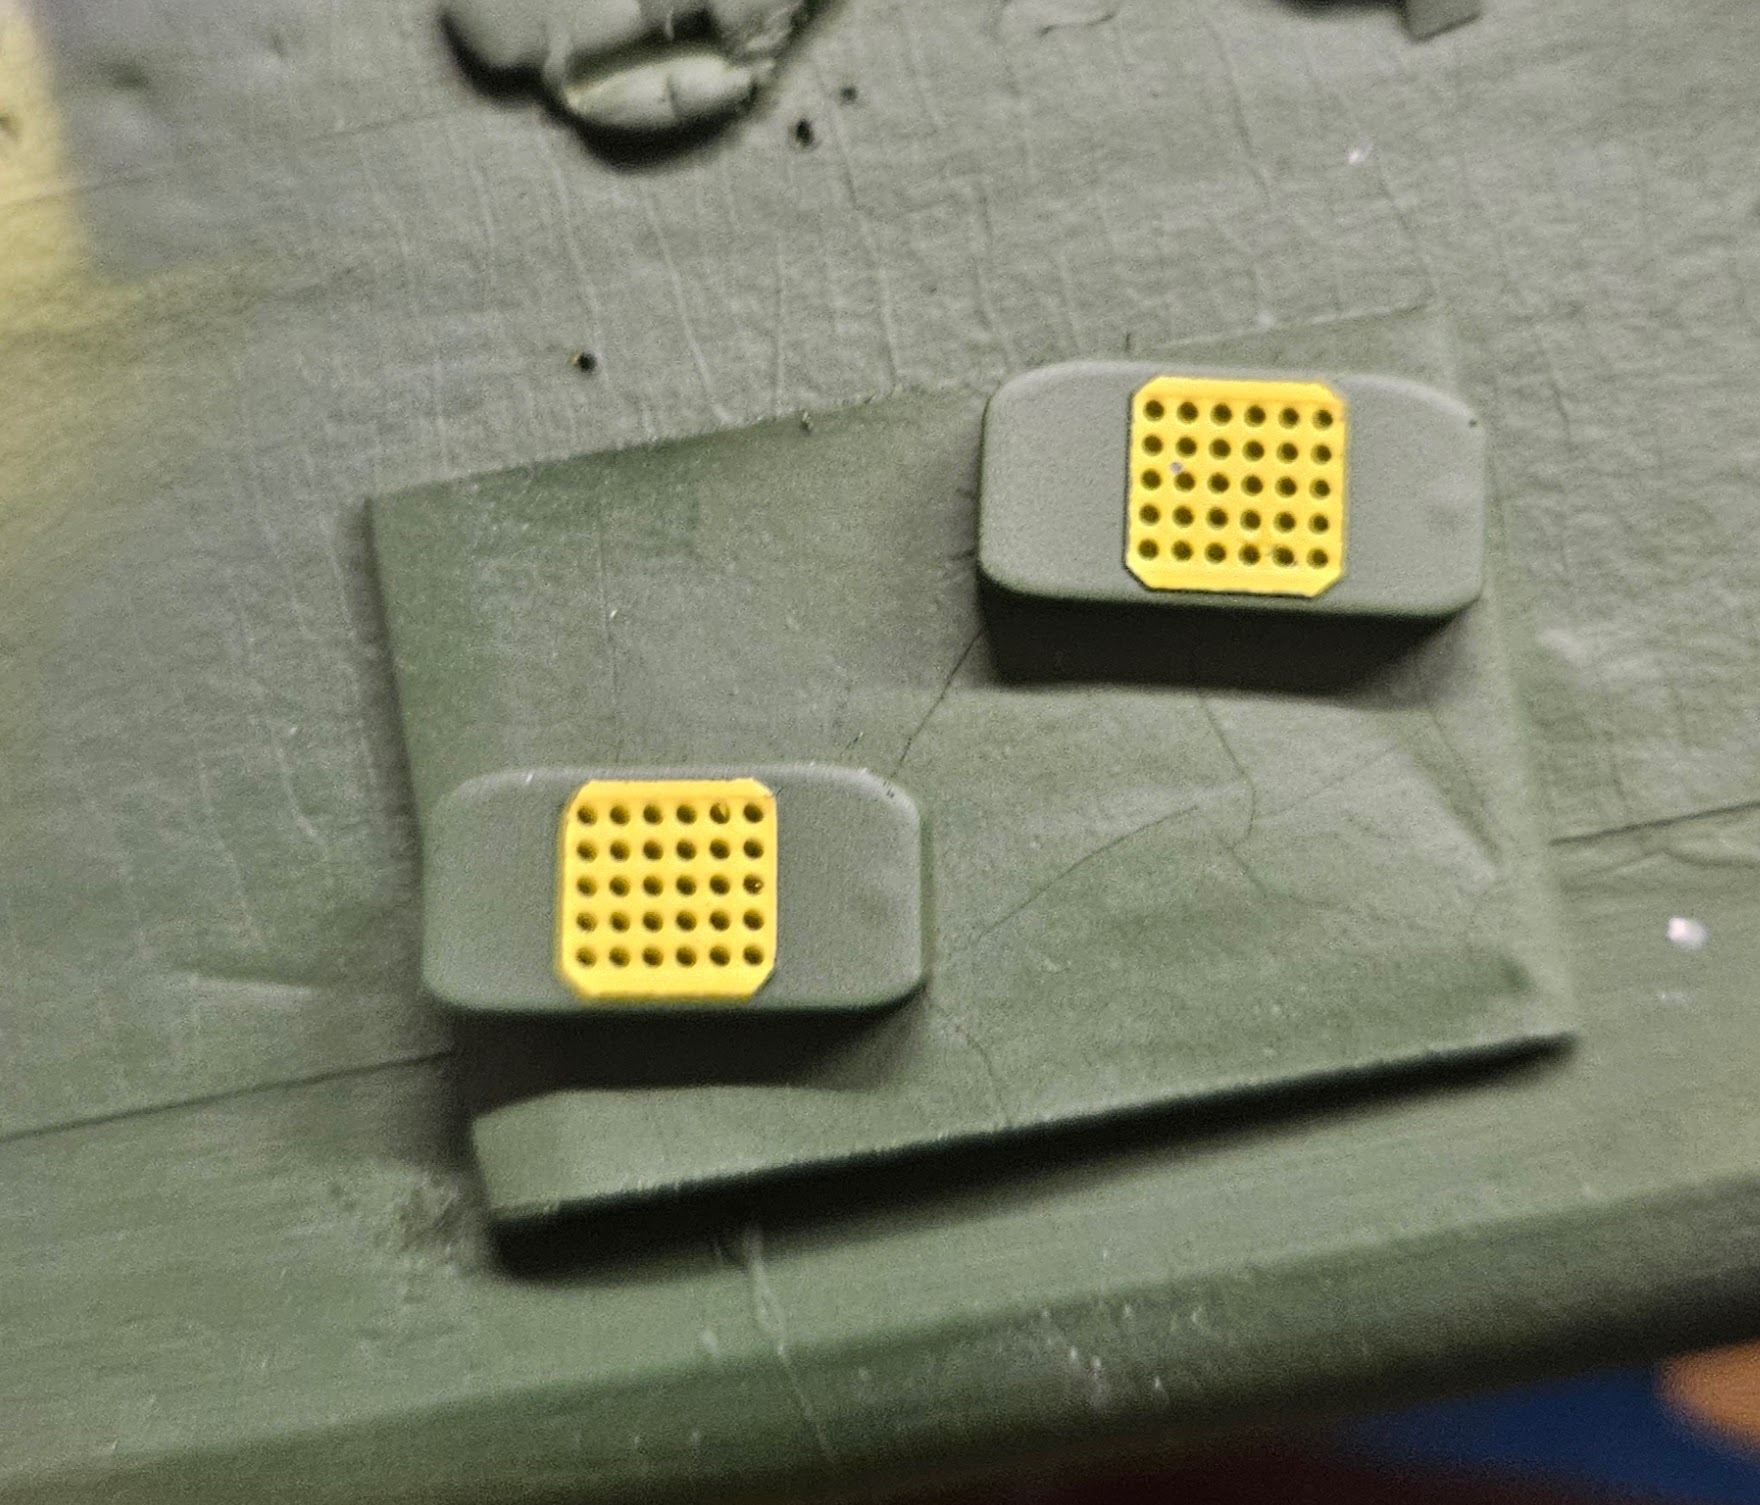
I finished decaling the instrument panel backing today and once they have all dried/set, I will dip the backing in Future again to seal the decals and provide the appearance of glass over the gauges. I may just lay the panel over the backing while the Future is wet and let it double as my glue.
Thanks for clearing that up for me.
Sorry I missed buying that Cobra Co. correction set for the Kitty Hawk doghouse.
Rather than ordering online I used to buy his stuff on site and when he stopped attending contests and meetings I missed out. I hadn’t noticed the problem when looking at built up models
but seeing a picture of an F and G side by side I see the G doghouse sits lower and extends further forward into the greenhouse windows which is why Cobra gave two sets of vacuformed windows along with the resin doghouse.
I’ve seen some nice OOB Kitty Hawk builds …looks ok.
TMN: “Stylish Seasprite” François Laloux builds the new Kittyhawk Kaman SH-2F in 48th scale
But now I know, …Darn it LOL.
The other thing I can’t figure out is what happened to the sensor operator station in the Kitty Hawk SH -2F kit?
The G kit has one, but neither the F or G kit has the sonar buoy dispenser in the interior…it should be behind the sensor operator.
The F kit has bench seating in that position and the G kit has a single jump seat there.
The Cobra Co. set has an electronics pizza rack in that position.
Photos I’ve seen have sonor buoy dispenser holes on the port side but the kits have a blank wall.
Did the Seaspites cease deploying sonor buoys?
For a brief minute, I had hoped I had just not paid attention when I unboxed the -F and that a second look would reveal the missing interior, but to no avail…I have a pretty good interior now, courtesy of my 3D printer. I deleted the sonobuoys from my build, as we were in the Gulf during Desert Storm and there was no submarine threat there, so that was not carried in our loadout (at least as I recall). I put the bench in my build, since I had it already. We may have had the jumpseat, but the best reference photos I could find had the bench, so that’s what I went with.
PLEASE PLEASE PLEASE make your .stl files available somewhere. I was just starting to design my own, it would make my life so much easier!
I’m happy to share them! There are a lot of them, so do you have a Google Drive/Dropbox/etc that I can drop them in? Do you need the MEF configuration (e.g. FLIR, chaff/flare dispensers/IR Jammers), or are you doing a standard -F?
I’m interested too. PM sent.
Thanks all for your interest. I did some research and I can publish these on Thingiverse, where you can download them for free. They require a 24 hour waiting period before I can upload, so I should be able to do so sometime tomorrow. I have a bunch of files (26 in all). Search for “Details for Kitty Hawk SH-2F kit”, which should take you to the landing page for all the files. Here’s what I’m planning on uploading:
ALQ-144 “Disco Ball” jammer with base
Forward/Aft mounting bases for the ALQ-144s
Canteen Mount for the interior bulkhead (Canteens can be downloaded for free from others, which is what I did)
Collective base (Mine was short-shot, so I made a replacement)
Fire Extinguisher
FLIR Pod
Flare Dispenser
Cyclic (My kit ones broke/disappeared)
Equipment Rack (aft of operator station)
Black boxes for the equipment rack (5 total)
Instrument panel in 3 parts: Backing, template and actual panel
ASW Operator lower chair rail
ASW Operator upper chair rail
ASW Operator Switch Panel (to the left of the seat)
ASW Operator Seat
ASW Operator Scopes
Sounds awesome. Thanks in advance.
That’s very kind of you.
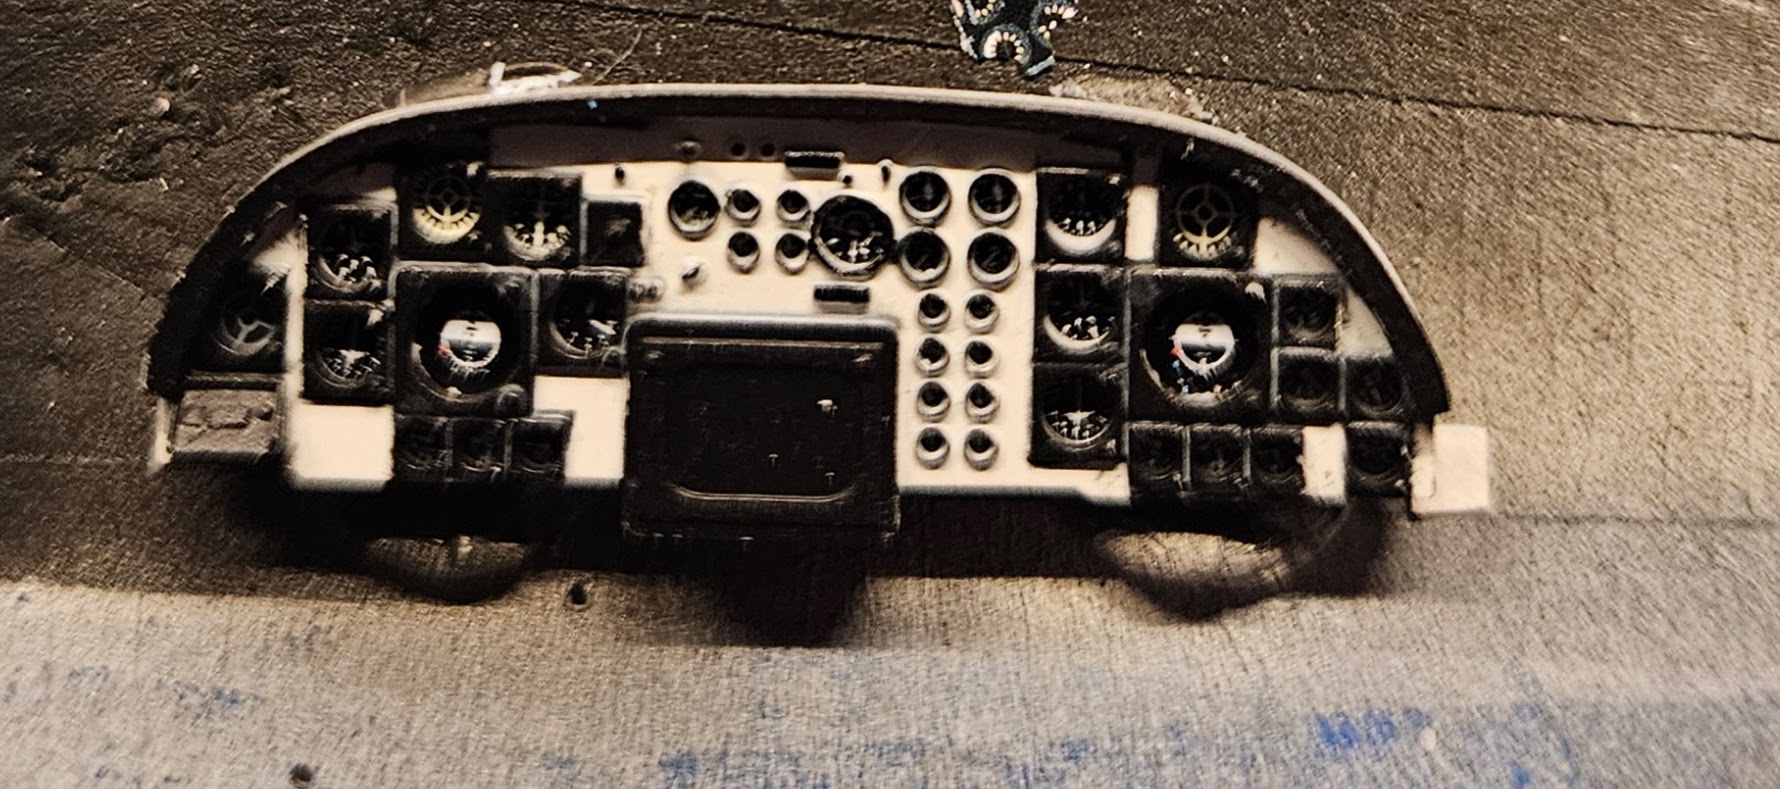
I got the instrument panel installed. I used Future to coat the instruments and to serve as an adhesive to the front of the panel. I’m very happy with how it turned out!
You should be happy…that looks fantastic!
Hi all–I have uploaded the STL files to Thingiverse. This link should take you to the collection. However, if it doesn’t, you can search for “Kitty Hawk SH-2F Details” and it should take you to these files. I have printed all of these on my Elegoo Mars 5 Ultra using the Lychee slicer. Lychee may tell you that some of the files need to be fixed; if so, let Lychee fix them and you will be fine. I have also printed files that Lychee said could not be fully fixed and they turned out fine, but if you have any questions, feel free to reach out. Enjoy!
Wow, you should be happy! That looks excellent. The black outlines of the instruments really pop!
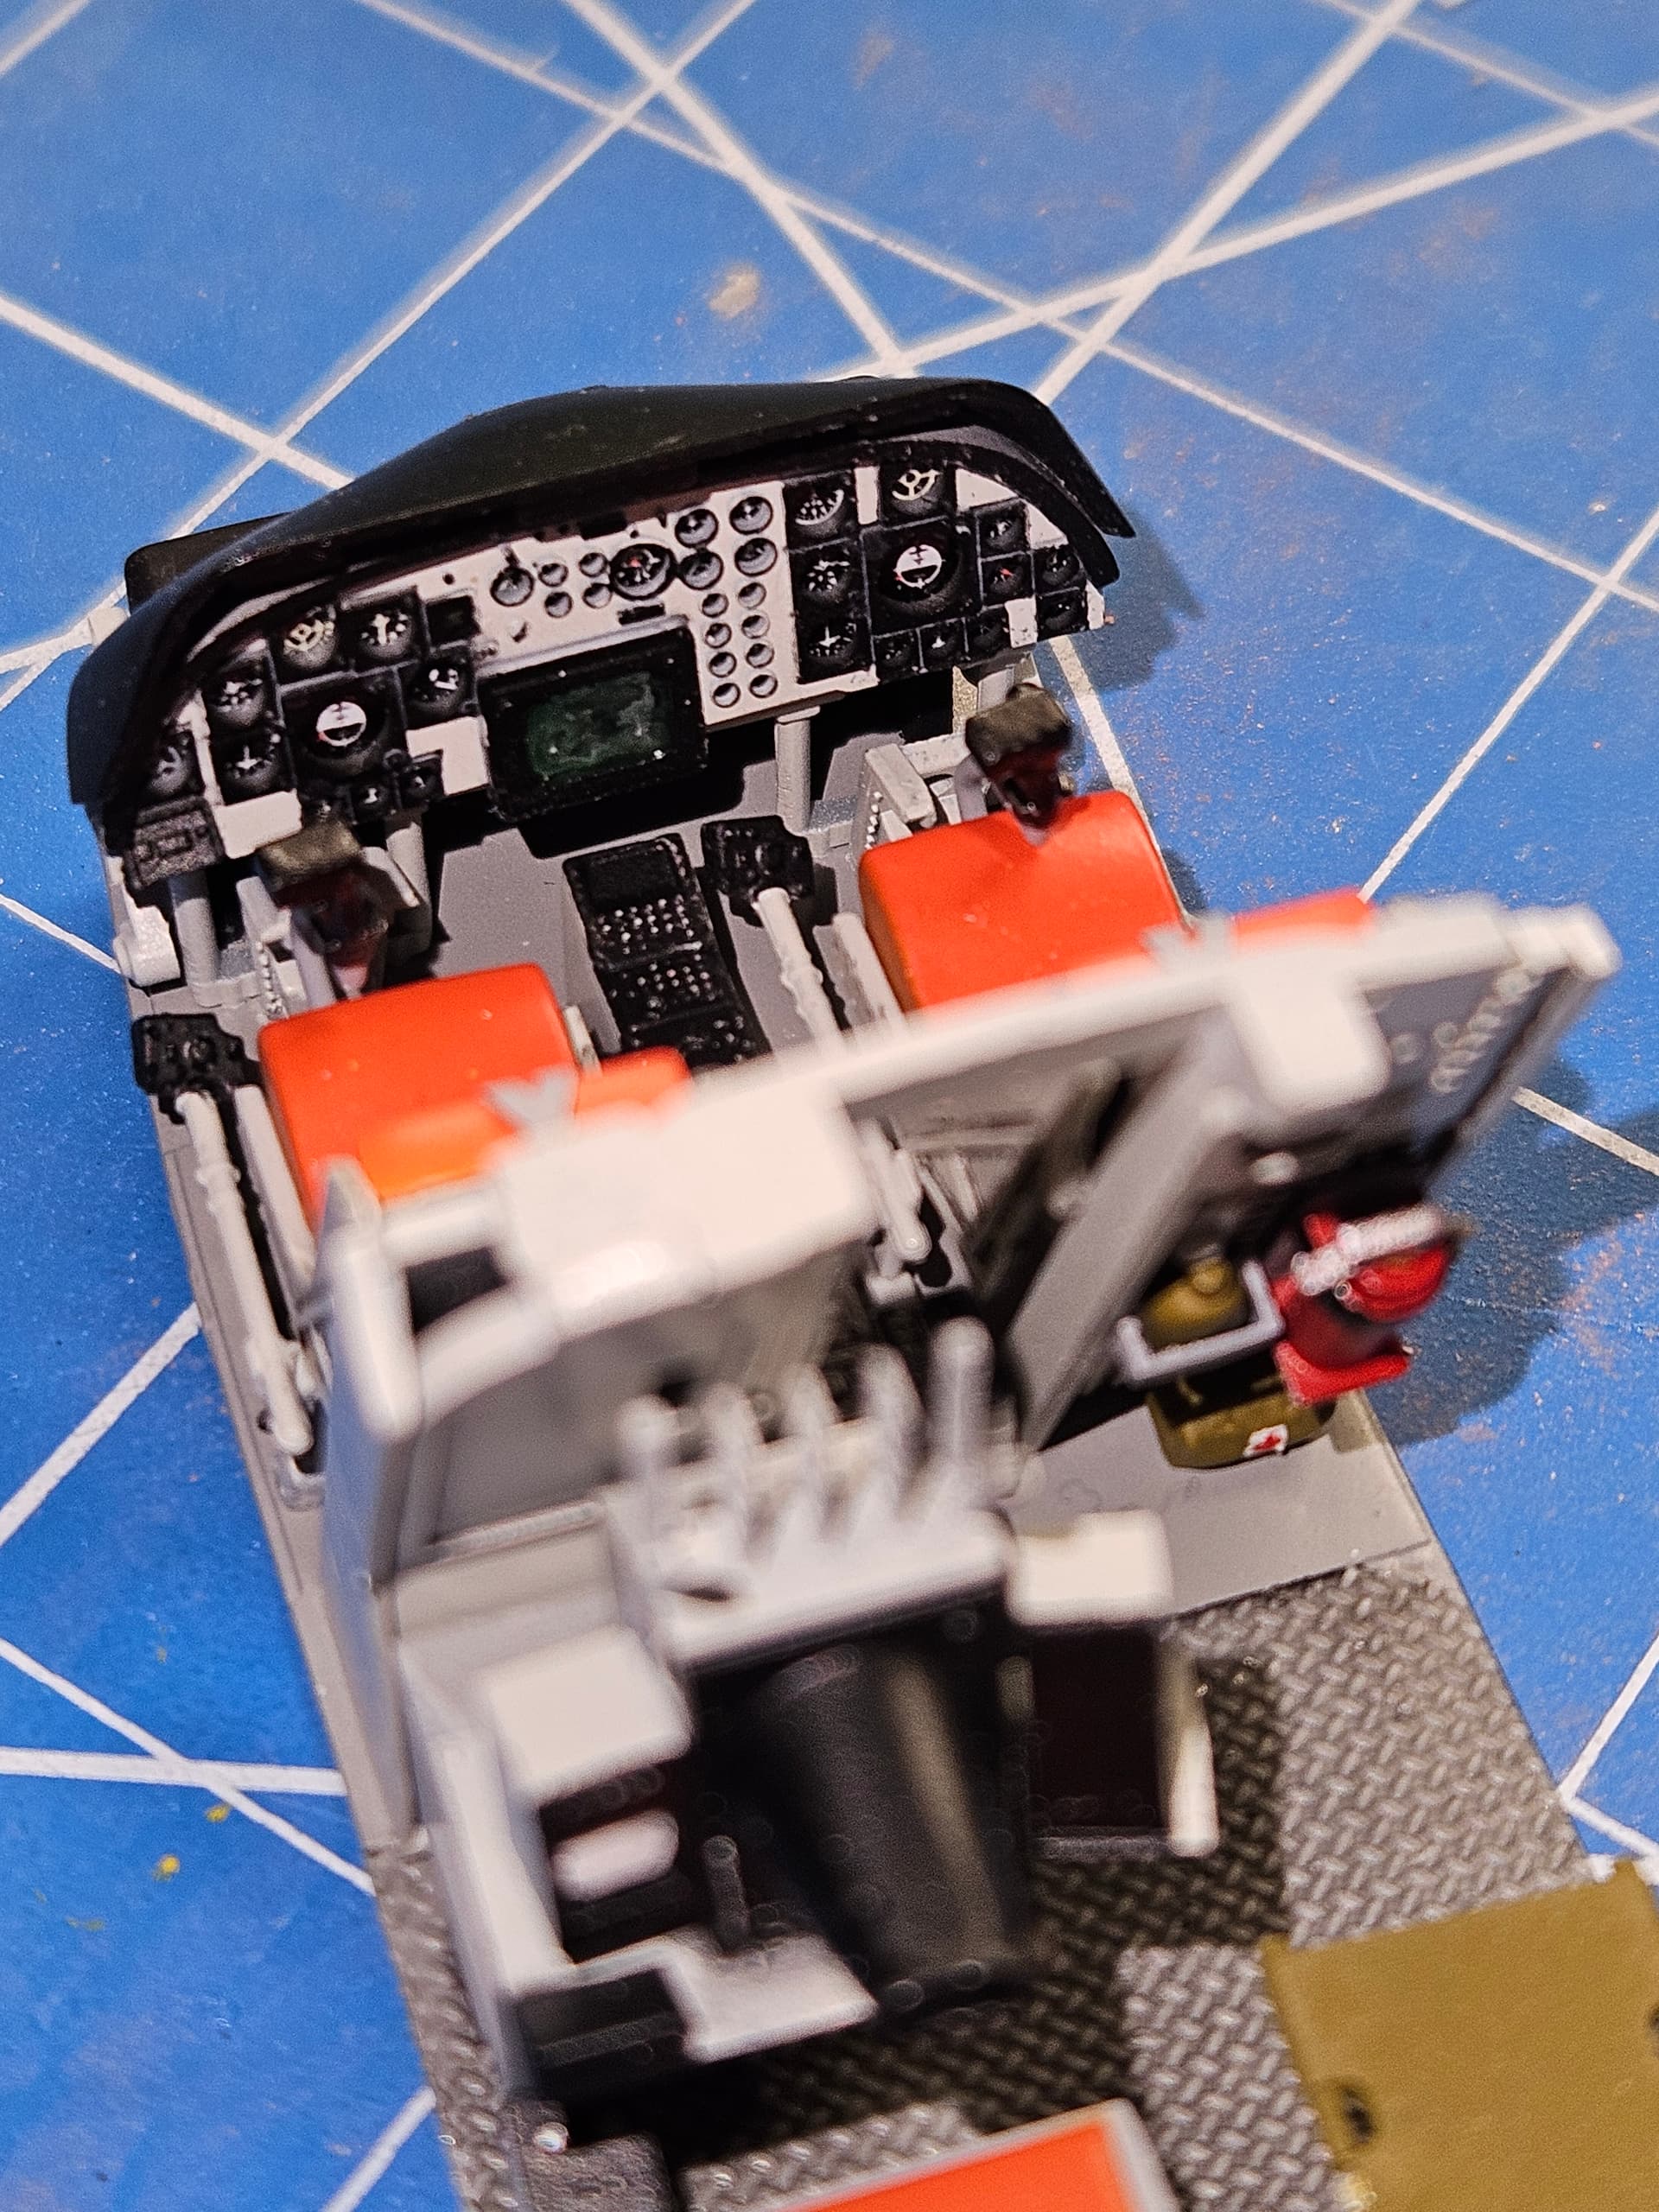
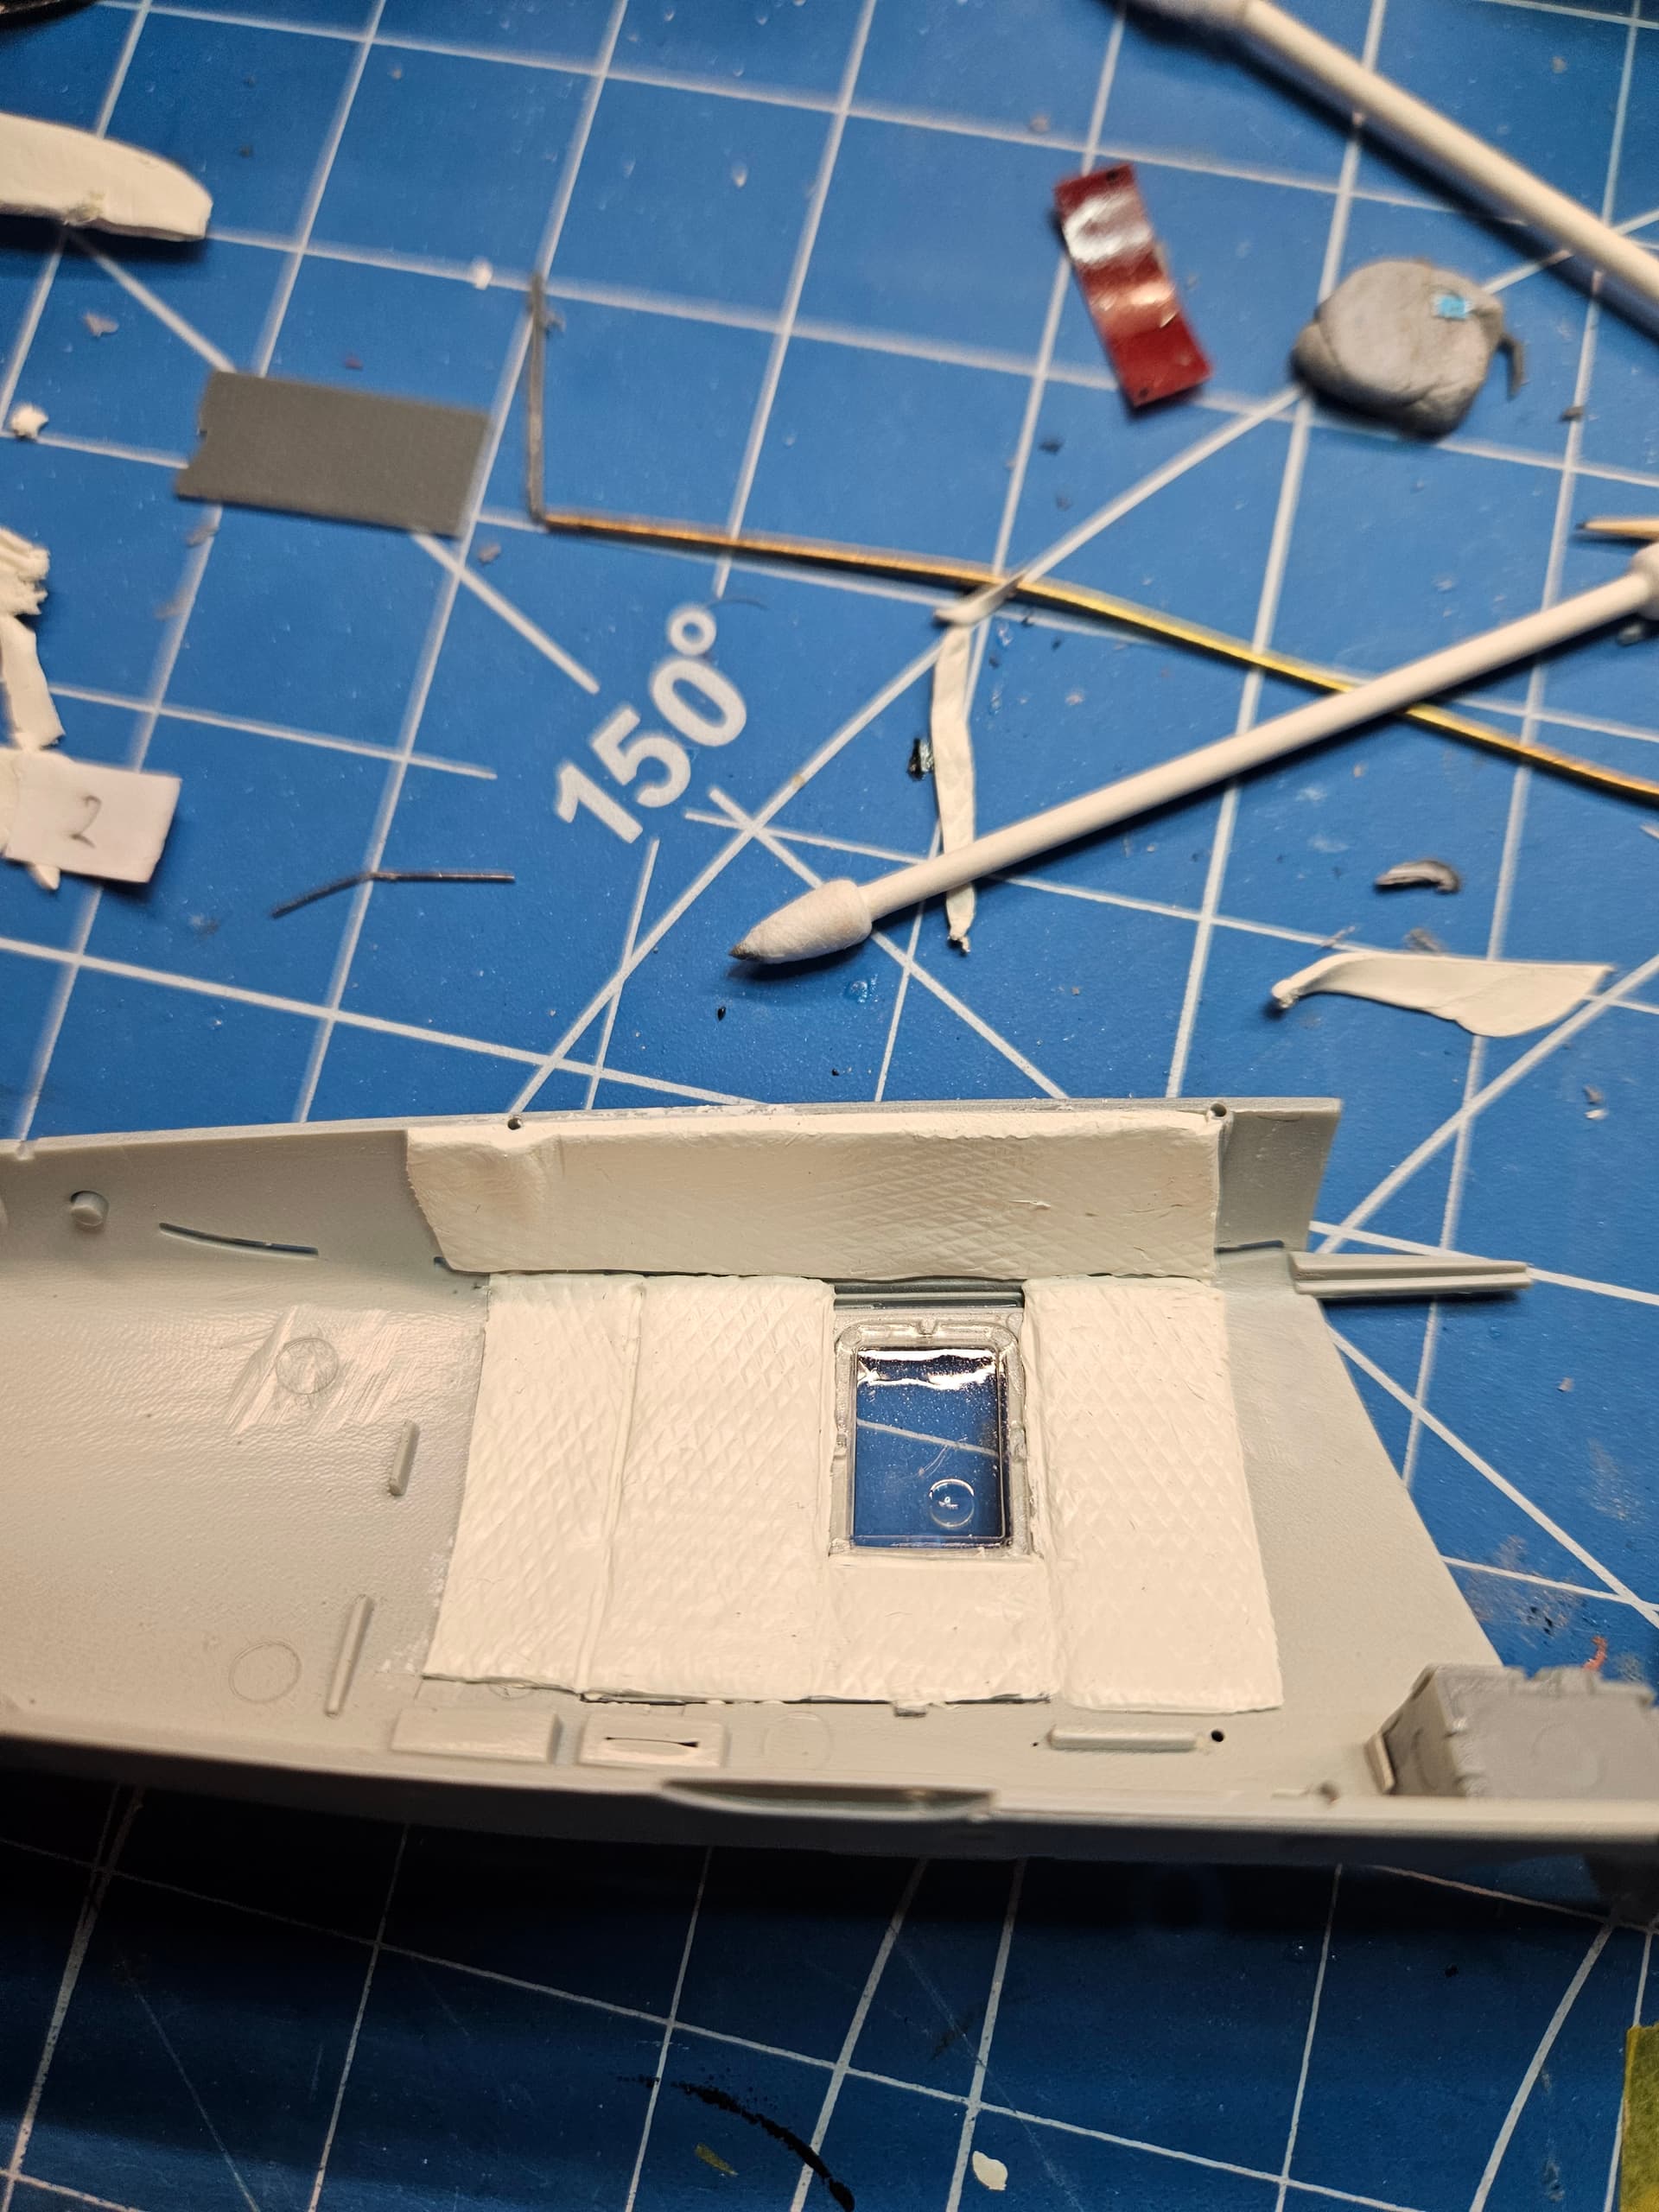
Thanks all for the kind comments…I’m pressing on now with the rest of the interior…today, I made the quilted noise deadening material that covered the fuselage next to the ASW Operator’s station. I used Milliput and some foil that I’ve been saving for years from a champagne bottle that had just the right pattern on it. I fit it into the half of the fuselage and will let it set fully before I clean it up and paint it. The key parts were remembering to leave enough space at the bottom to insert the interior, and creating seams to denote the door on that side. The window was a real pain to fit. Not sure if it was because I chose to assemble the door, then place the window, but I had to sand and force it a bit. Once I had it in, I was afraid that I might not be able to get it back in, so I applied Future with a brush to both secure it and make it clearer. I normally dip, but I did not want to fight it again.
This is the second time today I’ve read that champagne cork foils was used in building or as actual structure. It makes me need to drink more champagne! Nice work on the sound deadening. Very thoughtful.
Thanks. They all look great.
I have decided (at least for now) to kitbash the Revell transmission housing onto this KH kit. The Revell kit lacks any panel line/rivet detail, of which there’s more than a little bit on the actual housing. Therefore, I’m going to see if I can replicate that with my scribing and rivet tools. If I don’t like it, I can always revert to the KH’s inaccurate -G housing, but I will take my time and see what I can come up with. Also, I painted my ALE-39 chaff/flare dispensers, which will add some much needed color to the port side of the helo.
The fuselage is together now. I had some issues due to the fact that I flipped the floor over behind the cockpit, since the detail was on the bottom. However, there are certain fit aspects that I believe depended on having the non-detailed side up. After a lot of sanding, scraping and other adjustments, I was still struggling to get the fuselage halves to close properly during dry fitting. Finally, I decided to install the interior to the starboard fuselage half, aligning the cockpit section to the side of the fuselage and letting the rear section hang a bit away from the side of the fuselage. This ended up working and the fuselage closed up ok after that. I’m traveling this week, so I’ll add some pictures when I get back, but I expect progress to be fairly quick after that. I have a UH-1D to UH-1H conversion waiting for me after the Seasprite is done. Let’s see if Kitty Hawk got the detail on the right side this time!
I also designed the fuel tank filler pipes that sit just inside the opening on the starboard side of the fuselage. You can see the two ports on the outside of the fuselage, and there should be pipes inside that go to the fuel tanks below the deck. Here’s a great reference photo of what they look like. These are now available on the Thingiverse page as well.