Great job Plasticjunkie! [Y] [Y] That looks awesome, especially for 1/72 scale!
Ken
Great job Plasticjunkie! [Y] [Y] That looks awesome, especially for 1/72 scale!
Ken
Thanks Ken!
Ok guys, I finally received the new decals for the F-100.
I am calling the F-100 and F-104 complete, so here they are.
Son of Medicine Man, I hope you don’t mind if I grab the badge now. It’s been a long road.


As always, comments welcome.
Steve
Great job Steve! [Y] [Y] They both look fantastic!
The front page has been updated.
Ken
Great job Steve, they both look fantastic. Excellent job Dude! [B][B]
Got the halves together and discovered some low spots that required some filling and sanding. The halves went together fine and the join line disappeared but those low spots created a problem.


I’m debating leaving the bomb bay open or not. The 609th used the early M 31 Cluster Bombs so I have to scratch build two of them so it depends on how they come out. I have some good reference pictures and diagrams showing these early CBU type loads.
http://www.warbirdinformationexchange.org/phpBB3/viewtopic.php?f=3&t=34145&start=555
Scroll down to the bottom of the page and you can see them ready to be delivered as care packages to Charlie!
http://www.warbirdinformationexchange.org/phpBB3/viewtopic.php?f=3&t=34145&start=270
Looks like you are doing a great job handling those defects! [Y] [Y] And thank you for the links, I have book marked them for future reference!
Ken
Hi, MC,
I touched up your image a bit in Photoshop to bring out the detail on your exhaust. Very nicely done! You’ve done a great job on this build!
Cheers,
Russ

Nice job, Mailwalker! I know what you mean; I’ve yet to get there myself.
Cheers,
Russ
Thanks Russ,
I need to get Photoshop.
Very nice wiork, Plasticjunkie! I like the way the console turned out. BTW, I didn’t realize there was a K model of the B-26. Checked it out online and learned these were the ones used in Vietnam. I saw one land at Takhli AB, Thailand back in 69.
Keep up the good work!
Russ
You can do the same things with MS Paint that comes with windows. Click on Start -->All Programs → Accessories and select Paint. You can also download a free trial copy of Snag-It, which has some editing tools in addition to capturing images.
Photoshop is pretty expensive. However, if you want Photoshop, try to find a copy of Photoshop 7 on eBay. It’s an earlier version that has all you need for photo enhancement and more, plus it has its own built in browser - unlike the crappy add on browser that comes with later versions.
Cheers,
Russ
Hey Mailwalker,
Russ is right; we are all on this hobby journey and all of us still have room to grow and learn new techniques. As far as dry brushing goes it’s okay to pre-treat your bristles with a little thinner, but you want to make sure your brush is almost completely dry.
After I paint the base coat, I let it dry for a good while. Then I get my wide, soft brush and dip it in the paint enough to cover the bristle tips. Then I lightly drag it across a textured paper towel or napkin to remove most of the paint. Once most of the paint is gone, the remaining paint will form a more defined pattern and only attach to the very highest point of your model. (Like the knobs, switches, and buttons on your side panels). Once I’ve got the paint down to that small amount, I transfer it to the model itself.
Looking at your pictures, it looks like you are getting the technique, but maybe you’re applying a little too much pressure on the brush and the bristles are doing into the work deeper than you wanted. Try using a lighter touch and work in one direction at first- left to right, or up and down. It takes a little practice, but you’ll get there.
I also like to find good pictures of what I’m trying to replicate and will have a picture of the actual item from a book, or pulled up from my internet file on my computer to capture the actual ‘look’ of the item.
You can also use ‘washes’ to give those small details more ‘pop’ and visibility and to add shadows in areas where they’d appear on the actual item. And maybe one of the guys on here can explain ‘color modulation’ techniques…(Still struggling with that one myself.!!)…like I said, always something we can learn!!![:D]
Good luck with your Super Sabre!
TAD
Thanks Striker. Funny if the markings I’m using are the same as in the one you saw land at Takhli even though mine was based at Nakhon Phanom. Tail number was TA 646 which also served in The Congo in 1967.
Well no, not the same markings. I don’t recall those actually, although I think I have a picture somewhere. Was interesting to watch the crew unfold and drop out of the various compartment hatches.
Russ
Striker
It would be cool if you do find that picture.
Did some work on my Invader. Cleaned up the big props and assembled and cleaned up all the weapons.

Everything was fitting great until I got to the top fuselage aft panel that created a step on one side.

Tenaxed a thin piece of plastic card and when dry I sanded and blended the thin strip. Problem solved.

The inside rear nacelle wall has a nasty seam.

Matched the shape to my scribing template and made a thin plastic piece to cover the aft bulk head

No more seam.

Got the wings together and attached to the fuselage. Now to let them cure propped up with the correct dihedral.

I agree with Plasticjunkie. If you can find that picture I would really like to see it too!
I have some pictures of the B-26K on display at the USAF National Museum. I will try to post those tomorrow.
Ken
Nice work Plasticjunkie!! [Y] [Y] And thank you for taking the time to show how you fixed those problems. It is beginning to look like a Counter Invader.
Ken
Looking really good there, PJ. It’s all coming together nicely!!
TAD
Thanks gents!
Hi Everyone,
I made a purchase tonight and I thought I would share since it is a Vietnam era model. It is the new Italeri 1/32 F-104 A/C Starfighter. Completely new tooling and lots of detail.
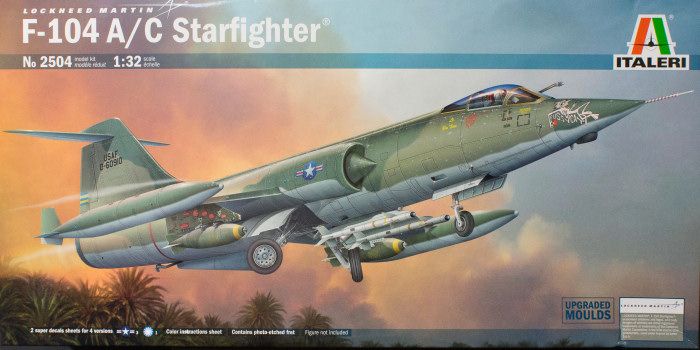
You can read the review here: