‘Green & Gold!’ Fans of the CFL (Canadian Football League) know Saskatchewan Roughrider fans are nothing short of fanatical! How else can a Province with the smallest population host a pro football team?
I was saving the pictures for later, because you asked here are a few more:


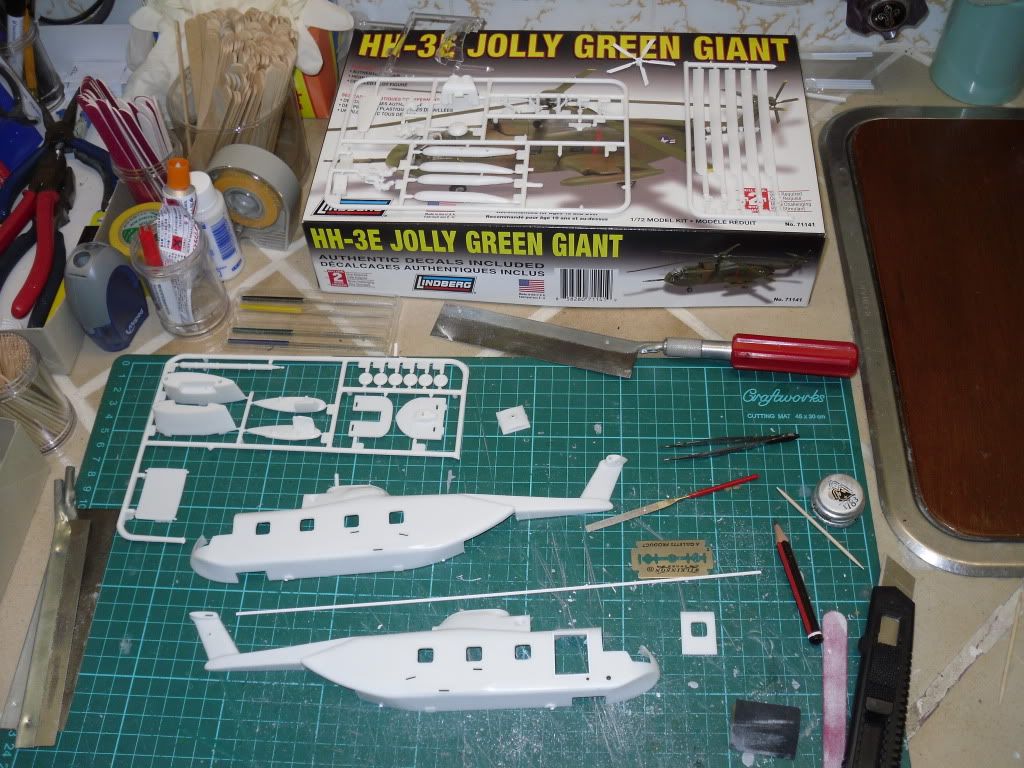
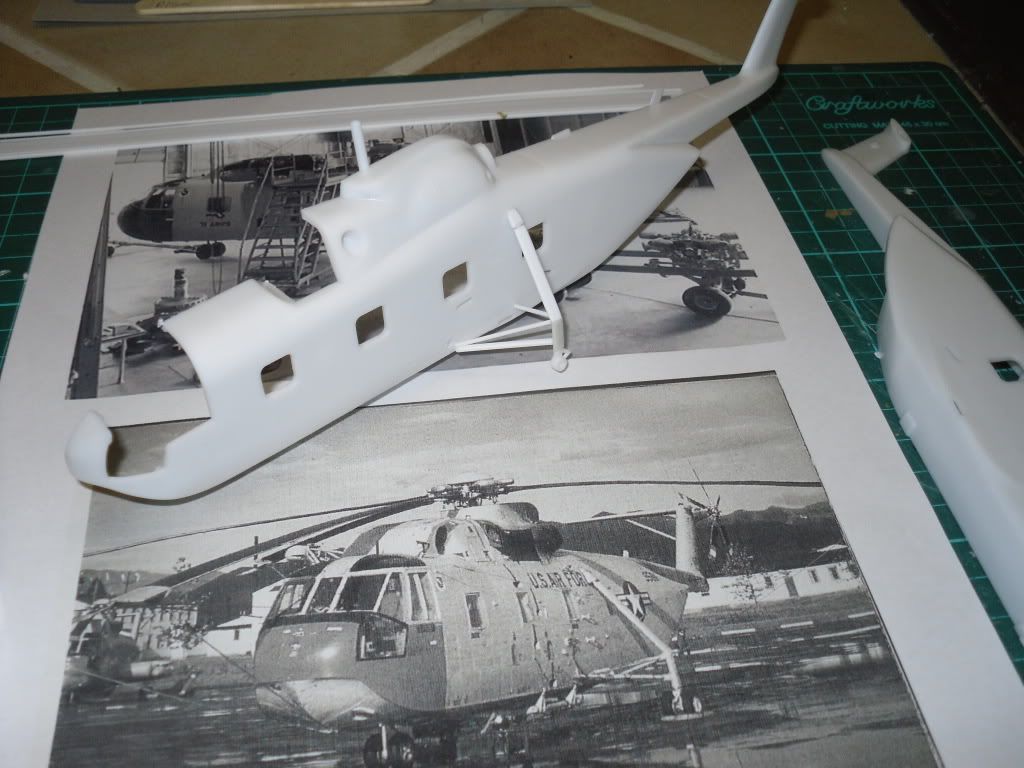
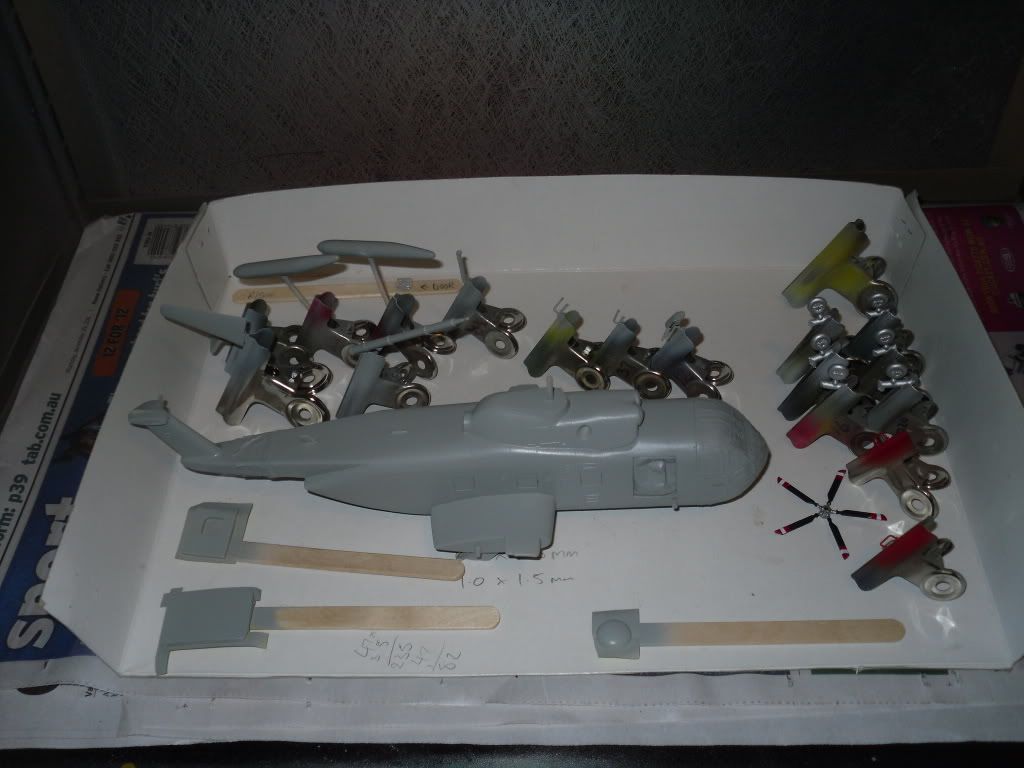
I’ve made a start on my Alaskan Air Command 1/72 HH-3E ;
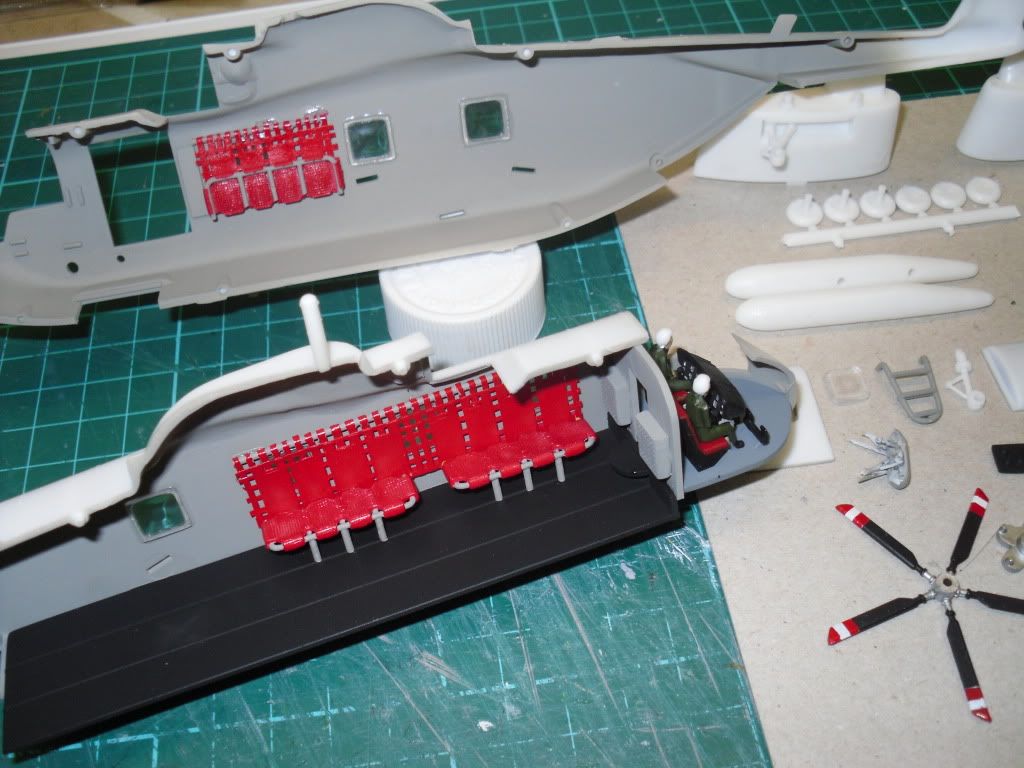
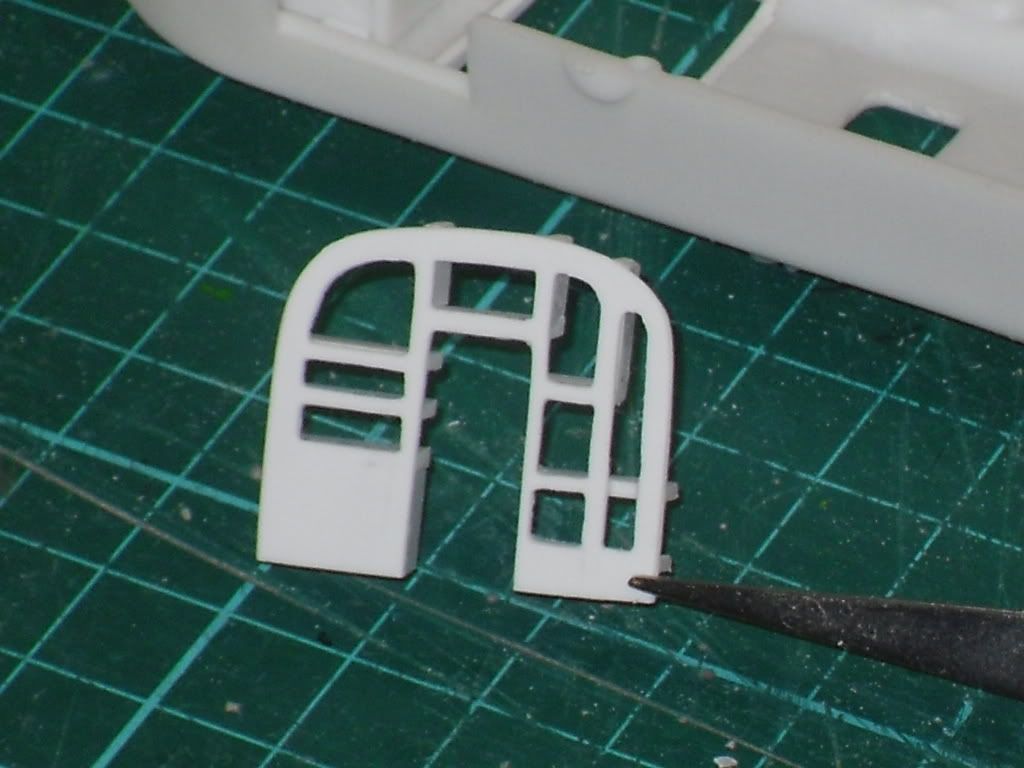
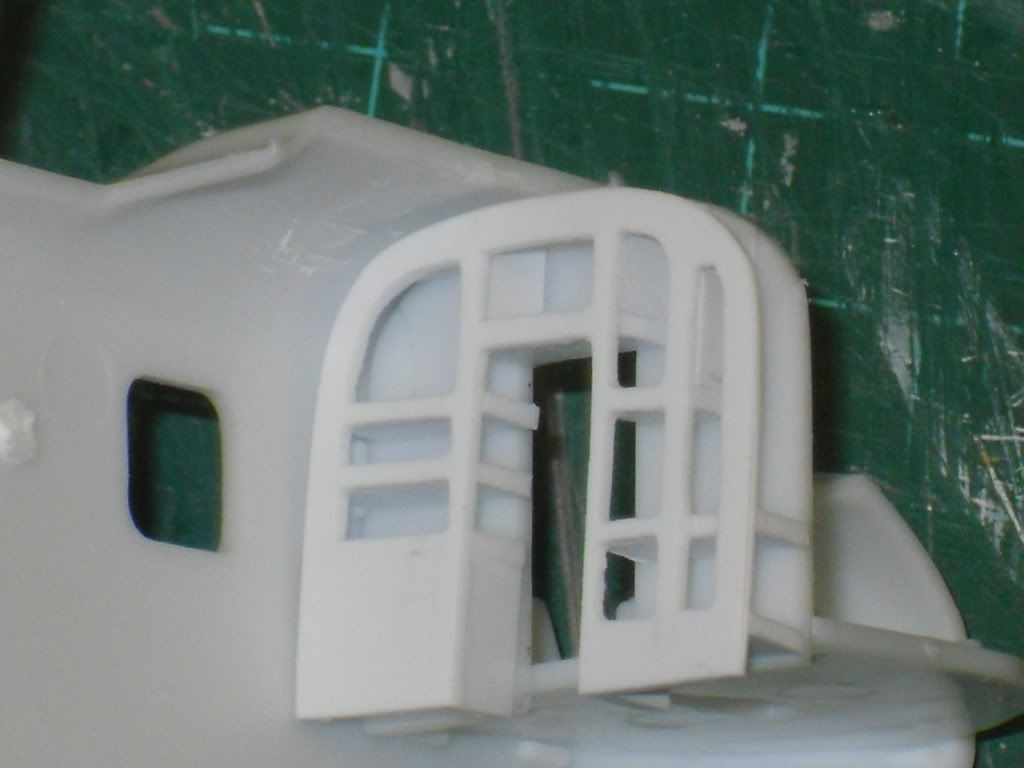
I cut open the side fuselage door and glued some 2mm plastic strip around the opening to make up for the saw cut and filing .
Next I cut the top off an old CD case to use as the cabin floor ;
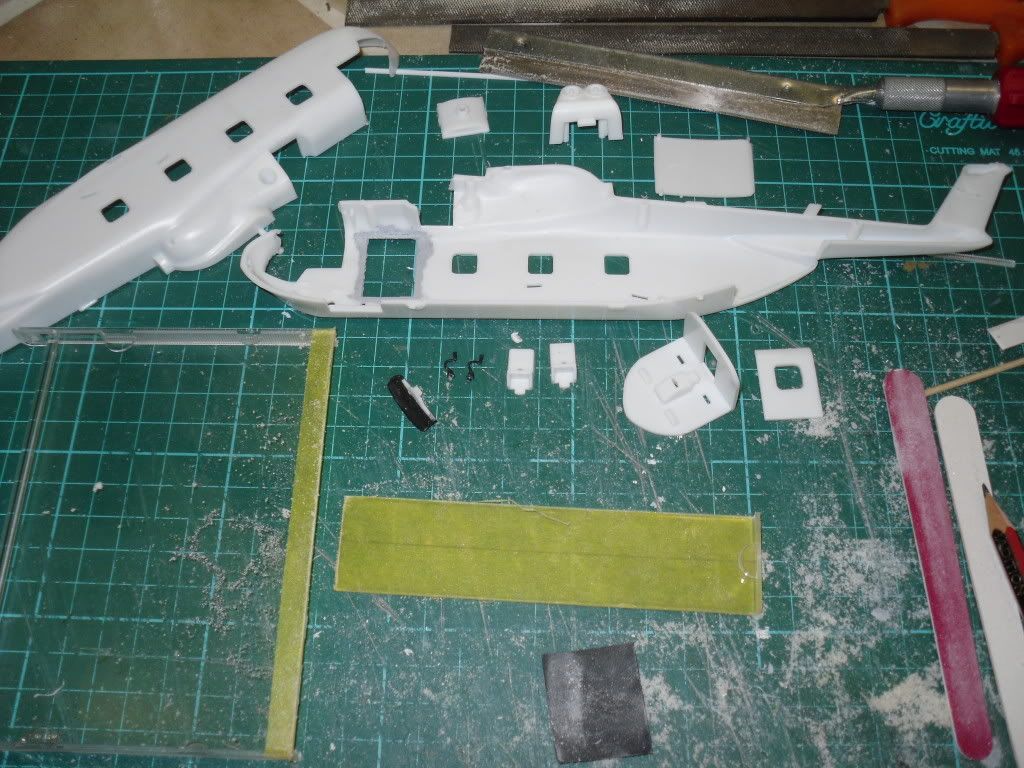
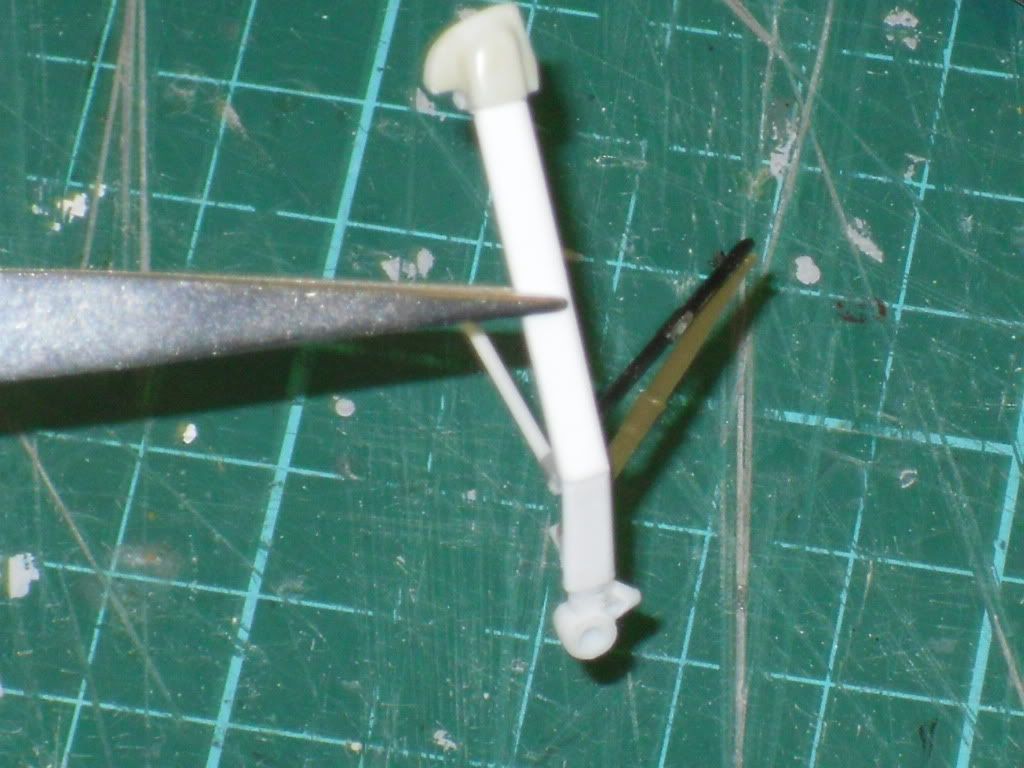
I found a spare instrument consol panel to replace the rather ordinary one Lindberg supply along with some control sticks for the cockpit .
I then made some troop seat backs from masking tape and attached it to some plastic strip ;
The seat bases are from the UH-1 Huey spares box .
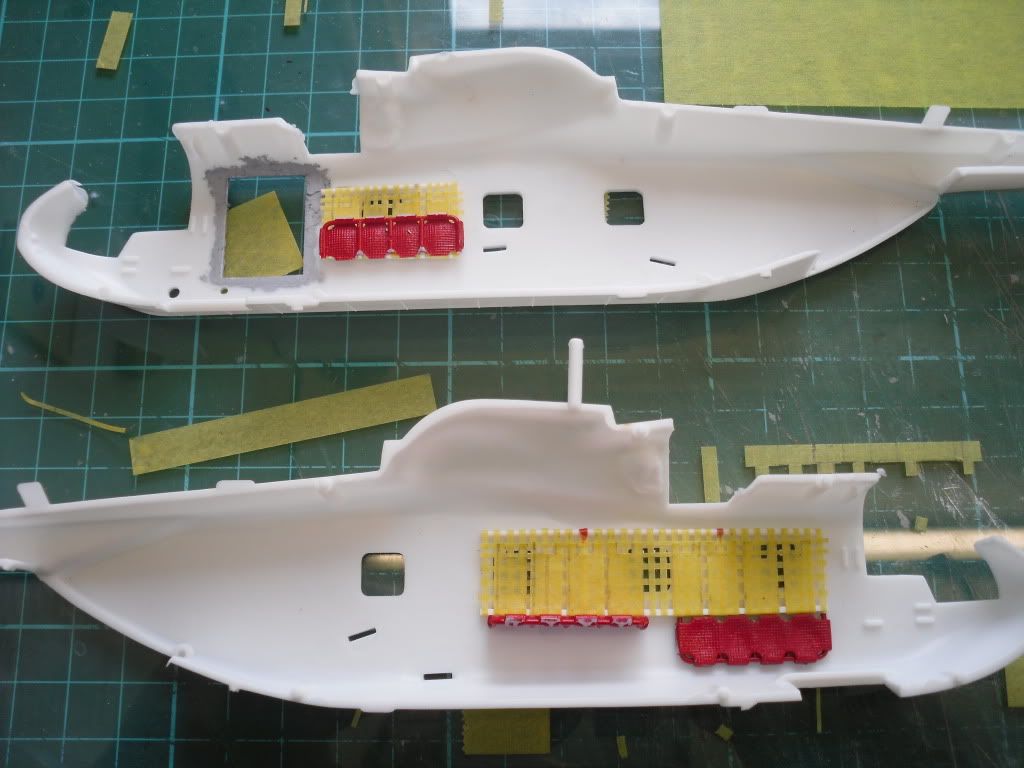
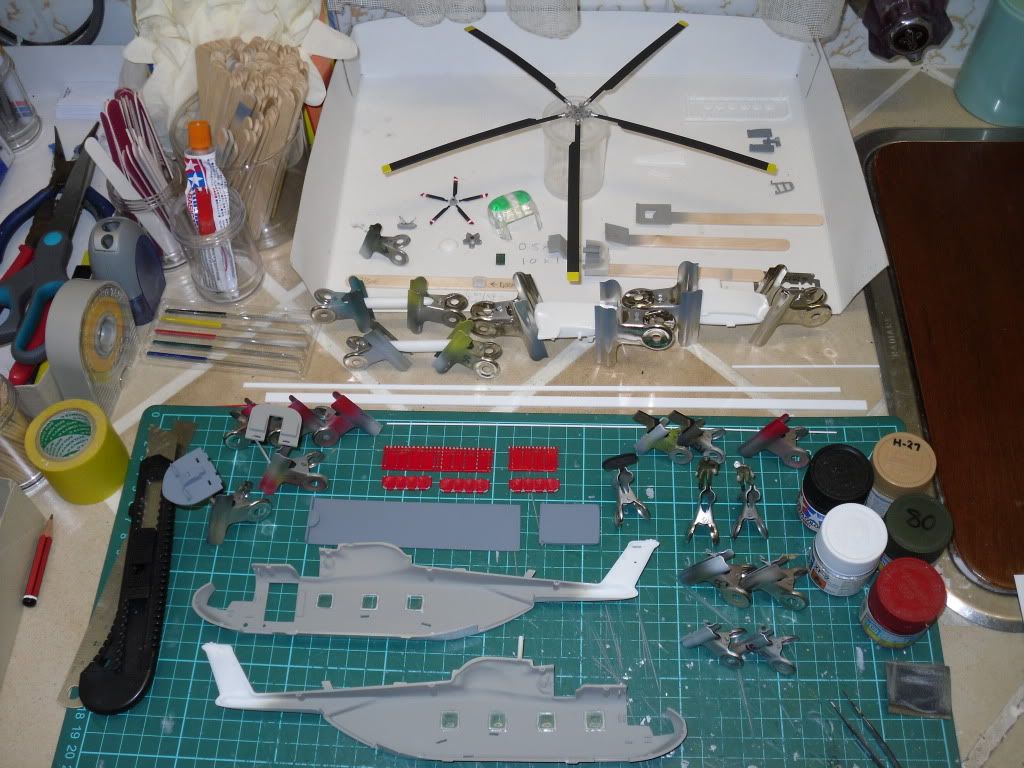
I then glued the rotors to the hub and painted them along with the tail rotors and some green tint on the canopy . The cabin seats I painted red and I found some pilots to use which I’ll give them a fresh coat of paint . The sponsons are glued and clamped as well as the external fuel tanks .
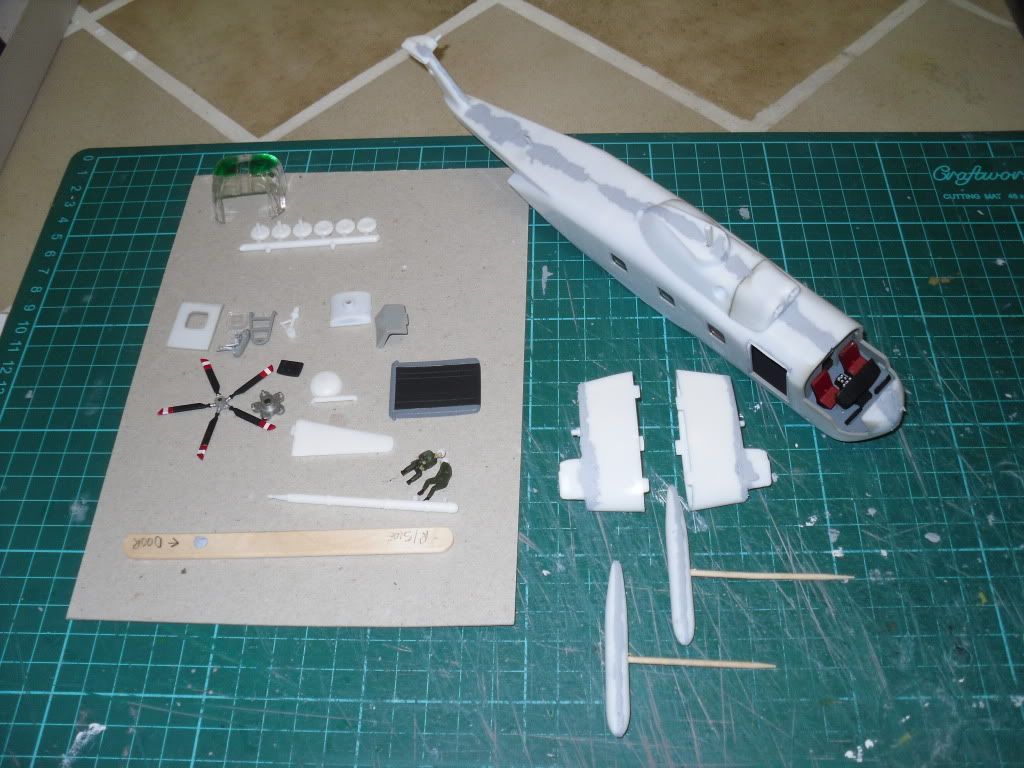
I glued the fuselage windows in place and next I’ll start glueing the interior bits into position , take a pic and close up the fuselage halves .
I’m aiming to complete this little project by New Years , it would be a nice change for me to start and finish a build in a week to ten days instead of having projects dragging on for months , like my other on-going builds.
Thank’s for looking ;
John .
A little more progress …
All the interior bits are glued in place and I’m ready to close up the fuselage halves .
John .
Helo magnific detail work [Y]
It’s the same lindberg kit i have? it’s a snap fit?
Yes , it is the snap-fit kit .
I glued my fuselage halves together , I needed a little tamiya putty across the top of the fuselage ;
Other than that the fit is not too bad .
John .
Some more progress , she’s starting to look like a helicopter ;
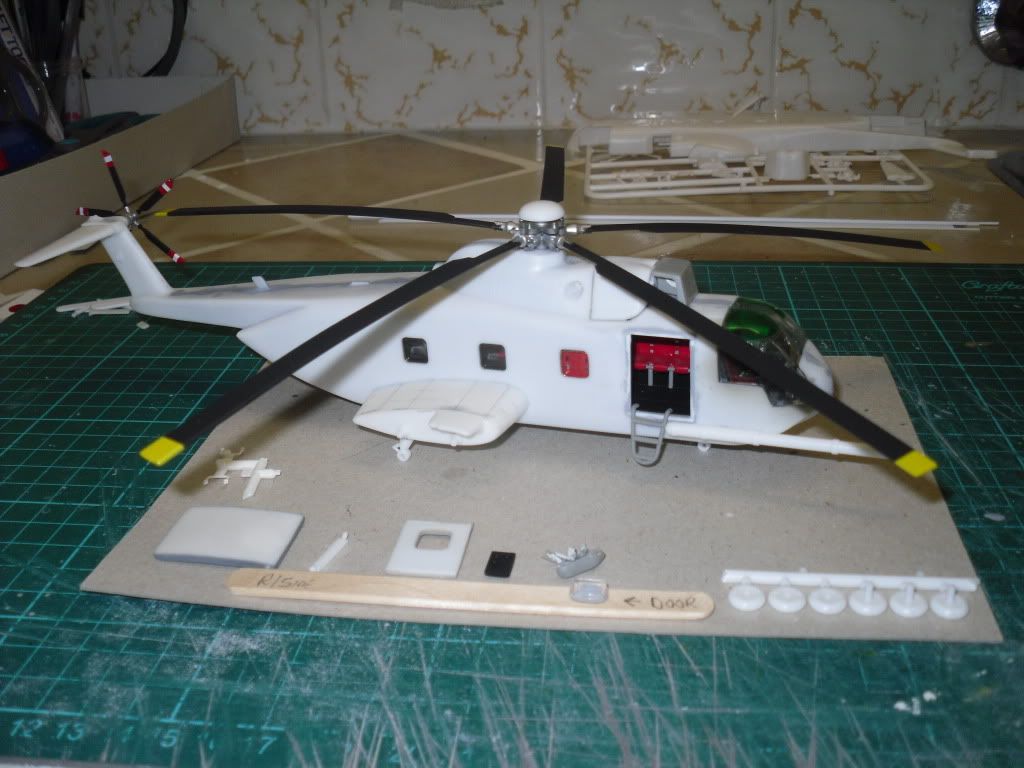
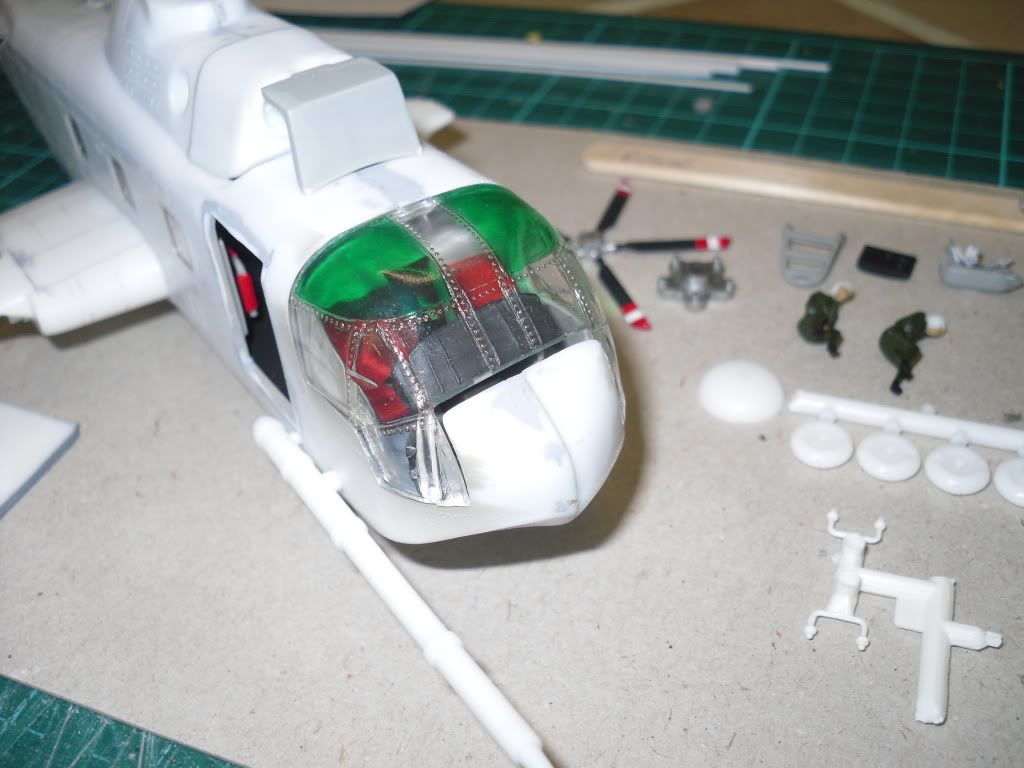
There is a small gap under the front canopy where it meets the fuselage , that I will have to fix with some plastic strip ;
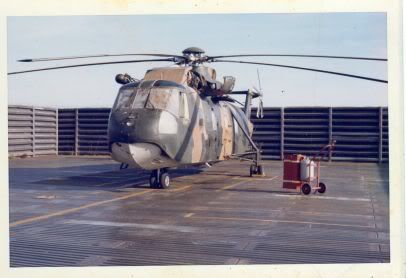
I was looking around the net for pic’s of my Alaskan HH-3E and saw a photo of an Alaskan CH-3E with those fixed main landing gear struts . I wondered how difficult it would be to try and scratch build some as an alternative to the large sponsons /main landing gear ;
I think it looks okay for a first try , it may work out on a second build , so I’ll think about it for a while .
Anyway I’ll fix the gap under the canopy on my current build .
John .
Helo H-34,
You are a modeling machine! Excellent work detailing the non existent interior of the Snap-tite kit.
I managed some progress at a club ‘Build afternoon & dinner’ Will post some WIP’s before 2012!
so omany details on this old kit helo [Y][Y] great start on scratching new gears.
'Its not the beginning of the end yet it is the end of the beginning’ ~ W.C.
To me progress is not in leaps and bounds but in small tweaks and added details. Here is what has been done thus far:
The WASP radial engine was molded in one part. After some debate I decided it could be improved. The cooling fins, fuel line and push rods were scraped off using a #11 & #22 hobby blade. Thin wire was wrapped around each with a exit hole foe the fuel line at the top. The fuel manifold was drilled to accept the lines yet I found the holes were not lining up so they were just cut to mate. The push rods are yet to be added. Small bolt heads were added around the inner housing by adding them with stem through pre drilled holes.

The plastic floor was replaced with wood. Bent staples are CA glued from underneath to become seat mounts. The walls were thinned anticipating frame work yet the reference pictures show thicker insulated walls. Sheet styrene was fit to the wall, windows cut and to be filed to a closer tolerance.

The plan is to drop windows in after painting using the interior sheet as a sill, it will eliminate masking as the windows were to be replaced with thinner material. Because of the simple flat shapes it should be a easy fit. I know its not the usual procedure yet somewhat of a new approach.

Suppressionfire , excellent work on the engine detail and I think your idea about making sills for the fuselage windows to sit against is awesome . I will definitly remember that technique for the future , it certainly will save time not having to mask them prior to airbrushing … “Great Tip” [Y]
I came across of a couple of pic’s last night while looking around the net and stumbled onto this site ;
http://www.rotorheadsrus.us/documents/231.html
CH-3E 69-05811 Blair Lakes , Alaska 1974

CH-3E 67-14718 NKP Thialand 1969-1970
Mmmm ; “Crazy Legs” . Maybe two more builds on the horizon !
John .
Helo H-34,
Thanks, like the Kung-Fu master asked:
‘What is the best technique?’
No technique! ~ Bruce Lee
Always think outside the box, the next great technique is just imagination & effort away. Of course it didn’t happen without a picture and excellent results.
The proof being in the pudding I have never tried nor heard of ‘window sill’ technique, will see eventually if its worth the effort.
Speaking of out host with the most… Ask him to update the roll call on page 1 if ya’ see him @ the LHS!
I got the HH-3E all masked and started some preliminary airbrushing ;
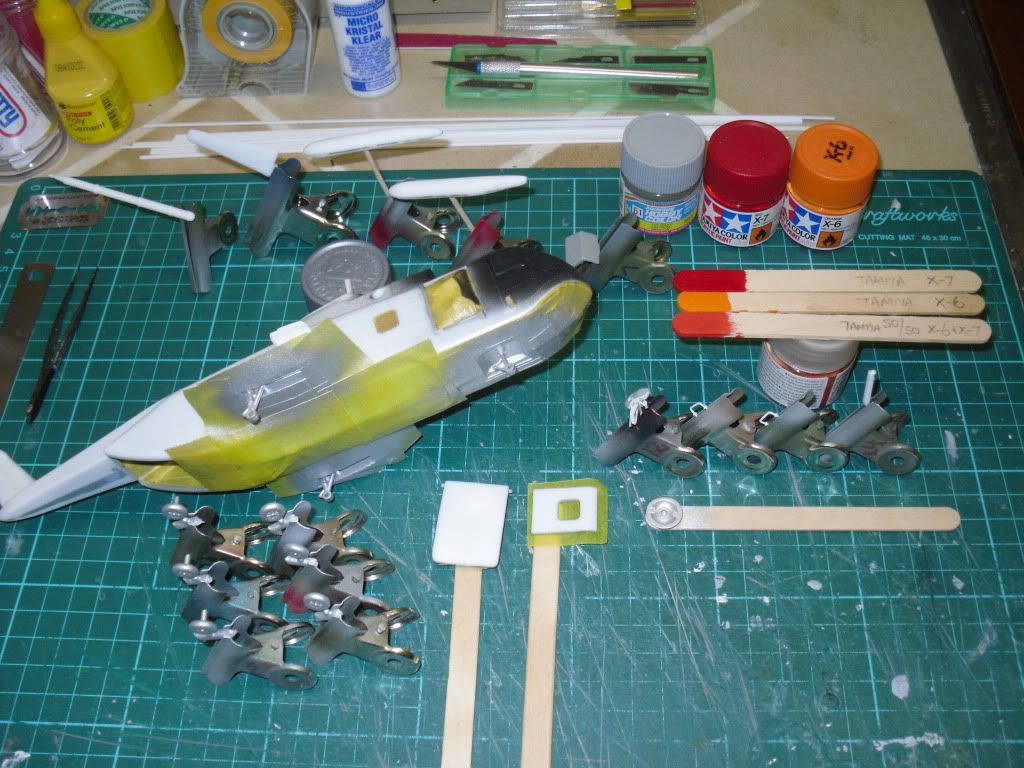
A little silver on the landing gear struts . wheels and wheel wells , which is what Wolfpak’s decal and painting instructions suggest . Also a couple of coats of flat black on the canopy frame lines , so when you look through the canopy you will see the black on the inside looking out .
I also tried mixing some Tamiya Acrylic X-6 Orange and X-7 Red (50%/50%) for the International Orange color . It looks okay on the stick , so I’ll give it a go tomorrow on the nose and tail boom .
John .
nice updates helo, the lindberg kit now looks more serious than from the box (i search for mine but probably was destroyed and gone in the recycle bin) [:D]
Suppression even me think to a similar mod on radial engines but never try till now. Your result is really good and nice wood on dancefloor [H]
My paint mix of 50/50 Tamiya X-6 and X-7 for the International Red/Orange worked out nicely ;
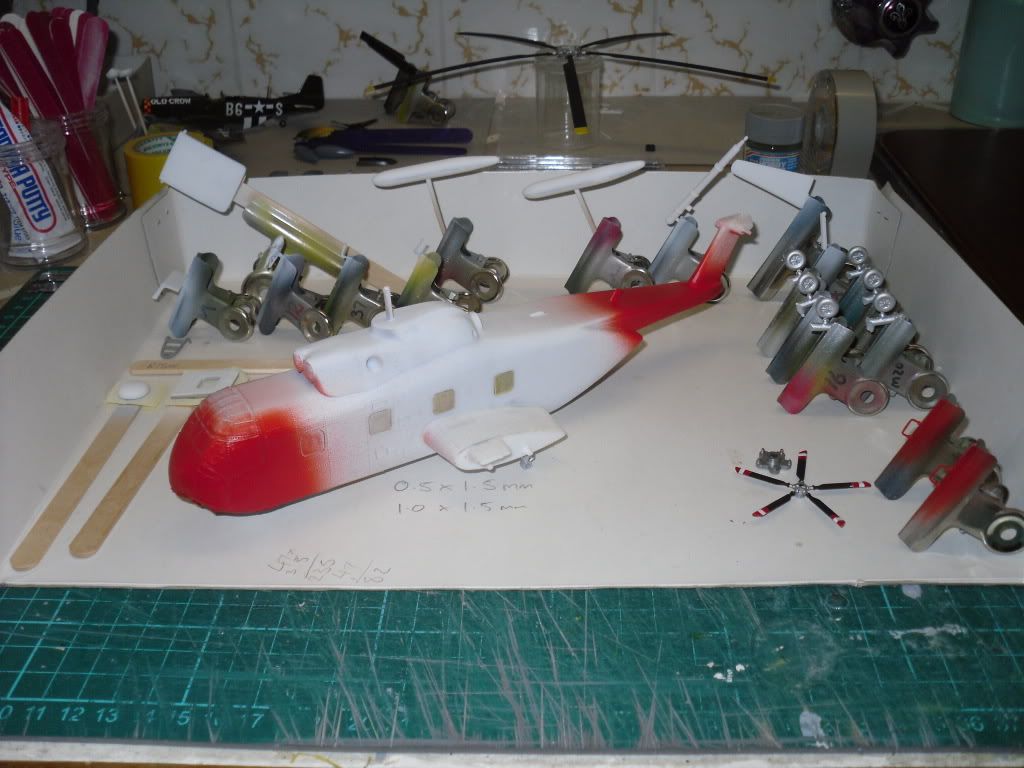
The next day I masked and gave the HH-3E a few light coats of ADC Gray (Gunze H-61) ;
Today I’ll mask for the flat black around the engine exhaust and lower canopy frame lines .
John .
I have completed the rest of the painting on the Alaskan Air Command HH-3E ;

Decals will be next .
John .
I haven’t started the decals on the HH-3E as yet , instead I decided to do some preliminary work on the next CH-3E “Crazy Legs” build .
As with the fist build I cut open the cabin door and drilled out the two fueling points on the left fuselage ;

Then I cut some sheet plastic the same size as the cockpit bulkhead and drilled and filed some openigs for shelves ;
The equipment rack should look okay once it’s painted along with rest of the fuselage interior ;
Next I started on the fixed landing gear struts . I used some spare support strut brackets cut from an old Revell Seaking kit ;
I also added some old H-34 landing gear struts cut to size as extra suppot pieces ;
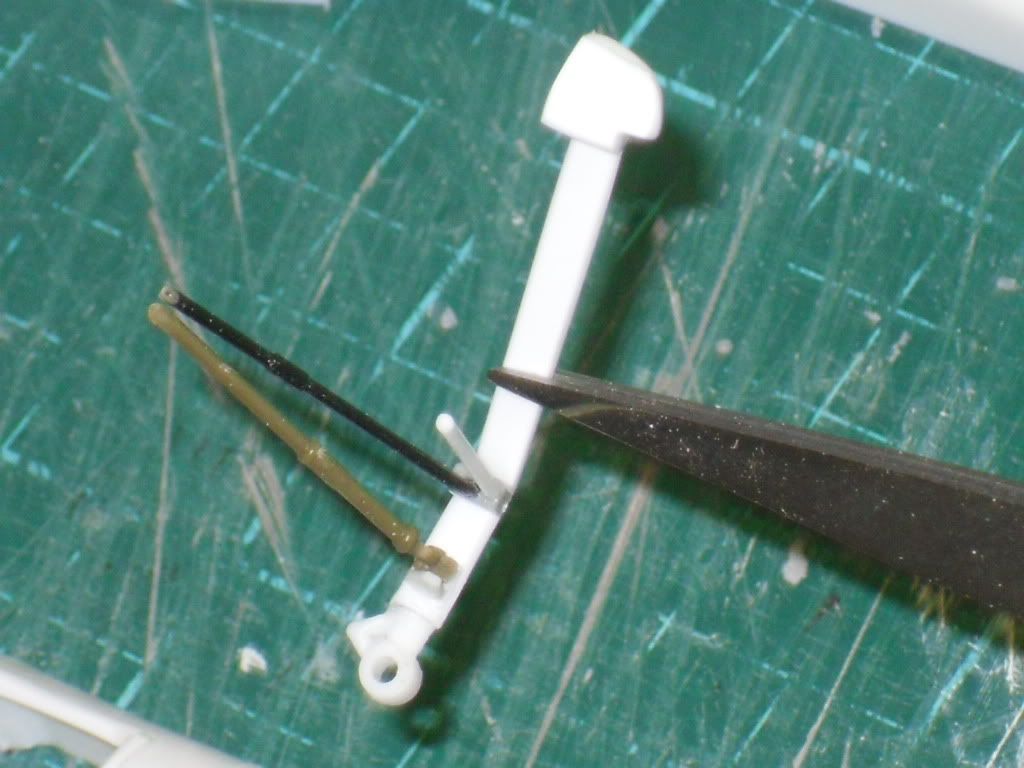
The fixed style landing gear seems to look the part ;

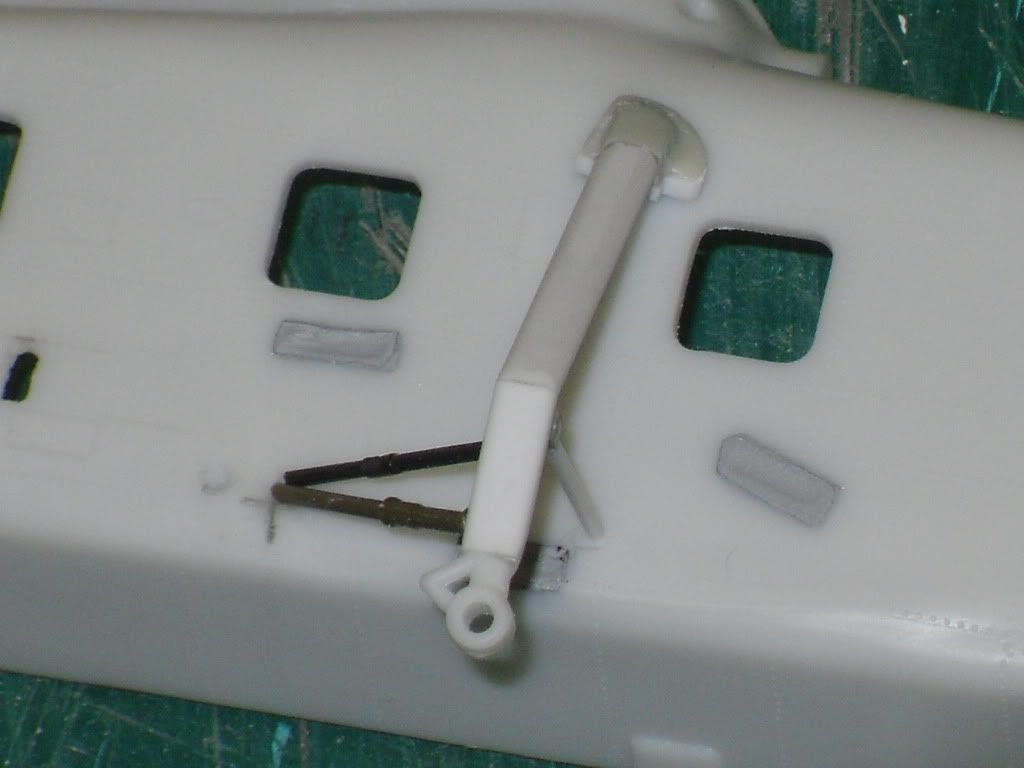
It was a lot of trial and error and it took me a lot longer to do than I first thought but I’m happy with the results ;
Next I’ll cut some plastic for the rear cabin floor and work on the rear cabin seats as well .
John .
Decals are on the HH-3E first build ;
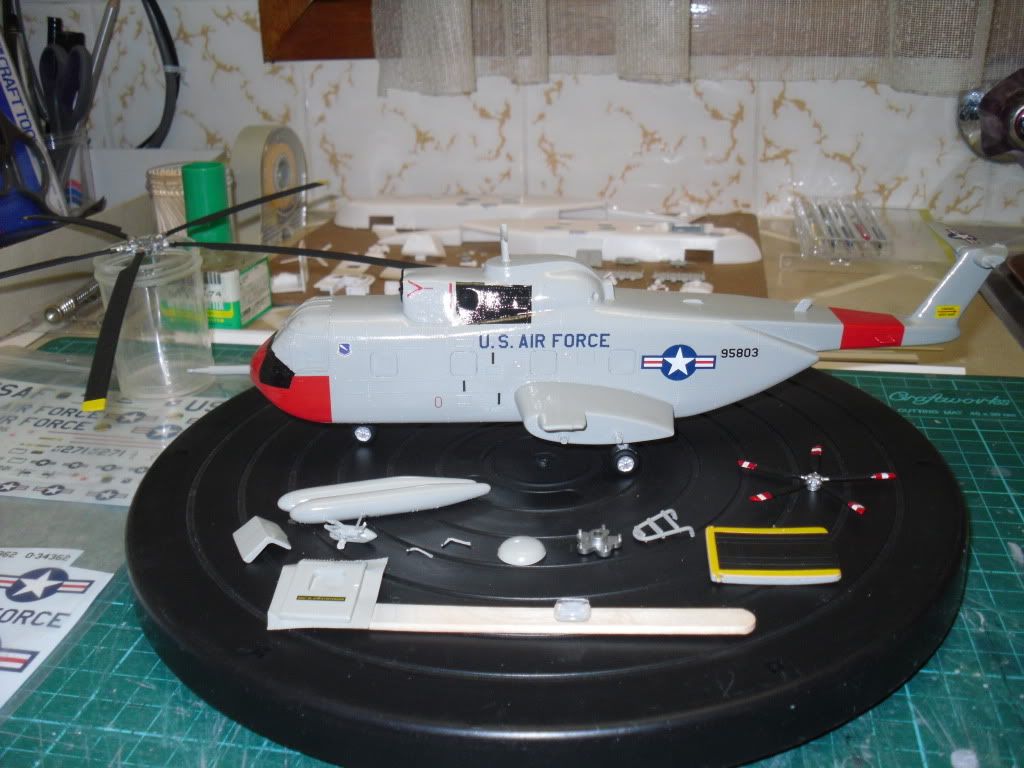
Tomorrow I’ll give her a couple of coats of clear flat , then glue on the last bits and post finish pic’s .
John .
Great progress helo [Y] the scratched landing on the second looks good
Here’s some pic’s of my completed HH-3E Alaskan Air Command SAR Helicopter .
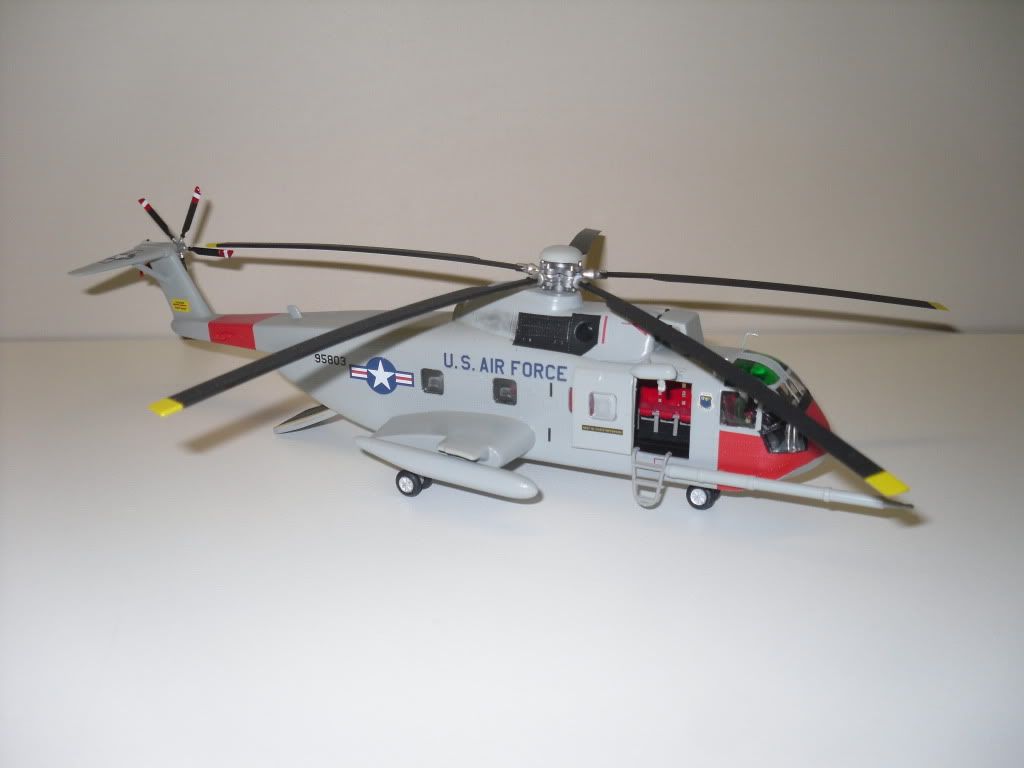
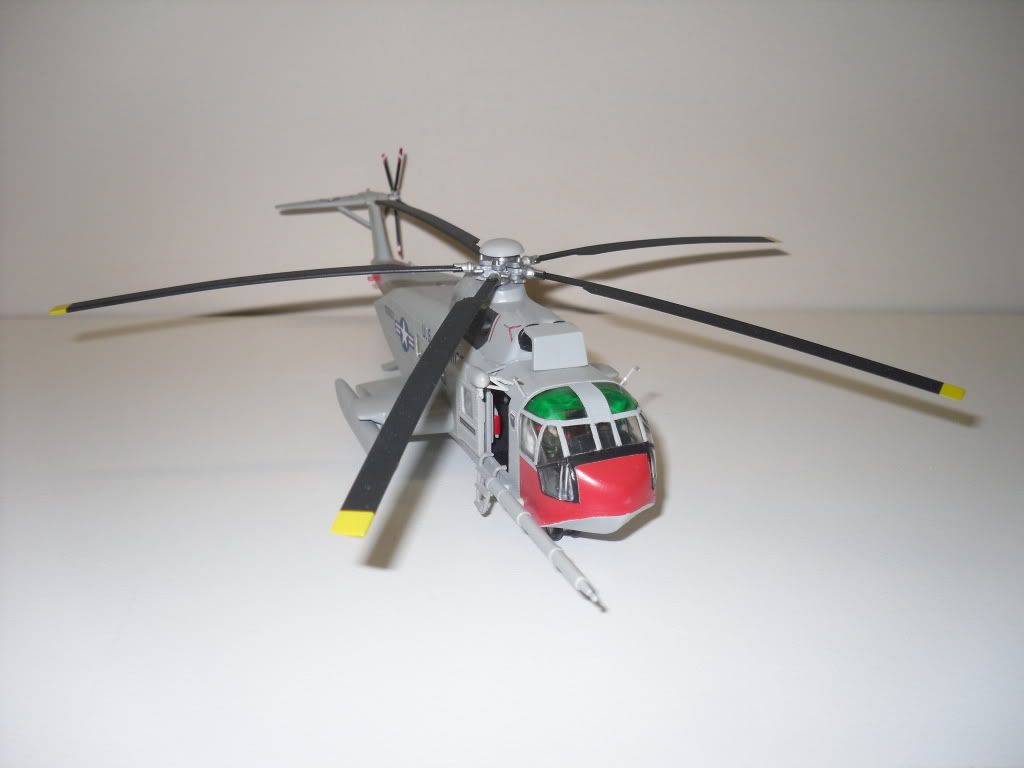
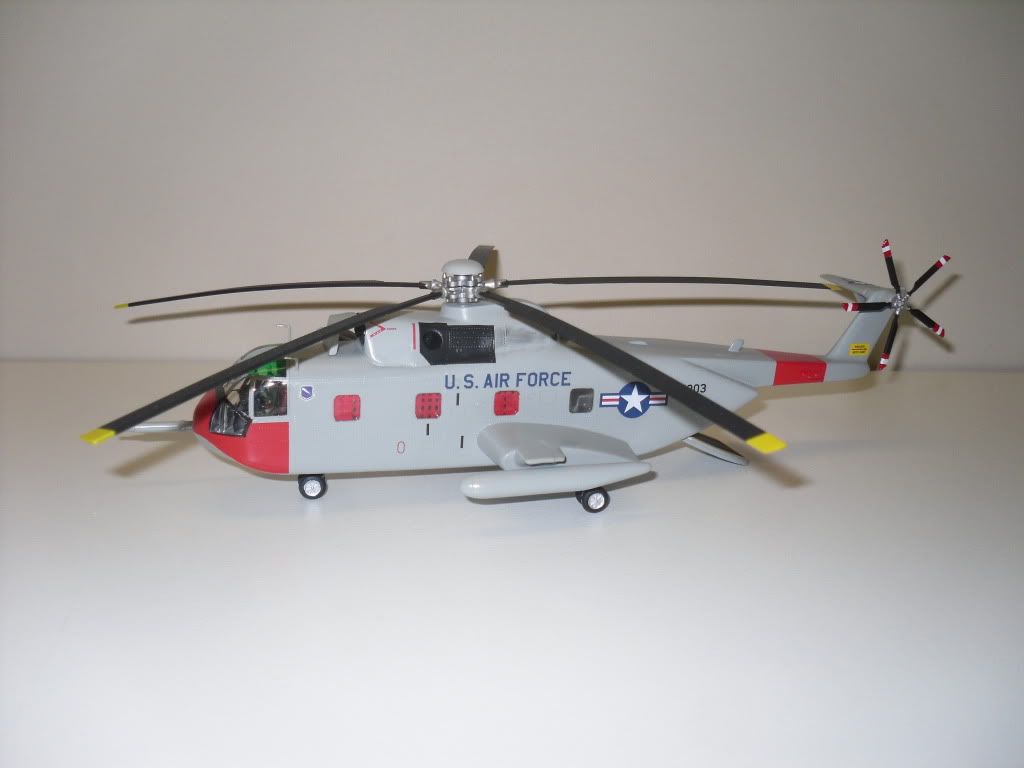
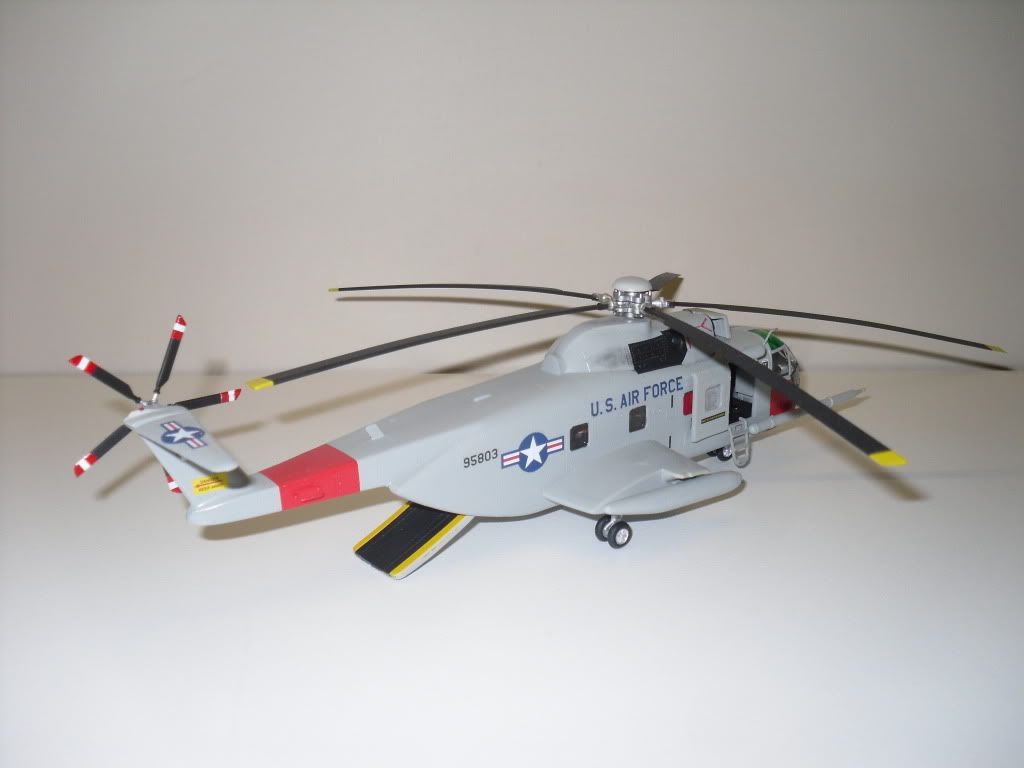
I enjoyed the build , in fact it’s the first time in a long time that I actually finished a build just several weeks after starting it . All my other on-going builds seem to drag on for months , so I’m quite pleased with my efforts and I hope build (2) “Crazy Legs” goes as good as this one .
John .