Sdkfz 234/2 "Puma" (Pics)

Finished this one up today while sitting at home waiting for the dealership to tell me the usual maintenance was done on my car. It’s funny about the designation on this vehicle…it’s known as the “Puma” but it was never officially designated as such…kind of like the “Hetzer”. I figured I should get this one built before DML releases their pending catalogue entry just so I can have some defense against buying another 234 kit in their series…or something like that. [:D]

Base kit is the venerable Italeri 1/35 Sdkfz 234/2 Puma with a JR barrel to replace the underscale kit offering. Everything else is straight OOB. Finished with MM enamels and weathered with Mig “Gulf War Sand” for the dust on the tires and fenders.

That’s a really nice bit of work, Bill.

[#ditto] 2 [tup] [tup]

Bud

This is some great work, here! I’m likin’ this a lot! A great finish, Bill! [^]

Personally, I would like to see more ‘dust’ effects! Some well applied ‘dust’ would really turn this baby into a real show-stopper, in my view! Nonetheless, it’s superb, as is! [;)]

Bill, fine job as always. Your builds always have that nice subtle finish. One question, since I’m building the same without the directions more-or-less. The straps on the jerrycans were base color?

I like it, I’m about to start my Italeri 234/4

Will

Great looking puma!

I have a soft spot for this AC, it is the first kit i build when i picked up the hobby again, some 3 years ago…

I like the subtile chipping and weathering, great job. I think it would bennefit from a nice base though [;)]

Jan [:)]

amazing!

WOW, That is First Class, wish I could build like that [yeah]…Kenny

Nicely done. I’ve got the Tamiya (I think its an Italeri re-box) version of this that I picked up while living in Okinawa. Thanks for the inspiration. Did you run into any problems or surprises while building it?

Appreciate the comments!

Fingers,

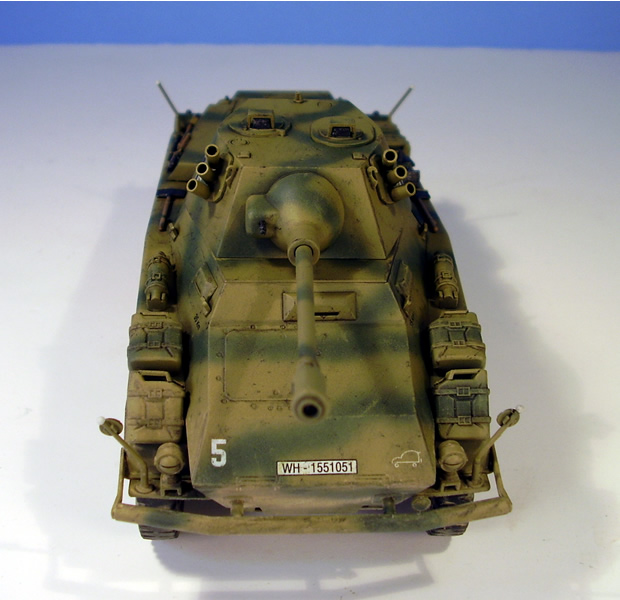
I know the heavy weathering/dusty look is in vogue and I like/enjoy the aesthetic that various builders are able to produce, but since my finished items go into a display case as stand-alone items, that kind of weathering always looks out of place/context to me, so I lean towards the lighter/subtle side of things. They would never be what you would call “factory fresh” and the camera pics/lighting has a tendency to mute some of that, almost to the point of non-existence, but it’s there. The dust/dirt effects are there in varying degrees on the tires, underside, running gear, etc. along with the wash effects and slight scratching to the upper hull. I don’t tyipically apply the 20km road march dust effect unless it’s on a base to suggest that sort of activity. Just my preferred style. [:)]

Tigerman,

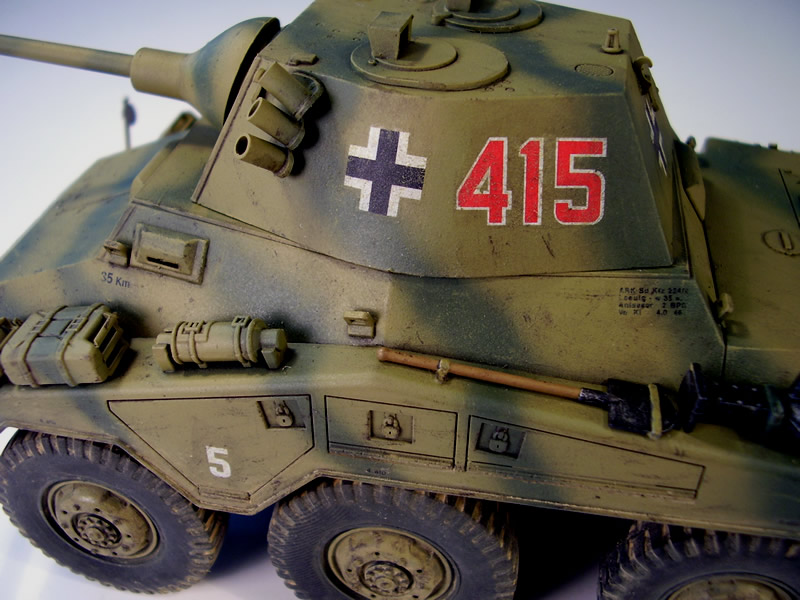
The few reference photos I’ve dug up on the 234/2 indicate that the straps holding the jerry cans were metal with the buckles and were painted hull color. While they look like leather straps, the photos of vehicle 1111 in GroundPower 7 (July 2000) clearly show they are strip metal type and match the hull color/camo pattern.

Schweinhund,

I’d considered that, along with some foliage around the superstructure and turret, especially since there are some great dio potential shots with the hatches open and the commander sticking out of what looks like a mobile hedge! [(-D] I went half-way though and put the scratching/chipping around the areas where the foliage loops are but minus the ropes that would’ve been used to secure it.

LemonJello,

There are only two areas of the kit that are problematic IMHO. The first being the lower hull to upper hull fit, depending on how well yours is molded, there may or may not be a gap at front, rear, or both, but it was easily fixed with a little putty/sanding work. The second is the gun barrel and muzzle brake. The muzzle brake is undersized, being the standard PaK 38 barrel and not the larger version used on the KwK mounted in the Puma. A third area to watch out for are the wheels/tires and suspension. The wheels/tires are molded in two halves and they don’t always mate up correctly. This is easily solved by sanding the interior circular portions that are supposed to mate up but it requires a lot of back and forth in sanding, test fit, sanding, test fit, etc. and each wheel pair behaved just a little differently from it’s neighbor. [:D] It was a fun build though, a nice break as 95% OOB kit that I originally started as an “exhibition how-to” while our IPMS club was doing a community outreach day/display at the local mall. Figured people should see what’s required to achieve the end product, so I had this kit, glue, knife, pair of nippers, pair of tweezers, tube of putty, one sanding twig, and some toothpicks and that’s it.

I did use some foiliage on mine, didn’t do a base though[:I]

Here it is (don’t laugh, it was my first model in 10 years or so [swg])

cheers, Jan [;)]

I agree with ya’, about how digital photography cannot highlight the subtleties of weatherin’, I have the same problem with my camera.

As regards basin’ these things, I’ve always planned on usin’ a suitable dusty or gravely ground effect for all my builds. I believe that if your gonna’ base ‘em, why not do somethin’ simple with the base, like create some ground effects! I cannot stand to have ‘em sittin’ on a plain base or surface! [;)]

Thanks for showing the pics. I just opened the dragon 234/4 about 2 hours ago. I had images in my mind of the old italeri offering. I built it about 15 -16 years ago. I can vaguely remember the suspension. The new dragon kit looks like something I would be afraid to build in case any of that fine detail would be lost.

excellent work again, I wouldn’t mind having an old italeri to do a comparsion. The italeri was the best and only for a long long time, its going to be hard accepting the replacement.

Congrats on a fine build.

Regards,

Terry.

Thanks for the heads up Bill on the straps. Also, do you have any good refs for camo jobs on this guy? I still want to do little squiggleys, bu am not sure that would be appropriate. Thanks.

Terry,

One of the reasons I built it was so I could have something to compare the new DML kits against since I’ve got both the /4 and the /1 in the stash. [(-D] Kind of a case of know how good (or bad) you’ve got it depending on the perspective. The DML kits tend to have a lot better detail through lots of parts, the Italeri is a simpler kit to be sure but was the best there was for a long time, so it’s kind of homage build too. [:)]

Tigerman,

I’ve got the Groundpower issue as a PDF, 14 MB in size. If you send me your email address I can zip it up and send to you or even put it up for FTP if you want it. Let me know either way. Other than that, there aren’t a whole lot of references out there on the 234/2 since none survived the war intact.

very nicely done bill, dont you just love these german armoured vehicles, im just putting the finishing touches on the italeri 234/4 as we speak, these italeri kits may be old and a bit simplified but i think they still build up very nice and yours is exactly what im talking about, great all round looking build.

Ron,

Appreciate the comments! The irony of this particular kit is that it was one of the oldest in my stash…purchased back in 2003 for a GB here that I had to drop out of and it’s been sitting on the shelf ever since waiting patiently for its turn…which came, also ironically, beacuse of the impending DML release of the same vehicle. It’s been one of the most enjoyable builds I’ve had in a while, the Italeri stuff may not be up to DML’s latest standards but that doesn’t mean they are junk either. [:D]

Played around a little with my “super macro” settings on the camera to get some closeups. They’ve been added to the original post. [:)]

Looking very good![tup]