Hi all,
My name is Eric and I’m a sci-fi modeler. (“Hi, Eric. . .” [:D])
I’ve had a love for Star Wars ever since I first saw it back in '77. Yes, I’m old enough to remember seeing it in the theater back then, and it’s shaped my hobbies ever since. These days, I’m mainly into full size prop recreations, but I’ve always had a passion for the Millennium Falcon. It’s just one of those designs that got burned into my brain and has never gone away.
Over the years I couldn’t tell you how many of the old AMT/ERTL Falcons I built, improving my skills with each one, trying new paint techniques, etc., but as I got older, I slowly came to realize that that little kit had many shortcomings. Mostly in the detail department. As more reference of the ILM studio models became available, I got more dissatisfied with the A/E Falcon. Those of you familiar with the kit know its issues, I’m sure. The “soft” molded-on detail, the too-high sidewalls and proportionally narrow cockpit tube, things like that.
With the internet came a slew of reference for sci-fi models, and for the Falcon I came across a site by Tim Ketzer, showing how he scratchbuilt his own version of the 32" ILM model. I was totally blown away by his model! I had done some small mods to models before, and had read about scratchbuilding, but I just stared at the pics/build logs on Mr. Ketzer’s site for hours at a time. I began to wonder if I could do something like that. . . after all, I was a grownup by this point. [;)]
I was living near Norfolk, VA at the time the very first Magic of Myth exhibition took place in Washington, D.C. and I took a 3 hour ride up there with my wife to check it out. I believe this was around 1997, and they had so much amazing stuff on display! But the high point of the exhibit (for me) was the original 5 foot ILM Falcon!! It was under a tremendous glass case. . . and it was sexy. I took close to 70 pictures just of the Falcon that day.
A couple of months went by and I decided I’d test my scratchbuilding skills. I used the photos I took in D.C., plus whatever else I could find on the net, and built one of the “endcaps” of the Falcon’s docking arms. I used some .020" and .010" sheet styrene, and a lot of trial and error.
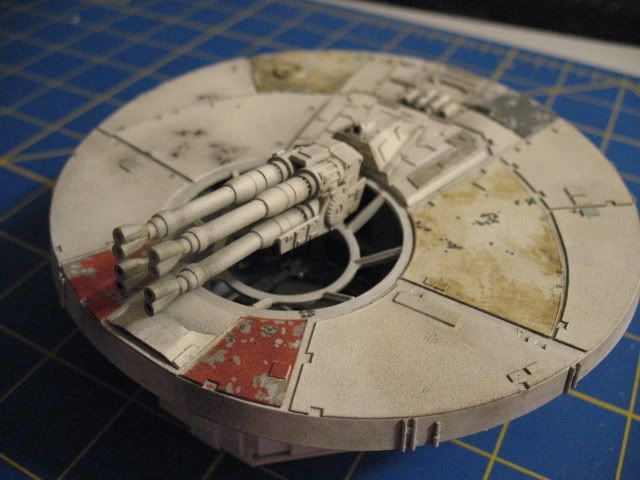
I thought it came out pretty well, so I continued with the other one. Then I built the upper gun disc, and taking a giant leap, decided to do the whole ship. I used the techniques that Mr. Ketzer described; taking 2 big sheets to make the basic body shape, then attaching curved ribs for the curved hull section, then gluing down more “pizza slices” of styrene to form the curve. It was then a long, slow process to do all the detailing.
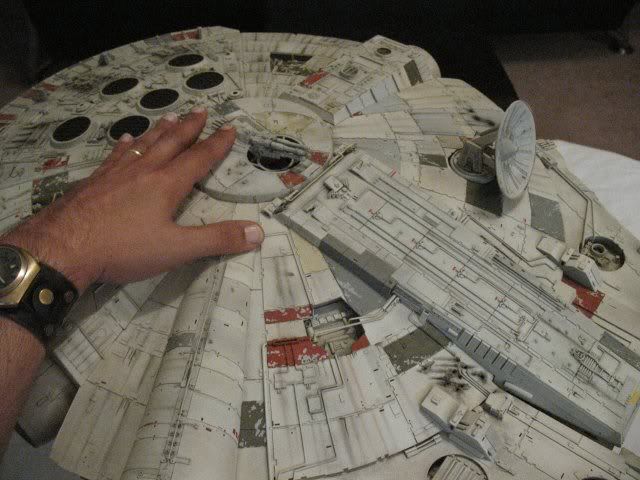
Sheesh, enough rambling. . . here are some pics. Here’s a shot with my 1:1 scale hand to show the size of the Falcon.
I always liked the 5 foot ILM model more than the 32 inch, so I decided to incorporate the detailing of the 5 footer into my 32 inch model. That meant a lot more scratchbuilding than kitbashing. I tried to get as close as I could to the details.

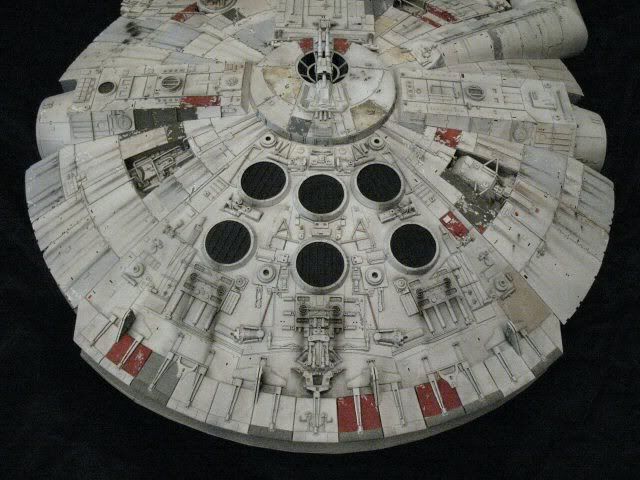
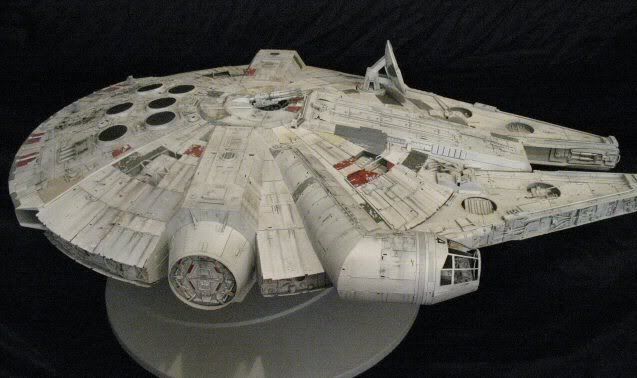
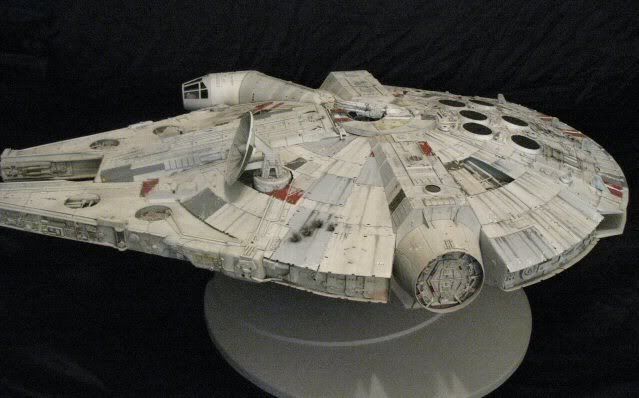
Here’s a couple of high profile shots.
This shot shows that “endcap” I mentioned above. It was the very first section completed on the Falcon.
The Falcon was painted overall with a Rustoleum color called White Pine. I think it’s part of the Decorator line. It was broken up by painting different panels with several gray/rusty shades, then further weathered using powdered pastels. Not sure if all the color variation comes thru in these pics, but some of the tones are very subtle.
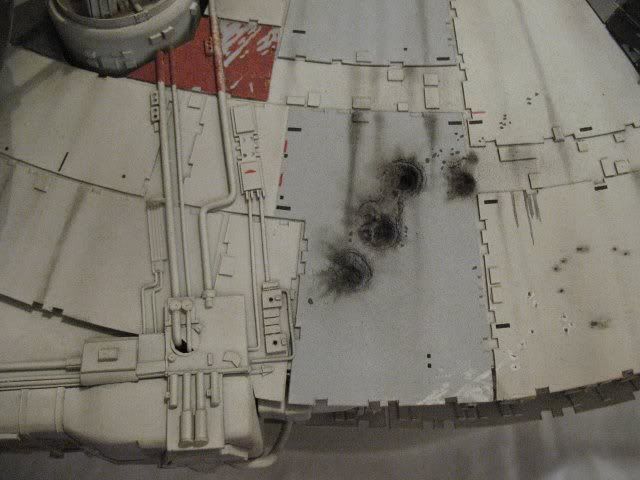
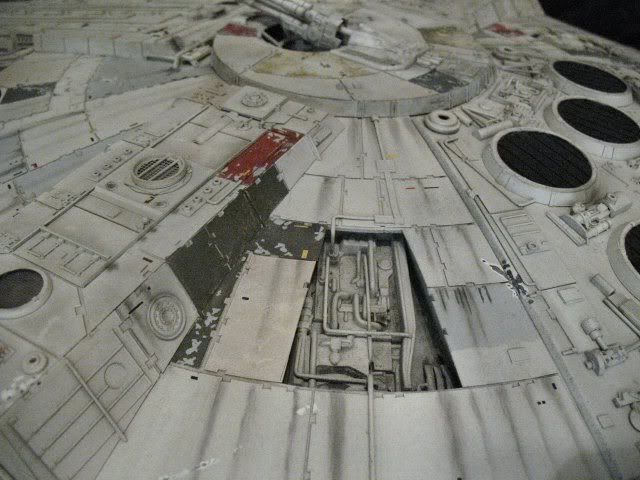
Here’s the forward port quarter, showing the sensor dish and those big blaster hits.

The blaster damage was planned out early in my build. I added some extra sheet styrene inside the hull, then when I got the section completed, carved out the pits with a Dremel bit. The edges of the thinner hull plates were nicked and twisted up with an X-acto blade. The weathering is all done with pastels. Heavy in the center, and fading outward.
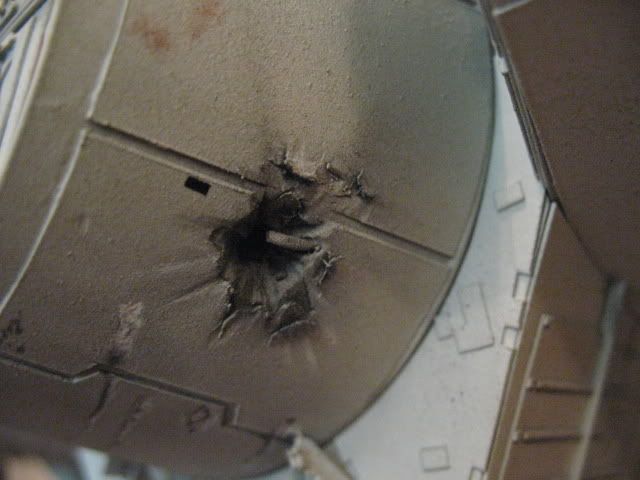
Other hull damage was done using the same techniques. Carve, then weather.

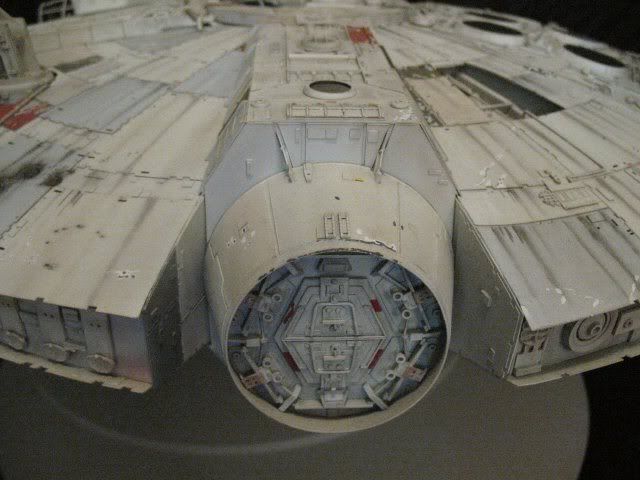
I used some small kit parts in different places, but I’d say 80 to 90% of the detail is scratchbuilt. On the engine deck, I used more kitbashing than on any other section.
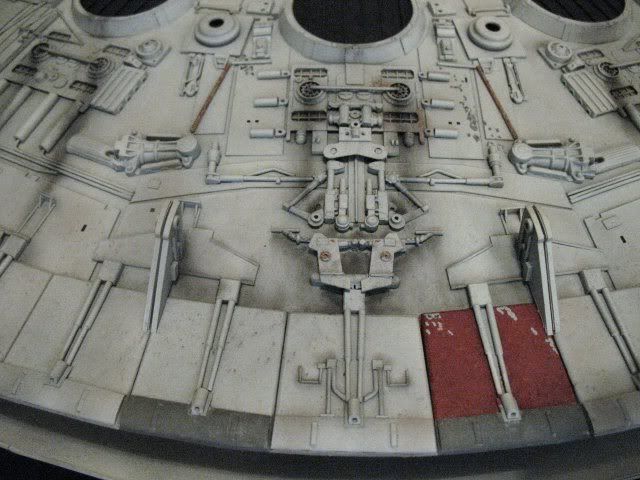
All of the dark streaks all over the hull were added using pastels as well. I just used a fine brush and swiped it down/outward a couple of times till they looked dark enough.

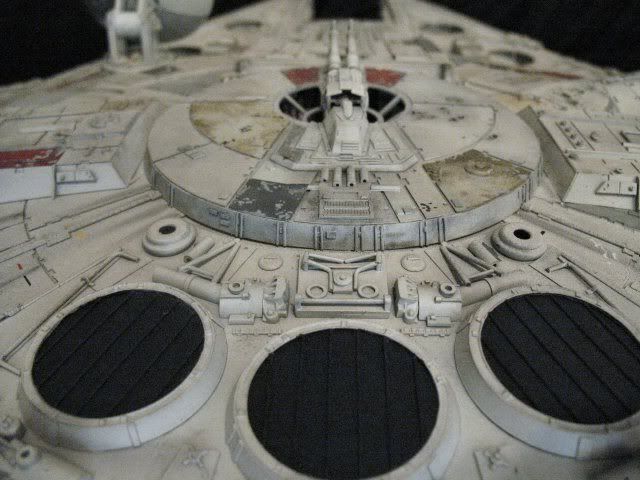
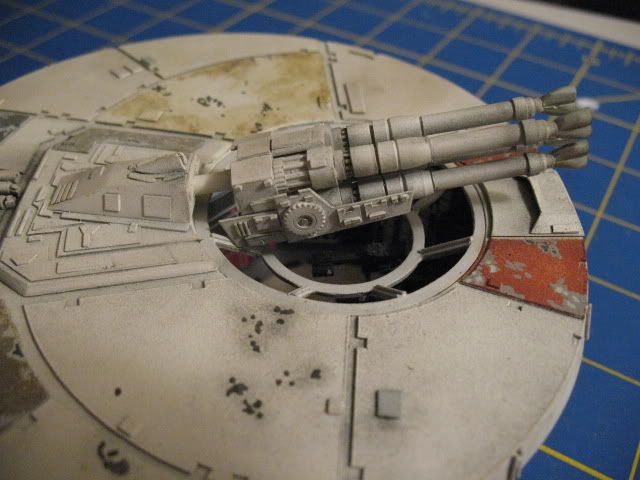
Here’s some closer shots of the upper cannon. Almost every bit of this is scratchbuilt, with the exception of the small round bit on the gun’s sideplate (that was a small-scale wheel) and the barrel tips (parts from a Tamiya 1/20 racecar.)
The small markings you can see all over the hull were done with dry transfers. I had a couple of sheets of plain black lettering, and got some sheets made for “pine derby” racers, then cut them up to match the full-size Falcon as closely as I could.
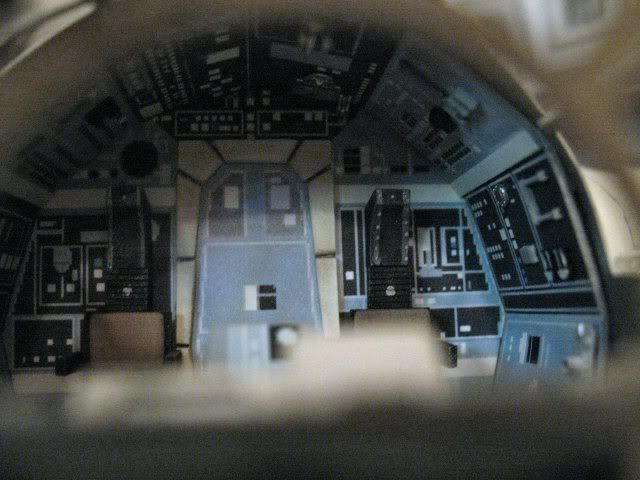
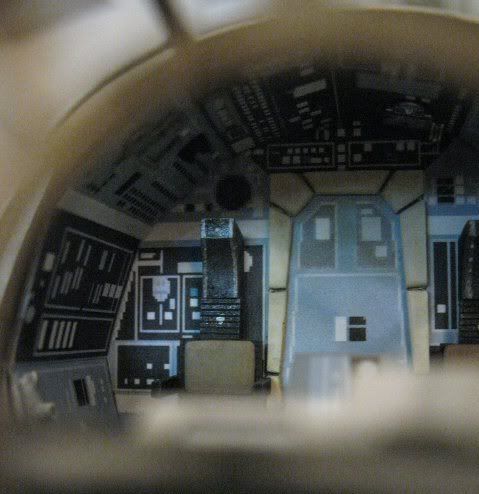
Since the model is so large, I wanted to add some visual interest to any interior areas that would be visible. For the cockpit, after completing the shell/control console, I designed some graphics based on the full size shooting set. I printed these onto good quality paper, then used a permanent glue strip to glue them onto the styrene cockpit walls. I did the same for the control console. To give them some dimension, I glued some small greeblies directly to the paper graphics.
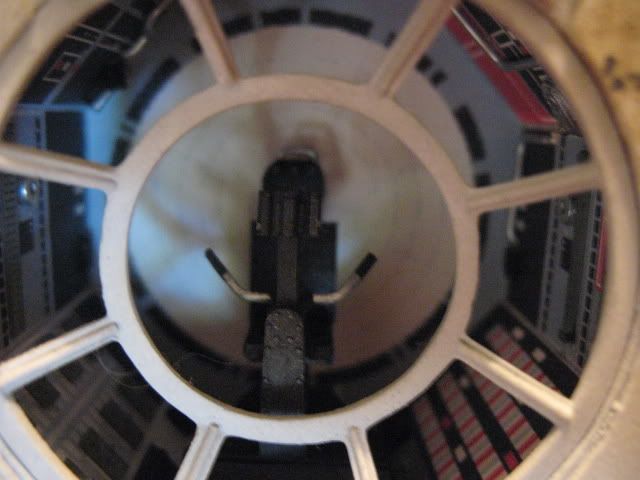
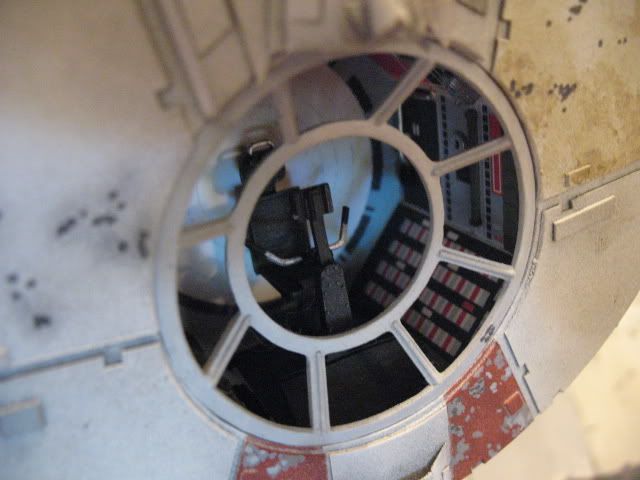
I built an interior for the upper turret as well using the same technique. The gunner’s chair is a combination of scratching/bashing.
So there she is! My representation of the ‘Fastest hunk o’ junk in the galaxy. . .’
Working off and on, it took me 6 or 7 years to complete, and has been all around the world with me. I’m in the US Air Force, and began the build shortly after I moved from Virginia to north Texas. I then got orders to Spangdahlem AB in Germany, and continued working on the Falcon while I was there. After Germany, I came to Tucson, AZ and finished the build and did the paint job here.
Sheesh, didn’t realize this post had gotten so long. Hope you enjoyed the pics, and thanks for taking a look! [tup]
Eric