SBD-3 Dauntless - Trumpeter 1/32 Clear Edition Complete

The SBD Dauntless has always been a favorite of mine, going way back to when I was a kid and first built Monogram’s more-toy-than-model Dauntless kit. I probably built that one half a dozen times growing up, with one in the stash now as well. I remember with a good fit of fondness one summer when my brother and I built a replica of Sharpstown Mall (big mall in Southwest Houston mentioned briefly in the movie The Right Stuff) out of playing cards - and then set to dive bombing it to smithereens with our Monogram Dauntless dive bombers.

But what really elevates the Dauntless is its role in the Battle of Midway. The story of Midway is among my very favorites to read about. The 1976 movie was a good telling of the basic story, albeit with a bunch of irrelevant subplots, non-existent characters, and bad use of archival footage. The new movie that came out last November was 100 times better in terms of overall accuracy, even with leaving out significant portions of the Midway story. But it was while watching that movie that I was reminded of my love of the Dauntless. Sitting in that darkened theater while in the midst of (a) a software engineering bootcamp and (b) two massive B-29 builds, all I could think of was how awesome the depiction of the aircraft was, and how long before I could get a Dauntless to my bench?

That time is now. I have three Dauntless kits in my stash, the aforementioned Monogram release, an old baby blue boxing from the '60s, an Accurate Miniatures SBD-2 in 1/48, and a Trumpeter SBD-3 in 1/32. I considered building all three at once, but unlike the B-29, I figure I can easily return to a Dauntless build in the future. I opted to tackle the big scale SBD.

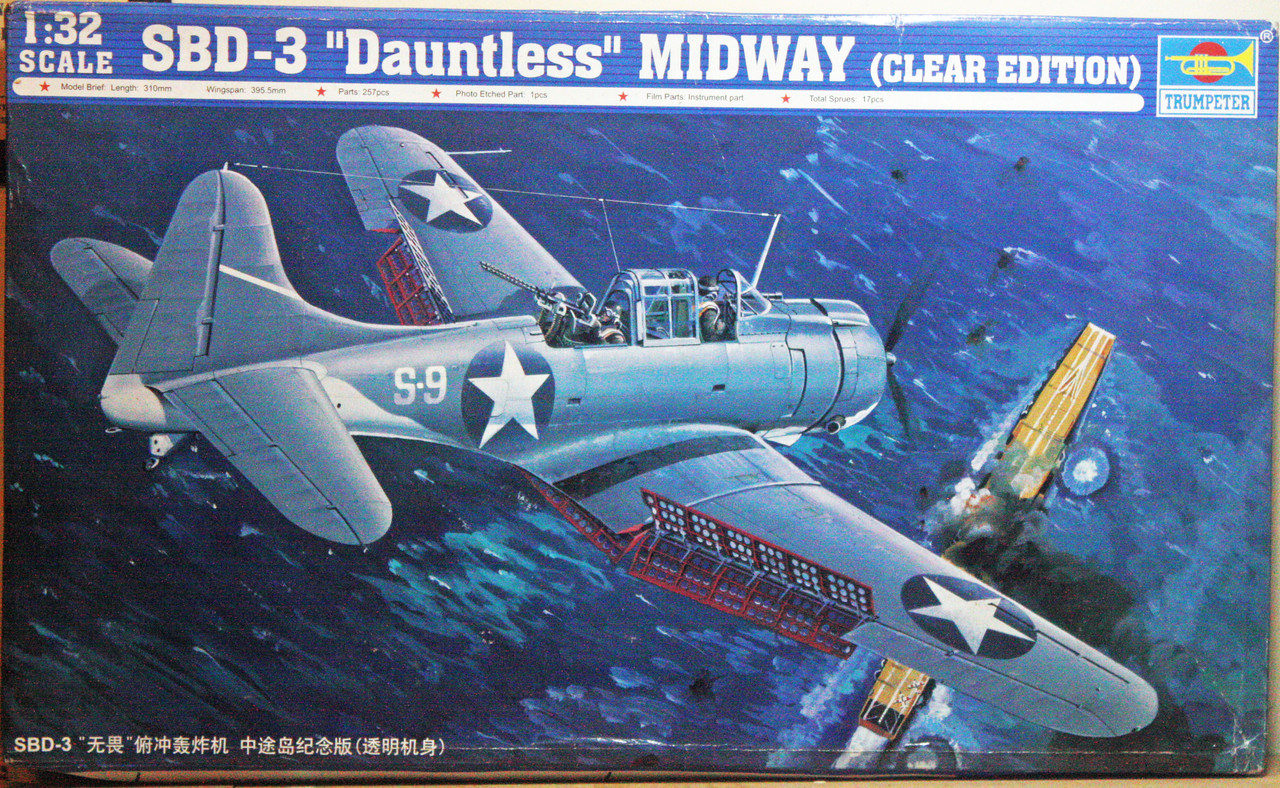
This is a pretty nice kit with a real good level of detail right out of the box. I’ve read that the decals tend to be garbage, but that will be for me to verify later. Hopefully I won’t need to track down an after-market decal sheet to complete this Dauntless.

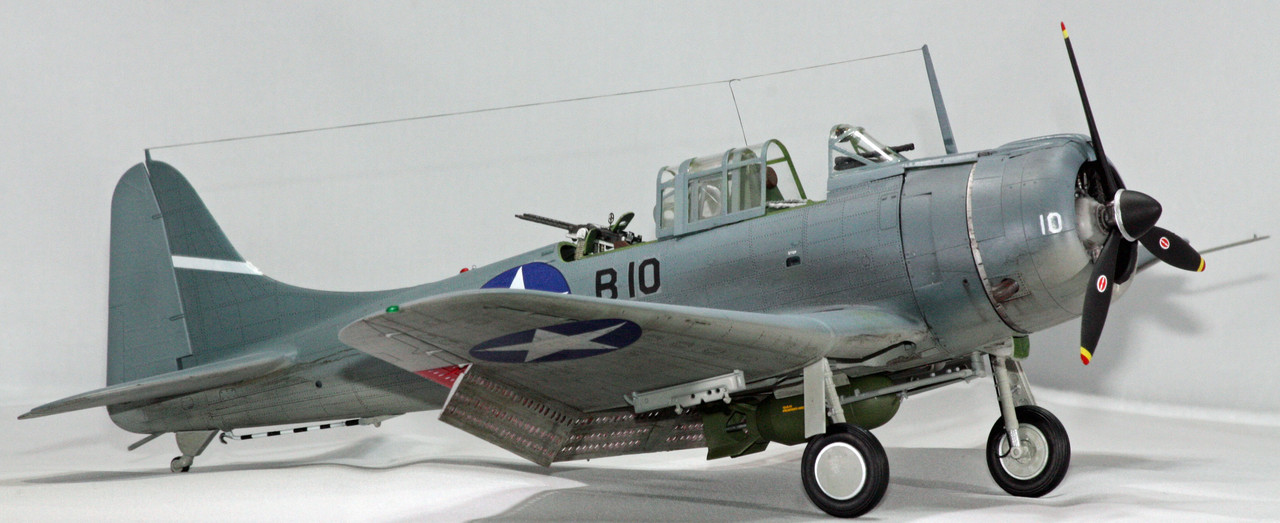
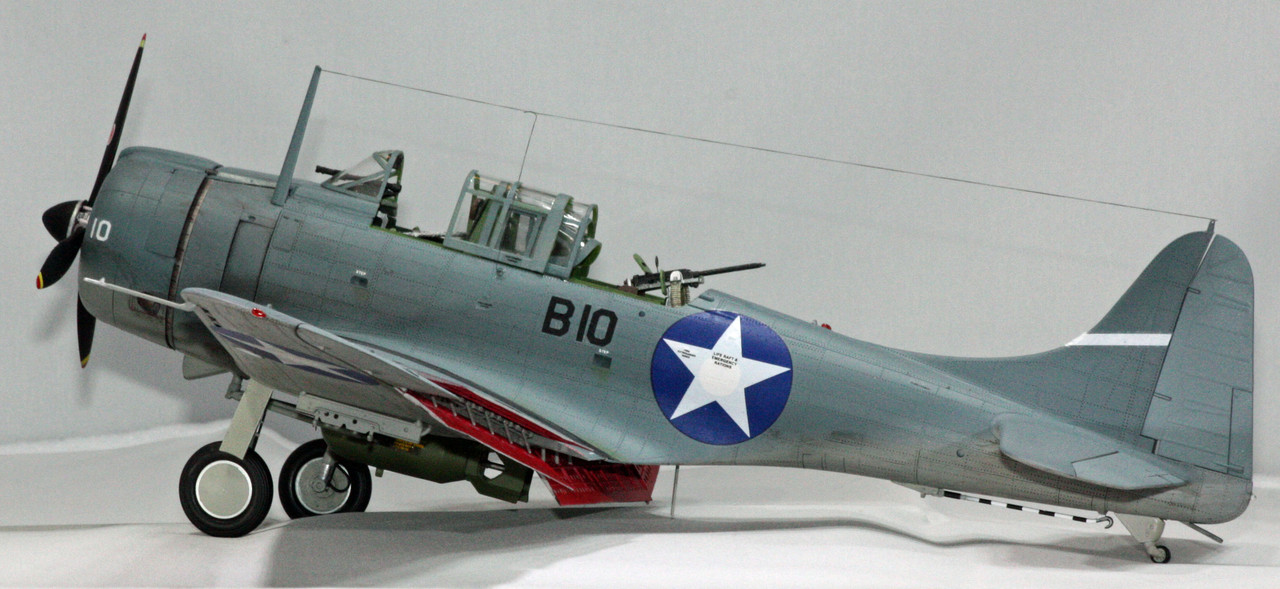
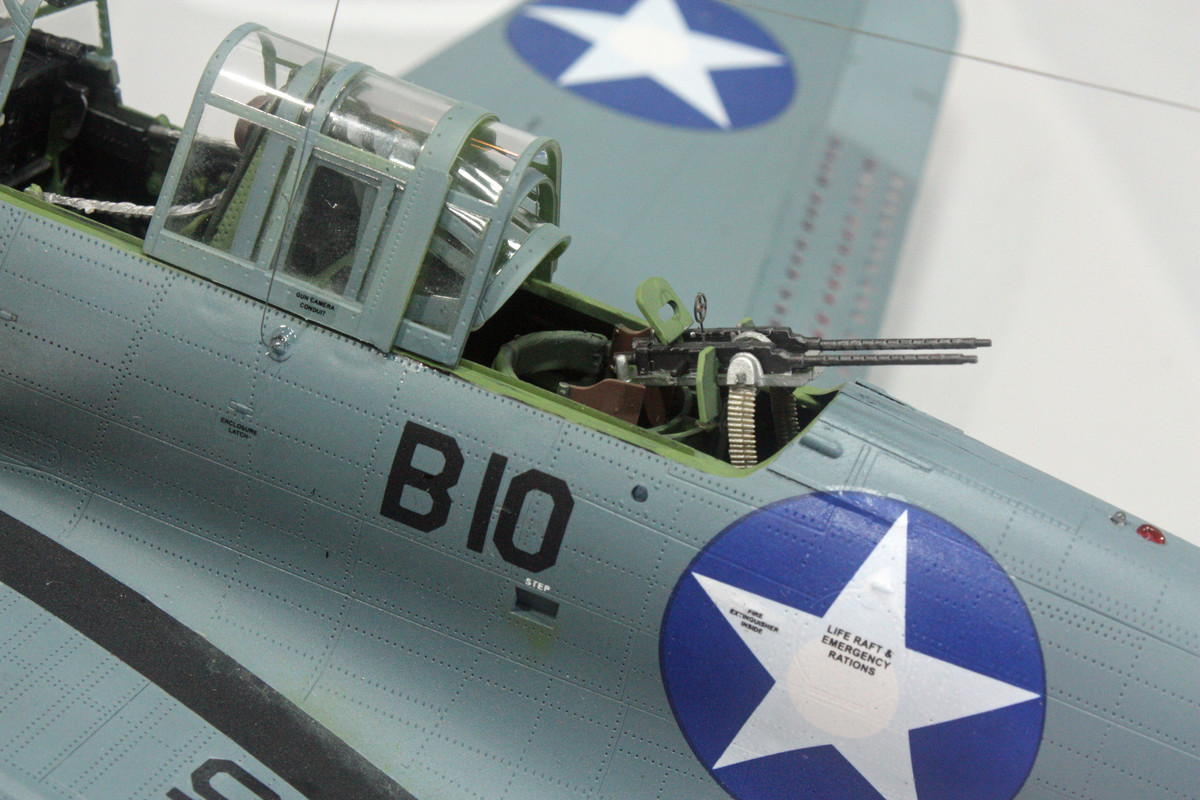
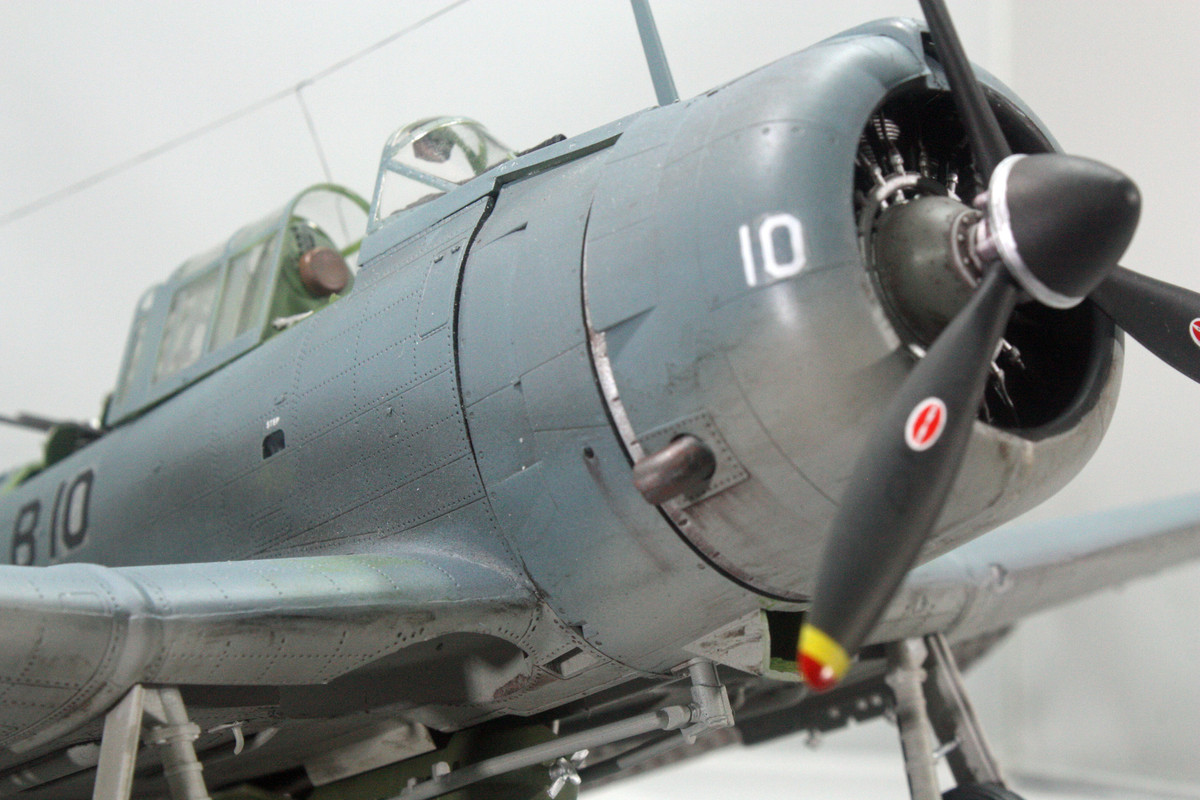
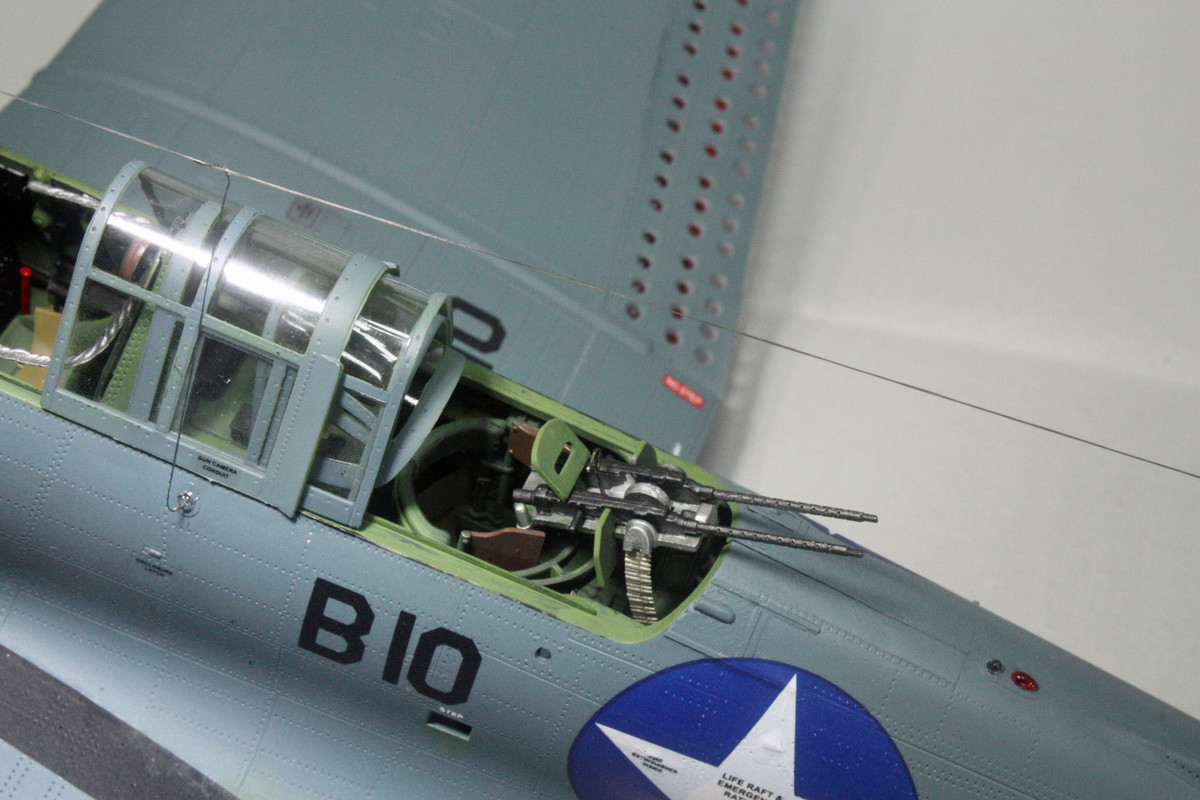
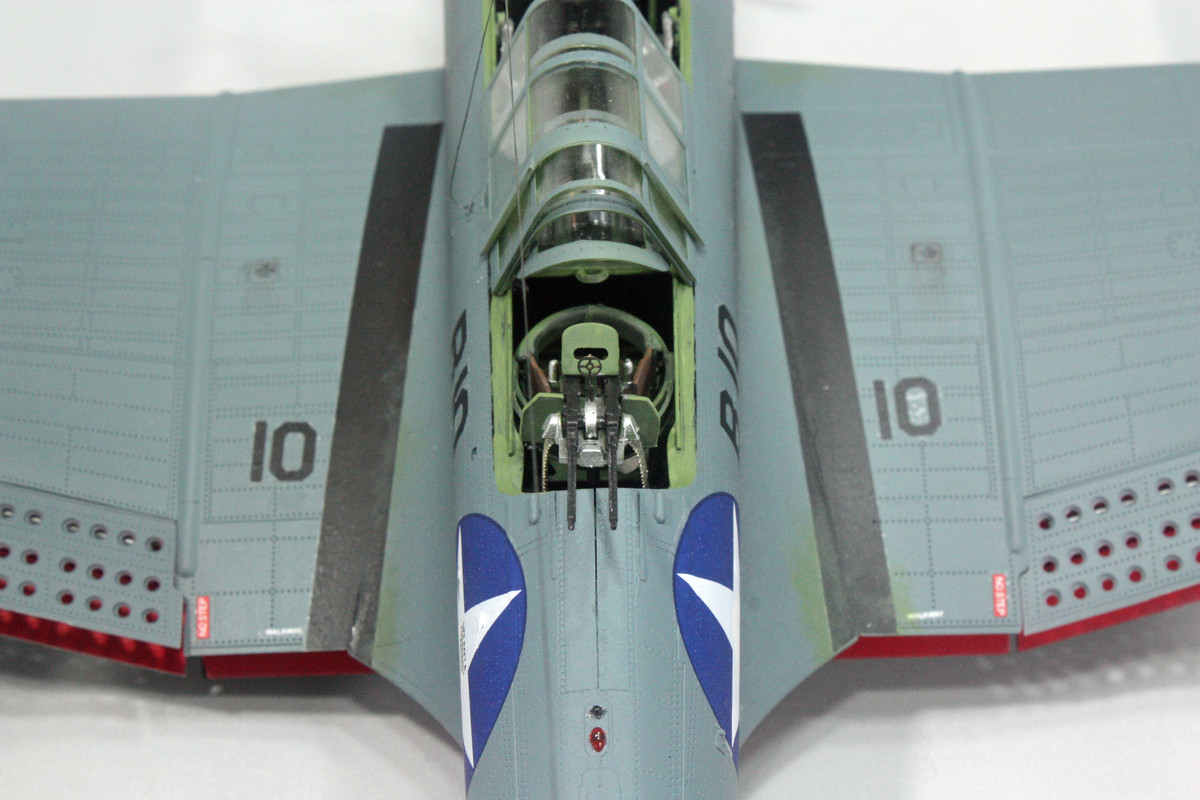
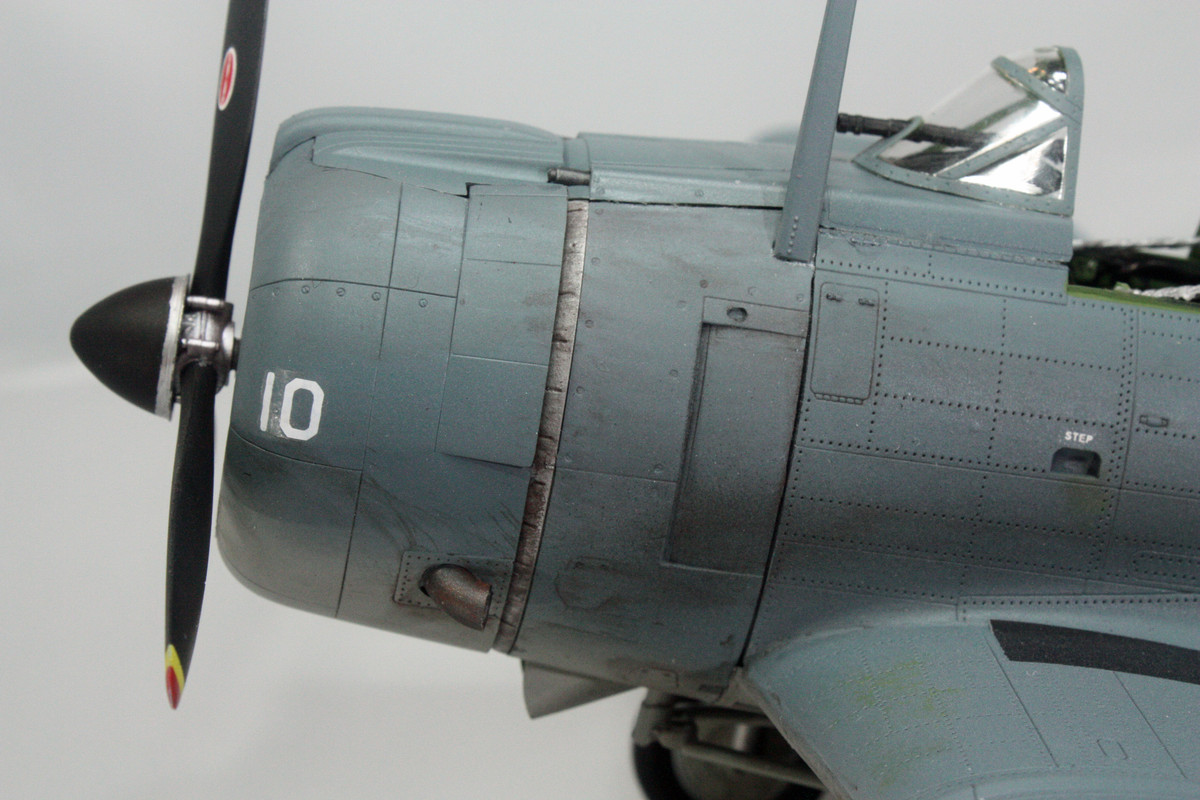
I am doing the ride of Lt. Harold S. Bottomley, Jr, B-10, flying off the U.S.S. Yorktown in Bombing Squadrong 3 (VB-3). Bottomley would be awarded the Navy Cross for his bravery in flying against the Japanese targets at Midway 4-6 June 1942. He was twice awarded the Distinguished Flying Cross for extraordinary achievement in the Solomon Islands Campaign in August 1942; and is entitled to the Ribbon for, and a facsimile of the Presidential Unit Citation awarded the USS Enterprise for heroic service in action in the Pacific Area.

He would go on to command various air groups, bouncing between deployments and a desk Stateside, and eventually would move on to command the USS Bon Homme Richard (CVA-31) before finishing his distinguished Naval career in Washington, D.C. in the Joint Staff Office in the Joint Chiefs of Staff.

Trumpeter can be hit-and-miss with regard to their instructions. This one is no different. Paint callouts are often flat-out wrong based on other sources that I have found on the Dauntless. I’ve opted to follow these other sources (Detail & Scale book, Walk Around book) rather than the instructions when I’ve found discrepancies.

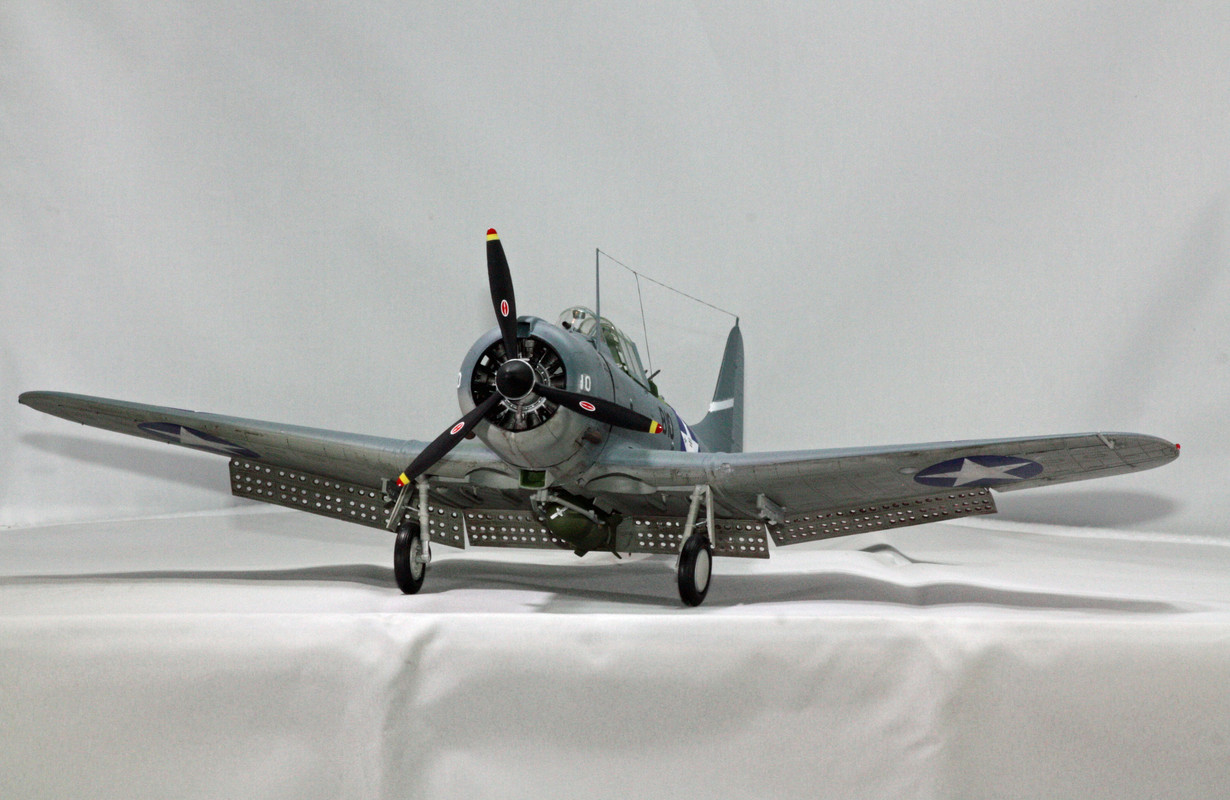
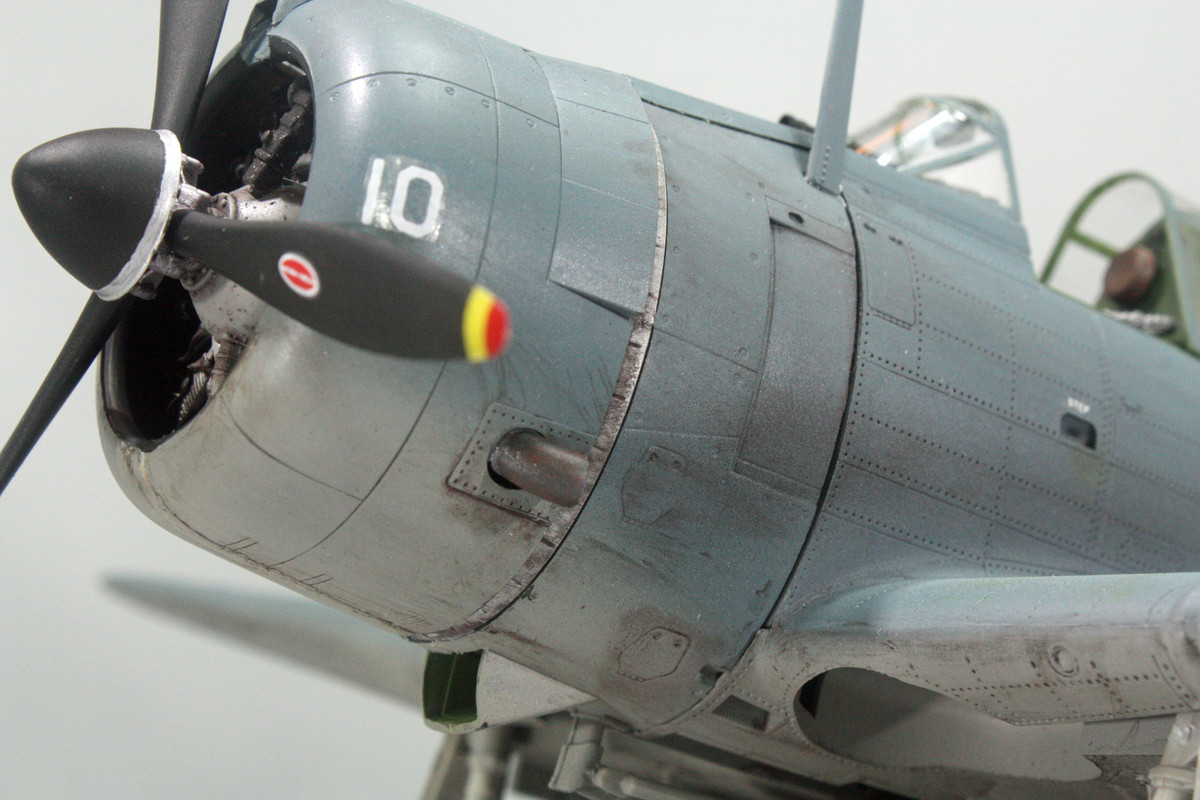
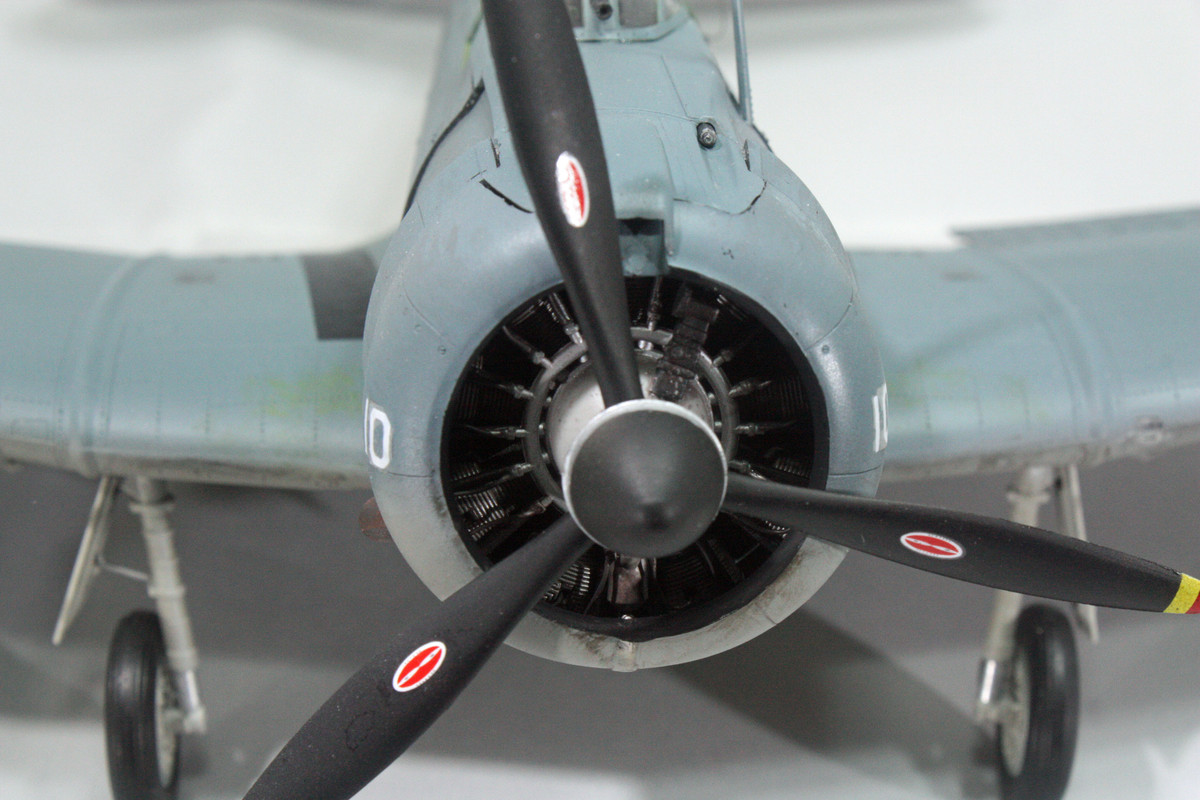
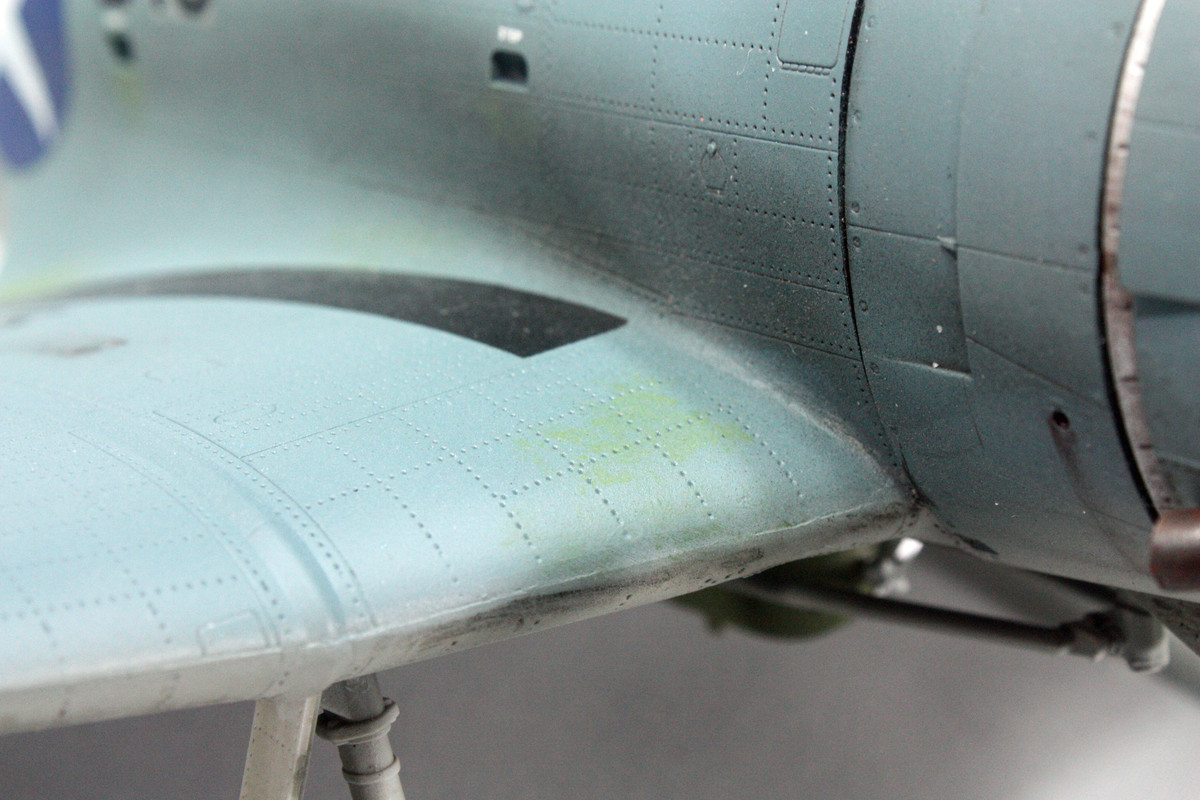
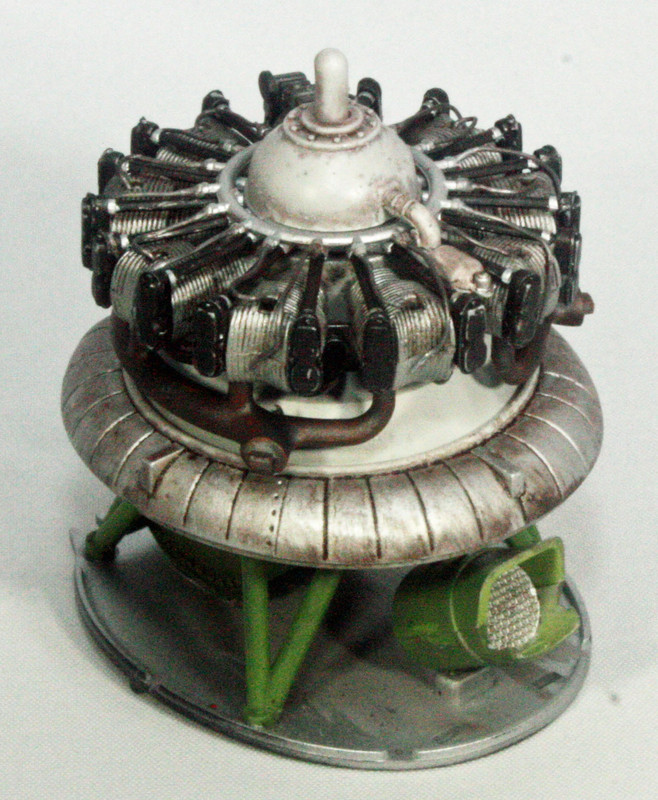
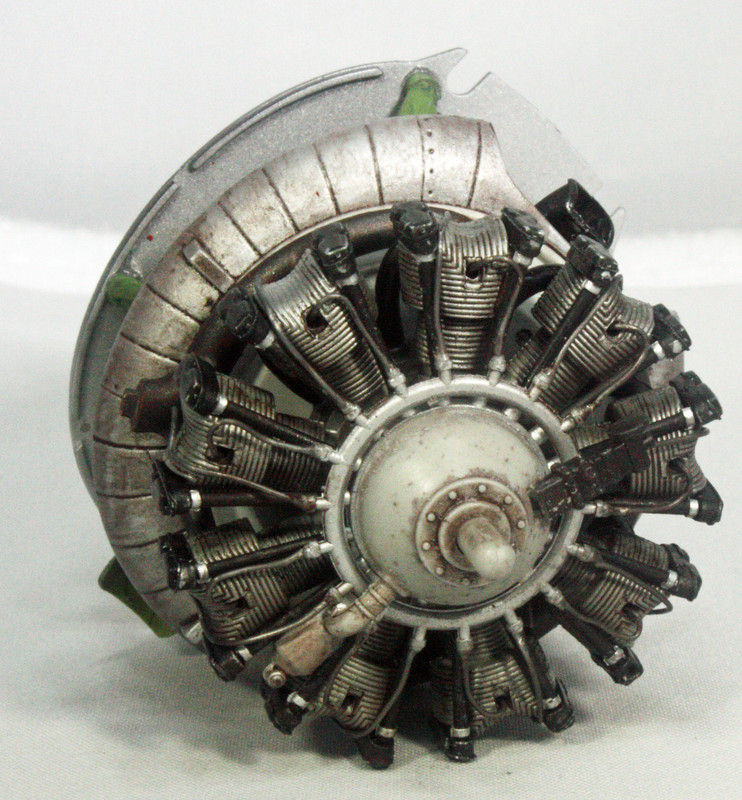
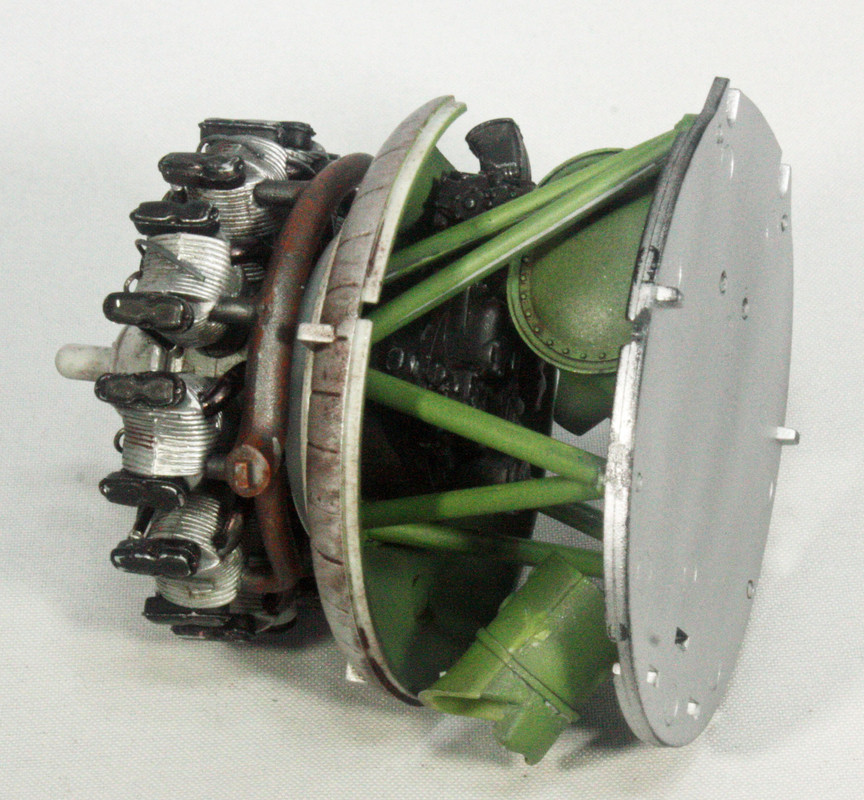
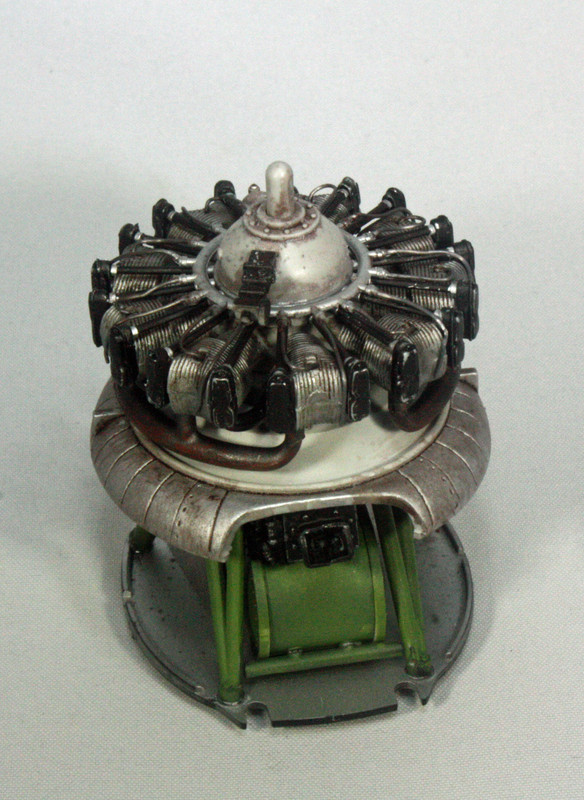
I started construction with the engine. I added .4mm lead wire for the ignition wires. I could not find anything definitive as to where the second wire in each tandem actually connected, so I wrapped it around to the backside. Midway Dauntless dive bombers tended to be the new SBD-3 models (the Navy began phasing out the SBD-2 following the Battle of the Coral Sea), so I figure the weathering should not be too obvious, but for the engine, I applied a bit of AK Interactive Streaking Grime followed by feathering with white spirit.

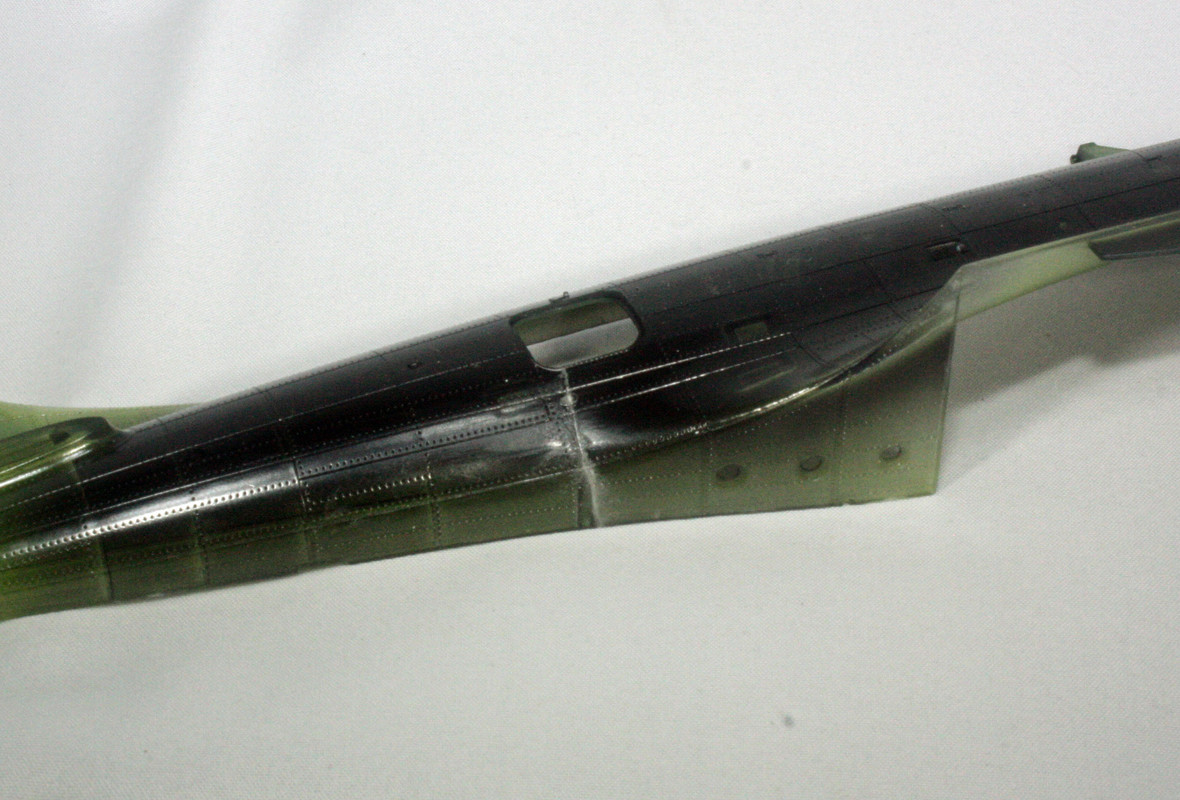
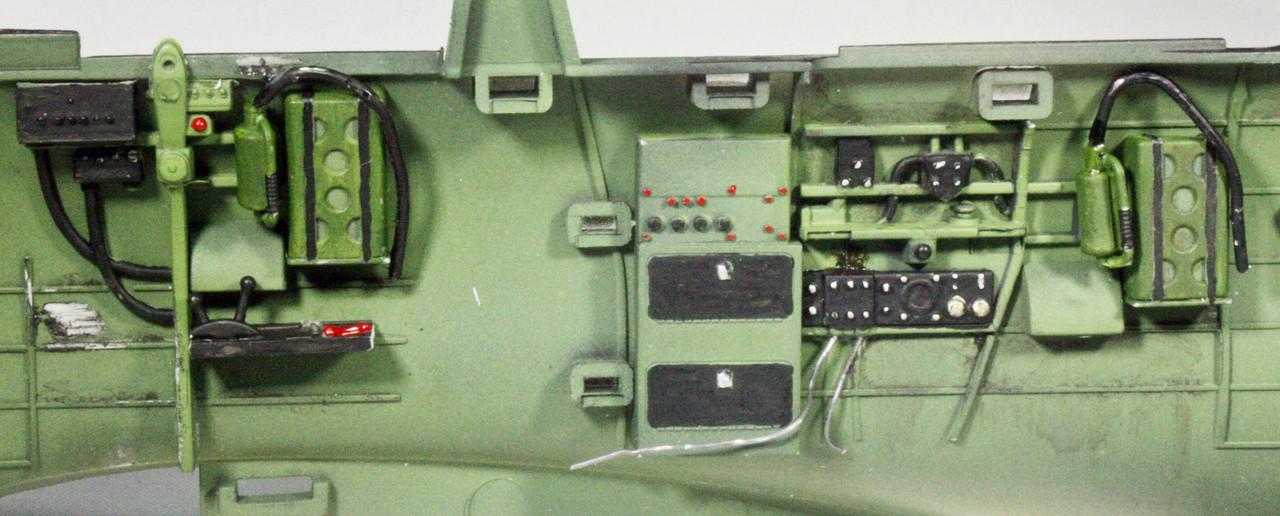
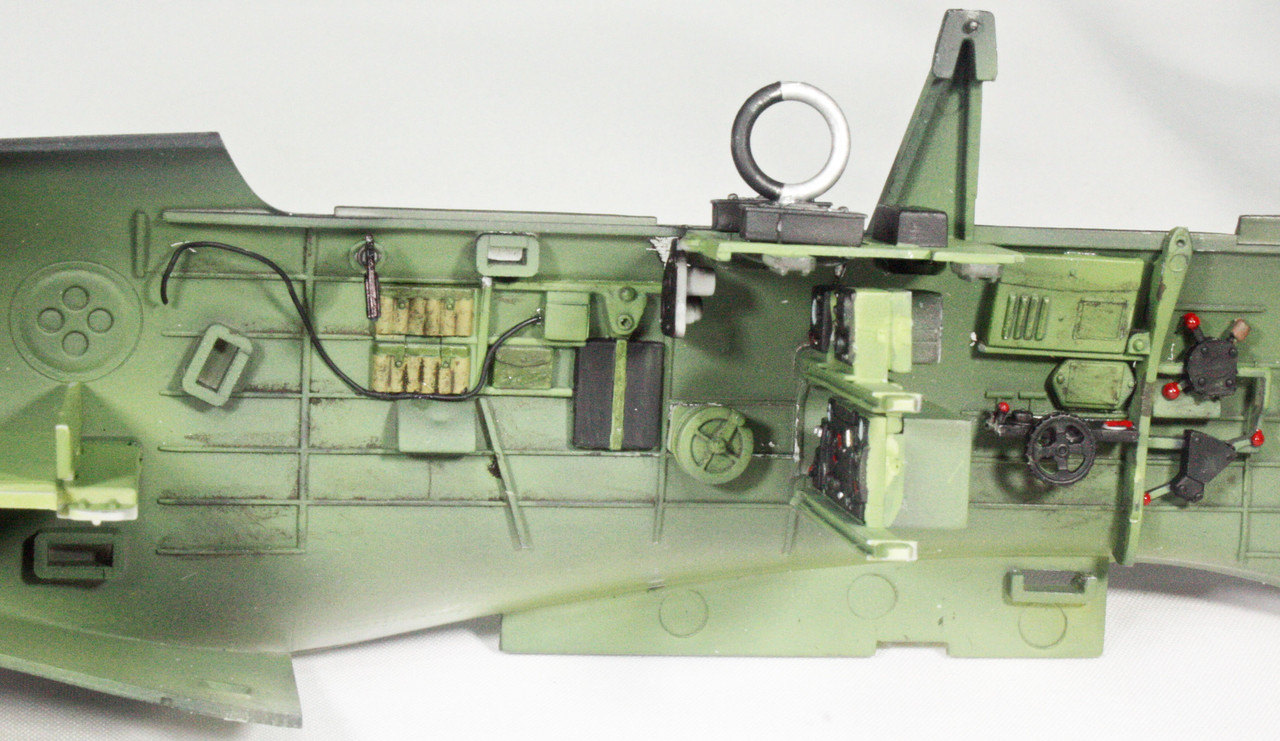
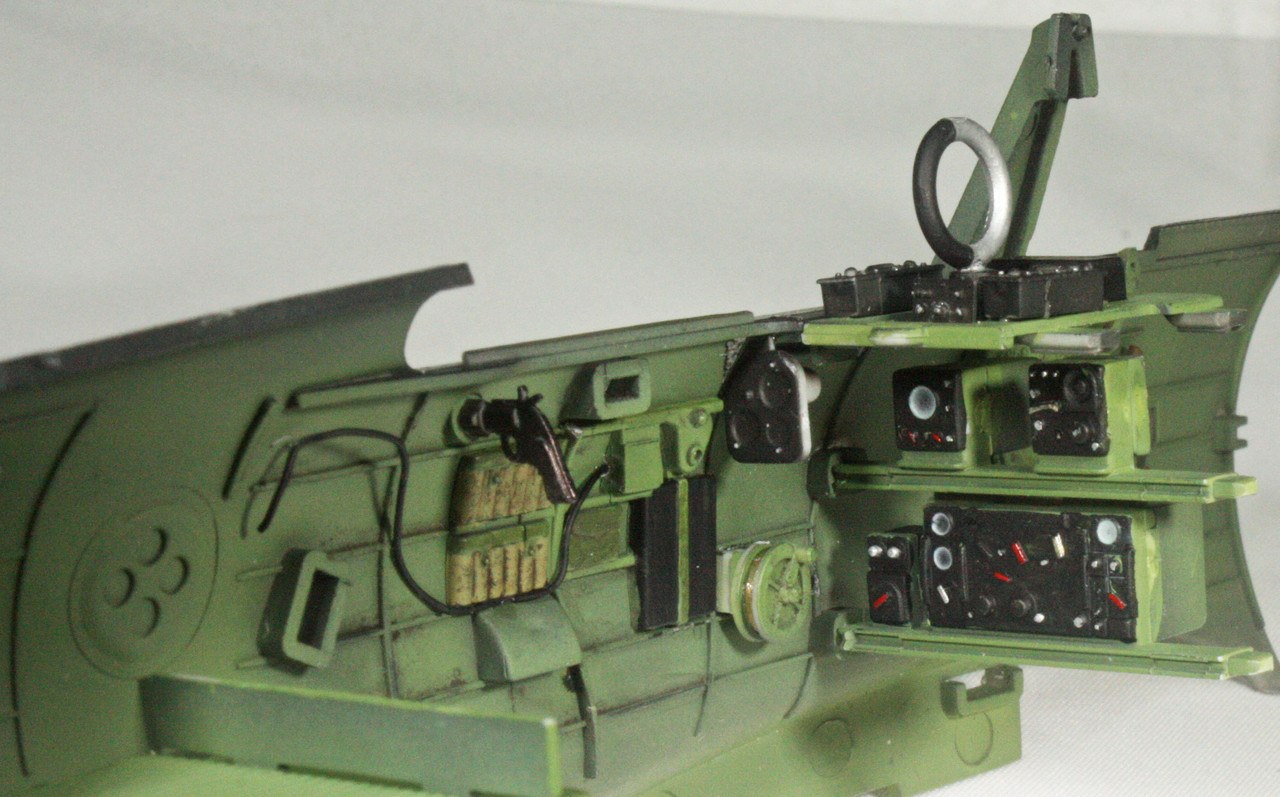
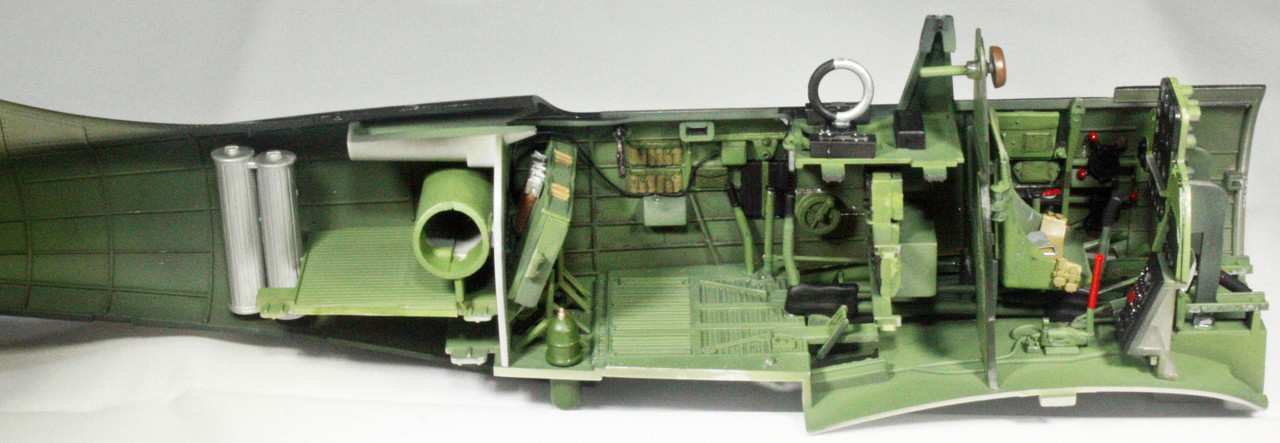
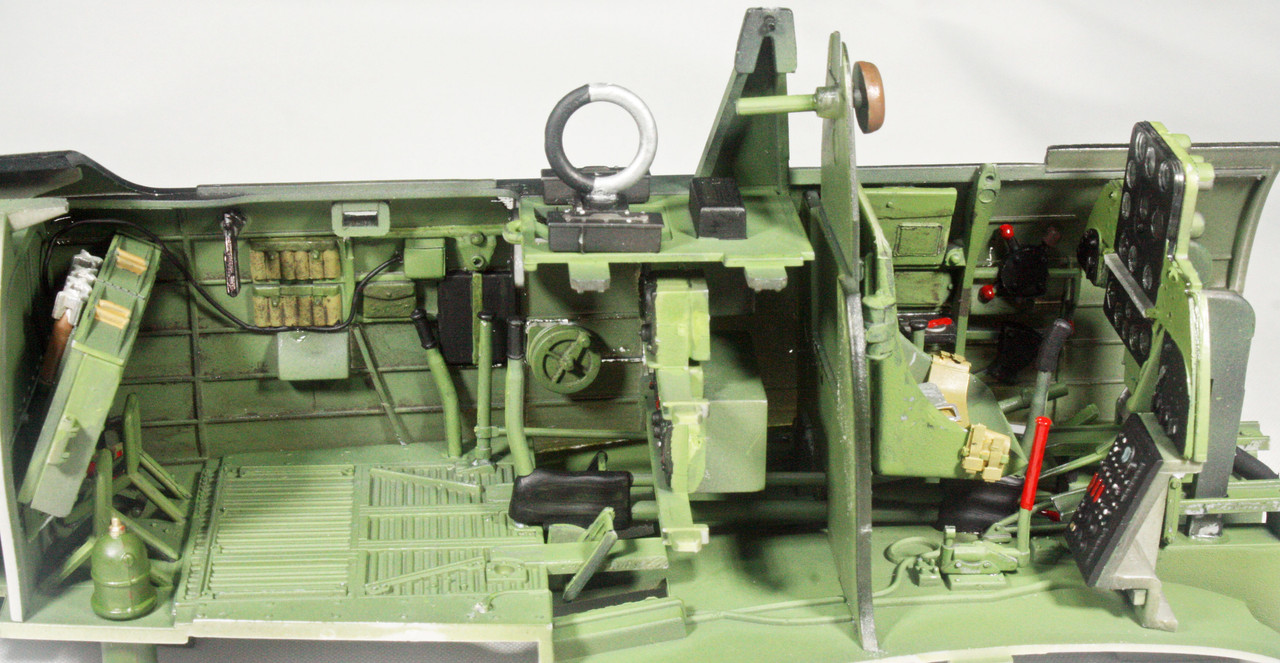
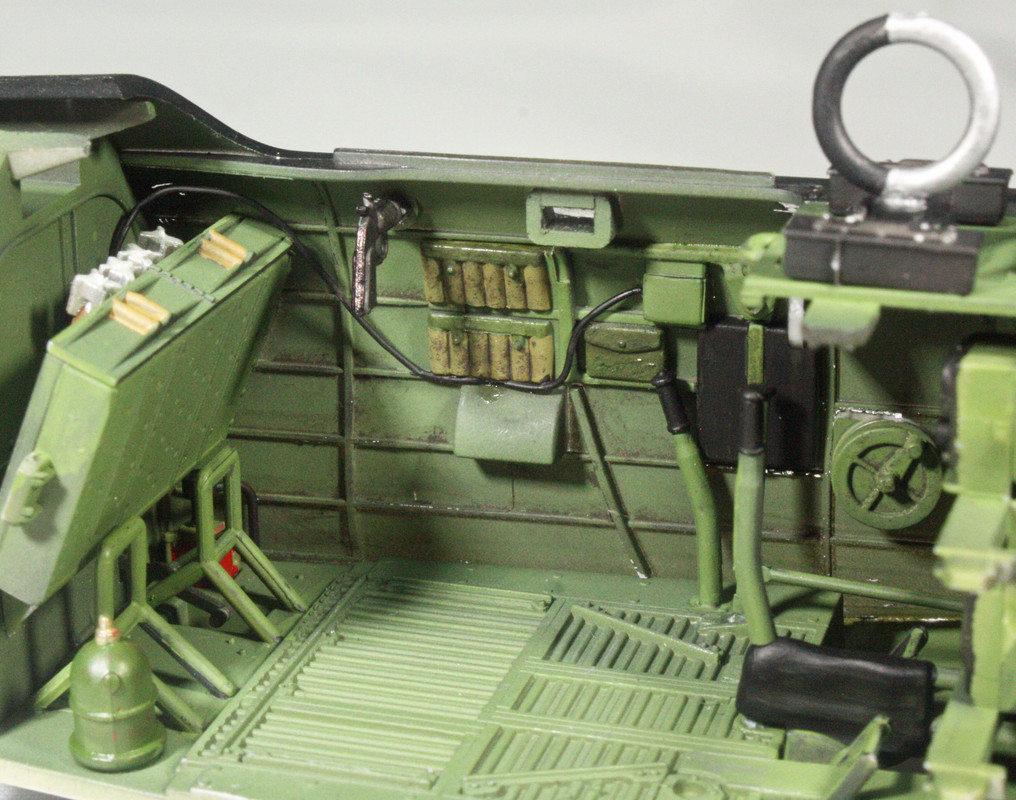
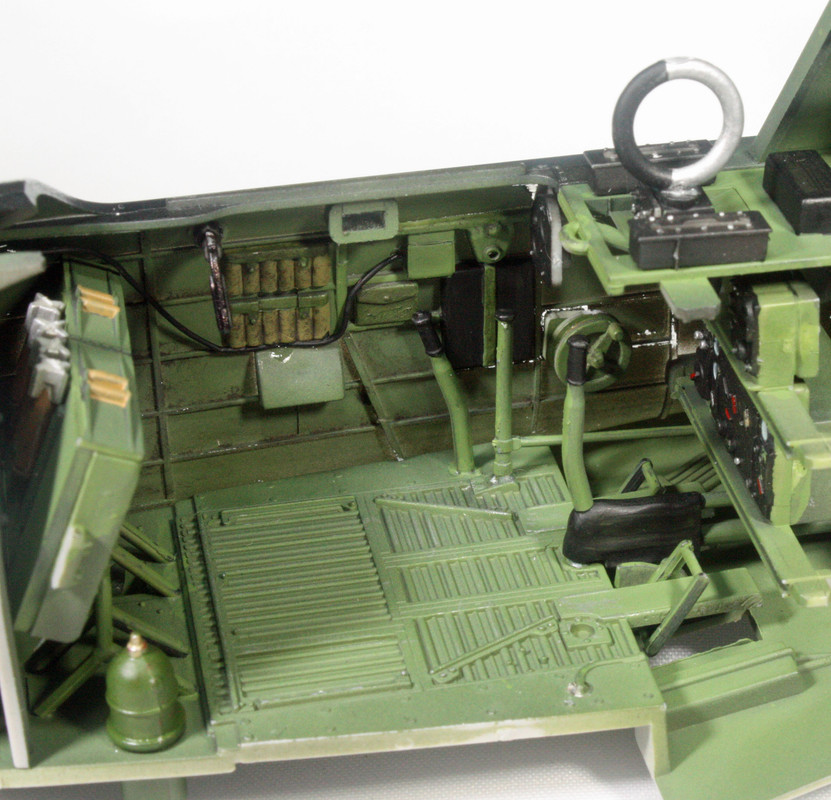
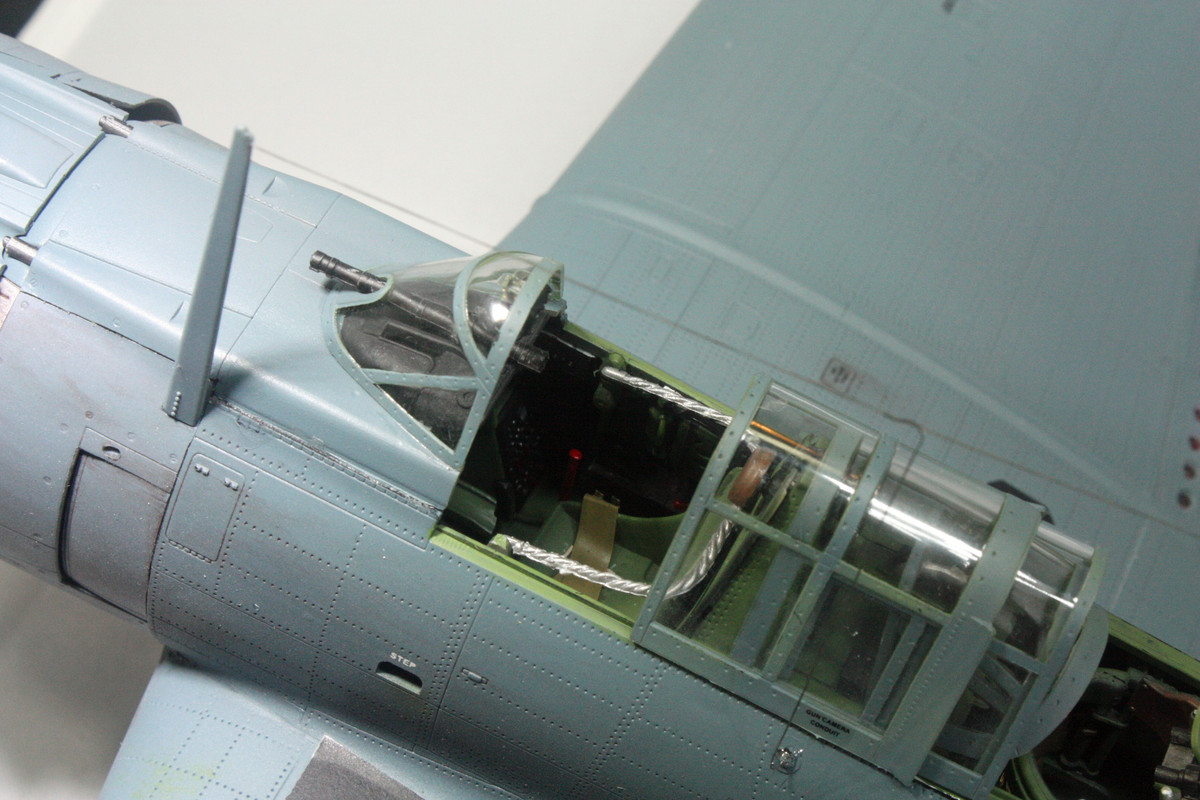
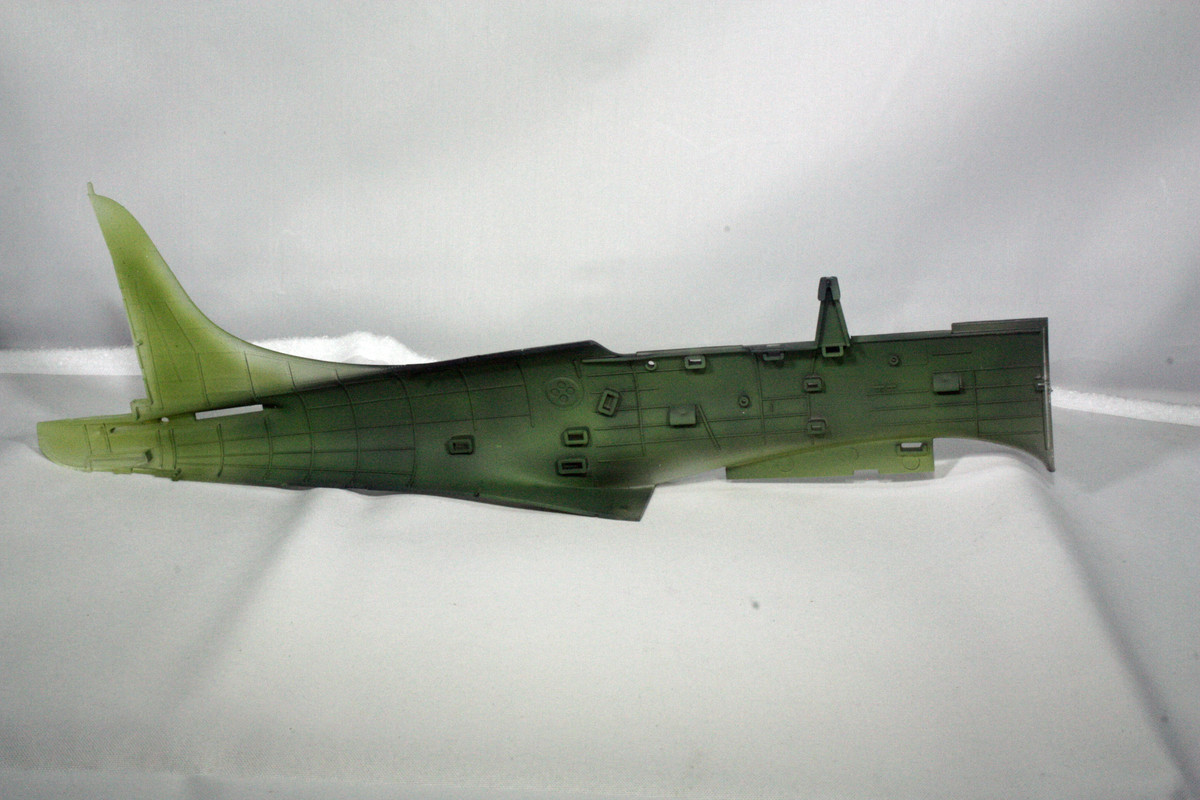
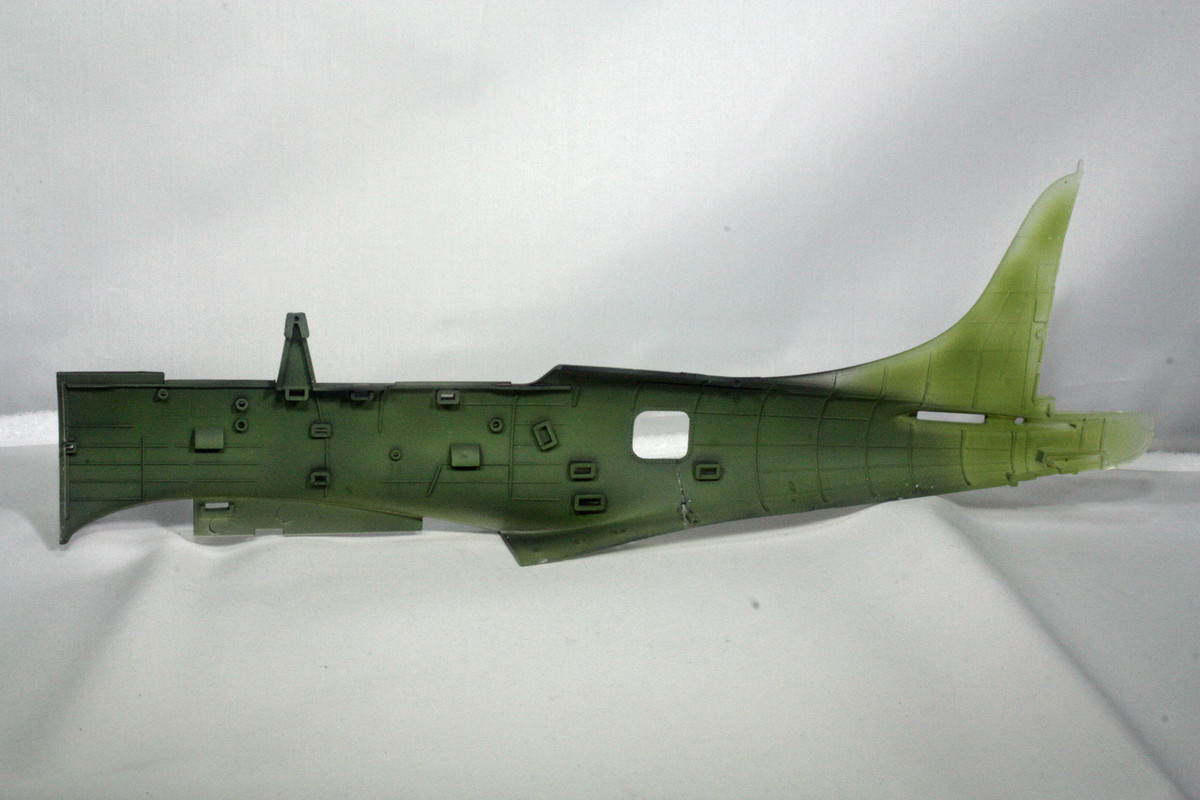
This is the clear edition, but I was never going to build it as such. I also wanted to try a different approach with painting the interior, so I first put down a coat of black Stynylrez primer on the interior surfaces of the fuselage and all the interior parts. Then painted with Mission Models Green Zinc Chromate. I think the primer base has allowed for the GZC to be a bit darker than it is coming out of the bottle.

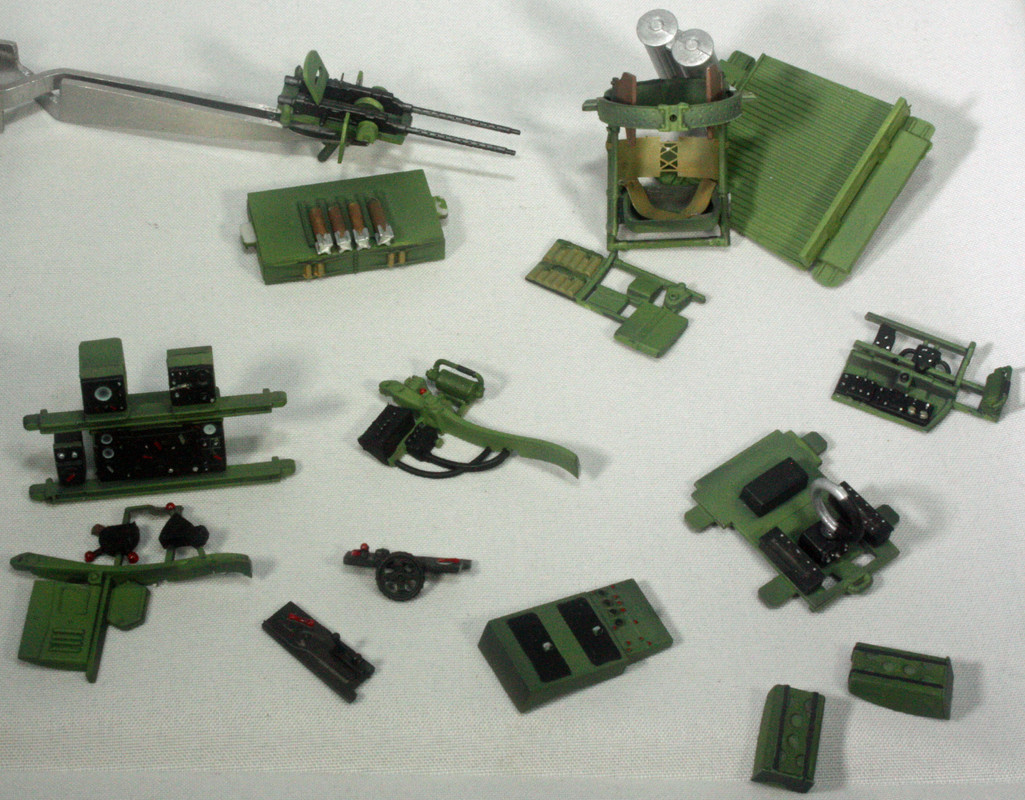
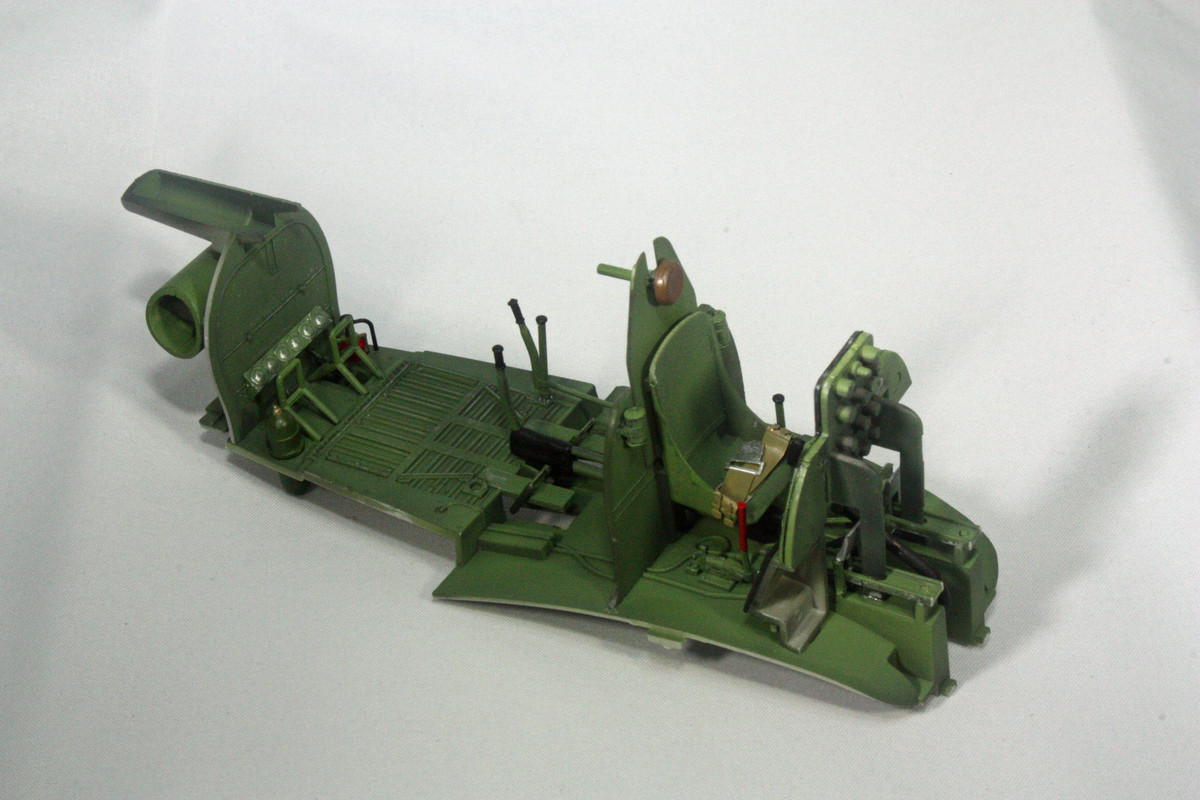
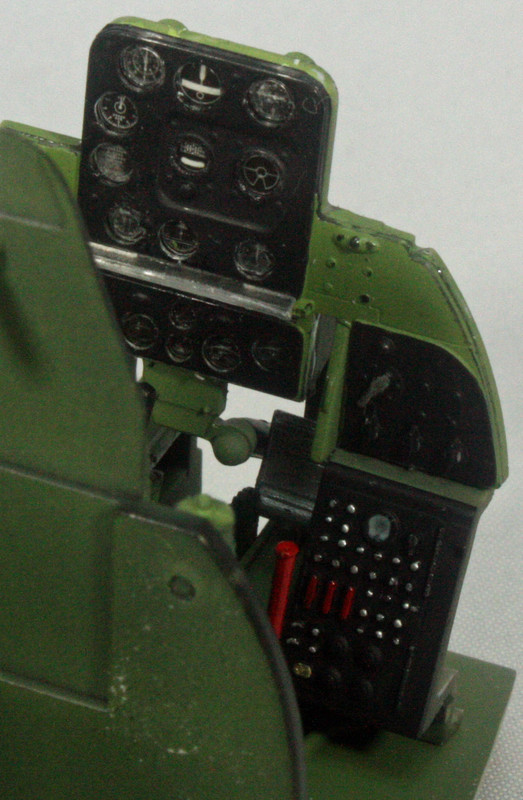
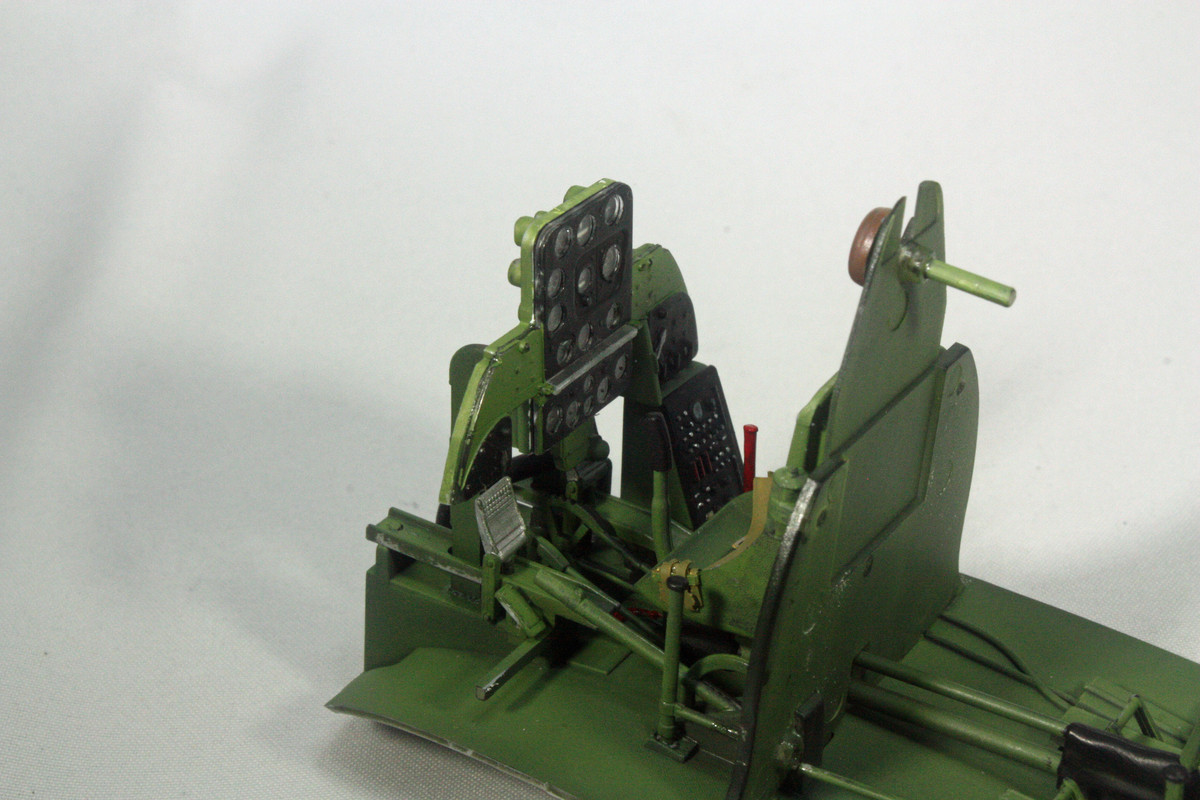
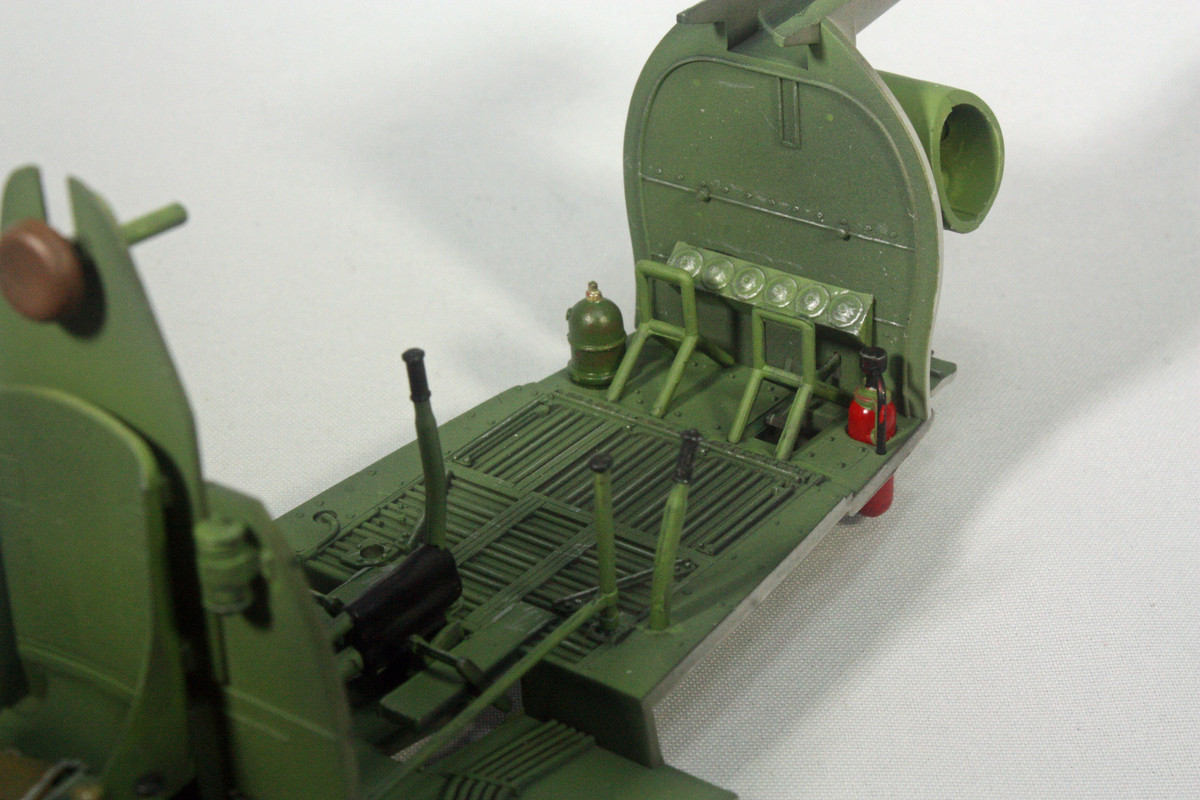
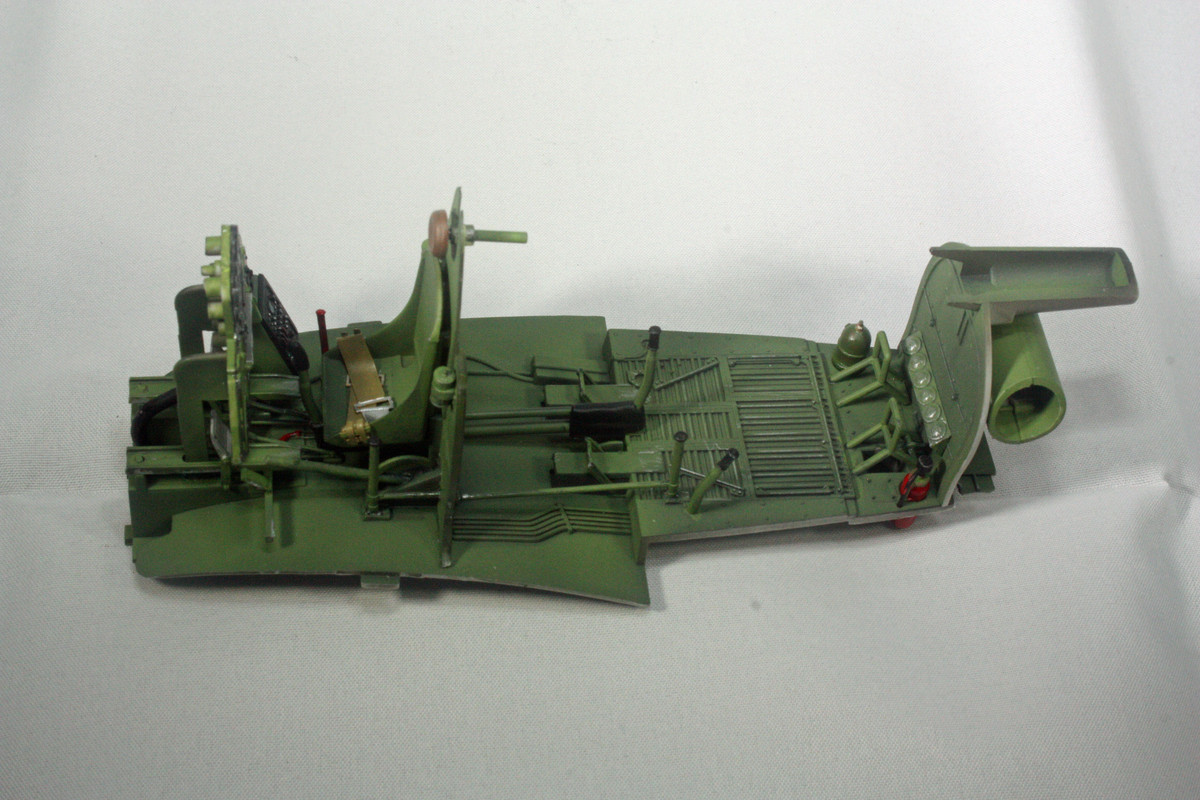
When I install all the cockpit parts into the fuselage, I plan to add some thick lead wire (not sure what size just yet) to replicate the tubes coming out of the O2 tanks, and run some electrical wiring throughout the cockpit. Very little of that detailing will actually be visible once I close up the fuselage, but it’s always fun to build to this leve of (insanity) detailing.

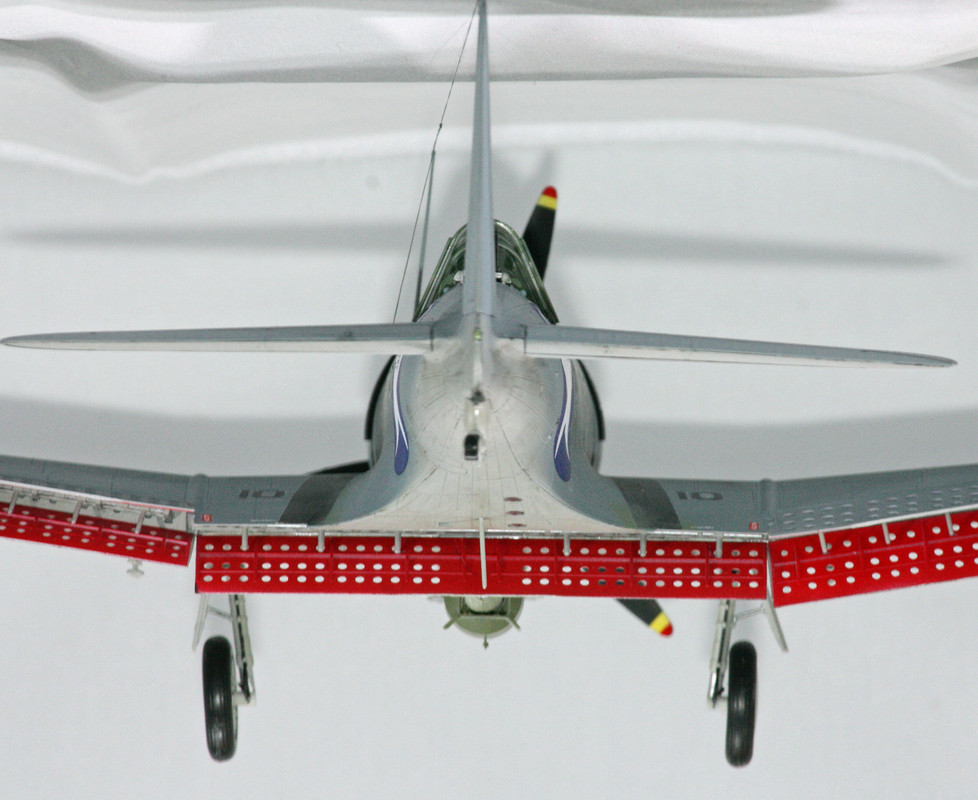
Finally, clear plastic is a bit more brittle than gray plastic. I noted before I started painting that the fuselage part was split from the bottom of the access hatch located behind the tail gunner on the starboard side. I glued the plastic together, but I may have to do some sanding to eliminate the evidence of the split.

Looks great, Stephen. I have that same kit and have been wondering about the brittleness of the clear fuselage.

I bought the kit from someone on eBay, but it did come with everything still on the sprues. There was also some foam packing in the box, so I can’t figure what happened to cause that crack in the fuselage.

Outstanding work, particularly the engine.

Looking good. [Y]

I like this aircraft, the open dive flaps always catch my attention. Looking forward to following along as I’ve yet to buy one…let alone build one. As a big kid, I mean.

Today was a productive day at the bench. I managed to get all the cockpit components installed into the fuselage, and button up the fuselage. I added .4mm lead wire for some electrical components inside, and .8mm lead wire to replicate the O2 hoses for both the pilot and the gunner. Some light weathering with Flory dark dirt wash.

I ran into a couple of problems. First, there are two tanks located right behind both shoulders of the pilot; while fitting the fuselage halves together, I saw something fall out, which I was able to identify as one of those tanks. It is still missing somewhere on the floor of my work room. Hope to be able to locate it as it will be pretty obvious that it is missing once I’m done with this build. Also knocked off the head rest when removing clamps - that part fell into my sleeve, so I was able to find that one easily enough.

The other problem was one related to the kit’s manufacture. On either side of the forward cockpit, there are panels. On one side is a trim wheel (?) and the other a couple of levers. The panels were too long, resulting in no space to install the main cockpit panel with the pilot’s seat bulk head. I dry-fitted these parts several times, but always with the same result. So out came the snippers, and I trimmed the panel parts to a length sufficient to allow for proper installation of the bulk head.

…I started building this exact kit last month and ran into the exact same issues you mention[:(] …I’m adding a crew to mine so I didnt get too worried about the interior,and if it couldnt be seen I didnt install,or paint it…I primed and painted all the clear… currently pre-shading and base coating the exterior…I’m old-and slow…hee heee heeee…[:D][;)]

How far along are you now on your build?

I read several reviews that mentioned potential problems along the wing roots if you were to affix the upper wing halves to the lower wing half prior to attaching the entire wing assembly to the fuselage. I avoided that problem by attaching the upper wing halves to the fuselage prior to affixing the lower wing half. There is a tab on the upper wing halves plus a cut-out in the fuselage that makes attaching the upper wing halves a breeze. The results are a seamless and gapless wing root.

…I saw those reviews-but after I’d already done the wings…[*-)] …it wasnt too bad…after joining the wing halves I somehow managed to flex them to fit near seamless…held them to the fuselage with some pressure until set and solid…there was only one small area that I filled- a very slight gap…I airbrushed the top and bottom base coat earlier today…leaving all to dry well

thru tomorrow(I have a long list of tasks from my wife to complete,so I likely wont do anything more till Wednesday…[:(]

My hero of Midway is complete.

This was a trouble-free build for the most part (lost one part to the nether-regions of my workbench). Parts fit was good. Some of the sprue attachments, particularly for the dive flaps, were curiously overdone, but I was able to remove those parts from their sprues without damage to the parts, just took a little patience on my part.

When I showed her to my wife, she pointed out that it wasn’t dirty (I have told her often that I like my WWII aircraft to be dirty, sometimes overly so). I explained that the Yorktown bomber squadrons had recently received the new SBD-3 Dauntless aircraft, replacing the SBD-2 birds they had flown up until the Battle of the Coral Sea. So there should not have been a lot of wear and tear, sun fading, etc, on these dive bombers. I did give it a dirt wash on the underside but opted against doing so on the upper surfaces. There are some typical oil stains, exhaust stains, and the like, and I also replicated the beginning of paint wear along the wing roots - which from various photos I found, the Dauntless came out of the Douglas factories painted in a chromate color (found differences in this, with some being of the yellow variety and others green). I dabbed on some very light green zinc chromate to replicate this wear, and it should be visible in the photos.

Next up for me is the Century Series, starting with Monogram’s F-100D Super Saber.

Anyone who is a a member of the Facebook group, WWII Model Aircraft Builders Group, will recognize the cover art on their page, as they graciously placed my Dauntless there.

…came out great! very nice work[:D]…still slowly muddling thru mine…find a recommended color for the upper part so I ended up using MM intermediate blue-looks ok in daylight or bright light but perhaps a bit darker than I’d prefer under regular illumination…about ready for decals and weathering…crew goes in last…did you paint the prop tips or were they decals?

I painted the prop tips. The decals never seem to work for me.

Thanks for your kind words.

Aggie,

I am duly and totally impressed! Well done. I wish I had the room for these 1/32 models, the detail and the possibilities of added detail is awesome.

Steve

Thanks for your kind words, Steve (my name also, btw). As for display space, I initially put this into my display cabinet, only to see it barely clear the cabinet’s sliding glass door and take up all the remaining space on the shelf. So I moved it to one of my bedrooms, where I hang builds on the walls. I am actually running out of room …

Nice model, Stephen, and congrats on the photo placement.

Turned out great. Love the color/finish. What paint/brand did you use?

Excellent

Oh wow she’s beautiful!!! [ht]

Congrads on being (Youtube) famous now!!!

And wish I had that problem- of running out of space to display so many beautiful models!!!

Thank you, John, for your kind words.