Rooster's WIP's

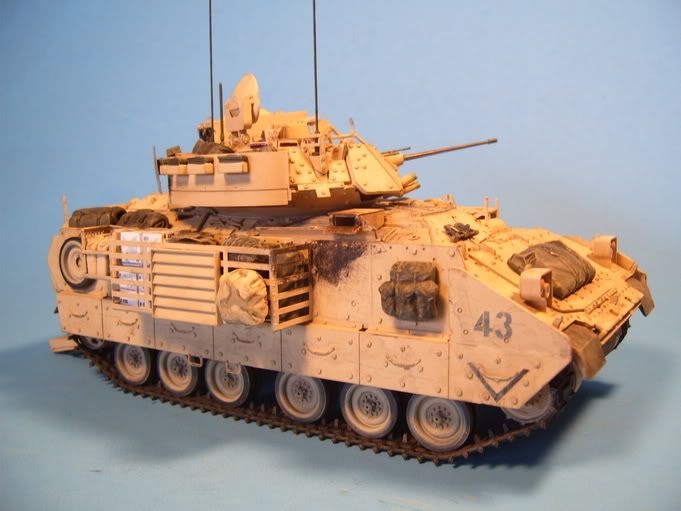
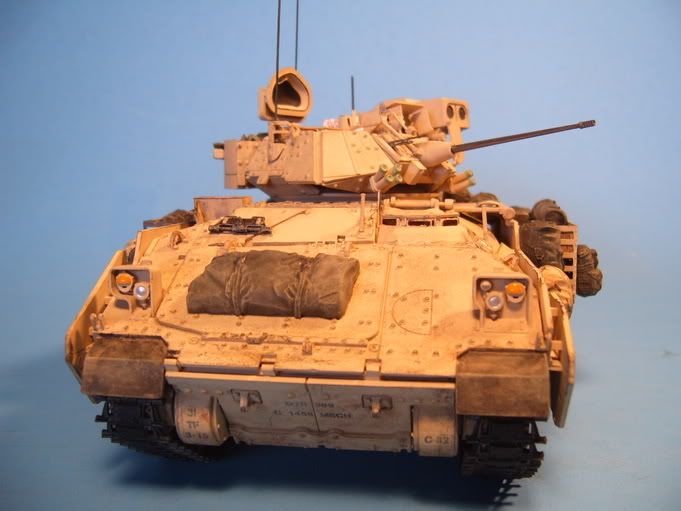
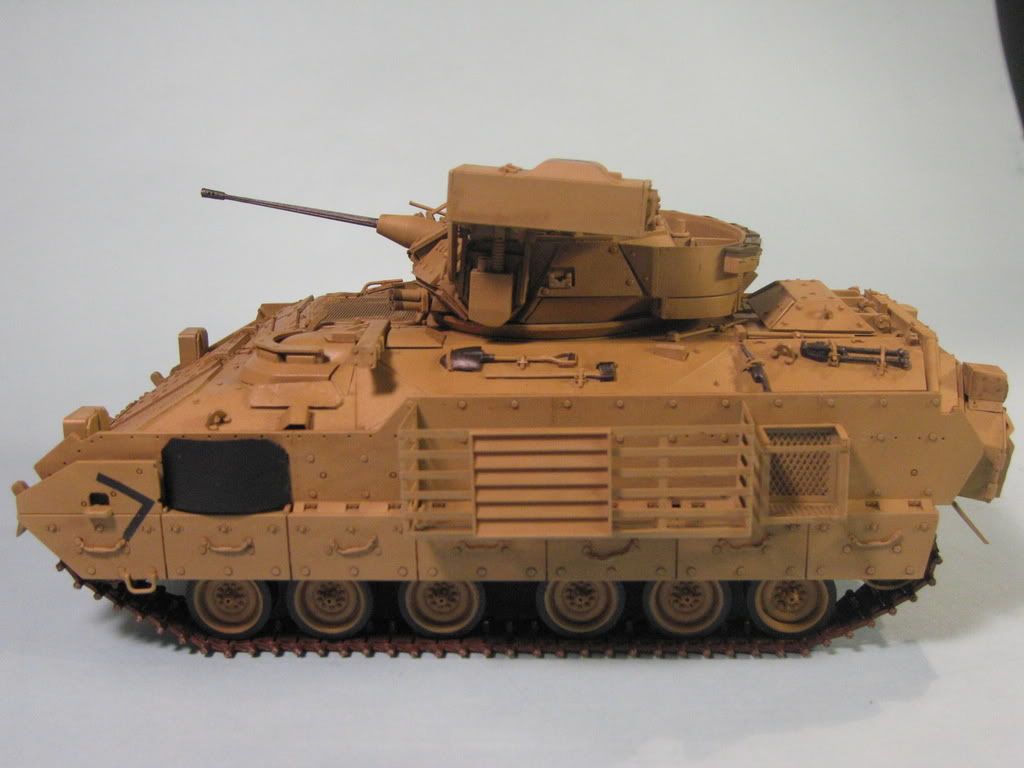
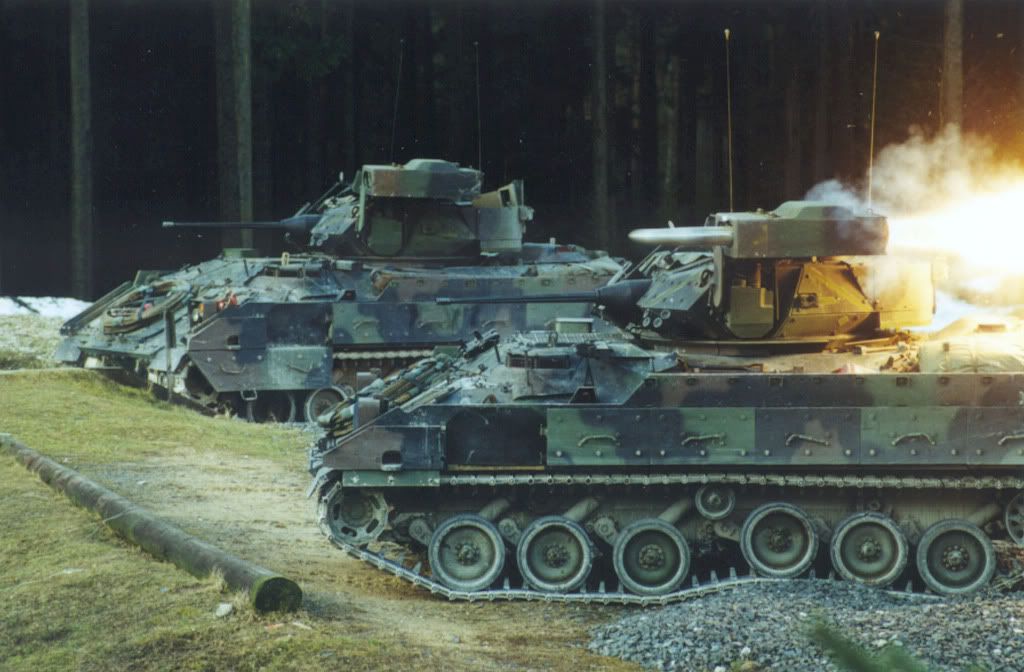
ok gents, i promised you some WIP’s on my last post. i haven’t touched the merkava yet, every time i look at those tiny little balls and chains, i just end up working on another kit. but i do have two other kits that i can share right now. the first is my academy M2A2 OIF version. i added the Eduard PE exterior set, and i have a ton of exterior gear i am working on little by little from verlinden: duffle bags, rucksacks, water jugs, sleeping mats, etc etc. i know there are some flaws in the kit, but most of them i caught once it was too late to fix. i am going to make it with the TOW being fired, so this shoud be an interesting little project. i scratchbuilt the TOW out of styrene rod and brass strips. i plan on hanging it out barley with fine wire covered by the smoke. i think i got it pretty accurate. 
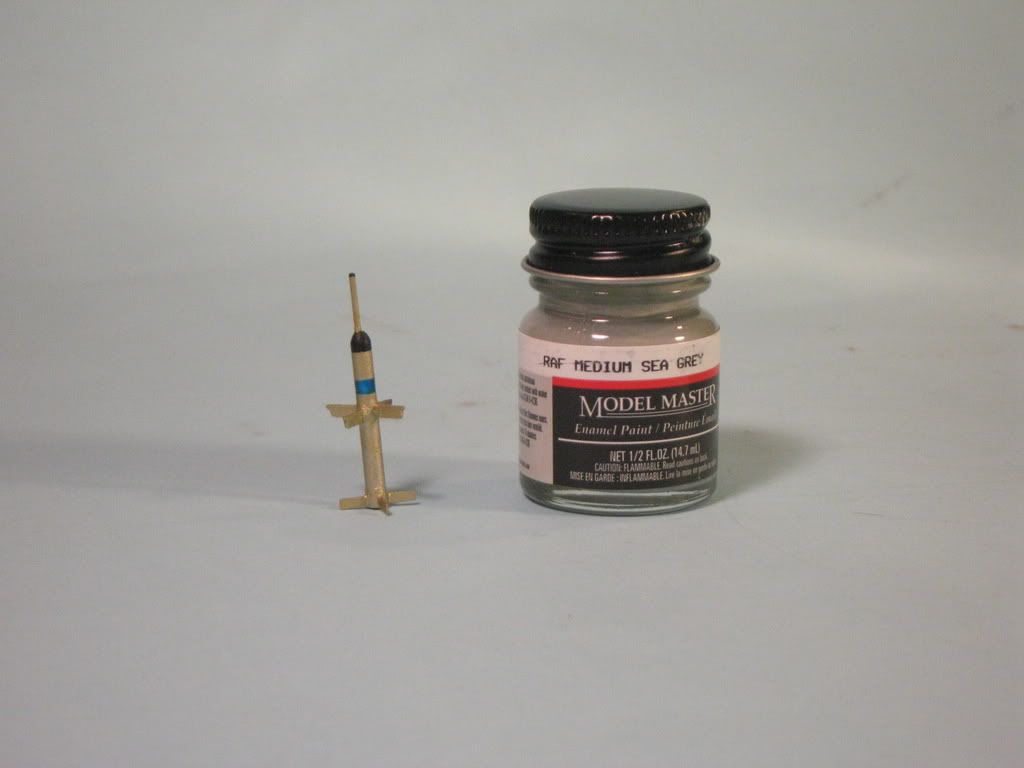
i plan on making some smoke coming from the back of the TOW and launcher with some pillow stuffing and a little bit of airbrush love. let me know if there are any major flaws in the build.

and a word of advice for fruil curious guys, make sure you do some research before you spend 30 bucks on fruil tracks. these were my first set as i wanted to try them so bad, i bought them for my bradley. turned out to be a complete waste of money, since the bradleys have no loose tracks, and i couldn’t sand them down to their bare metal since US tracks now have rubber pads. could have saved my money and spent it on the king tiger instead.

up next is the DML king tiger premium edition. this is my first time attempting the zimmerit, and i went head first into learning how to make it instead of buying AM parts. i used the tamiya tool and both apoxie sculpt and squadron green putty, to see if there is a difference. i found that apoxie sculpt looks better, and goes on better, but is really sticky, and if you cross directions, you’ll mess the whole thing up. as the green putty dries very fast. both have their advantages. it didn’t come out as planned as you really have to practice and take your time. there are a lot of mistakes in the zimmerit with my consisity (sp?), so i opted to make it a battle hardened tiger with damaged fenders and zimmerit. i’m trying to make the 503rd king tiger from normandy. since this was one of the few that survived, i’d assume it had seen alot of action. word of advice with applying your own zimmerit: make sure you study the instructions and not glue parts on that would impede the zimmerit application. i won’t even begin to show you the back of it, as most of the tools jack and such were already glued on, and i couldn’t take them off without damaging the kit. so the zimmerit looks horrible back there. i’m still in the process of applying the magic tracks to the tiger, as this is a very time consuming process.

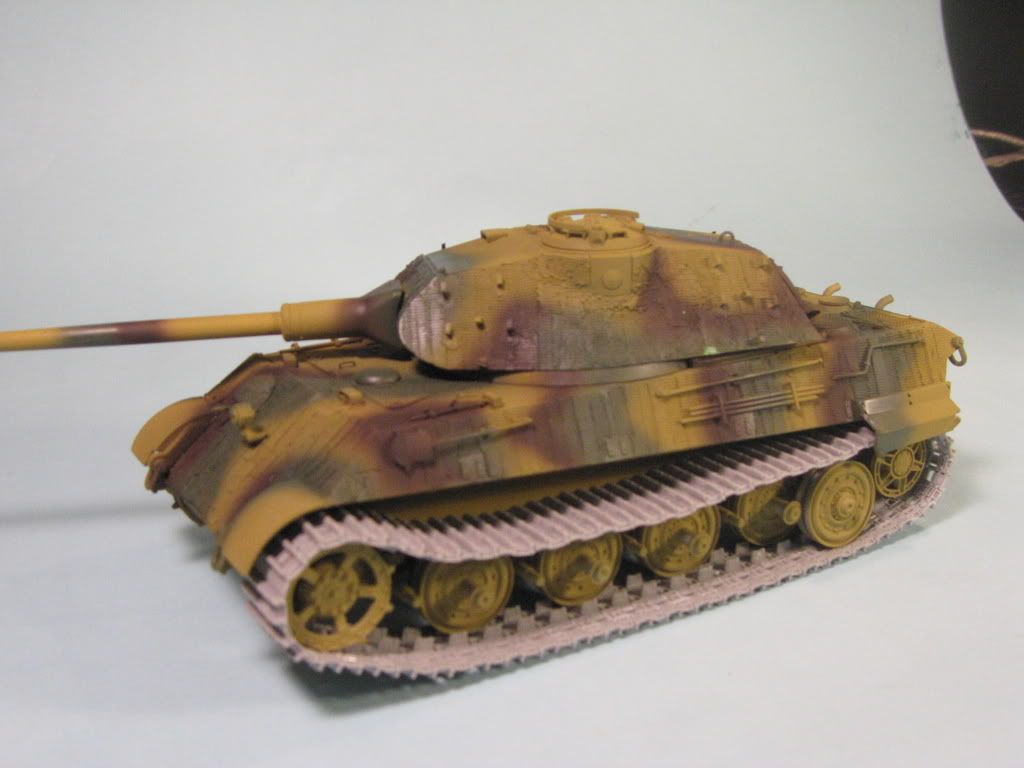
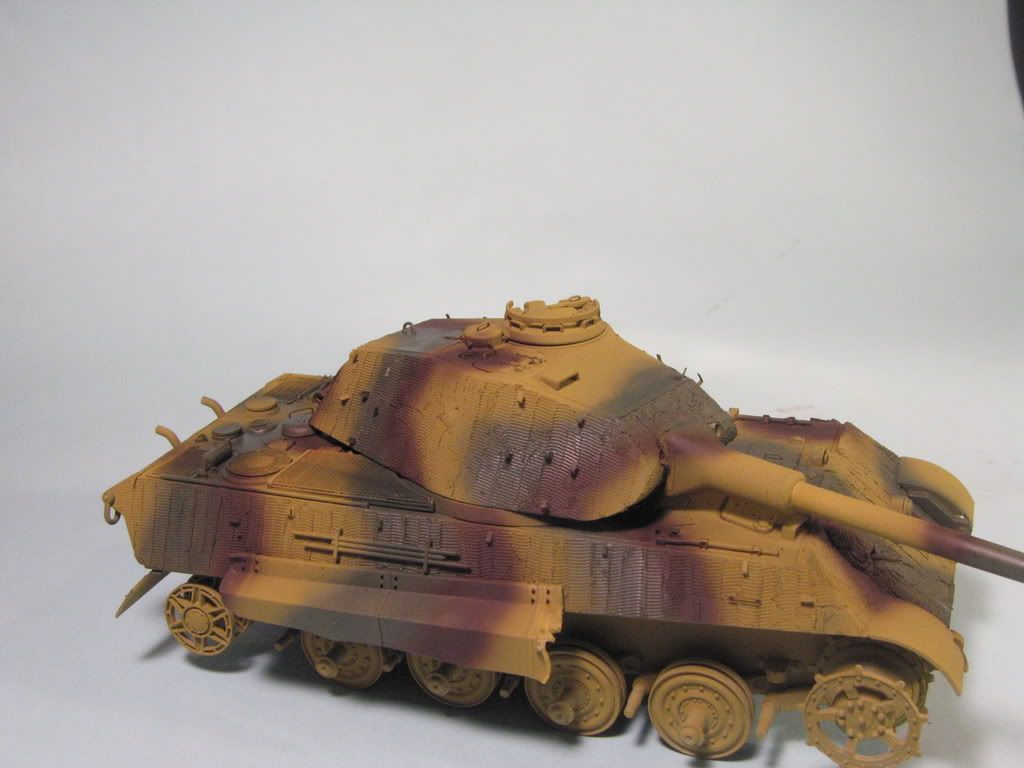
both of these kits are in the painting stage, so don’t freak on the painting details. the M2 has just finished the washing and dry brushing phase so its still glossy, and the tiger has just got its base coat with nothing else painted as of yet. learning from my mistakes on these two kits, i plan on building my most newest project, a DML elephant premium edition, with a little bit more caution with the zimmerit application and indy tracks.

i’m free for any comments, suggestions, and feedback. thanks for looking guys.

I’m not sure about smoke coming out of the back of the TOW. Aren’t the engine nozzles located approx. centre-body just aft of the fins? Ok, so I’ve never seen one in real-life, but of the pics of TOW firings that I’ve seen, the smoke is only from the booster, and once the sustainer kicks in a few metres out from the launcher, it seems to burn pretty clean? (Once again, happy to be corrected by anyone who knows [:)])

EDIT: Ok, after a little more research, it seems the pics that I’ve seen with the TOW just clear of the launcher show it after burnout of the boost motor (boost motor is completely expended before the missile leaves the tube) but before ignition of the sustainer motor, hence the minimal smoke trail.

The Bradley and TOW missile are looking great. It should look awesome once it is in place.

A note, I can’t tell from the pics, but there should be a large rack on both sides. Verlinden only gives one per set for some reason. I may have told you this before, but can’t remember. If so, here it is again. The Brad storage racks were only on vehicles from 3-15 IN, 2 BDE, 3 ID in OIF 1. They were locally made in Kuwait and added to vehicles that were in the PrePo fleet there. The Bn ID# for 3-15 IN was in the 40 series.

Hey Rooster,

Looks like you’ve been busy. I’m curious (being a Tiger guy) about the track hangers on the “early” turret, I can’t recall ever seeing them in the photo record for the 503rd (or any other unit for that matter). Anyway, the zim on the right side looks pretty good to me, but the application around the cupola looks a little tired. Maybe some practice runs with the apoxysculpt would have been in order. As for the Fruils on the bradley, the top runs are of course hidden by the skirts, so, you probably could have made them work. I see your point though, about spending the money and all. There are quite a few assembly tricks that I have learned over the years to make “live” track look right using the metal blocks. It is a matter of opinion, but I don’t agree with a blanket statement that they are “a waste of money”. Maybe for you, but a lot of us have been working with them for years and they are a good product.

Applying realistic zimm in any medium is an art, not a science, no matter what medium you choose…hang in there, the more you do it, the better you’ll get. I admire your hutzpah in going for it on the KIng Tiger, most builders are intimidated by the thought of scrapping a $30.00 plus kit…but, that’s how we learn right?

Long Live the KING!

regards,

Steve

Hey Roo! I don’t care what ya say; I think the both of these are looking superb![8D][yeah]

And to be honest, the zimmerit looks really commendable for your first time–my first zimm’d model looked like Jeff Goldblum as “Brundlefly” after he crawled out of the transport module at the end of the movie! (Ya know,“The Fly” remake, with Geena Davis, about the guy who…oh never mind![:-^] )

Anyway, to be fair, you picked one of the worst choices for a first-time zimmerit; that Porsche Tiger II with that annoying turret bulge! In fact, when I recently did mine, I opted for a Cavalier Zimm pack–I just didn’t want to try to putty around that! I think it looks great for your first zimmerit, and I commend you for “diving in headfirst”! And the truthis, you’ll take it to a contest, and somebody will complement the “realistic” rough zimm application-I guarantee it!

I had to chuckle about your “learning curve” regarding placing tools, details etc; it mirrors mine exactly! Hey-there’s no better teacher than experience!

Ditto with ya on those “Frooly” tracks![yuck] As I already wrote in another post, I can’t justify the cost myself either; some guys love 'em but I’ll take a nice set of kit-included link tracks myself any day!

Well if I can offer any crit at all, I’d say to cut your Dark Yellow base coat by 50% with white; in any color photos and even an ORIGINAL StuG III in the Patton MUseum at Fort Knox, the DY is more of a light tan than rich mustard, as it comes out-of-bottle. You really notice it when you wash it; the unaltered DY really looks a touch TOO dark after a dark wash…something to keep in mind for the next build!

Well, I’m looking forward to seeing the finished products when I get my computer back–my disc drive failed; I’m on my way up to the “Geek Squad” at Best Buy to see about a repair. I’ll probably be offline for a couple weeks if they have to send it out! WWAAAAAA!!![BH]…DOOG

hey guys, first is for phil. i know what you are saying about the smoke from the TOW, but being a 11H myself when i was in, i can clarify what happens when the TOW is fired. the launch motor fires first. this is what gives the TOW the initial “boost” out of the launch tube. this is where the smoke comes in from, which is very minimal actually to avoid giving away your position. once the missle is out of the tube and approx. 3-5 meters from the tube, the flight motors kick in. these are the vertical and horizontal exhausts you were talking about mid way down the missle body. kinda like the booster packs on the space shuttle, these are what keep the missle in the right direction left/right, and up/down. althought you would never ever see the smoke in real time, as the TOW is a very, very fast missle. but thanks for the heads up. it will just barley be clearing the tube, not too far out so i can hide the wire holding it and using the smoke as a cover. i thought about going out farther and using the smoke in the stabilizers, but then the wire would be way too thick and out of scale to simulate the real wires.

for gino, yeah your right about the bustle racks. verlindin only gives you one. no you never told me that they did, so i didn’t know if i was correct in this. oh well, better knowledge for next time. i know that when i was there, we bascially had our fuel and storage racks for the back of the HUMMWV’s locally made along with bars on the bottom near the tires so soldiers could step up better with all the heavy gear. i was surprised when we got back that the army now makes these in the new OIF packages. so i guess i just learned a valuable lesson. are my marking ok for one of the units you provided?

crockett, thanks for the words of wisdom. i was basically following the kit directions for the link stowage on the turret. it shouldn’t have them, being an early turret? and my god are you right about the left side with the zimmerit. that curved cupola messed it all up, but like you said, it just take practice practice and more practice. that’s why it turned into a “battle hardened” tank with messed up zimmerit [:O] i’ll get the hang of it soon enough. but to clarify on the fruil comment. i know there was a debate earlier on fruil tracks. i never meant it was a waste of money. i really liked them actually and wish they were a little bit more cheaper, as i would be buying a lot more of them. i just was trying to say i bought them for the wrong reasons with the bradley, as i think the main beauty for these tracks is that they have that nice sag, and you can sand them down, which i couldn’t do either one with this kit. wish i would have saved my money and spent it on elephant or king tiger tracks.

and now finally, the doog. what’s up buddy? yeah what is a better way to learn zimmerit than applying it to a 30 dollar kit? you seem to be a little bit more careful. although i could have been the most careful guy in the buisness, but trying to apply to those curved pieces is a real pain in the [censored] lol. and i did notice the yellow was a little dark. reason is becasue i only use tamiya, MM acrylic, and polly scale acrylics. this is also my first time using enamaels. i only bought a few colors and i didn’t have anything to lighten it up with. me being all impatient to see how they work, said screw it. but now i know that the next time i go to the LHS, i need to start my collection of colors in the enamaels as well. and i’m glad i could bring you a smile on my little story of a completly glued back piece, jack, block, exhaust and all before the zimmerit. sometimes we see mirror images of ourselves on here, how we were when we first started out. hurry back soon, and i hope your PC gets fixed soon.

thanks to all for looking with your comments and critiques. looking forward to some more [;)] and i’ll try to post some more up when they move along closer to the finish stage. thanks guys

You have a start to the markings, but need more to be accurate for a 3ID Brad in OIF 1. Check out the one I did for a customer as a 3-15 IN Brad in OIF 1. You can see all the markings on it. Let me know if you need further help. I made the markings myself and can print up a set for you if you need them.

More here and here.

Chris, that Bradley is looking really superb. Love all the extras. [tup]

As for your King Tiger, I admire your courage in trying your own zimmerit. I think it’s commendable for a first time and like Steve said, practice makes perfect. In the end it will come out looking fine.

As for the Fruils, your probably right about doing them on the King Tiger as opposed to the Bradley for the afforementioned reasons. Live and learn my friend.

gino, if you wouldn’t mind, that would be a great help. since i’'m finished the painting stage and already begun the drybrushing stage, i’d hate to mess it up now. any decals you could provide would be greatly appreciated, as long as its not an inconvievience for you or cost you any money. i love your brad, and i would love to try and make mine a copy of yours, but i’m sure that won’t happen, hehe. so yeah gino, any help you could be, i would humbly accept.

thanks again guys for everything, and if anyone can clear up the confusion about the track brackets on the turret, that’d be great. i know crockett said he’d never seen them on the 503rd tiger, but i was just following the instructions, and they had them on, so i put them there, lol. funny because i also am trying to make my 503rd like crocketts’, [bow] its not too late for me to rip them off and spot paint those areas.

thanks guys

No problem. Message sent. They say imitation is the greatest form of flattery.[:I][:I][8D]

Thumbs up on both models so far Rooster. I like the Bradley, I’m more and more interested in these modern armors. As for the King Tiger, I think you did very well on your first experience with your own zimmerit.

Great job.

hey chris [:D]-- great looking works in progress! can’t wait to see finished results-- the zimm on the tiger looks real good also!-- tread[8D]

thanks guys. i went ahead and took crocketts comment about the track hangers and took them off of the turret. hope everything will still look ok. i just finished puting a coating of future on it, so its ready for the washing stage. thanks alot guys for looking and your comments.