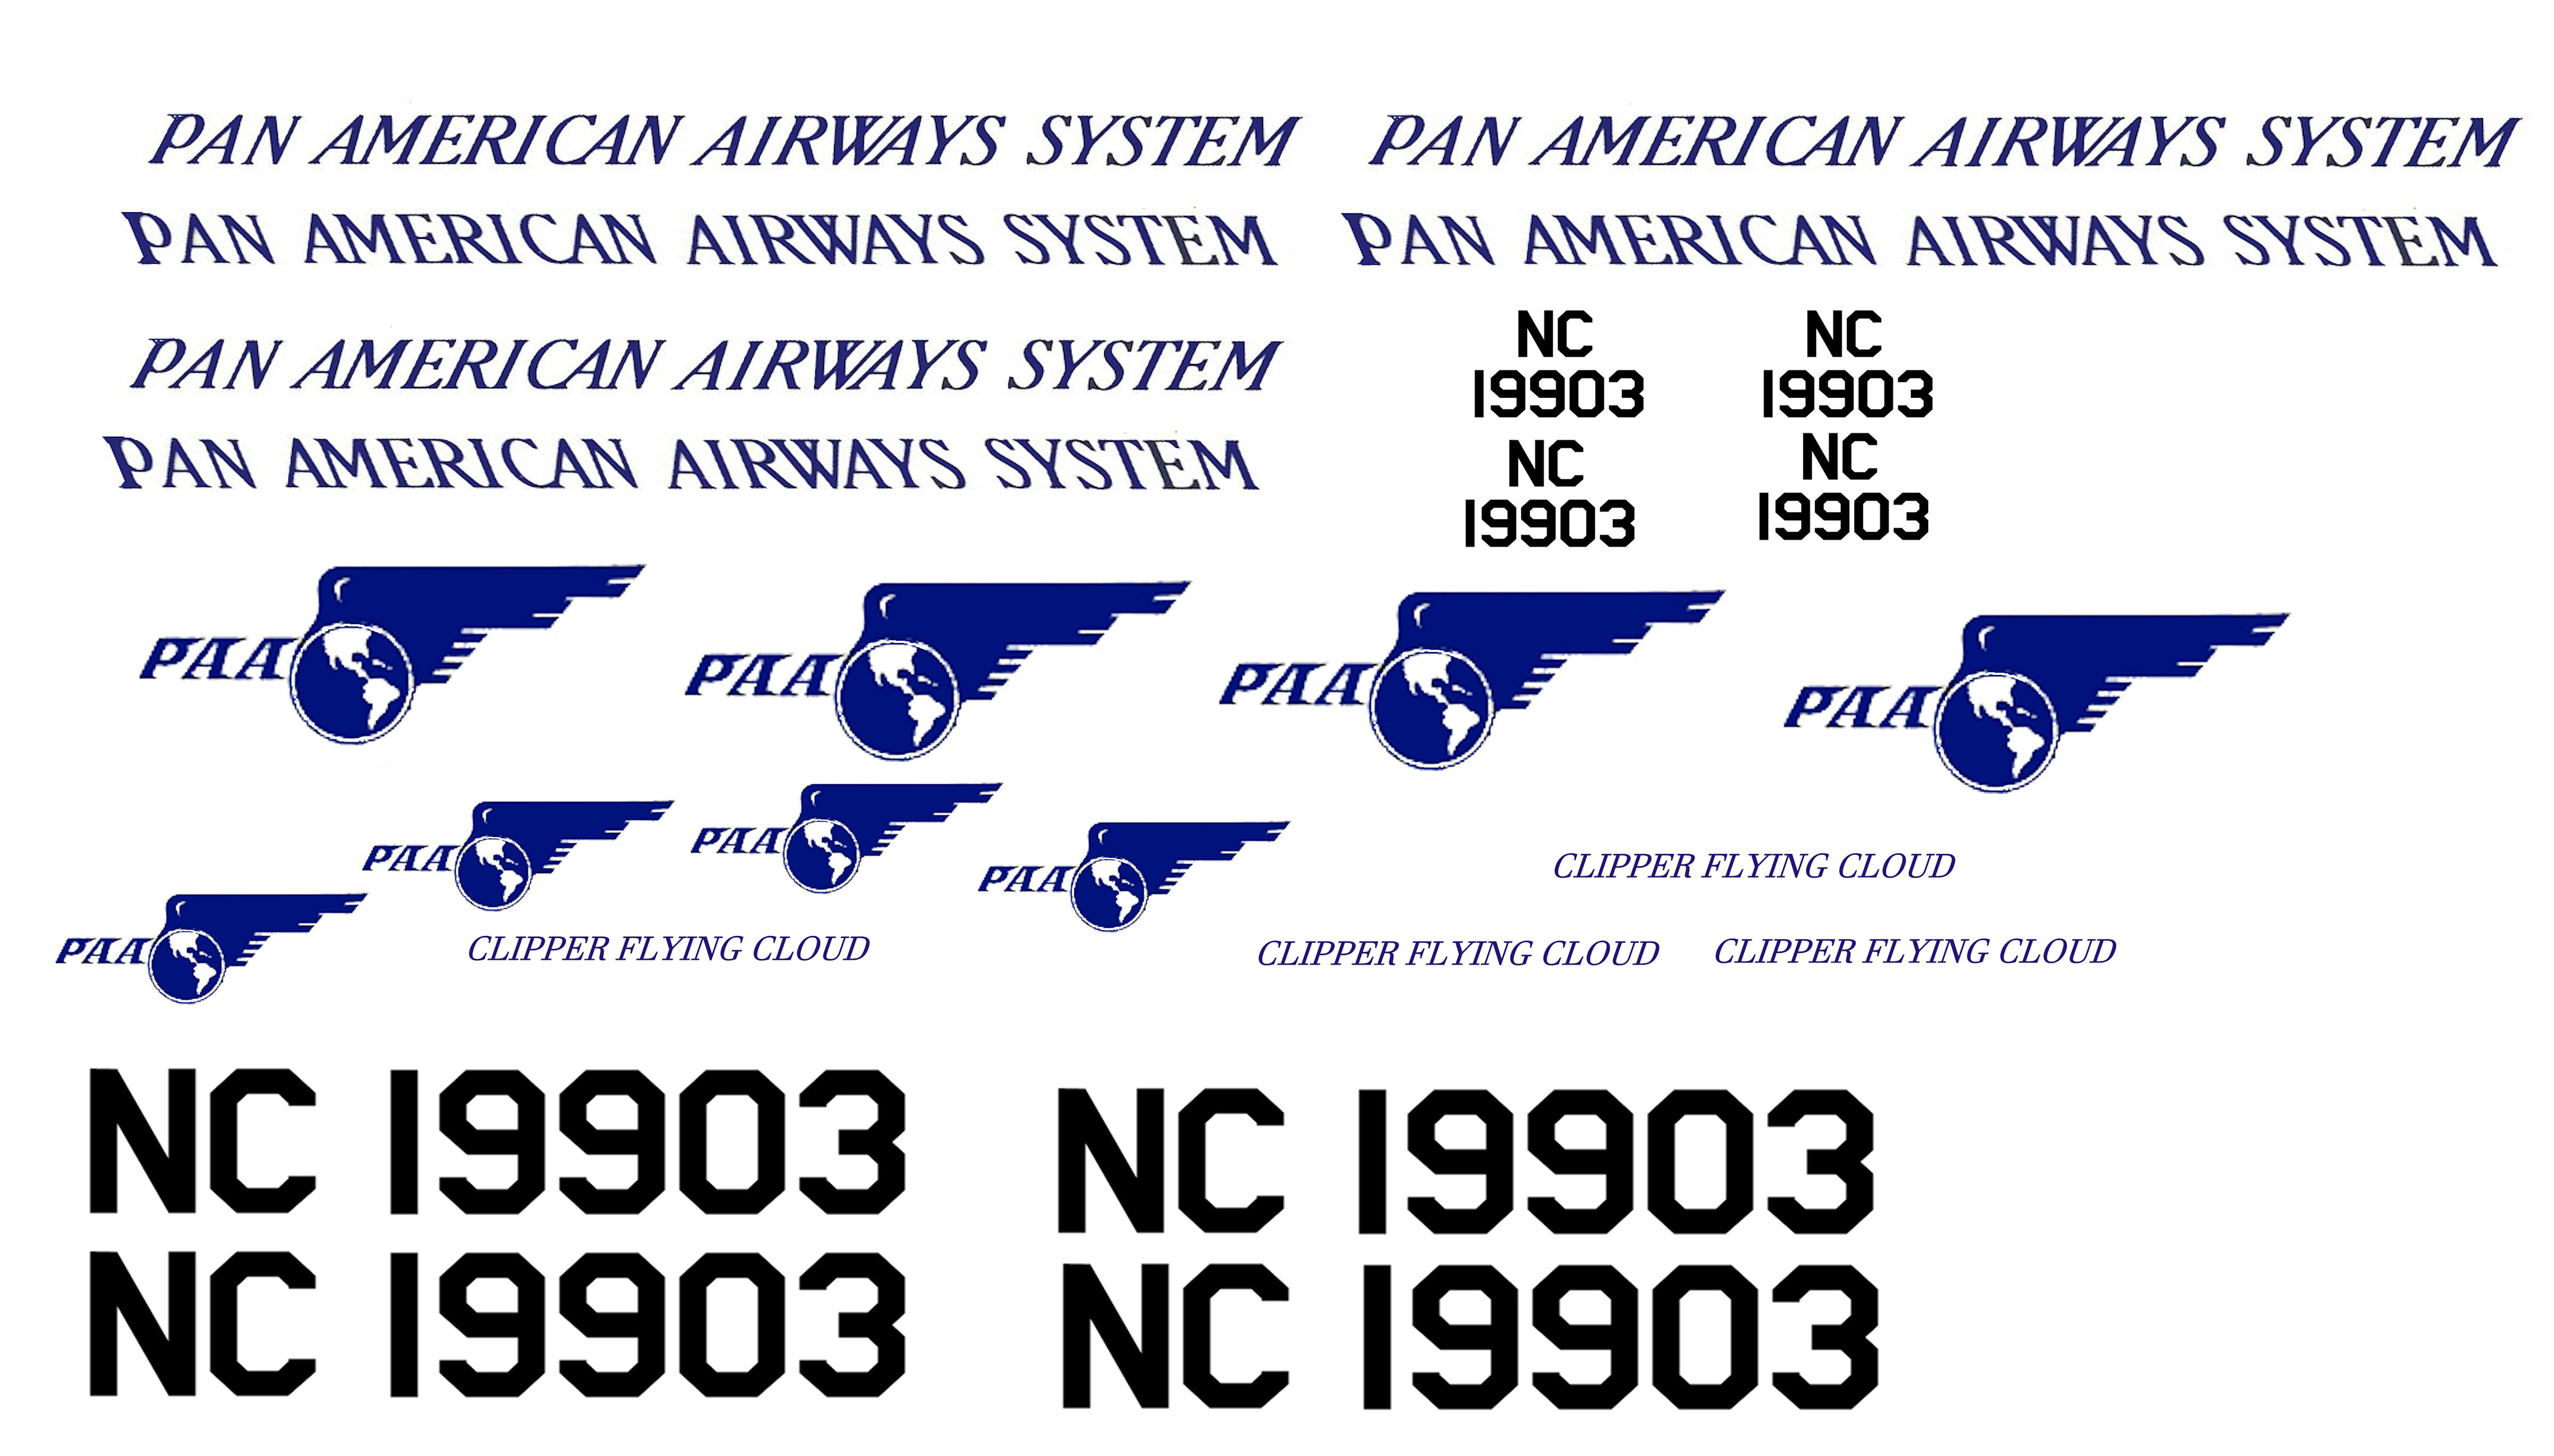
Lost two weeks doing the last pair of decals. One week to print, dry and coat, then found they were the wrong size! So, rescaled them and printed, dried, and coated again. Finally done.
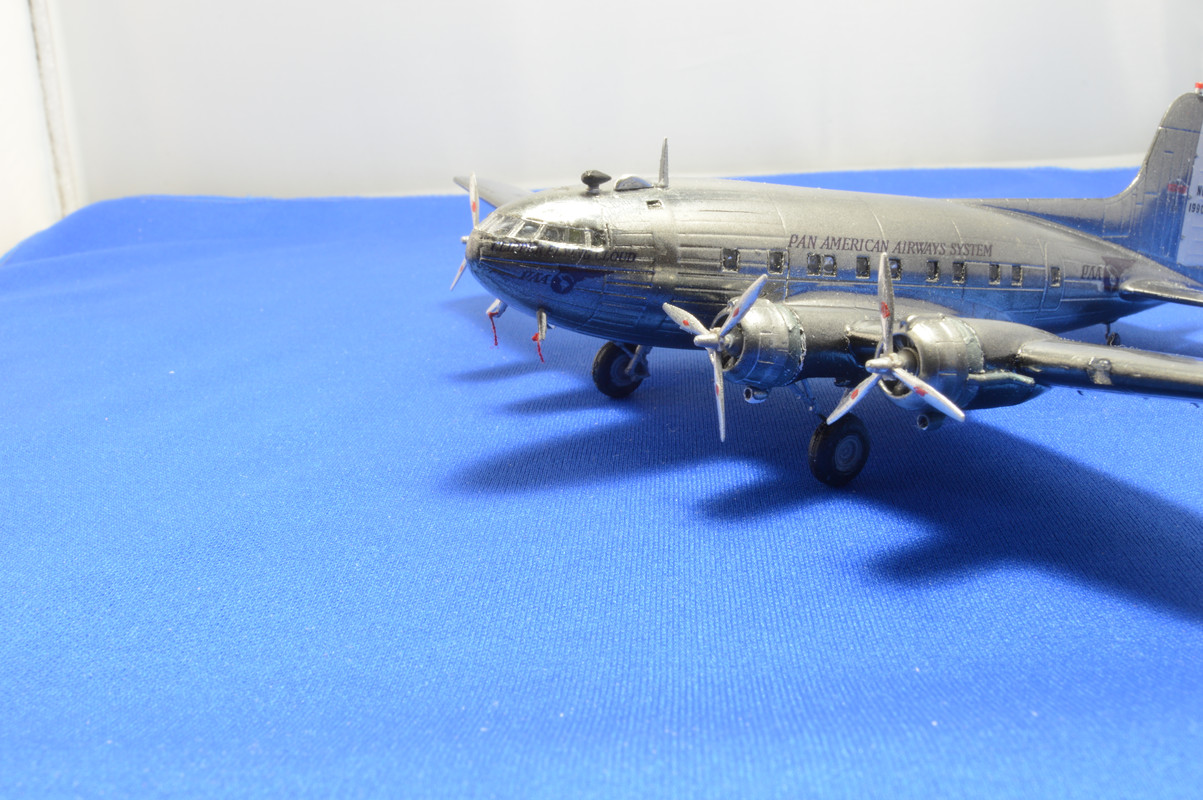
These shots are not edited yet- I will be cleaning them up later. Two last minute changes- the direction finding loop (black antenna) is above the cockpit on the Panam version, so mounted it there. Also, all versions have a teardrop fairing above the cockpit which I had to scratch. I painted the tips of the pitot tubes red and glued a piece of red thread from the tip to simulate the remove-before-flight covers, which the museum bird is displayed with.
It is a good time to be a modeler - a friend bought the Maquette(?) kit, and it was BAD! The two fuselage halves were not even the same length! The quality of the rest of the kit was very poor. I think that was the only kit where my friend opened the box, perused the contents, closed the box, then got rid of the kit.
Best wishes for your build! Roden, despite their variable quality (compare their C-141B to their VC-10), are putting out nice kits these days.
Yeah, I bought that Maquette kit too. Threw away the fuselage, kept the wings with the idea I might scratch a fuselage. I may still do that- that kit was in 1:72 and I might like to have a 1:72 version. No problem scaling up the decals.
Slow progress on mine. Matching length was ok; it was height that was off. And why have recessed but still blanked off cabin windows?
The decal kit from Vintage Flyer has the cabin windows. Current struggle is that the wings are from a B-17C and I have to rebuild the lower halves of the nacelles to remove the turbos.
I guess they did have four engined transports at the time. Okay,I’ll go along wid dat! To answer another question that was brought up though. Revell used to do a lot of their airliners with depressions where the windows were. Never understood it then, Still don’t .
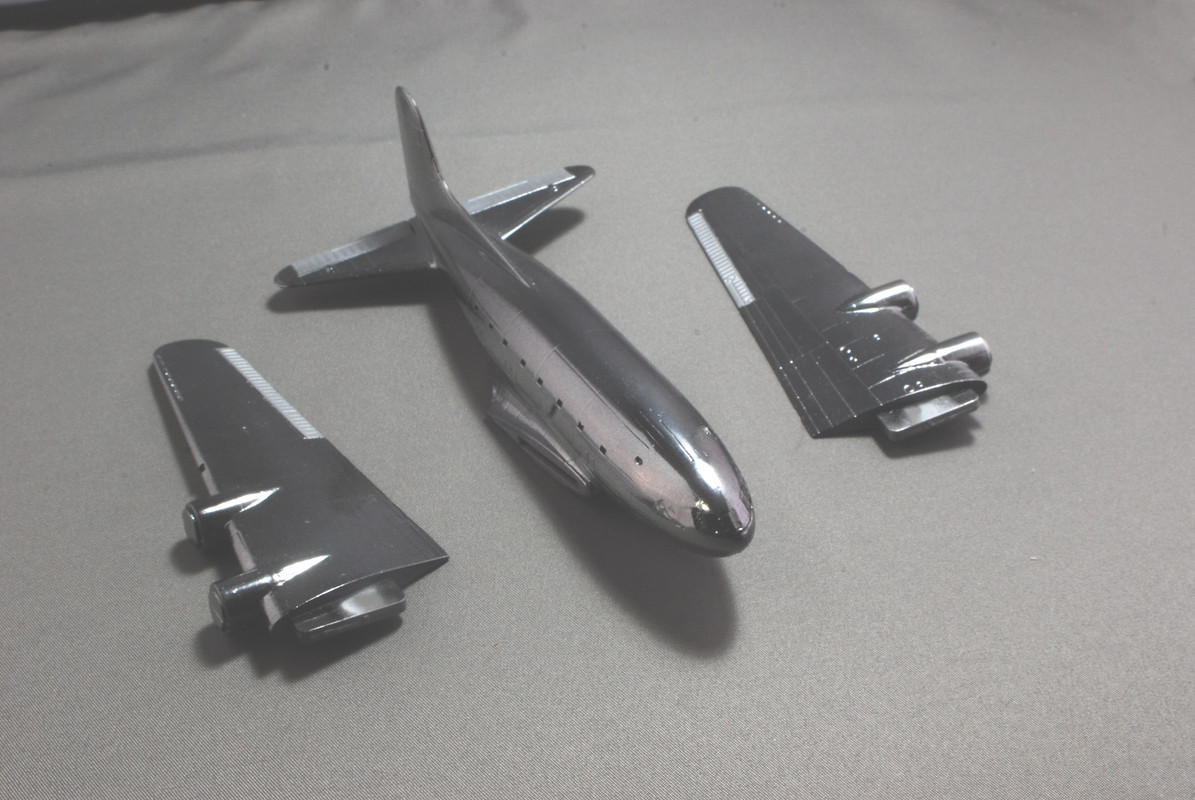
Got a nice Alclad finish, got the wings attached to the fuselage, and model is on its gears now. Also started decals- just a couple, to ensure the sheet is okay. I duplicate all decals so I have spares in case I screw up one.
They are working fine except for one I screwed up.
Here is the Alclad work.
I have the left engines on the wing now. I also unmasked the windows and windscreen, with great trepedation, and found they were fine- a relief.
I’m embarrassed! Apparently I forgot to save some editing I made on the decals. I had decided to start decalling the right side first. Turns out the correct font for the right side was not on the sheet. The lettering on the name leans the other way on the right side and so the image I started with was okay for the left side. I had fixed that, but had not notice the same thing for the logos and their text.
I found it should be a mirror image of the left side (with the letters reversed, of course). Spent yesterday editing the decal sheet. Printed it out yesterday, but the ink needs to dry for three days before I can coat the new sheet. In the meantime I will do the left side first
Yep, caught that. Copied the globe first and pasted it in an empty spot. Then mirrored the whole logo and pasted the globe back in. Did the PAA letters seperately.
I found the right logo by google-ing panam logo with an image search.
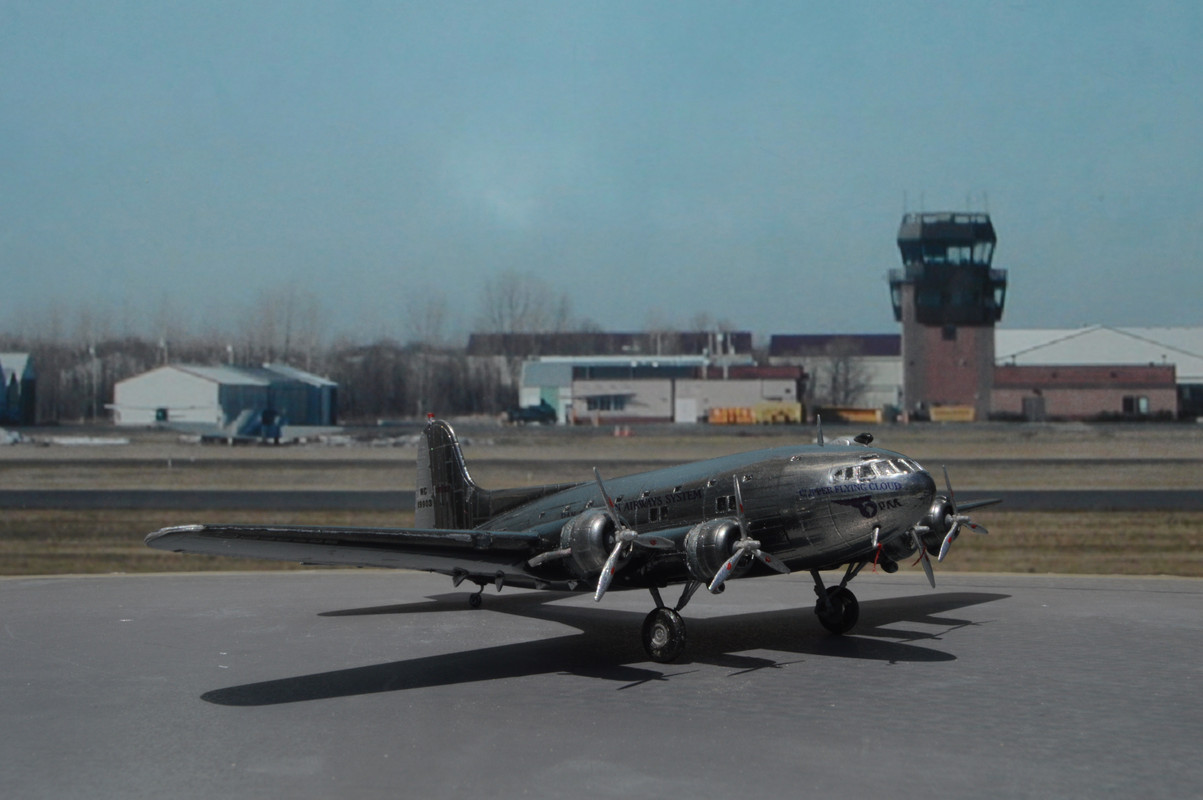
I have lots of pictures of the Smithsonian plane so I saw the reg numbers in all those photos. I wanted to do that specific plane. I would be happy to send anyone who wants to build that plane the image of my decals.
Nice metallic work, Don. Looking really nice so far. I’ve seen teh 307 at Udvar-Hazy…she is most certainly a beautiful lady, nicely shined and resotred for posterity. Looks like you’re representing her beautifully. [Y]
Beautiful paint job! Always loved the look of this aircraft. Btw, the plane acutally landed in Elliot Bay a stones throw from West Seattle and not Lake Washington. As a WS resident it created quite a buzz or should I say glug. Can’t wait to see the finished project.