Revell Pro-Modeler 1/32 Junkers Ju 88A-1 Bomber - "FINAL REVEAL!!" (3.18.16)

Hello Chaps,

Since completing my Monogram Pro-Modeler 1/48 scale Heinkel He 111H-22 and enjoying every minute of the build, along with the end result, I wanted to do another German Bomber, either the Ju 88 or the Do17. Very kindly, one of my YouTube viewers sent me this kit- the Revell Pro-Modeler 1/32 Junkers Ju 88A-1 Bomber, for which I was extremely grateful!

So, without further ado, let’s get onto the introduction:

The kit comes in a sturdy two piece lid and base box with a 24 page black and white instruction booklet, a decal sheet that offers two sets of markings- one for Geschwaderstab KG 30 and one for a “Battle of Britain” version Kampfgeschwader 54, six bags of sprues; five bags containing a total of 13 grey sprues and one bag containing a single clear sprue making a total of 281 parts.

This kit was originally released as a new tooling in 2008, then again in 2011 with a new box art and last released in 2013 with new box art and some new parts. This kit is the second release of 2011.

The Box Art:

IMG_4480_zpsrkz5znkt.jpg

IMG_4481_zpsfijjw6kk.jpg

IMG_4482_zpsgnrjzfn7.jpg

IMG_4484_zpsrsdbxwsu.jpg

Specification table on the side of the lid:

IMG_4483_zpsrfs47vno.jpg

With the lid removed one can see the contents are contained in a nice sturdy base with overlapping sides:

IMG_4485_zpsvydf5oiz.jpg

The 24 page black and white instruction booklet:

IMG_4487_zpsj9rwtzta.jpg

IMG_4488_zpswmirzlrt.jpg

IMG_4489_zpsca9ejqlo.jpg

IMG_4490_zpsld37b59s.jpg

IMG_4491_zpschcdq6cx.jpg

IMG_4492_zpsr8eeotqh.jpg

IMG_4493_zpsluj0faqm.jpg

IMG_4494_zpshtvftd3o.jpg

IMG_4495_zpsp7rgsgso.jpg

IMG_4496_zpsg8dmjkma.jpg

IMG_4497_zpsf3ihcquz.jpg

IMG_4498_zpszzn7yek8.jpg

The Decal Sheet:

IMG_4486_zpsqhmfwlfd.jpg

The 13 grey sprues:

IMG_4505_zpsdwmpxump.jpg

IMG_4506_zpstdmuud6y.jpg

IMG_4507_zpsqxrzyvkz.jpg

IMG_4508_zpsvtbp8y4f.jpg

IMG_4509_zpsxd2e7n91.jpg

IMG_4510_zpsyh98nvx2.jpg

IMG_4511_zpskhljaofb.jpg

IMG_4512_zpsm8hnzx7h.jpg

IMG_4513_zpsnlvcycse.jpg

IMG_4514_zpsifnpohqg.jpg

IMG_4515_zpsp4yjkppl.jpg

IMG_4516_zpsfyvvflru.jpg

IMG_4517_zpsmjuktzq4.jpg

IMG_4518_zpsm4lpusob.jpg

IMG_4519_zpsxev3fcr8.jpg

IMG_4520_zpszs0mhb8m.jpg

IMG_4521_zpsfikdhkqp.jpg

IMG_4522_zpstmvyqx9f.jpg

IMG_4523_zpsisfp1ei9.jpg

IMG_4524_zpsmr7eml2p.jpg

IMG_4525_zpsjkzhdzwl.jpg

IMG_4526_zpsinidqbh0.jpg

IMG_4527_zpsp4kfkzqb.jpg

IMG_4528_zpsipo4bems.jpg

IMG_4529_zps1qdxmu2b.jpg

IMG_4530_zpsm9ncjs2g.jpg

IMG_4531_zpstqc1pljc.jpg

IMG_4532_zps6zqevofm.jpg

IMG_4533_zpsjjjh6mn9.jpg

IMG_4534_zpsx1ol3wte.jpg

IMG_4535_zpspmnqi1ox.jpg

The one clear sprue:

IMG_4536_zpsufsjf7yd.jpg

IMG_4537_zpsc2veyaug.jpg

IMG_4538_zpssnjuolqv.jpg

IMG_4539_zpsjpnwlame.jpg

IMG_4540_zpsq45nop52.jpg

So, that’s the kit, let the build begin!..I have actually begun the build, I started on Monday, but I’m just getting around to posting and starting this build thread.

"Build Update #1 coming very soon!

In the meantime, if you’d like to see my YouTube “Build Introduction” video, then here is the link to that:

https://youtu.be/jXrdga-zYG8

Thanks in advance for reading this thread, leaving any comments and for watching my video, should you decide to do so!

Happy modeling and have fun!

Cheers

Martin

Thank you for the link, I’ll definately be following this build. I’m looking forward to this.

Toshi

What’s the parts count on that kit? Looks like a lot.

BK

I will be following this build myself and looking forward to it. The only thing that stops me building one is that I’m a UK guy in the USA myself and will be returning in 6 months after a 10 year stay and already have to many precious models to ship back!

Very nice. I look forward to your progress.

Thanks Toshi, much appreciated! I hope I can make it worthwhile for you to follow!

Cheers [:)]

Martin

There’s 281 parts Brandon, you can see the specifications on the side of the box in one of the box images above.

Cheers [:)]

Martin

Thanks for aking a look Orfy, much appreciated and I’m happy to hear you’ll be following the build. My next update will be uploaded within the next 30 minutes. Any reason you’re returning to the UK, or was your 10 year stay here a contract that you’ve now reached the end of?

Eeewww…I’d be nervous about my models being shipped that distance, I wouldn;t be able to sleep worrying that they were going to get damaged!

I’ve been here 16 yrs now- November 1999. I lived in Palm Beach, Florida for the first 7 years, then mved north to new Hampshire for business and have been here since. I bloody hate the long winters though and miss the all year round sunshine!

Where in the states do you live? Have you enjoyed your stay, or do you miss the UK?

Cheers [:)]

Martin

Thanks Lawdog…next update coming in minutes!

Cheers,

Martin [:)]

Revell Pro-Modeler 1/32 Junkers Ju 88A-1 Bomber- “Build Update #1

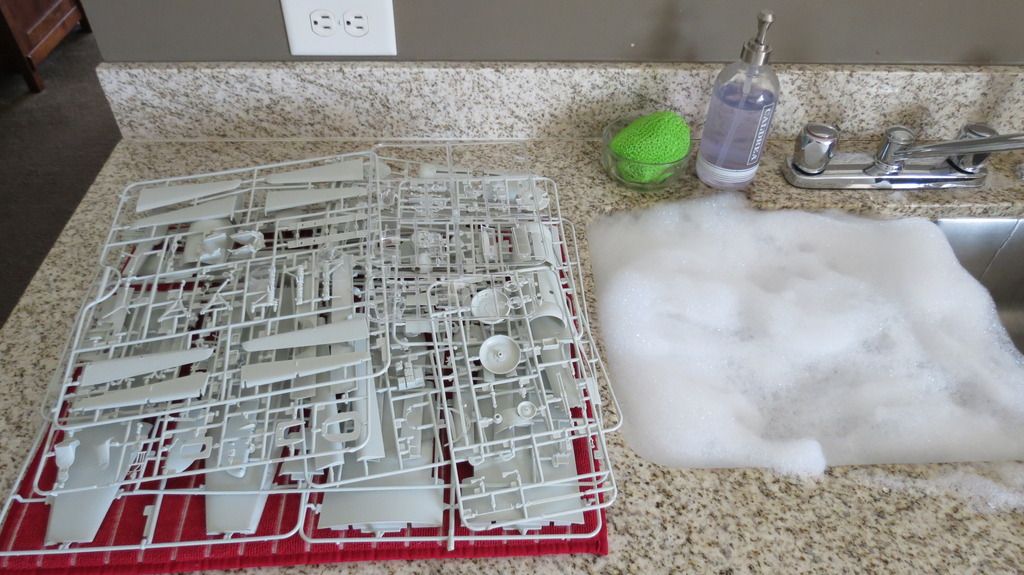
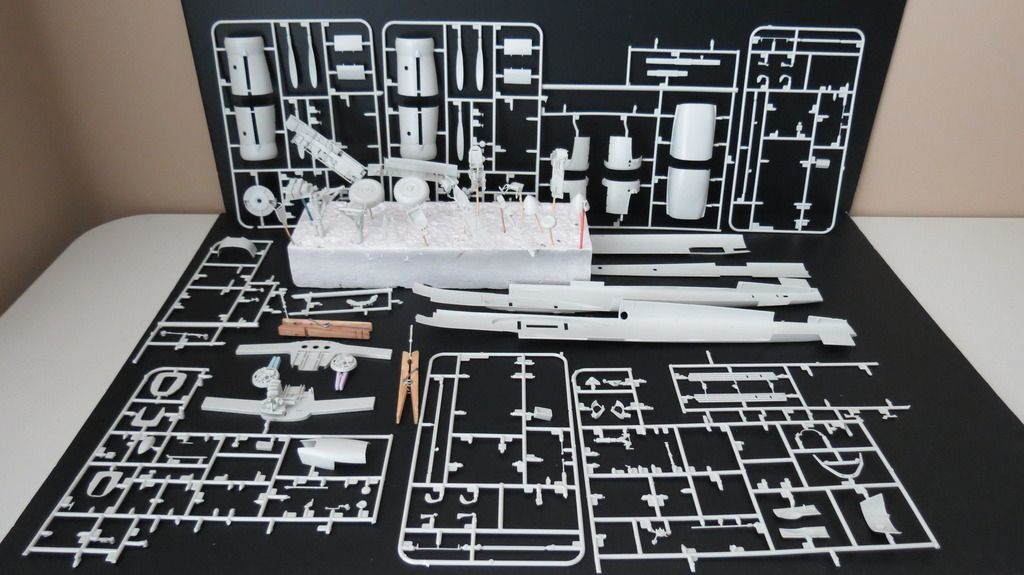
The build began last Monday and the first thing that I did was the ceremonial bathing of the parts, followed by allowing them to air dry:

IMG_4541_zpsyubcgv3x.jpg

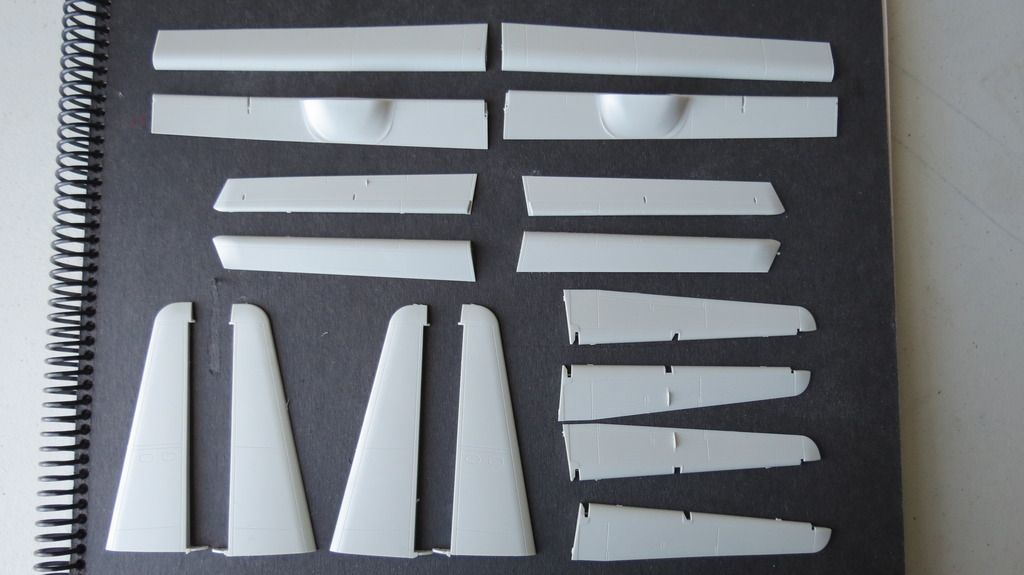
After the washing, the next thing that I tend to do is to glue together as many of the sub-assemblies as possible to eliminate the large number of sprues piled up on the work-bench. I started off by cutting from the sprues all the halves of the ailerons, flaps, horizontal stabilizers and elevators, then glue those together:

IMG_4542_zps3pnfe5oi.jpg

IMG_4543_zpsuncni9bt.jpg

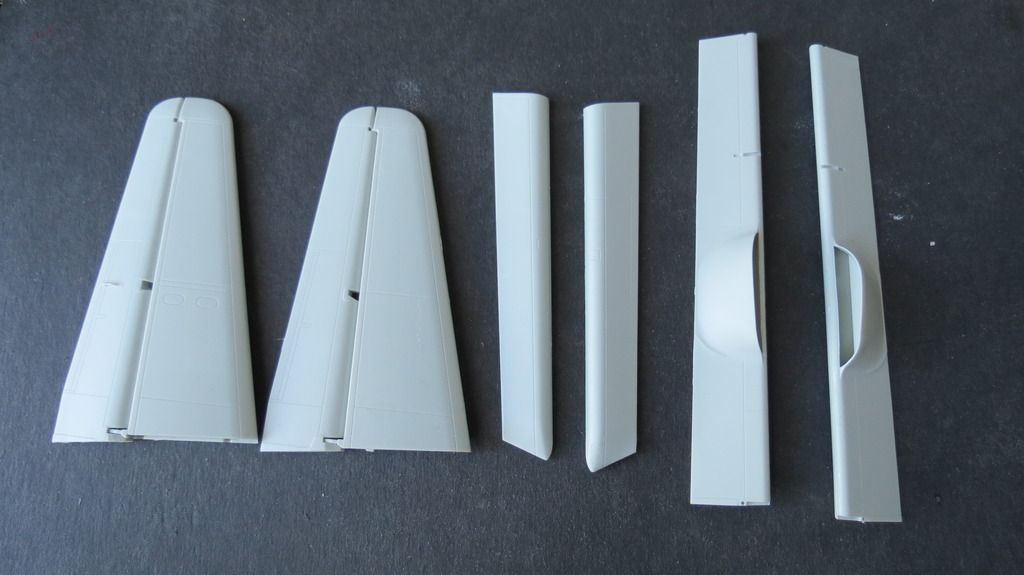
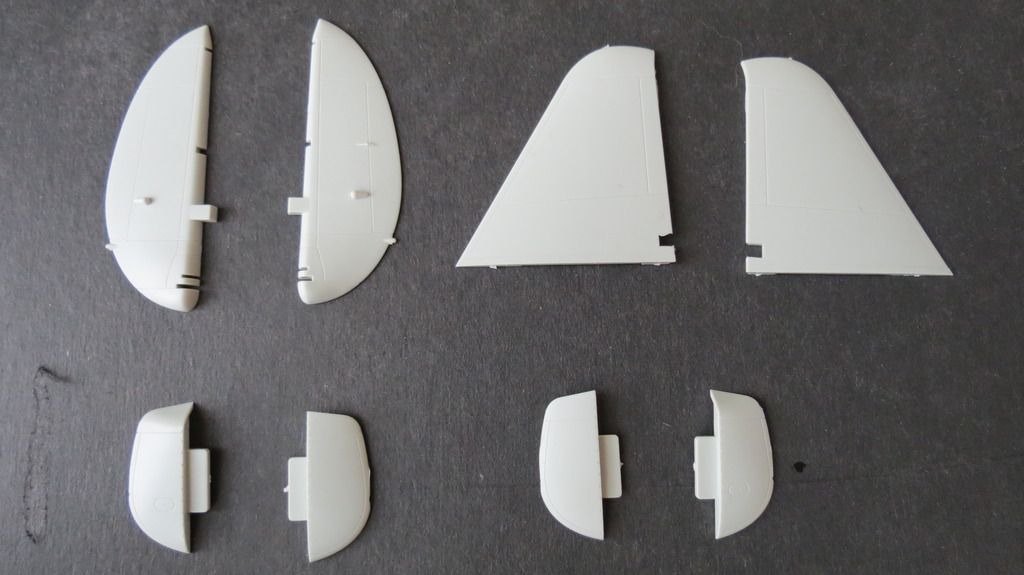
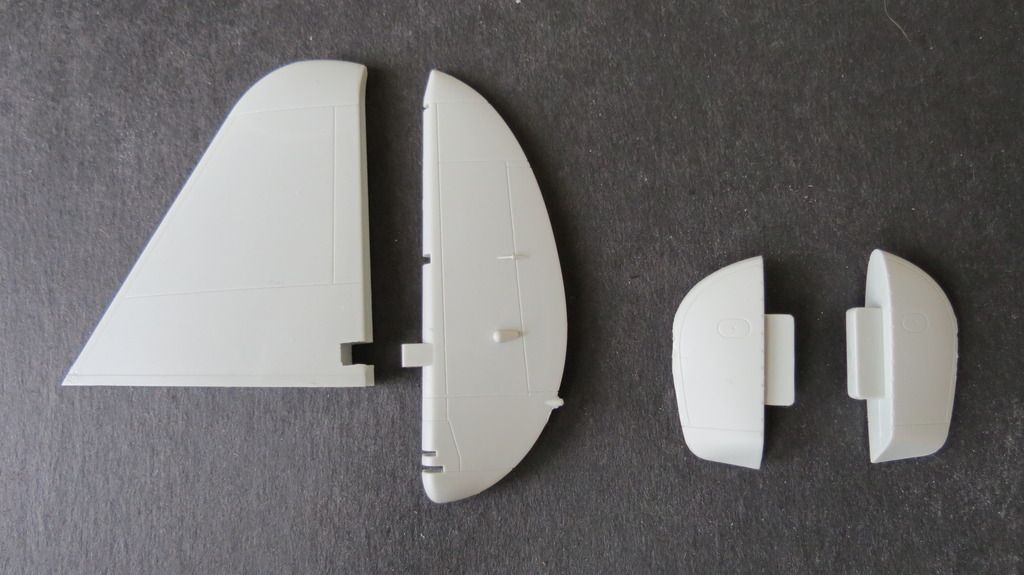
I then got the parts together for assembling the vertical stabilizer, rudder and wing tips and glued them together:

IMG_4567_zps79dv9jqp.jpg

IMG_4568_zpsbzsni91m.jpg

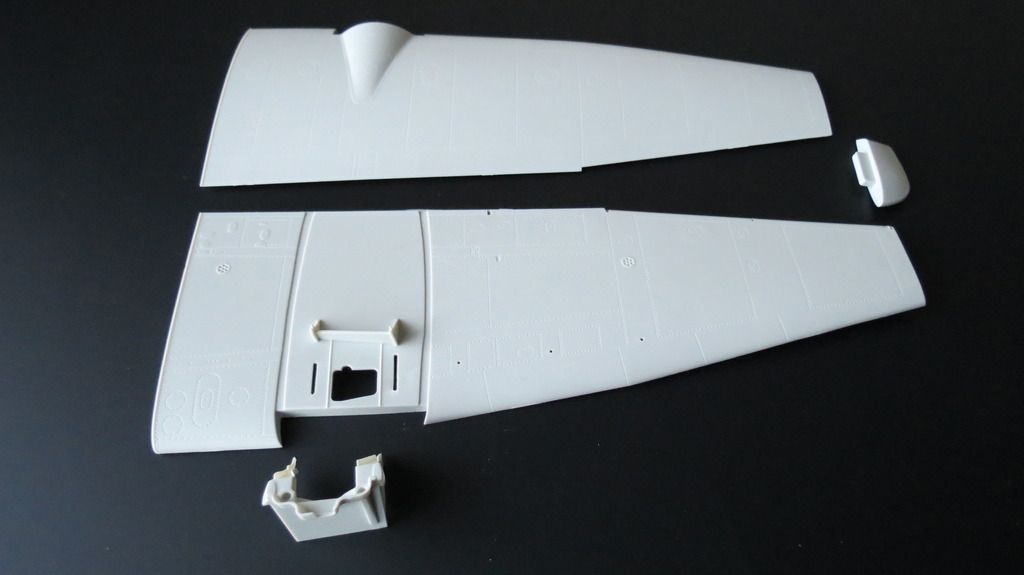
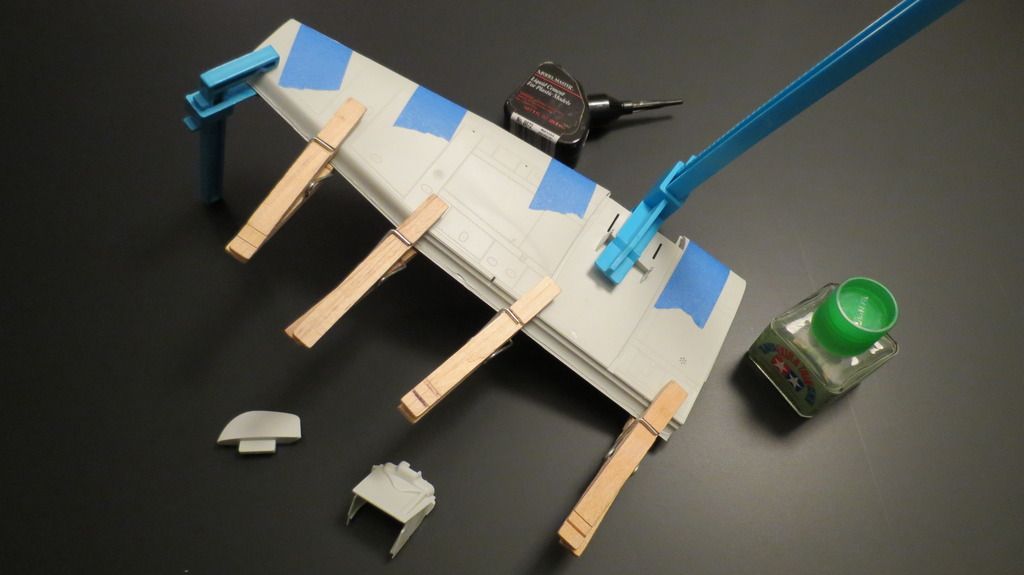
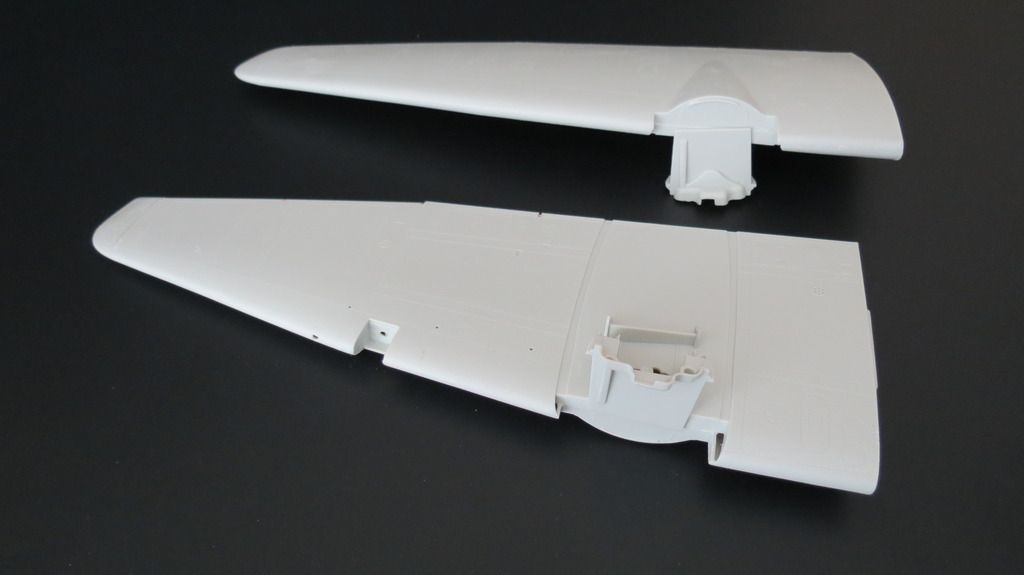
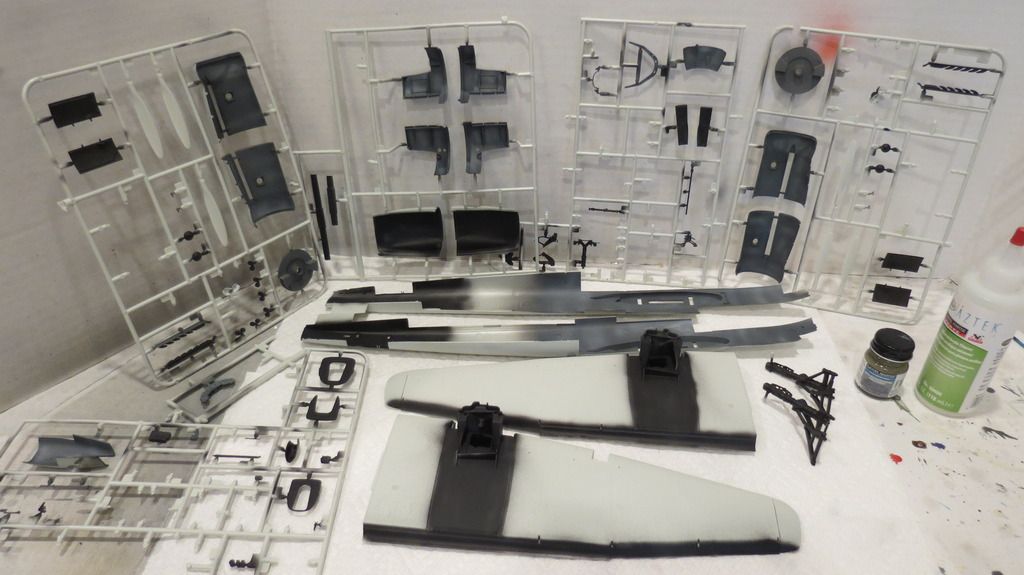
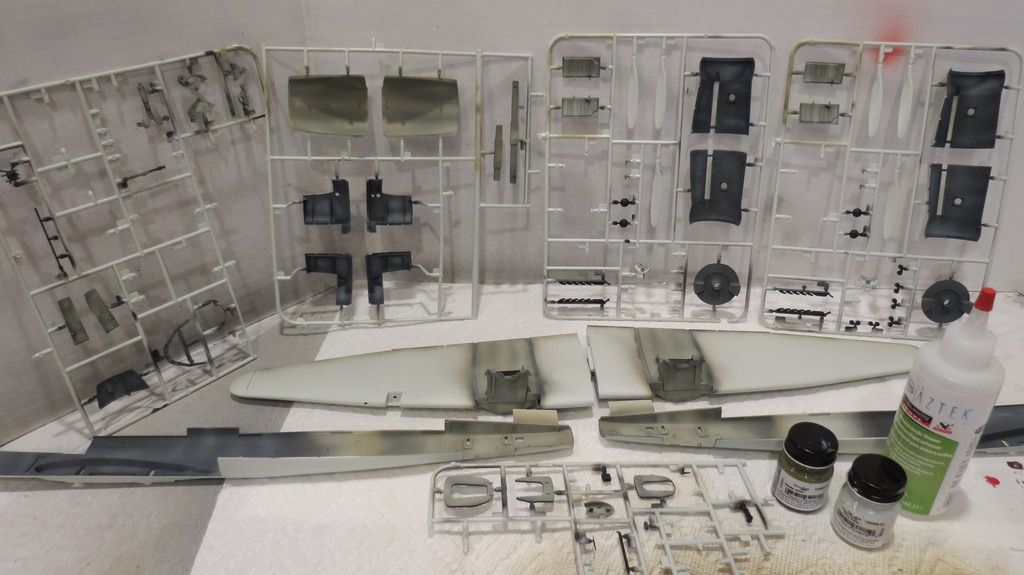
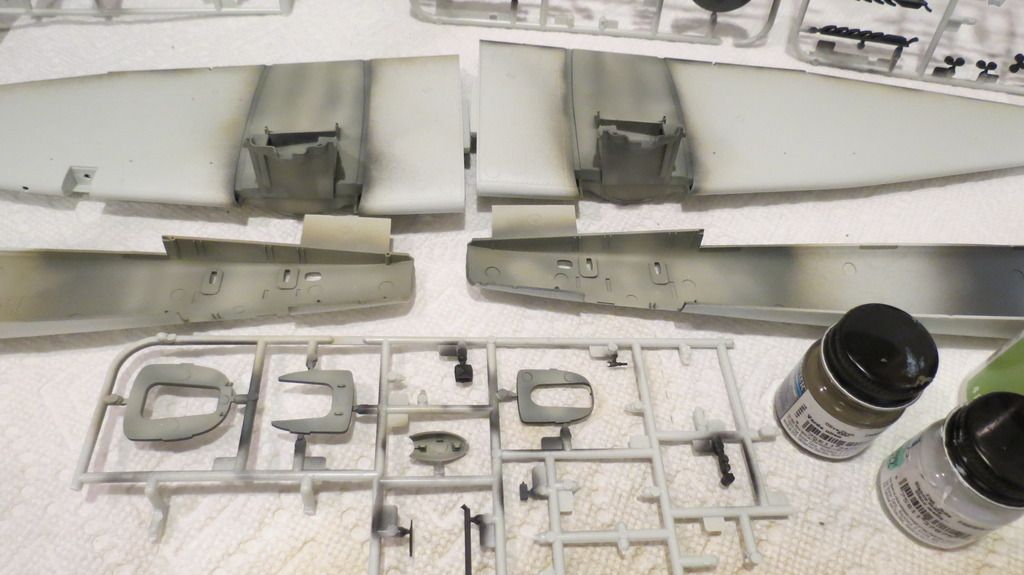
Next, I got together the parts that make up the wings- upper and lower wing halves, the previously assembled wing-tips and the undercarriage mounting structure. I glued, taped and clamped the starboard side first, followed by the portside:

IMG_5061_zpsec9a2m6t.jpg

IMG_5063_zps1tlt27ll.jpg

IMG_5062_zpsfgl5ee0k.jpg

IMG_5065_zps2nxtduak.jpg

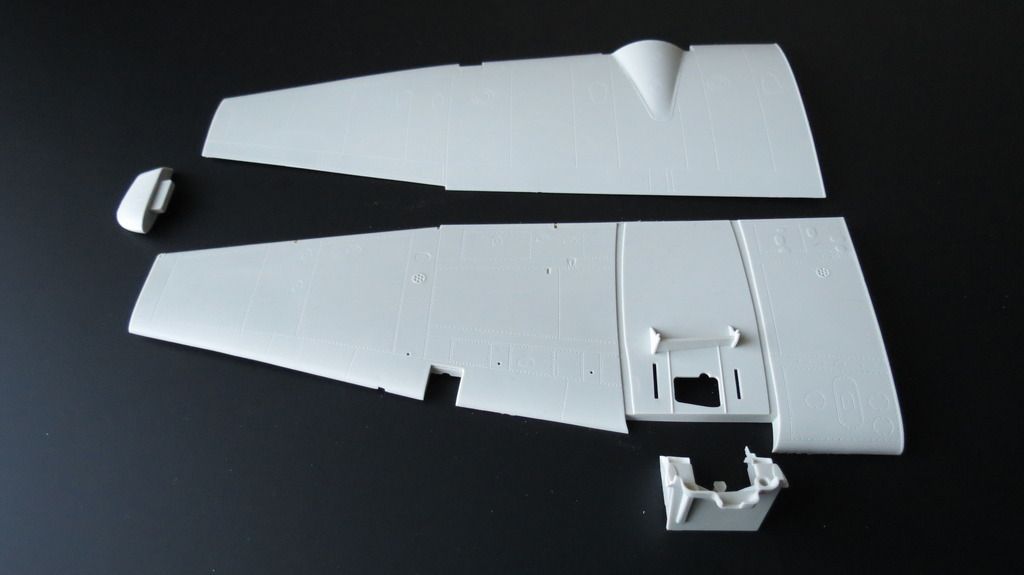
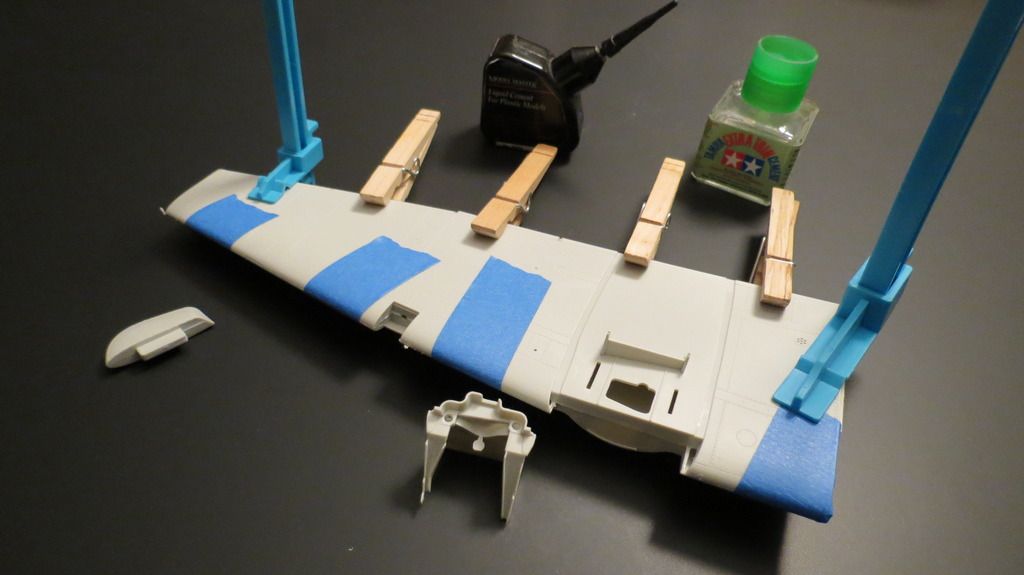
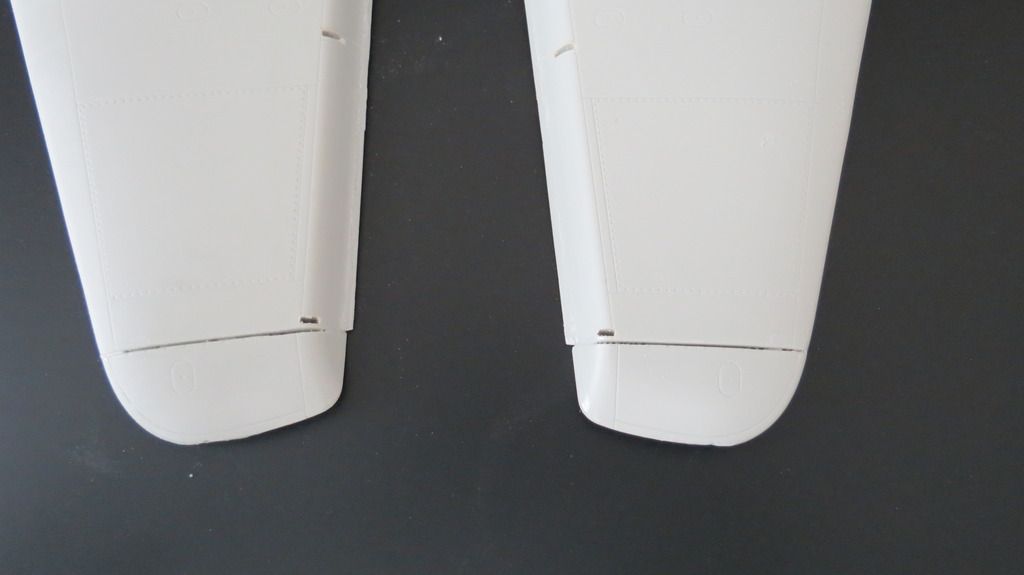
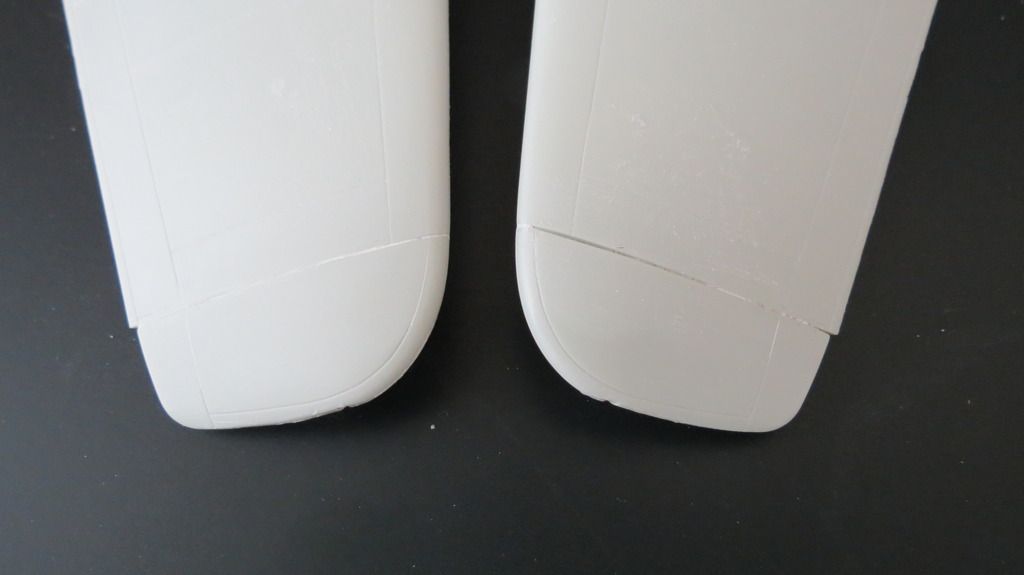
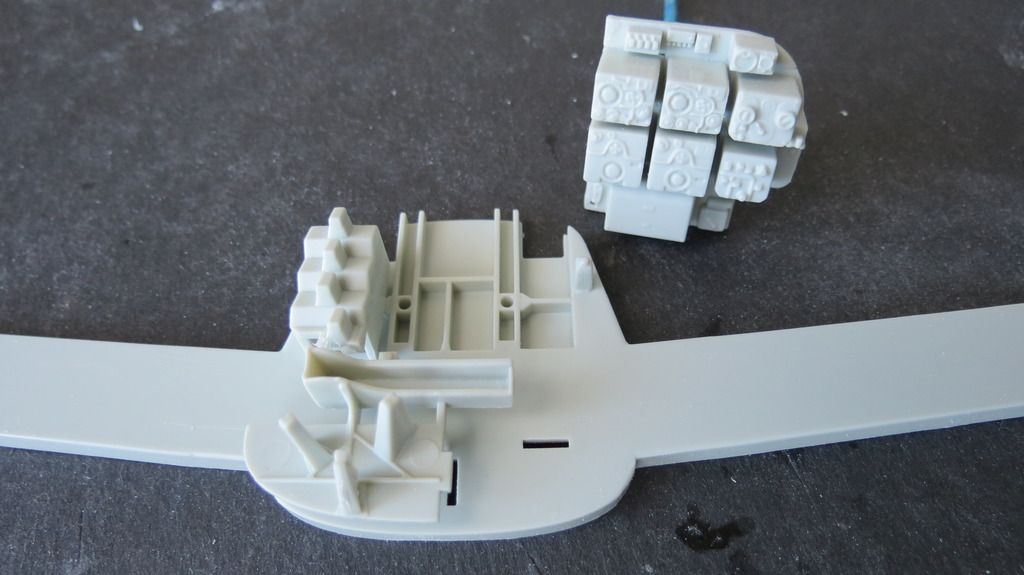
When the upper and lower wings were set, I removed the clamps and the tape, then glued the wing-tips on and the undercarriage mounting structure, I then smoothed down all the seams. The wing-tips didn’t match very well and there were gaps that will require filling at a later stage:

IMG_5069_zpsemc3no3y.jpg

IMG_5070_zpscfc3a3we.jpg

IMG_5071_zpszgrejrua.jpg

Next, I got the parts together to build up the cockpit rear bulkhead- bulkhead, radio sets, magazine rack and magazines and glued them together:

IMG_5041_zpscdh95pjj.jpg

IMG_5042_zpsyqggisbc.jpg

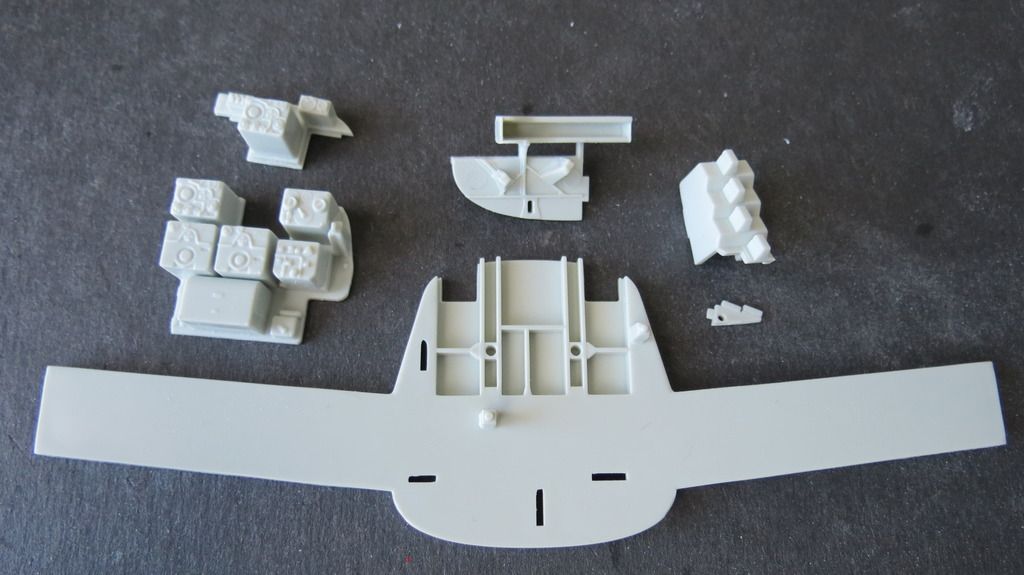
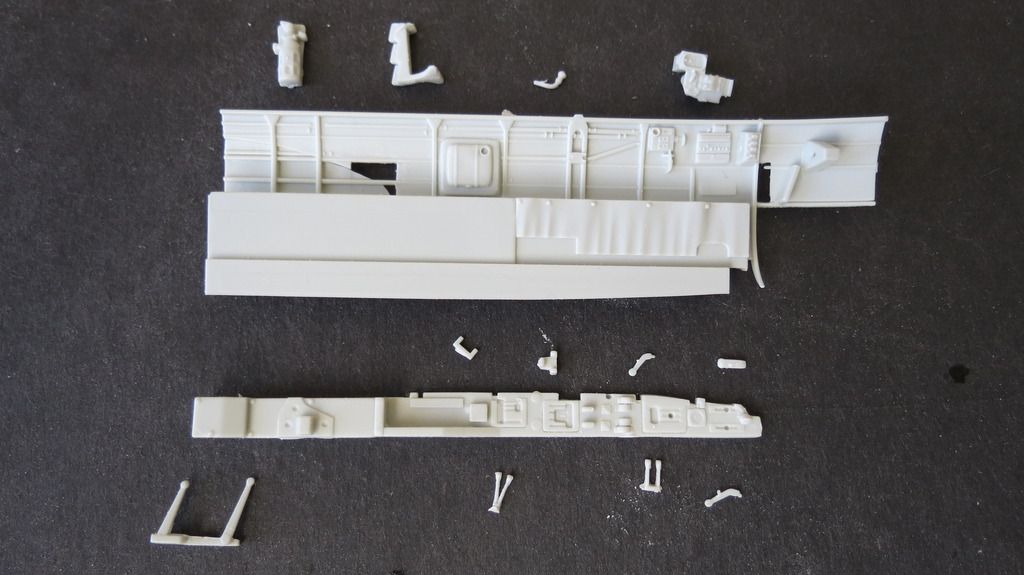
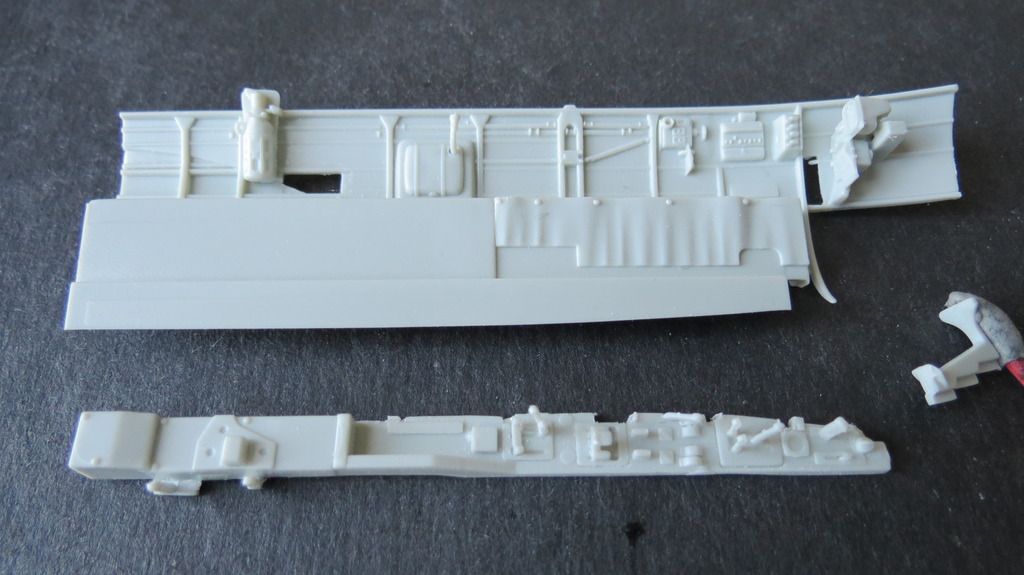
This was followed by getting together all the parts that make up the starboard side inner wall assembly for the cockpit and then gluing that assembly together:

IMG_5039_zpslhv9mkva.jpg

IMG_5040_zpsd6opzxk2.jpg

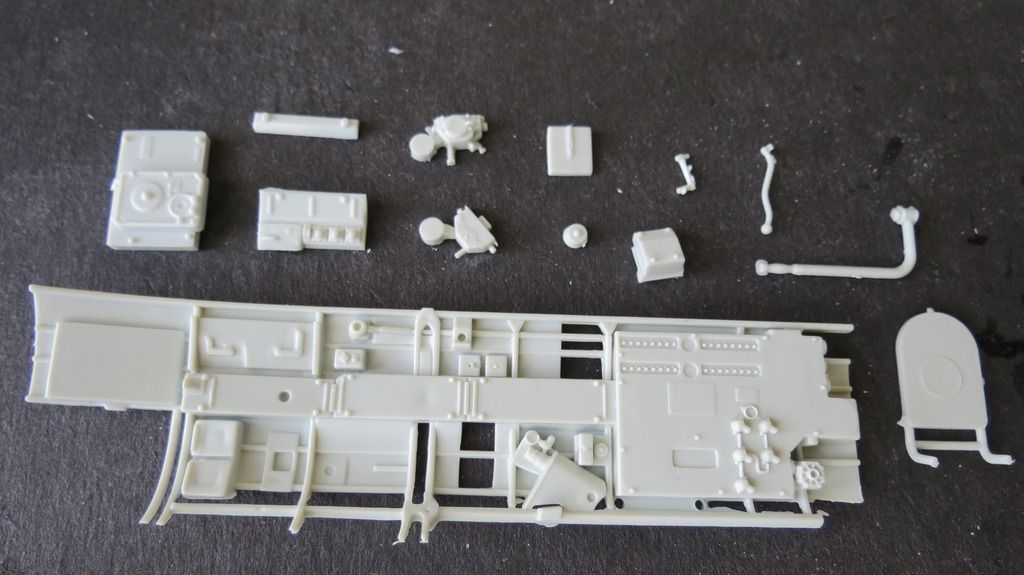
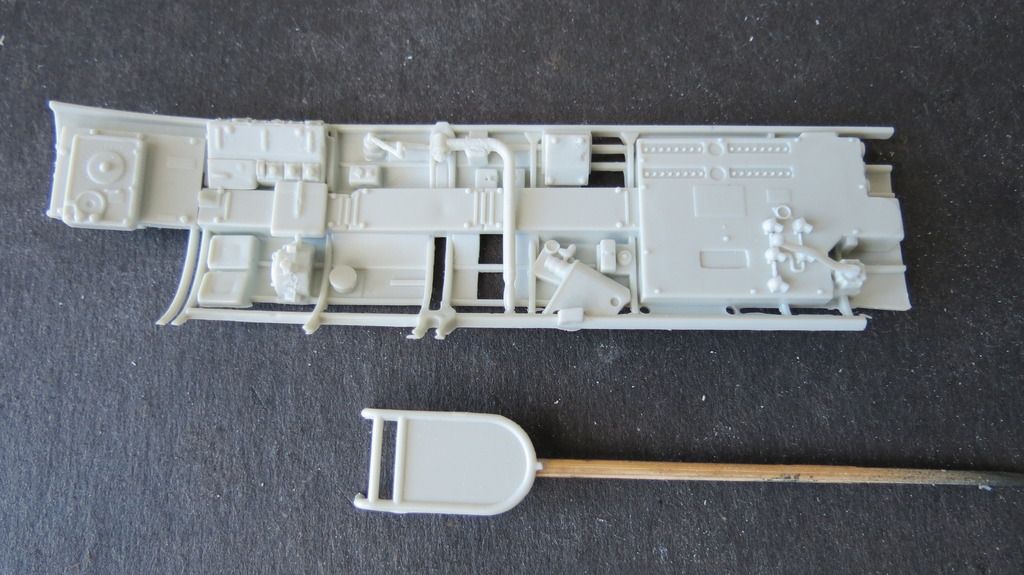
…and then all the parts for the Portside inner cockpit wall and console assemblies and gluing those together:

IMG_5051_zpsu18phbzb.jpg

IMG_5052_zpscimdrwa5.jpg

I then got the pieces together for the central dividing wall with the bombadiers floor and bomb aiming sight and glued those together:

IMG_5044_zpsv84qwvmx.jpg

IMG_5045_zpss3xdzz2u.jpg

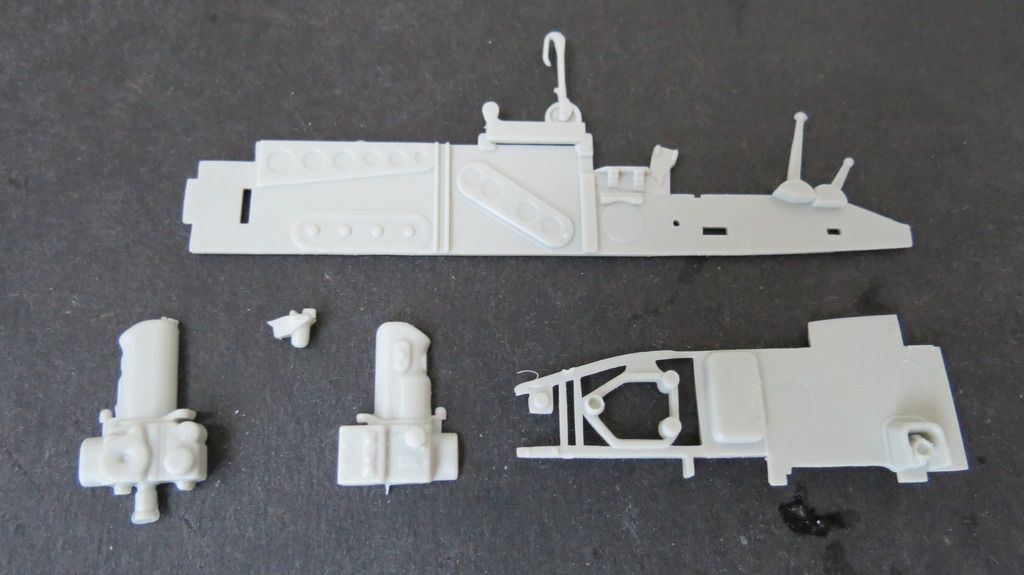
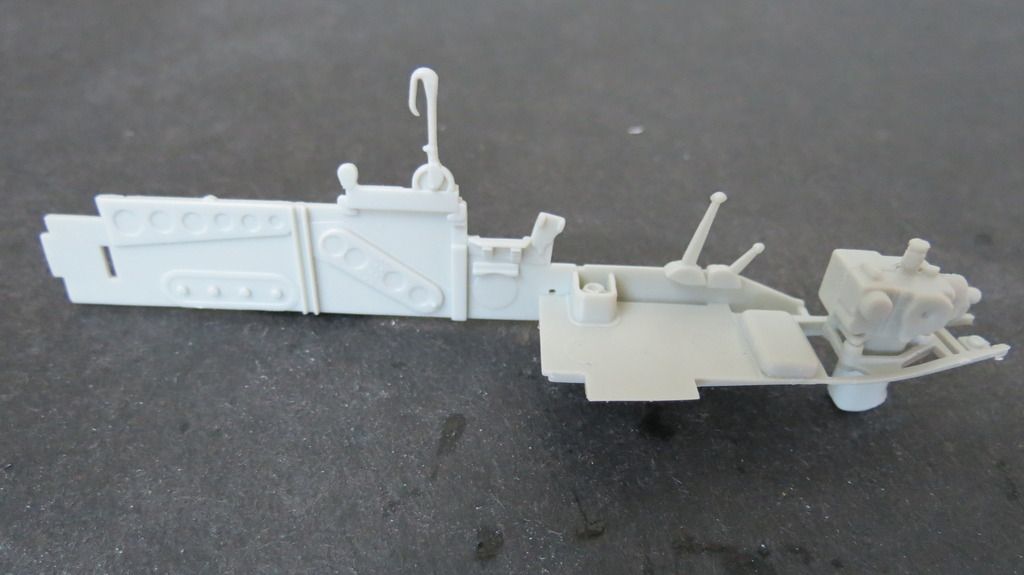
Next were the parts that assemble to make the cockpit rear floor area, and again, these were glued together to make them ready for priming:

IMG_5049_zpsgsfks1hq.jpg

IMG_5050_zpsyfr41ouh.jpg

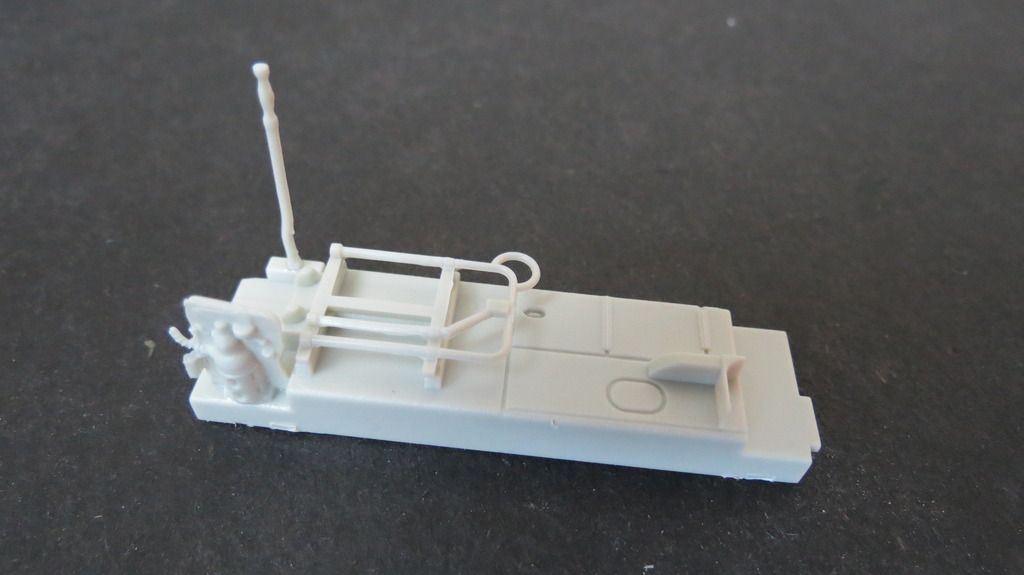
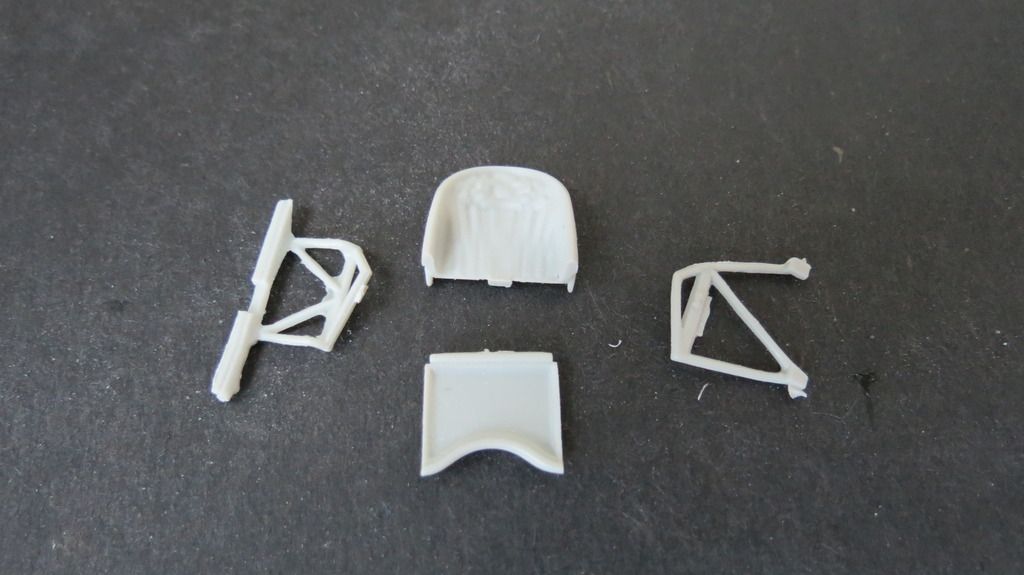
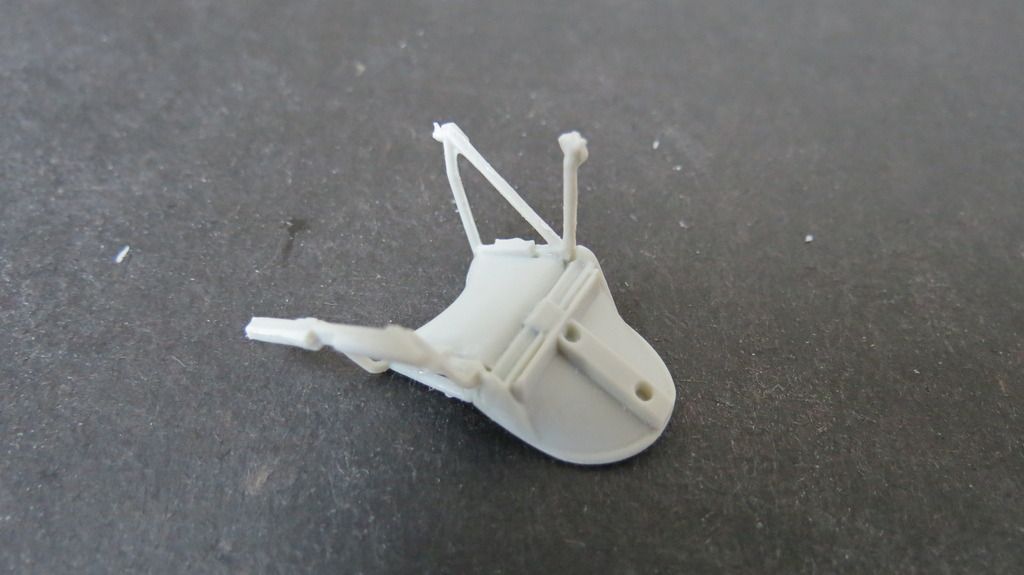
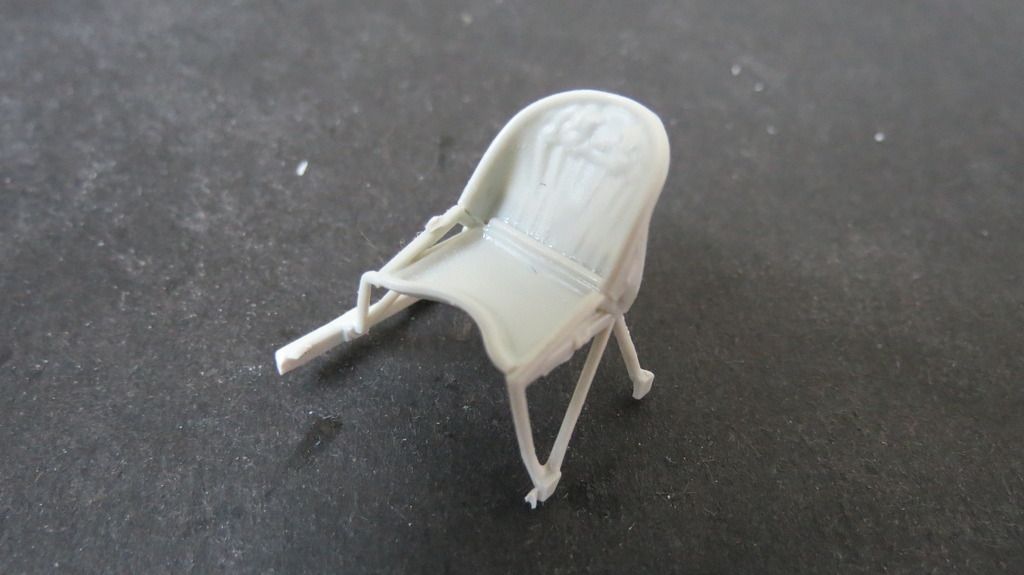
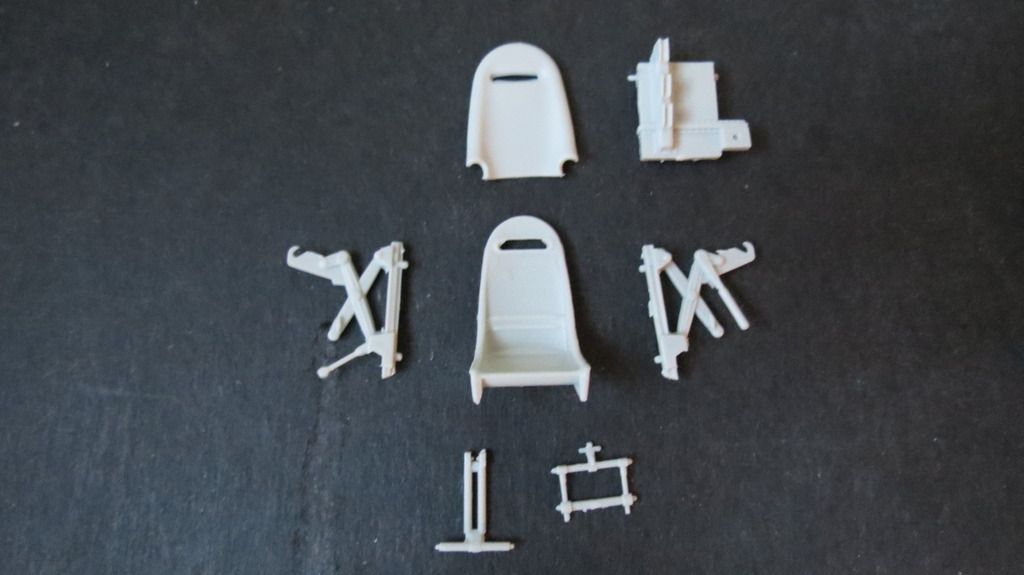
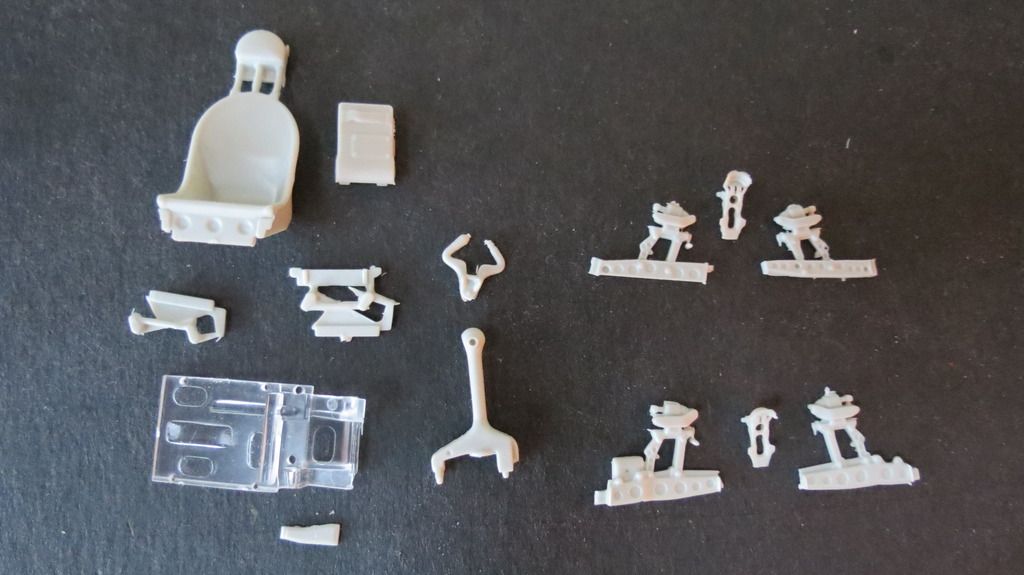
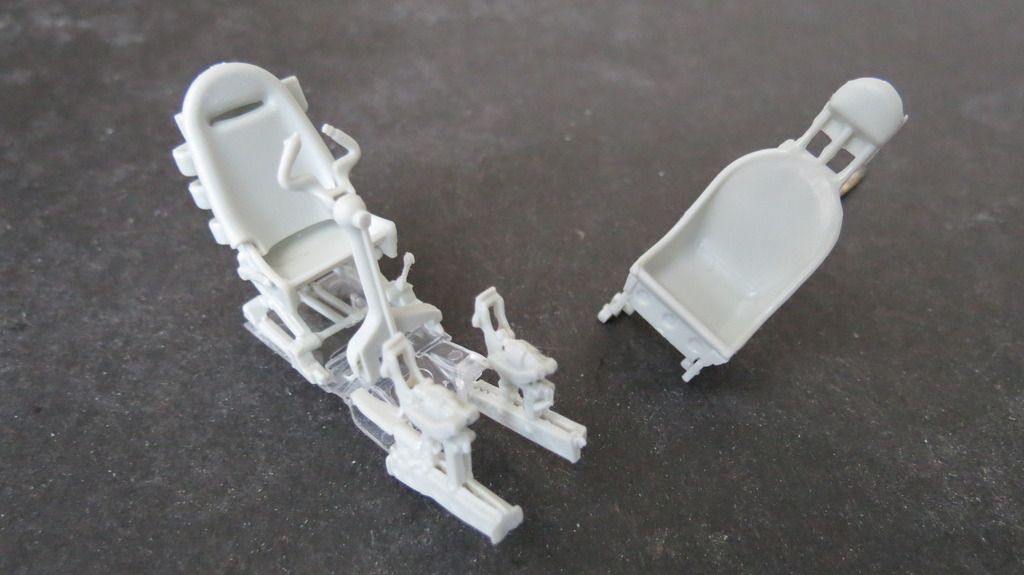
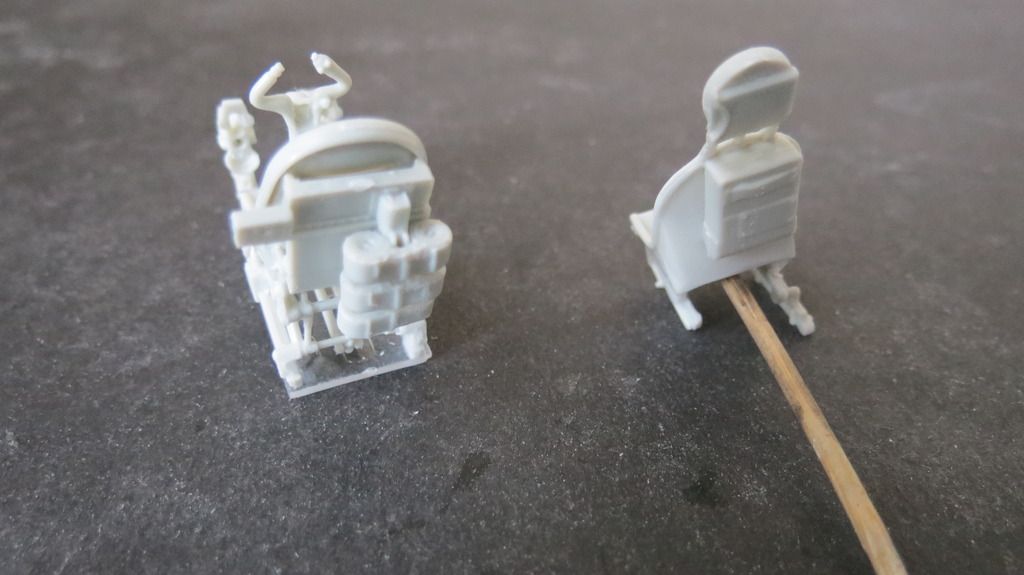
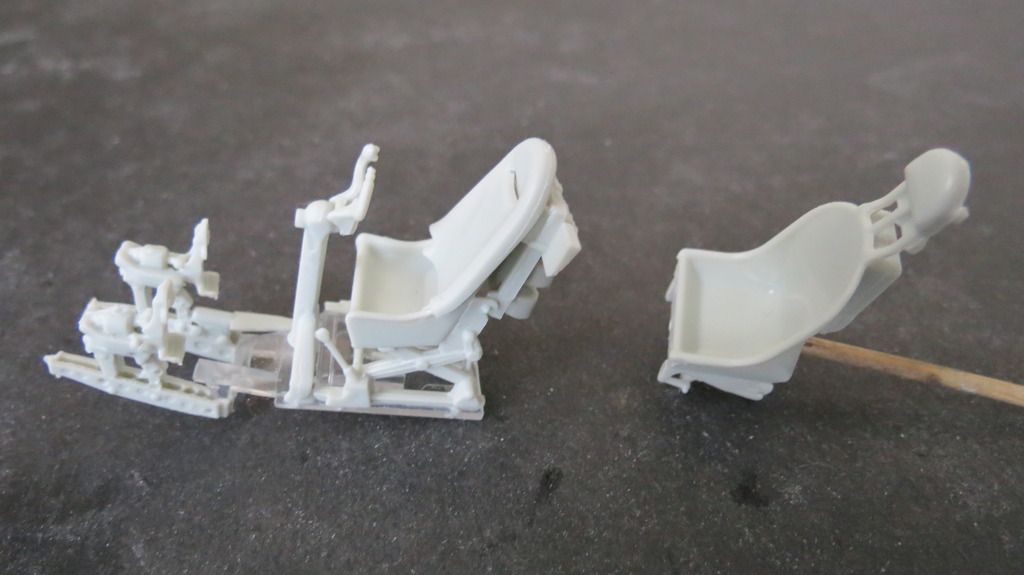
Next, I got all the parts together for the three seat assemblies, one being the pilots seat which was also assembled to the floor beneath his seat that carries the foot-pedals and the steering column:

IMG_5046_zpsgtqflwq9.jpg

IMG_5047_zpsnmlx58j2.jpg

IMG_5048_zpsilatziis.jpg

IMG_5053_zpsogsldfp8.jpg

IMG_5054_zps8sp5qnbl.jpg

IMG_5055_zps6bxg9oj1.jpg

IMG_5056_zpso7yp6v1n.jpg

IMG_5057_zpsr7bhiw88.jpg

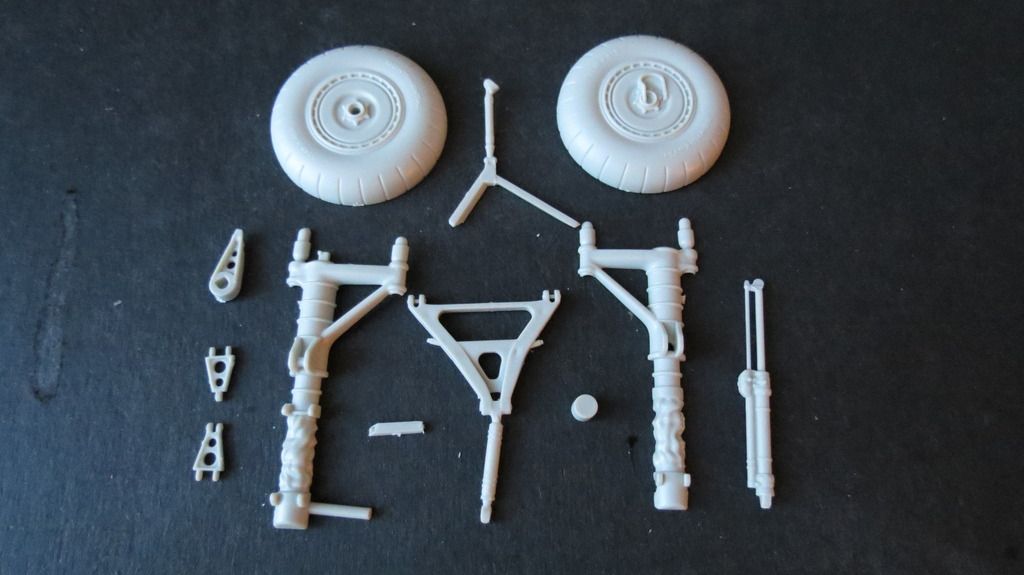
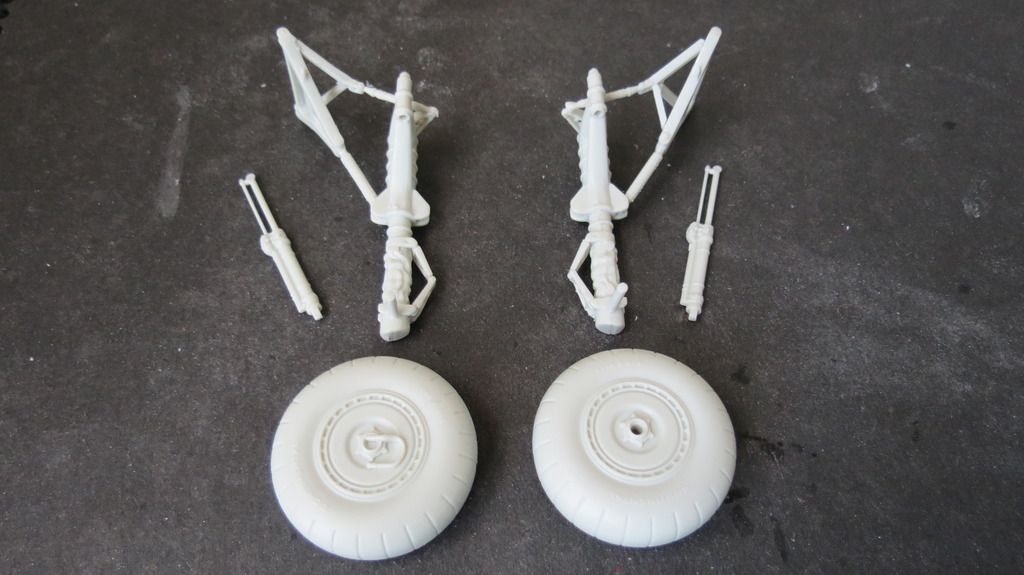
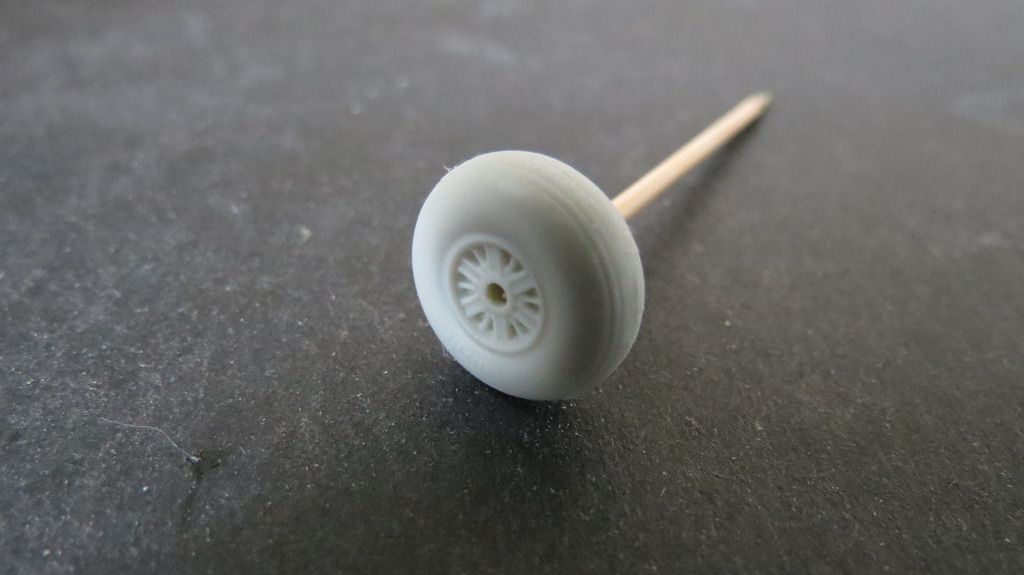
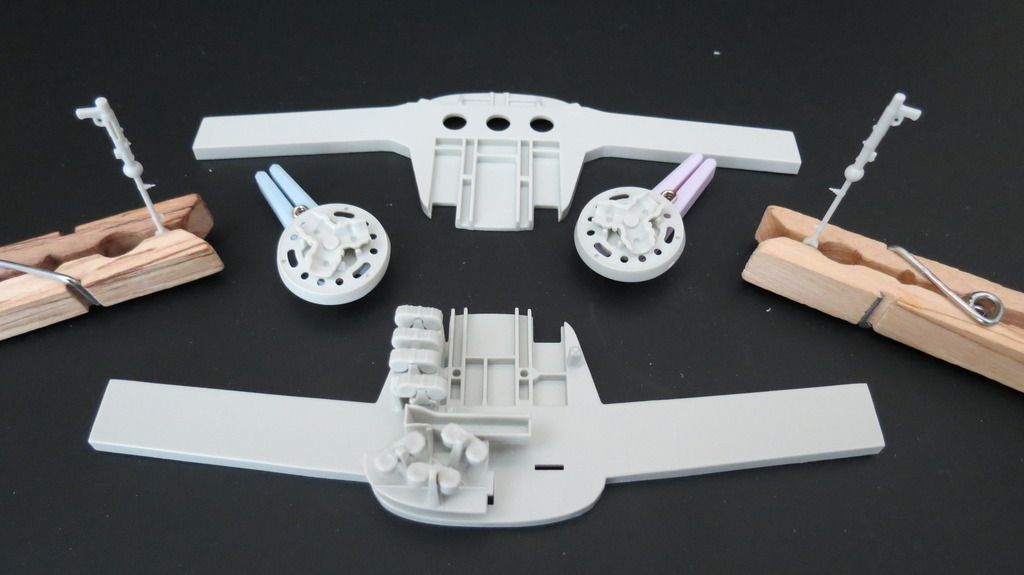
I then got all the parts for the wheels and undercarriage and assembled those together, leaving the wheels off and putting those onto cocktail sticks ready for priming and painting:

IMG_5038_zpsi2rgbrc3.jpg

IMG_5043_zpspygdi9u8.jpg

IMG_5060_zpsry9v6cu5.jpg

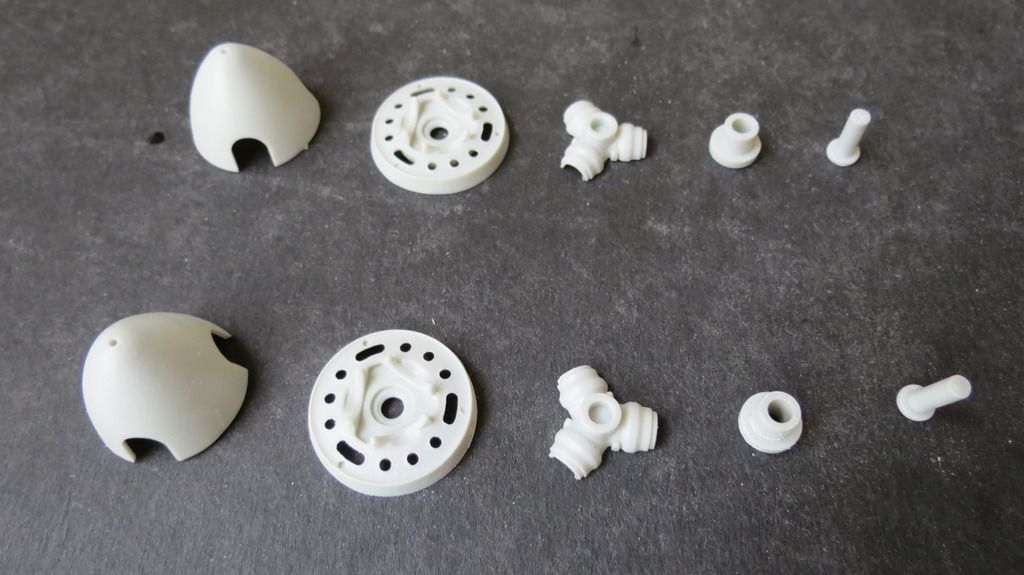
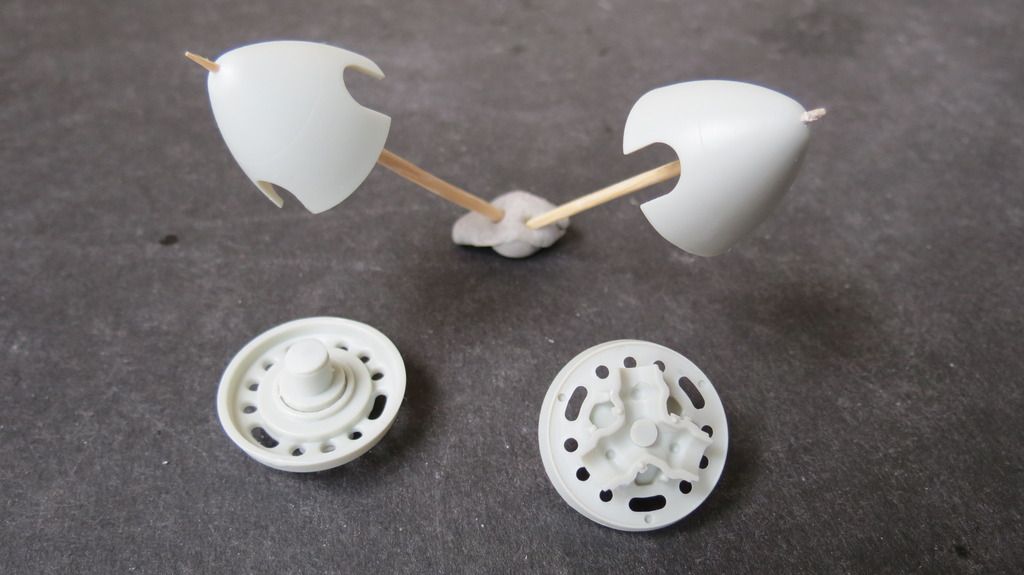
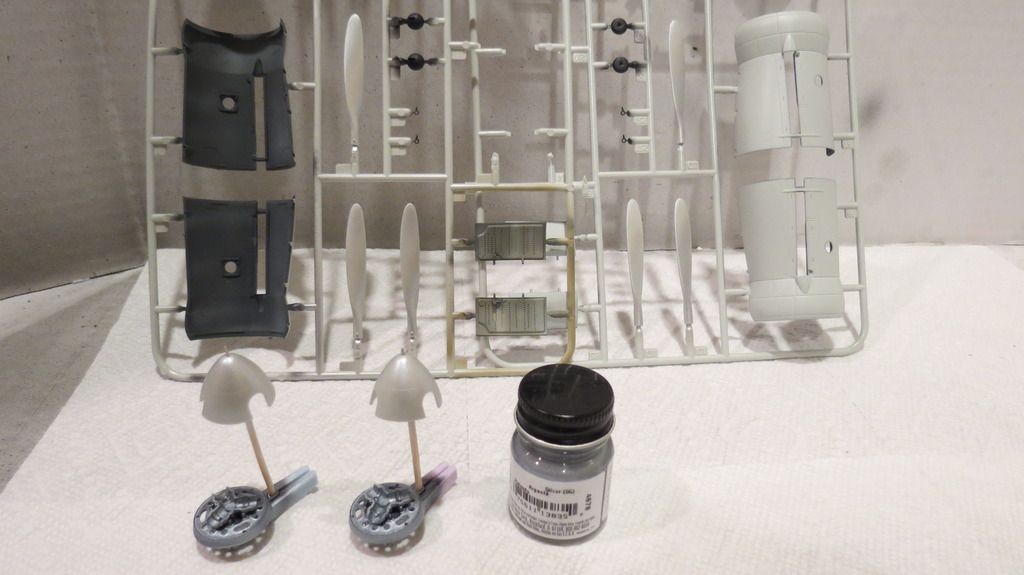
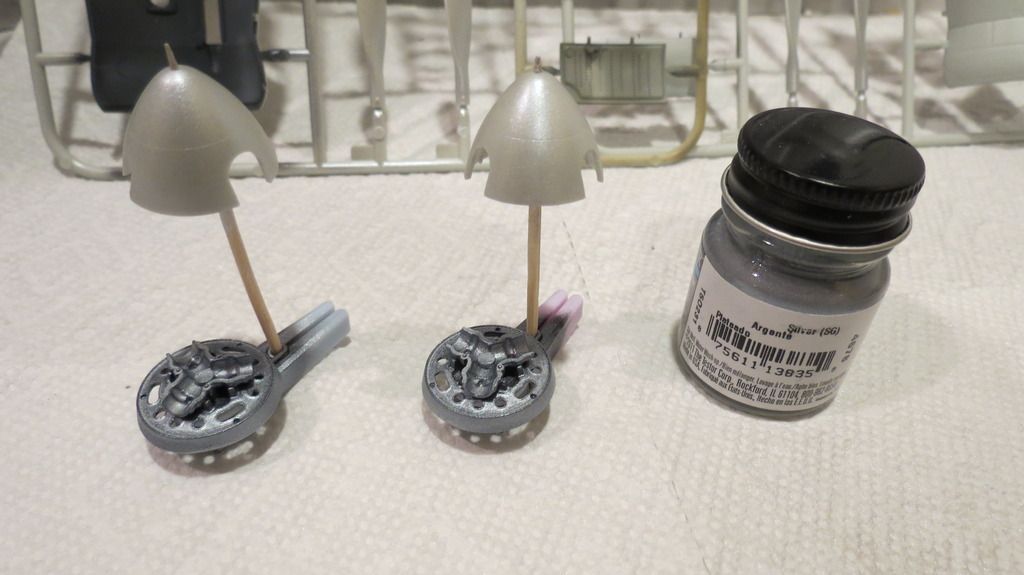
The last of the sub-assemblies was to put the propeller spinners onto cocktail sticks ready for priming, then assemble the spinner back-plates and center hubs for locating the propeller blades onto. The bearing and spindles were also assembled to the back of the spinner back plates:

IMG_5067_zpswj1q679c.jpg

IMG_5068_zpszbozgesg.jpg

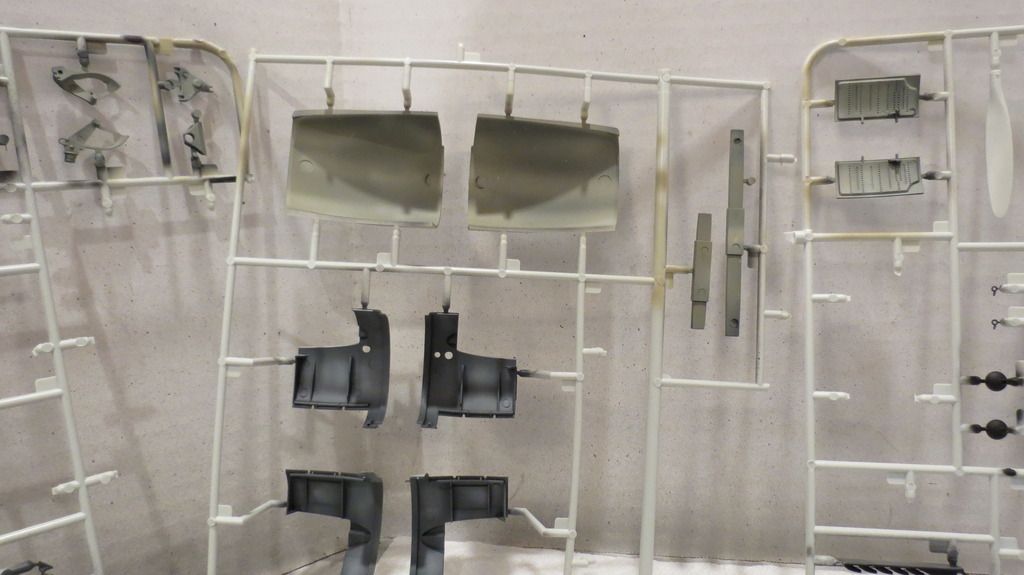
Next, I prepared all the sub-assemblies and sprues that were to be primed and took them to the spray-booth:

IMG_5072_zpsqmq8fs3d.jpg

IMG_5074_zpskgvy9faj.jpg

IMG_5075_zpsvrcyq0x6.jpg

IMG_5076_zpse4xb3dhk.jpg

I then airbrushed a black primer onto everything in readiness for painting all internal parts and surfaces:

IMG_5077_zps0fsawp1p.jpg

IMG_5079_zpsiytmship.jpg

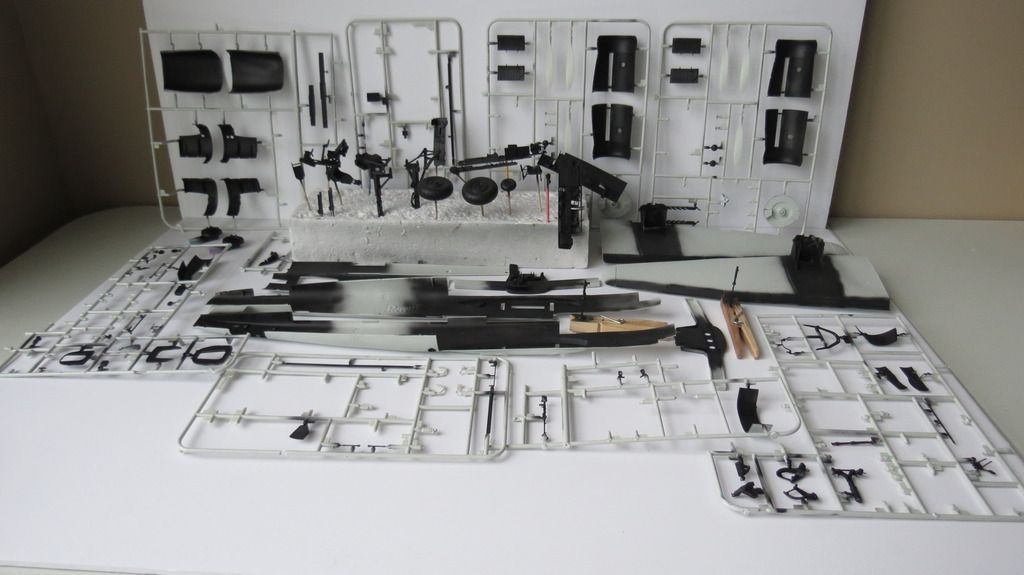
When the black primer had dried, I then airbrushed RLM 66 Grey onto the cockpit assemblies and internal surfaces that were to be this color. I then added some white to the RLM 66 to tone it down and then airbrushed some highlights on top:

IMG_5080_zpsdxbzv248.jpg

IMG_5081_zpspt8ioeds.jpg

IMG_5082_zpsz9svna9b.jpg

IMG_5083_zpsz82a1d63.jpg

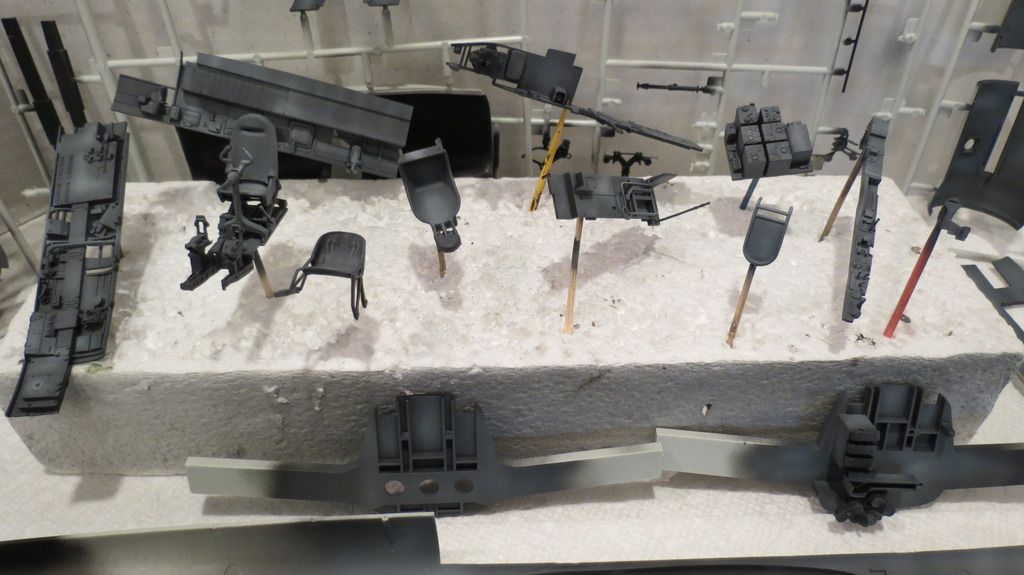
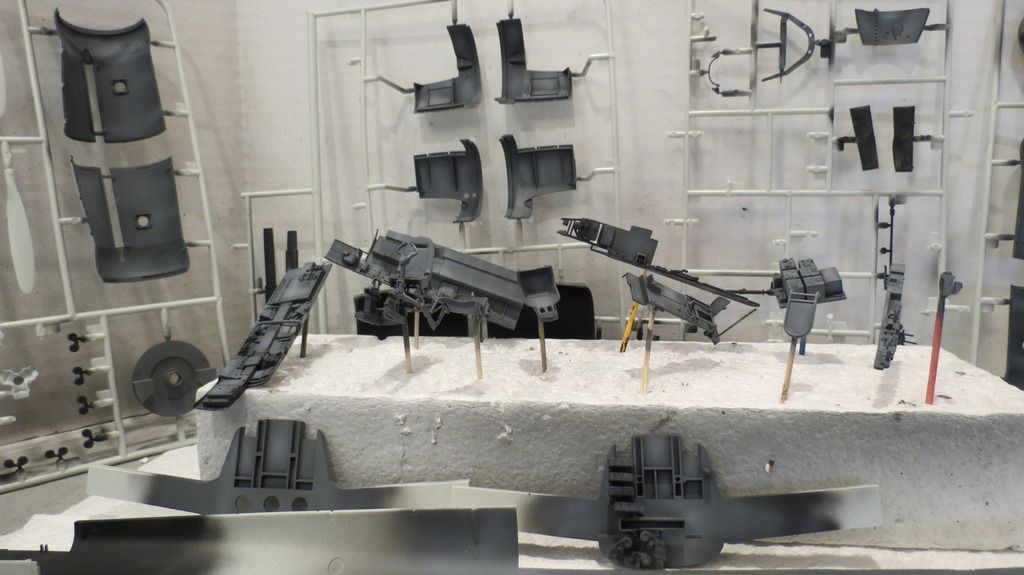
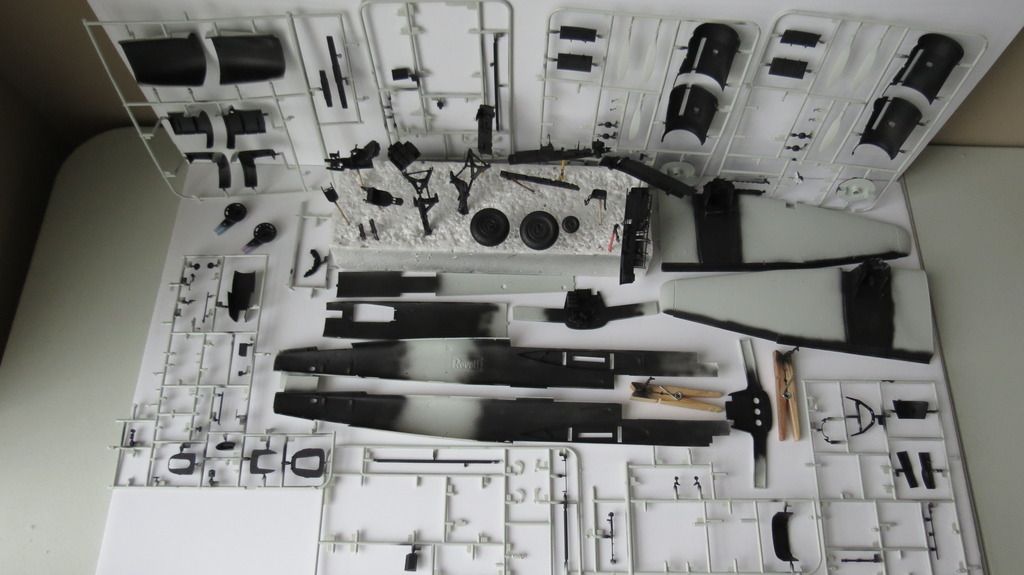
Next, I airbrushed the light olive onto the parts that required this color and again, I added some white to it to tone it down, then added some highlights:

IMG_5084_zpsine0dcee.jpg

IMG_5085_zpsfwllxp9h.jpg

IMG_5086_zpsi3gjrrg5.jpg

The last items that I painted were the propeller blades and spinner assemblies with silver so that at a later date of this build, I can apply the “Hairspray Chipping” technique to expose some of the silver beneath the top coat colors:

IMG_5089_zps1dzscujg.jpg

IMG_5091_zpskzilmike.jpg

IMG_5092_zpsmcgejzwi.jpg

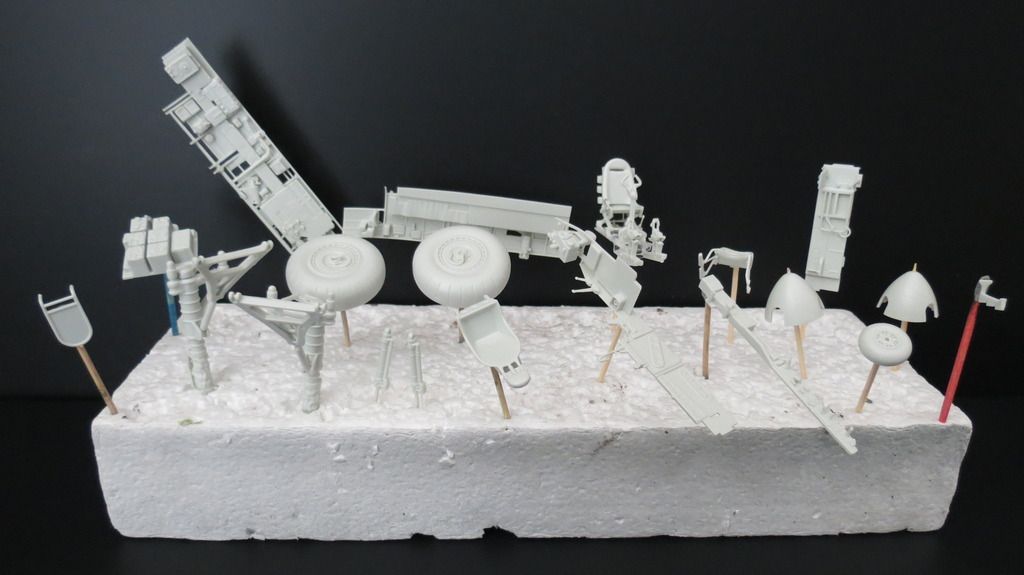
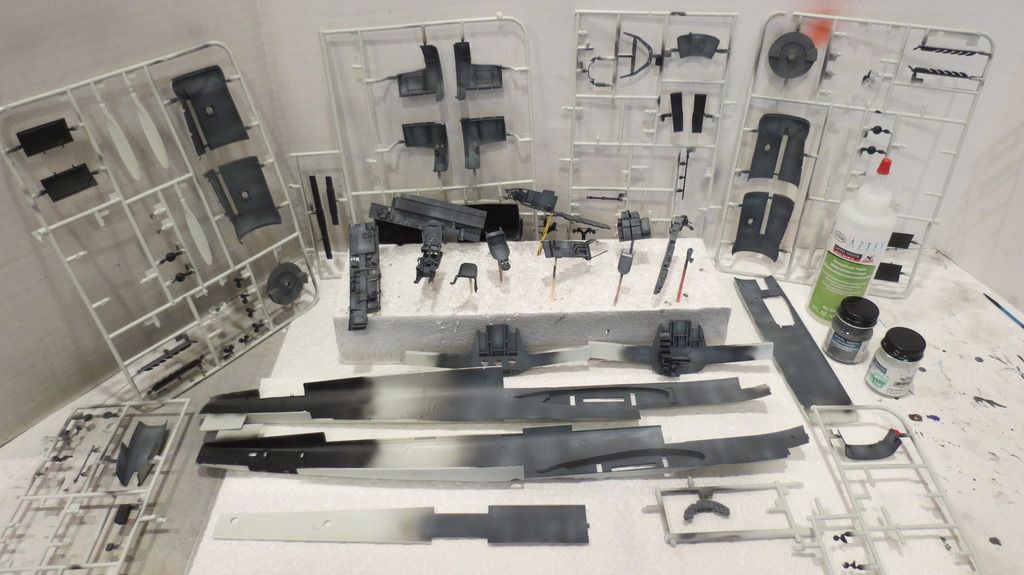
I had now gone as far as I wanted to for this update, and so, I put everything onto my work-bench to check out how much I had got done and took some photos:

IMG_5093_zpssitkbsm3.jpg

IMG_5094_zpsk74pinp1.jpg

IMG_5095_zpsszw30a6f.jpg

IMG_5096_zpsnjdzfhcu.jpg

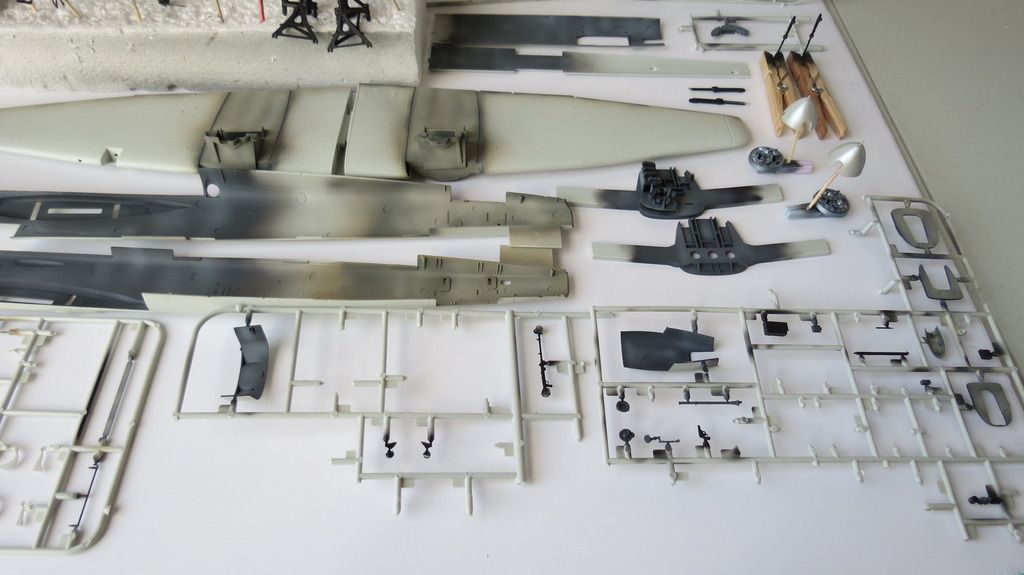
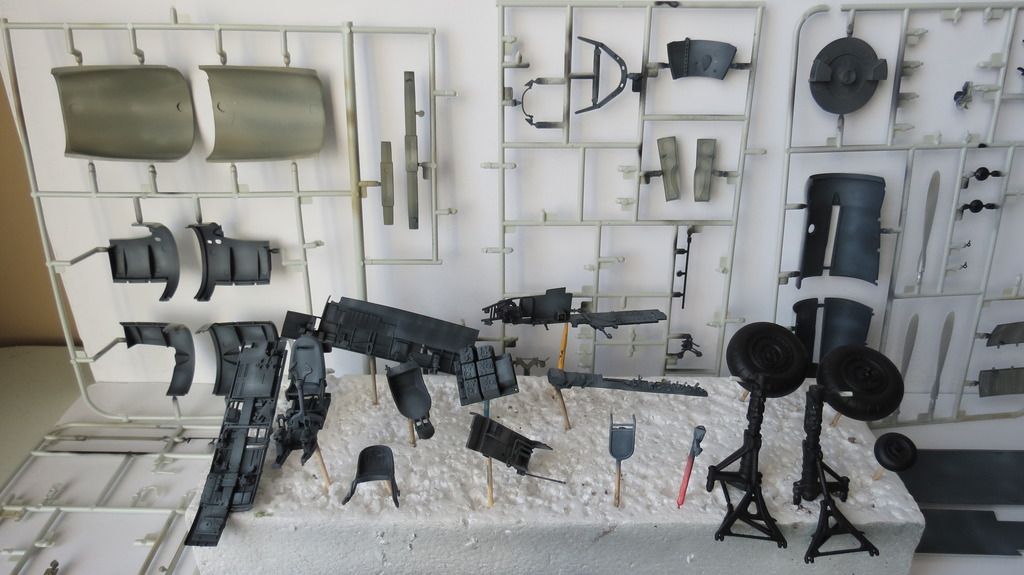
Well, that’s it for this update. From hereon, I will detail all of the internal parts, gloss clear coat them, weather them, then finish them with a final matt clear coat. I will then assemble the plane, fill and smooth any gaps, clean the plane, then prime and pre-shade ready for moving onto the painting stage.

In the meantime, if you’d like to watch my YouTube Channel “Build Update #1” video for this report, then here is the link for that:

https://youtu.be/-z3OV-9Bicc

Thanks in advance for looking at this thread, leaving any comments and for watching my video should you decide to do so

Until my next update, happy modeling and have fun!

Tally Ho and Chocks away!

Cheers,

Martin

I like. i just got my hands on the new ICM A-5. I hope to dive into that one soon. Maybe they will also give us an A-1 in 1/48th too. I look forward to your progress here.

Nice start, lookin forward to seeing more. I have the RoG boxing (minus swastika’s of course, didn’t realise the Revell kit’s over there had them) so will be following along.

I love to see the parts get color. You feel like you are really cruzin’ along at this point. I like what I’m seeing here. NICE>

BK

Looks great… I’ll be watching this

I always follow your builds with great interest, and I thank you for the excellent W.I.P’s. You do make things look rather easy . Interesting that you assemble interior parts before base color painting where I tend to base paint the small parts before assembly. I should try it your way since your models come out much better than mine. cheers.

Thanks mate, much appreciated! Sweet…I’ve never built an ICM kit, but that one looks like a good kit from the reviews.

I’ll be starting the detailing of the interior sub-assemblies and parts soon, then I have to clear coat and weather them, then apply the flat coat. It could be another week before I get another update ready…there’s a lot of details to contend with!

Cheers [:)]

Martin

Thanks Bish, much appreciated!

Have fun with your RoG version…I love their newly tooled 1/32 scale kits…I’ve made a few of them now.

I didn’t realize Revell USA had the swastika’s in their kits either, until I opened this one. It must just be a ban in Europe and the UK?

Cheers [:)]

Martin

Martin,

Great introduction to your build, and it looks like you are off to a great start of your build. Looking forward to more postings of this build.

Hunter

Ye, i have a few as well, yet to build one, but they all look really nice.

Ye, its definatly a Europe thing, well Germany mainly. I just assumed with it being Revell, it would have carried ove rthere. Good to see it hasn’t. AM Swatika’s are a must here in any scale.

I feel the same way…as soon as there is color on the cockpit parts and some of the internal areas of other section, and, I have sub-assemblies built up, I feel I’m aking good headway!

Thanks for taking a look and commenting, much appreciated, Brandon!

Cheers [:)]

Martin