Revell/Monogram 1:48 P-40B Flying Tiger AVG (Complete)

Hey Britt, I just picked up the latest incarnation of this kit at a local drug store as a “sacrificial lamb” for my next project. Last night, for [cnsod] and giggles, I taped together the main airfame (and nosepiece) to see how it would go together. Oh my…absolutely horrendous! This mold has certainly run its course. With that, I had to give you a shout out. Congratulations on turning this pig into a beautiful work of art, and making it look easy at that.

Joe

Okay guys here it is! I’ve finally washed my hands of this one. This Hawk kept finding new ways to challenge me along the way, but now it’s complete. =D

So here we go: (Lot’s of pics. Sorry. =] )
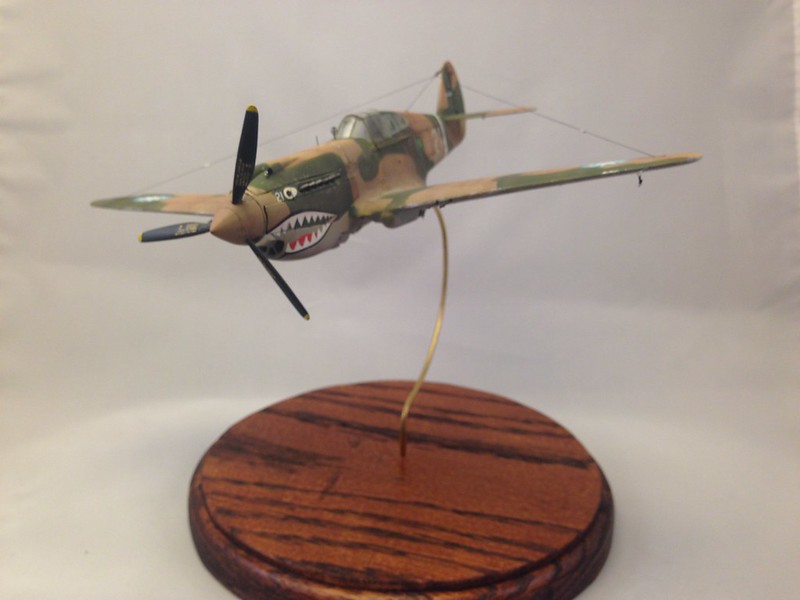
image by brittvallot, on Flickr
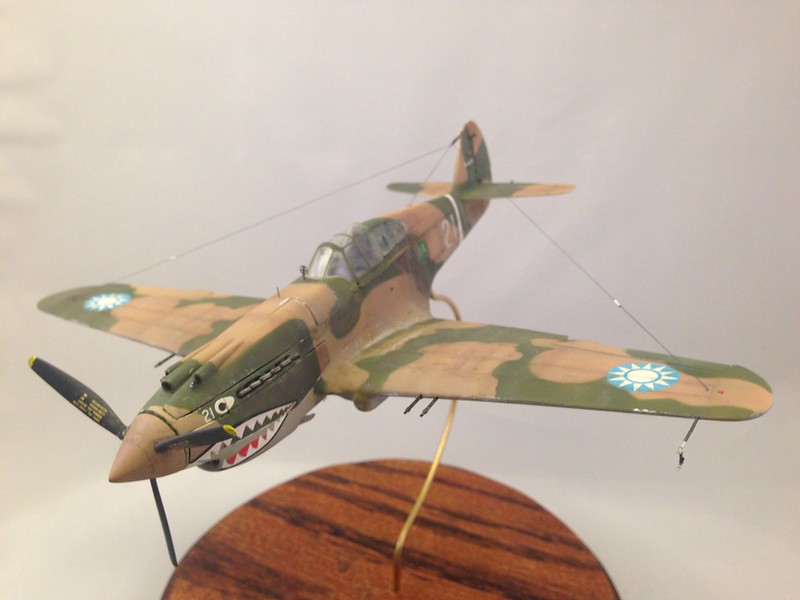
image by brittvallot, on Flickr
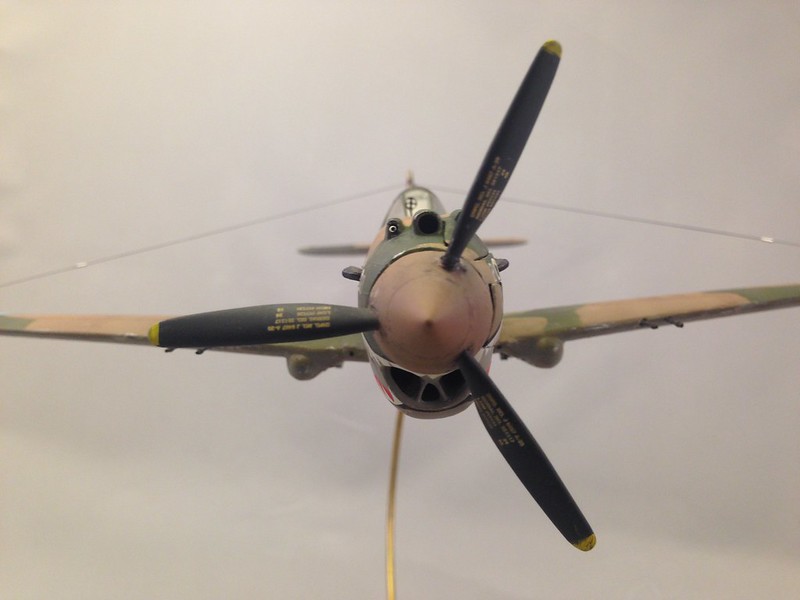
image by brittvallot, on Flickr

Close up of rudder horn and aerial hook up.
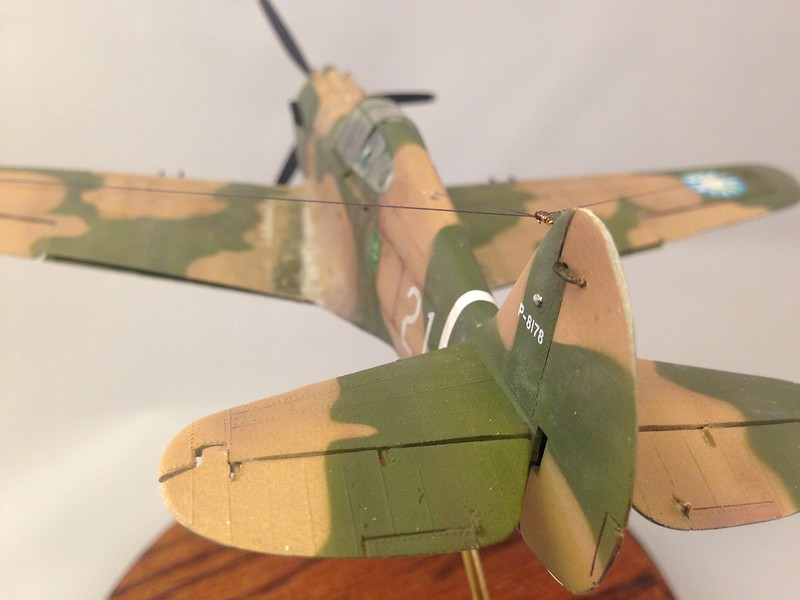
image by brittvallot, on Flickr
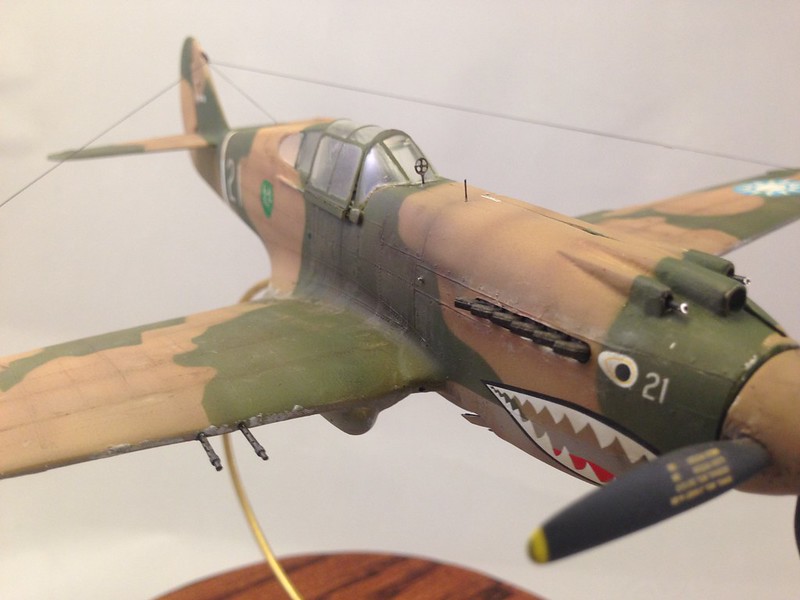
image by brittvallot, on Flickr

For the cross hairs…I literally spent about two and a half hours trying to do something that would’ve been really nice. But they were just too tiny for me to grip and put together. Ugh! But still I took the kit part to see what I could do with it and ended up filing it down as thin as I could and used a sharp No. 11 blade to trim up the insides. I’m mostly content with it.

Detail of the exhaust and what’s either a static pitot tube or some exhaust vent that protrudes from the cowl.
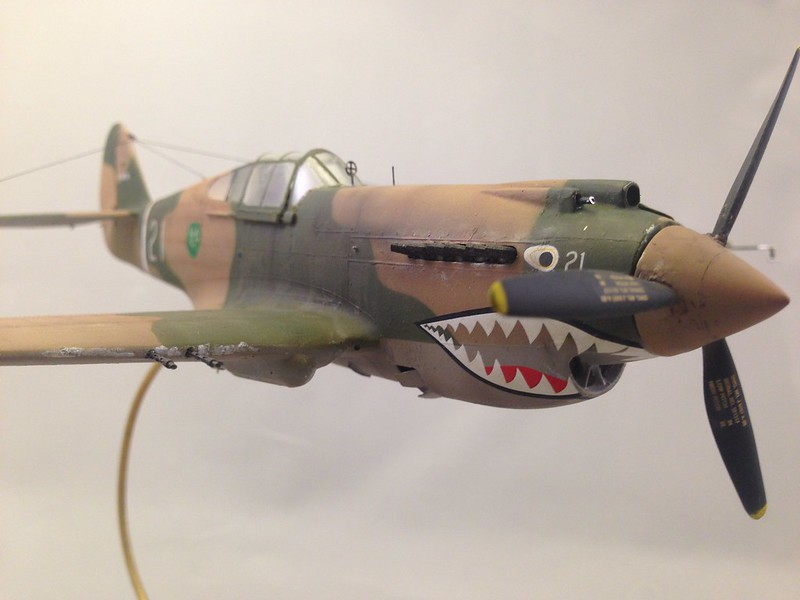
image by brittvallot, on Flickr
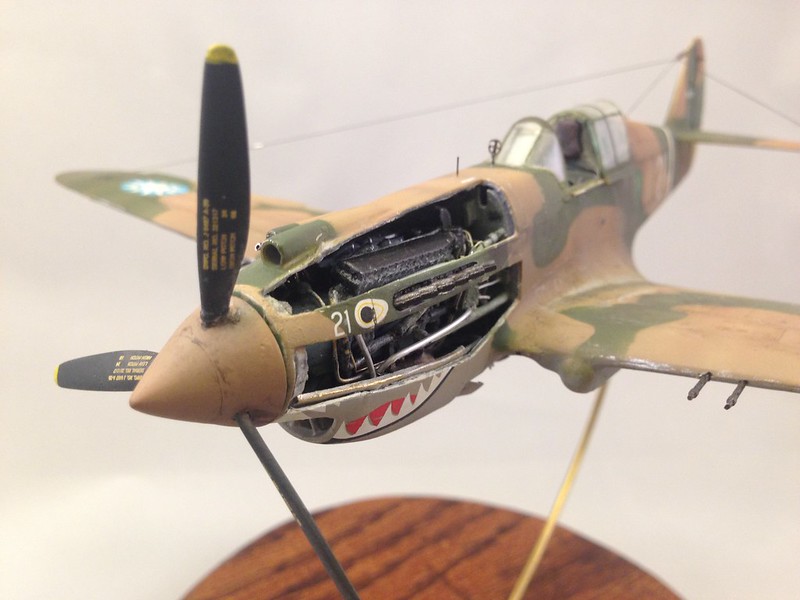
image by brittvallot, on Flickr
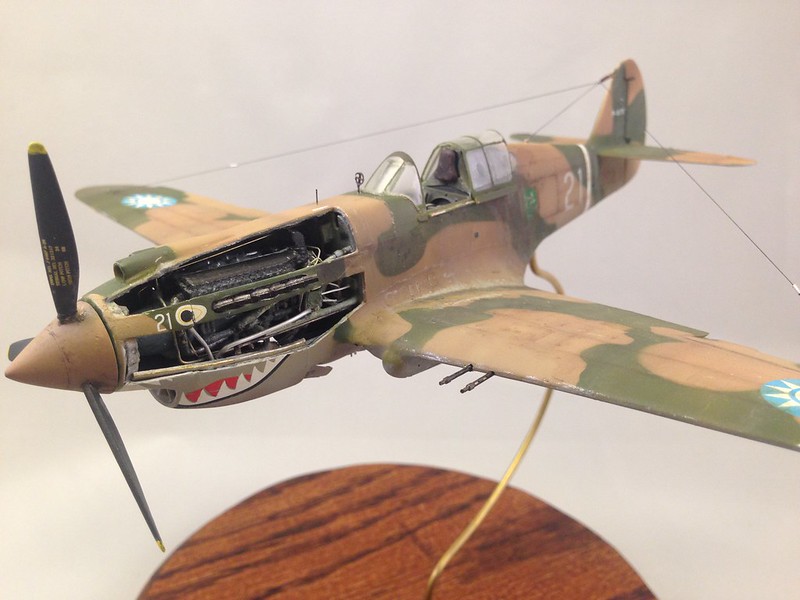
image by brittvallot, on Flickr

Detail of the engine. I’ve included the fuel drain here and that really tiny hole on the landing gear housing is what they used to grease the gear parts for turning the landing gear. (This is also seemingly the only picture I have where the crosshairs look less than nice. =[ )
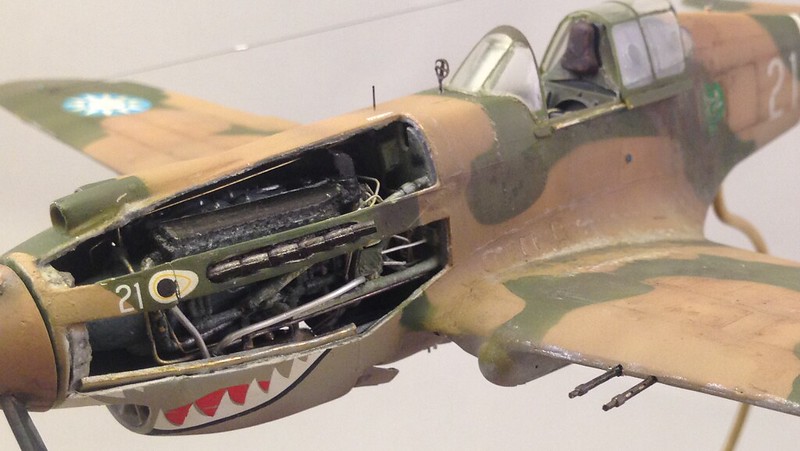
image by brittvallot, on Flickr
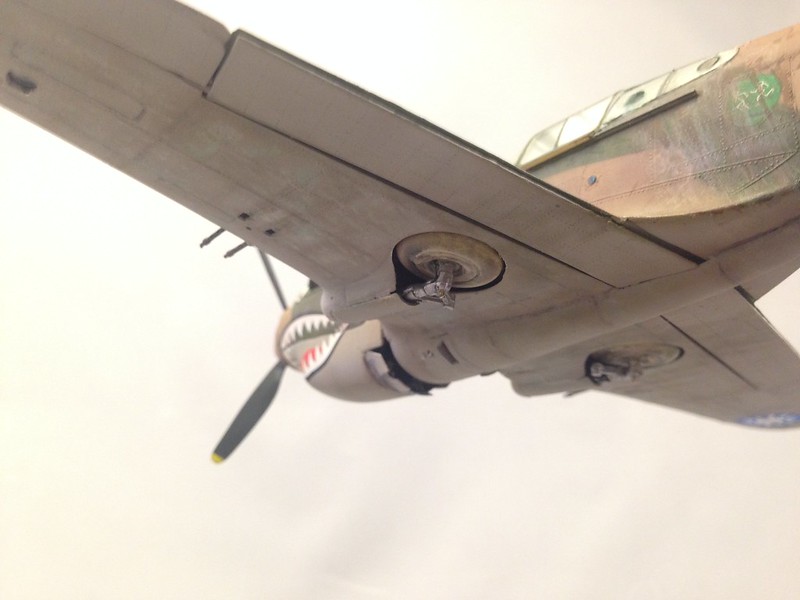
image by brittvallot, on Flickr
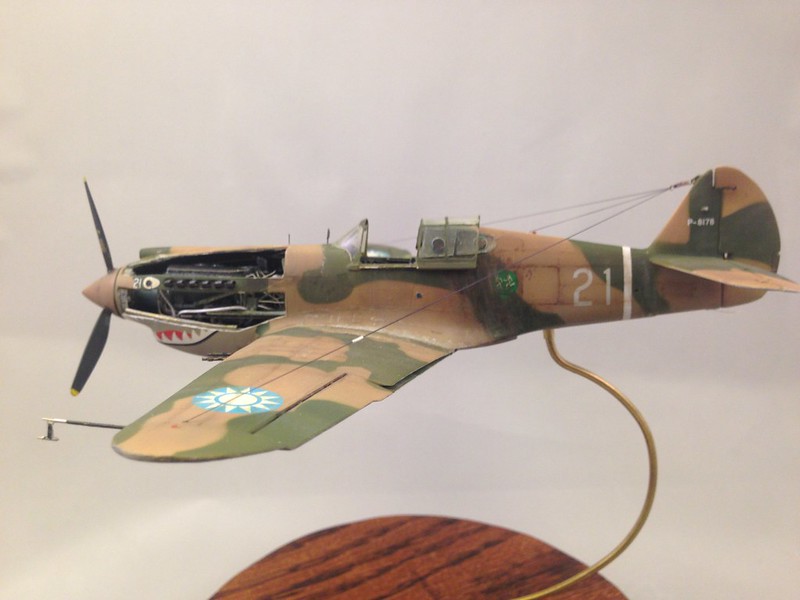
image by brittvallot, on Flickr
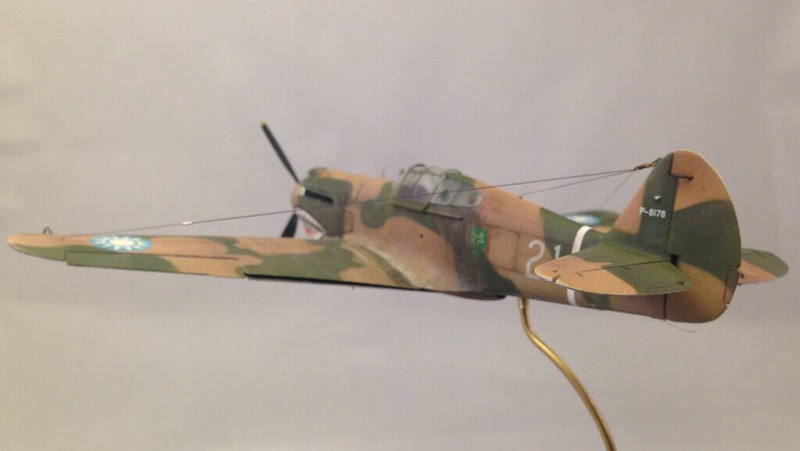
image by brittvallot, on Flickr

Detail of scratch built British pitot tube.
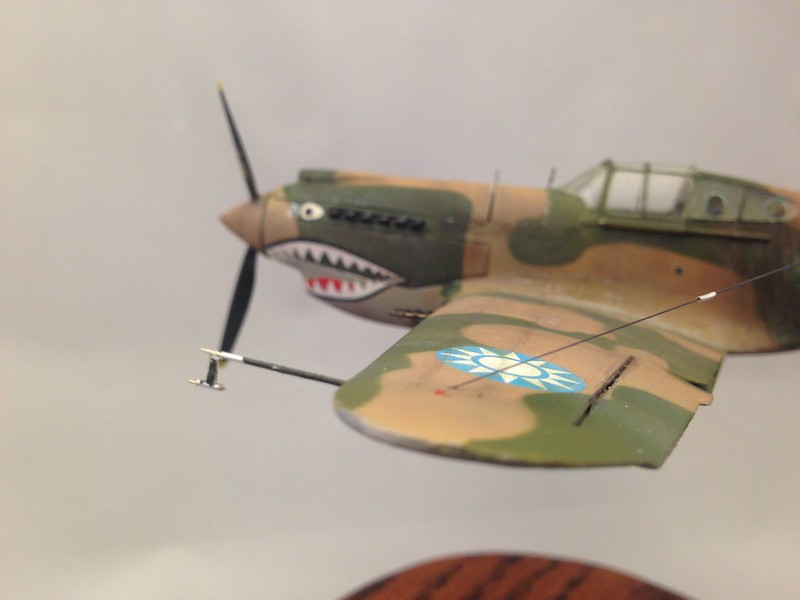
image by brittvallot, on Flickr
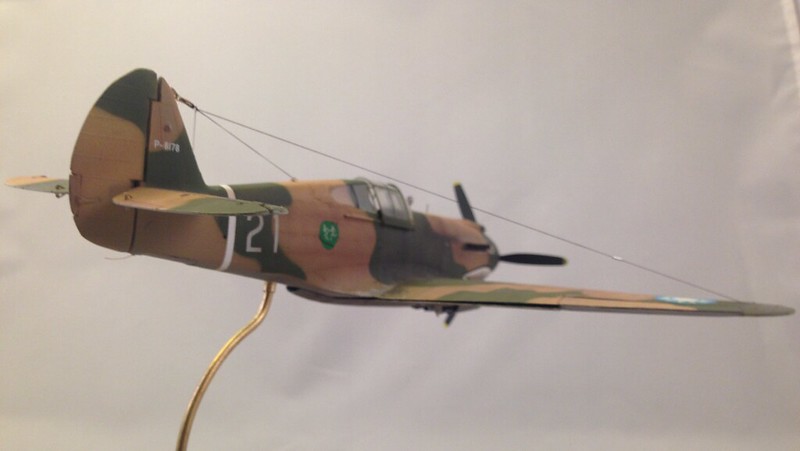
image by brittvallot, on Flickr

image by brittvallot, on Flickr
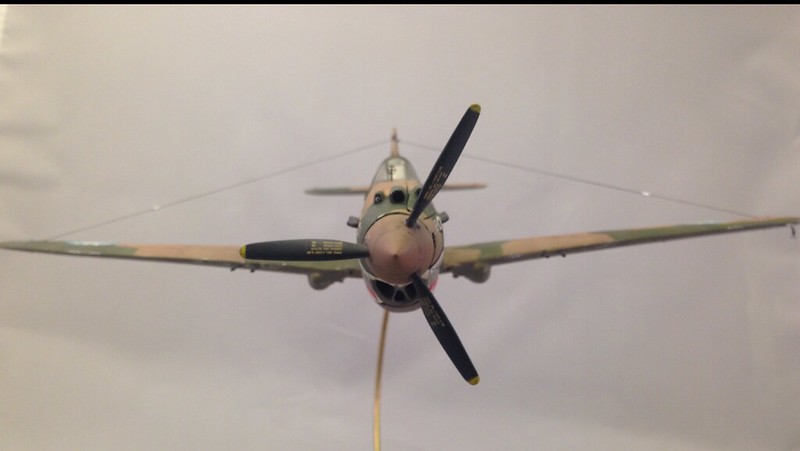
image by brittvallot, on Flickr
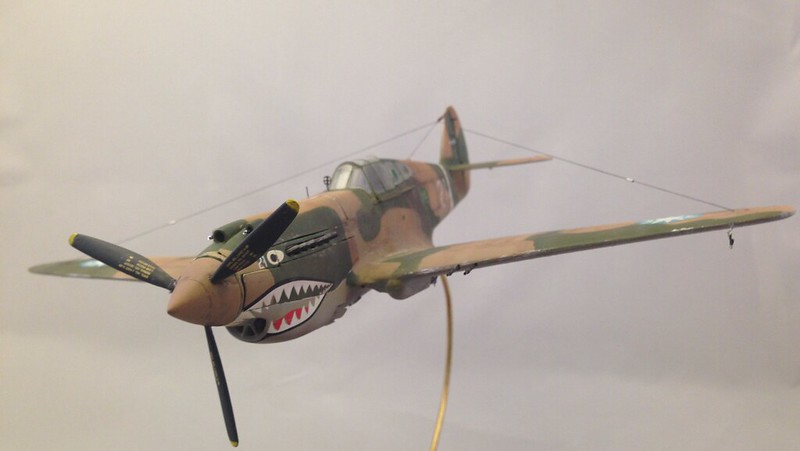
image by brittvallot, on Flickr
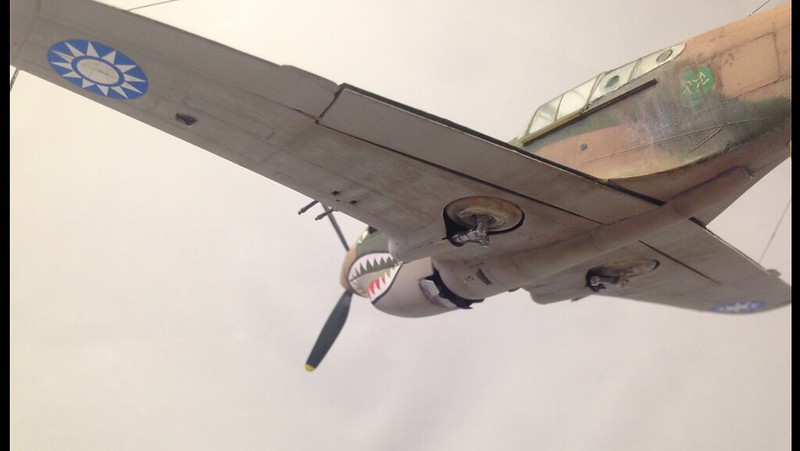
image by brittvallot, on Flickr
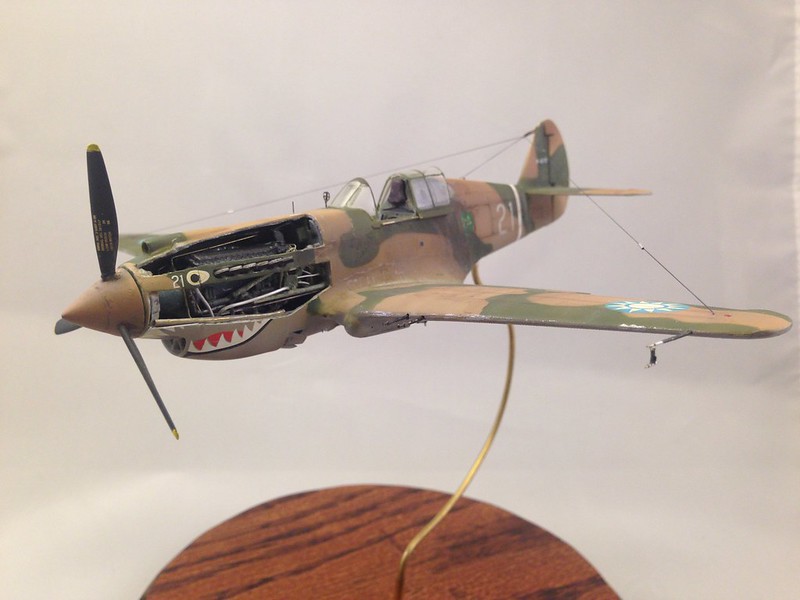
image by brittvallot, on Flickr
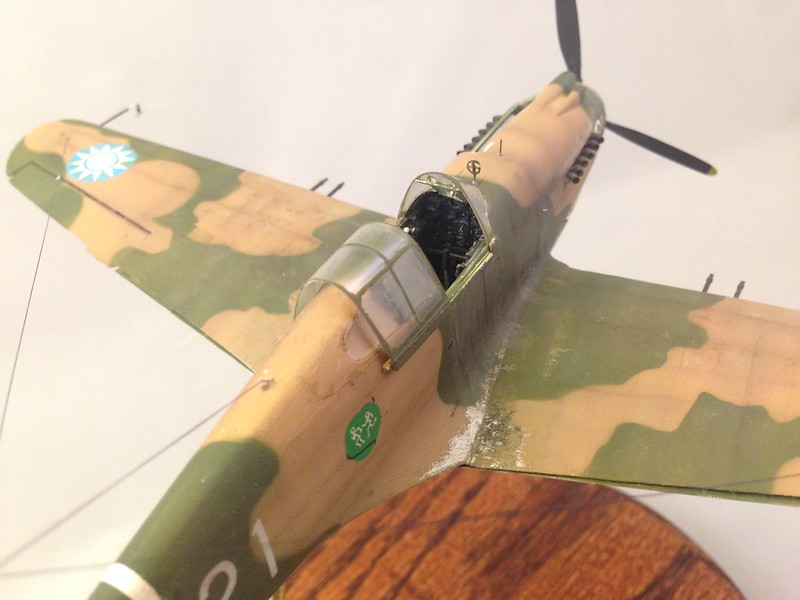
image by brittvallot, on Flickr
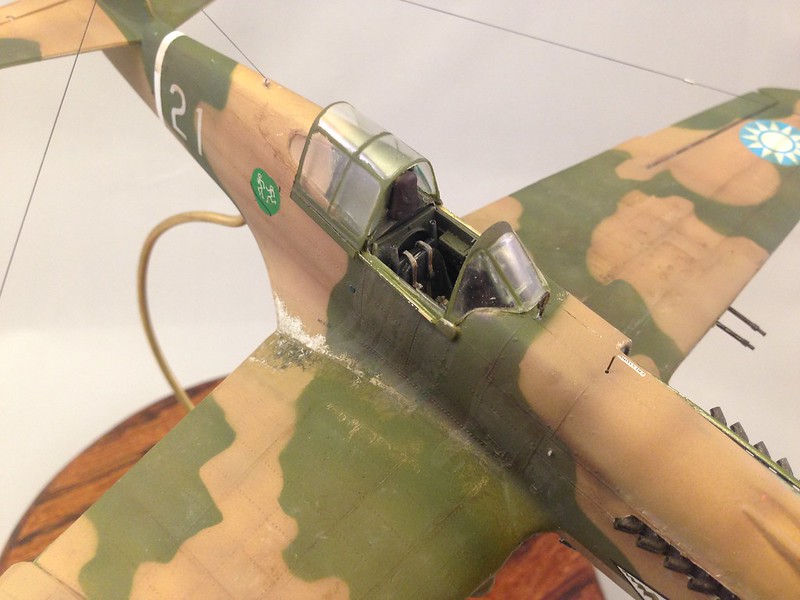
image by brittvallot, on Flickr

Deflector made from plastic strips and a thin sheet of acetate. Hangs from a brass rod scratched out.
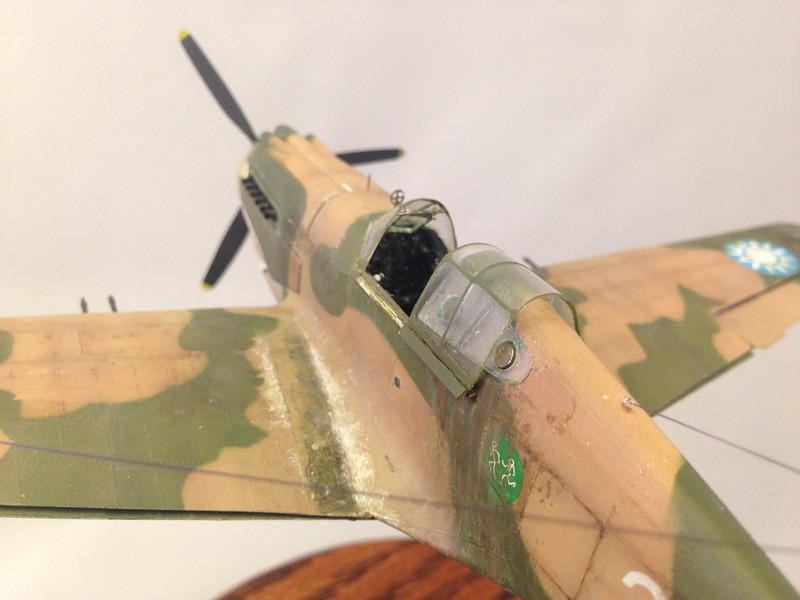
image by brittvallot, on Flickr

That’s a wrap. Of course I don’t mind hearing what the jury out there has to say. This Hawk is far from perfect. There’s a couple of spots I’ve had to live with considering the add ons I did. But she’s still purty to me. =] There’s a Saints game on now and I think my boys need me. Gotta run!!

1 Like

Absolutely beautiful Britt! You went way above and beyond the call on this one, especially knowing what you had to work with! I’ve got this kit on my want to do again list, but not for a while :wink: Congrats, mate… She’s a beaut for sure, Raymond

Gorgeous Britt. I hope my Frankenstein P-40 turns out half this well. Nice job on the rigging too. I must say I’m a fan of your in-flight displays.

Joe

That’s some mighty fine work Britt! She looks cool “in-flight” too. Great job on a difficult project![:D[

Gary

That really is a super nice build. What an amazing amount of work you did in modifying that kit in to something it was never meant to be. Success!!! I love it.

Thanks guys!

Ray: I will say that for the most part I didn’t find the kit to be too awful…maybe I got a lucky one. It did have some nasty spots to correct which I was adequately prepared for (this time). I did just pick up another one for the P-40B in OD Green scheme. I saw a lot of nice photos that showed some subtle variation in the color of the OD due to weathering and such. And all the kit’s quirks are still fresh in my mind so I might work it a little on the side as I do my next one that I’ve been putting off for a while. Should be a quicker build without all the extras. And of the Curtiss P-40s, the -B is my favorite shape. =]

Joe: I’m such a fan of that EZ Line! I don’t dread rigging up the aerials anymore. What used to take 2 or 3 hours of fooling with is now wrapped up in about 20 minutes. I think it comes out so much nicer too. Much more straight forward for me especially. And thanks. I’ll still do some in-flight planes, but I’m getting eager to have some on the ground. There’s a part of me that cringes when it comes to the moment where I have to drill a hole for that rod that it gets mounted too. There will come a point where I’ll want to display certain features of the aircraft that will dictate it stays on the ground. And now that our house is in order and the busyness of post-wedding on-goings is over, I’ll have my attention on that special item for you. The nature of it being flat has been tricky for making a mold that won’t get destroyed when opening. It’s comin’ though. I promise!!

Beautiful build! Love the weathering you did on the tires.[D]

Mike

I hear you Britt… My chief complaint with the kit is the awful gaps, the horrid cockpit set up, and the intentional misses on the landing gear doors. Not a huge fan of the wheels either, though yours ended up looking awesome. Honestly, I’m not sure you can’t look at this kit from two angles: First, being that it’s a great beginner level kit, and it is what it is. Second, that it’s an experienced builders dream because there’s so many modifications that can be done to improve a fifty year old mold. Like I said, I’ll probably do it again, once I’ve got a little more experience under my belt. I’m actually seriously considering doing a diorama of Boyington’s bird being repaired on top of the mountain top Chinese cemetery he crash landed on… Complete with him getting his butt chewed on by a peeved crew chief :wink: But, you got to admit… going from a modern Tamiya mold to this is enough to strip anyone’s gears :slight_smile: Raymond

Bvallot, you certainly raised the bar on us. That is a plus fine P-40B. I noticed that you attached the canopy so that it could be moved back - nice touch! Have you ever used pilots? I bet you could get one to drop right in there. They help fly the plane!

No doubt about the gaps Ray! =D I’ll tell you like anybody else about this kit…if I had one thing that got me through this it was–well, two things–a positive mental attitude and my secret weapon: Milliput.

One thing that kept me up was that I didn’t have any expectations from this kit and I wasn’t worried about ruining some part. I just did what I was going to do and I was going to make it work. As for the Milliput, that stuff made this kit happen! Can’t say enough about it. I used it for the leading edge of the wings, the fairing in front of the landing gear, the gun barrel fairings on the cowl, and a few spots along the wing root. That stuff absolutely helped me keep the shape right without having to make a mess. CA just wasn’t an option for me in some of those tight spaces. I just couldn’t sand it all properly. That Milliput went on like silk too and it was fairly forgiving.

I think you should go for it on the diorama! Beat that plane up too. =] So long as you’re taking care of the important things, i.e. seams etc., I think it would be more fun not worrying about making it perfect. Do you have a picture of that event at all? All I can picture is a steep hilltop cluttered with tombstones without the first notion of being able to land much less take off again. And looking forward to seeing that Spit when you get around to it. :wink:

Shipwreck: Thanks for the assist with the canopy rails heads up. =] That little addition was all cause of you right there. I may make this a thing I do with certain builds from now on. It’s a little big to scale, but…it’s functional. And it works like a charm!! If I can find one smaller, I might try that out too, but for now I’ll make this work.

I still may try dropping a pilot in there. The seatbelts may get in the way. I’ll give it a try. I’ve developed this “ghost pilot” means of display for these WW2 birds so as to allow the cockpit to be viewed. For more modern jets I do plan to include a pilot.

And I appreciate the kind words from all of you.

No, I got that event out of his book… Wouldn’t surprise me if it happened though. That was around the start of the end of the love affair between him and Chennault. He described it as being at the top of a mountain, and being very rocky… The graves, if I remember correctly, were piled up rocks. I’m sure I could do a google search and get an idea of similar cemeteries, and extrapolate the rest. I’m thinking about having the plane sitting on makeshift supports while a mechanic works on the Landing Gear and another mechanic beating the heck out of a bent prop blade, while the other chews on Boyington. I know they flew in to the spot. I’ll have to go back and check and see what in. If I can, I may see if I can build that bird to go with it.

I’ll have to check into some of that milliput. I used putty and did a lot of sanding. It did fairly well, but there are areas I’m still not 100% happy with. You’re right though, attitude as a big part of the kit. At least we have something that’s fairly accurate. I’m still flattened that there’s just not a better kit for such an important plane… Raymond

Definitely get some and practice with it beforehand. A little goes a long way. A couple of tools to help push and carve with will be of some use as well. Use your imagination! =]

In my rush to get those pictures posted and done with, I forgot to show that prop blur! =[ I put in all that work to make it fit nice and pretty so as make it spin and I plum didn’t even film it. So here’s a few fun ones and i noticed I left out a detail of the insignia. I thought they were pretty damn good and with a little help I think they worked out nicely. So here’s that as well.

A little extra weathering on top goes a long way for a convincing decal. This was done with a very light wash of the green I used and Tamiya Weathering Compounds.

image by brittvallot, on Flickr

image by brittvallot, on Flickr

Fuel drain and cowl flaps

image by brittvallot, on Flickr

image by brittvallot, on Flickr

I just really love the shape the -B makes. =] I could stare at this for hours.

image by brittvallot, on Flickr

image by brittvallot, on Flickr

That’s that. =]

1 Like

Wow, somehow I missed this, beautiful work and I love the prop blur!

Hey Britt… Just for… grins and giggles, why don’t you convert the second from last to black and white… I bet it looks pretty !@#$ spot on… Raymond

I just caught up… nice job BV, that’s one sweet looking P-40! I’d love to build one myself, but don’t think I’d have the same appetite for wrestling with a kit. Way to go!

Thanks Britt! Theres no hurry believe me. I’m eyeing that Accurate Minitures P-39 in my stash right now. Its one that I’ve always wanted to do…

Joe

Hey Britt… I hope you don’t mind, but I did the honors… Wow, you did a good job! Even my wife is impressed.

=D Ha!! That’s nice. You even photoshopped the brass out. That’s pretty sweet. I’ve been wanting to do that very same thing with all the pics I’ve ever dressed up…just never got around to it. I did start one. I’ll try to get it up here tonight some time.

Nicely done. =]

Raymond, well done man! That’s a great job! Very cool too.

Gary