Revell Constitution Build Log

When all else fails, follow instructions.

I failed on at least three other attempts to complete the Revell model of the USS Constitution. The main reason for my failure was that I did not follow instructions. I tried to do too much and went beyond my skill level without proper preperation.

I purchased the Bluejacket Shipcrafters instruction book and plans with the intent of of building the Revell kit and rigging it acording to the Bluejacket plans. It sounds simple. After all, they are the same scale. But, for me, it was a disaster.

This time, I am going to follow instructions and go step by step through completion. Well, I am going to follow instructions for the most part.

After all my attempts, I have develpoped a respect for the instruction book. It is one of best I have seen. Not only is it written in English, it tells you what to do instead of giving you some symbol to follow. And there is a purpose in the order of the steps, especially in the rigging.

Some interesting and informative sources:

Arnot, Lawrence. U.S.S. Constitution 18-12-1815, Bicenentennial Edition. Searsport, Maine: BlurJacket Inc., 2000

Gillmer, Thomas. Old Ironsides, The Rise, Decline, and Resurrection of the USS Constitution. Camden, Maine: International Marine, 1997

Lankford, Ben. How To Build First-Rate Ship Models From Kits. Hollywood, Florida: Model Expo, 1999

Magoun, Alexander. The Frigate Constitution and Other Historic Ships. New York: Dover Publications, 1987

Martin, Tyrone. A Most Fortunate Ship, Revised Edition. Annapolis: Naval Institute Press, 2003

The one thing I am not going to do is to agonize over anything. The moment this build ceases to be fun, it goes back in a box

STEP 1

Painting;

I am using Model Masters acrylic paint. I have come to like this paint. It dries fast, is water solubile and brushes clean up with window cleaner and amonia. Fast drying is a double edge sword: I have to clean the paint brush about every 10 to 15 minutes to prevent the paint from drying on the paint brush.

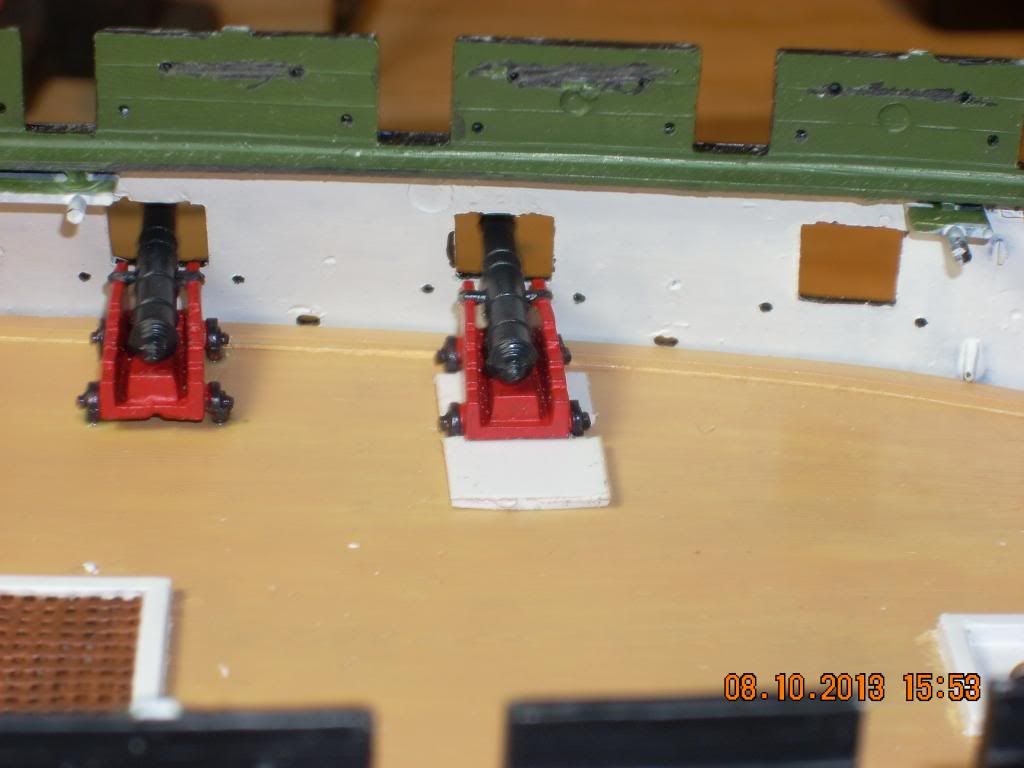
I am using BlueJacket Shipcrafters paint schedule for Isaac Hull’s paint scheme. It calls for the spardeck bulwarks and waterways to be painted green and the gundeck ceiling and gunstripe to be white.

What shade of green? I haven’t the fogiest idea. So I slected a medium green. Right in the middle and it will have to do.

Assembly;

This thing is warped! Look at the gap between the two hull halves.

It needs a bunch of clampsThe molds for this model are probably 50 to 60 years old. I think there are only two molds. One is for Revell-Monogram and that one is in China. The other is for Revell Germny and it is in Europe. (I forget which country.) I have attempted both and I can state that the molds are identical.

The instructions are identical with one exception: The German plans have three pages showing the location of each part. It is very handy and I don’t see why Revell-Monogram won’t inlude them in their instructions.

The molds are showing their age. But I don’t think that the warping is a product of the mold. I think that it is a function of the cooling of the plastic after molding. It means that someone was not paying attention to detail but the next one may pay attention to this detail and the parts might not be warped. It is what it is and I will deal with it.

There is a very nice feature of this model that is not mentioned in any of the instructions. The model was designed to be mounted on pedestals. Trap a #8 nut in the cavity provided and open up the path for the screw before assembly.

Then you can mount the model on a board using pedestals. I bought a pair of brass pedestals from BlueJacket. The mounting board is temporary scrap of 1 x 6 pine.

[On to step two.

I have some photos I would like to include but I have no idea as to how to do it. As I remember, you have to use an intermediary. So I posted the photos to an old photobucket account. Does anyone have any suggestions?

http://s263.photobucket.com/user/captjayman/media/15ManyClamps.jpg.html[IMG]http://i263.photobucket.com/albums/ii145/captjayman/15ManyClamps.jpg[/IMG][/URL]:600:0]I am going to see if this works.

This is trial and error.

http://s263.photobucket.com/user/captjayman/media/15ManyClamps.jpg.html?#/user/captjayman/media/14ScrewampNut.jpg.html?&_suid=137616071547505098508870659157:600:0

Looks good, Jay!

Can’t wait to see your build as it progresses…

Thanks David. This photobucket is a trial and error process for me. I managed to post some photos and I hope I can replicate the ptocess.

Jay

Look forward to seeing the build progress, especially when you get to the wonderful mass of rigging!!

For the photo’s from your photobucket pictures:

-Bring up the individual photo you want to post

-Click the ‘html’ link to the right which will copy it

-In your post on here click ‘use rich formatting’

-Click the html in the top right of the menu bar next to ‘paragraph, font family, etc’

-Paste the html link you copied in the source editor that comes up

Thats should work fine then, if you hadn’t worked it out properly from your trials. Hope that helps!

Hey Jayman,

Wow, what a great looking kit! I may venture into a ship someday, but until then, I will stare in awe of those of you who do awesome work with the ships!

Eagle90

photo gundeckunderside.jpg

photo gundeckinstalled.jpg

photo transome.jpg

Step 2

Deck color has always been a problem for me. I tried a few variations on a scrap piece of plastic but I did not like them. So, when all else fails, follow instructions. The instructions called for tan. Well, tan it is. Model Masters acrylic tan. I’m not pleased with it, but it was the best I could come up with. The hatch coamings are white and the hatch gratings are painted with Model Masters leather. I like the leather color to simulate brown wood.

I joined the deck pieces together with a couple of strips of balsa. The only problem is that the aft piece is of a different thickness so I could not extend the balsa all the way aft. The deck was warped and the balsa helped to straighten it out.

I generally followed the instructions with the painting of the transome.

I did not rig the rudder to turn. I could care less about that.

I snapped but did not glue the deck in place.

photo gundeckunderside.jpg

Transom looks good, Jay! Tell me, what do you have in those little plastic paint cups lined up in your pic?

Step 3

The painting is rather conventional. There is a fit problem here. Make sure that the bulkheads will not interfere with the placement of the transome. I put a couple of figures in the cabin for the fun of it. The mate is trying to explain to the captain but he is not buying it.

photo cabin.jpg

Step 4 is ommited because gun port covers were shipped when the guns were run out. Thank heavens because half of those little things would end up being broken off before the model could be completed.

Really they dismounted the port covers? I’ve not heard of that?

Thank you David for your kind words.

The cups have amonia, window cleaner and water and are used for cleaning paint brushes. I mainly use acrylic paints and use them to keep my brushes clean. One rack has one of each and the other has one amonia, one water and 3 window cleaners. The cups are in every grocery store here and are sold mainly for Cuban coffee. One of those little cups equals about 4 regular cups.

The covers were held in place with slide bolts and removed for battle. CDR Martin mentions this in his book. I could provide a reference if you would like.

Step 5

I ended up using Testors enamel flat red for the gun carriages because I could not find anything in acrylic at my LHS. I used gun metal acrylic on the barrels.

I wanted the barrel to be in the center of the gun port so I made a tool to help with this. I would place the gun in the tool and run the gun out to its proper position.

[photo Cannonampmountingguide.jpg](http://s263

.photobucket.com/user/captjayman/media/Cannonampmountingguide.jpg.html)

Then, I removed the gun and scraped off the paint where the trucks (wheels) would go.

photo Mountingguide.jpg

I applied a dab of CA glue on the four trucks and put them in position. It worked out OK.

I could not see using the line supplied with the kit for the breeching. So I drilled out holes for the ring bolts and made breeching tackle using .040 line. I seized the line to the ring bolts. Then I glued one end to the hull and put the breeching line around the cascabel. I secured that with a dab of CA and secured the other end to the hull.

This was partially successful. I should have secured the line around the cascabel before installing the gun in the ship. Oh well, next time. But I do have the cannonades to install. Also, I used the wrong size line. I don’t know how I came up with that size. The 24 pounder had a breeching tackle of 9 inches in circumference. That would be about .030 in scale and I have some .027 line available.

photo 24pounders.jpg

(Measure once, cut twice. Measure twice, cut once.)

photo Reinforcements.jpg

Step 6

The spar deck was badly warped, especially the center section. I reinforced it with a couple of strips of pine wood. Balsa wood would have been of little help. The pine helped but it did not take all of the warp out.

The rigging instructions call for tying a simulated dead eyes to a plastic ring bolts inserted in the deck. The ring bolts are fragile and prone to break and I plan to replace them where necessary with twisted stranded electrical wire. In this case, I used #10 stranded wire to wrap around the base of the dead eye and twisted it to form a tail. I inserted the tail through the deck and fastened it with CA glue after bending the tail so it could not pull out. I will use different sizes of wire depending on the required thickness of the eye.

photo wireeyebolts.jpg

Now there is the installation of the spar deck. There was still notable warpage of the spar deck, especially in the center section. The result was that the deck would rise above the water ways molded in the hull. I had to bring the deck down even with the hull.

I tried attaching tabs along the deck using scrap plastic strips. That helped but but there was a problem in that the deck was thicker than the mating surface on the hull. I build up the tabs using scrap 1/32 deck planking. Now it was too thick. I sanded the wood down to get the required fit.

photo Deckwithtabs.jpg

I snaped the deck in place and could see that it would take quite a bit of pressure to have the deck mate up with the hull. So I used some .045 rigging thread inserted about every othe gun port to be tied off to apply tension to the process.

I used Testors plastic cement instead of CA because it would take longer to cure. And it was a good thing that I did that. The first time I tried to glue the deck in I could not get one section to fit and I had to take it apart, scrape off the glue and start all over. If I had used CA, I never would have been able to do that. I let it cure over night and, while it is not perfect, it is servicable.

photo Spardeckgluedin.jpg

Step 7

I attached the wheel before installing the deck. The wheel is glued in place and will not turn.

Step 8

Again there was a fit problem with the gallery stern. I first attached the gallery stern to the hull and then attached part 45 to the model.

Step 9

I did not install the eyebolts as instructed because I am going to assemble the guns frist, including the breeching tackle.

It is my hope that others will learn from my mistakes. If that is the case, then this should be very instructive as I have and will make many. It is also my hope that others will point out areas for improvement and the errors being made.

Good Stuff, Jay! I like your template for placing the guns…very handy!

Thanks for the step-by-step…when I get to my Big Connie, I’ll definitely refer to this thread! Meanwhile, I’m enjoying your progress!

You might want to check out my log “Right of passage”. I had similar issues w/ the spar deck.

BTW I found that using a ‘rolling’ or ‘clothesline’ hitch works beautifully for clamping the way you did here. the knot allows you to keep cinching the loop tighter w/ out having to do the tourniquet thing you did here.

http://en.wikipedia.org/wiki/Taut-line_hitch

Thanks David

It is going a little slow now but I may have something to post tomorrow.