This is a really neat build-up. I look forward to seeing the completed project.
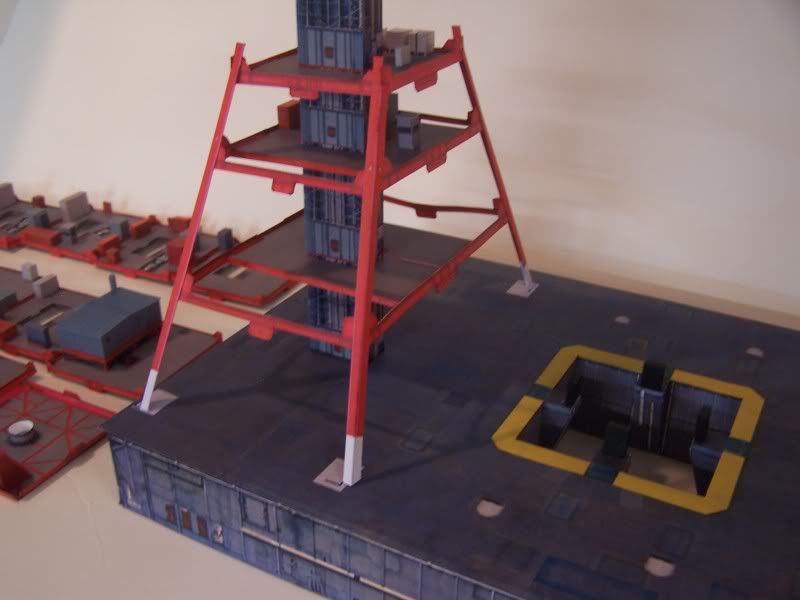
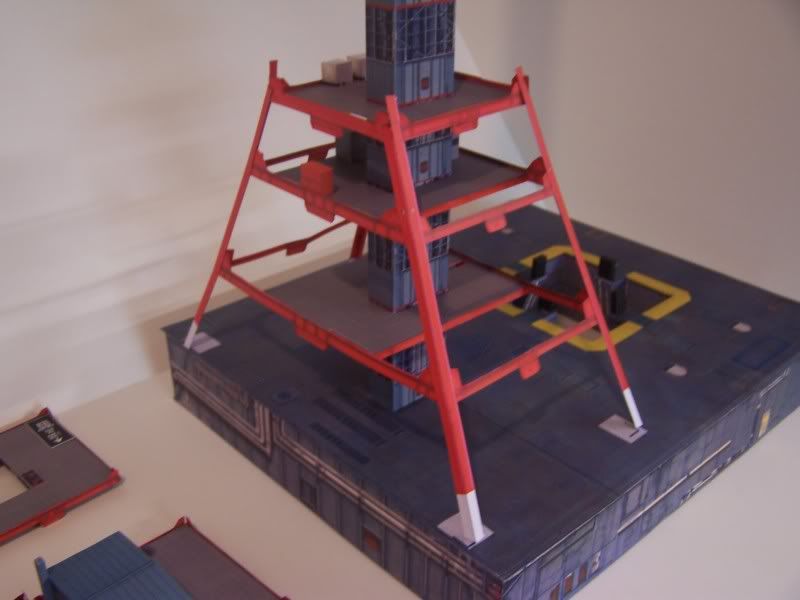
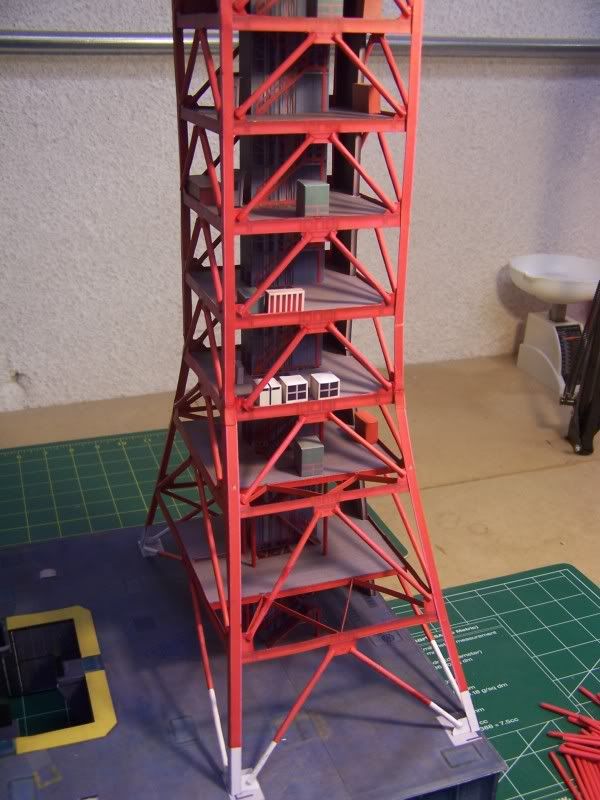
Levels 1, 2, and 3 assembled to the vertical girders. Things will straiten out when the girders are attached to the platform.
Cheers and have a Happy and Safe Labor Day
Rob,
You’ve done some very nice work! My son and I are building the Revell kit too. He’s three years old, going on four in November, so he helps me with gluing and some painting, but I’m doing a lot of the work. Neverthless, he has gotten a lot of hands on time with this model.
I’m glad to read that better decals are available. The black text just doesn’t look right.
I’m anxious to see more of your work on the launch tower.
Regards,
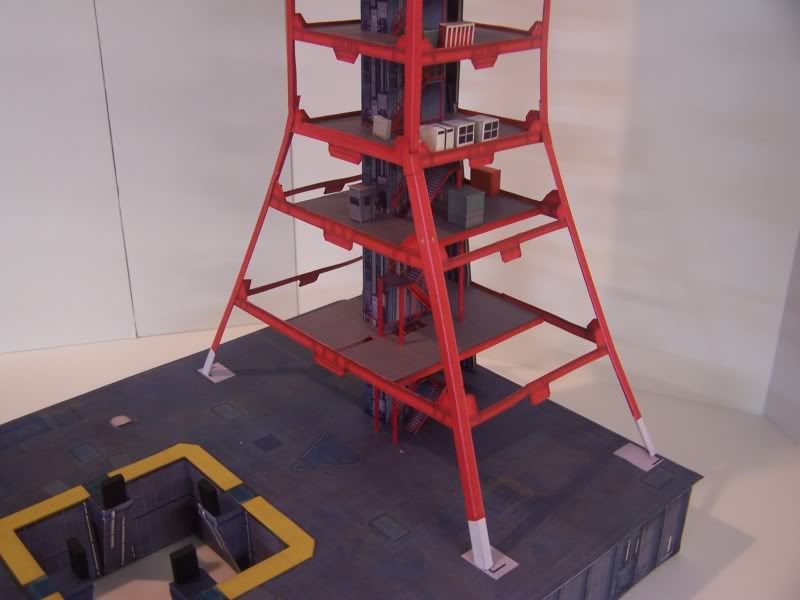
Making some progress
Cheers
That’s really looking good!
I just followed the link you provided to the LUT’s site to see if he had any pix of the finished product, and to compare whereabouts you are regarding the finished product and … YIKES!! I was blown away by the detail he’s included in the ‘model’!
I’m pleased to see no warping in yours and it looks like you’ve got a really good framework going, on which to build all those coming details!
Is all the piping done in paper too? Do you think you’ll use the kit parts or replace 'em with styrene rods or tubes?
Man oh man, I’m looking forward to this more than I was before!!
Just keep doing what you’re doing!! And thanx for posting!
Pete
I’m an aircraft modeler snooping around the space forum. Your Saturn V is looking terrific, I’ll be back to keep checking on your progress. Keep up the great work!
That tower assembly ( and, of course, the rocket itself ) looks great! I’m going to have to reconsider those paper kits. I’ve kind of disregarded them up til now.
A question about the SaturnV: was this the recent commemorative re-issue with Buzz Aldrin’s picture and name tied in for the Apollo 11 anniversary? My son was wanting one and I figured if that was the one with the decal issue then I would just order the correct ones at the same time as I get the kit.
If that re-issue does have decal problems, maybe Buzz Aldrin should know about Revell’s attitude when they goof this big on something with his name on it, especially since he flew in the original.
Hi Kugai,
Thanks for the compliment…Yes…The Saturn V was the Buzz Aldrin re-issue. The decals were screwed up, unfortunately, I didn’t realize it until after I applied them. it took me 2 days to get them off. I ordered a new set from http://www.spacemodelsystems.com/ and they worked great. Good question about Buzz…I wonder if he knows?
Cheers
This is really looking great! I have this model and after reading this thread, I also ordered the replacement decals. The launching platform looks great as well. Is it very hard to put together? I haven’t put together a paper model yet although I have bought a couple and have some nice free ones as well to do some time.
Thanks Slingshot…I haven’t been able to work on this since my surgery and the 8 week recovery. I’m not supposed to lift my hands above my shoulders and the LUT stands almost 6 1/2 feet high while it’s sitting on my bench, so I’ve put it aside for now. It’s not that hard to build. Just takes time and patience.
Thanks for looking
Rob,
I hope your recovery is going well. My almost four-year-old son (his birthday is 11/19) and I have been working on the Revell 1/144 Apollo rocket since this summer. Naturally, I’m not putting as much time into the kit’s finish as I would working on it by myself, but it’s still coming out better than I expected. John has done a lot of the work gluing parts together and has also done some of the painting.
Thanks for the tip on the Space Model Systems decals. I’m going to order some today.
I’ll probably post photos in another thread once we’re done.
In the meantime, I look forward to seeing more of your work when you’re able to get back to the bench.
Regards,
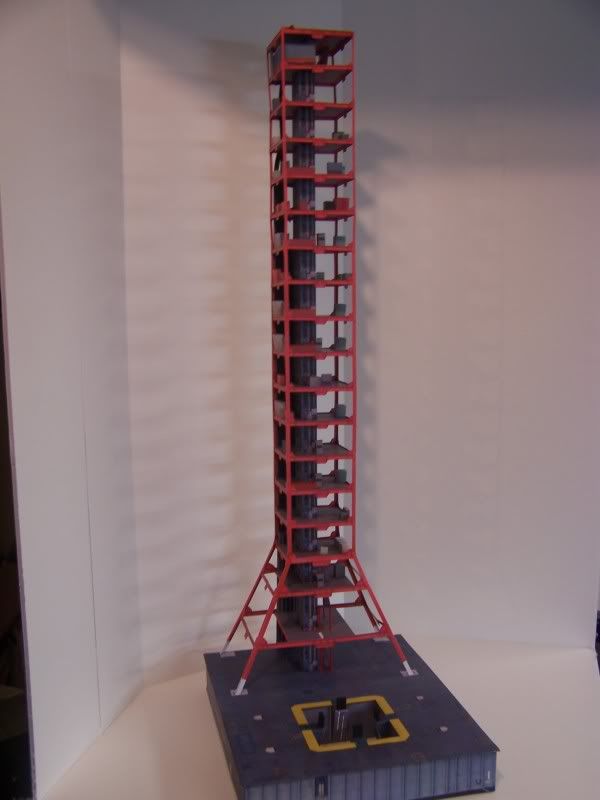
Time flies when you’re having fun. I’m finally back to work on this. Started rolling the 220 diagonal braces for each level. I’ll post pictures tonight after they are installed.
Cheers
It’s been a few months since I worked on this, so lets get back to work.
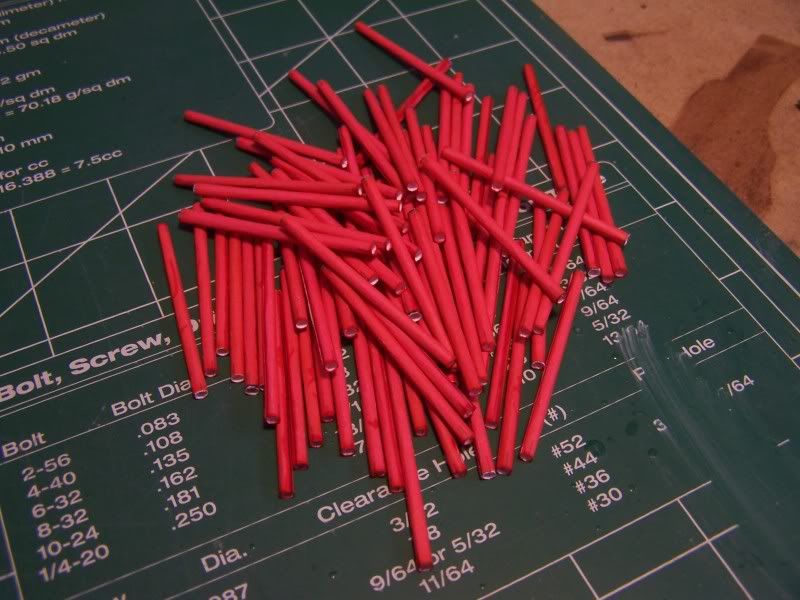
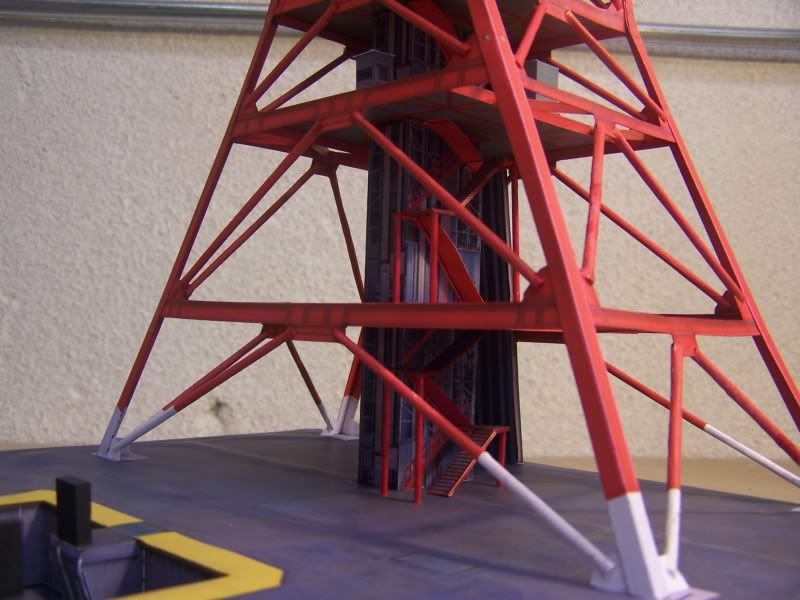
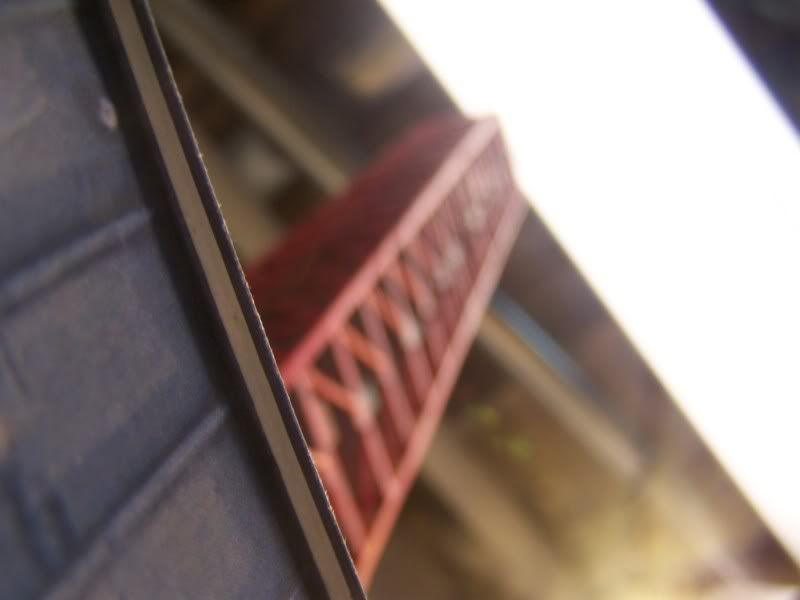
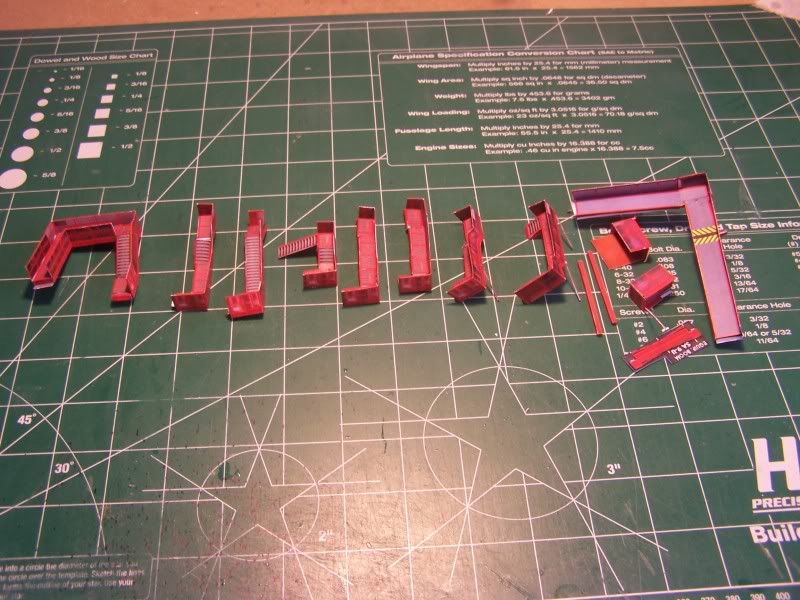
I started adding the diagonal braces. Over 220 strips rolled onto a brass tube then removed, cut to length, touched up with a red sharpie and applied to the LUT.
This is a portion of the braces before cutting out
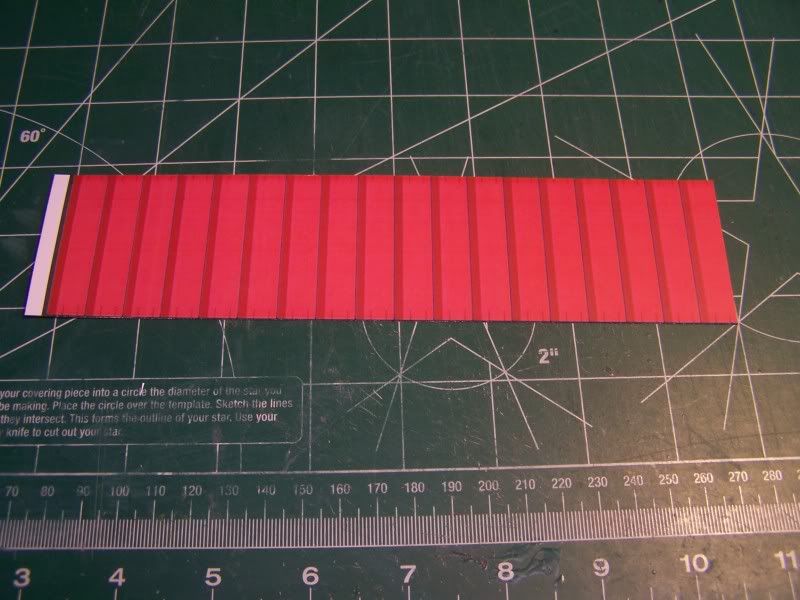
This is one brace ready to roll and glue

This is a portion of the tubes ready to trim to length and install
This is what I have done so far.
Cheers
Wonderful work, as always. What kind of glue are you using for the paper work? What are you using to apply the glue for all those repeated assemblies?
Thanks…I’m using different glues for different applications. For the rolled parts, I’ve been using a glue stick. To attach the tubes, I use CA. I’ve also used contact cement, and white glue.
Cheers
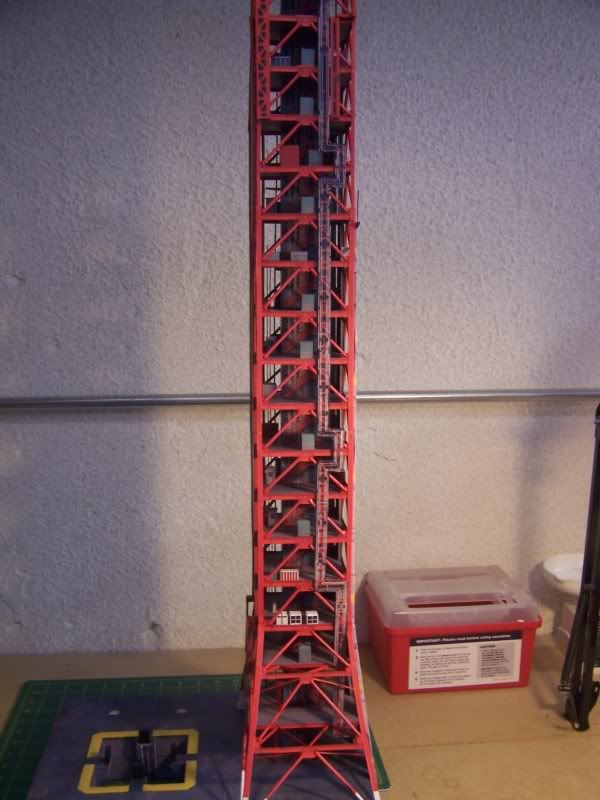
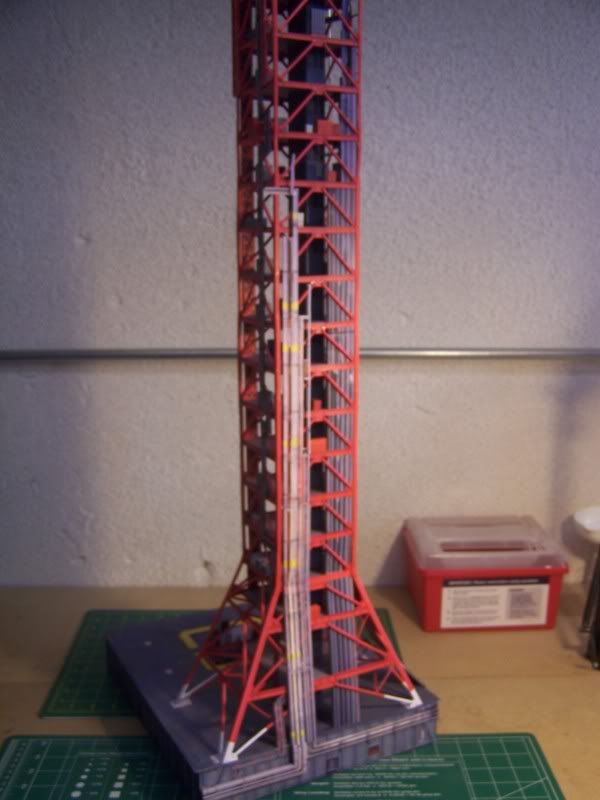
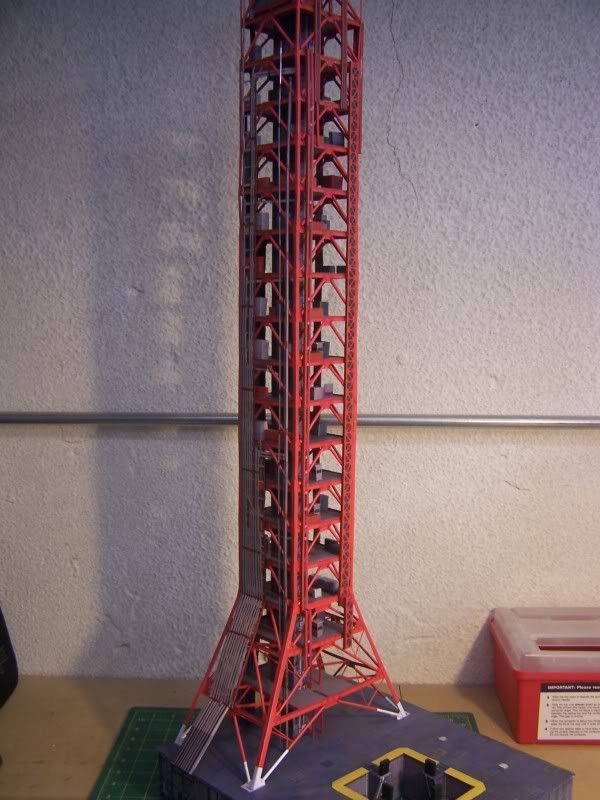
Diagonal Braces are complete
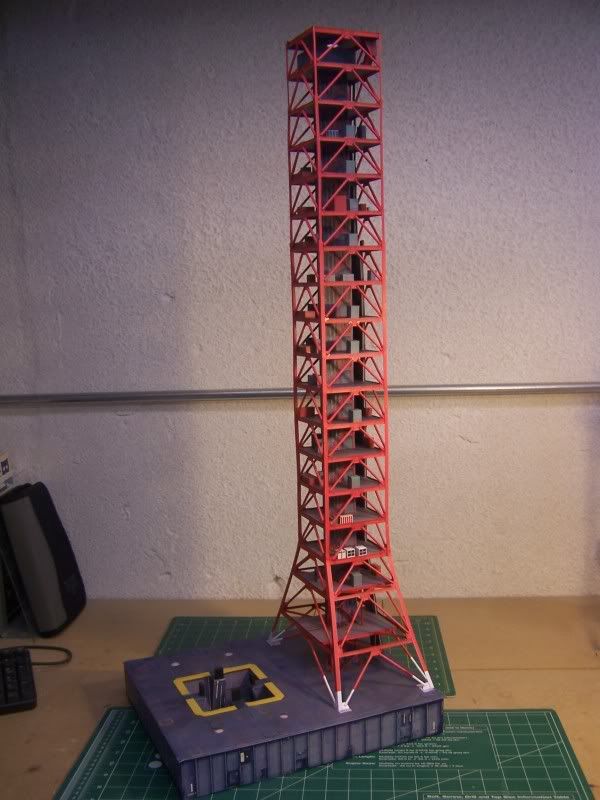
Tried to take a picture looking up from the ground. This should look better when everything is complete
Cheers
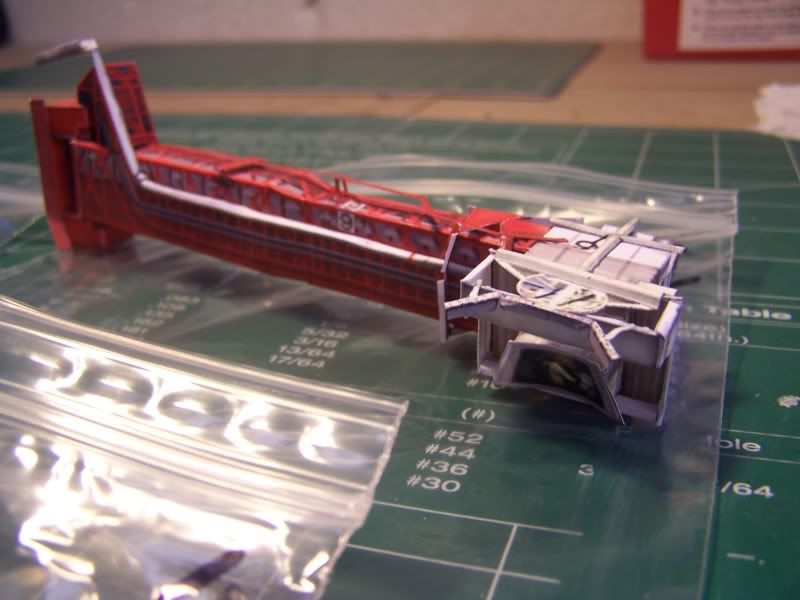
The tower is complete with piping and supports. Now it’s on to the swingarms
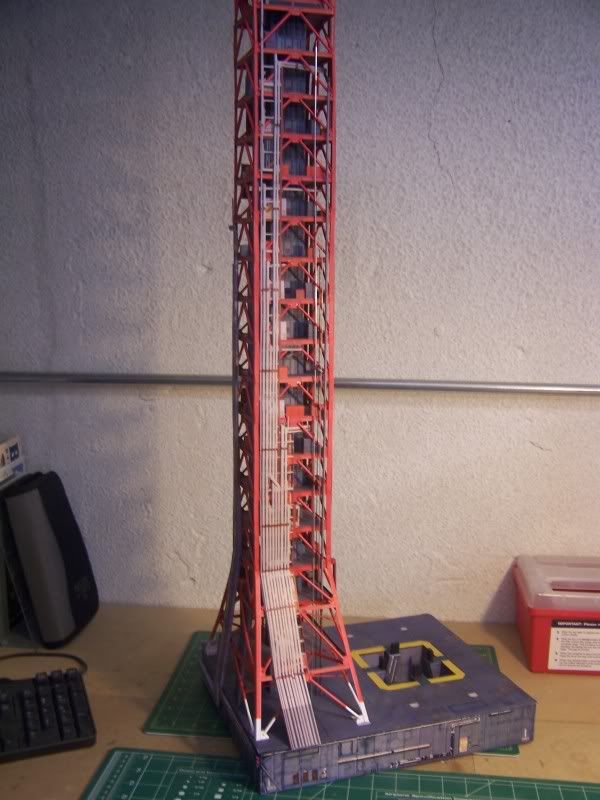
Cheers
Very nice work!
I’m trying to build one swing arm per day.
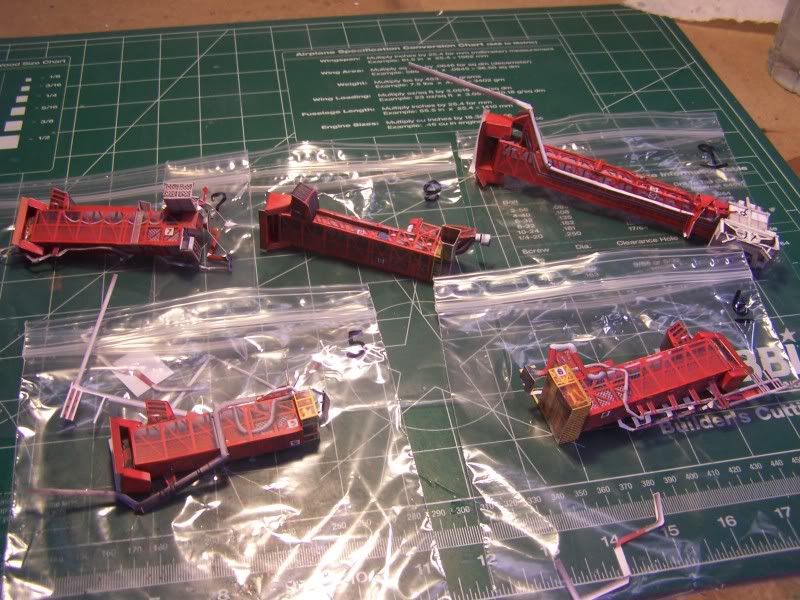
Swing arms 1 thru 4 are complete. Lots of cutting with a razor blade.
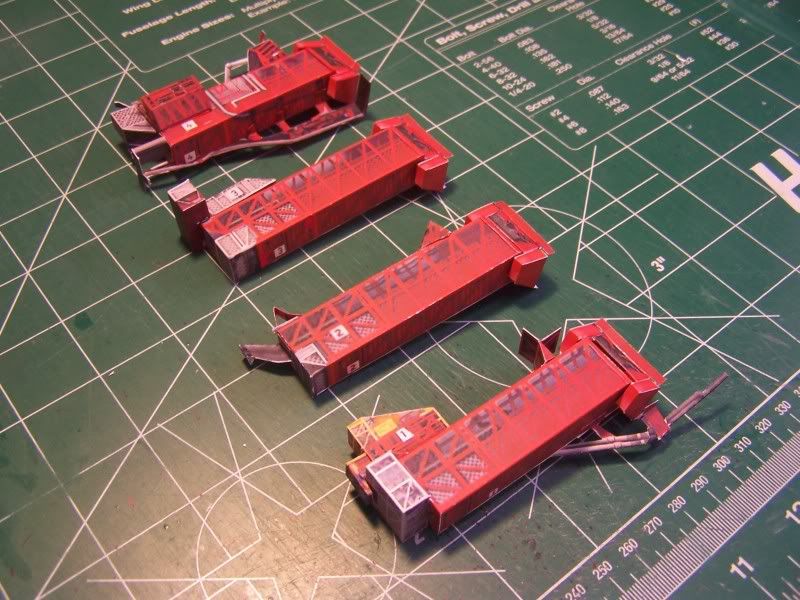
Cheers
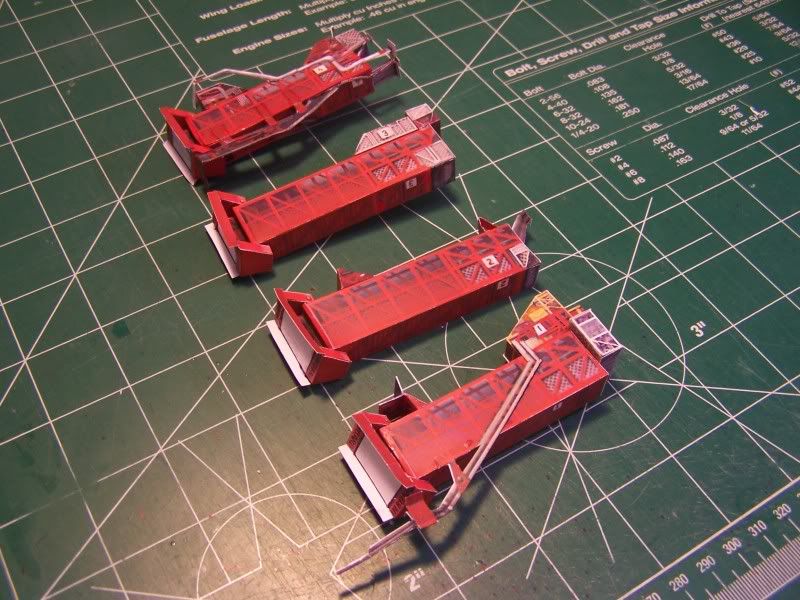
It took awhile, but I was able to finish the swing arms on Friday and the swing arm gantries today.
Cheers