Return to modeling with the 1/96 Constitution

I’ve been following arnie60’s and Force9’s inspiring work on the old classic Revell 1/96 USS Constitution with great interest. I built the 1/196 version back in middle school or thereabouts, and didn’t do an especially good job. I intended to redeem myself as a ship modeler by building the Thermopylae, but at some point over the years I tossed what was left of the incomplete kit in the trash. My life drifted a long way from modeling over the years, but after a series of recent life events I find myself in possession of a brand new current production version of the old classic. I work 60+ hours a week, and this will probably take me five years to complete, but who knows, I might actually produce something worth displaying.

At this point in the process, I haven’t acquired any paints yet, so I’m busying myself with gluing together some of the parts that want to be cleaned up and painted as assembled units. Thus far, I’ve glued together all the cannon barrels, and have started separating some of the other parts into individual bags.

I am still deciding a great many questions at this point, inspired by the high bar set by Arnie and Evan. What will I do with the color scheme? What will I do with the transom? The coppering of the hull? How can I get a proper ship’s wheel with 10 spokes, and make it look good? How am I going to deal with the upper masts?

The questions I’ve decided so far:

  • I will use the deck from scaledecks.com instead of trying to make the three-part decks look decent. I’ve spoken with John, and am looking forward to making that particular purchase

  • I will use scale rope instead of the embroidery floss supplied with the kit

  • I will probably use blocks and deadeyes from Syren

  • I am going to buy brass eye bolts instead of making my own out of bread ties, because I’m lazy, and having tried to help my wife with beading, I have advance knowledge that I’m miserably bad at forming tiny wire into loops

  • I am going to rig the shrouds and ratlines by hand, and try to get mine to look 1/100th as good as Arnie’s. I am inspired that he did such great work with shaky hands, and it gives me hope that I might manage to get in the ballpark in spite of having a fraction of the fine motor dexterity I enjoyed the last time I attempted any serious modeling

  • I am going to use the plastic sails, and do the running rigging. I hope to achieve something like this guy on another site, but with less of an antiqued effect

  • I won’t rig the studding sails, and may go with the limited rig they used on the actual ship while sailing recently

  • The belaying pins on this kit are mostly beyond salvaging, and I’m going to slice them off, drill out the holes, and replace them with brass pins as needed, in the fashion of the modern day ship. I noticed in the Google Streetview walkthrough they put up recently, that most of the rails have empty holes, and that seems like a nice detail to model, assuming the practice “back in the day” would have been the same

  • I intend to rig the cannons on the spar deck properly, with all the tackle

  • I don’t plan to do any gross structural modifications to the hull as provided

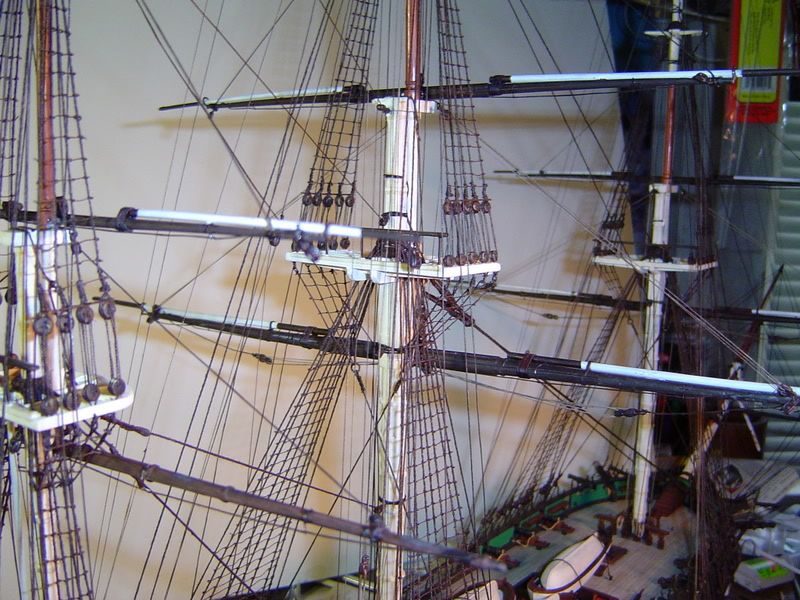
  • I do intend to replace the upper masts with something far stronger than this flimsy plastic, but as a woodturner who has made some tiny stuff on my lathe, I don’t think there is any way I could ever make masts and spars thin enough to look right out of wood without them being nearly as fragile as the plastic, so I’m thinking about trying to use brass rod

  • I will turn pedestals on my wood lathe, and make a base out of a nice piece of walnut instead of using the lame plastic version included with the kit, and I will probably rig a way to bolt it using the locations molded into the hull, and #8-32 machine screws, or thereabouts

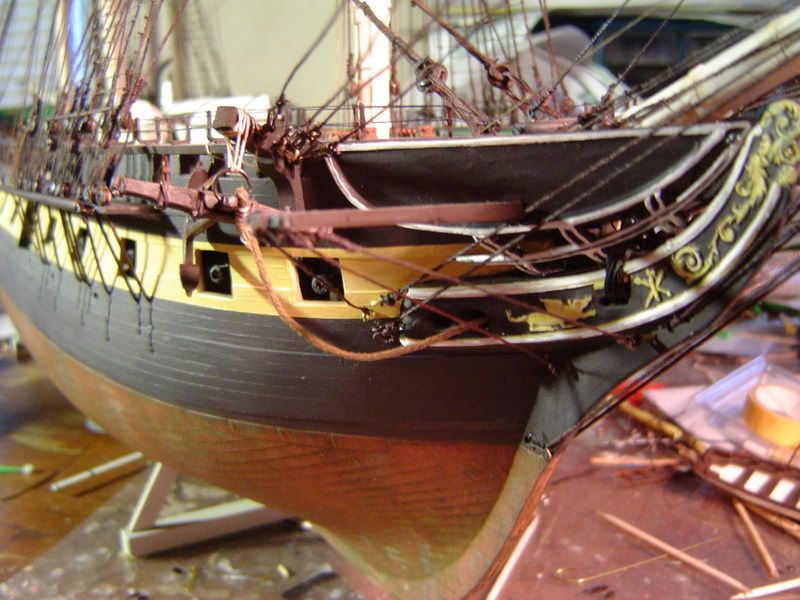
There are many, many questions as yet undecided, but this is a start. I would probably be inclined to model the restored ship as she sits today, but that transom is a serious problem, because the molding details and spacing of the windows doesn’t match the old Revell kit at all. The cannon port covers are another serious problem, because not a single piece of my research on the ship so far supports square, flip-up covers in any way, shape, or form. Even the painting on the box cover of the current release kit shows different doors, which happen to be of the same style as she sports in restored form today.

I definitely don’t want to fill in all the little rectangular bits where the doors mount in the hull, but I’m starting to ponder on drilling holes in these single-part doors, then cutting them in half to model the split doors. I might go that way, and I might not. One of the reasons I got away from modeling, is that I tend to be some so obsessed with minutiae that I cripple myself by setting too high of a bar. I should probably just do the simple thing and go on, but if I could fix the transom and alter the doors, modeling the ship as she sits today would be a no-brainer. It’s a lot easier to model something where you have tons of detailed reference photos, after all.

Well, that’s my start. I decided to join this forum today after lurking for weeks, and throw this out there. With some luck, maybe I’ll be posting pictures of something interesting before 2025. Here’s hoping!

I wish you the best of luck with your build. The idea of building her in the current “fighting sail” configuration is interesting. That will allow for setting up some of the (imho) handsome running rigging for the sails, without hiding a lot of work. And for some reason I find that sail configuration very aesthetically pleasing. I would, however, recommend scratch building the sails from individual strips of silkspan or fine cloth if you go that route. Less sails to work on, so you can really try to do your best on each one.

Sounds like you have a good plan. I think you’ll enjoy yourself.

I’d lso suggest building up the appearance of thickness of the ships sides by framing around the inside of the gun ports.

I second rdiaz on not using the plastic sails. You’ve got a while to practice, and you’ll be able to do much better with paper.

I wouldn’t bother to drill out the pin rails. Why not just make new ones from scratch in styrene? And seriously consider attaching them to the sides with steel pins. You can drill all the way through to get good purchase, and you’ll never see it on the black outside.

Good luck, sounds fun!

Best of luck in joining the ranks who have built this kit. You have a good plan and a wealth of information concerning this kit.

I think that you will find using wood for the masts and yards will more than meet the requirements, and w/ your skills w/ a lathe, a piece of cake to make.

I kept the base masts from the kit as they are very solid and are essentially correct and get painted white anyway, but I scratched built the rest of them and most of the yards from wood. They are holding up superbly to the tension of the rigging.[Y] [I don’t know what experience you have w/ rigging, and you may well already know this, that too often unexperienced riggers put too much tension in their lines {yes, I am guilty of this too!} and thats when things snap. Its not a piano and you’re not going to play it.

You have laid out quite an ambitious project there, and I will be watching how things progress w/ great interest.

And thank you for the compliments on my build. If I can help in anyway…[t$t]

Plastic masts and yards are not that terrible - the rigging system usually counteracts tension in each line with another one pulling in the opposite direction, so if you don’t put excess tension, nothing should bend nor snap.

Sometimes replacing is a must, I guess. The flying jib boom a very long and thin spar, and thus very flimsy if made of styrene. Yards other than lower ones and topsails have the same problem, though the braces that would bend them backards shouldn’t have a lot of tension. Royal and topgallant masts are thin, but not that long, and stays plus backstays should hold them in place - but with wood working skills like yours, scratch building them is probably a no-brainer.

Replacing is a must! I destroyed several of the most delicate parts trying to cut them away from the giant blobs of plastic attaching them to the trees. The quality of this current release kit leaves a lot to be desired.

Oh well. I have the skills to do it, and with a few false starts, it should be fine. Making them out of wood gives me the interesting opportunity to model the fact that the upper masts were just oiled, and their age and strength was gauged by their color. I can come up with two or three different natural colors from my scrap pile, and then I’ll just oil them prototype style, and I bet it will look perfect.

I’ve built a few ships, but I never got the rigging remotely close to being correct. This is a larger scale, so it’s easier to imagine succeeding.

The deeper I get into this, the more I see work ahead. The stock capstan is laughable, and the ship’s wheel leaves a lot to be desired too. I’m wondering if I have the chops to pull off making a new ship’s wheel from scratch, with the correct number of spokes. Difficult to say the least, but if I pull it off, what an accomplishment!

I’ll see what seems like less work, and after I try drilling out a couple of these, scratch building will probably win out. Even the fife rails aren’t that complicated.

Arborvitian,

If you’re anything like me, if your project isn’t done in a reasonable time (like maybe a year and a half) you’ll lose interest in the build and it will never be finished. I’ve only built one sailing ship and I think it came out great. Many here stressed that the rigging either makes or breaks any build. I took that advice to heart. I don’t know, you might have more spare time and concentration/focus than i do but I’d be overwhelmed trying to correct everything you want to do.

I wish you only success. These are photos of my Constitution I built in '05. Lots of fun but a lot of work. Even at this point I could have worked another year on it, but I had enough.

It looks dramatically better than the last one I built!

You have a very valid point about the attention span issue. Right now, it’s winter, and business is slow, so I have some free time. In a few months, I will be working 70 hours a week, and I will never touch this thing. Will I pick it up again next winter?

Maybe.

I found a guy who made a wheel out of wood, and that looks like something I could possibly pull off one better than that guy did.

Shrug. At this point I’m amusing myself just doing the research and making plans. It may be all I ever end up doing. If so, I’ve spent more money on less entertaining things before.

Arborvitian,

I enjoy the research more than the build. Don’t forget to search this site for photos of the Isaac Hull Constitution model. Hope that helps.

When/if you replace the masts, make sure to eyeball the actual shapes the masts take on–they are seldom simply round. Significant portions of the masts are square and octagonal. Topmasts often have a “heel” of sorts where they seat in the crosstrees. Which means you may need a rectangular bit of stock to cut a given mast from.

One nice thing, though–you can cut the angled slot for the hoisting sheave in the foot of the topmast. When the topmast was unstepped a tackle was temporarily bent on to heave the mast up to get the fid out. (A person could model the fid, too–except it’s generally buried under model-scale shroud eyes laid over the mast top.

The gunport issue remains a thorny one. You did not address what I find to be the most vexing issue in the gunport area–the thickness of the hull. The plastic hull is around .005" maybe 1/16" thick. The actual hull is 18-20" thick around the gunports; that would be about 3/16" thick, a significant difference. There’s no one way to address that. Though, we have some painstaking ways to achieve this illustrated in this forum.

Wow, I am insane! I bought the kit on a whim more than a plan, spent a goodly number of hours cutting and sorting parts in preparation to begin working in earnest, and then I let my perfectionist demon possess me. I said something about this in my initial post. I’ll get it built if I don’t cripple myself by raising the bar too high, or something to that effect.

While I was researching some bit of something, I had the misfortune to stumble across the Model Shipways kit. Compare it to the street view walkthrough the Navy put up (or your memories, for those of you lucky enough to have seen her in person), and it compares very favorably. The transom in its current state isn’t very pretty, and there are a lot of issues relative to any historical period for the ship, but the one historical period I can model with a high degree of certainty is the history of her most recent voyage, under the few sails that actually exist for her. I have reference material up the gazoo, and it’s a million times easier than back when I was photographing railroad equipment with a film camera and working from small prints.

Once I saw that, I went to war with myself. Where do I spend the money? Where do I spend the time? Where do I compromise? The old Revell kit has a lot going for it, but that Model Shipways kit is absolutely gorgeous to my eye, and my eyes are the ones I need to make happy here.

In the end, I think curiosity won out over everything else. Can I actually turn a 12-pound box of basswood, brass, and Britannia metal into a ship?

Probably not, but what the hell. Looking at pictures of the kit is like looking into the future. Until you’ve gotten your hands on it and tried to build it, what do you really know? And then, of course, you’ve spent a large sum of money.

Have you ever built a wood ship model before? If not, I have to say in all honesty that the Model Shipways Constitution is NOT the one to start with.

You obviously have high standards. To build that model to those standards would take at least four or five years. We all (or nearly all of us) improve in our modeling skills over time - and newcomers improve faster than veterans. I’ll guarantee that by year three of the project, the stuff you did in year one won’t look acceptable to you.

It’s a well-known fact that almost none of the wood kits of that complexity ever get built. (For that matter, the number of Revell 1/96 kits that get finished is miniscule. And how many people in this Forum have actually laid eyes on a completed Heller Victory? I haven’t.)

Incidentally - I’m a big fan of Model Shipways, and I’m sure that kit is an excellent one - IF you’re trying to build a model of the ship as she appeared at the time Mr. Langford drew the plans. (That was several years ago; it’s a safe bet that some details of her have changed since then. But it has its limits. One that bothers me: the guns on the lower deck are “dummies” - stubs of barrels that plug into holes in pieces of wood behind the ports. I’ve got real problems with that approach on such a big scale. (You can download the instruction book and parts list from the Model Expo website. Note the thirty “dummy cannon barrels” on the parts list.)

I’ve said this before in this Forum, to the point that I’m sure longtime members are sick of reading it. If you want to get into wood ship modeling, that’s great. But start with something less ambitious. There are quite a few nice kits on the market that can be built very nicely in a few months. It makes so much more sense to start with one of those (and have a nice model to be proud of in a reasonable amount of time) than to dive in the deep end and not come up.

In another thread on a similar subject (I think the newcomer in question was talking about building the world’s most detailed model of the Titanic), another experienced member used the well-known modeler’s expression KISS - “Keep It Simple, Stupid.” I’ve never quite had the nerve to say that directly to anybody, but the sentiment is a wise one.

That, as I say, is advice I’ve given many times - and most people ignore it. I don’t know how many members of this Forum, in the years I’ve been taking part in it, have tackled enormously sophisticated and time-consuming projects as their first sailing ship kits. So far as I’m aware, NONE of those models has ever been finished.

End of sermon.

I would also add to John’s “sermon” that you the builder should also be interested in the ship you are modeling. Many modelers start with something simple for which they have no interest, and end up with a partially started lump of wood or plastic. Look at your interests; if there is a simpler kit of something you like, learn on that. You will finish it and grow from there.

Bill

Regarding turned wood spars - I just did a post in another thread offering my own opinions (for what they’re worth) on the subject: cs.finescale.com/…/1800045.aspx . It’s entirely possible to turn wood spars to 1/96 scale - and considerably smaller - if you use the right kind of wood.

I built several 1/96 Constitutions and Cutty Sarks when I was much younger, and I don’t recall having any trouble with the plastic spars. But that was a long time ago. In recent years I’ve read lots of horror stories about Revell’s (and Heller’s) quality control when it comes to styrene quality: soft, rubbery plastic, warped parts, etc. I can certainly sympathize with anybody who feels obliged to replace the plastic parts with wood ones

I certainly agree with Bill that any ship modeling project needs to be a labor of love. If you like eighteenth-century ships, take a look at the Model Shipways Pride of Baltimore, or Rattlesnake, or Fair American, or Niagara, or Syren. In all honesty, none of them would be my first recommendation as a starter kit, but they aren’t as elaborate as the Constitution.

The kit I like best as a starter for eighteenth-century enthusiasts is the solid-hull Model Shipways Sultana. But it’s been marked “out of stock” for months. I think MS is having trouble getting a supplier of good machine-carved hulls.

I agree with every single thing you just said. That’s why I’ve never built a wooden ship model.

Nevertheless, once I looked at that kit, I just couldn’t help myself. If I achieve this, I will be tripping over my ego everywhere I walk, and if I fail, nobody could have expected otherwise.

If it weren’t for morons like me, responsible modelers wouldn’t have kits to buy.

Sultana was my first. That model can be found regularly on eBay if Model Shipways doesn’t have it.

Bill

I suspect quite a few retailers have it. I like to buy direct from Model Expo for a couple of reasons. First, the company is up front about whether an item is in stock or not. (Many online retailers aren’t.) Second, Model Expo has sales all the time. At the moment it’s selling everything at 41% off. That means the Flying Fish, for instance, is $218 cheaper at Model Expo right now than at Freetime Hobbies (a fine retailer that I trust completely).

oldmodelkits.com has a Sultana right now for $85. Not bad. But not as good as the $59 it would cost (41% off of $99.95) at Model Expo - if the kit wasn’t out of stock.

I have a suspicion that Model Shipways is on the verge of abandoning the solid hull. There are only four solid-hull kits left in its line (the Phantom, the Harriet Lane, the Sultana, and the tugboat Taurus). All of them are out of stock most of the time. (Right now the only one in stock is the Harriet Lane.) I’ve heard that the problem is finding a supplier that can turn out such hulls to a consistent, high standard - but that’s a rumor.

I’m working on a fishing schooner based on the MS Elsie. The machine-carved hull in that kit is beautiful. It’s now gone from the Model Expo catalog; I’m glad I bought it when I did.

On another subject - in arborvitiem’s biography he brings up the History Channel miniseries “Sons of Liberty.” That struck a nerve. I’ve ranted enough about it in another Forum thread ( http://www.finescale.com/fsm/general_discussion/f/50/t/163939.aspx?sort=ASC&pi240=1 ), so I won’t start on it here. I guess a lot of people liked it. I’m sorry, but I thought it was junk - and in some cases even offensive. I don’t believe that making history palatable to a general audience requires demonizing historical figures who don’t deserve it.