Alright guys, [bow]I want to tell you all about my first model tank, it’s a Trumpeter 1/35 russian T-72 with KMT-5 mine roller, bought it in 1999. I never finish it cause it was too difficule with its engine that i couldn’t get it moving and I don’t know how to cut chain, I stop it’s building twist, first when I bought it (and bougth another tank instead) and again in 2005. Just now I started to rebuild it but i’m missing lots of pieces and testo’s glue just dosen’t seem to be working on this model, it dosen’t stick and when it dries it’s just pels off, what am I doing wrong? Is it the glue i’m, using or is it my technique?
Any tips on tank models will help, i’ll try making it my best tank model but it’s not looking good after all theses year, i’ll post some photo as soon as i know how to put photos on the form.
Normal glue doesn’t work?.. It’s the same problem with Trumpeter’s T-54/55 series: They’re made out of ABS plastic, so normal plastic glue is useless… I don’t know about liquid cement, you can give it a try… I’d use cyanoacrilate. If you need info about the T-72, I can give you something… I’m working in an Iraqi Asad Babil… that’s a T-72M1 made in Poland, modified in Iraq… Most regards.
Best advice I can give you regarding the Trumpeter T-72 is to give up. You are right that normal model cement will not work. I used a glue callled Proweld to tackle the Trumpeter T-59 that had similar issues.
It’s not the glue, it is the plastic Trumpeter mistakenly used in their early motorized knock off kits.
As far as T-72 kits go, Tamiya is the best with the Dragon (now Revell/Zvezda too) being number two. A distant third is the OOP Esci/AMT/Ertl T-72/74 and followed by the nasty Trumpeter kit.
I built one of the Trumpeter T-72 tanks using Tamiya thin cement, and it worked just fine. Now, I know that there was variance in the plastics used, and it will work with some kits, while not with others.
Thank for the advise, i’m not gonna give up on the model since it’s my first model, mit as well make it my best, if it turn out bad, so what! dosen’t really matter. At least i can look at the good side, by simply using a hobby knife i can simply peel off the glue with out damaging the model, what’s strange is that not all the part that are glue falls off, some of the wheels on still attach. I’ll try Testo’s liquid glue but i don’t think i’ll work cause it weaker than the tube glue, also i’m having problem with the engine, I can’t get it to move with the tires on and i can’t cut the chain.
What do you need exactly?.. Well… I have kits that look worst than that… First you may remove the electric motor and fill the motorization holes… I know that the Trumpeter kit is a copy of Tamiya’s…I mean that the turret is also incorrect… That’s a turret for a M version and the hull is an M-1 Hull…there was no such combination… You can buy a resin replacement turret OR you can fix it with epoxy putty and a lot of patience. Take a look here: /forums/744891/ShowPost.aspx I’m modifying a Zvezda T-72A, but the final result must be the same… the turret is not finished yet, but it has almost the shape… some minor details are missing in the pics, but now they’re in… I’ll post pics soon… Here you have something more:http://www5b.biglobe.ne.jp/~TANK-GUY/kit-rev/Rev-T72js01/T72js01.html You can see the differences between the Tamiya turret and a replacement turret with the correct shape, and: http://www.perthmilitarymodelling.com/reviews/vehicles/blast/bl35046k.htm The excelent Blast Models replacement turret… I’m using these pics (along with a lot of actual tanks photos) as a guide for my modification. Hope this helps. Most regards.
Yes, I see the M1 turret seems whither that mine and has a sharp back, sorry but I think that my turret is the right one because my T-72 isn’t a M1, he’s a early T-72, The M1 was made after, beside thats the bturret that came with the model so its going on the model.
Still clean him up, I’ll shoul be done cleaning in about a week.
Thank anyway, please fell to add any good model building advise that could help.
As you can see, it has an aditional plate welded on… The Tamiya/Trumpeter kit depicts it right, an M1 glacis plate, the turret is NOT for an M1, but for a G/M Polish/Czech made T-72… Well, if you don’t replace the Turret, you must fix the glacis, by sanding carefully the armor plate and scratch building new, and totally different points for attaching the KMT mine rollers, because the early T-72, like T-72G/M DON’T has the aditional armor plate, as I’ve said earlier, The turret is an M turret and the hull is an M1 turret… There wasn’t such combination. Hope this helps. Most regards.
According to Art Instructor - my armor modeler - this kit is very difficult to assemble due to very poor instruction manual. Anyway he managed to finish it. He didn’t mention any trouble in gluing it together. This was built in 2001 :
Wait Zero, did you just said that the turret is for a Czech T-72, maybe he would go well with my Czech buildning, oh wait, the building is in WW2, and the T-72 wasn’t a second war vehicule, it is the inprovement of the T-64 but the T-72 enter production in 1970, the improve T-72B1 was made in 1980.
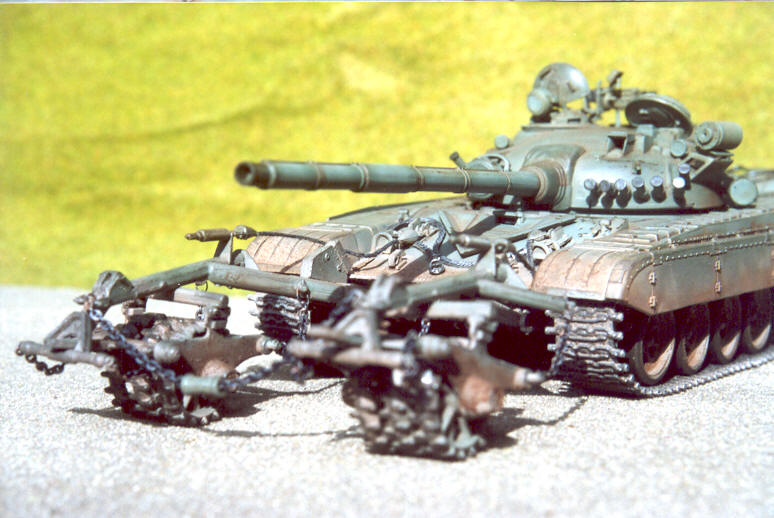
And Maniac my T-72 apears more like your image except its not done and I may not add the KMT-5 mine rollers, lost too many pieces.
As for the turret, I don’t see waths wrong, my turret is NOT a M1, nor is the body, so its just fine.
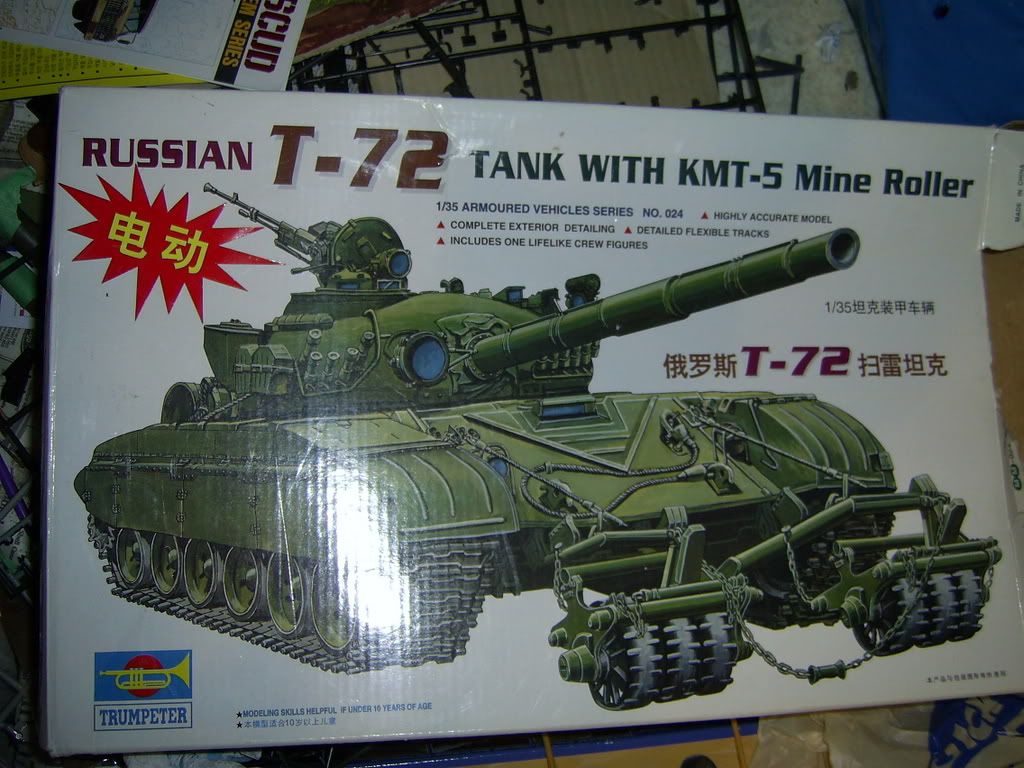
Here’s the box of the model.
Well thats it for now, I’ll tell about the construction of the model after cleaning him up. More adive please.
Thank god my Escii T-72 is in a league far better than the Trumpeter kit. And if you want to do windows use transparency film. I gave up on the future method and went with the transparency film instead so all of my windows and sighting optics are transparency film.
Whew! Sorry for the wait been also working on a Tiger 1, now where was I? oh yes the T-72 anyways now I tried the best to remove as much of the dried glue but some small spots aren’t completely clean, the turrett may be a M1 as they say but I can’t tell if the body is. Also some important pieces are lost, such as the side wheel guard (the metal sheets on the side of the tank body, that covers the top tracks and wheele) are missing, fortunatly with a large pieces I think I can scatchbuild some> I can use syrofoam (takes the shape of anything that is compress on it, but for more finer detail, play doh or plaster, but first I need to make a copy of the pieces. Where can I get the dimentions of those parts, or does anyone has them, remeber 1/35.
Althought it looks like no one know the dimention of the T-72 wheels guards there is a real full size T-72 at a military museum not far from my house, by mesuring the dimention and reduce it by 35 I sould get the right size for the model.
To have a exact appearace of the piece I can use a 3D program at the computeur to make the exact pieces, this is for the fine details like the bolts and maybe battle damage.
Making a exact replica of the piece with sculpting doh, cause it’s easier to get the pieces right.
once the pieces is done I could put it in a box and fill it with plaster, plaster when dry is strong and takes the fine detail of the piece.
finaly make two molds and fill them with meted plastic (literally its spare model parts braches metled is a old cooking pan) then colded and wash.
It should be exactly the same as the real thing but I don’t know if this is going to work, what do you think.
Weakset you say, them maybe I should use tamya liquide glue instead.
Now for the engine, I should remove it before building the taqnk, there just one srew holding it under the tank, origanly I wanted to keep the engine for a mobile vehicule but since the road wheels aren’t mobile then the tracks can’t move.
Only problem is if I remove the engine then the back wheels (the wheels where the engine is conected, see image of engine in this forum) will well, fall cause there’s no axel holding it.
I could try strach building a axe but I’m not to good at strach building, any advise?