Hi everyone.
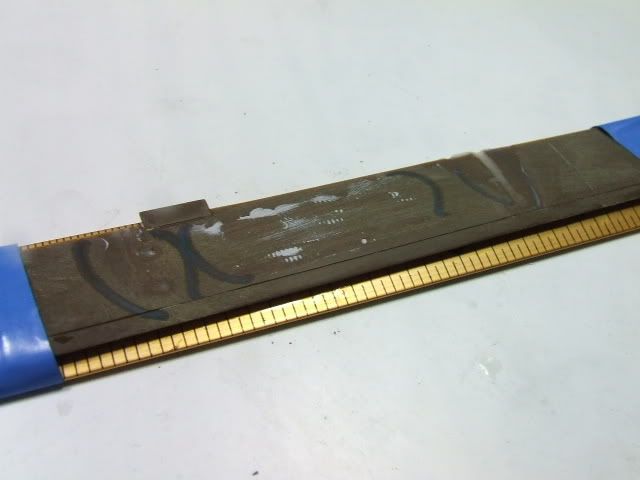
I have been working with a set of damaged rotor blades from a Seminar 1/35 Huey, which were deeply damaged by the viny machine gun belt laying on top of the plastic. Vinyl parts should NEVER come in direct contact with plastic for exactly this reason: I have had several disastrous results from AMT Tigercat tires completely melting my wheels after the kit was built, as well as creating deep circular grooves in the plastic from the tires being in the same bag with the kit sprue. If you have a kit with any sort of vinyl, immediately check it: I have not seen problems with old rubber band tank tracks, but other vinyl parts such as this will cause serious damage like you see here. These vinyl parts are best tossed since they are still weeping some chemical which acts as a solvent. In this set of rotors-even weeks following the removal of the vinyl from the bag-the plastic is still soft, as if glue has been poured onto the plastic just a few moments ago!
Instead of using a putty that will dump MORE solvent onto a bad situation, resulting in either warpage or continued shrinkage as the solvent in the putty dries, I am using talcum powder mixed with superglue–a technique recently demonstrated at our club meeting, which I am now using extensively in repairs, filling pinholes, etc. It sands as smooth as plastic, is easily controlled, easily applied, and should be sanded out about 20 minutes after application. Mix up your superglue (Im using medium from Hobby lobby) with talcum powder to the consistancy of warm toothpaste and apply.
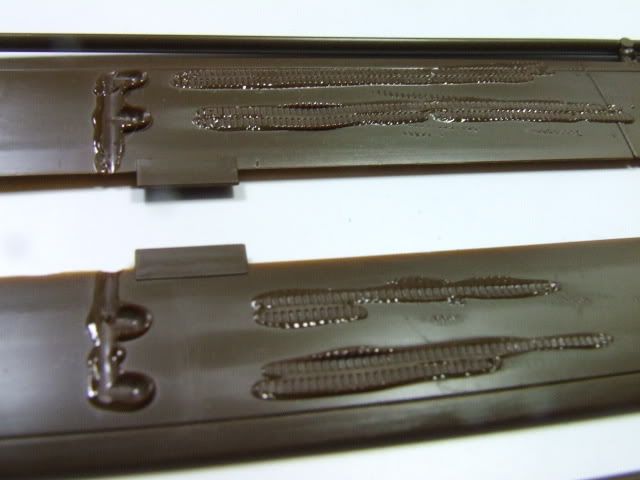
You can see from the progress photos that I first sanded down the raised, molten slag that used to be the bottom of this rotor, bringing it about flush. Both rotors are damaged to the same extent, as well as some other parts that were in this bag. The plastic is fairly soft so I had to work carefully and the trailing edge is simply goo. This will be reinforced with superglue later on. I sanded as much as I could, and applied my superglue/talc mix, which will fill the big gashes and provide a level of structure that is now partially missing. This rotor may droop too much if filled with putty, but the SG/T mix is rather rigid when fully cured overnight.
Ok, On to the pics. If you have any questions, please feel free to ask.
This is only ONE way to fix this type of damage, Im sure there are others as well, but this technique works for me. Check the helicopter forums for repairs I did on my HSL-41 rotors tonight which had serious sweep problems, also repaired using the SG/T mix.
David

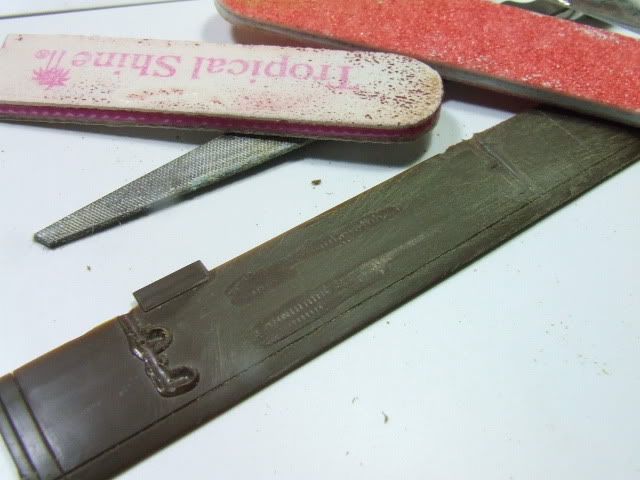

Mr Surfacer 500 is applied to the groove damage where the belts layed flat on the blade. The trailing edge is very soft at this stage and requires thin superglue reinforcement before any further work can be performed.
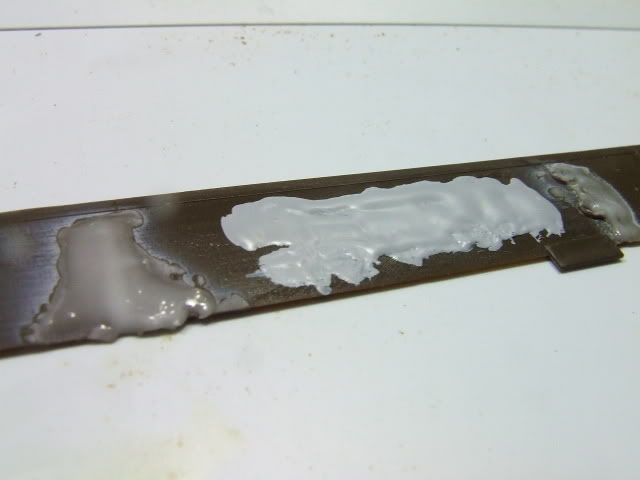
Black cirlces indicate where the damage was originally. A second round of filling will be needed on damage at the end of the blade.