Just took a couple of pictures of some models of a friend, in the realistic style, and thought I’d post the best. Most model photography is done to emphasize quality and workmanship of model. It is often from a high camera angle, with very flat lighting, and against a very plain background.
The realistic photo is sort of a “bet I can pass this off as real thing” shot. The model is posed against a realistic background (I use photo backdrops), low camera angle (usually from scale eye height) and with sun as light source.
Here are a bunch of midget race cars. The blue 32 in the foreground is by Bob Maderich, and is the Offy version of the Revell KK midget kit. The cream 27 next to it is my build of the Ford version.
Agreed it enhances the subject when the viewer has a second look to see if its a real photograph or not.
Better yet is when the viewer cannot figure out the scale of the subject.
There is a great Panther in B+W in the Reader’s online Gallery that deserves a second look.
People that took the time to read Shepard Pane’s ‘How to Build Dioramas’ would have read the chapter on realistic model photography. Of course most are digital now yet the concepts are the same.
Been meaning to try something along these lines. My problem is that I live in a subdivision surrounded by houses, fences, cars…so getting a wide-open, distraction-free background is a real chore.
Not that there aren’t workarounds. Forced perspective tricks would work really well, but that means a whole lot more building. I’ve also considered using greenscreen and dropping a background in in Photoshop, but that would call for running down appropriate photo backdrops at really high resolutions.
Just need to get off my duff on both counts, I guess.
Those are great pictures! They really enhance the enjoyment of what are already fantastic models. Here’s a great contrtibution to the reader’s gallery that I remember from a while back. This was submitted by Jason Sloboda from Truro, Nova Scotia…
Try the photo backdrop. Go to an airport, park (for cars) or any nice background area. Shoot the background, print it as large as you can on regular paper (you don’t want gloss on the backdrop). For larger backdrops for larger scales, take it to a Kinkos or similar to print 14 or 17 inch wide.
The only time I Photoshop is for model ships, since I need to cut off the part of the hull below the waterline. With anything but ships, a photograph background (and foreground- laid flat) eliminates need for photoshopping. I also like to use sunlight to get sharp shadows and sun glints off model.
A city park or dead end road in the country can be a spot to get away from the clutter of the city. When shooting against a background outdoors, use a setting that gives the least amount of depth of field.
Also if you have objects such as buildings, vehicles and other equipment in the background make sure you place your subject far enough away from those items so they appear to be more in scale. Often these are photographed too close making the subject look too small compared to the objects in the frame.
When you use a printed background such as this example
Obviously we’re all of the age group that was taught about framing and composition for photography. A skill lost in the younger generation, raised in a world of Photoshop. I much prefer the “trickery” showcased in this thread.
Watch the lighting on those “outdoors” indoor shots… There should only be ONE shadow, since we only have one Sun…
See it all the time on TV and movie sets that’re supposed be outdoor scenes, but the shadows are a dead giveaway it was shot on a sound stage… Sometimes the lighting angle an intensity doesn’t match the background… See a lot of “overcast” shots where the backdrop is right, but there’s sunlight glinting off the model…
i think if the subject is over 50 yrs old that B&W is the most realistic approach besides it hides (some) boo boo’s such as wrong shades of color in a camo scheme
Good point. Most of the pics we had on WW2 stuff was released in B&W. Now the color stuff from the war (apparently there was a lot!) is just coming out. Recent stuff on TV is great- had to record some of that because of all the reference shots. Get to see what the colors looked like after it got well weathered.
So I keep coming back to the idea of forced photography. As tempting as the photo backdrop or photoshop sounds…it’s extremely difficult to pull of matching lighting conditions. You have to have a base anyways, so why not use forced perspective to narrow taxiways as they move back? Place 1/72 or 1/144 aircraft and vehicles in the background, small buildings, a small tree line?
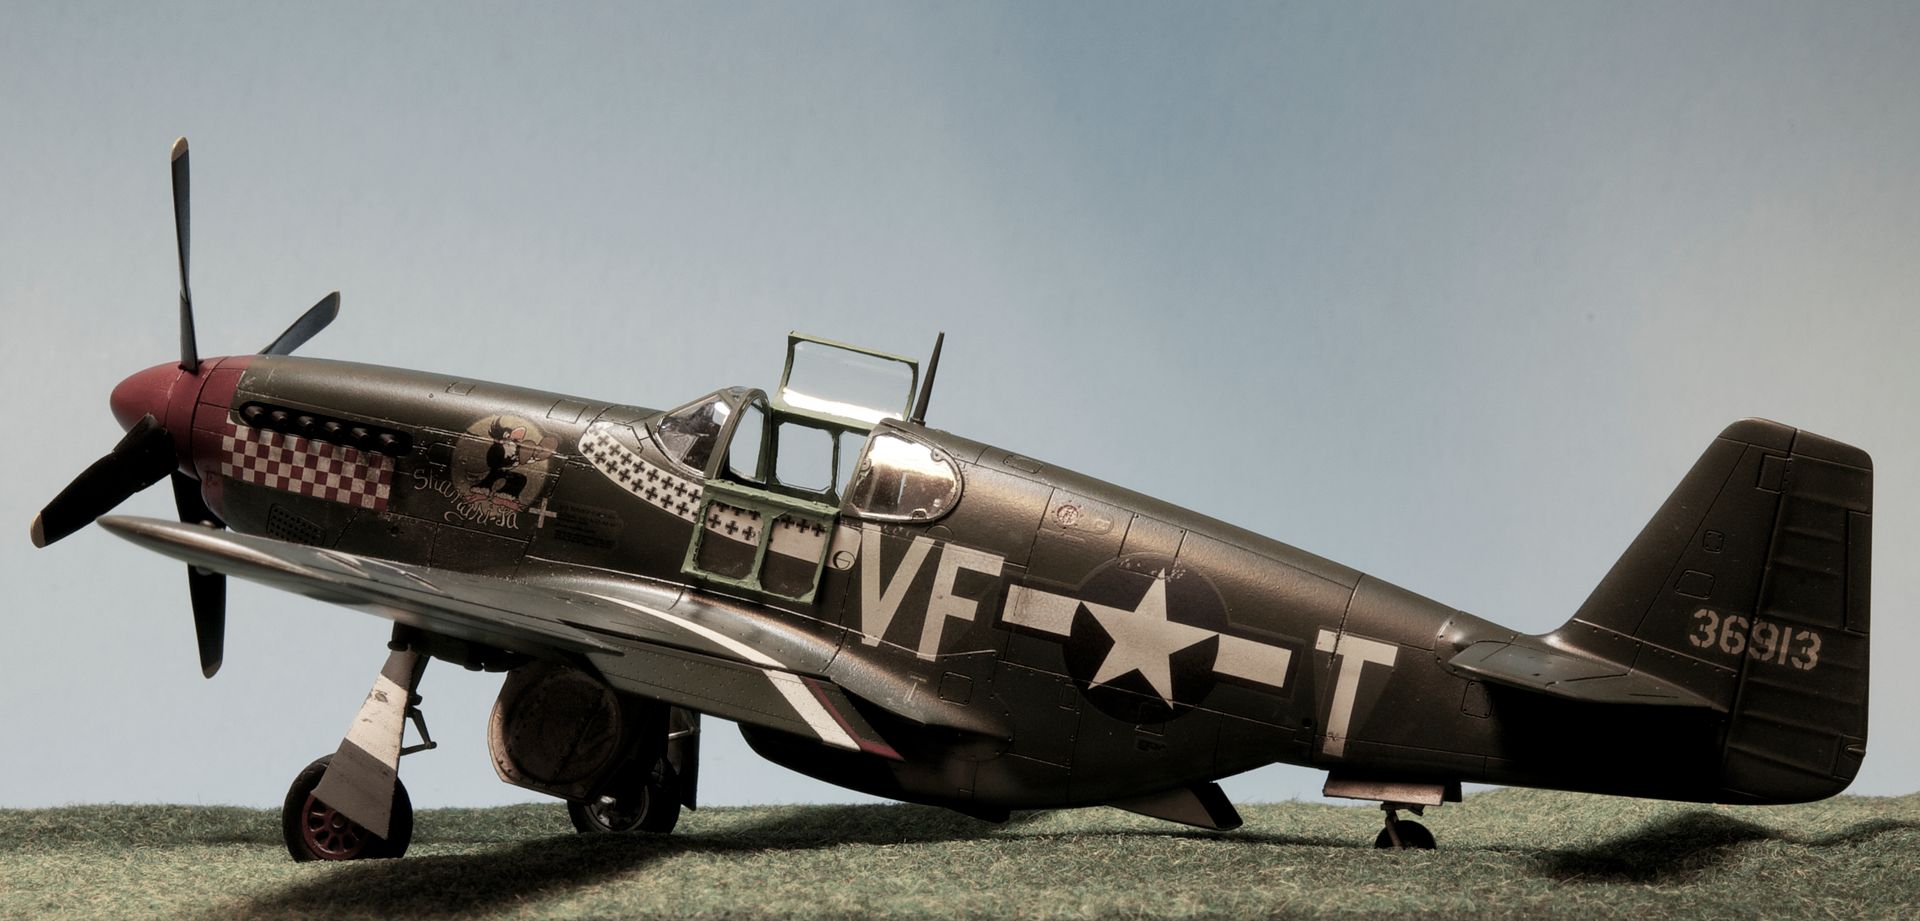
I have none of this on hand…just have a small grass mat (not even 8x12) to experiment with. Went out and shot this a few minutes ago. With more foreground and background, and some sort of elements to separate the end of the mat from the “sky”, I’m convinced this could work. For bonus points, take the setup outside and shoot under natural sunlight. Sadly, doing so would probably result in melted plastic as hot as it is here.
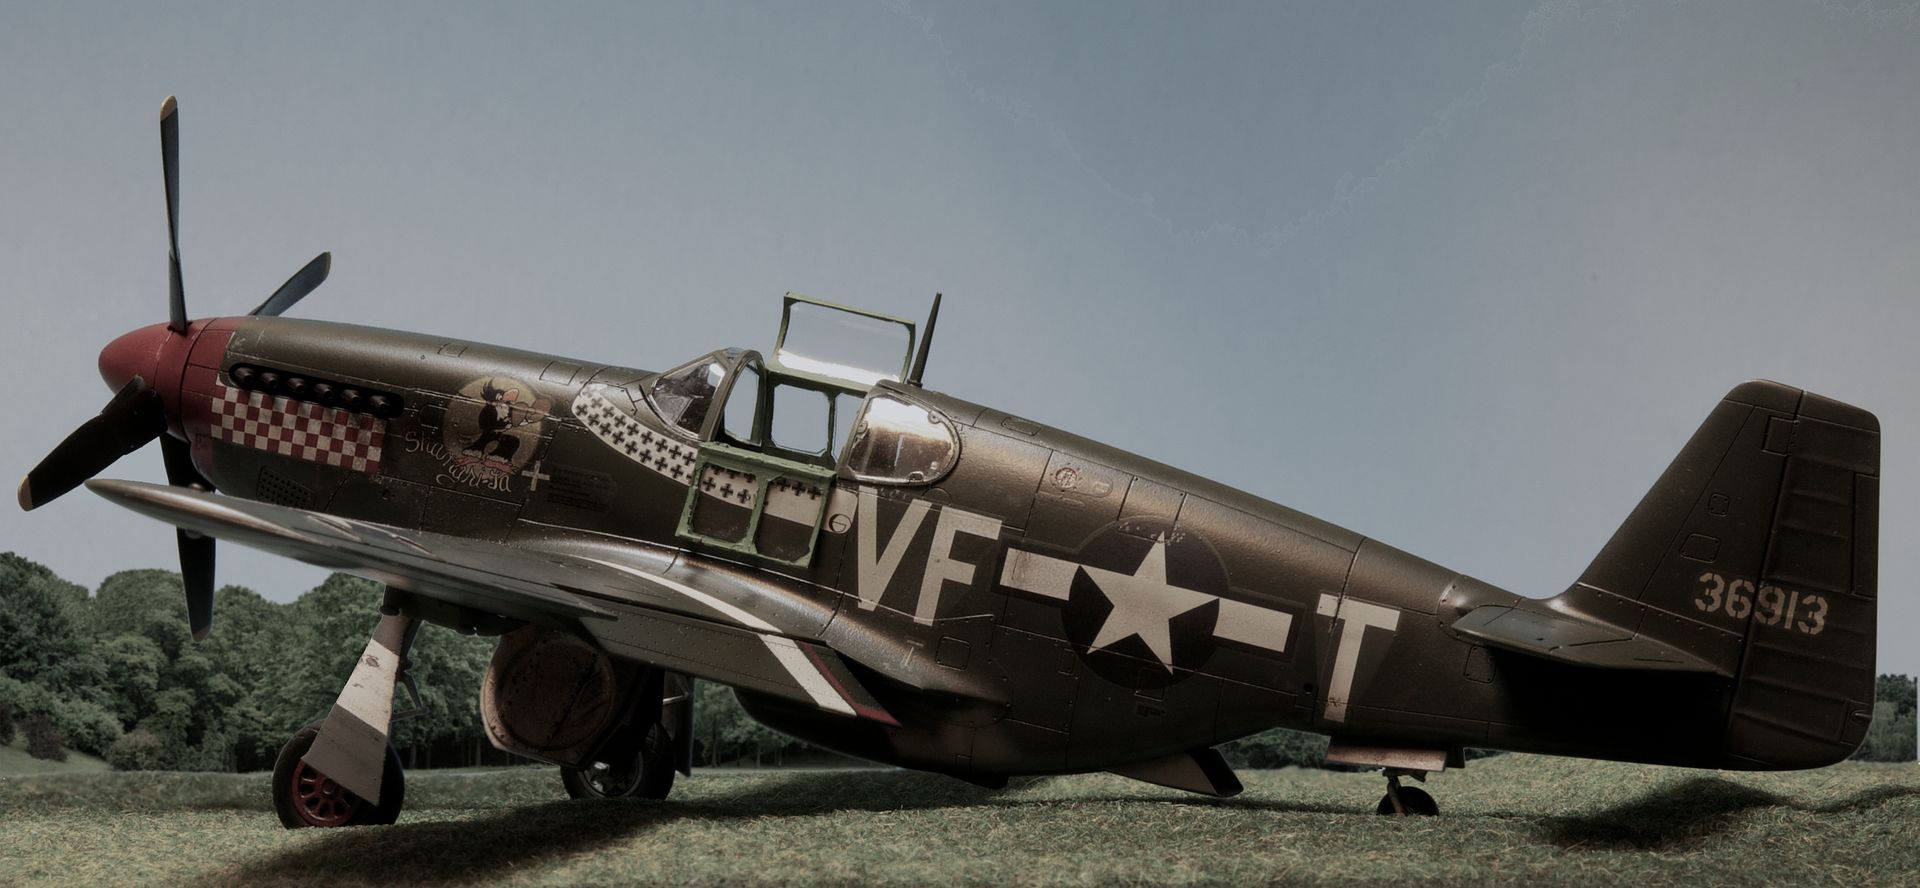
Anyway…Shangri-La
and a little black and white + noise. I think this would be better captured shooting at really high ISO next time…Photoshop noise always looks too uniform to me.