Here are some new pics of both of my “revived” Classic Airframes kits. Both are 1/48.
I installed the cockpit in the Claude one piece at a time, rather than assembling first. This assured that everything aligned and fit in the right place. I needed to paint the fuselage interior and part of the inside lower wing with the cockpit color, since these could be seen once the cockpit was installed.
The wing halves had been glued, and they resulted in a “step” at the fillet, and large gaps front and rear. I scraped, filed, and sanded the wing top to match the fillet before it was glued to the fuselage. I filled the large gaps with CA, and the smaller ones with Krystal Kleer (white glue). The wheel spats needed to have their tops sanded to match the wing contour. They were CAd in place, and white glue was used on the small gaps.
The vertical tail also needed filling with CA.
Here she is, ready for the paintbooth this weekend:


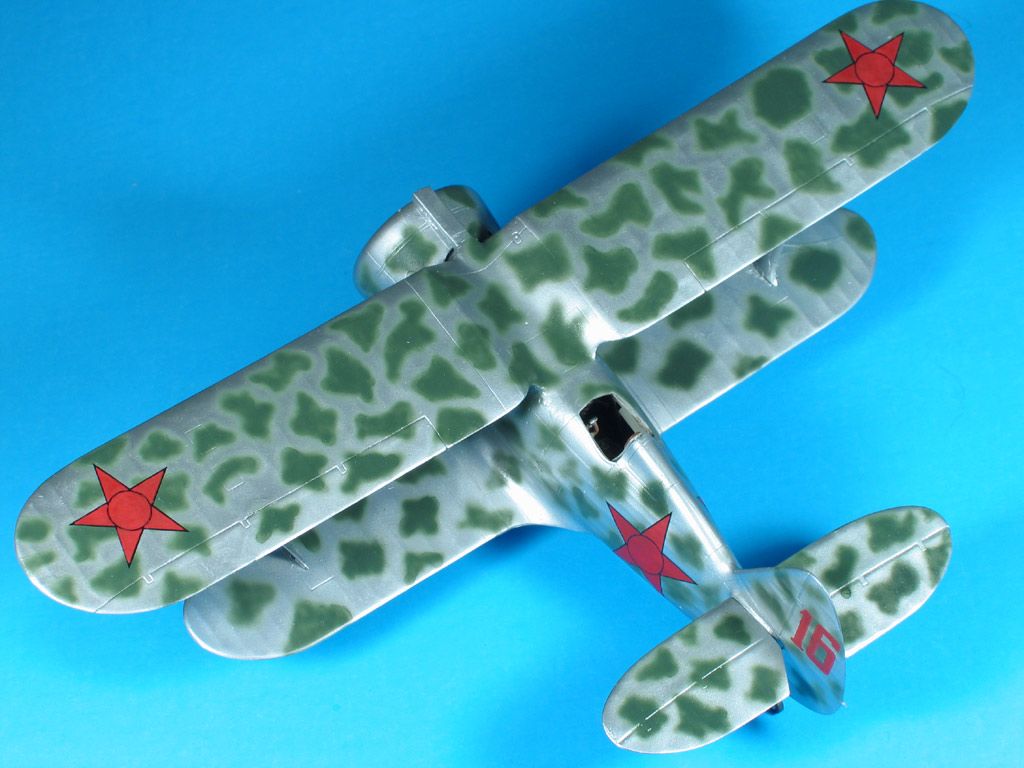
I got the decals on the I-153 Chaika (Gull) also. After having to put what seemed like hundreds on my recent Luftwaffe builds, it was refreshing to have only EIGHT decals total for this little bird ! Unfortunately, they’re translucent. I have no other decals with the same stars or numbers, so I may have to use a sharp brush, steady hands, and some red paint.


The Claude will be primed with Future for the Alcad Aluminum, and I’ll seal the I-153’s decals at the same time. These are moving along pretty quickly !
These look great! It’s a drag about the translucent decals. I’ve had that happen to me a few times. Not like we can test them first, right?
Great job, as always-
Looking great! Good luck with the decal touchups!
Bummer about the decals. I know you’ll be able to overcome that shortcoming though. Great subject and a sharp looking plane.
Looking good Pix. Have you tried fitting the engine into the cowl on the Claude? That’s usually another source of frustration on CA kits.
Regards, Rick
pix fantastic work yet again my friend.
joe
I have not tried these kit yet but yours looks great from here
Thad
I like that soviet Bi-plane.As for the stars,you can get Frisket film and cut out the star pattern and paint it with a double-action airbrush.The double action will give you the control to paint the red stars cleanly with no bleed through.The seam-work on the Claude is first-rate.Please post pictures when it is finished.
Thanks ModelNerd, Fred, Quagmyre, Rick, Joe, Thad, and philo !
ModelNerd - this is an early CA kit, with Propagteam decals. They’re thin, flat, and fragile. They moved on the surface pretty well, with only one of them tearing. But you’re right - no way to tell beforehand. I put the ones on the wing bottoms first, and they looked alright. Oh, well. Just another challenge to the kit !
Rick - that’s happened to me before on a few other CA kits. The engine cylinders are separate, so I usually file a bit off the bottom of each one. It fits tightly in the cowl, but I don’t anticipate it being a problem.
Thad - Classic Airframes kits are limited-run injection molded kits. The earlier ones came with resin, PE, vac canopies, and sometimes white metal and brass tube. They have large sprue attachments and no locator pins/tabs. All the parts need cleanup, and must be dryfitted, trimmed, and sanded. The panel lines, though realistically narrow, are sometimes a little shallow. These are great “diamond in the rough” kits, which allow you to do the polishing yourself. Thank goodness that the engineers didn’t design all the work out of building these kits !
philo - properly thinned paint and a sharp #000 brush will do the job. Masking off the black lines in the insignia would take forever.
Thanks again !
I got the decals overpainted with Model Master Insignia Red and a sharp #000 brush. What a relief !