Preshading grrrrr...

I’m currently building a Heller Canadair CL-415 in 1/72 and decided to try preshading for the first time and since the top coat is yellow, I preshaded with light grey. This I have come to regret… I’ve used a full bottle and a bit of yellow to get the shading even close to a realistic look. I know yellow can be a difficult colour to paint, but for me preshading has turned it into a nightmare!

Any thoughts on preshading?

Sorry to hear that it’s turned into a nightmare…

My recommendation - don’t preshade yellow. Every yellow I’ve ever tried, from MM Insignia Yellow to Tamiya yellows to Guzne Orange Yellow, seems somewhat translucent. Personally I’d paint the whole area white and then just lay the yellow over that and post-shade instead.

Yea… I completely agree with you. Lesson learned. Just out of curiousity, any other colours you would not preshade? White perhaps? Do you preshade all models (except the yellow ones of course)?

That’s a good question! I’m about to start my first pre-shading project and one of my colors is white.

I know this question was posted quite a while ago. Too bad it was never answered because now I am in the same situation.

I need to know if and how one pre-shades white. I am building a USCG helo and the final color is gloss white.

Help!

White does not pe-shade well.

I tried a grey pre-shade under Tamiya white and it just looked “dirty” instead of shaded. By the time you get enough white on it to counter the “dirty” look, you may as well have just painted it solid white.

I hesitated to get into this, but, hey, here goes. I personally am not a fan of preshading. On a recent trip some friends and I caught a couple of museums and looked for the appearance corresponding to preshading. We found very few that really looked like that. It is one of those things that modelers are coming to expect to see on a model, whether the real aircraft looked like that or not.

Many painted aircraft have very little visibility on most panel lines (removable panels are something else). Bare aluminum finishes show more visibility of the panel lines themselves, but the lines do not extend very far from the actual seam itself.

I have never seen carrier planes in operation- they may show the effect, but ground based planes seem to have only the most subtle panel lines to me.

Well, you were looking at museum planes. There’s a big difference between something that’s been meticulously restored, painted, waxed, and stored in a relatively controlled environment and an active combat aircraft.

My internet connection is sucktastic at the moment, but I have definitely seen pictures of some very dirty, crudded-up aircraft that match pretty closely with pre/post-shaded effects. Usually during periods of conflict, when flying sorties takes precedence over keeping the planes pretty.

WWII is definitely the high point in this regard, with questionable paint that didn’t stand up well to the elements, but I’ve seen everything up to the modern day (find some pics of A-6s or F/A-18s during Desert Storm).

Here are a few examples I’ve managed to dig up:

Pre-shading is something I avoid almost completly, the exception being control surface-joints… I do post-shading with pastels almost exclusively because the control factor is echelons above pre-shading… And if it goes completely Tango-Uniform, I can wipe it off and start over…

For most pre-shaded areas, I use a black Sharpie… But the areas it’s used in are limited, however, the plus-side is again, being able to easily wipe it off, and even “feather” it. using rubbing alcohol…

Having never pre-shade yet, I’ve wondered if a Sharpie would work since trying to keep a nice, straight AB line over the panel joints look very challenging.

I can’t remember where, but I do recall reading on some thread that sharpie’s can leave some funky results if you use the wrong type of paint over it.

Hans, what type of paint do you use over the sharpie?

I usually A/B my preshading and I don’t use black under anything but dark greens etc. Nato black heavily thinned and with a touch of white or light gray seems to work very well under most light colors.

I preshaded once. Never again. Such a giant pain, spraying all those fine lines (I wouldn’t use sharpies either, I’ve heard horror stories of them bleeding through subsequent layers of paint).

I read an article on a blending technique I’ve since taken to calling the “three layer blend” back when I took up modeling again, and it’s my preferred route. Similar effect to pre-shading, but a bit more subtle, and FAR more controllable.

Basically, it goes like this.

Step 1 - BASE COLOR

Step 2 - HIGHLIGHTS

Take your base color, and add anywhere from 25-50% white/light gray/light tan, depending on the color and how much of an effect you’re after.

Spray this generally in the centers of panels and surfaces, avoiding panel lines. On fabric surfaces, you switch, so the raised detail gets the highlights.

When you finish this step, it’ll look nasty.

Step 3 - BLEND

Go back to the base color. Thinned AT LEAST 1:4 paint to thinner. Go over the model in multiple passes. As you do, you’ll see the color start to build back up and the nasty highlighted areas will start to blend back in with the overall paint job.

When you get to a point you’re happy with, stop.

It’s tough to use this technique for white, but it can be used for yellow pretty easily (though I never bother shading yellow since it’s at most a wing stripe or something, and dirties up very well under washes anyway).

Doggs,

I have used the 3 step shuffle on a couple of kits. My J1N1 being the last one I did it on. It does work well but I find spraying the panel centers just as much of a pain as painting the lines. I guess there is just no easy way to build up layers and make things look just right.

Try using pastels on panel centers…

Make sure the surface is dead-flat though…

I have used sharpies with succes in combinations with enamel paint and with disaster in combination with acrilyc. Probably because the alochol in Tamiya acrylic eats up the sharpie line…

99% of the time I use enamels… I don’t really care for acrylics… Any alcohol-thinned acrylics will disolve Sharpie-ink if it’s too “wet”…

However, so will enamels… It’s a matter of using some judgement in applying them, and a little feathering is ok anyway…

I generally avoid pre-shading altogether, with the exception of control surface joints… And I usually spray one and two-color camouflage finishes with rattle-cans… If needed, I can spray acrylics over enamels, for more complicated camo, like the USAF Vietnam-era T.O. 114 camo…

I like the control I have over post-shading vs pre-shading…

Thanks for explaining that Hans!

Is this the article about the dangers of using markers to pre-shade?

http://www.ratomodeling.com/articles/pre_shading1/

Working in 1/72, pre-shading is far beyond my skills with an airbrush. I admire those who can pull it off.

Sharpies are alcohol-based… If you use them you can’t use any type of alchol-soluable paints over them. Ever… Those others he showed are types I’ve never used… But then, I don’t use automotive-grade primer either… Styrene doesn’t need priming, and I wish people would stop telling others to do it…

The grey primers from Wal-Mart or Krylon and the like are ok, but they work for me as finish-colors… The Wal-Mart brand, “Tru-Color” primer is a good substitue for USAAF Neutral Grey, IMHO… Overall though, priming is just adding another layer of paint, and in some cases, two layers, since the primers are relatively thick, especially if you use a primer-surfacer… Primer-surfacers work to not only act as a primer, but also to fill tiny sand-scratches and other imperfectections… It’s quite porous and needs more paint to be fully covered, as some of the color is absorbed into the primer…

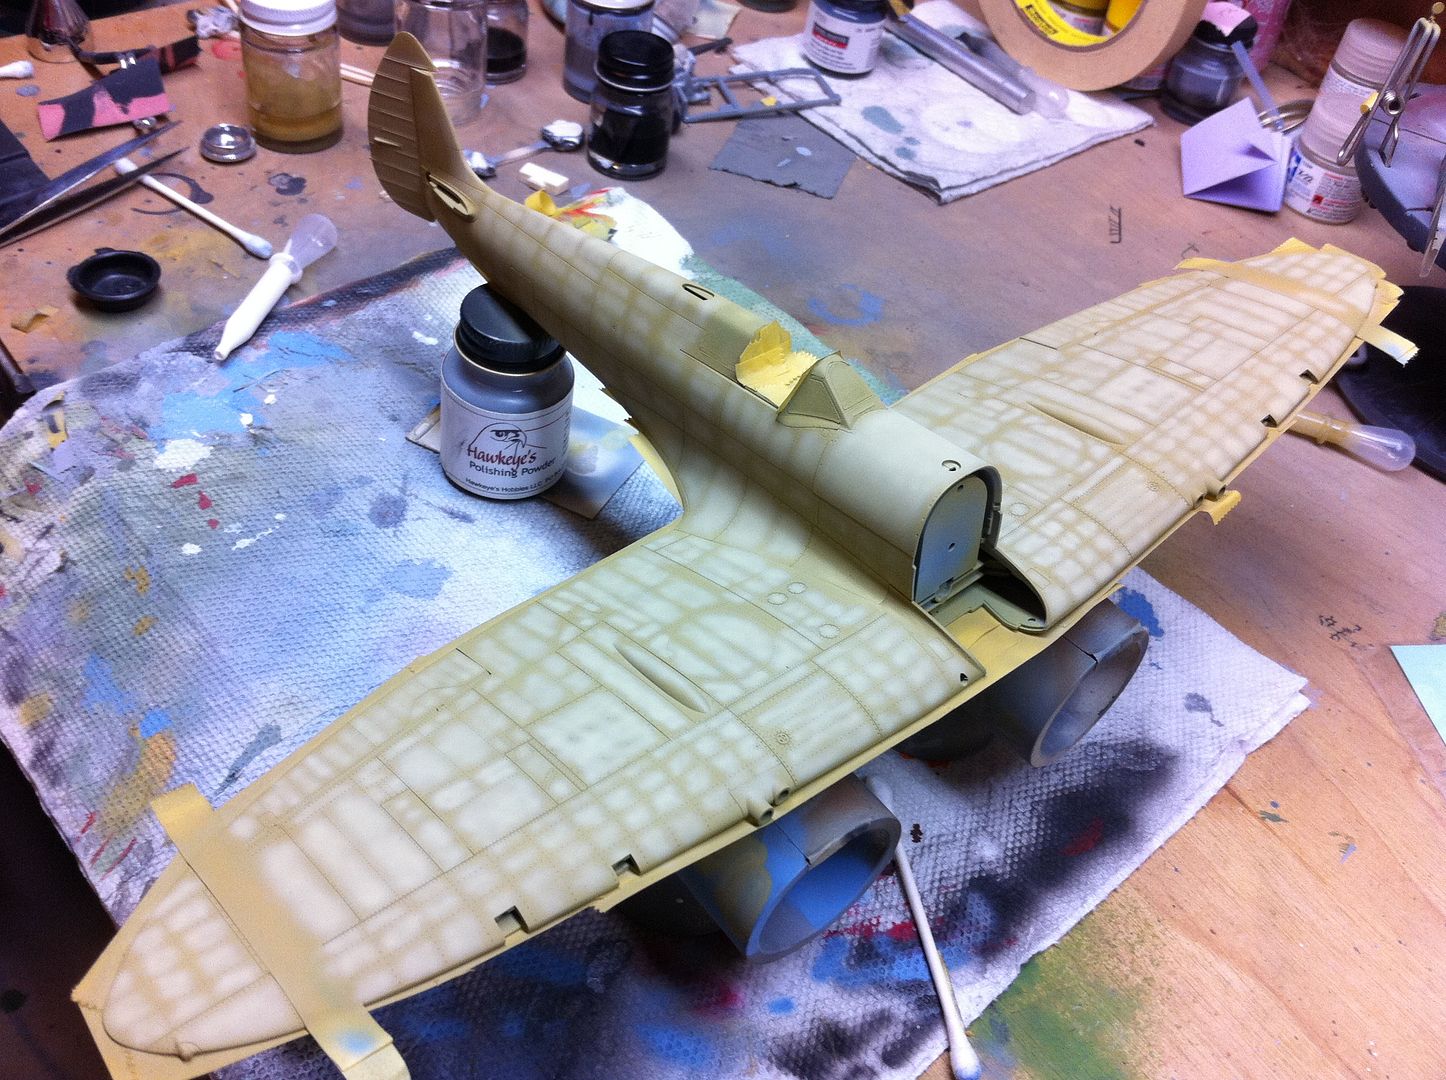
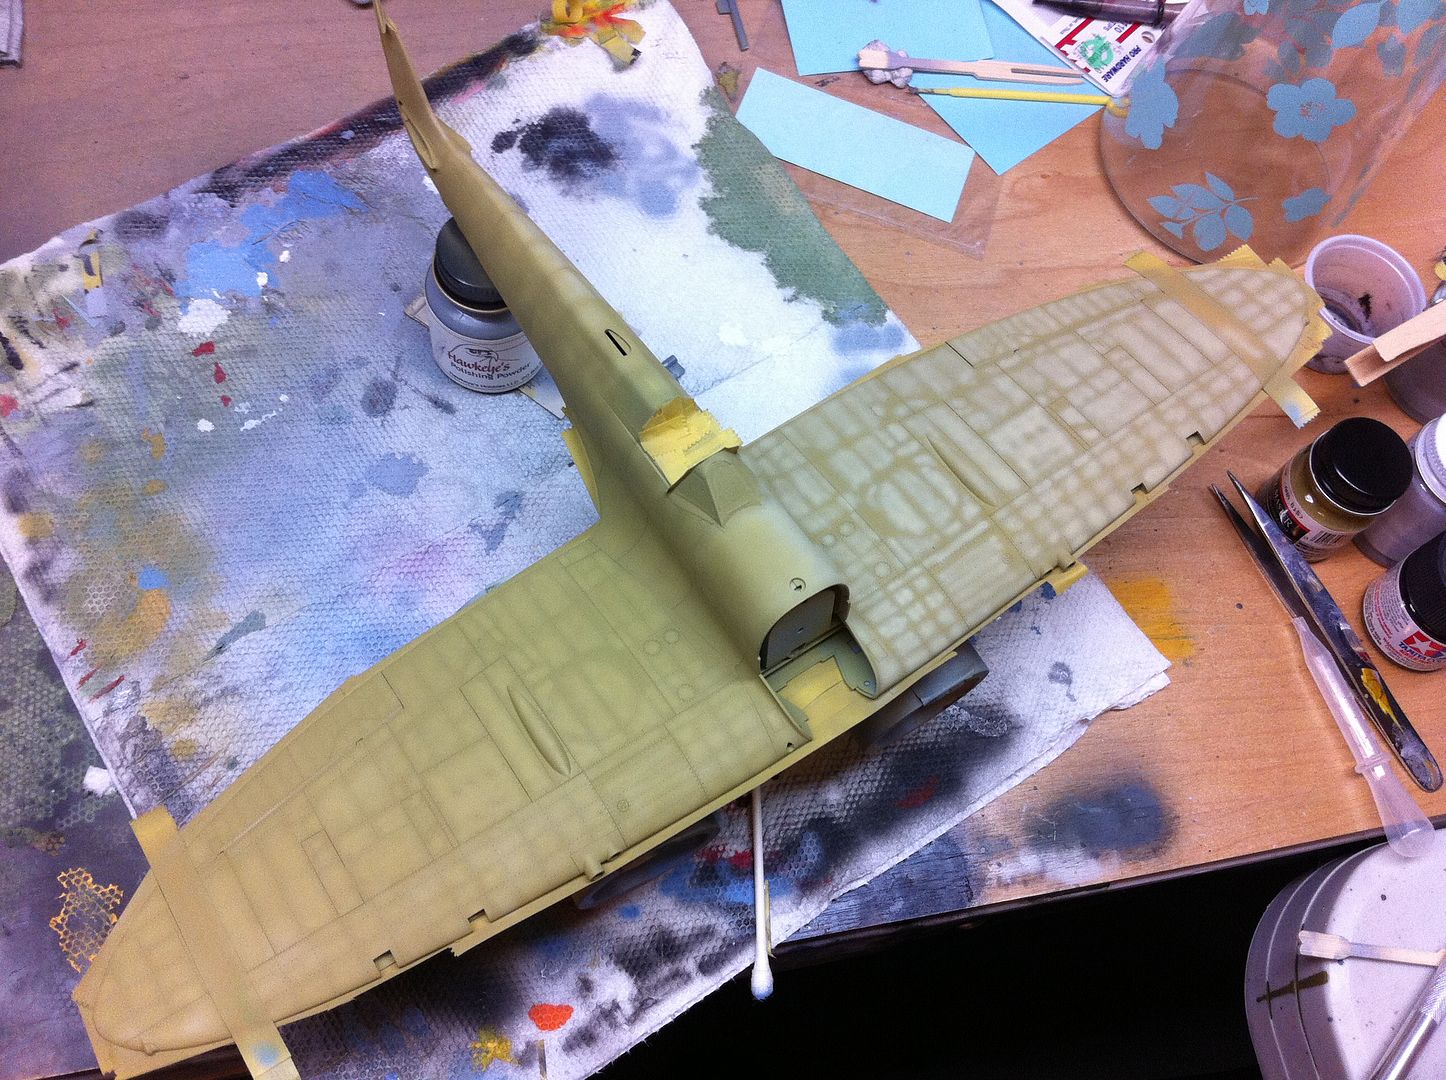
I’ve never experienced the “transmigration” he spoke of, but I’ll bet a dollar to a dime the culprit was the primer… The only model I ever completely pre-shaded with a Sharpie was a Hawker Sea Fury, and I did the pre-shading on the inside of the fuselage and wings, where the paint never made contact with the ink anyway… The results where that I could barely see the shading, and I wanted it to be more pronounced, so I started post-shading all the little stuff and the panel lines… But it still showed… Just not like I wanted it to…

Also, that model depicted was covered with huge (for the scale) recessed lines… That type of detail calls for a post-painting wash during the weathering process… Especially in that scale, IMHO… I would have used either an oil-wash or a tempera-wash… And, it would have been only a few shades darker than the paint used for the finish… A dark pin-wash would have worked in the recesses of the flight-control surfaces…

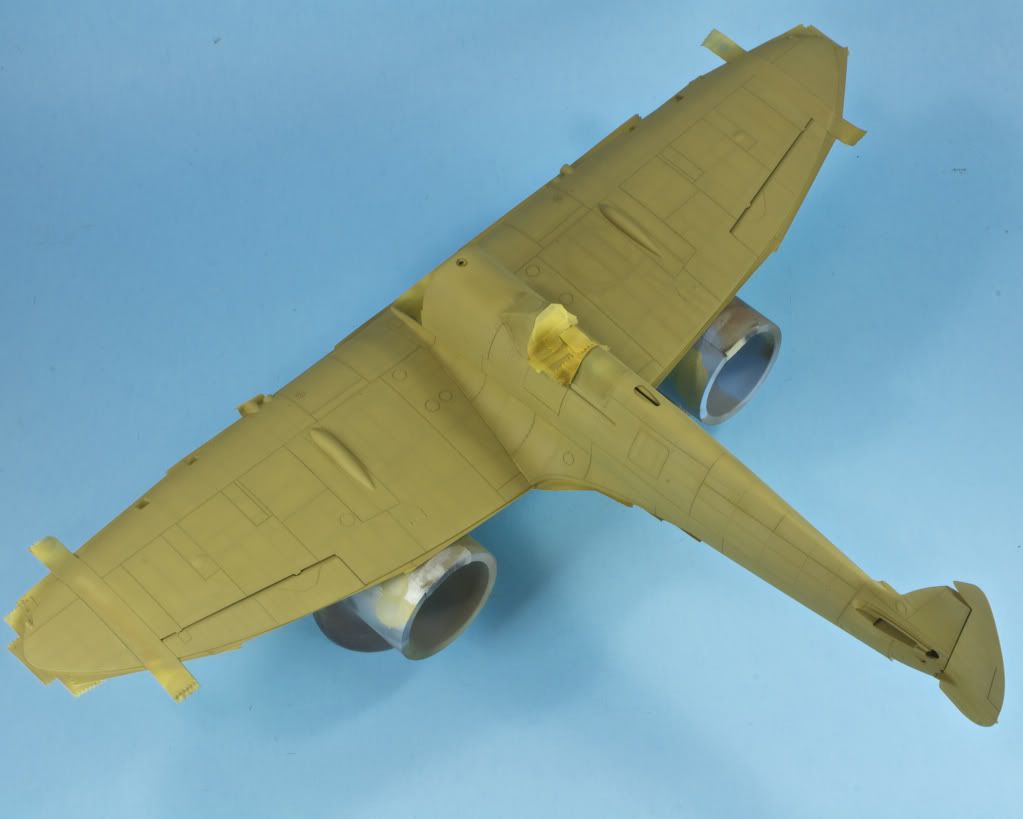
Very few aircraft benefit from a pre-shade vs a post-shade, IMHO… It all depends on the color of the finish though… It’s one of those things that really looks good, but isn’t all that accurate up close… Scale distance is the factor there…

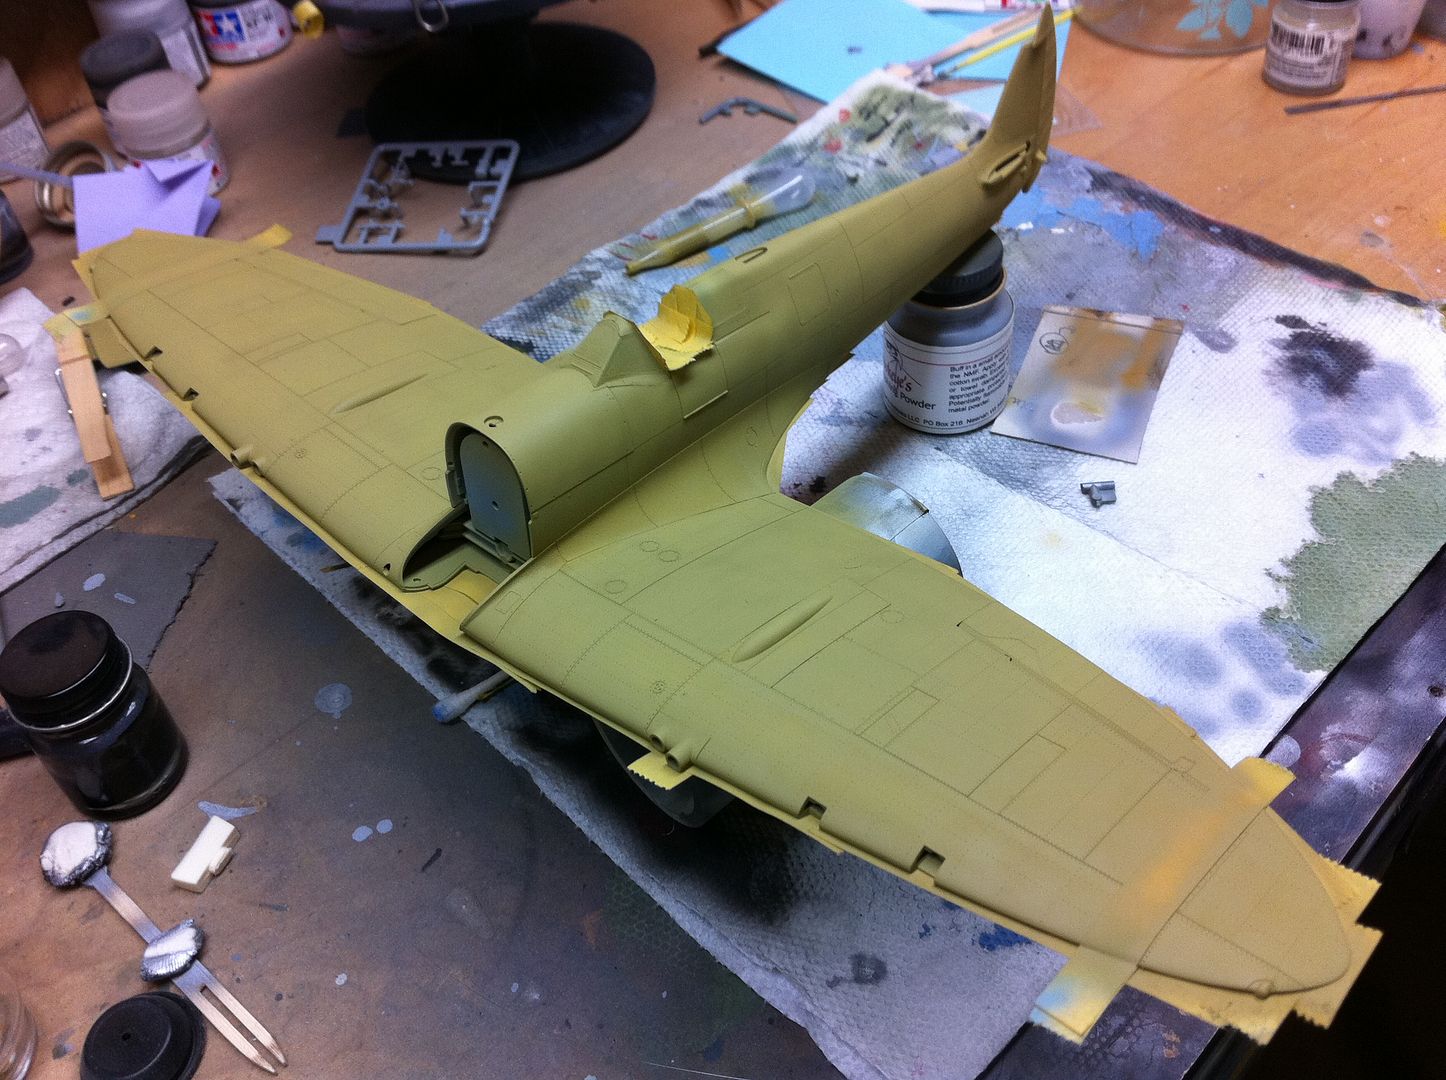
At any rate, I’ve been ok with using Sharpies, but I only use the “Ultra-fine” tip… And that’s only IF I opt to pre-shade, which doesn’t happen very much…

Try airbrushing Lifecolor onto bare styrene and tell me it doesn’t need primer…