Here’s the Potemkin in 1/400. The original molds were Heller. I cannot decipher who the manufacturer is of this version except that they are in Mockba. (Moscow)
WIP to follow.
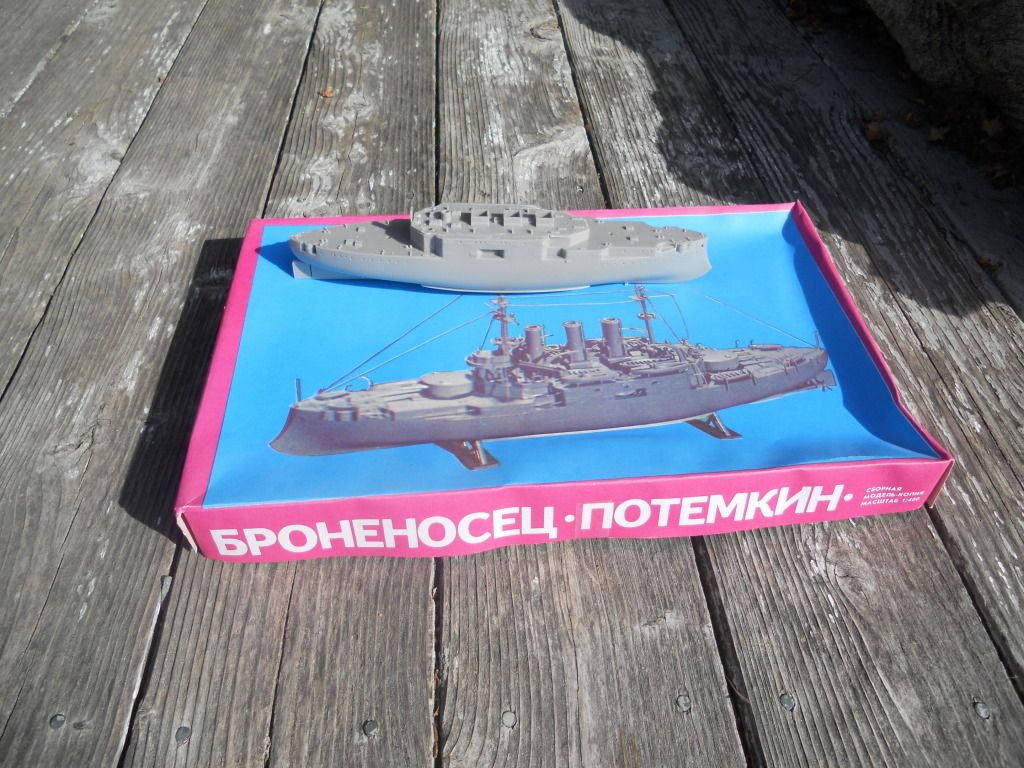
Here’s the Potemkin in 1/400. The original molds were Heller. I cannot decipher who the manufacturer is of this version except that they are in Mockba. (Moscow)
WIP to follow.
Looking forward to seing this build my friend
Will enjoy watching this one come together…Cheers Mark
GM,
I’m very much looking forward to your build. I loved your Borodino and Ting Yuen.
Steve
LOOKS LIKE MY FINGERS WERE REALLY FAT TYPING THIS LAST NIGHT. might be an alanger. i have one of these i started. not for the faint of heart. sink wells through the wood planking but many are hidden by boats and behind the gun turrets. i covered 2 forward and 2 aft with a square piece of styrene to look like a hatch. will have to rebuild the flying bridge as the port and starboard wings are not symetrical. will be an easy build and i can make the canvvas a lot thinner. the canvas on the boat deck scale wise would stop a 308mm shell but it is too much trouble to cut it off. the deck fit rather well to the hull and the superstructure needed a bit of extra styrene trimming to fit but it will be hidden by the dark colors. steam launches are very nice but some of the boats are iffy. i am using mine as a test bed for PE, EZ-line rigging and different techniques for stack stays.
Every thing you pointed out has bit me so far, Wayne.I cut off the bulwarks around the boat deck, but it left a mess and there’s a fair amount of plastic trim to put back. There were probably the first two Aztec stairways ever added to a model under the bridge. Chiseling those off left two craters. And the sink holes are fierce. It’s all a bit of a pity because in true Heller fashion, the deck planking detail is probably as fine as I have ever seen on a plastic model, although the joints are raised.
The bilge keels are big triangular section affairs, that had to go. Definitely need a Stoli shot before modeling.
Na sdarovie!
sorry about the fat fingers typos last night.
the screws are a tad thick too. i will not add all the rigging and stays, just enough to be representative. all the rigging would look like a family of spiders on speed. have the hull painted a dark gray. looks too light but a black wash should darken it enough without going stark black. my research indicates no boot stripe. i may have to pull this off the shelf and work on it some more. oh i replaced the steam lines on the stacks.
I think you are correct about no boot stripe. Borodino didn’t have one. Seems kind of pointless with black over red.
I’m using Polly Scale Steam Power black. What would you use for the topsides? I have seen a couple light gray, but maybe a little too much so.
I ordered a generic PE fret of railing from GMM. Hopefully there will be enough 2-bar.
I’ve used nylon paint brush bristles for stack stays with ok results. I rigged Emden with real line and that was a chore. There was a lot of interference with the boats.
I also always replace the fighting tops with thin aluminum. Easy to do and one of the first things that draws the eyes.
Yippee I’m glad folks are interested. Gives me momentum.
One other thing- this pig has a bowsprit! How cool is that!
momentum i don’t need. i have 3 tracks, a helo, a gunboat and an armored car all partials so, i pulled out my ship and did some more sanding to even up the main deck edges, mine is dark frey to the boat deck, probably light gray with yellowish stacks, i too have a GMM pe fret. i also have a BORODINO and KONIG partially done but kinda put my ships aside. too much i want to build and not enough tiime.
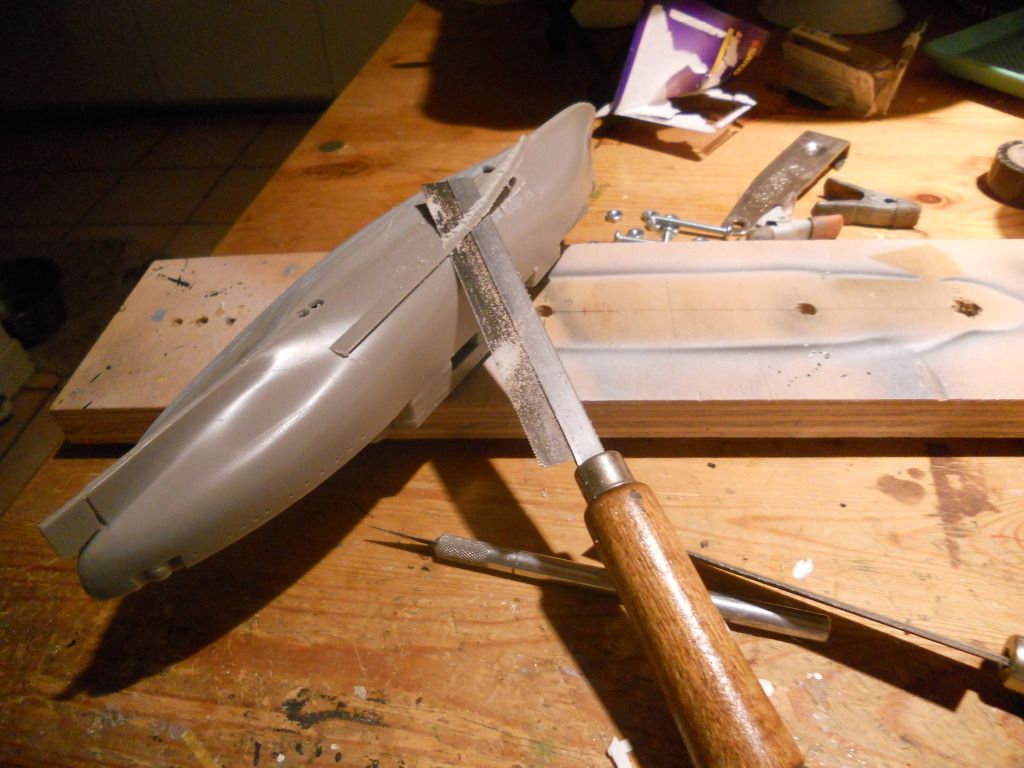
First order of business is to clean up below the water line. The kit has a pair of fins that are intended to be bilge keels. Off with 'em!

I have an interesting photograph of the Potemkin at sea in which she appears to be painted a light gray, but it is a black and white photograph. The photo is on page 119 of “The World Encyclopedia of Battleships” by Peter Hore. I have also seen other photos of Russian pre-Dreadnoughts showing what appears to be light gray paint schemes, as well as black. For example, I have a photo of the battleship Retvizan entering drydock with the USS Holland that shows light gray hull and superstructure with darker funnels with no boot topping.
In other words, there is some variety to the pain schemes. Russian pre-Dreadnoughts do not have to be painted only in black. There are options.
Bill
All true 'nff. The ones that survived Tsushima often were painted light gray prior to WW1. I have to go “mutiny” though.
I thought that you would enjoy this site about Potemkin . . . www.cityofart.net/…/ru_potemkin.html
Bill
Thanks for that link, Bill.
Lee
Yes, thanks Bill.
The old keels are replaced with new ones matching the drawings and truly fore-aft.
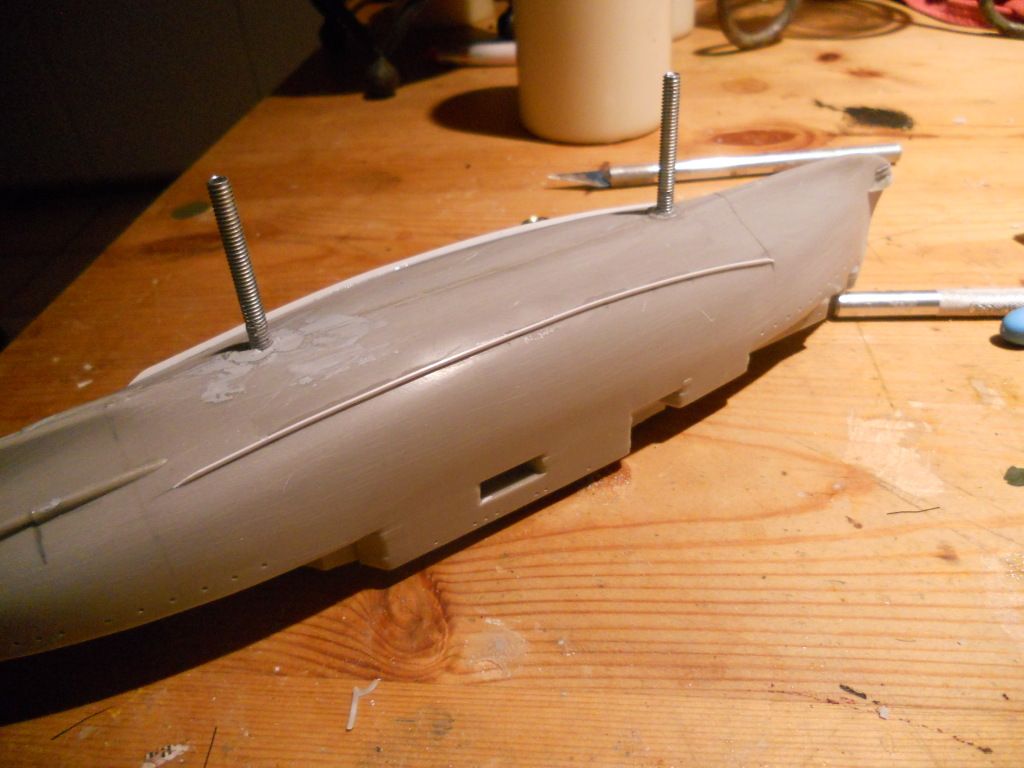
Reinforcing at the battering ram.
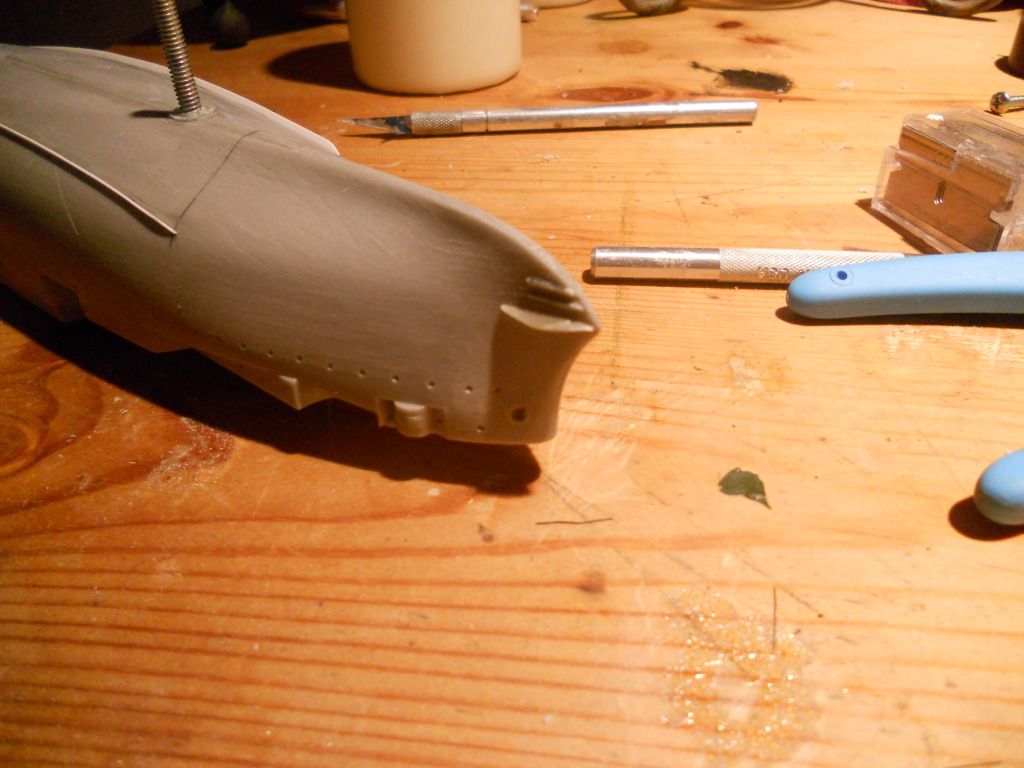
Shafts and brackets. Fair amount of drama here as no parts had any locating pins, and the two brackets were more identical than symmetrical.
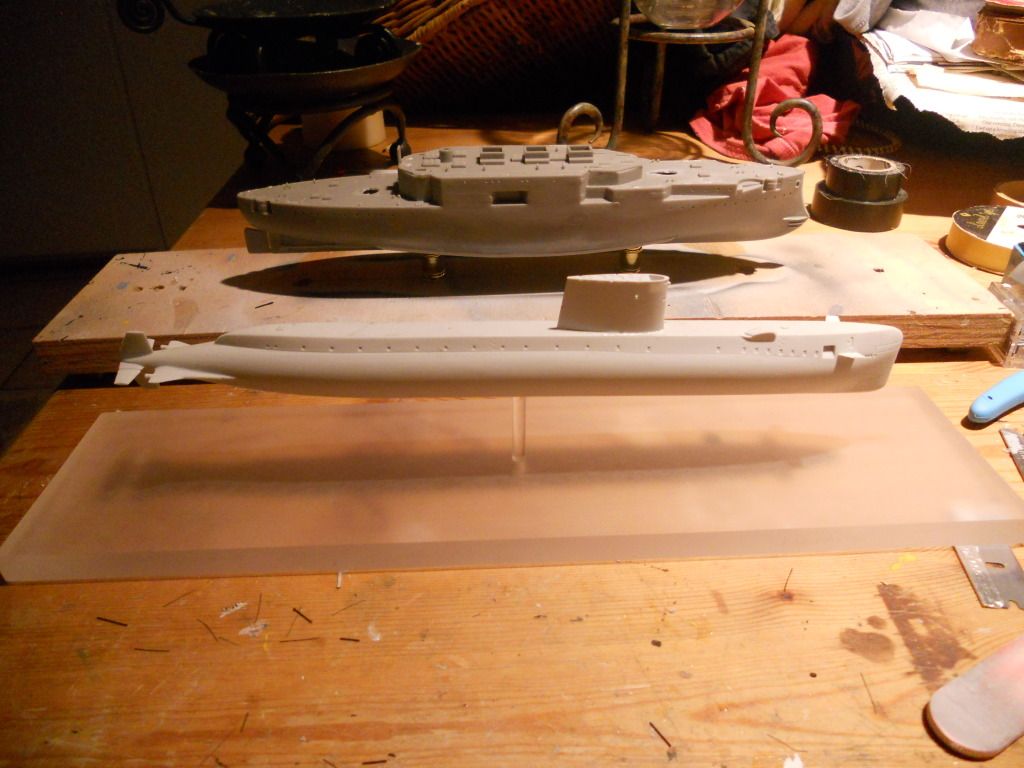
On a stand just for a bit, and compared to SSN 571 at the same scale. I thought this was interesting.
You are doing a very nice job on this one. The Bilge Keels look better in scale with all your efforts…Cheers mark
Wow! Much improved bilge keels.
Bill
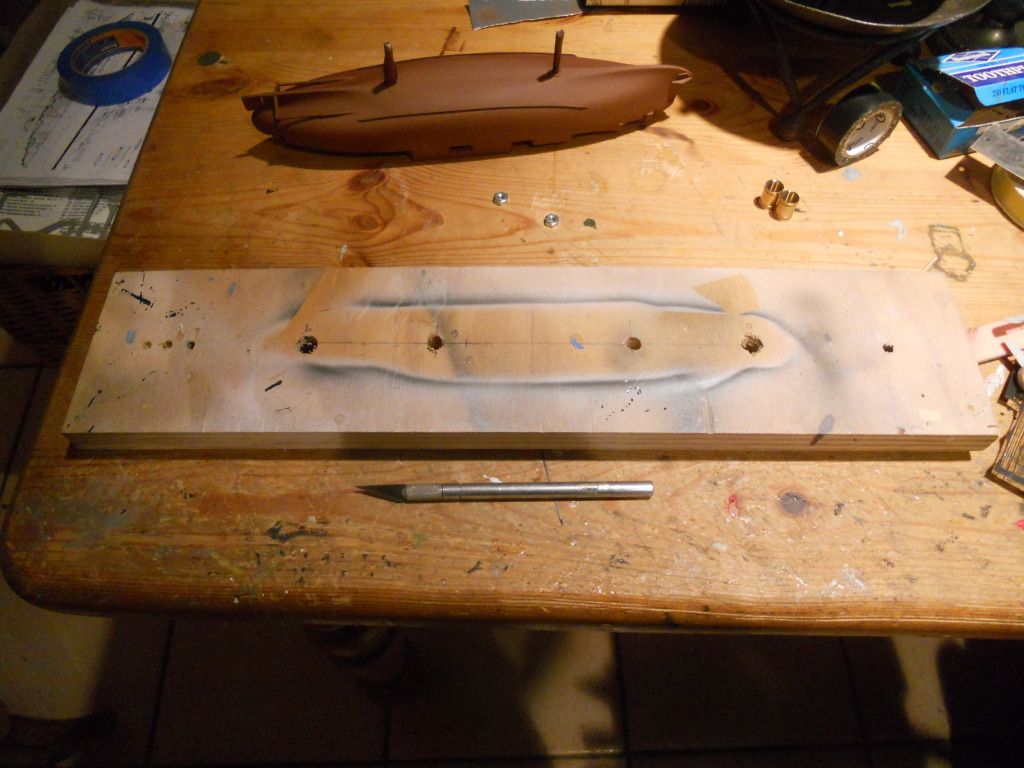
As it happens, I am at the base mounting stage of my Potemkin, so I thought I’d share a few photos of the steps that work for me.
Here’s my temporary base that I use for all of my ships. Well, not CV-8 Hornet- she is mounted to a 3’ long 1 x 10 melamine shelf.
But you see that the base has as many pairs of hole as I’ve had to set for the numerous 1/350 ships I’ve built so far. This base is great because it allows me to handle the ship without touching it too much. One of the other modelers here has a 90 degree end on his and I can see how that would help too.
[imghttp://]i295.photobucket.com/…/DSCN3379.jpg[/img]
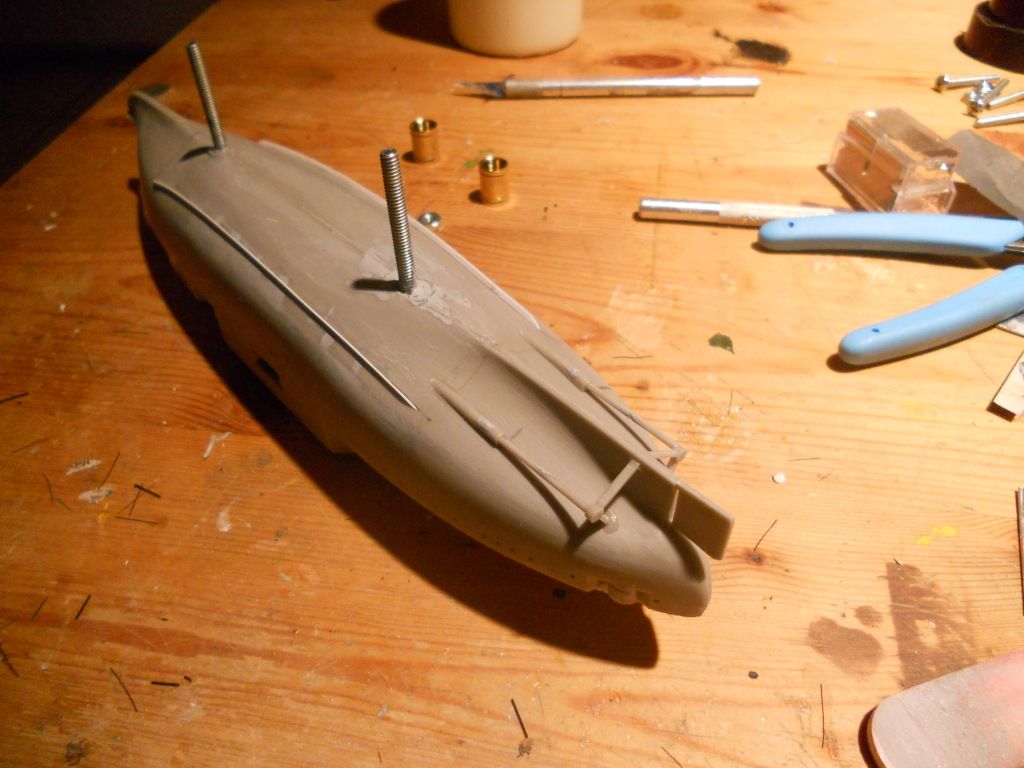
Here’s the Potemkins hull with the finish coat of oxide, and the two 10-32 screws I keyholed, glued and puttied in. I’'ve masked the threaded areas where I need them clean later.
These neat little barrels are from the lamp part section at Ace. I have a big bag of them as I like uniformity in my displays.
Here’s the underside of the temporary base with nuts attached in the countersunk holes.
After it’s all done, I transfer the ship to a finished oak base. Same kind of set up.
That’s how I usually display my ships.
I put up a post in the ship display thread about progress, and they say not to double post so please look over there.
I decided to bump this to the top because I don’t want to lose track of this build.
Bill