Hi, I hope this is the right forum for this question.
I am building the Revell 1/32 F4U-1D and would like to position the rudder, elevators and flaps. My question is, when I cut the control surface off what is the best way to rebuild it and reattach it. Should I just use a piece of tube along the whole piece or work with a smaller hing? Any help is appreciated.
You may try aligning the surfaces in whatever position you want, then marking and drilling holes to attach the surface with a piece of styrene rod; or you can super glue them in place with a little accelerator to set them fast. Good luck!
I like twinmustang’s method…I know you are new here so I don’t know your skill level, but you must be experienced or you prolly wouldn’t be chopping off control surfaces.
If you aren’t comfy with drilling matching holes as twinmustang suggests…once your landing gear legs are on, you can use a good tape on the underside to attach the flap to the wing and prop up port and starboard flaps at the level you want then use some CA in about 3 spots along each flap…let that set then peel off your tape and glue ,ore as you see fit.
Getting a nice ‘air gap’ between wing and flap (if you care about it) will be easy with twinmustang’s way to go!
Well to be perfectly honest I have never removed any control surfaces before. I am praying I don’t screw it up. I have modeled for along time and think it’s time to give it a try. I appriciate the advice! Thanks.
If you’re planning on entering the finished model in a contest, don’t forget to position the stick and rudder pedals appropriately. Judges will notice.
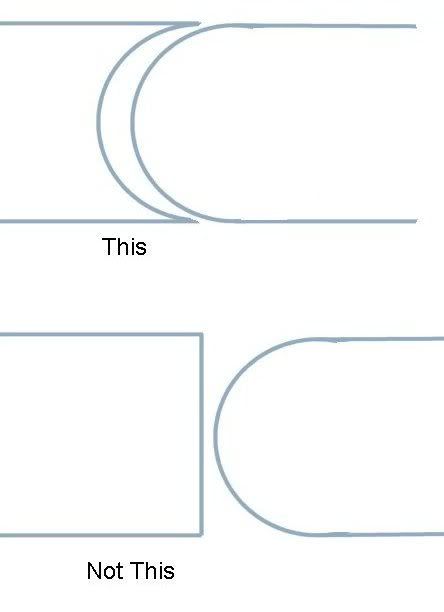
If you simply cut off the control surface and glue it in a different position it will look wrong. The space between the flying and control surface will be too wide. The cut edge of the control surface needs to be rounded over. Sometimes a thin strip needs to be added to the edge to get the correct profile. But just rounding over is not enough. Then the back of the flying surface needs to have a trough cut into it so the front edge of the control surface fits inside.
Go to this link… http://www.scalespot.com/ and to the P-400 build from 9/2/06 in What’s New. Go down about 8 or 9 pics. An alternative to the rotary tools is to first file a groove in the center with a triangular file then finish it off with a round file.
Wow that article is a great help, thanks. I was thinking about doing it that way but wasn’t sure if it would look right. I have been detailing the engine and figured I would take some photos of a corsair at the airraces if one shows up this year.
Anthony, check some good reference photos of the flap set up. It is not a standard split or drop flap. Not sure if they are Fowler flaps but a Corsair expert can help you there. Point is they look different than just an elevator or a rudder. The method on that site will work great for those but the flaps are going to need a bit of a variation on that theme to get the right look.
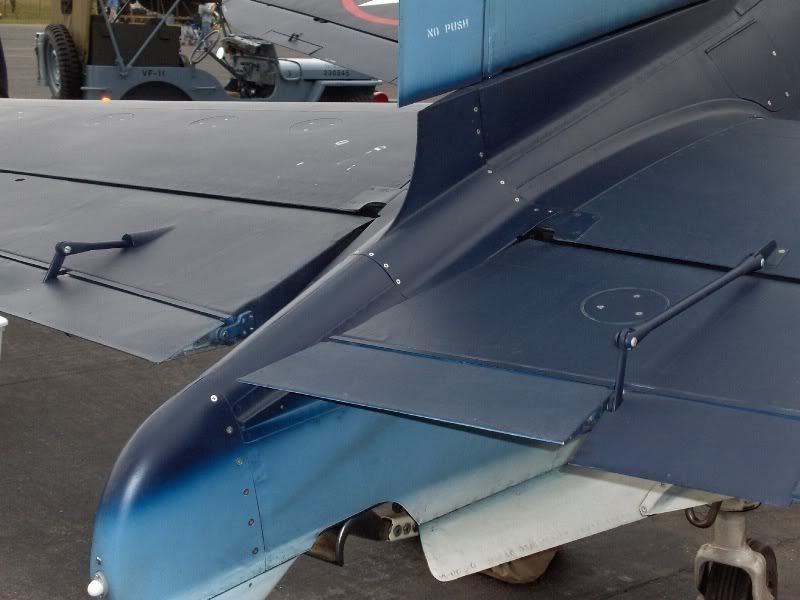
Here a couple of pics I took at a show. Sadly I did not get great shots on the controls surfaces but get the idea. The rudder looks just like the elevators.
The first flaps were attached to the wing (often with piano hinge) and simply moved up and down (P-40s,C-47s and Spitfires are examples of aircraft with the origional type flaps). Fowler flaps move aft first (actually increasing the area of the wing - a bonus when flying slow), then start to drop. This is accomplished by mounting the flaps on tracks (a clue is the “slots” which run fore and aft in the flap its self - notice them in the pic of the F4U flaps above)
Thanks for the pics wing_nut! I am starting to get nervous about the flaps but don’t think the plane would look right with the flaps up. Since I am still working on the engine and cockpit I have time to plan it out and hope I can get it done with tips from you all. When I cut out the flaps, should I make whole new flaps or work with the ones I remove since the are already scribed?
The Corsair is an especially fun bird to drop flaps on… It’s required that the flaps be down when the aircraft is parked, if there is no ground equipment for it, because the the foothold for the pilot is located inboard on the right flap. Besides, the Corsair looks best when everything’s down & dirty…
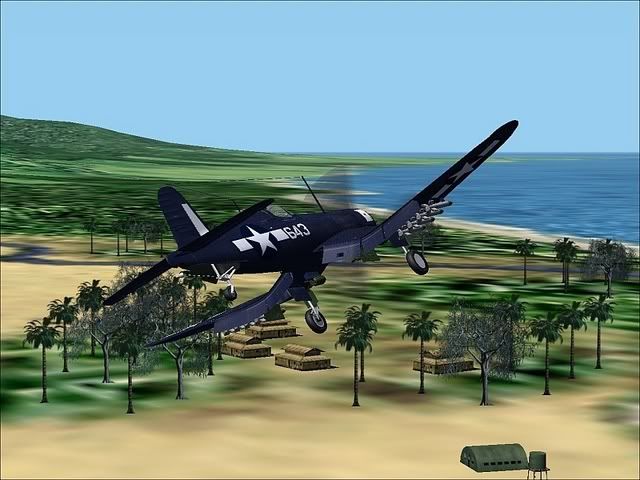
I have always wondered what the white outline in front of the cockpit on some Corsairs is for. Is it tape used to seal the fuel tank and keep fumes out of the cockpit or ???
Yup, it’s tape, but it wasn’t to keep fumes out of the cockpit (if you smell avgas in the cockpit, there is a much more serious issue at hand), it was used to seal the fuel cell area from dirt and dust kicked up from the crushed coral runways and taxiways on the South Pacific bases in Navy and Marine land-based squadrons…
When I dropped the flaps on my 1/72 P-51, I used a piece of half-round styrene rod on the “flap” portion I’d cut off to give it that correct rounded look. The half-round rod also nicely filled the gap in the wing from where I sawed off the flap pieces.
I have seen models with the flaps in the down position when the wings are folded. I haven’t seen any photos showing this, so is that an actual position or just added for dramatics.

 .
.