Attached are photos of my 1/96 scale Revell Apollo-Saturn V moon rocket. This model was engineered to allow it to be broken down to represent each phase of its moon journey. This “toy like” feature, along with the kit being modeled after an early static version, requires substantial modifications to produce one of the Apollo-Saturn V’s that went to the moon. Revell’s kit is made up of 188-plastic parts. Of this total only 53 were included as part of the finished product. The two main after-market sets used were New Ware’s Saturn Detail Set with Boiler Plate Cover and Saturn V Decals . This project would not have been possible (for me) without the “Detail Set”, which contained an incredible 82-resin and 134-photoetched parts. The most helpful information from New Ware was 7-pages of scale drawings showing very specific part location and painting information. This information saved me many hours of research and guesswork.
Because of the kit’s age, the molded parts were poor quality, thick, uneven and lacking detail. Throughout the entire project a good bit of sanding and cutting was required on every piece to get a clean appearance and good fit-up. Listed below are some of the more challenging details added during construction:
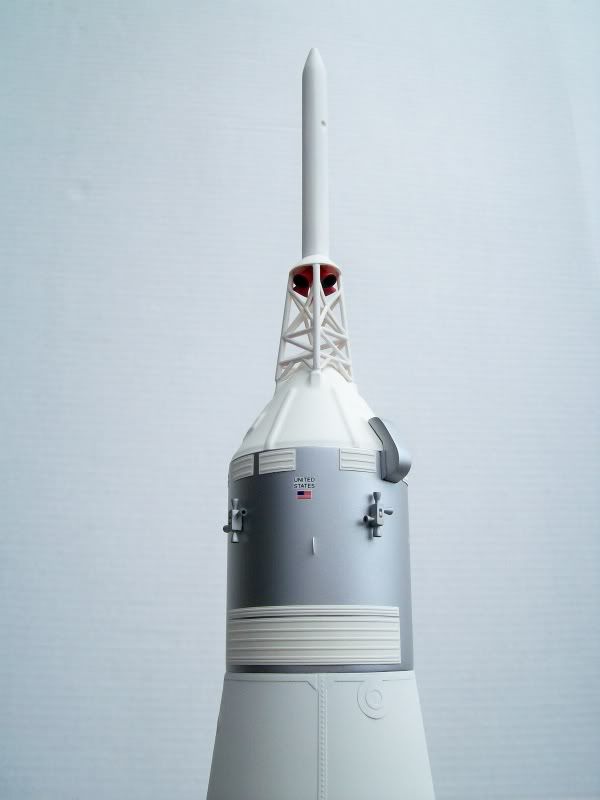
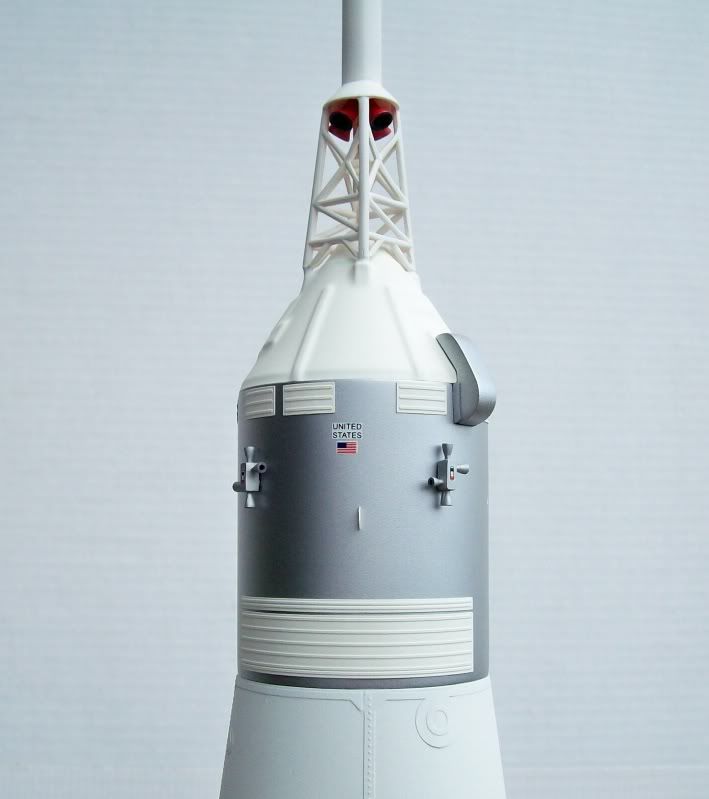
The Apollo spacecraft was modified from the kit supplied Block I (earth orbit version) to a Block II (lunar docking version).
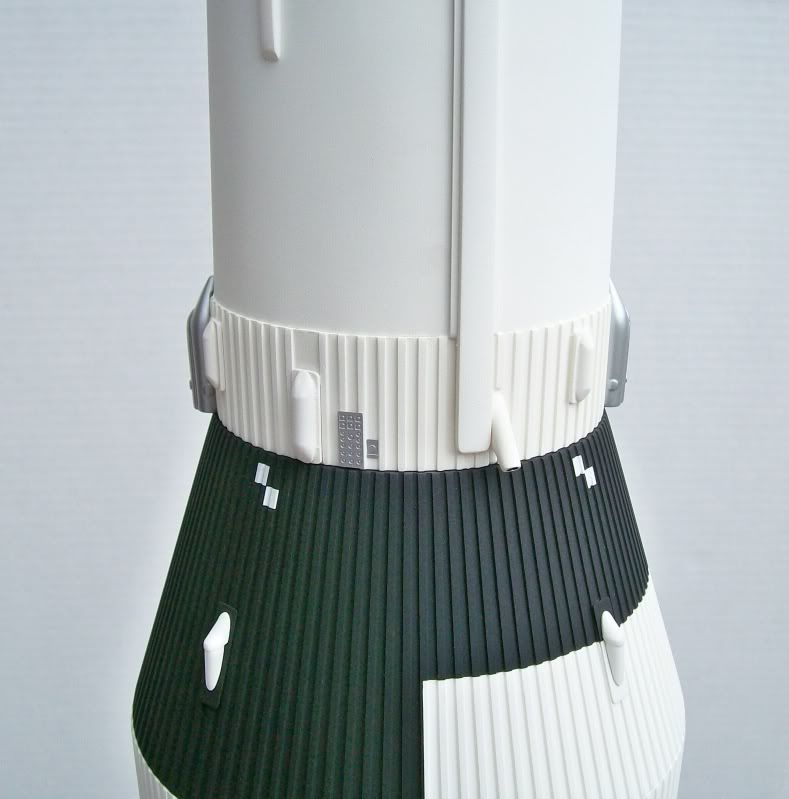
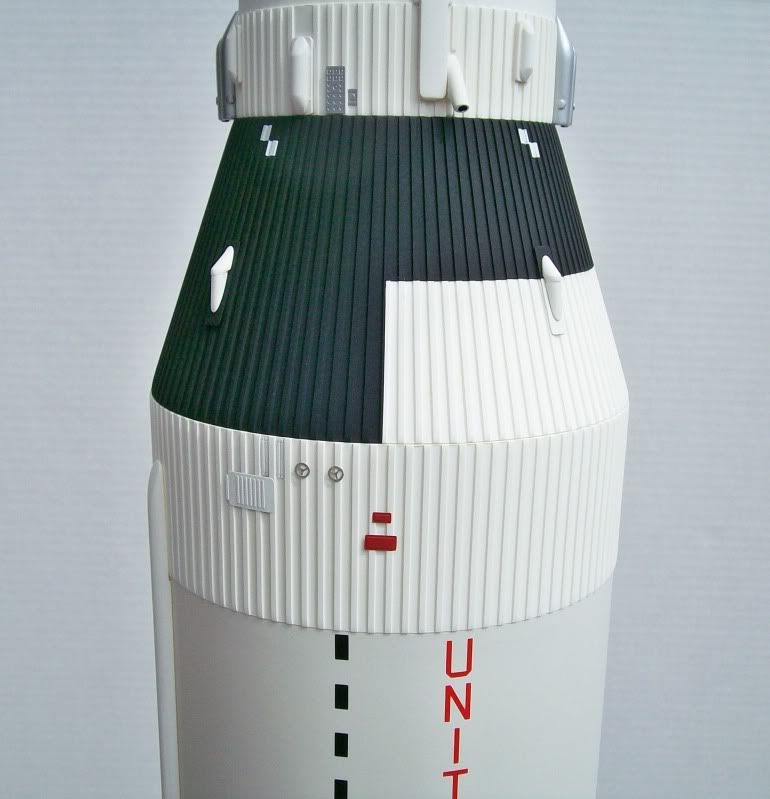
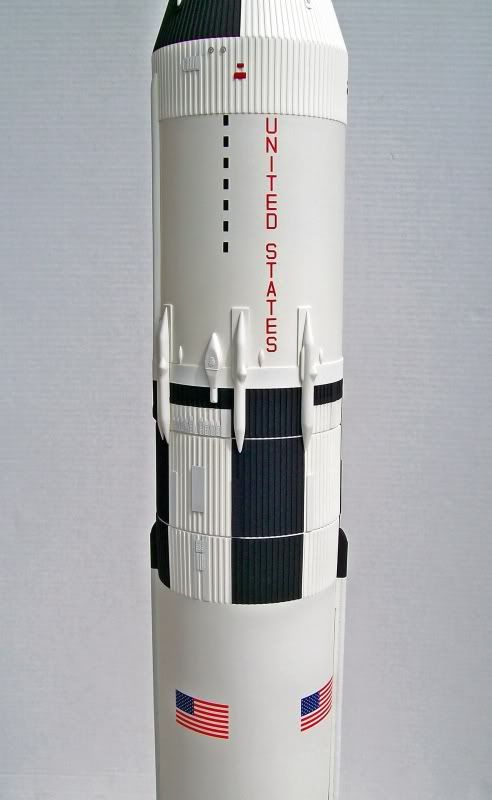
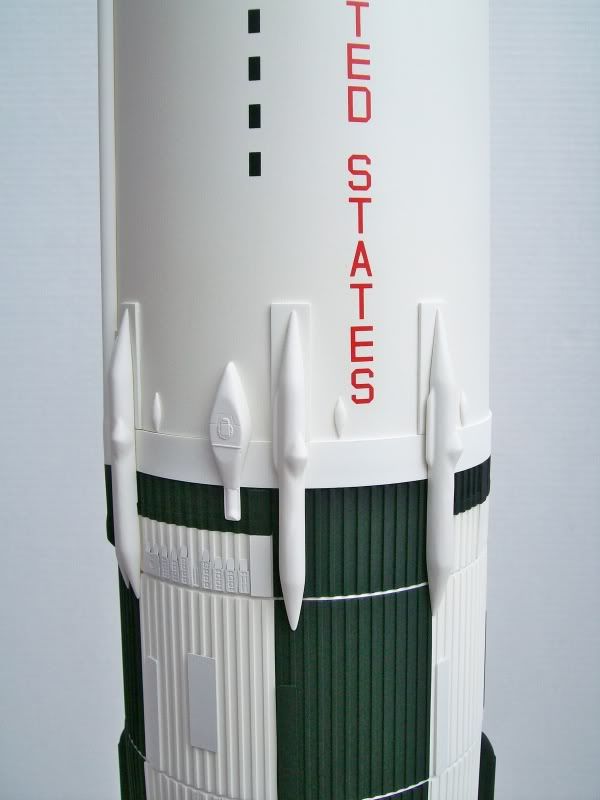
The black striping requirements were very specific and very uniform over the entire model. A lot of time was spent verifying the correct location of each part, since each part became integral with the paint scheme. In applying the black striping, it was always critical to make the separation line between black and white as sharp as possible.
Future floor polish was applied only to the sections where decals were placed. New Ware’s decals were excellent and went on without any problems. Testors Dullcote was then added to these areas to give the model a uniform finish. The small white serial number decals near the bottom of the first stage are the only way to identify that the model represents Apollo 17, the last moon mission.
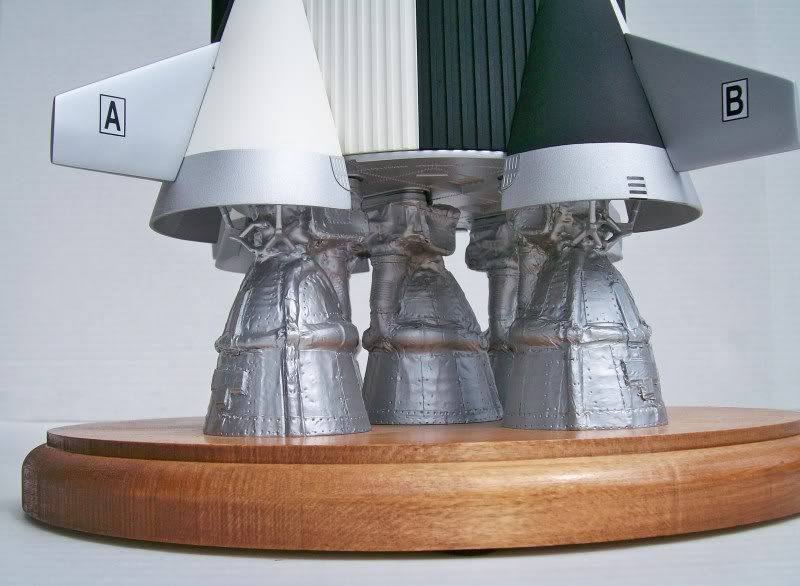
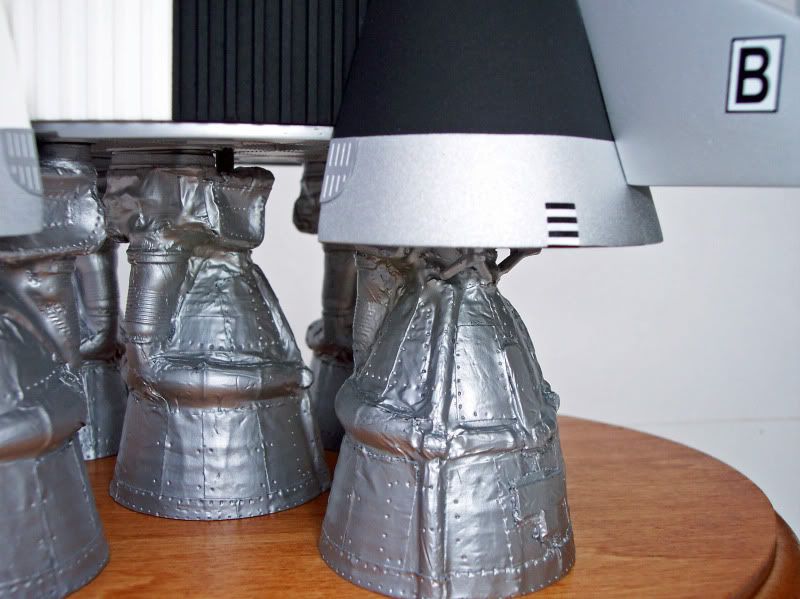
Realspace Models’ resin F-1 engines were used in place of the kit parts. These parts are represented with “batted-insulation”, which was on all of the Apollo-Saturn V moon rockets when they were launched.
Building this model was more difficult (and took longer) than I expected. However, the finished product is huge and an “eye-popper”!
Oh dear … I’ve seen way-y-y too many poorly done Saturn 5’s.
But I’ve gotta tell ya … yours is lovely! [:D[ Thanx for posting! Your paint, the mask lines, the application of the PE parts … this is eye-candy for these old eyes!!
And by the way, BPC stands for Blast Protective Cover. [Y]
Now let me get back to looking at this gorgeous beast!
Thanks for the compliments. They are appreciated. As I stated above, making the sharp demarcation lines between the black and white was difficult. Listed below are the tools and methods used when I built my model:
General Purpose masking tape was used exclusively. It was always cut in very thin strips (1/4" wide) and in short overlapping lenghts to have good contol in laying it down straight.
Testors Flat Black was used exclusively.
A good “trick” that was very effective when painting sharp lines was to burnish down the masking tape immediately (i.e. literally seconds) before the paint is applied. I used a round toothpick to do this in many cases.
Finally, I held the airbrush at a slight angle away from where the masking tape and model met. This helped eliminate any paint “bleeding” under the tape.
At the heavy corragation sections I cut the masking tape into 1/16" wide strips so a toothpick could be used to press it in to the tight spaces. This was not easy and a couple of sections had to be painted several times because I either missed the alignment or got overspray on the wrong part.
As I built the model, the thing that stood out most to me was how plain (and void of detail) the Revell kit was (to be so large). The New Ware accessory sets really elevated the project in a big way.
Hi, Great work on the model. I have recently come into possession of one of these owned by my father. I don’t know much about it, and came across your post while researching. How much do you think this model is currently worth? It is still in it’s plastic wrapping. Thanks, Elizabeth
Elizabeth/Jim Barton-Thanks for the compliments. They are appreciated.
Elizabeth-This kit has been re-issued several times since its original release in 1969. It is really not that much of a collectible, and I would think it would not be worth more than $50-$60. If you want to sell it you should go on e-bay and search what other people are selling this kit for. You should be able to find several being sold. Good luck.
Phillip…AWESOME work! I got the Revell History Maker 2 days after they came out in Tampa, FL! And as most stories go, I was young and very impatient, thus it was a mediocre job at best! Your painting is spectacular sir and I have to ask…how much trouble did you have with the body assembly? Any tips or tricks with that? I remember seeing those “sheets” that were to end up being the body and thought it was a silly idea. Of course I was like 14-15 at the time they came out so my “maturity” level was not at its highest! [:$] Just wondering if you had a tip on doing that. I am actively pursuing another kit…but can’t see paying some of the prices they are asking for! [;)]
Eagle90, Scotty T, Spru-ce Goose,-Thanks for the compliments. I am surprised and pleased this thread has generated this amount of interest. I guess it is safe to say that NASA’s Apollo-Saturn V rocket is the most popular of all the manned rockets.
Eagle90-Earlier in the thread I listed a few building “tips” that might be helpful. I did use flat black/white paints instead of gloss, because they are easier to work with. I believe the thin plastic wrap sections work well, you just need to reinforce them internally. It is a big project and will be easier to build if you break it down into sections. Only concentrate on one section at a time (i.e capsule, service module, 1st stage, etc.). Finish each section completely before moving on. Doing this helped me from getting burned out. Also keep in mind the kit does not have good detail or well fitting parts-so be patient. Like many NASA rocket modelers, my build was a “labor of love”. You should be able to find a decent price on e-bay for an older release ($50-$60) if you keep watching. If you build the kit I do recommend using the New Ware detail/decal sets, as they as they elevate the model to a new level.
Below are a few new photos of the entire model. I had not taken these when the original thread was posted. I hope you like them.
Great advice! I saw all the tips you had (and made sure I wrote them down!), but just had to ask about the thin plastic wrap. Great advice on that too! Like I said, I was probably 14-15 when I got it and immediately began assembly…quickly began assembly! Hind site 20/20, I wish I had bought 2 of every History Maker and stored them ALL away! Oh well, I’ll get another one someday and will take heed to your advice. Thanks for the post, it’s a marvelous build!

