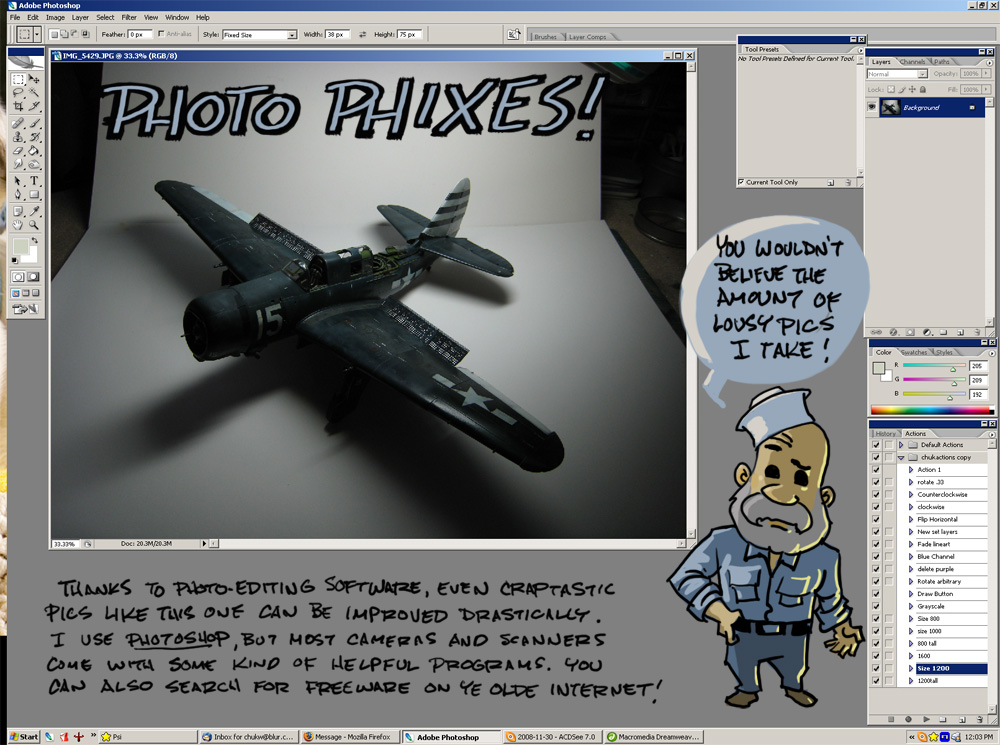
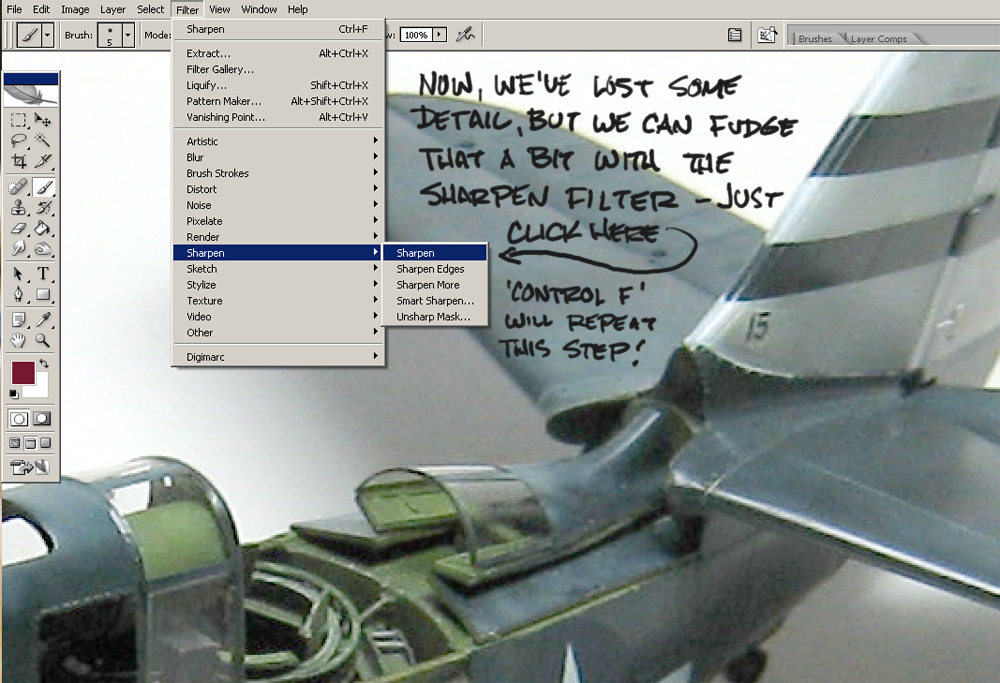
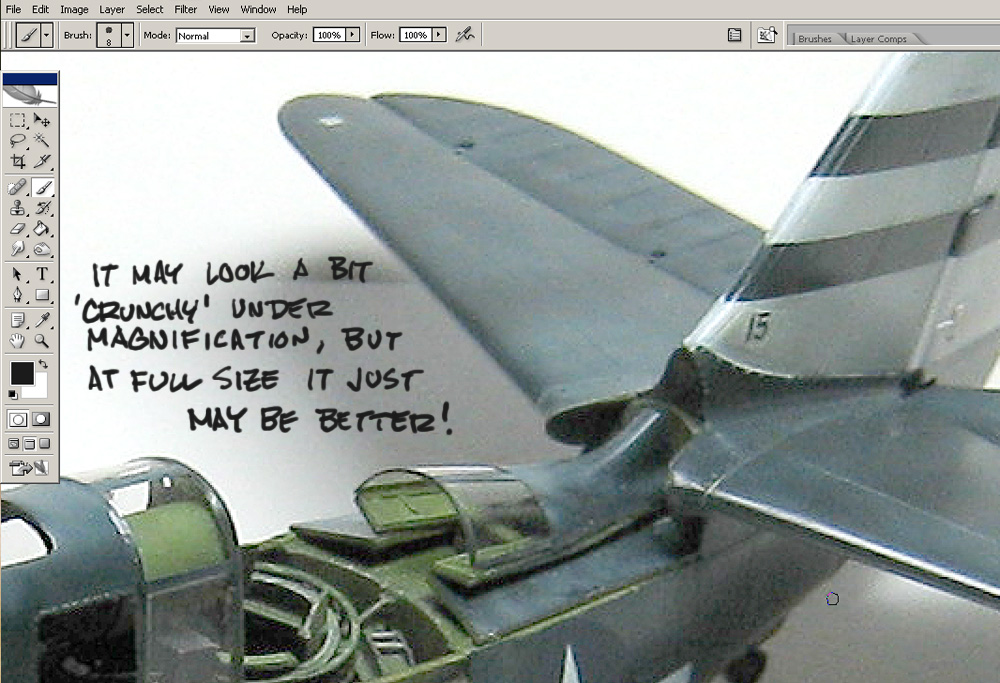
Well, I’m stuck at home with the flu again, so here’s a little tip I’ve been meaning to share… the last pic is animated, so wait 5 seconds to see the change.
EDIT:
Thanks to Phil in Wollongong, Down Under, here’s an addendum.


Well, I’m stuck at home with the flu again, so here’s a little tip I’ve been meaning to share… the last pic is animated, so wait 5 seconds to see the change.
EDIT:
Thanks to Phil in Wollongong, Down Under, here’s an addendum.
Chuck, when i grow up,(Fat chance, Mrs Lufty) i want to be you.
Great tips. My photography is definately my weak point. I have photoshop and never thought to use it. I have no more excuses for dodgy pics.
You da man.
…Guy
I’m with you Guy. I really need to sit down one day and teach myself how to use photoshop. Chuck I always enjoy reading all of your posts. The addition of the charectors and illustrations are always top notch and very profesional. You have taken posting building progress reports to a new level. Very informative and much better than alot of articles I’ve read in some magazines. Well done sir [bow]. Hope you are feeling better soon.
Soulcrusher[oX)]
Very nice and helpful tutorial Chuck. You should consider submitting it to FSM for print.
I run all my photos through photoshop if for nothing else than to crop the size.
Great tool.
Eric…
If you can’t afford Photoshop, give GIMP a try. It is an open source image editing software program, very similar to Photoshop.
Here’s a link to the Windows version.
Perhaps just a little technical explanation as to why you need to fix a photo situation like this is in order. Plus a possible way to shoot photos and avoid the problem, in the first place, might help some of you.
I been a pro photog for 30+ years and today make my living with Photoshop. I’ve also taught college level photograph. This kind of a problem is very, very common. Photoshop, or another photo editing program comes in very handy, but you can only push a bad image so far. It may be easier to avoid the bad image altogether.
The problem Chuck demonstrated is a simple problem of the camera’s auto exposure making an error because the dark blue model is sitting on a white background.
Camera’s exposure controls are based on averaging the tones in an image to a neutral gray. That way most of the detail in the lighter areas, and the shadows, can be captured digitally, or on film. The trouble is that when the camera sees all that white, it tries to select an average exposure setting which tends to make the overall image too dark. Its trying to “gray down” the white. When that happens, the dark model can only get darker.
There are two simple ways to fix this.
First, if your camera has an exposure compensation control, set it at a + (PLUS) setting. Often a +1 is enough. This allows the camera to adjust for the white background. You may need to try a few frames at different settings, (this is called bracketing exposures by the pros) to fine tune it.
A simpler way is to NOT USE A WHITE BACKGROUND. While white backgrounds are often seen in FSM now, remember a short time ago the backgrounds were all blue?
The blue background was a more neutral background than white. Please note that we are talking brightness, not color, when we say neutral. Most aircraft and ship models will photograph well on a medium blue background.
A medium gray background is even better for exposure control. However the photo may look a little drab.
These tricks should help you get better exposed photos from the beginning, which is always a goal.
There’re lots of other issues that come up when dealing with model photography, like what may be good for a computer screen and the web won’t work quite so well with ink on a printed magazine page, for example.
Playing with and adjusting digital images in the computer can be fun. Just remember that every computer adjustment done to an image file destroys some information within the file. The more you do, the less the quality of the final image. For most of us wanting to record and share model work with others, this doesn’t matter all that much. If you are submitting the image files for publication, etc., it can mean a lot!
Bottom line is, try to get as good an original photo as you can. Don’t rely on Photoshop to be able to fix everything.
Have fun and keep shooting. And don’t forget to reset your camera’ exposure compensation setting when you have finished with your model. It can do the wrong things to photos of kid’s birthday party!
Mike
Thanks Mike, I’ve been frustated with the photos I’ve been taking with a white background. The model looks much too dark, compared to what I see with my eye. I’m going shopping for a better background color. Thanks for the color suggestions.
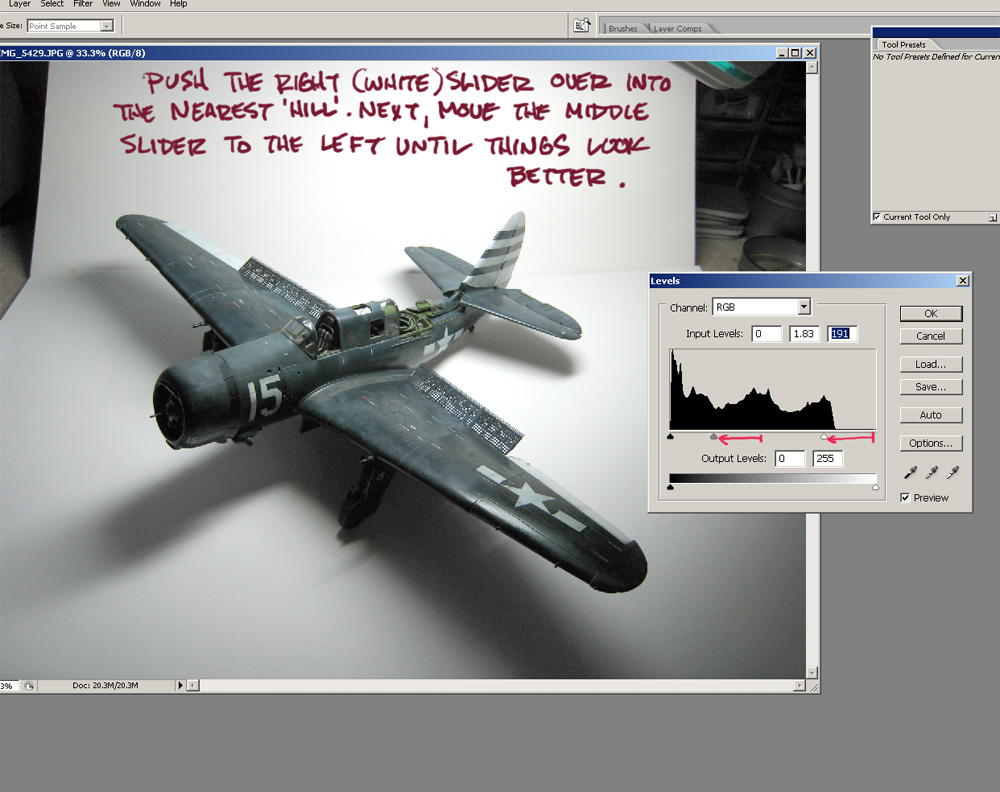
In conjunction with adjusting the sliders on the histogram, you can also tinker with the Shadow/Highlight adjustment (in the same drop down as Levels), as well as the Exposure.
And you should always shoot with the highest quality your camera allows (RAW/NEF with a DSLR or JPG Fine with a P&S). These allow you to capture the most detail, should you need to recover from an underexposure or blown highlights (though that’s tough to recover from, regardless).
I haven’t used a P&S in years, do they show you the camera’s light meter? On a DSLR (nikon, anyway), you can check to see if the camera is over or under exposing, based on your input. It’s nice to know that you can change the setting and save the picture before you even press the shutter.
-Fred