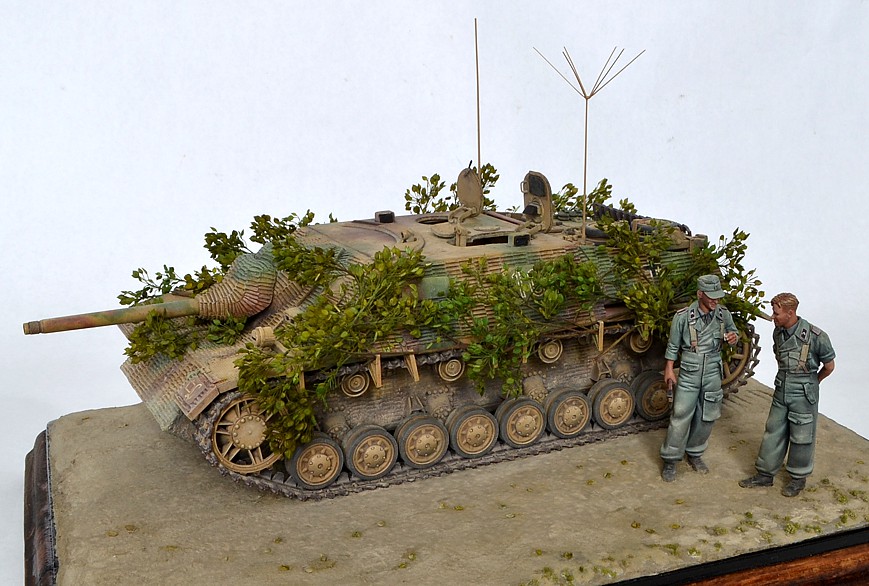
The base kit is Cyber-hobby 1/35 Jagdpanzer IV L/48. A few sets of PE, resin zimmerit (ATAK), workable track links (AFV Club), and a metal barrel were all thrown at it.
Vehicle is part of the Panzer Lehr Division, a command vehicle of the first company of Panzerjäger-Lehr-Abteilung 130. It is portrayed as traveling towards, or even having arrived at the front, and has yet to see combat action - this would occur shortly on the afternoon of June 10 1944. Lieutenant Werner, acting commander of the first company, would be called upon to engage five British tanks that breached a command post just west of Tilly.
Geeminie-Christmas. That’s superb! The Figures are great and the tank is VERY Realistic looking! Really great work! I mean it!!! Damn I wish I could do that! LOL
Jack, you are truly one of the most talented modelers on the site. Your tank and crewman and are well painted as always. I Like the simple dio as well. Another winner my friend.
I love how you’ve got that set up. It looks like an actual photo of a real moment in time. SUPER!
This is all really great stuff, but my eye went to the figures for some reason. I can’t explain it, !http://www.desismileys.com/smileys/desismileys_6646.gifthey look WAY cool, but they’re the ONLY thing that gave it away as being a model.
It’s really quite beautiful though. I know we all strive for results like this.
CodyJ, Eric, disastermaster, Terry, Bucksco, KT5150, Mike, and JohanT, thank you all for the kind and positive comments.
The vegetation on the vehicle is an organic product from JoeFix Studio, item #113 Small green leaves on twigs. Once I had them in place, they looked yellow (wilted and dying?), so I removed them and gave a light spray of olive green paint. The main branches too, received a light wash application of umber brown.
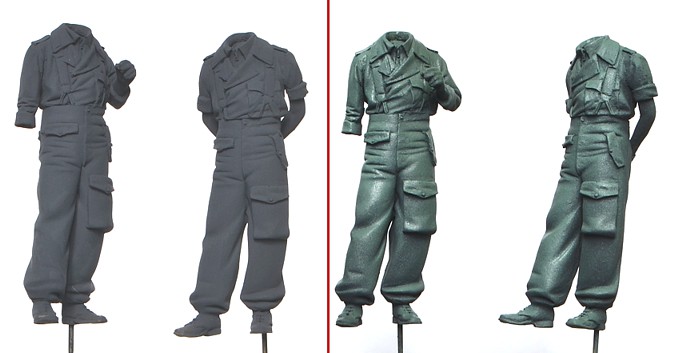
The reed green uniforms were coloured based on this photo which is suppose to be original, but as they say, internet has been known to be wrong. I have though, seen on other forums, stating this material could be found to have a turquoise look to it:
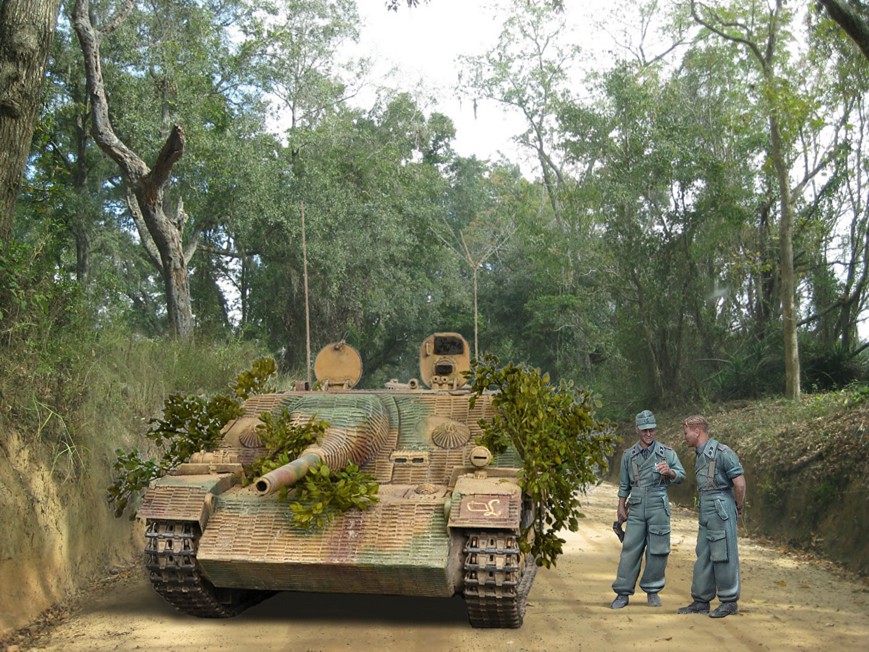
Yes, there is definitely something not right with the scenic photo backdrop. I’m certain it’s an issue of lighting - the figures were shot with light source directly in front of them, while the photo utilized from google has it’s light source from the right side, as noted by the ground shadows. So I took another stab at it by adding shadow to the figures, leaving only some portions of the original in the ‘sunlight’ :
Jack, thanks for the reply. I’ve got a project on the bench right now that will benefit greatly from the Joe Fix products. Now, is there any way we could convince you to show us your technique for painting figures?
I don’t know about “something not right with the scenic photo backdrop”! It sure looks good to this untrained eye. I was blown away when I first saw the pic. Wonderful work.
Thank you Tojo72, Raualduke, M1GarandFan and udel09!
@ KnightTemplar5150 - my techniques for painting figures is nothing new. If you don’t have it, Shep Paine’s method of painting figures is a must have for a laying a good foundation and understanding on how to approach this subject.
The Marion Ball tutorial found on youtube is also recommend - great low down on how to paint faces with acrylics. At 1/35 scale though, I don’t bother with shading, and rely on a final sienna wash for that, as well as bringing back some colour after applying highlights.
I don’t know who started it, but using an airbrush as a light source to create highlights on the uniform saves a lot of time and work. This aspect is the only one I’ve photographed during my work in progess postings in the ARMOR IN THE WEST (Defense of the Reich) GB.
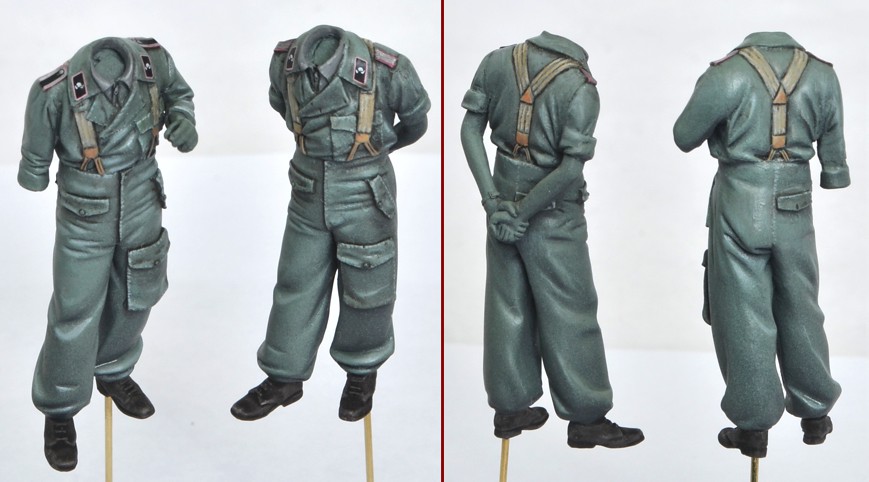
Figures were sprayed overall Tamiya German Grey. This acts both as a primer and for the shadow colour of the uniforms. Base colour of the uniform is then sprayed from up top, like a light source. Another round is sprayed slightly lighter in shade, the beginning of highlights:
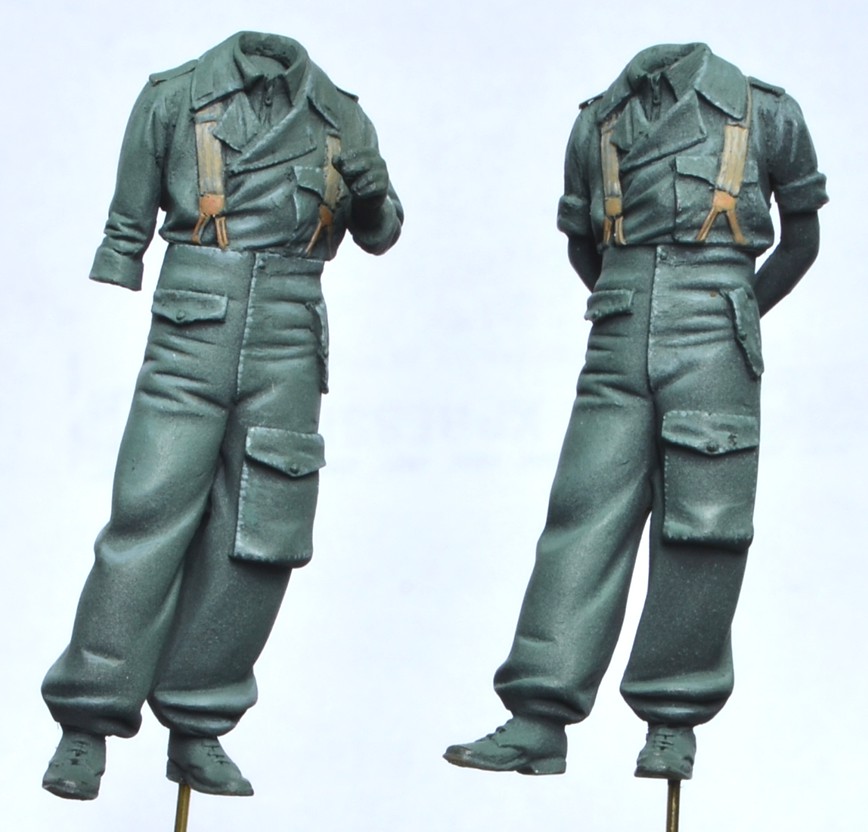
Further highlights to folds and details applied with paint brush, suspenders painted.
Decal insignia added. Some precise dark washes applied to uniform details and equipment. Same can be done to shadow area of the folds in the cloth, but I found for the most part the initial German Grey was still holding out to good effect.
A final comparison shot of before and after application of some pigment powders to simulate dirt and dust on the uniforms:
Again, Jack, thank you for taking the time to put all of that together - wonderful work! I tried Shep’s methodology countless times, but it never yeilded anything like what you have achieved here. I’ve got final exams coming up, but I have a project waiting to hit the bench. I’m going to try out undercoating in the Panzer Grey as you have demonstrated because the resulting shadows are far more convincing to my eyes than my poor method of using washes for shading. I understand that some of the table-top wargamers use a similar approach, but they use a straight black undercoat and mist a very light coat of flat white to pick up highlights - zenithal lighting or some such label is how they describe it. I always felt that the black overexaggerated the shadows, but you seem to have hit upon a formula with good balance. Looking forward to trying this out - thanks again!
Glad to be of help. Yes, depends who’s version of ‘zenithal’ you observe on youtube. I just watched one where they had a black primer coat, followed with a blue and then a final light blue - basically what I did. Just build up slow with low pressure. Really don’t want the airbrush wide open, as the spray takes on a cone shape. That results in less control if you move down the figure on an angle.
Beautiful work, everything looks great—figures, model, et al.
I would suggest blacking out the interior with some flat black paint, Looking down into those gaping hatches and seeing “empty plastic hull” is a little strange.
Also, the “greenness” of the foliage struck me as a bit off. I would actually dust the foliage with some dust-colored airbrushing, or even some yellowish-brown. You actually should have a little bit of yellowy leaves on them if they’ve been cut and stuck to the vehicle while traveling on a dusty road.
Lastly, the uniforms are spot-on. I’ve done a fair amount of research on uniforms, and that reed-green denim uniform with the big leg pocket can be any number of weird shades of bluish-green. Your color looks totally inside of the expected color palette. [Y][:)]


