Panzer w/ Infantry dio SBS update 4/12/07

Joining Kenny in the SBS dept. of dio making. This is by no means a “this is how I build a dio and I never deviate and I know everything” thread. I’m doing it to a) keep myself motivated, honest and, b) allowing others to check me out for mistakes or hints they may have. This may be boring, but here it goes:

Starting by flipping the base over and adding cheap green felt pads from the dollar store. Keeps it steady and allows a few mm to pick up the base.

The dio will be a Pz III with infantry boarding after a potty break. Cute, eh? Russian road, autumn. Road bordered by ditches. Will add clear resin for water, not sure if this medium will burn a hole through base clear to China, but I’m spackling the ditches before celluclay. We’ll see if it holds.

Next, I stake out where the trees will be. This will save me from having to drill out the holes when the celluclay has set. It also means that eventually I will have to do detail work around the trees, since I need to plant them before the celluclay sets the toothpicks in there forever.

More to follow.

Steve

Ok, now on to the fun stuff.

I’ve got a selection of groundwork material portioned out that I know I usually pull out and have spread all over the room. This time, I will try to be more organized. They range from several different shades of static and field grass, ground up moss and lichen, some sands, fine gravel, silver birch catkin seeds, etc.

This is one of my favorite glues for heavy groundwork. Dries clear and fast! I also use tons of Woodland Scenics’ Scenic Cement. It’s the s**t.

I start by mixing celluclay, water, glue with these paints:

I add dark earth colored sand to bring it to a texture that I can easily work with.

I start with the edges of the base (just like icing a cake. A big, purplish brown, nasty cake).

By the time I lay it all around the edges, it has started to fall, slide slightly. But it has set enough to where I can “pull” it back up with a spatula, bring it up over the top edge, then come back with an old rag and clean the bottom edge at the taped off wood. This will help much later when I’m trying to remove the masking tape. At this point, the top side layer is a piece of cake (purple cake).

One of the ditches:

While wet, I sprinkle differnet shades of sand on to the celluclay according to how I will “color” the road.

It immediately goes much darker than planned, but will lighten up once the celluclay dries. Plus, I will be adding much more texture and color, so this layer of sand really only serves as a “thickener” for the next step.

More on that soon.

Steve

Keep going! Hahahaha Am enjoying and learning at the same time.

First few pictures is that just a sheet of styrfoam? Then just shaped to ditches into it?

If you’re still with me at this point, God bless ya. I promise, a model appears in this thread at some point. In fact, here’s a peek at the commander of the tank-

Let’s make a ditch, eh?

I start by laying down clumps of static grass in varying shades, no real method (like producing a charge, blowing across it- I could never get those ways to work for me). I sprinkle sand of different colors over that. I add some scenic glue with an eyedropper, and then plant taller, different shades of field grass that I have cut to a good scale size, plus some catkin seeds for fallen leaves. Since this is going to be a ditch with water, I expect the taller grass to stick up out of the water. The water will be tinted, but I want to see some of the detail below the surface. I’ve added a Russian ZIS tire to the first ditch, it should end up a little less than half way submerged.

I come back with a dental pick- another dollar store find - and pick and jab at the grasses and sand. It settles the sand just where I want it, and I ''pull" the grass up. over, blending the colors until it looks right to me.

Fiddling around with it for about 15 minutes, I got it the way I like it. I came back over it with the eyedropper with scenic cement to make it all permanent.

Here’s the second ditch, which will be at the back side of the dio. In it sits the driver’s side door from the same ill-fated ZIS, and a headlamp is at the top of the ditch.

I laid track marks from previous vehicle with a Lego wheel. Ran it back and forth a few times to suggest high traffic at some point, but not this day.

I then laid in some “rubber band” panzer tracks from an old Testors set ( that I will never build, having done a DML). Then I placed the panzer where I wanted it, here it will stay. The celluclay and the glue within it will hold it to the base just fine, as long as I don’t drop or throw it to someone.

Ok, that’s enough for the night. If you’re still here, thanks for sticking with me.

Steve

Steve,

It looks great! Thanks for sharing the info and step by step of how you are building Dio. I sure am benefiting from your photos and steps you are taking. Good luck and good building!

Looking great! The variation in groundwork reall gives it a natural look! Ill have to forage around here for some natural groundwork supplies, although everything here in vermont is jsut starting to come back to life again.

i tell you one thing it is not very often that you find someone with the patience to explain what they are doing as they are doing it.you could be a teacher.20 years ago i had the patience to sit down and explain what i was doing,came with my old job when i was a mechanized inf. assistant squad leader.but today its all kind of slipping away.no patience at all.the diorama is great so far.if i send you about 25-30 figs. could do em up like yours?perhaps you could have added verlindens poopin panzer-grenadier ha ha.one ingredient i use is sphagum moss from the garden center at big-k or wal-mart has all the little sticks and goodies and many differing textures,try it you’ll like it.i’m rambling wheres my nurse and my crayons.good luck and keep them pics coming.

Hey- thanks, guys. Detailfreak… if there’s one word that rises to the top of my all-time-favorite-words, it’s “sphagum”. I feel like I shouldn’t be allowed to say it.

kcmat- yeah that’s styro glued to a wood base with the water-based super glue. You can glue it down and go straight to work. Great for styrofoam, ceramic (as in buildings), balsa… just fantastic stuff. I formed the trenches with a styro hot wire cutter.

Steve

I’ll be moving much slower after these next couple of posts and treachery lies ahead because there are tasks to perform that I have never done before. But if all goes well, I will try to enter this one at the end of April in the Austin IPMS show. So let me know if anything is looking wrong to you. I’m so nervous I’m shaking! Oh, wait… no that’s the coffee.

Side note, I have developed a rule-of-thumb for myself when bringing a coffee mug to the work bench. Never drink coffee within:

  • 1 hour of gluing with CA

  • 2 hours of cutting with a hobby knife

  • 3 hours of figure painting

  • 1 day of painting waffenfarbe

Here’s the beast:

I laid it down to the base before I thought to do the “median” of the road. No problems, as long as noone goes crawling under the tank to inspect my groundwork. A little flinging of grass and dirt under a tank is good for a dio now and then, don’t ya think?

Continuing on with the jabbing method, I planted and blended the grasses, sand and a few pebbles, catkin seeds to make scruffy little patches.

When it looked right to me, I secured it all with the eyedropper of scenic cement. This stuff takes a little while to dry but when it does, it is clear and ultra flat.

Then I went to work for real on the road. I’ll shoot close ups of the road and get back to you. Thanks again for looking and I’d love any constructive criticism. As I’ve said, I will for the first time enter a contest.

Steve

Now for the detail in the road. At some spots, the tracks appeared to be floating above the road. Plus, the weathering on the tracks were a different shade than the road itself. I want to portray a road not quite wet, not quite dry. A drier top layer, wet underneath. This could all be pulled together with a sludgy mix of earth colored sand and pastels in sceneic cement, applied with a brush. The consistency of it, half-mixed, produces earth tone glue with a dry top layer of earth tone pastels. What I’m able to do is put wet and dry on at the same time, manipulating with the brush to get each aspect where I wanted it to go (does that make sense?).

I started by brushing at the meeting place of the tracks to the road to bury the tracks a little. Then I built up a layer parallel to the track to give the impression of a mud “wake”. Not too much…

Next, I painted the tracks where they would meet the ground with this mixture. The original weathering (a lighter shade) now becomes dried mud. I really glopped it on at the rear of the track run, using less and less as I approached the front. I still need to go in close and drybrush steel in selected areas of the track to portray the worn look. That will happen much later. The guide horns are already there. I will use this same mixture to create footprints on the tank when the infantry are intalled.

Now it was time to work on the rear, where the tracks have left their impression. Pulled out the rubber band tracks from the Testors kit again and really pressed them into the still-wet base. Then I came back with the sludge mix and layered on the “wake”. The mound of “wake” will dry slightly darker than the road itself, creating an unearthed look. It will dry slightly flat, wich is ok with me. I don’t want the mud to look too, too wet, as the tank should have been sitting there for ten-fifteen minutes whilst the riders unloaded (pun intended).

***Side note- the “punch-line” to this dio (working title- Potty Break") will most probably be the aspect that gets it kicked out of the contest… a soldier will be standing on the other side of the tank, unseen at first, whizzing on the ZIS door. His actions won’t be visable at first, but unmistakable once discovered. I may leave him off for contest sake, but I don’t know if I can comprimise my artistic integrity[(-D][(-D]

Anyhooo-

Next step was to create the litter on the side of the road, where the bits of natural debris collect.

Here’s some overall shots of how the dio is looking thus far:

The turret is not permanently attached… got some work to do on the Rommel box. It’s completion will start the next installment.

Thanks again, and fire away if you feel it…

Steve

Hey steve, looking good, but I noticed the figure is a bit shiny, maybe hit him with some dullcote or whatever yo like to use.

Thanks, Ian. Yeah, he’s a shiney one alright. He’s got about four coats of dullcoat already. Can’t get him flat enough.

Steve

Tank looks fantastic!

Hey what about some charcoal pastel for his Uniform? that might take some of the sheen off.

ssteve that is awsome and you are alot quicker than i am great job!

After a weekend trip to the Texas coast, I’m ready to tackle the harder aspects of this thing.

I started off yesterday with getting the air recognition banner in place. Before I left for Port Aransas, I continued on ( I say “continued” because this is the third panel that I’d attempted from this Archer set) with the panel by transfering it to aluminum foil.

When it set, I trimmed it to a working size.

Gave it a couple of coats from the rattler…

Left it to set while I burned in the Texas sun.

Like I mentioned, the first two attempts at getting the transfer on the storage bin (they called 'em Rommel boxes?) made it this far. However, I thought the smarter idea was to work the transfer on to a spare’s box bin, and then move it over to the real thing. This proved to be fatal twice, as they are so damn flimsey. So yesterday I said “[censored] it” and went straight to the finished storage box. The turret still wasn’t permanently attached, making this less of a nightmare. But I really wanted it on there for the color it would bring the overall dio (so many browns… so many greys[zzz]). After trying to work the folds- I noticed on several ref shots that they tucked 'em in under the bin lid- I glued it. Spot painted where it had ripped here and there, and then toned it down with a mix of Mig Euro Dust and H2O. Brushed off the excess…

Put it on the Beast…

Ok, that was the easiest of the hard parts.

Steve

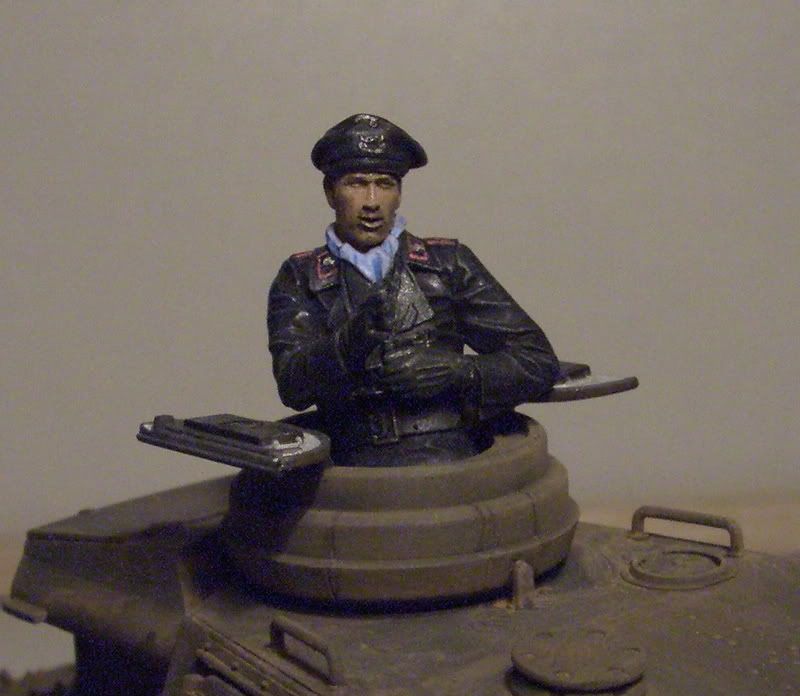
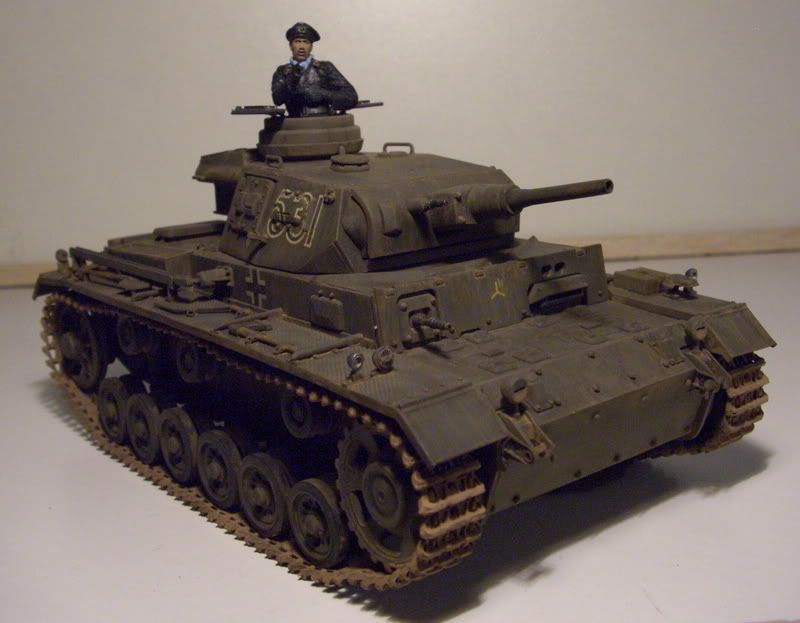
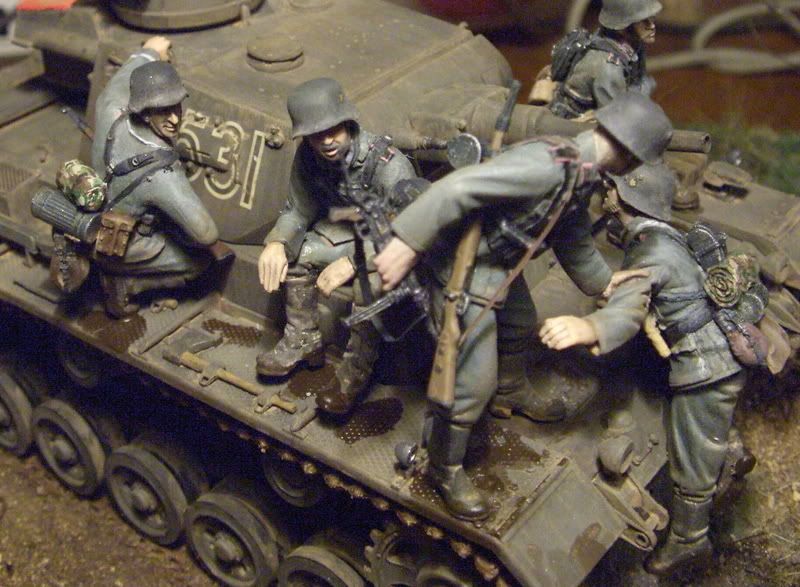
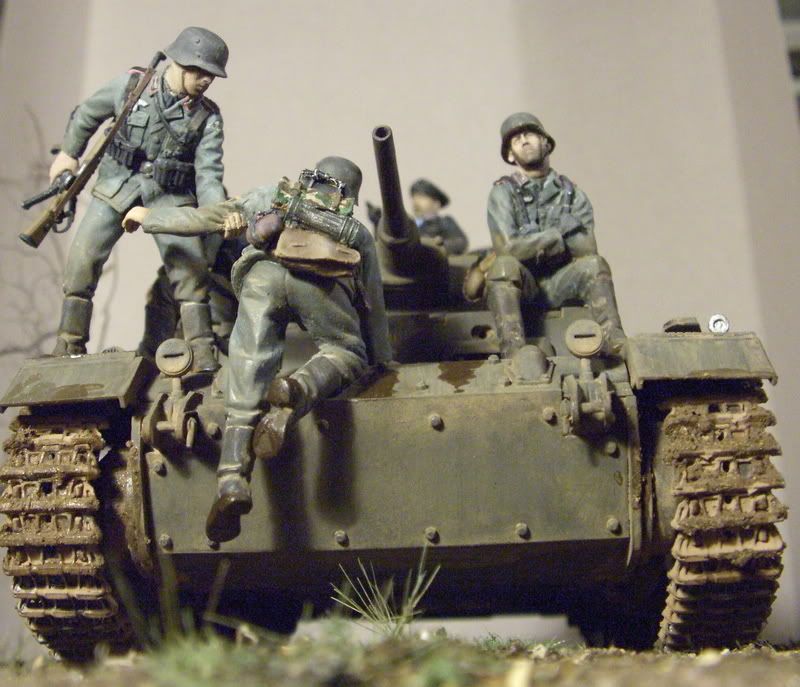
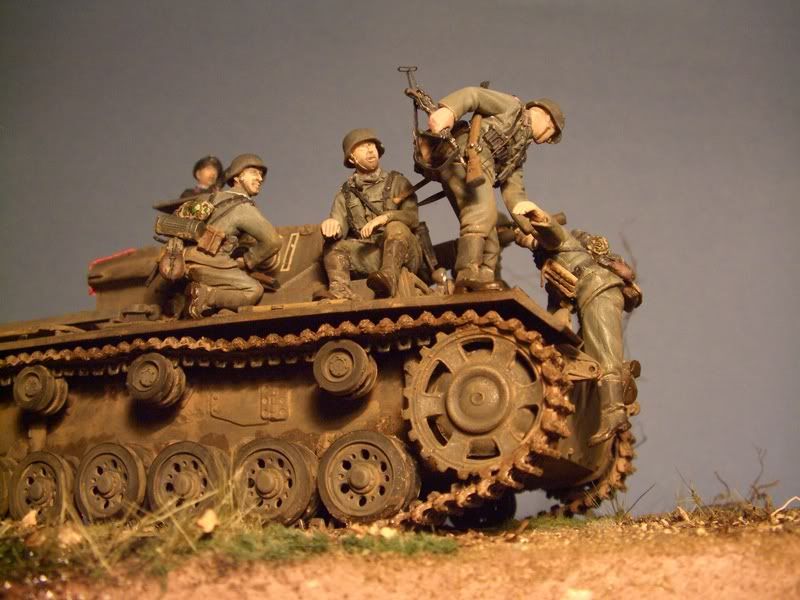
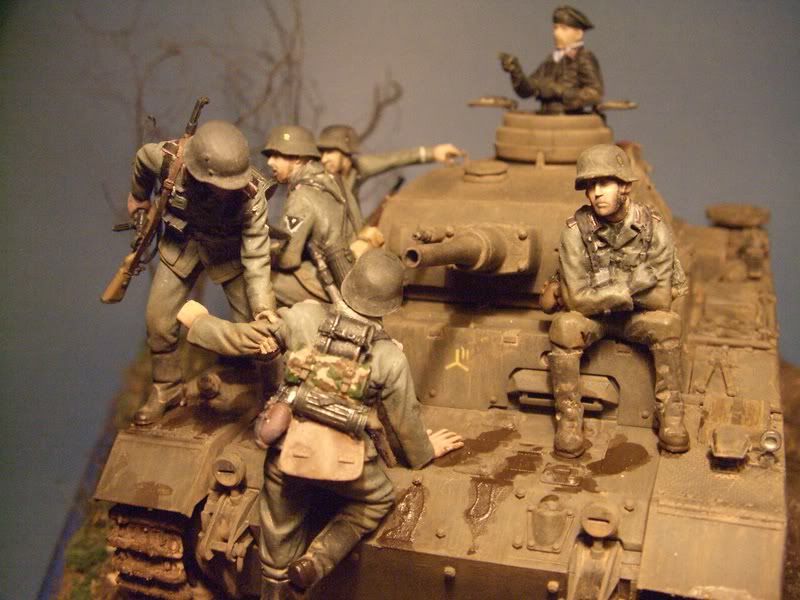
So now it’s time to attach the figures, I’ve been dreading this for two months.

The figures turned out ok; it’s my first time to paint 'em with oils. I’ll get better as I get more practice. Won’t win any competitions, but that’s not what drives me.

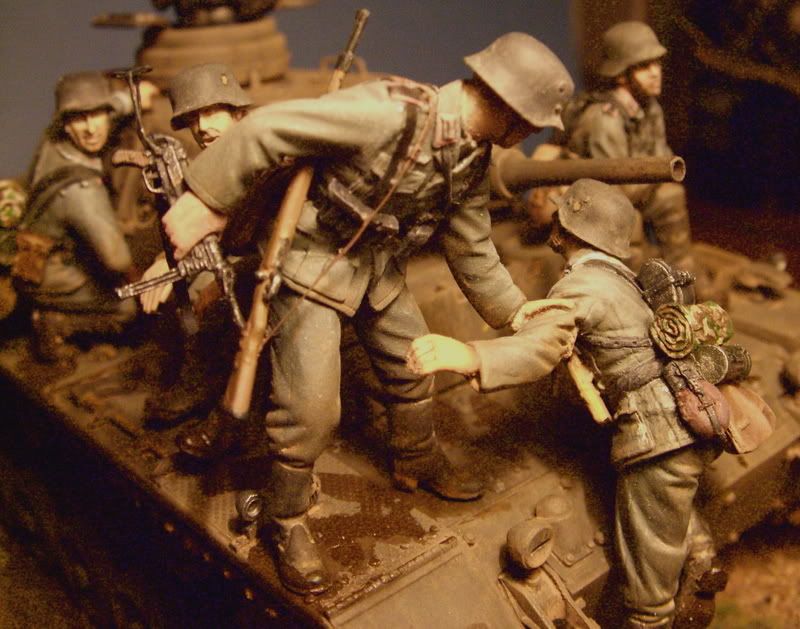
On with the first one-

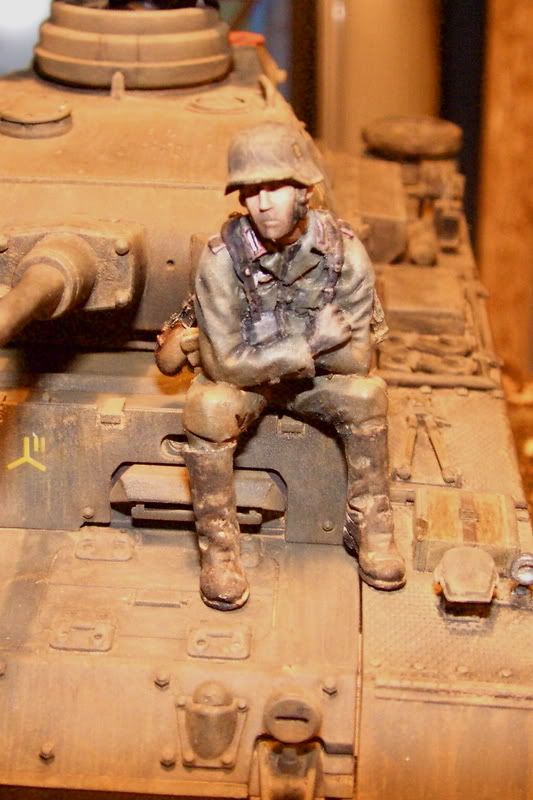
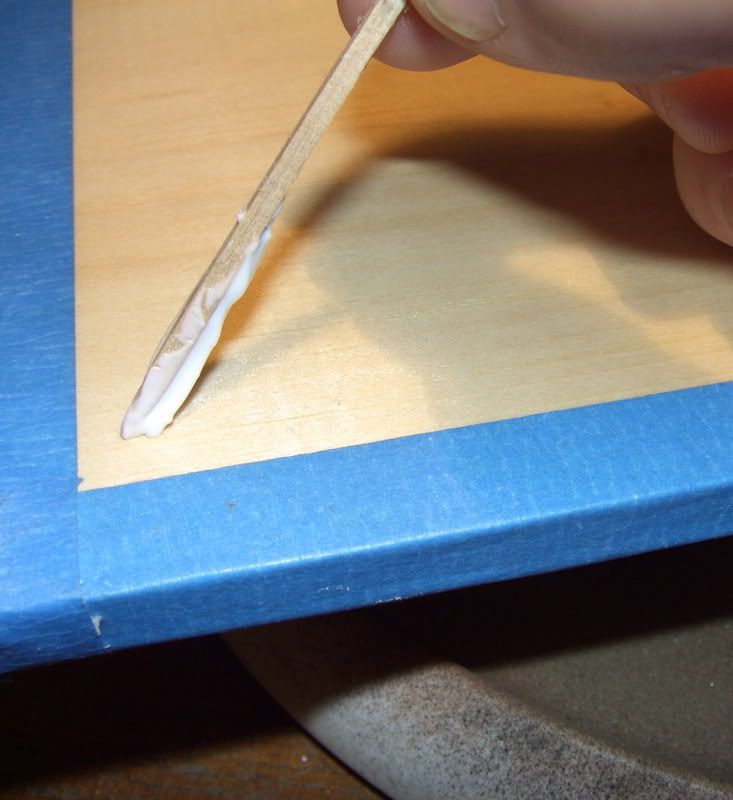
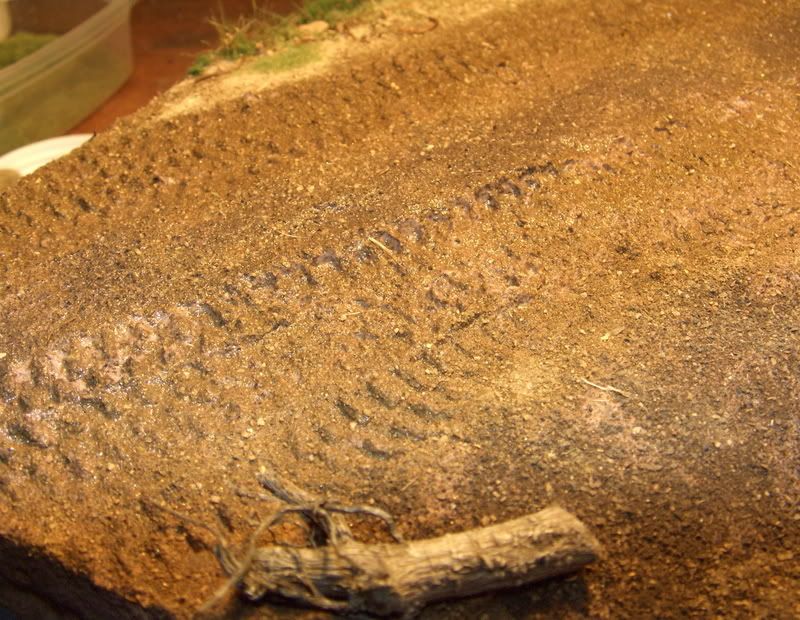
Here’s the method I am using: figs are pinned, dip pin in balck paint, place fig where final position will be, drill black dot on tank.

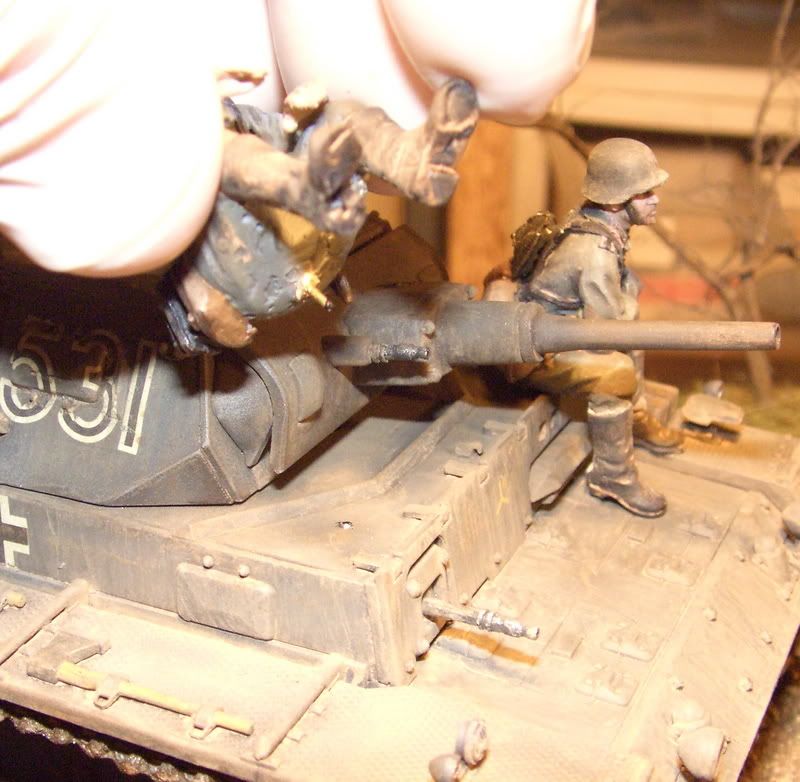
Sound simple? Not really. I knew the black dot wouldn’t really be the precise location, so I tried to guesstimate. Not the best of luck, either. Finally settled for removing the pins on the rest of the figs, CAing them and resolved to never take this dio off the shelf ever again.

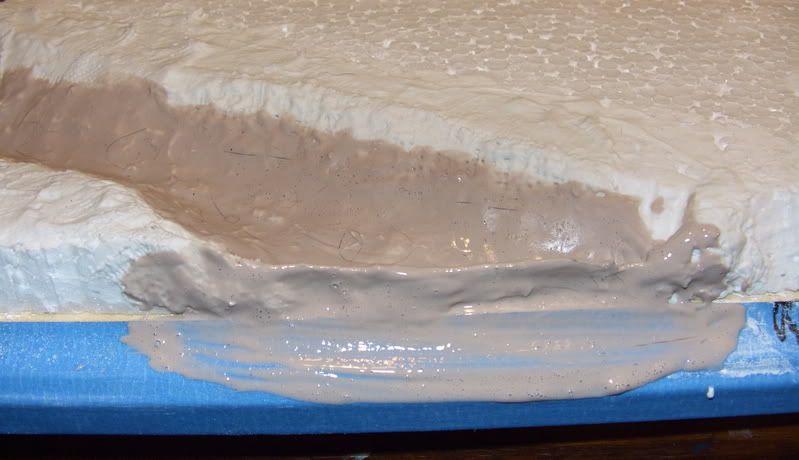
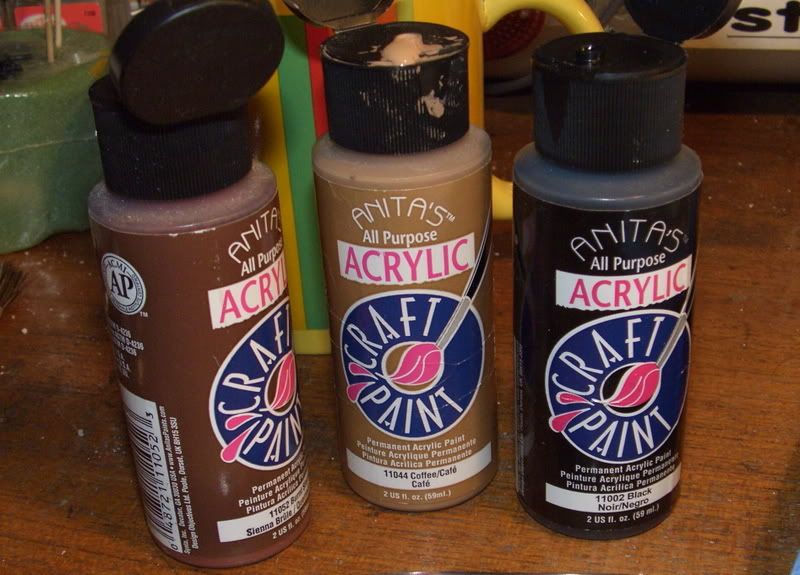
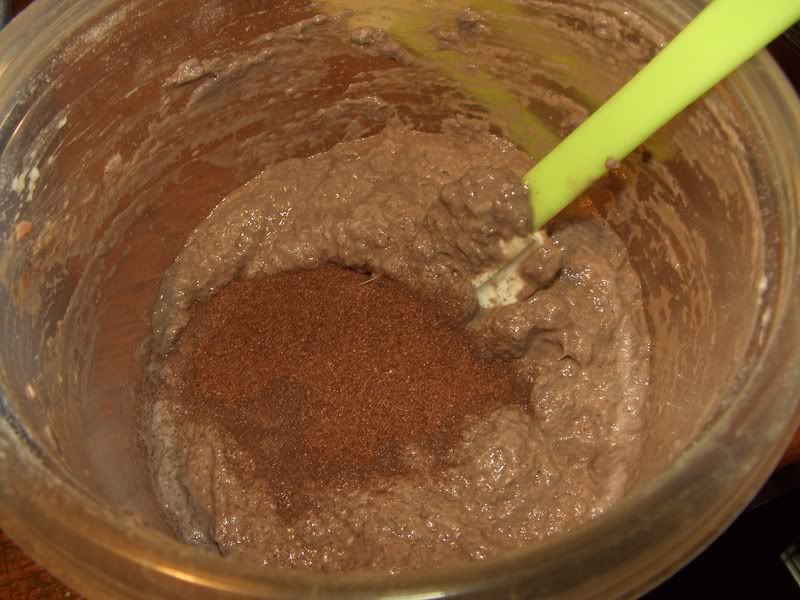
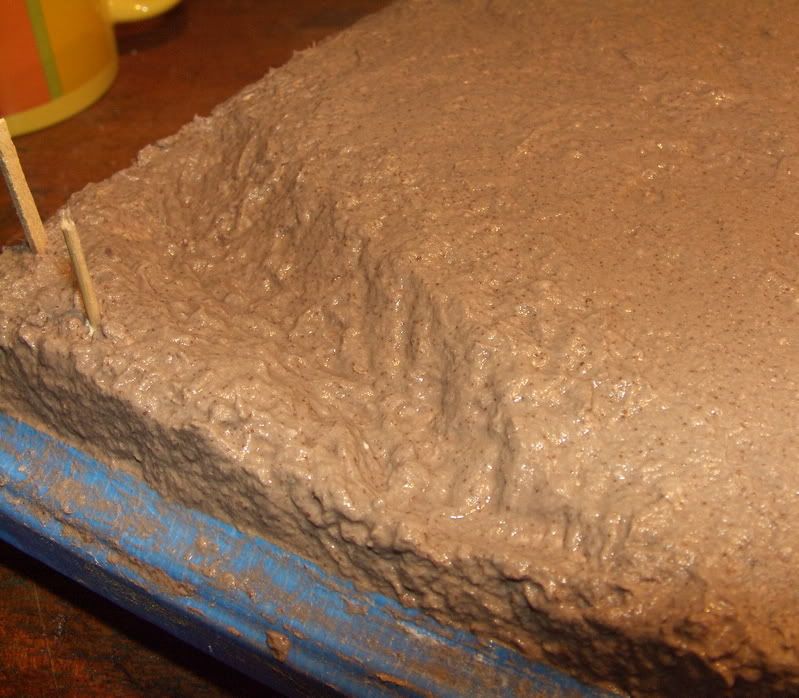
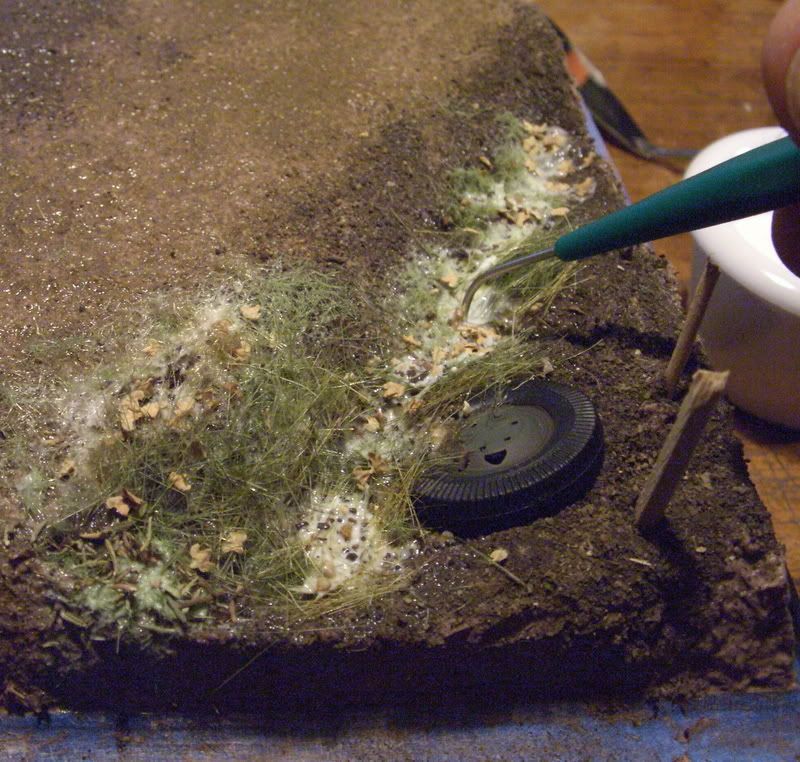
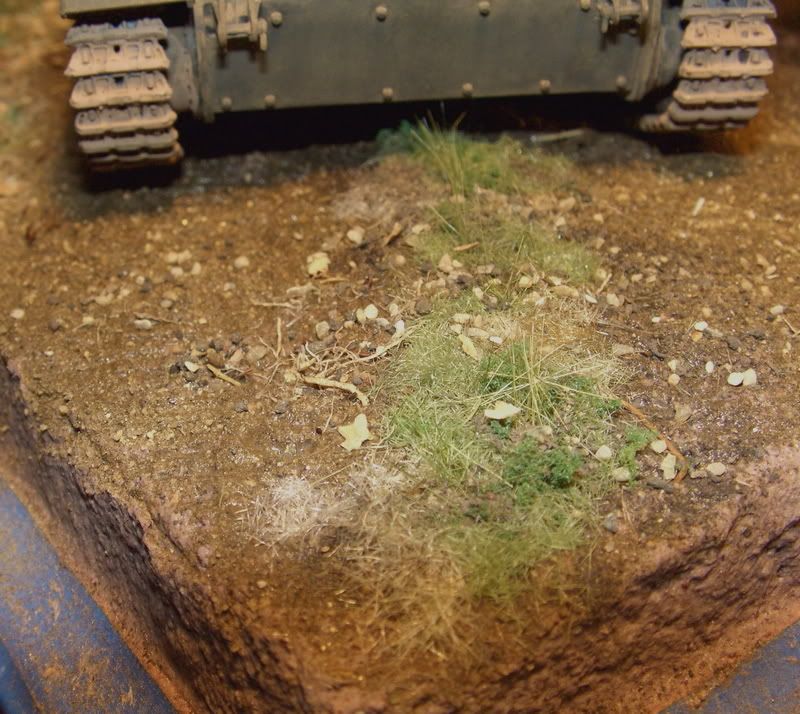
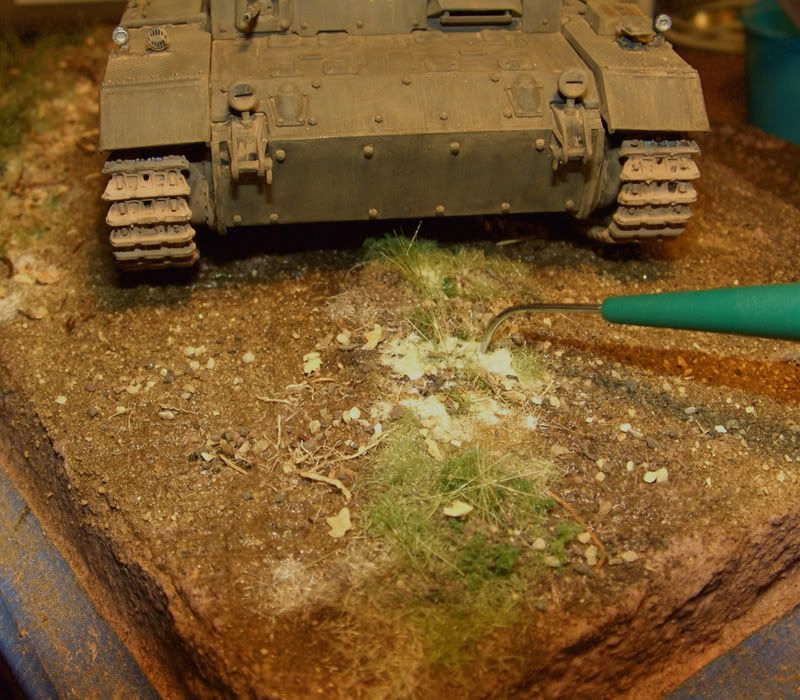
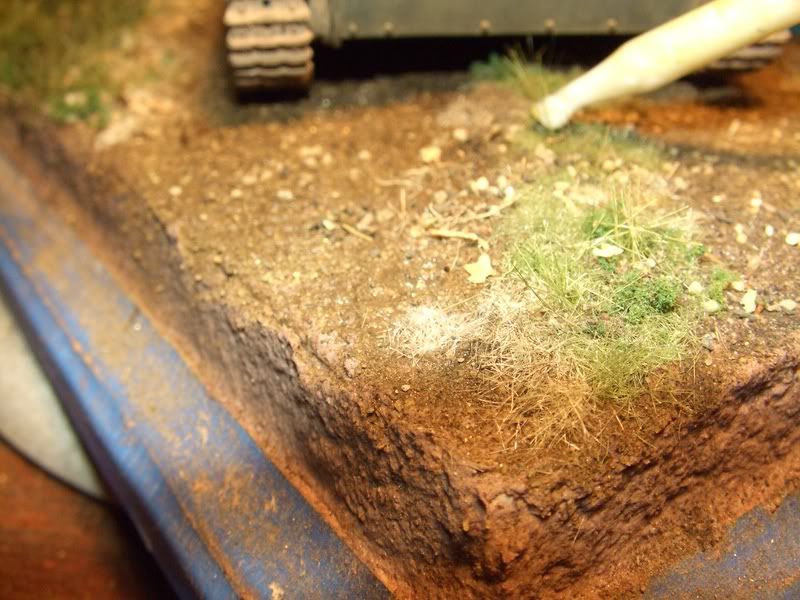
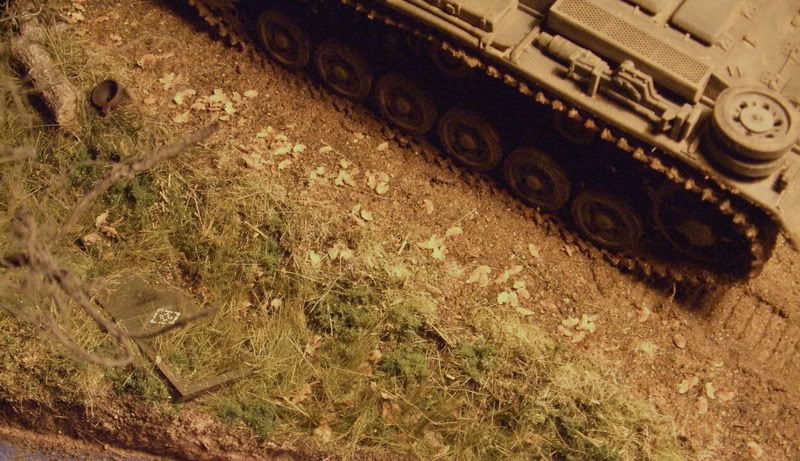
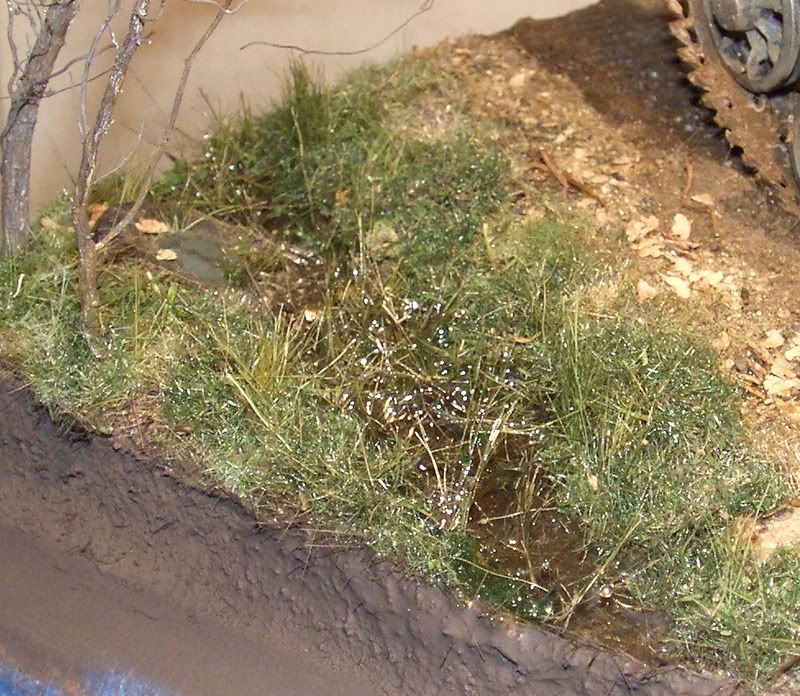
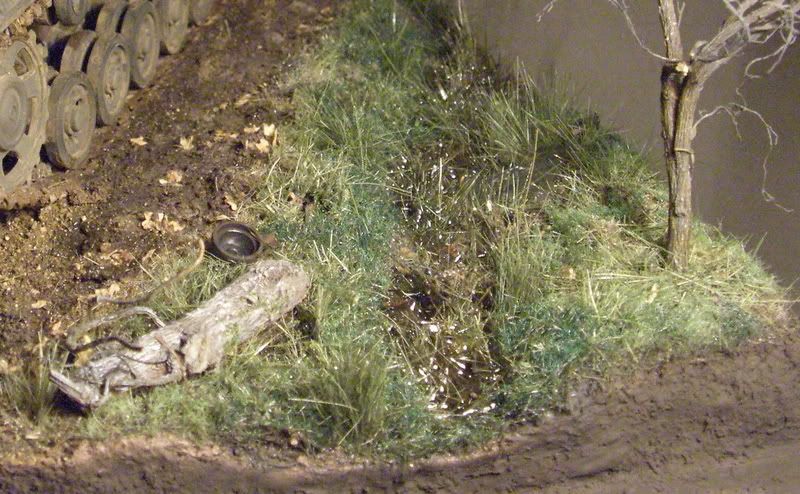
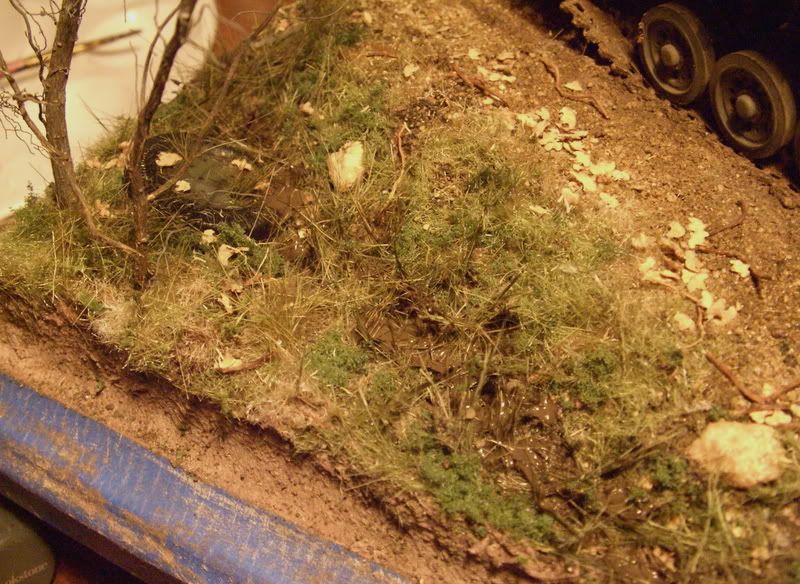
The tank and groundwork looked completely undisturbed for having been the area for a half dozen troops to relieve themselves. Mixed up another batch of sludge to work this problem out. Added a little Artist Acrylic Gloss Medium for some wetness.

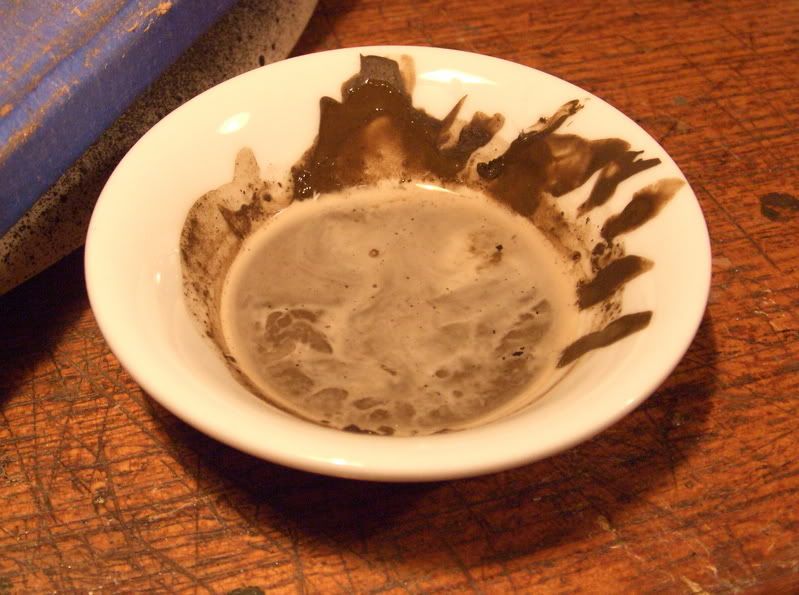
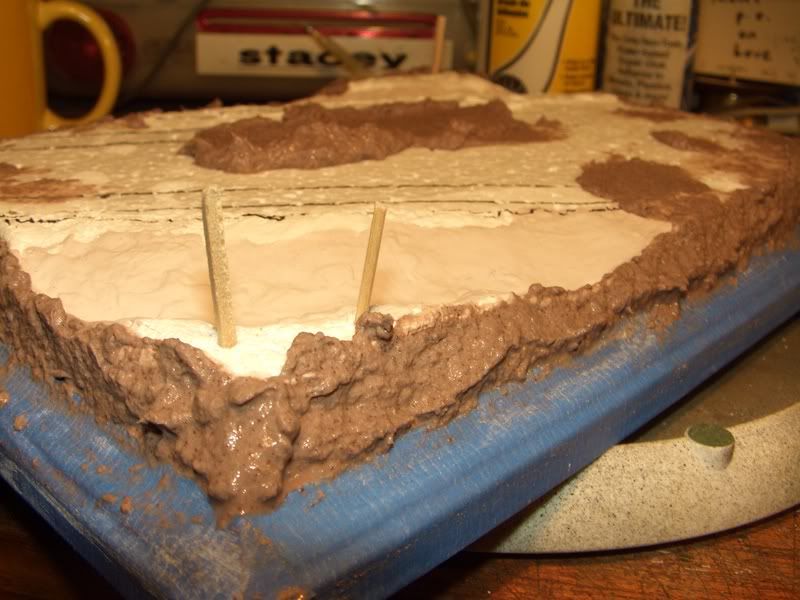
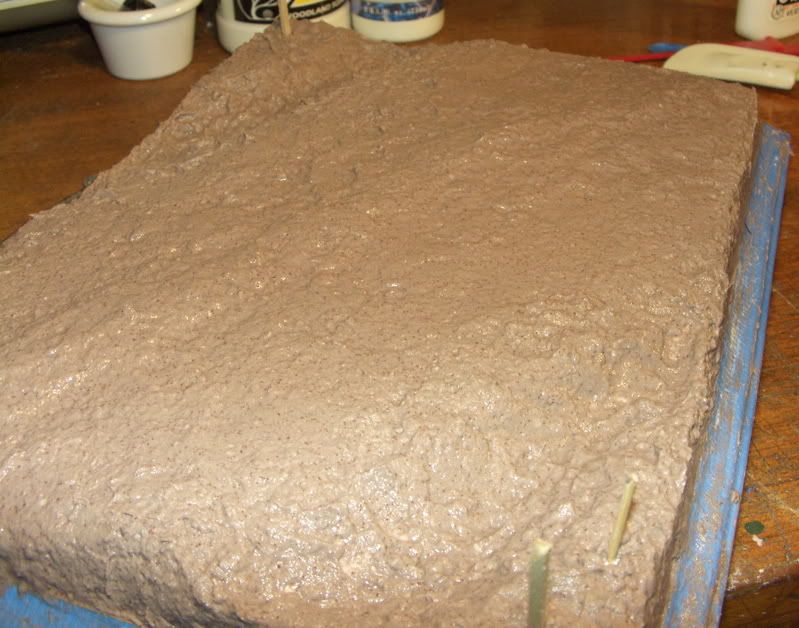
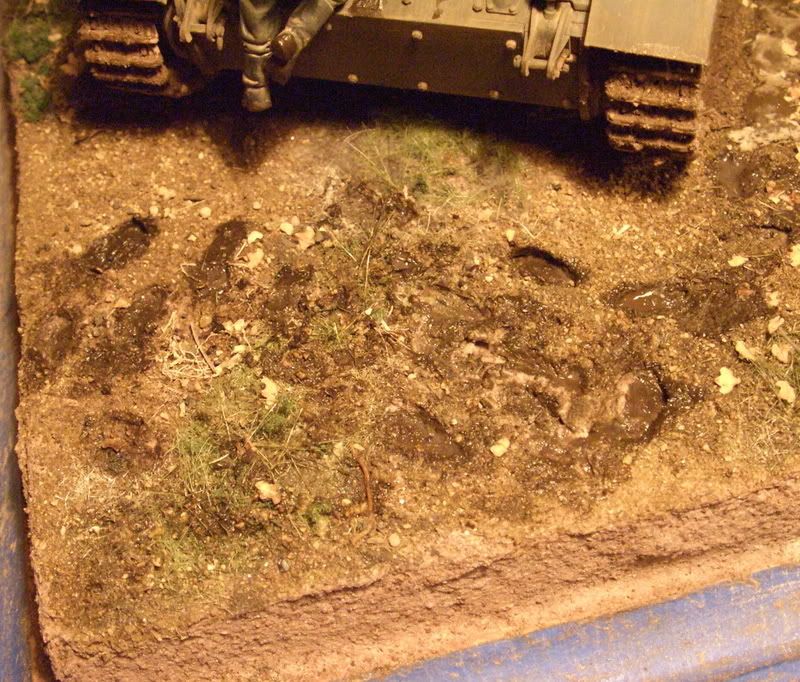
Next, I eyedropped scenic cement on to the already hardened base where the majority of the foot traffic would have occured. This will soften the base so that, in a few minutes, I can press in some footprints with an old Tamiya leg.

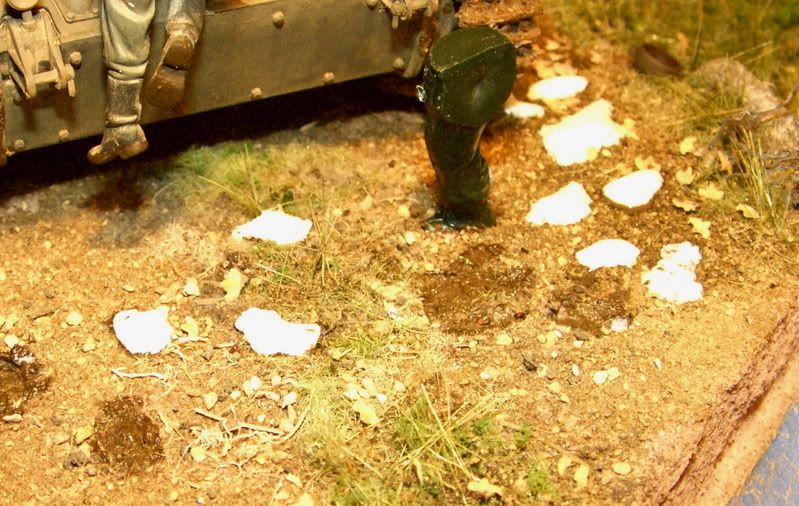
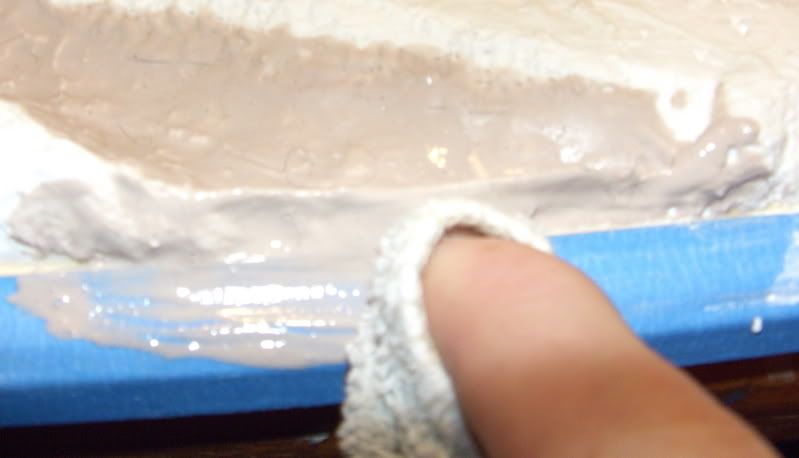
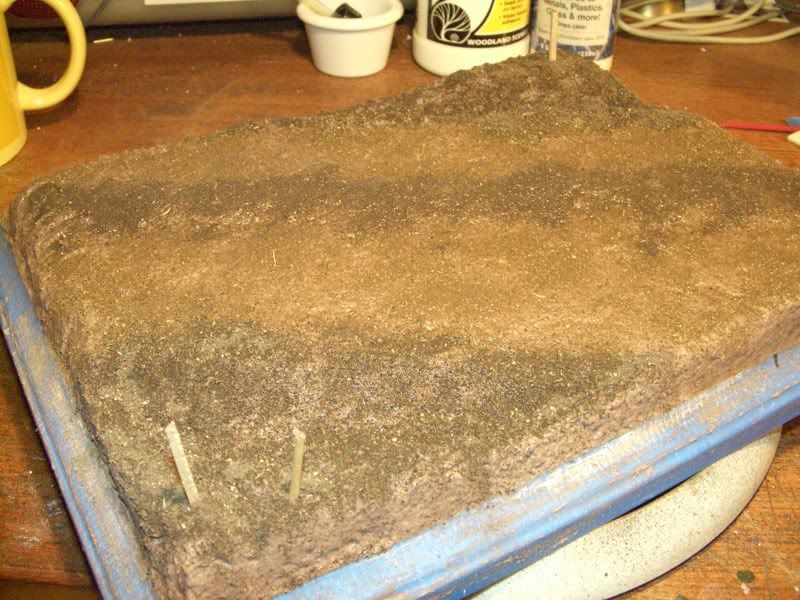
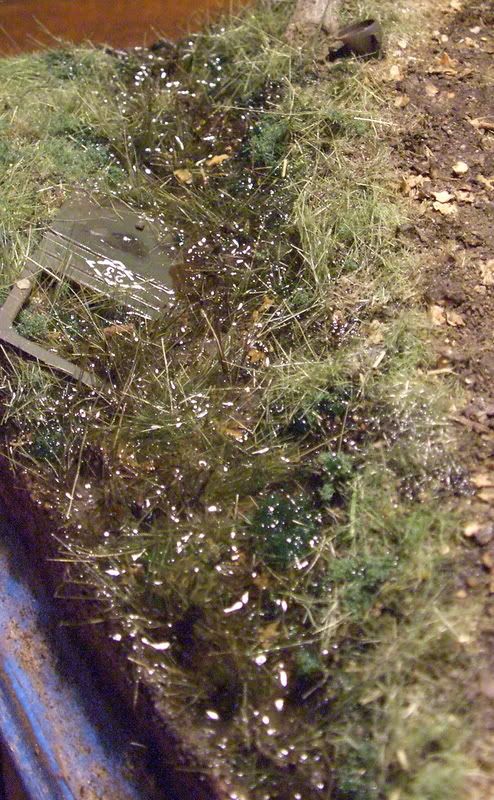
When the prints were embedded, I painted in a little shiney sludge to represent “fresh and wet” [:O]:

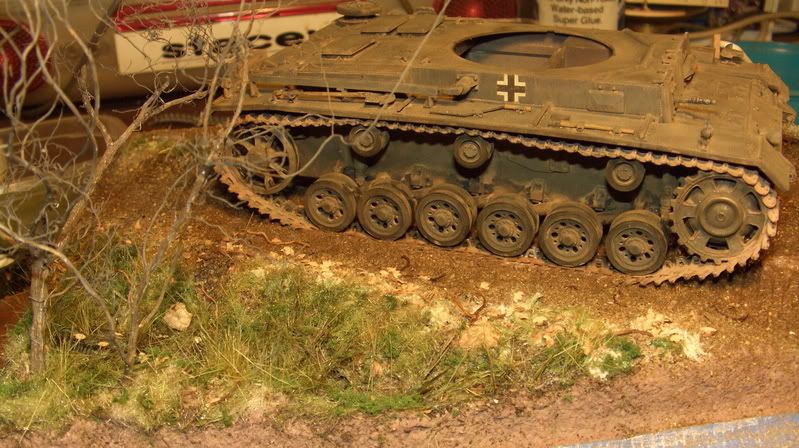
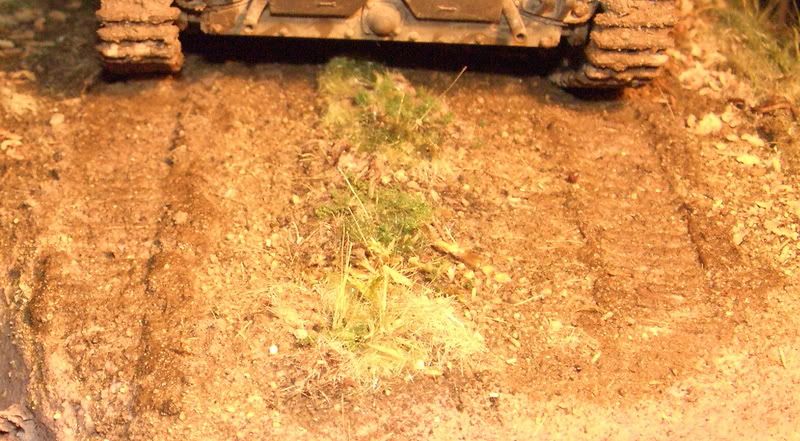
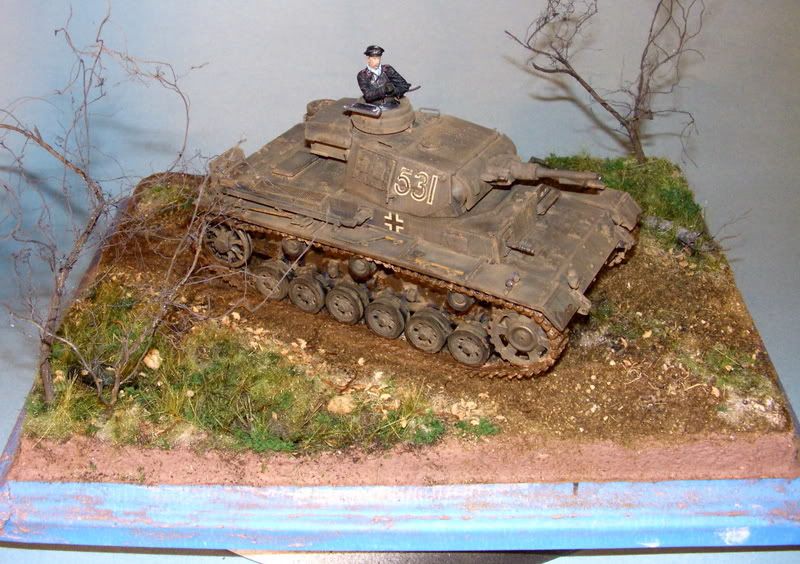
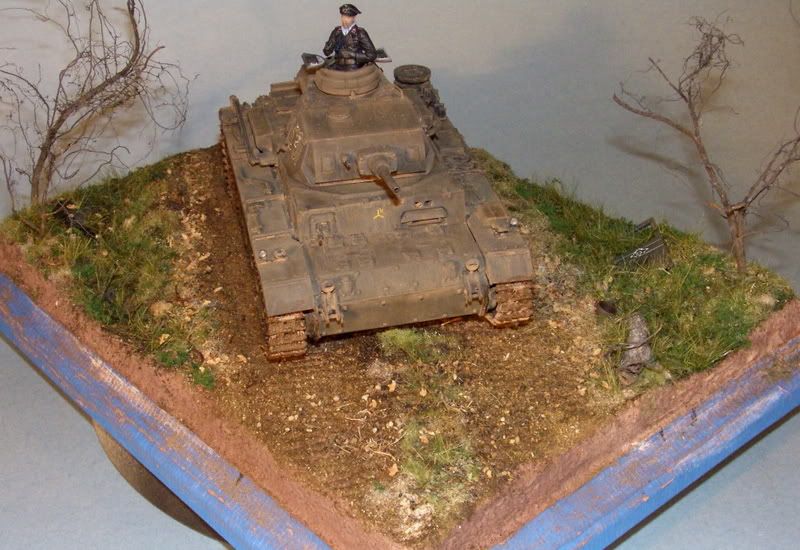
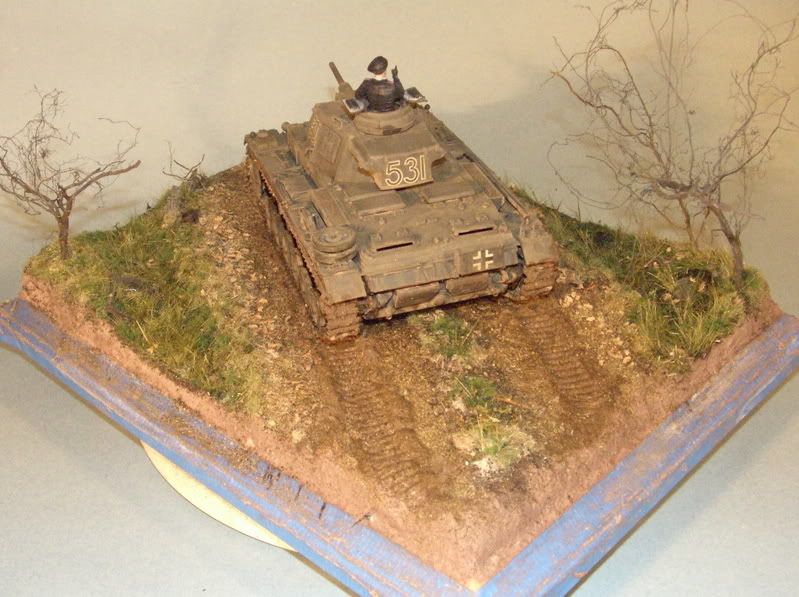
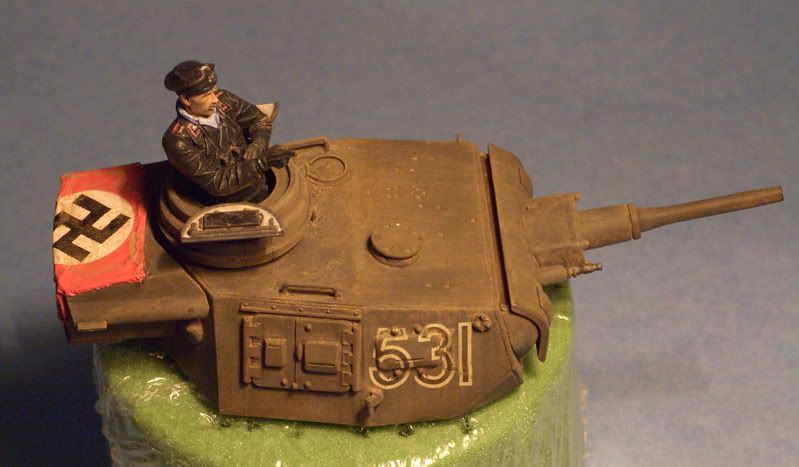
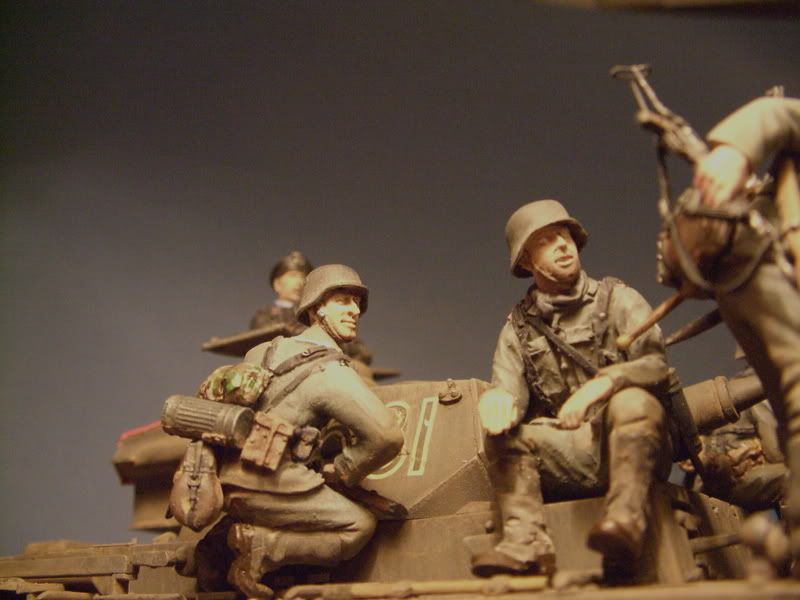
Then painted the tank…

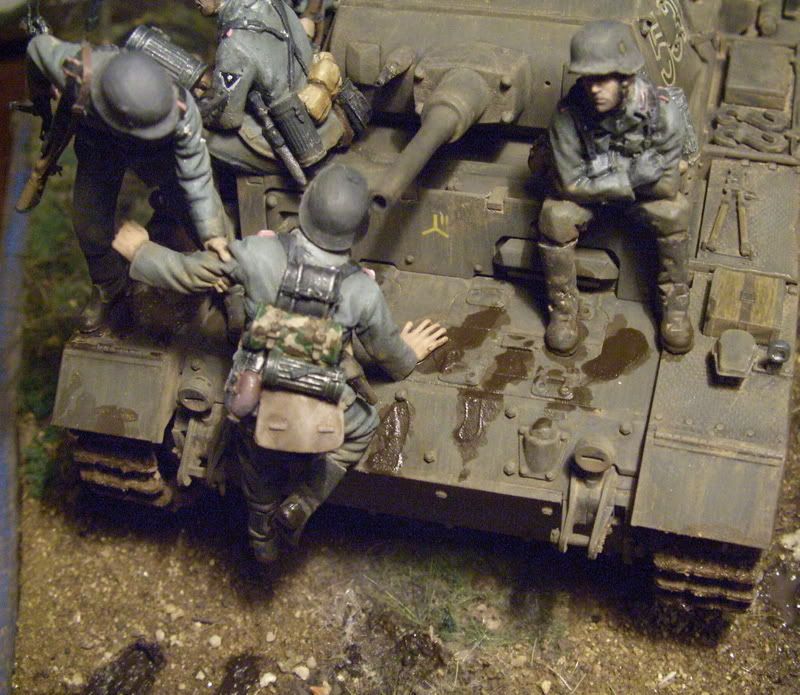
They still look too shiney and dark to me. I will try to subtle-fy later. Maybe re-dust the tank in places. I’ll take suggestions.

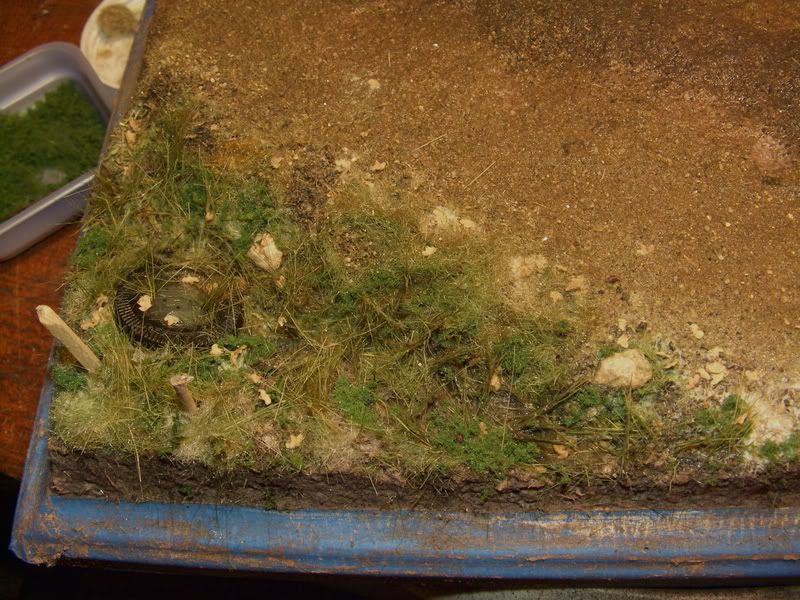
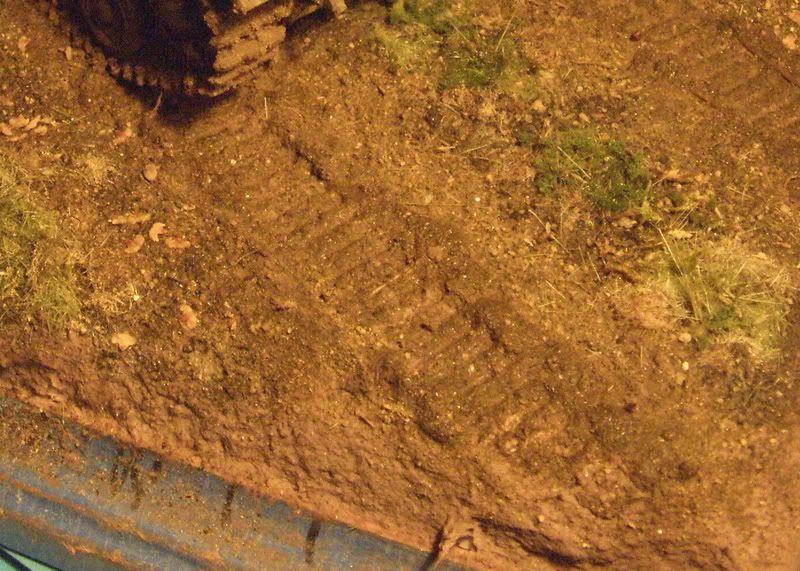
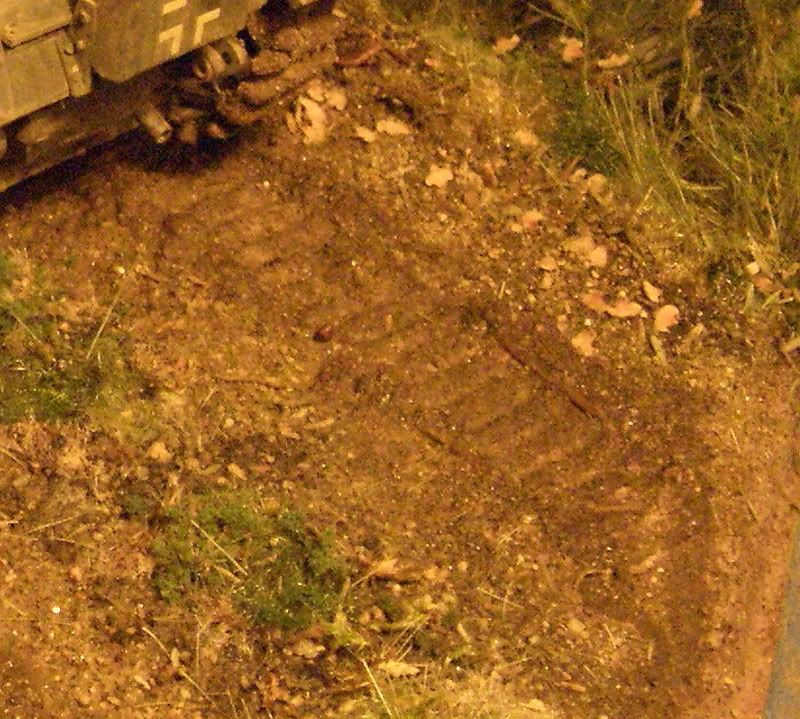
I used the remaining sludge to coat portions of the ditch that will appear as “gross, smelly silt” at the bottom.

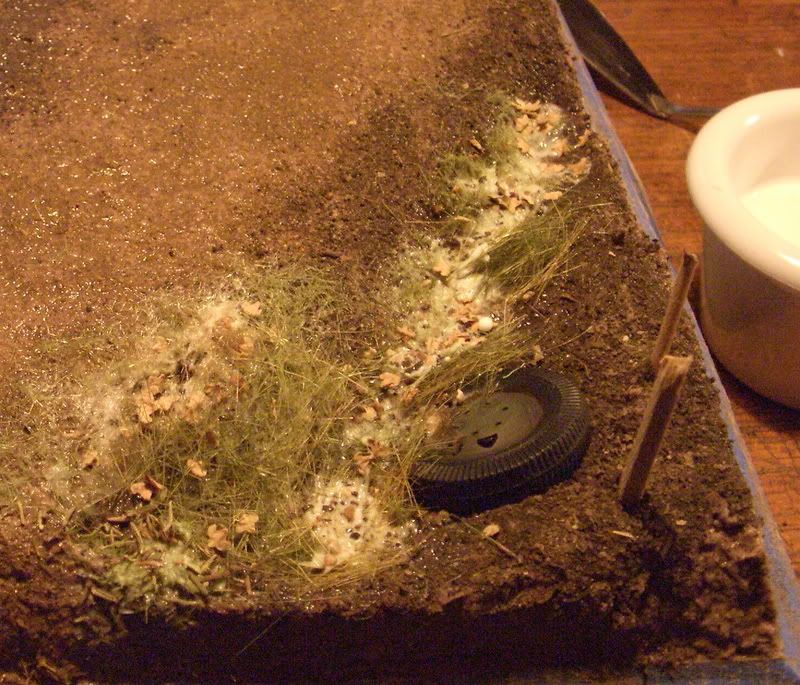
Ok, next came another first- using 2 part clear resin for water effects. Almost stuck myself to myself with this stuff. Not too dangerous, tho. I poured it into the ditch recesses and waited to see what happened next. A hole through the base? A fire? Uncontrollable meniscus? A little of the latter.

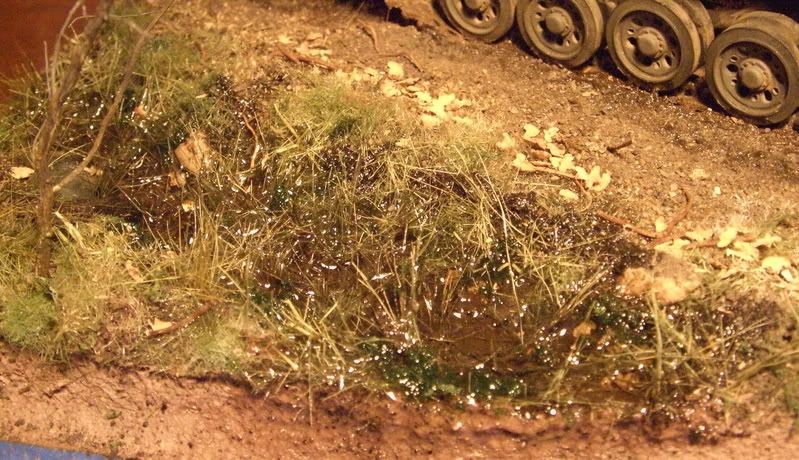
I can “fix” meniscus (a seemingly gravity-defying action by the resin that makes it appear to be “creeping up” the sides and items within it) later as well with some more grass planting and sand throwing. But I need something else to do with my life-on-vacation for the next 72 hours while I wait for it to harden. Already mowed the lawn, dishes are clean, Military Channel showing repeats. I need a side hobby.

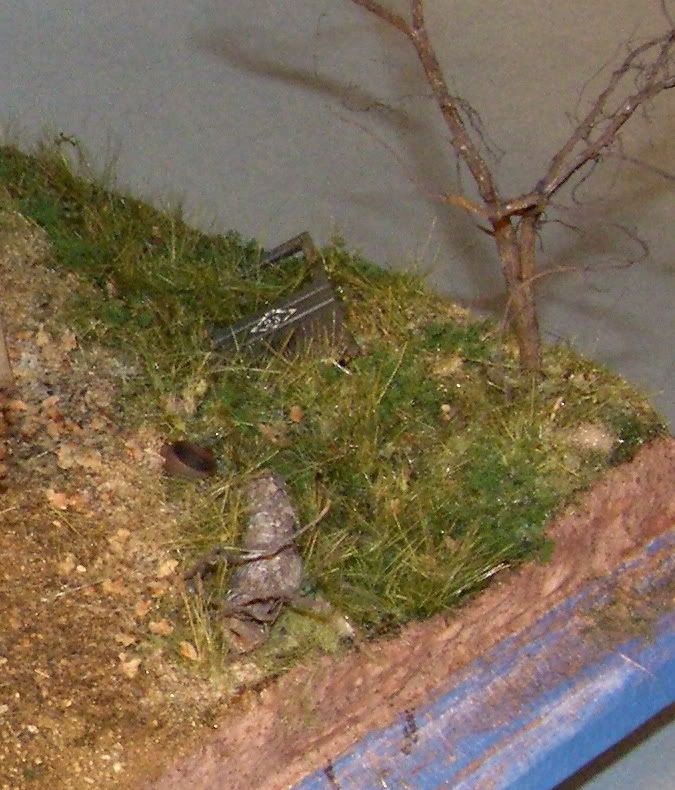
Here’s a few shots of the infantry. Like I said, lots of fine-tweaking left to do, but here is where I’m am at present…

Hope this isn’t too boring. I’m a little bored. And I heard Ian is bored.

Suggest away. I’d especially like to hear from any of you out there that judge competitions. Among other criticisms and aspects, would you disqualify a dio because within it, a man is peeing? I’ve left this figure off for now, but he is my favorite part, and best one painted. Yes, his anatomy is sculpted and painted to a certain degree of reality. All I need is a strand of blond hair. Shame on you, Hornet[:I]

Steve

I guess you heard right Steve (Grrrr. why dont m smileys work anymore!) Anyways, Looking great, those figures are looking amazing compared to some of the ones I saw by you a long time ago. I had the same problem with the meniscus of the resin a while ago too, but I wasn’t clever enough to fix it. You just remeinded me how much resin Im gonna need for that Omaha diorama you helped me out with! Ive been working on the figures, and Ill post some soon just to let you know I havent forgotten. Im kind of wishing I waited on painting up the LCM–after my last few models now that ive got my first airbrush, and using enamels, and oil washes and futuring my decals and stuff, and overall just being more serious and accurate with m models, I think I could have done a lot better of a job on it. Then again–after every model you build you feel you could ahve done better on the one before once you compare them–if that makes any sense. Maybe ill Try repainting the LCM or detailing the Lindbergh LCVP you sent. Sorry to bore you and hijack your thread, but part of my side of the deal was promsing to keep you up to date on the progress, and now that skiing’s over for the year due to lack of snow and a stubbron collar bone that decided to snap, its back to my bench–er–my dad’s bench. Keep us updated on the dio!

EDIT By the way, as far as the guy peeing, I once saw a dio of the same figure, and the guy had put a couple drops of yellow into some resin, let it dry a bit, and then dipped toothpicks in it. He stuck the dry end of the toothpicks into th side of a block of styrofoam and let it hang over the side of the table. When it dried, it was in the form of a long thin, yellowish translucent rod, kind of like heated/stretched spue. Maybe if you did this, then cut a piece, and smoehow bent it, it woulfd work for the urine.

Thanks for your step by step explanation. Your diorama turned out to be great work.

Thanks for checking in, M1. I know it’s dull reading, but its working as far as motivating myself over the humps of getting it started and seeing it through. Started another little vignette while I wait for the resin to fully cure, hope it doesn’t distract rather than compensate.

Ian, sorry to hear about your collar bone OUCH! The resin urine sounds like a great trick. My concern is whether it should be in the scene at all. I will try the method out.

I think your LCVP looks great as it is. If you start over or try another one using an airbrush, you could risk never finishing the dio. I think you should continue to bang it out. You can always do a second one- noone ever said you only get once chance at a theme.

Steve

Here’s a couple of shots of the ditches with replanted grass. Tried to fix the meniscus:

Steve