Hello I am new to modeling tanks. I just started my first tank build Rye Field Models Tiger 1 Late Production. I’m doing the Normandy 1944 version.
I have some questions on painting it.
I watched some youtube vids on this tank and some people are painting these a bit different. Like the cables, tools, and other details. Are these details painted a different color? Or is the entire thing painted with camelflage?
Would the cables be rusted.
Also any tips for painting camelflage, I’ve never done this before. I have an air brush and I’m fairly experienced with that.
My understanding of German armor is that the tools were not painted with camo from the factory. BUT, that being said there were a lot, A LOT, of field applied camo that was done by the crew and they would slopp paint on whatever they like. So, to answer you question, they could have been either way. You would have to have a good photo of the piece you are building to argue one way or the other on THAT piece of armor. You really can’t be wrong to do it either way. I prefer to paint them and leave the tools in a natural state, but that’s just me. I like the detail it gives the eye. It’s up to you.
Cables may have rust, but very very little and only is spotty bits, not overall. Most armor did not live long enough to rust up any or at all.
Camo paint is done in different ways by folks, mostly from preference. Paint the lighter colors first, then get darker from there. You can mask, use silly putty, or free hand camo. Again, it’s your call. Experiment and find what you like.
Artistic liscense,there are very few absolutes in WWII armor modeling.Just a light sheen of rust on cables,like from an overnight rain,because they were in use.Unless you are making a rusted out hulk.
Ok thanks very much for the info on this. I think I will paint the tools seperately, and put a tiny bit of rust on the cables.
Some thoughts so far about the kit. It doesn’t come with zimmerit, but has a zimmerate application tool included. Why doesn’t make sense, now I have to buy a zimmerit set on ebay.
The tracks. Oh boy I am not installing 200 peices of tracks together, way too much work. I will buy some metal assembled tracks I found on ebay.
There are a bit too many detail parts. Things like grab handles, could be modeled on making it look better then having to glue each one.
When I was at the hobby shop I saw the Tiger 1 with zimmerate by Dragon, and had assembled trucks, I should have got that one. Next build for sure.
As I understand the tanks were delivered from the factory in the mustard yellow scheme. Then the crew added the camo with an air-gun, brushes, mops, whatever they had handy. They probably didn’t remove the tools to get a nice perfect paint scheme but I too generally leave them off, paint them, and then add them.
Zimmerit isn’t that hard to make yourself. It does take some practice though. You can always get either a cheap kit or an old one to practice on. Or then again buying the PE zimmerit is an option too.
I have not build any Rye Field models, the separate grab handles look great but I agree with you- they’re just too much [cnsod] work. I’d never get them all straight.
As to the tow cables, I think you have it right there. I can’t think of any other use. Hopefully someone with more information can chip in here.
The Tiger I seen in the Normandy campaign were usually SS heavy Tank companies. Only the elite got to use these and the Tiger II.
They were delivered to the unit in a base coat, for the Normandy Campaign, this was the base coat
Using this, RAL 6003 and RAL 8017 were used as disruptive patterns and were applied in the field by the maintainance company/tank crew to suit local conditions, which is why you never see the same pattern on a tank, unless it was factory done.
Usually the tools were taken off the tank for painting to be done and nets and tree branches also used to break up the lines of vehicles to hide from roving allied tank busters.
At this moment in the modelling world RAL 7028 and its variants in chipset correct colours are rare (AK’s range is wildly out apart from one which is close enouogh to be used) and actually the closest shades which will pass when the green and chocolate brown are applied are Vallejo’s Afrika Corps colours found in their Model Air range.
being new to armour building you have certainly jumped in at the deep end. many of the new range of kits are higly detailed with high parts count. And i certainly would not recomend a Dragon kit, those can frustrate even the most experianced model builder.
As mentioned above, German armour at this period was delivered in the dark yellow, the green and re/brown were applied by the troops in the field. It would be up to them if they removed the tools or just painted over them. Personally, i like to paint the tools seperatly as this adds some variantion.
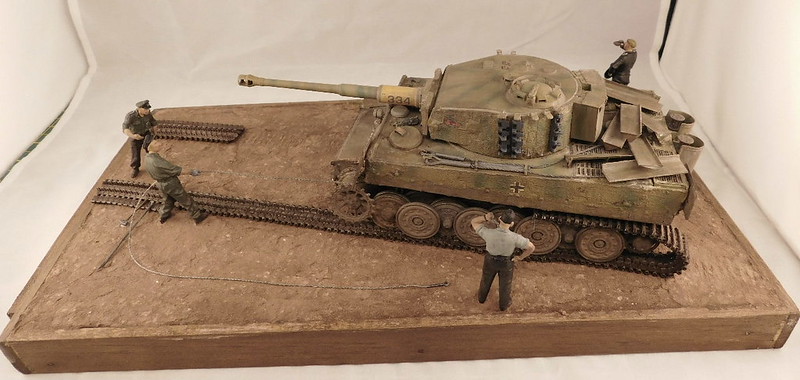
On a Tiger, there are 2 types of metal cable. The 2 thicker ones on the hull roof are for towing, though it was forbibben for a Tiger to reciver another vehilce, but of course it did happen. The longer thinner cable on the right side is used for fitting the tracks. This is a Dragon kit i finished a few weeks ago, you can see the thicker cables on the hull and the thin one in use.
The pre zimmed kits are nice and it makes it easier, but i prefer to add my own with Miliput as it looks more realistic and you can add damage as well as fit tool clamps and other items properly.
Bish and Snapdragon are the experts here on German subjects and Tojo and Brandon are fantastic modelers so if they say so it’s gotta be!
If you’re going to seal the Tiger up I wouldn’t worry about painting anything in the interior. If you’re going to stick a commander in the turret hatch you might want to paint what you can see.
I have to concer, Tamiya kits are pretty simple to assemble and look great. Academy is usually pretty good too.
In any case please post her when done, I’d love to see her!
Well Im having a problem with the wheels. The large wheel on the front with the sprocket, doesn’t even attach properly. I’m having to use some soda cans on both sides because they are floppy and loose. Dumb design.
Another complaint is the instuctions. Each step has like 100 parts and doesn’t clearly show exactly how they attach. Just shows lines/arrows from a hundred different directions. And no pics of parts should be attached, unless I look at some of the next steps.
Normally, the final drive housing is mounted flush to the sides of the hull forward of the axles for the first station of roadwheels. Most companies have a circular recess to indicate where the drive housing gets seated.
Just a heads up - the Academy Tigers use the same system.
Your drive housings are mounted incorrectly. They do NOT attach to swing arms. They should be attached to the hull sides at the very front. Here’s a shot of the real thing.
Tamiya’s design is pretty much identical in how it goes together. Academy, Rye Field, Dragon, and several other companies all do the suspensions of Tigers the exact same way. The design is almost an industry standard, so expect to see very little variation.
They all suffer from the same sorts of shortcomings as you have listed - the interleaved suspension can be a pain to line up, every company has you drill out holes to suit different build options and personal tastes, every one of them has instruction sheets that can be difficult to follow sometimes, and most require a extra little work if you want to incorporate zimmerit into the build.