Hey gang,
I’ve been trying to paint a PE instrument panel for a 1/32 X-15A-2. I tried dry brushing, to no avail. I tried base-coating with black and then painting the top color and then removing the top color to show the black - to no avail.
The raised detail is so shallow that when I dry brush it, the paint just collects on everything. And when I try the other method, all the paint just comes off, not just the top coat.
Does anyone have any solutions or suggestions? Or maybe know of someplace that carries color PE for the 1/32 Special Hobby X-15A-2?
Any help would be greatly appreciated.
Thanks,
Fred
Is this a two piece affair, outer panel that covers a decal applied to the kits panel or another PE one?
Make sure it is clean, lightly prime it then apply the final color…leave it. Apply a drop of Future to the dial faces and let it cure. If it looks as if it needs more hit them again. You probably won’t see too much of the panel through the greenhouse canopy anyway.
Hi Gerald,
It’s a PE panel that has a backing sheet with dials on it. The main IP itself, though, is just bare PE. Unfortunately, it should be some shade of light blue with black bezels and buttons.
It should look like this, when finished;
http://www.nationalmuseum.af.mil/shared/media/photodb/photos/060830-F-1234S-007.jpg
But what you get in the kit, starts out as this;
http://www.cybermodeler.com/hobby/kits/sh/images/sh_32031_parts3.jpg
The raised detail on the IP is almost not raised at all, so dry brushing doesn’t really work. There’s nothing for the paint to collect on.
-Fred
Well, I finally figured it out.
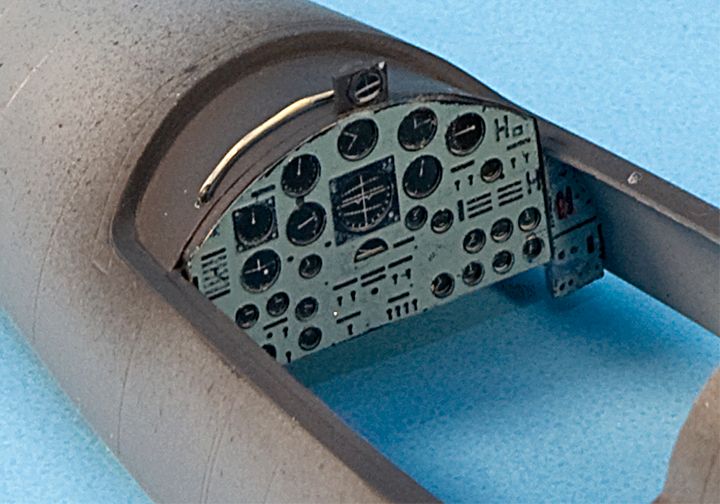
I painted the PE with the top color. Then I created a stamp, of sorts, using masking tape and a sharpie. I wrapped the tape around my finger (sticky side to my finger). Then I took the sharpie and scribbled on the front side of the tape (the part that’s over the pad of the finger) until it was good and wet with sharpie ink. The lightly rolled it over the PE. It landed only on the high points and came out great. Took 2 or 3 applications to get full coverage, but it’s done.
-Fred
Gig…thats a great idea!!! need to try that out sometime,
The other thing you can do is use enamel paint for one color than acrylic for the other so say a base coat of semi bloss black enamel…let that cure well then hit it with the light blue acrylic…gently wipe off with acrylic thinner damped cloth/wipe…this should take the blue off the guages without marring the black…light touch!!!
Carlos
Use a toothpick for a paintbrush. Very easy to control for any kind of fine raised detail. Got that from a Floyd Werner DVD. It works great.
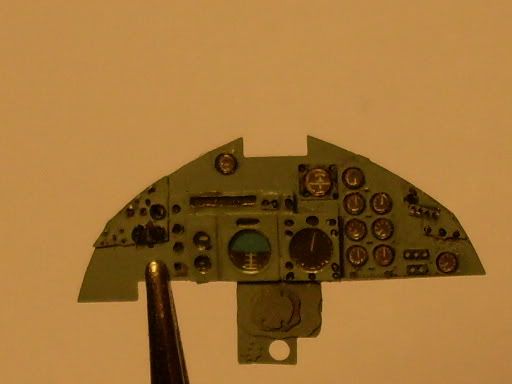
Fred glad to hear you got it fingered out. This is a shot of my PE IP for my 1/48 Buccaneer and I painted the base coat then went over the bezels and other bits with a toothpick as Tucoh mentioned.
Now that you guys mention it, I could have used a round toothpick, like a roller. Give it a little paint, then roll over the highlights.
I did think about using enamels and acrylics, but as it turned out, I didn’t have either color in enamel.
Anyway, here’s my finished piece
-Fred
You got it in the end Fred!!! That looks great!!![Y]
Just for info purposes ‘permanent ink markers’ are a vegetable oil based ink they are easily removed from surfaces with said oil ,just ask any landlord in the bad side of town how he removes graffiti!