Don Stauffer posted some pics of his heated drying box a while back, I don’t have a link to the thread, but it might be of some help. But I look forward to seeing what you come up with.
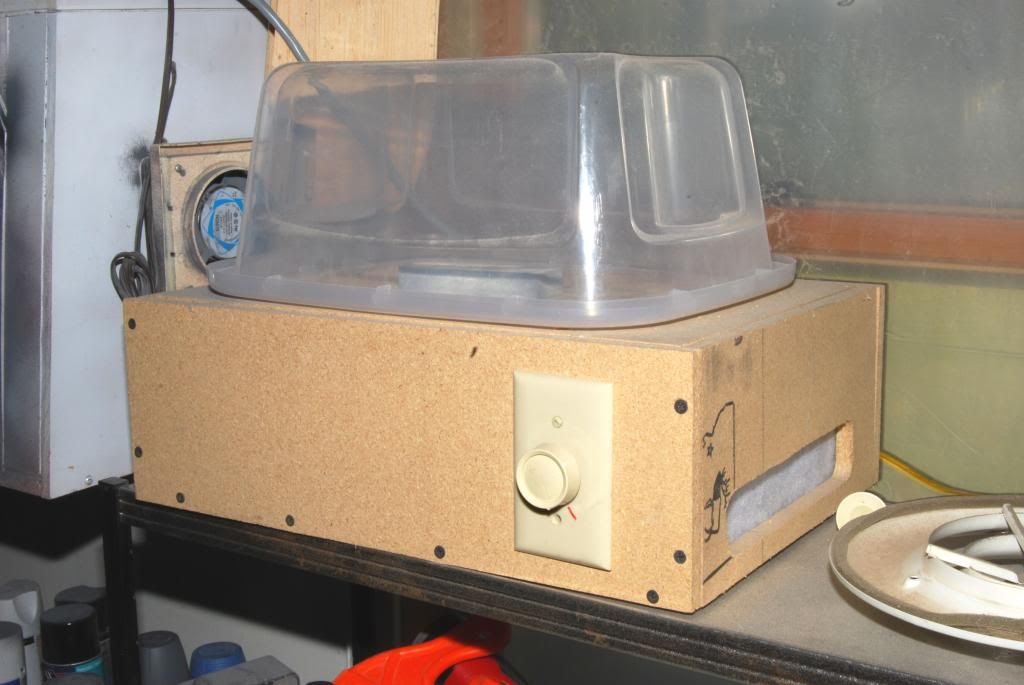
Here is a pic of my drying box. The actual chamber that holds the model or parts is one of those plastic storage containers we take our models to shows in.
Inside of the lower chamber, made from particle board, is a lamp socket and a 60W incandescent bulb. I put a lamp dimmer/switch on the box because I thought I’d need control to adjust the temperature, but it runs at a fine temperature of 105F wide open, so If I built another I would replace the dimmer with a plain switch. There are holes drilled in the top of the particle board box to allow air to flow up into the upper chamber. All holes, btw, are covered with those cloth filters that you use inside of hot air registers to keep dust out. Most of the top of the storage chamber is cut away, except for the flanges, to allow the airflow from the lower chamber. And, a hole is cut in the bottom of the storage box (now the top, since it is upside down), with a filter taped over it. All the holes allow natural convection of the heated air through the system to help dry the paint. It works great and was cheap. It will dry enamel flats in an hour or two, gloss in 6 to 12 hours, depending on thickness of coat. That is my homemade spray booth to the left of the drying box.
Thanks for posting that again Don. I really nee to make one of these. I mainly wanted something to keep the dust away while leaving kits to dry, but if I can speed up drying time as well, that’s a bonus.
If you use a more powerful bulb, say a 75 watt, the dimmer would be okay. With a 60W a dimmer isn’t needed- it runs wide open. There is a range of optimum temps- too hot and parts or assemblies may warp, not hot enough and the drying time is longer. I lucked out on the 60W, I have never warped a part but the drying time is quite short.
Being as how my work area is not air conditioned, I do this. I take my wet painted pieces, if they are small enough and put them in a Wal-Mart rotissierie chicken container .Well washed, I might add . I then put them on the highest shelf in the Garage.
I then let them sit there for about a day or two .This works best. Now, the big stuff gets put on top of my shelf unit behind my work area .This puts the model about three foot from the ceiling. You see, except for storage around the area, I only have about twelve square foot to call my own .So space is at a premium. Therefore a heated drying box is out of the question . Now my paint booth is collapsible and The unit hangs from the wall when Not being used. T.B.
Modelers are indeed a funny lot. Here we go choosing a hobby that demands precision and patience while at the same time giving us the possibility of hours of relaxation. So what do we do? We come up with ways to quicken up the process and then ask others how we can improve on the methods we have come up with and finish even faster! Don’t get me wrong. I admit to being a member of the group and at one time had a warped Dragon Tiger I tub that was the victim of my own quick drying attempts. I just think it’s all kind of funny in a “warped” sort of way! [;)]
I paint in a non-air conditioned " shed '…it’s rather large. I live in Florida so the heat in there has no problem drying paint . I just cover my newly painted models with a clean cardboard box and forget about em for a few days. I usually pass the drying time prepping my next build ie scraping and sanding those DANG mold lines and flash from every DANGED part…I wish the mfgs would cast cleaner models, cuz I hate days of parts prep.
I think I put more crud on my models in the pre-paint work than the mfg leaves on the parts
I leave fingerprints, glue blobs, and sanding dust all over the thing! Have to clean it up just before painting. I do hit the sprues with a coat of prime before I get very far in build, but still need to clean up all the junk I get on the model afterwards.