Hello, I did a search for paint chipping and what I got was the salt trick. I’m wondering the best way to go about paint chipping with dry brushing it on.
Another thing is what is generaly the easiest way to add exhaust stains and the gun powder residue that builds up on the wings behind the guns?
I’ve never weathered an aircraft before so I’m hoping to give it a try.
Dry brushing for paint chipping is its’ own technique. If you are familiar with drybrushing it should not be a problem to adapt whatever your method is to your aircraft. If not, go light. Use a small brush, lightly dip it in paint, then wipe it off on a rag, paper towel, or whatever until hardly any paint is coming transferred. then go the area of your model you want to weather and lightly move the brush across that area until you have achieved the look you desire. Repeat as needed. I prefer using enamels over acrylics for drybrushing because they do not dry as quickly on the brush during the process.
For soot stains you can use and airbrush, pastels, or Tamiya Weathering medium.
Here’s a few examples- a good way to develop your techniques is on an old model, before you go to a new more important project.
Airbrushed exhaust stains and machine gun soot stains. Drybrushing highlights on exhaust stacks.

Drybrushing chipping and airbrushed soot

Don’t forget that piston engines are pretty often leaking oil (old joke is you worry when they stop leaking- it means they are out of oil) use a dark wash in recessed lines on the lower surface and lave some there to blow it back in direction of airflow

Tamiya Weathering Medium soot applied with micro brush for gun and exhaust soot stains

Tamiya Weathering Medium applied with supplied applicator, Gunze custom mix oil stains thinned and applied by small paint brush.

Heavy drybrushing on propeller, Tamiya Weathering Medium applied with original applicator

For paint chips I use silver paint and use a toothpick tip for a brush. Or, I have a “silver” art pencil- using that more and more.
For exhaust stains I have used dry brush, but prefer airbrush. I mix a little bit of flat dark brown into the flat black.
IMO the larger the scale the more important it is to replicate the same process as it is on real subjects. Removal, not adding to the surface as a finish or weathering technique. It becomes obvious when someone dabs a little silver onto a camouflage scheme.
Wear and chipping is a result of removal so start with a NMF base as your primer then you have the necessary foundation to produce accurate and convincing paint wear and damage.
Several techniques can be used to remove paint to expose the metal underneath, salt, masking tape, sanding…what ever you’re most comfortable doing.


for exhaust stains I use my steel polishing powder as it makes a nice sooty stain on either NMF or paint.

Hey thanks everyone! I think I’m going to try pastels, I have some laying around. I’d try the airbrush but i’m not the effeciant with it yet, I will do some more practicing before I try it on a model.
Chipping paint I like the tooth pick as a paintbrush, I will have to do some experimenting.
I use pastels for soot/gunpowder residue…
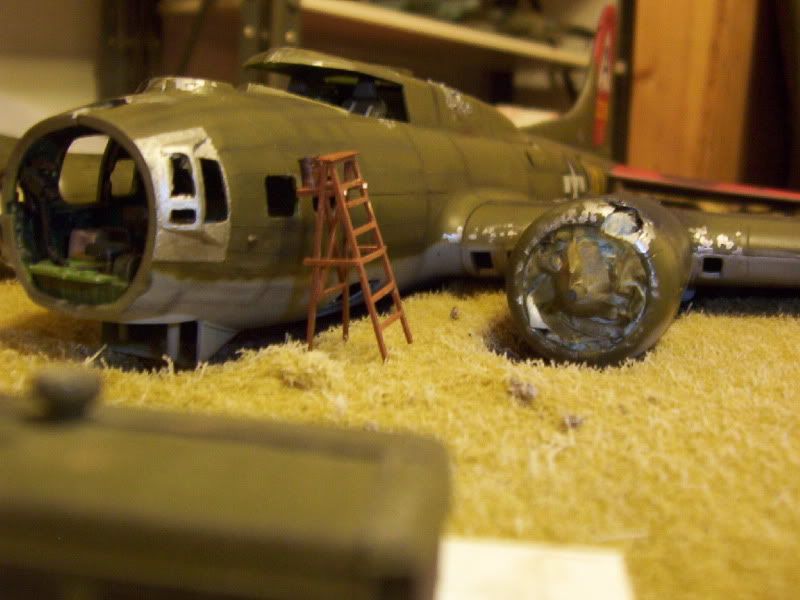
For chipping, I generally use rubber cement masking. I first paint the model with whatever color I want for the undercoat that shows through, silver, aluminum, steel, primer, earlier finish coler, whatever… In this case, aluminum…
After that paint dries, I take the rubber cement and, using a stabbing/stippling motion with the applicator brush, apply it where I want the paint chipped…
After the rubber cement dries, paint as usual… Then when the color-coat is dry, I rub off the rubber cement, reaveling the base material under it…
Here’s the result on my B-17:
And my Marder, showing the “original” Panzergrau under the Dunkelgelb:
!(http://img.photobucket.com/albums/v233/HansvonHammer/Screenshots/Models/Tamiya Marder III/TamiyaMarderIII005.jpg?t=1267551657)
!(http://img.photobucket.com/albums/v233/HansvonHammer/Screenshots/Models/Tamiya Marder III/TamiyaMarderIII004.jpg?t=1267551721)