PAGE 5-FINISHED PICS! The "MIG-nificent" DML King Tiger!

Hi Guys,

Wel, it’s been a busy few weeks here, but I’ve been plodding along on the ol’ DML Pre-Zimmeritted King Tiger, andhere’s the ready-for-paint shots, along with a review of my impressions of the kit. My opinion is mixed, to say the least!

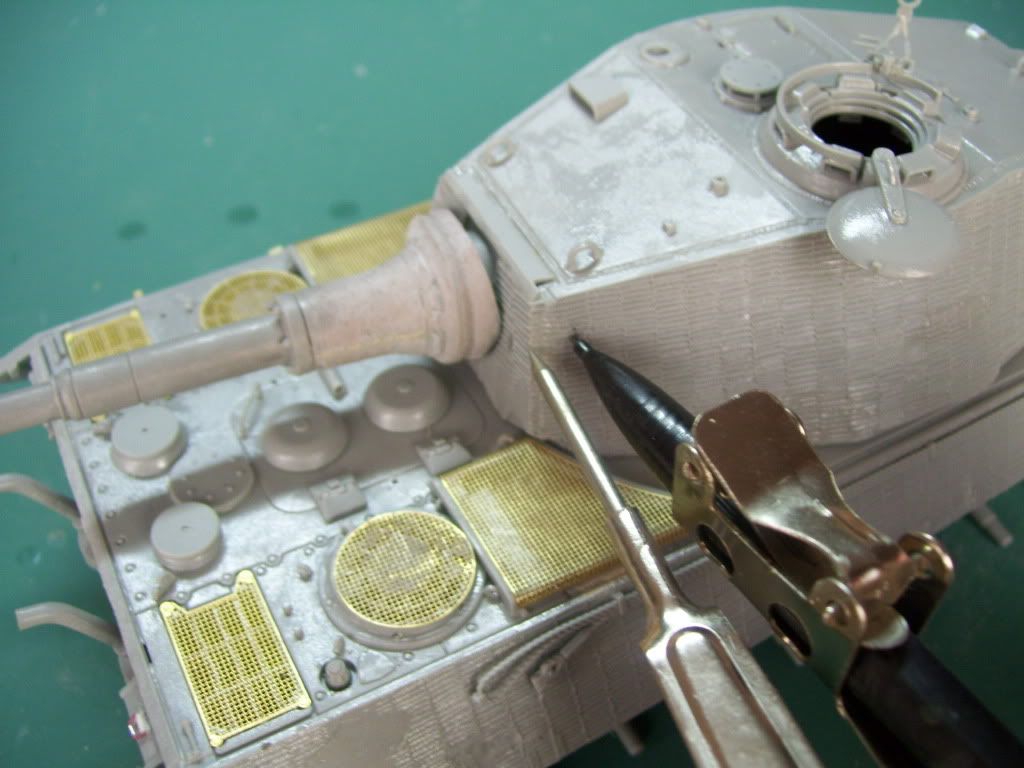
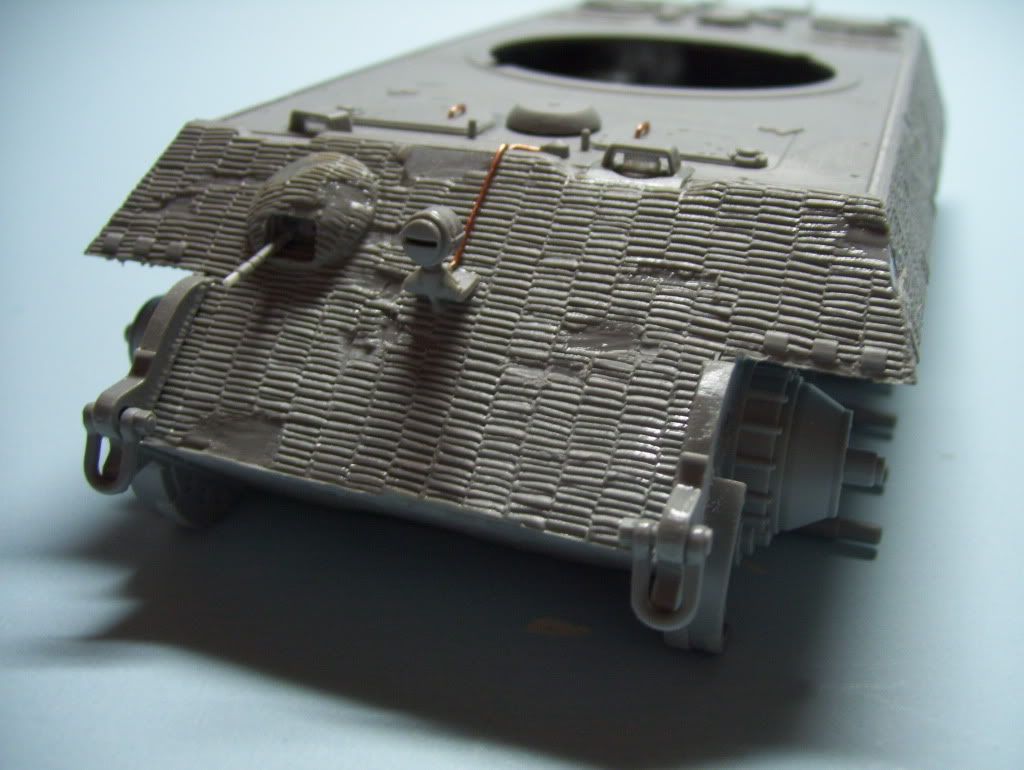
First, picking up from the original post, here’s the shot of the front hull, which shows that you can indeed “chip” and damage the zimmerit. I’ll show how I did this in a minute.
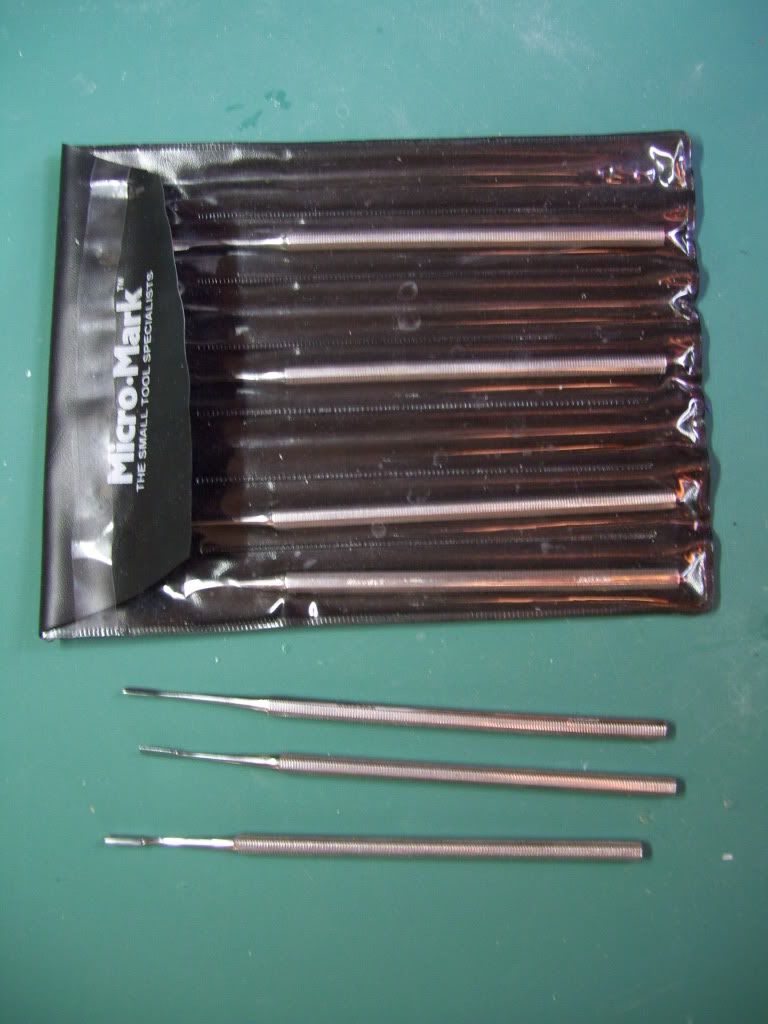
Here’s the mini-chisel set from Micromark. A VERY handy set of tools!
Just a sample of Ye Holy Tools of Zimmerit of Destruction.(sound of angelic choirs in background)
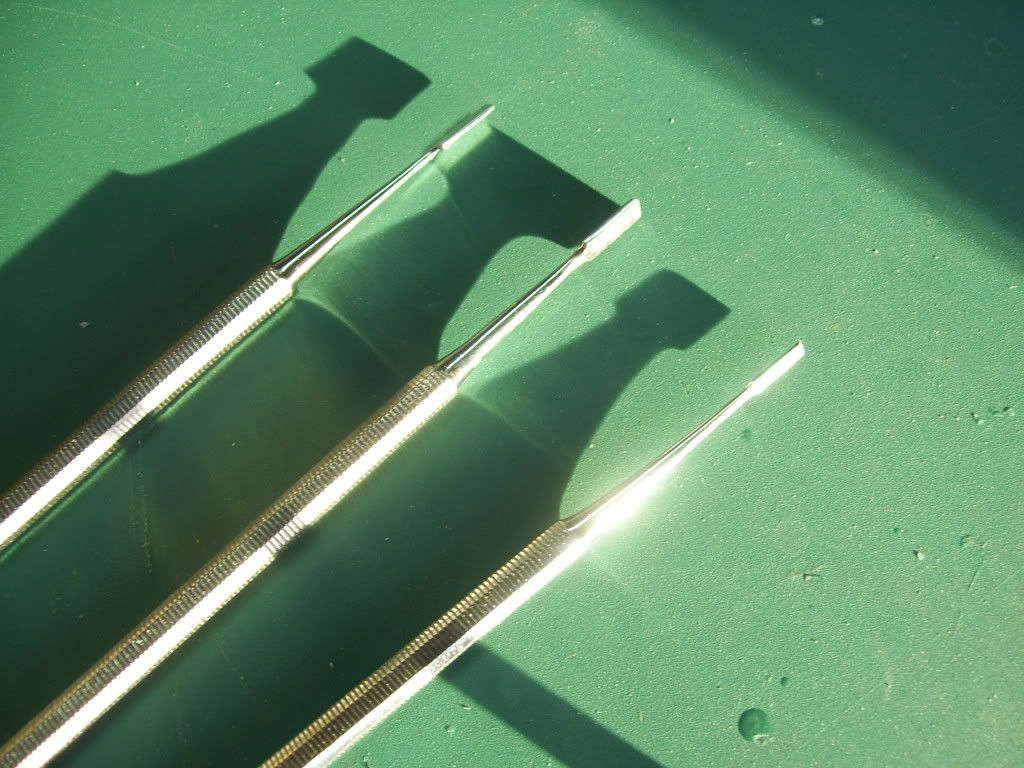
First shalt thou take out the Holy Chisel. Then, shalt thou count to three. No more. No less. Three shalt be the number thou shalt count, and the number of the counting shall be three. Four shalt thou not count, nor either count thou two, excepting that thou then proceed to three. Five is right out. Once the number three, being the third number, be reached, then, wield thou Holy Chisel towards thy hull, which, being naughty in My sight, shalt be chipped.
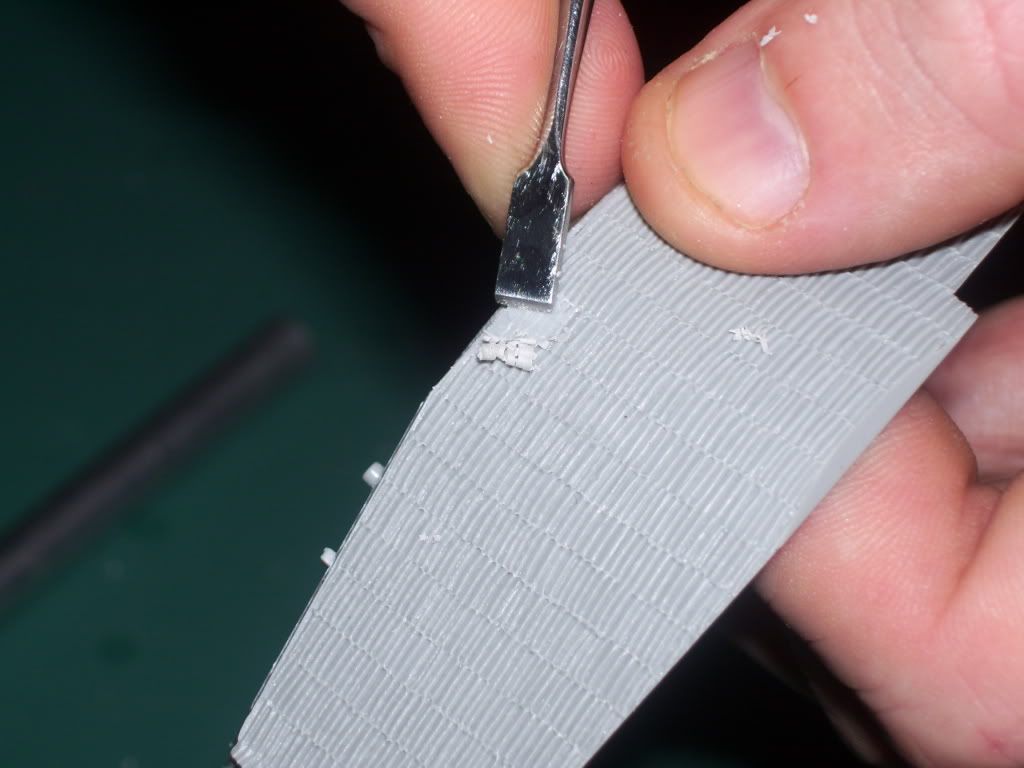
I also used the Less-Holy-but-Still-Venerable Xacto Blade of Laying-Waste to scrape less-square sections, and to smooth the chiseled portions–but only on a Thursday, and never before noon, as required by The Law.
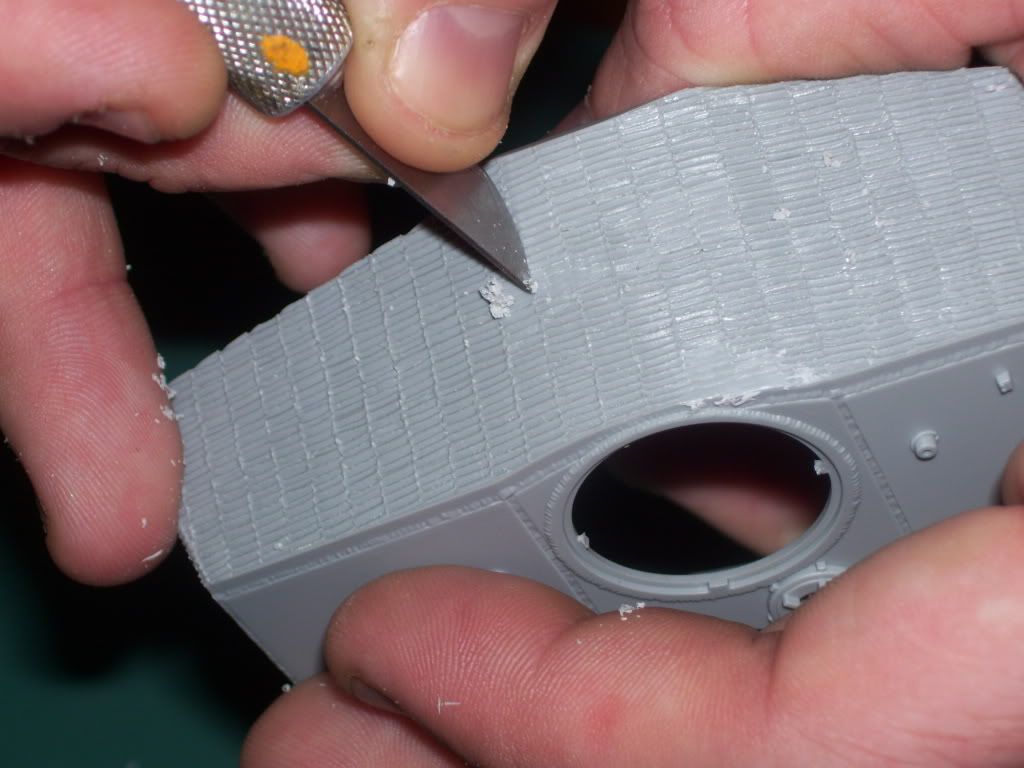
OK; things to add… (Sorry, I’m in this “Monty Python” groove today…[:)])

The weld on the mantlet–this is really very subtle. I have seen this added in much excess, looking like a major hull weld; go very subtle here. I added it with a light dabbing of Squadron’s White putty. I also roughed-up the mantlet texture with some Mr Surfacer 500.
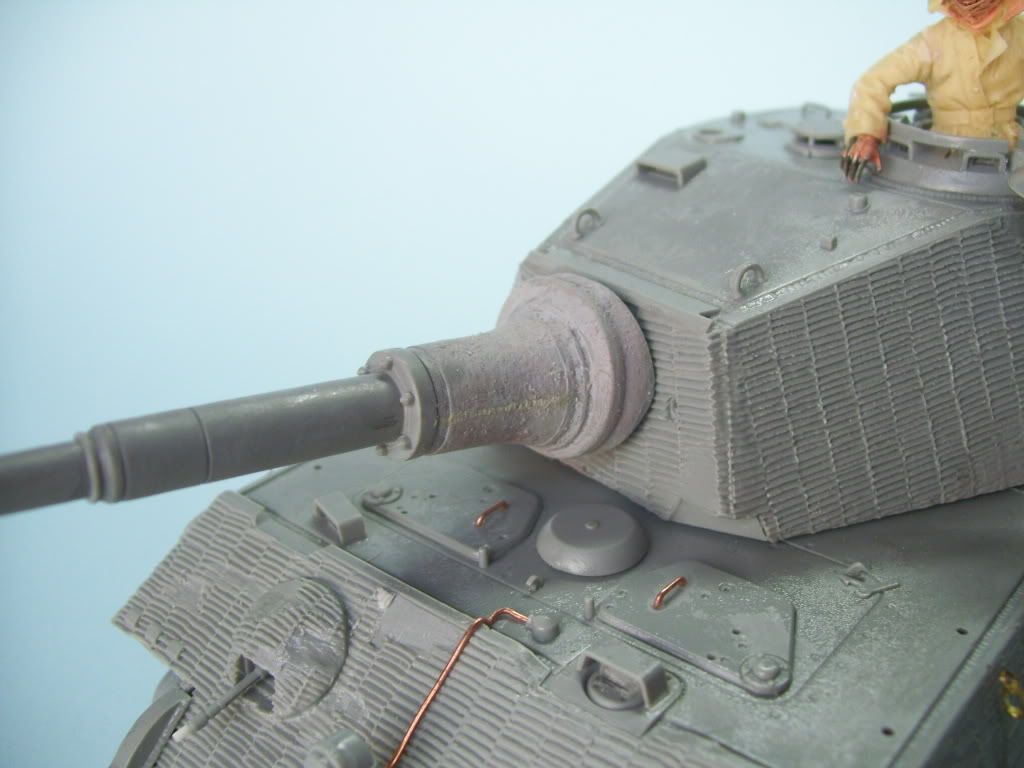
Don’t forget the lifting lugs on the rear muffler guards…I also scratched a bent fender; you can’t see it in the photo but it has all the requisite bolts detail in it…
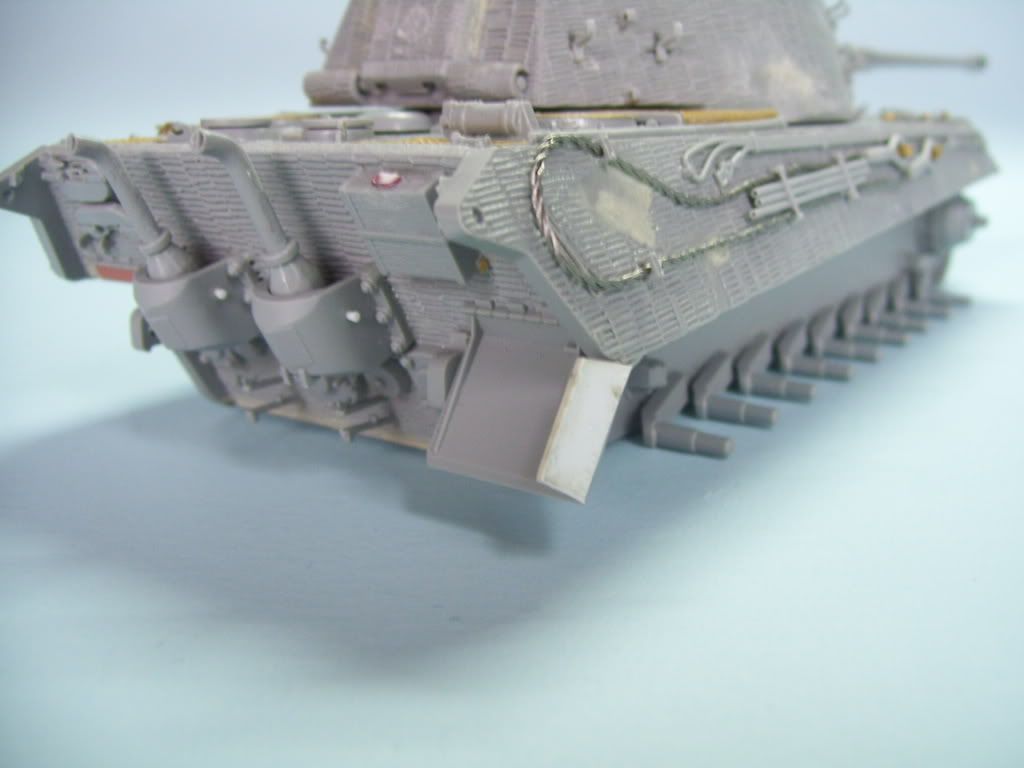
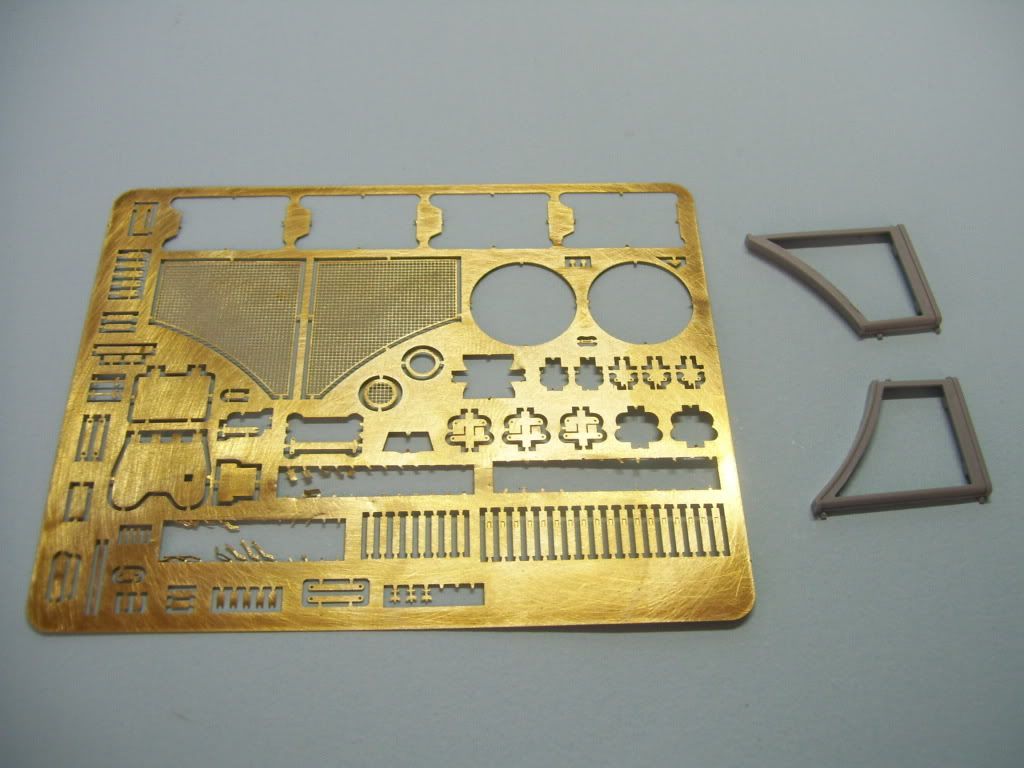
OK–next, for Tony, an illustration of how to do engine screens. Here’s the PE and the parts you have to bend the PE around.
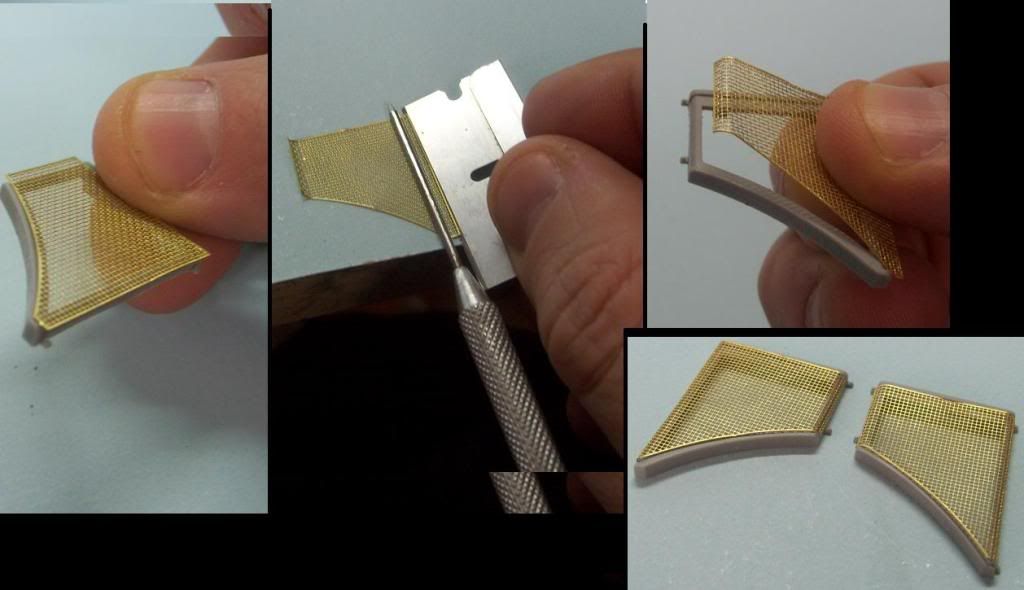
And, in composite, how I bent the PE around a pick using a razor blade and knife blade. It;s important to remember that you should look for a diameter slightly smaller than the curve that you actually want. Some strange law of modeling physics says that if you choose the exact same diameter, the PE wiil always be slightly under-bent!
Now here comes the mini-rant. Mostly this has to do with my disapointment (disillusionent?) with the touted “extra’s” in this kit.

First, I have read some other notorious rants against DML/Dragon directions, but lemme tell ya–I can empathize with the author! The “photo directions” used in this kit are unforgiveably vague. The lighting of the photos often precludes the possibility of seeing the detail needed to correctly position a part. Secondarily, the added PE parts are for the most part simply illustrated as how-to-assemble, but often are not pointed out as to where they are to be used. And there are a LOT of unused PE parts left over that leaves one scratching one’s head where and what might have been possible, or missed! The “working clamps” were, for this experienced modeler, impossible to manage or assemble; I wound up substituting some Royal Model clamps instead.

The debacle of the directions and PE are unquestionably a cost-cutting decision by DML, as they are simply using the “old” directions, modified with some new illustrations, but they are, IMHO, wholly inadequate.

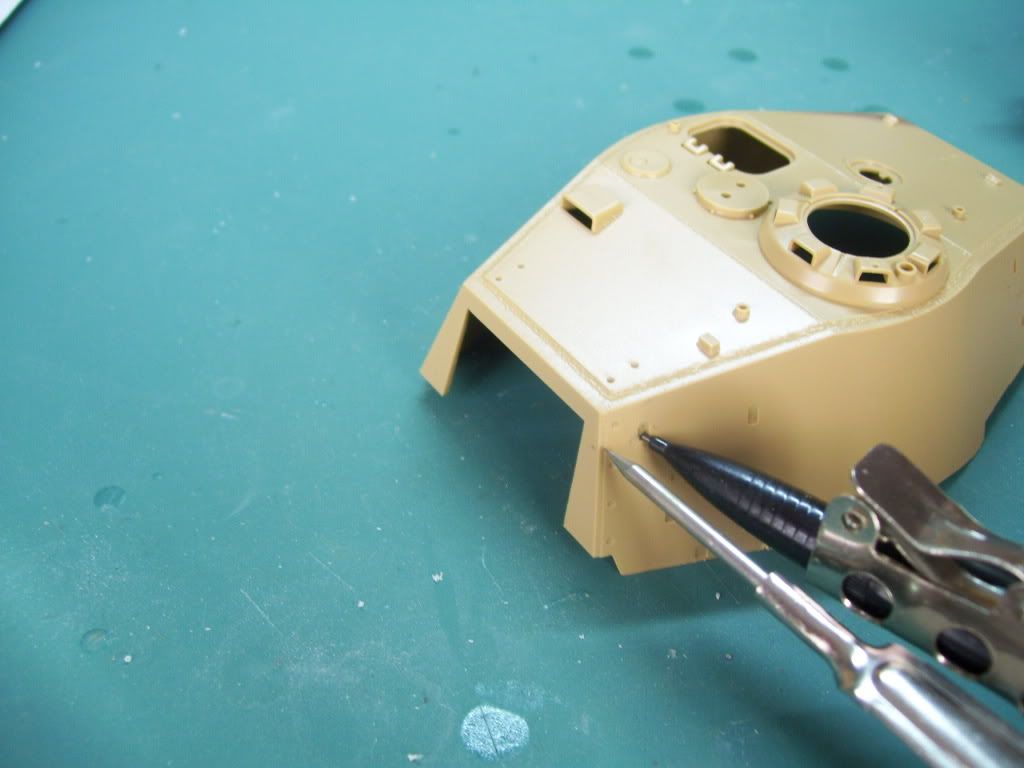
Here’s another bummer–the lack of locating points for the track hangers on the turret. Could not DML have put some punch-through marks behind the turret wall (much as they do in their fenders) so as to retain the possibility of those who want to build one of the earliest Tiger II’s which came without spare track hangers? True, you can glue the tracks onto the turrret side first, and then add the hangers inside the cut-outs, but I found this to be an untenable option for the finish procedures which I have planned. This is a major PITA of the kit in my opinion–especially if you don’t want to portray the kit with a full complementof hanging spare tracks!

In any case, I used a compass and a Tamiya turret to locate the hangers.
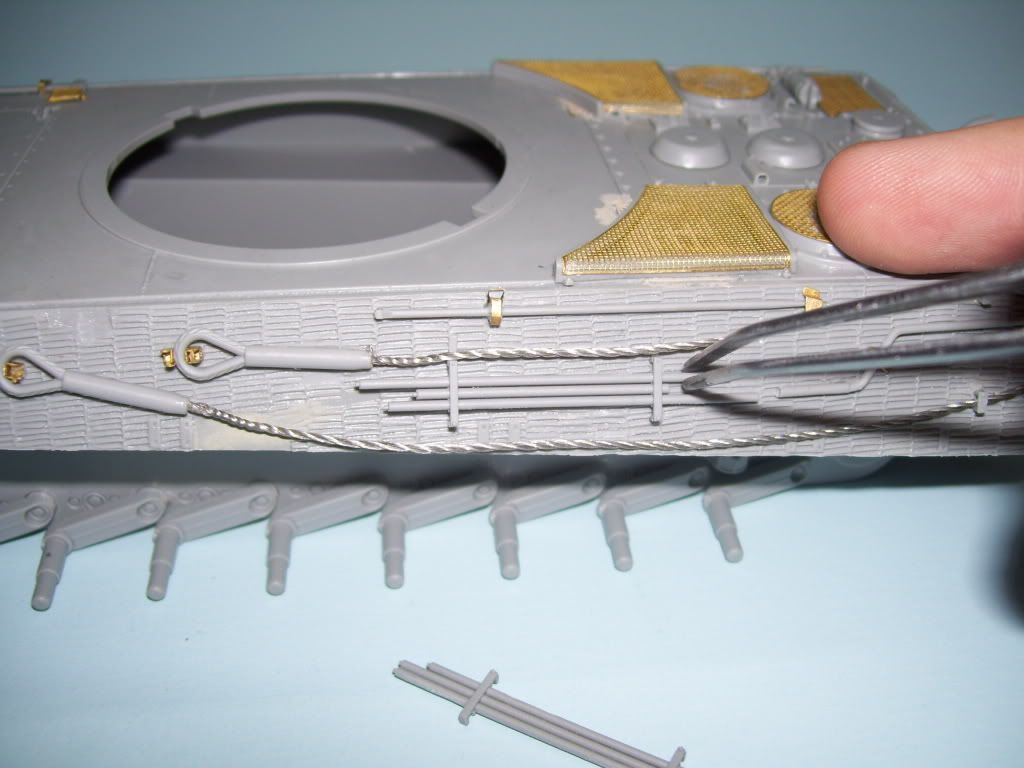
And this really [censored]'ed me off. It’s nice that DML has included extra parts and real cable fo rthe towing cables–but they realy goofed on the dimensions here. Check this out–if you use the stand-alone cable ends, the dimensions are off on them–I could NOT properly fit the cleaning rod parts once they were affixed!
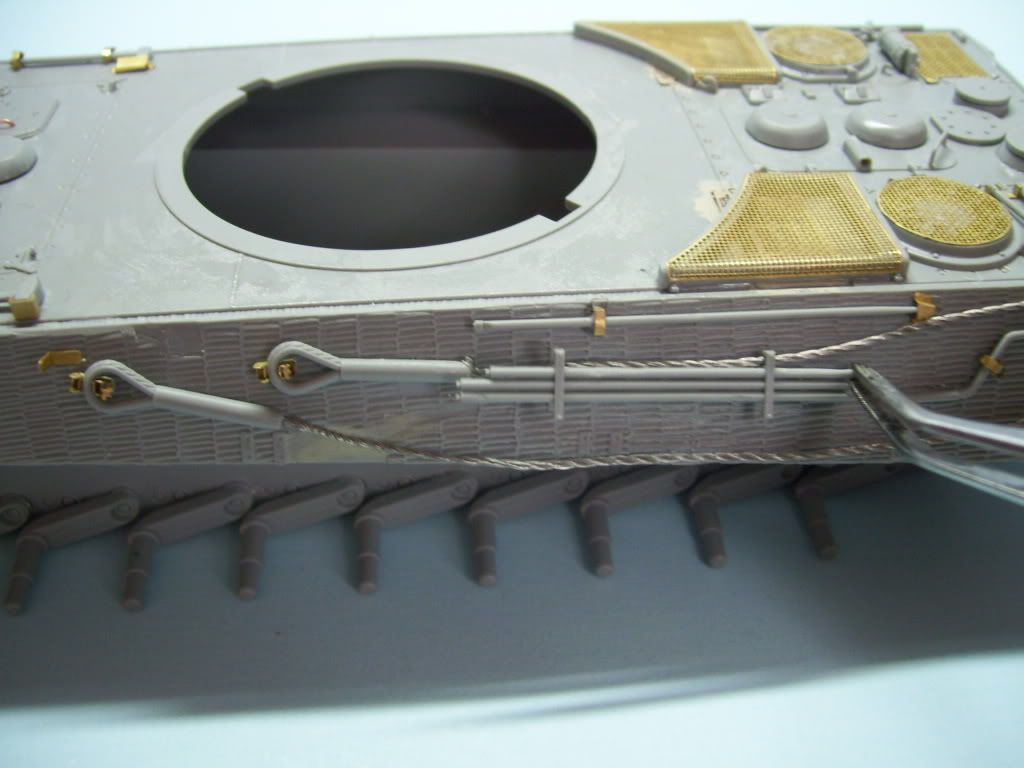
Neither one fits!!
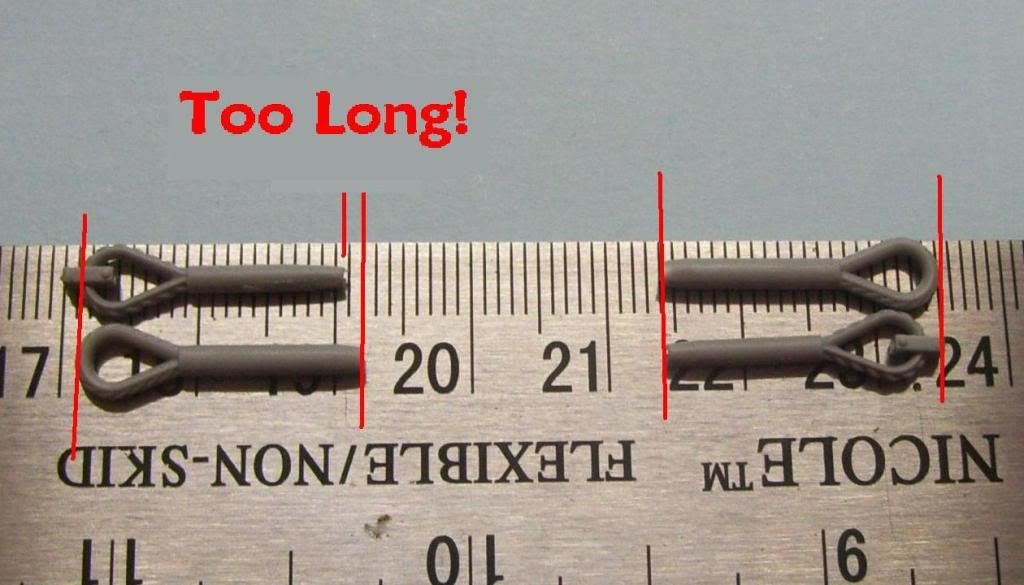
The reason for this is evident in this comparison–if you look at the set of stand alone, and molded cable ends on the left, notice how, if you compare the length of the actual cable ends, the stand-alone ends are actually longer by about 2mm!!! [banghead] You can see in the right-hand parts that when they engineered this part, some bonehead measured the entire part, clamps included and used THAT for the measurement!
I’m sorry; I know I should be grateful for these added “extra’s”, but this kind of engineering strikes me as just plain sloppy! And–MEA CULPA!!–Yes, I *should have “test fitted”–*but hey man, this is supposed to be like a state-of-the-art kit! Slide molding and all, you know?! Additionally, when you use the provided wire as I have, the wires themselves are too big for the diameter of the cleaning rod kit parts. When you try to attach them over the wire, thet stand “off” the hull. I wound up having to use a needle file to thin and enlarge them considerably; in fact, down to almost breaking through them. Again, I expected more here.

So, I would up shortening one cleaning rod, and then moving the entire part/assembly bacl a few millimeters to fit the part. So much for dimensional scale accuracy! [sigh]
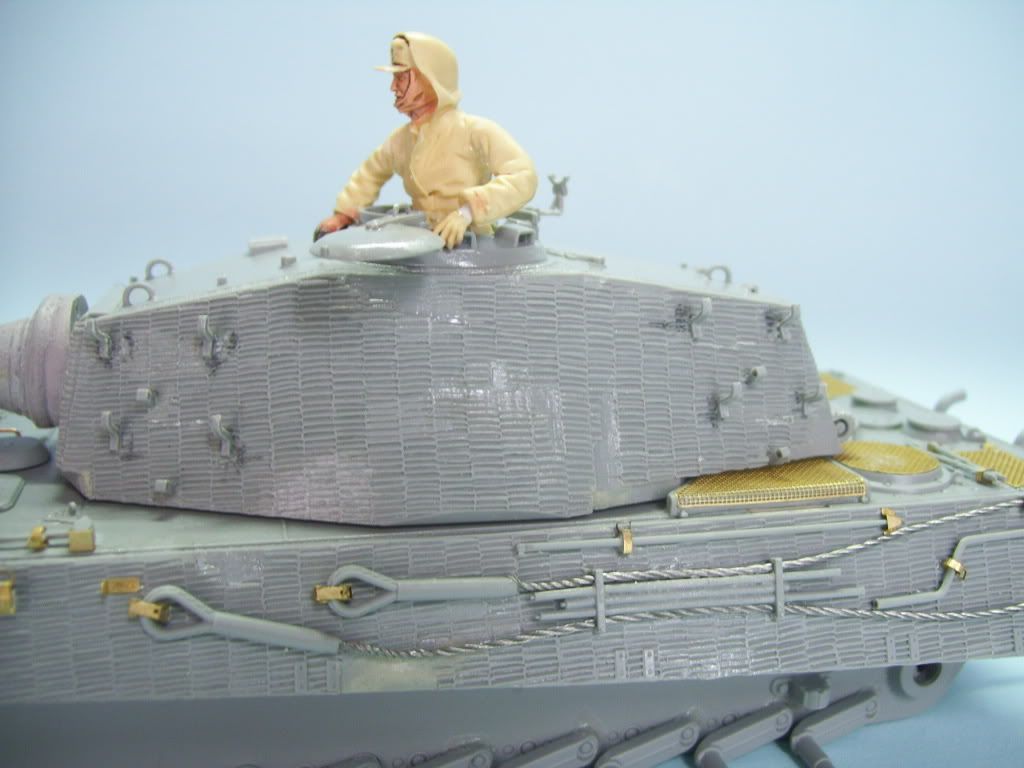
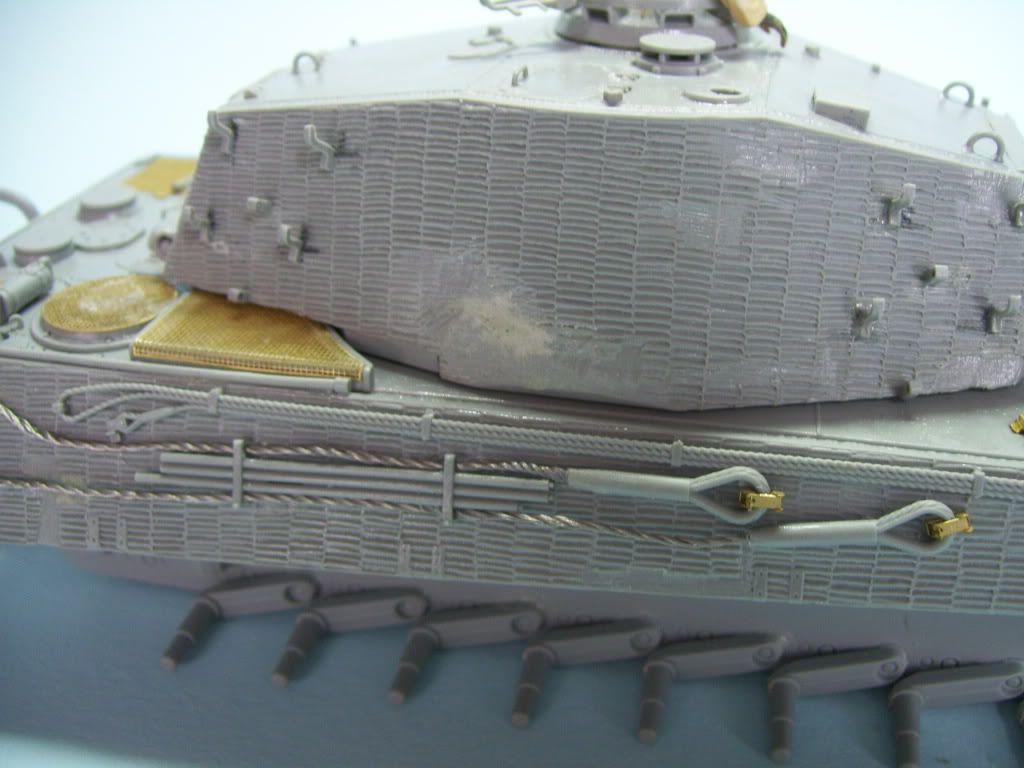
So in the end, as I prepare for painting the base coat, I have mixed feelings about this kit, For my money, if I build another one, I would use nylon thread for the cables, and really pay attention to those darned cable ends, as well as possibly using a whole other Eduard or similar PE set.

Manny, did you encounter any of these problems?

I’ll be busy tonight until later, but questions and coments are welcomed–I’ll try to answer when I get home! Thanks for looking guys! [:D]

The Idool himself on yet another project? Can’t wait on seeing the result on this!! Looking very proffesional so far… no wait… You are proffesional [:)]

Now I wish there were a subscribe button for this thread… [B)]

Can’t wait to see more! [8D]

Regardless it looks very nice. I do agree that how Dragon and their kits are touted, the issues you brought up should never have happened. The kit itself may have been rushed into production and sale, but there is no excuse for thier directions. They have had long enough to get proper staffing to correct them.

Doog,

You’re encountering similar problems that often crop-up on the “Premium” kits…cases where parts are taken from generic or upgraded sets (like the tow cable ends) and just thrown in as opposed to being specifically engineered for that kit. It’s unfortunate to see that happening with these pre-zim kits…but I guess that just means DML needs to leave some room so they can keep “improving on perfection”, eh? [;)]

Looks like you’re beating this one into submission despite the issues encountered. If you’re looking for alternative clamps, try the Griffon line, I’ve been impressed with them in terms of ease of assembly and solid detail without resorting to the Aber “shrink an actual metal worker down to 1/35” approach.

It looks like you have things well in hand despite the kits shortfalls. I have complete faith in you. Just a small correction. In image 6 the features in question are grinder marks to the seams left by the forgeing process, and should look a strip of irregular verticle grooves. By the way is that a scratchbuilt flash supressor on the hull mg, looks nice.

Doog

Really excellent work you are doing with this cat. You figure the price that these kits run, you expect better. Have you shot DML an email about the lack of instructions with the PE parts? It probably won’t go anywhere but I think it won’t hurt to give them some feedback. Who knows, they may listen and improve the model and the instructions.

Looks pretty nice from here Karl. Your zim work sure paid off. I’ll have to keep your observations in mind if I ever pick one up, but I’m leaning to the BoB version myself.

Hmmm…

'Ya might have something there…“American Idoog”…

Comin’ along well doog. Did you see this?.. The commander is lookin’ at it I believe.

!http://www.thelastsuperman.com/disastermaster/pinmark-1.gif

!http://www.thelastsuperman.com/disastermaster/%23t1-4.jpg

Looks great Doog!!!

[:)]

Thanks, guys, for the comments and compliments!

Bill, --thanks for the heads up on that Griffon line. I’m going to be in the market for some more generic clamps, and I’ll check those out. The Aber ones are just sadistic!

I didn’t really realize that the Premium kits were plagued with the same problems. I never bought into them–I guess I have been vindicated, in a way? [:D]

rabbiteatssnake, --thanks for that info! I’ll make some cuts in there to properly simulate the correct appearance.

plasticjunkie, --Hmmmm…I may do that, but I doubt it would bear fruit. I imagine every company is in economic bunker-mode, with the coming Depression. Luckily, the Nashorn I’m eyeing next has line-drawing instructions, I believe!

tigerman, --I want the “Babes on Board” version too! [:-^]…[(-D]. I want a final version!

Steve, --that pin mark–I didn’t see a “mark” so I either got it, or I’m looking at that hole and not recognizing it for what it is–that hole in the back of the mantlet is supposed to be there though, is it not?

Thanks, stick man, ps1scw, and Huxy!

I forgot to mention too, that the dimensions for the side of the hull are actually incorrect too–if you look at a KT’s sides, theside skirt hanger brackets are actually spaced quite a bt above the edge of the hull sides. On the model, the hanger brackets are almost flush with the edge.There’s no real way to fix that without destroying the molded zimm!

I’ll be trying to get a base coat tommorrow if all goes well–stay tuned!

Looking good Karl. [tup]

Just to expand a little - the Griffon clamps look a lot easier to use - they’re two-piece. The base and strap are one piece and the flip-latch another. The set also comes with some very nice looking toolbox latches. They are very nicely priced too, at under $4.00. Luckymodel is asking $3.11 (inc shipping) at the moment.

Looking forward to seeing paint on this baby.

Well, not too sure since I don’t have this particular kit, but it looks suspiciously like a ejector pin mark.

!http://www.thelastsuperman.com/disastermaster/%23t1-4.jpg

Looking good, Karl, I can’t wait to see some paint on this bad boy.

A question, I know that’s unlike me, but indulge me, whay have you attached all the tools, cable, cleaning rods, etc prior to painting. Is it just to properly place the workable clamps, then they will be pulled off and the clamps painted, or what?

Doog, it aint fun if you don’t have to tweak it a bit…OK… a lot. Looks like oyu got a good handle on everything and when all is said and done it will be a fine looking kitty.

Aaah. And they scratch building is a lost art!

Oh, OK; I think I see it as you were looking at it–no, that’s supposed to be there. I found a great shot in the Ryton book “Schwere Panzers in Detail” by Culver and Feist which I’m using for reference. There is a weird little hole behind the mantlet; that’s what you’re seeing.

Phil_H --thanks for that info on those clamps; I’m going to try them when I need more.

Bill – I used to paint everything off the model, but in this case, with all the PE it’s just “safer” to attach them all, and then worry about painting them afterward. Besides, I’m going for a winter camo on this, so I won’t really have to worry too much about the painting so much in detail, because much of it will be whitewashed.

Marc – thanks for looking in!

Jeff – “Scratchbuilding is dead”? [:O] EEEK! Who said that?!

Actually, I just think that these days there’s a lot less need for it! But it’s always satisfying to put a little personal touch that you yourself have created on a model!

nice one. looking forward to seeing this one progress.

Terry.

Seemed to me this kit is not worth buying. Shape of the zimmerit pattern isn’t very accurate but that’s debatable, since not all shared the same patterns. However, the result of chipping the plastic zimmerit doesn;t look good, in my honest opinion. I know it probably took you lots of work, but it doesn’t look like layer of material shedded, more like the result of a chisel used on wood…

I think what these kits should include are photo etched mudguards and fenders. Not many places on a model where thickness is clearly visible, and for one of the crucial pieces in this regard, plastic mudguards are much too thick.

Thank you, Satori, for your honesty. I have to agree that the zimmerit depth-of-molding does preclude one from maiking a strictly “accurate”-looking chipping process. In place where I have thought that the depth went too far, I have tried to fill it in with putty. The best I could do. However, as zimmerit was a plaster-like material, it would not have “shredded”, but instead broken off in chipped pieces of various sizes. This is what I have tried to simulate here.I’m curious as to what you think would have been a more proper way to simulate this effect? No scarcasm intended; I’m sincerely curious–how would you have handled it?

Ideally, the will refine the zimmerit molding to where it is a finer texture and shallower depth. In this case, however, I have to “dance with what brung me”–I can only put lipstick on this pig, not make it a princess…[swg]

Hey Karl! No one said that, just implied that with all the new fangled process used in manufacturing today, all of the available PE with aluminum and resin pieces now out that one is surprised you would even have to alter a kit that is sold these days. [;)]

You’d think it would have some of the zimm chipped off and not factory fresh looking. Nice work!