So I just picked up this kit today, it is the first model I will be putting together in about 10 years, I decided to put my B-17 project on hold till I can not get outbidded on e-bay for…
Anyway, the detail of the kit seems nice and it is a 1/32 scale, just about perfect for my shelf in my office…I did want to ask if anyone has ever built this kit before? Anything I should be aware of, any trickey areas to work around?
Lastly I am not to interested in the decal kit that come w/ this model, it is very detailed however I am not digging the provide “names”…“Man O’War”, “Butch Baby” and “Alene”…is there a company that makes alternative decal sets for the P-51D?
Building the same kit right now…lol
But, this one was boxed for Yeager’s “Glamorous Glen III”
Thy only major things about this kit to look out for is the engine. You cant really omit the engine because thats how the propeller is attached to the kit, but the only support the engine has when attaching it to the fuselage is the exaust…lol
The verlinden cockpit set for this kit is good, but a bit oversized and I couldnt fit in all of the little detail parts because of it. But its still a heck of a lot better than the kit’s cockpit…lol
Paragon’s cockpit interior is made to fit the Hasegawa kit, and he does separate flaps, too, since Hasegawa don’t give you the option of dropping the flaps, something you see on virtually every parked P-51D.
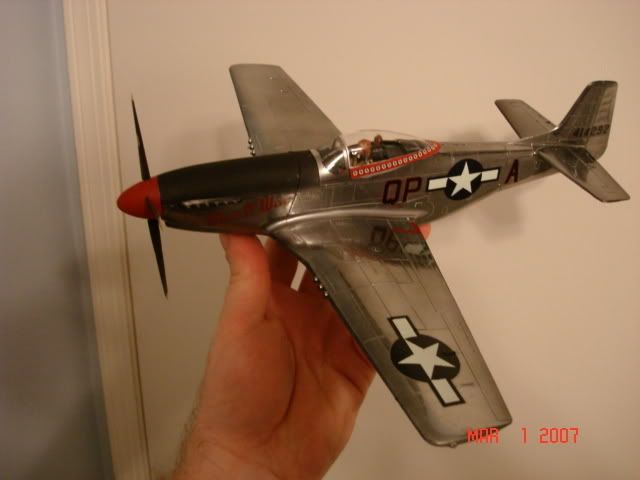
[ Just finished that kit about a month or so ago. Pretty straightforward build, only on my particular kit the locator pins on the fuselage were missing so alignment was tricky.Very easy kit to build. though. Good fit and mostly flash free parts. I elected not to assemble the gun troughs as mine is currently patrolling the airspace in my office. You will be pleased with the kit. I highly recommend using any type of gloss black (acrylic or enamel) followed by Allclad II polished aluminum. Mine looks like a mirror and always makes for interesting conversations in my office.
Decals for the 51 are fairly abundant. I think Tally ho and Mike Grant make nice sets.
Do you want to build boring ‘run of the mill’ NMF American P-51 or something different? There are a number of different sets of markings for the P-51 available including colourful RAAF aircraft from Italy.
Yeah I just took a look at Paragons setup…real nice, I think I might buy that one.
As far as the body goes I was planning on using the Tymia aluminium, the guy at the shop says that after it dries, a day or two, u can then go over it w/ a cloth, kinda buff it, and it will bring out some shine. Although I dont think I want the plane to be too shiney, the airfeilds were dirt and grass, and I suspect that they were fairly muddy from time to time as well, that being said, polishing and cleaning ones plane wass probably not to hi on the priority list…so a good weathered look is where I am heading.
One problem I am having now, is the motor…it is a very basic detail job…I have seen the 1/48 scale from Aries but that is going to be to big…so I have been trying to collect som photos of P-51 motors, to see if I can at elast improve upon the orginal cast…add some wires, maybe build a few of the additional components…so does anyone happen to have some good engine photos? or a link?
Lastly, the panels that cover the ammo and guns, on the model it shows the panel as a sigle piece…doe this panel hinge or simple rivet on?
For my flaps, I cut each one out of the wing(carefully! lol) and glued the two halves together. I then used a piece of sprue for the expansion of the flap(that goes in the wing) and sanded it down to shape(like a half circle…will be seen in HERE) and size. I also had to fill in the gap in the flap with putty, and cut out that section under the wing root. This caused a hole so I used some spru, sanded it down flat with the dremel and glued the pieces in place.
I have a few good links that show some pretty good engine details.
I have that same P-51 kit as well. Were can I find this “Paragon Cockpit Interior/ Flaps”. I know they went out of business some time ago, but I heard they were back in business, so were can I find them at?
 [
[ Just finished that kit about a month or so ago. Pretty straightforward build, only on my particular kit the locator pins on the fuselage were missing so alignment was tricky.Very easy kit to build. though. Good fit and mostly flash free parts. I elected not to assemble the gun troughs as mine is currently patrolling the airspace in my office. You will be pleased with the kit. I highly recommend using any type of gloss black (acrylic or enamel) followed by Allclad II polished aluminum. Mine looks like a mirror and always makes for interesting conversations in my office.