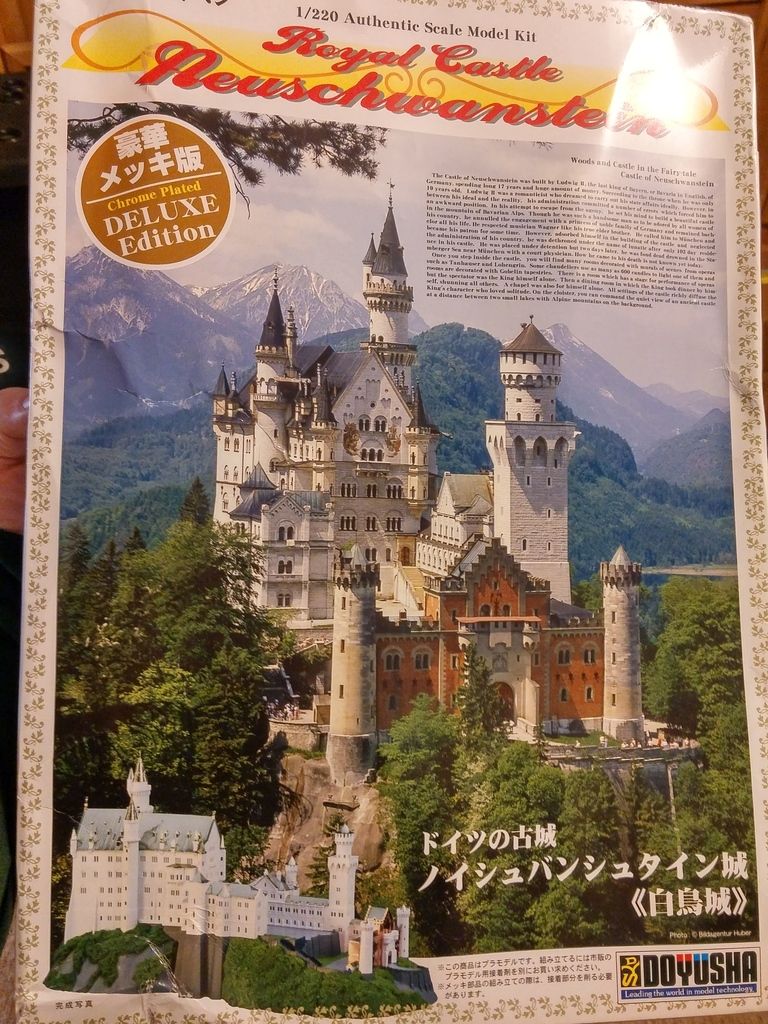
On our trip to Germany, last year, we visited Neuschwantein Castle. The wife absolutely loved the place, along with the rest of Germany. I came across an old WIP thread of Doogs, where he built this model. I didn’t know there was a model. GREAT idea for a Christmas gift! I scoured the web for the kit. The cheapest one I could find was the “deluxe edition” from Doyusha. “Deluxe” mean chrome plated parts…all the roofing and the gate house were plated. I hate that stuff.
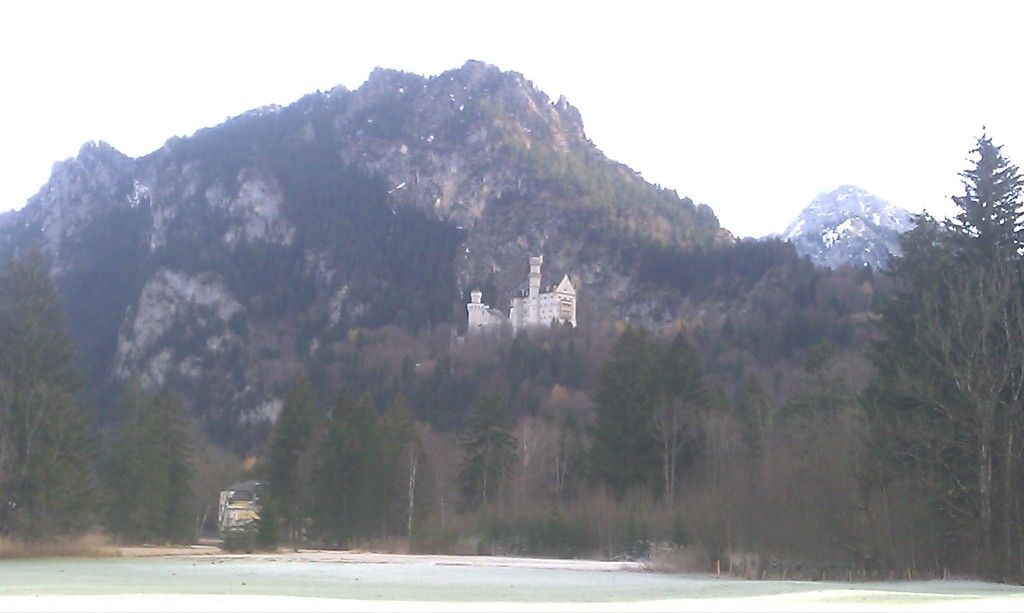
On the road to the castle…
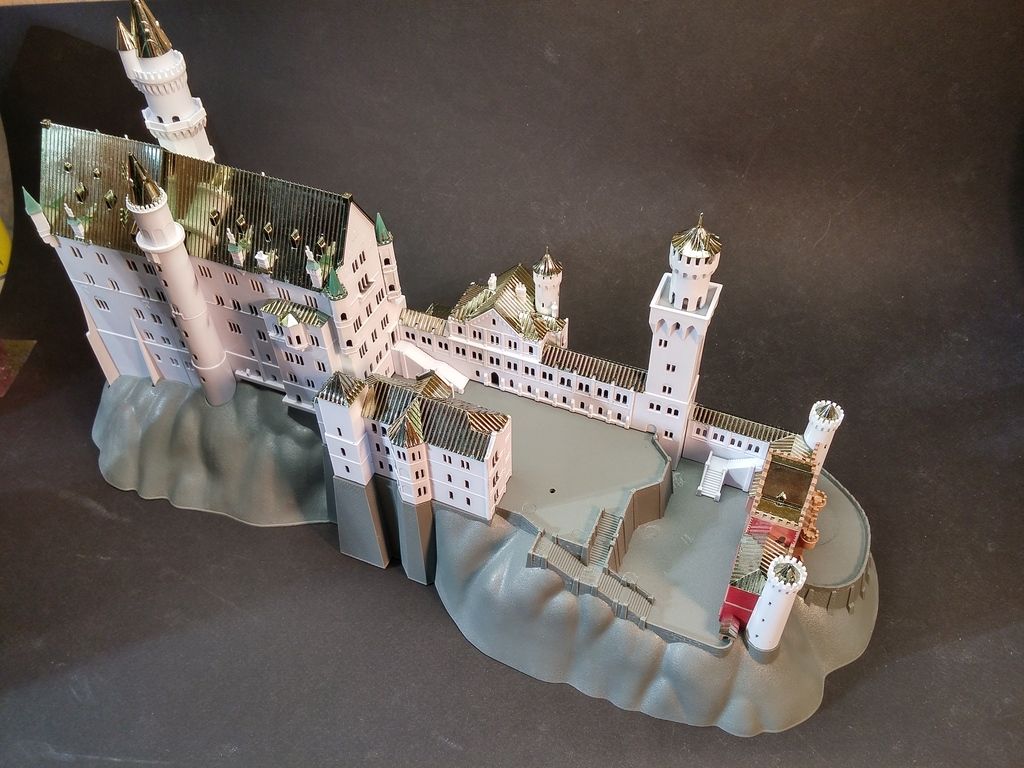
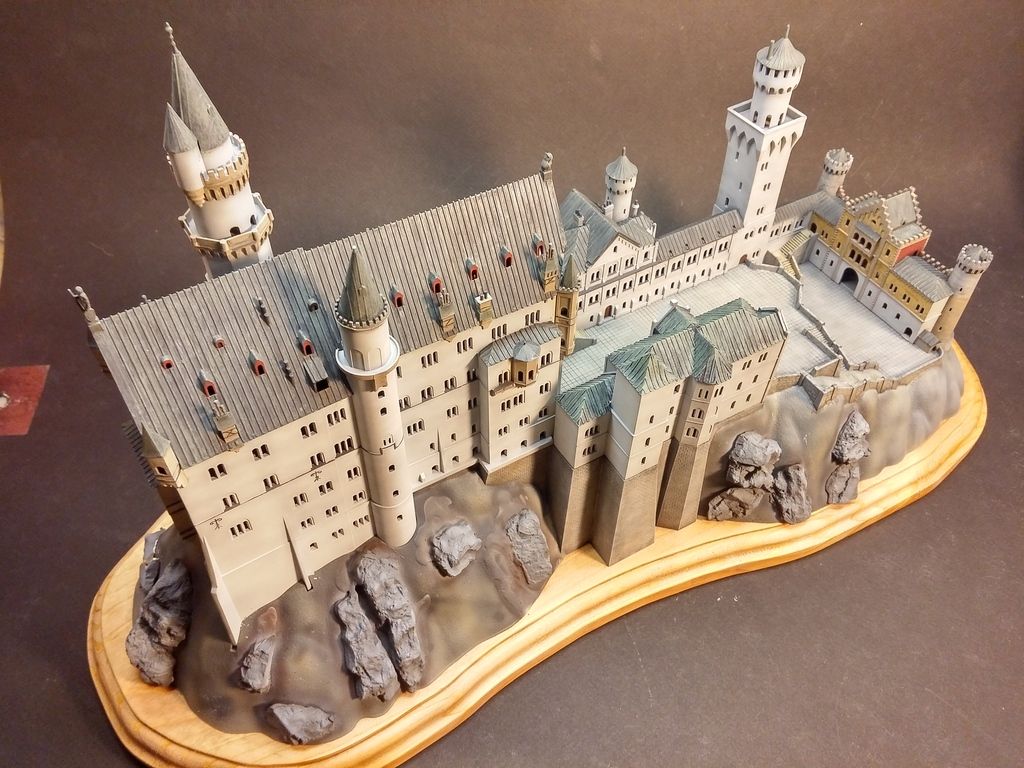
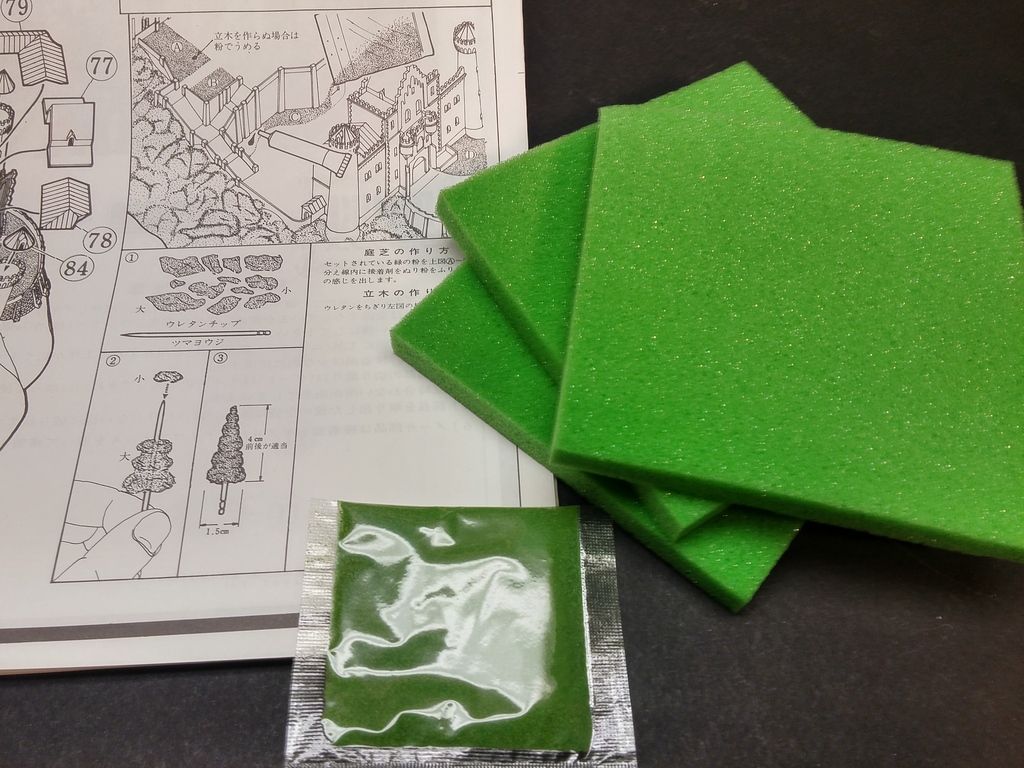
The kit…
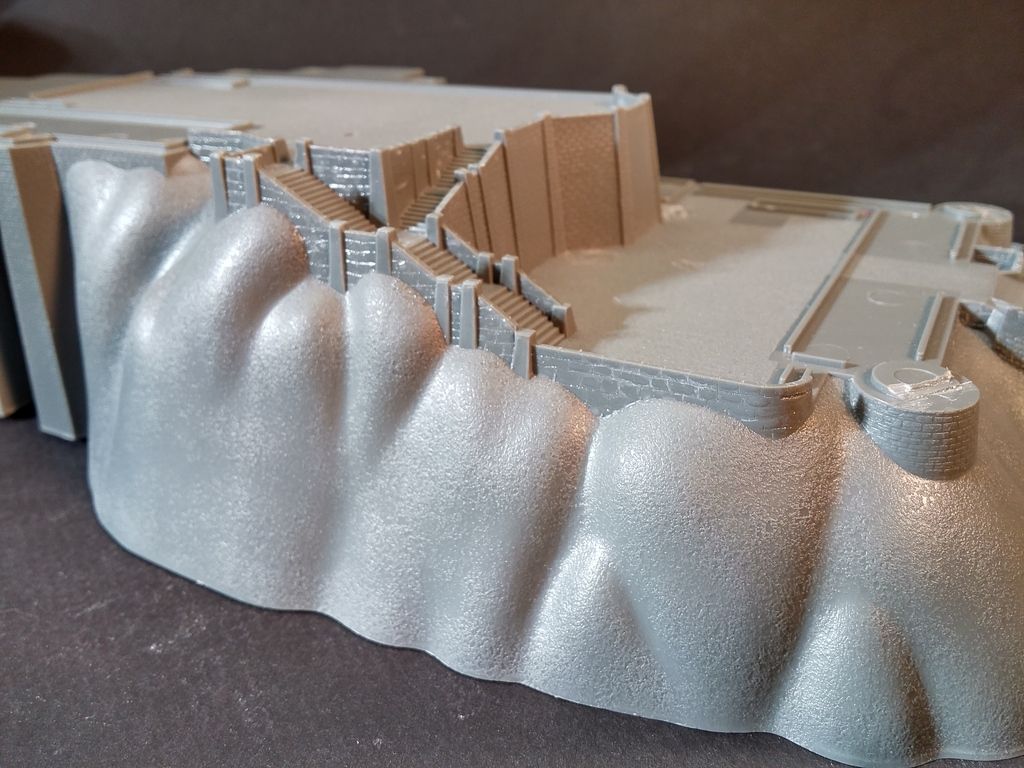
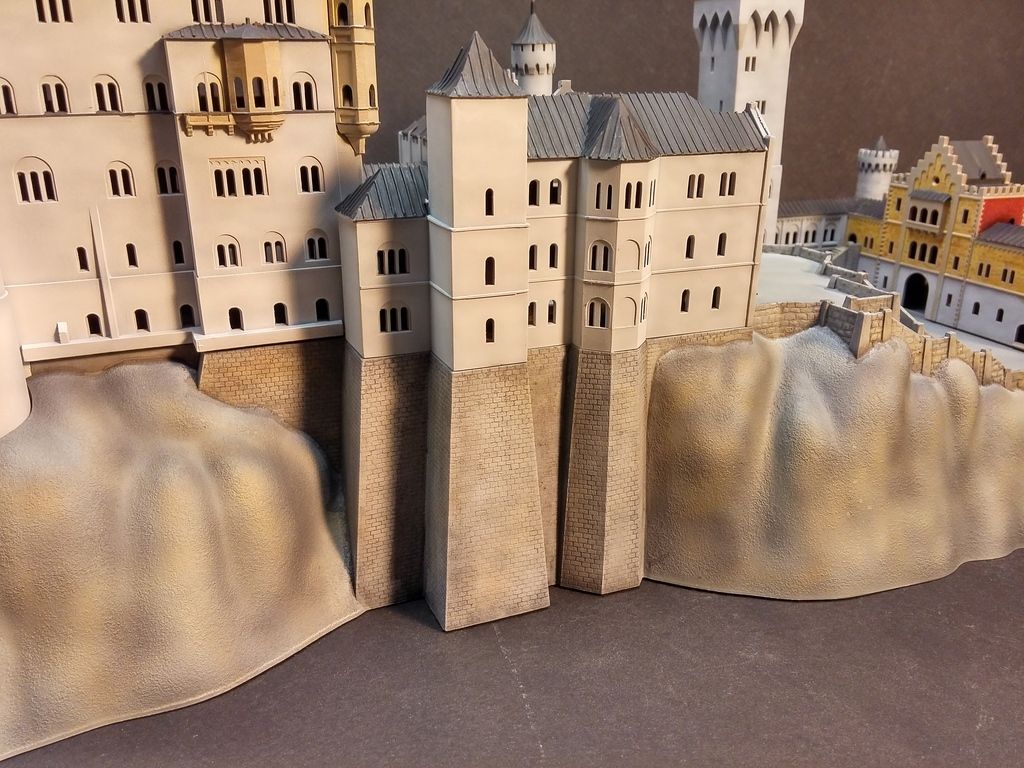
The more ref pics I look at, the harder this is for me. LOTS of accuracy issues. The biggest issue, for me, is the the buildings are made of stone, so there’s a lot of texture…the kit is just smooth. I considered scribing it…and had I started this thing a few months ago, I probably would scribe it all…not now though. I did do some scribing and texturing on the stone walls/rails around the base though.
I scribed in he stones and textured em with a bit of CA.
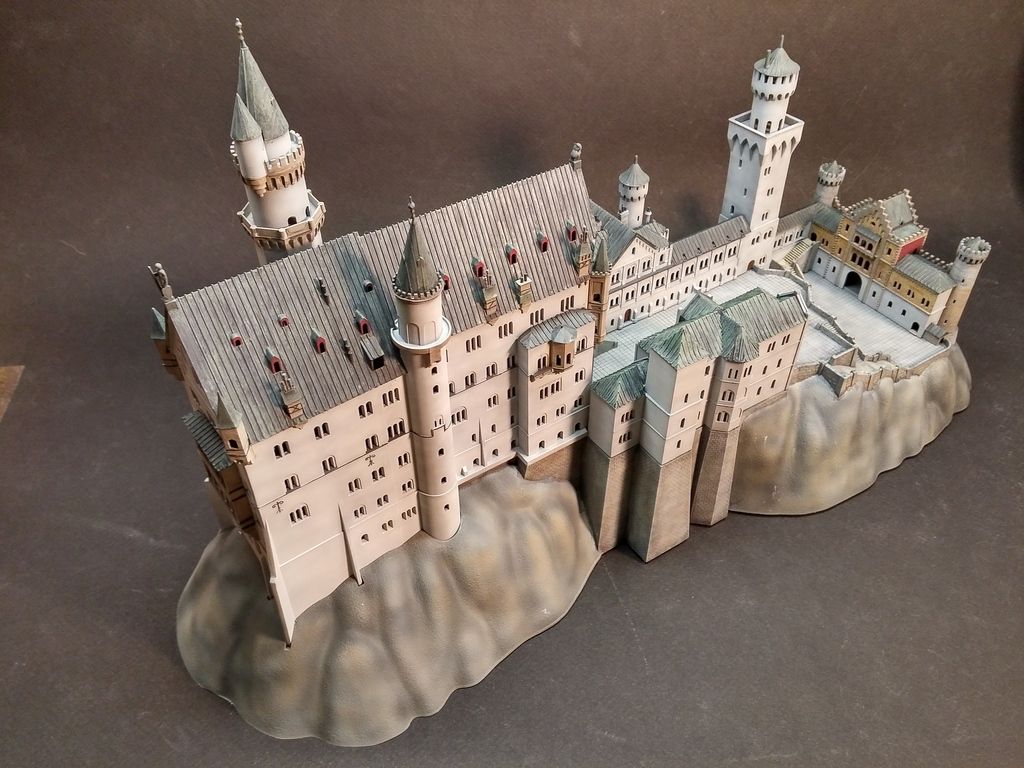
Buildings are built…some ill fits all around.
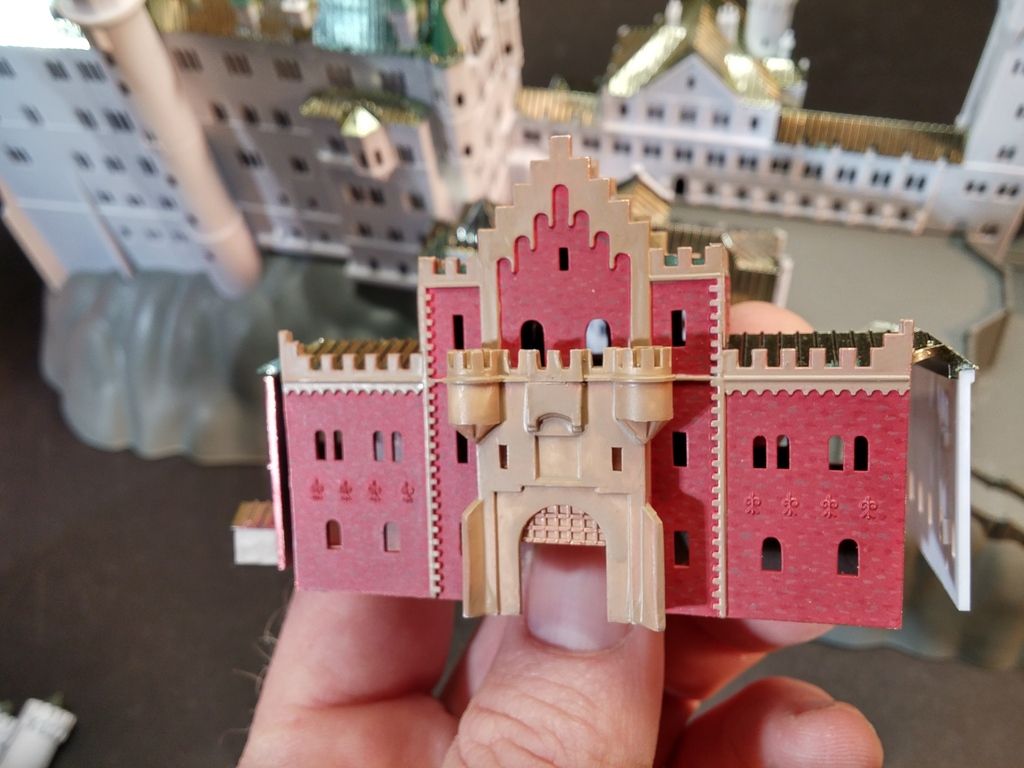
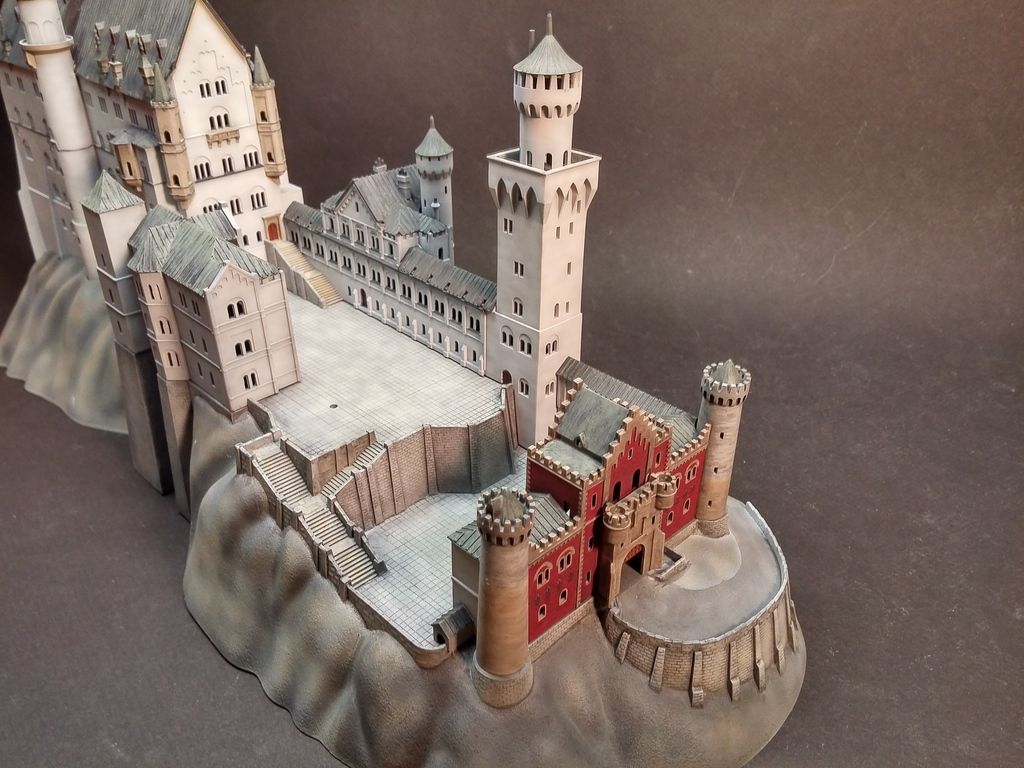
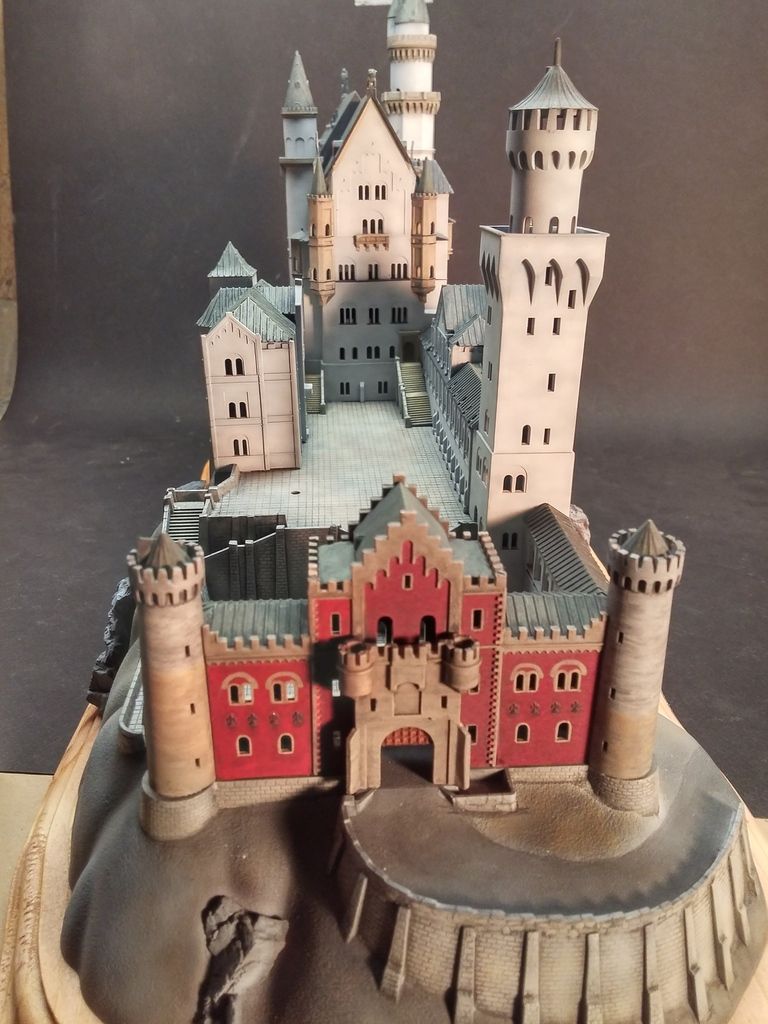
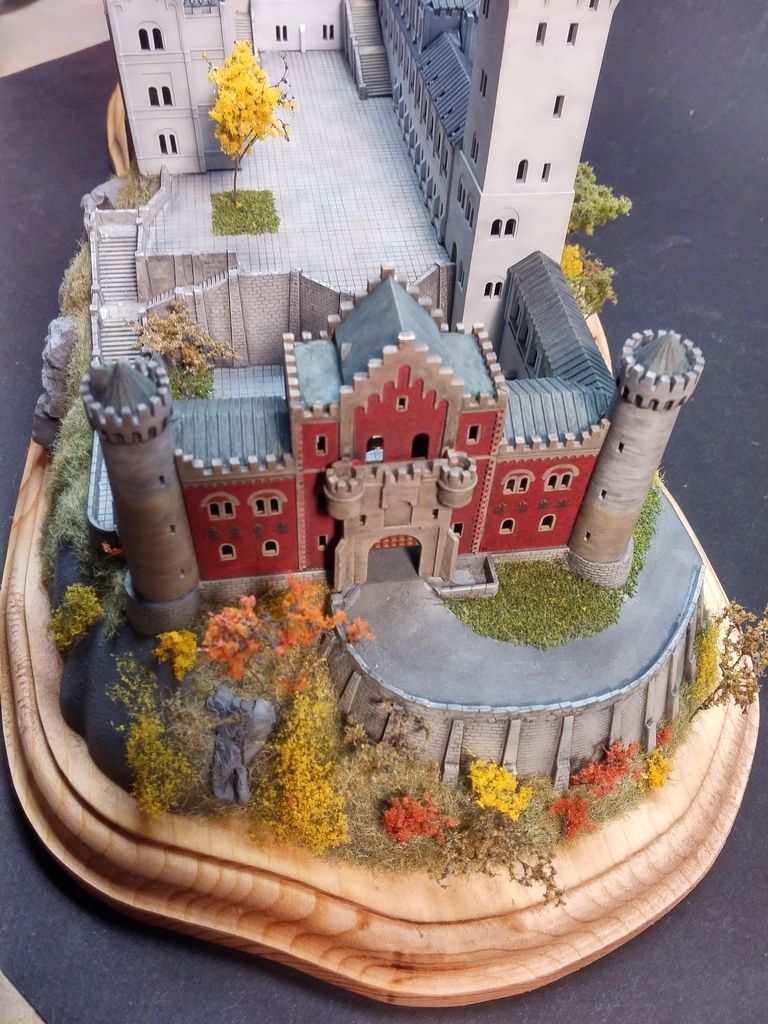
Started painting the gate house. So far, the only bit that’s done is the brick. I mixed up a “brick red” base layer, then mixed other colors with it to “pick out” some brick and make look a little more bricky!
I’ve been there a couple times. A very scenic place, but the walk up that hill… I never knew they made a model of the place. This will be interesting to watch.
Walk?..HAHA sucker! We took the horse cart. Me and my Dad coulda done the walk without issue…my wife…maybe?..my mom…no way!
Work continues…
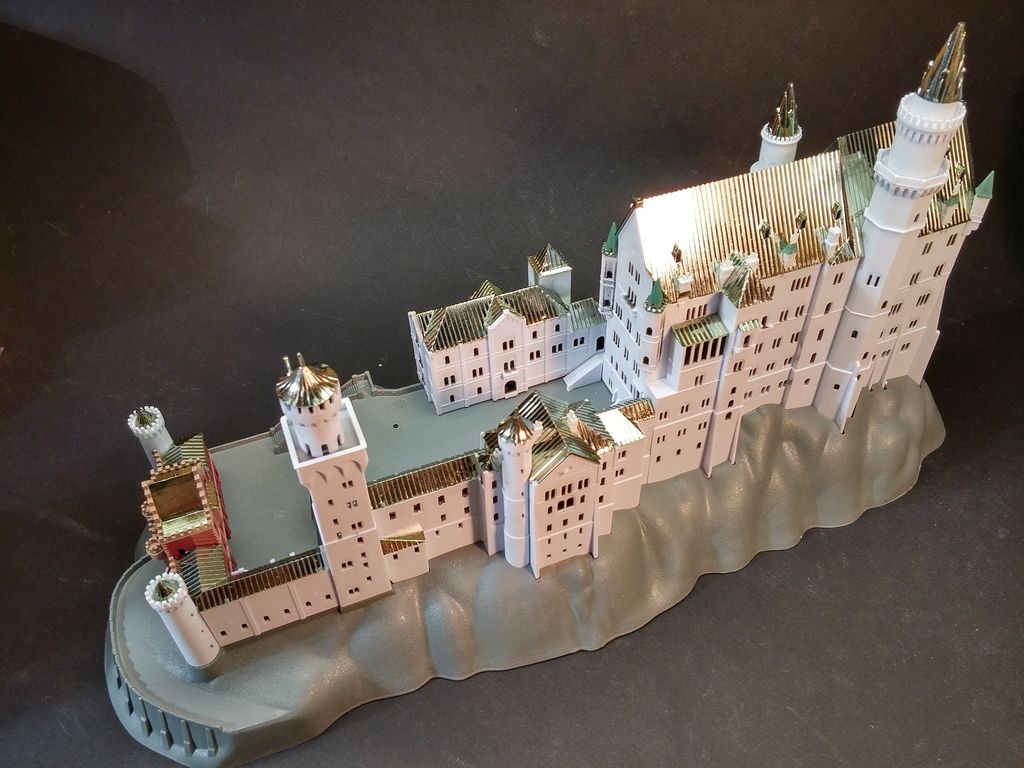
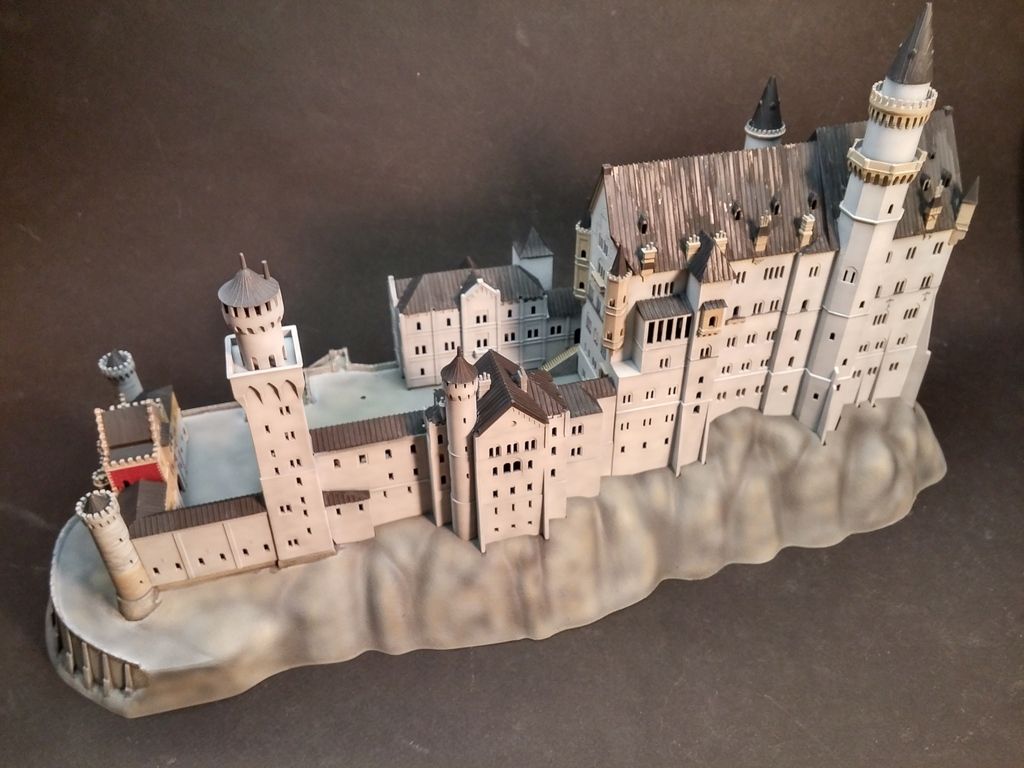
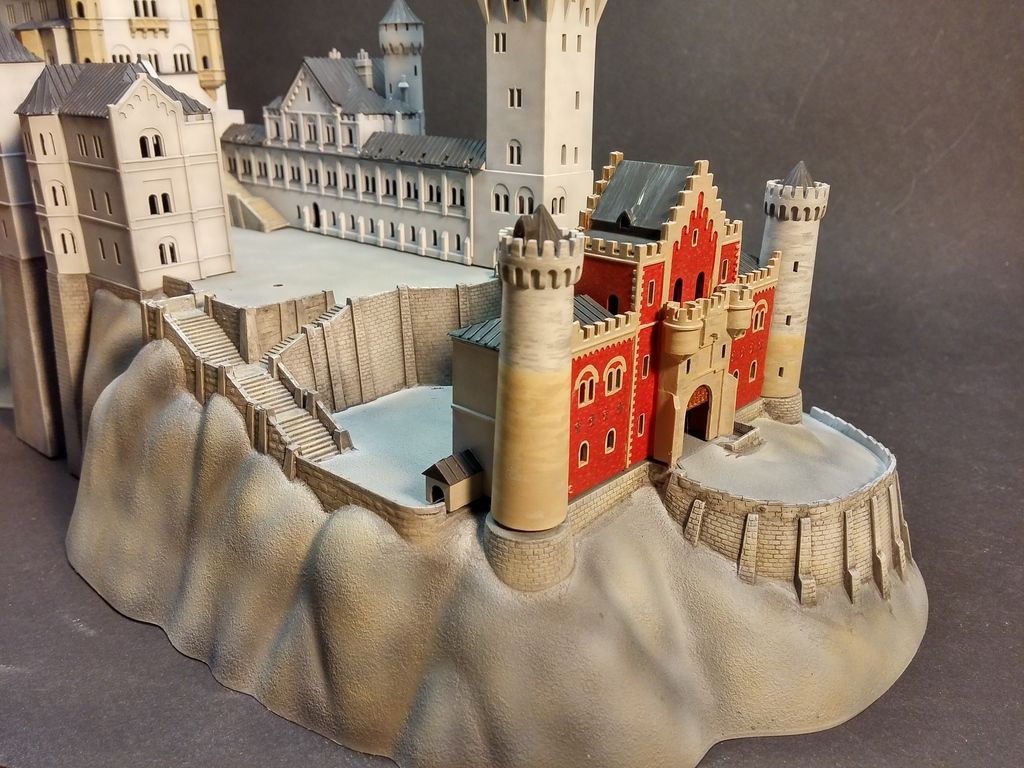
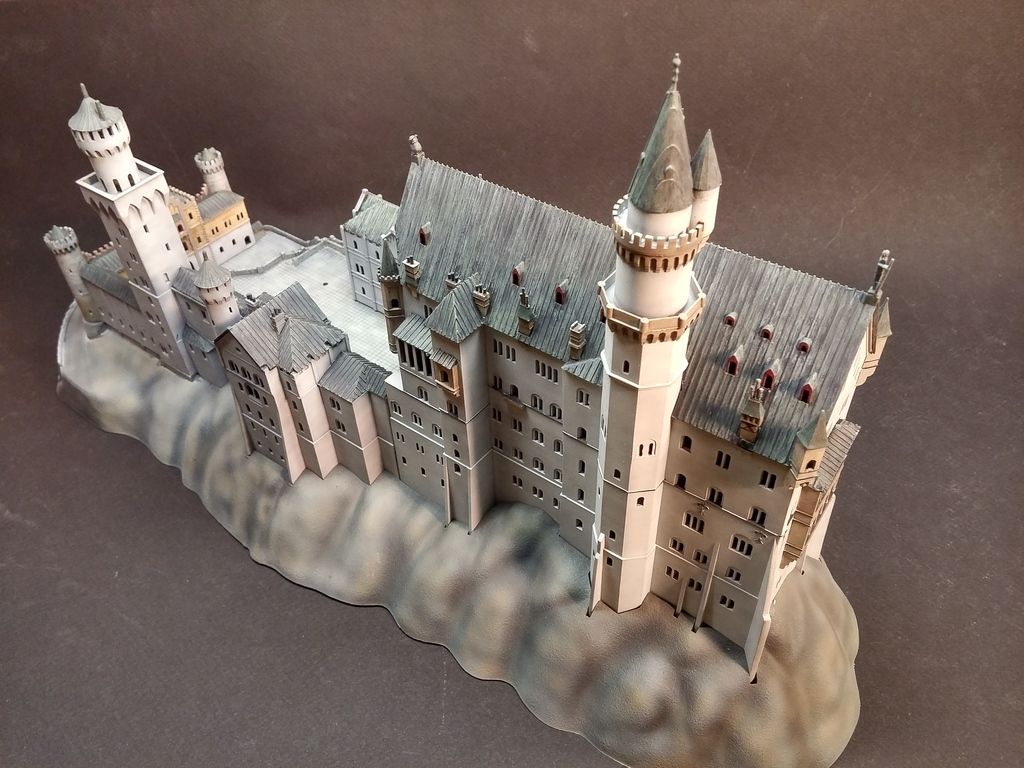
Did some rough painting on the base. Painted up the stone walls and gave em a wash. Buildings are all painted…other than the detail/weathering of the roofs. Gotta gloss and wash as well.
Nothing is glued down yet.
Notice the distinct difference in colors on the towers of the gate house…
Hey fermis, I was stationed in Germany for 3 years and my wife and I made it there too. It is awesome isn’t it? I did not know they had a kit of her either! Very cool build, I’ll be keeping an eye on this one. Thanks for posting!
It was quite impressive, for sure…as was most everything else.
I never lived there, although, I was conceived there. My Dad was stationed there in the early 70’s…they lived in Erlangin (SP?), just outside Nurnburg. He was a tank commander on M60-A1’s…then put in for aviation…I was born in “Mother” Rucker, while Dad was in flight school (Huey’s).
I wasn’t aware of the kit either, until Doogs old thread popped up, and I just happened to look in the dio’s section(I’m not a frequent flyer in here!)
There’s quite a few details missing and/or overly simplified. It bugging me. I gotta keep telling myself “just build it…just build it”! My wife won’t notice those little things, or even care that they’re not there.
The first time I was there, as a strapping young 19 year old PFC, the Gebirgsjaeger that I was with would not have allowed the horse. We were walking. The second time 20+ years later with my family, we took the horse cart ride…
Looking awesome Fermis! Sorry to say I missed this at first, saw the title and figured someone had kicked The Doog’s thread back to the top again.
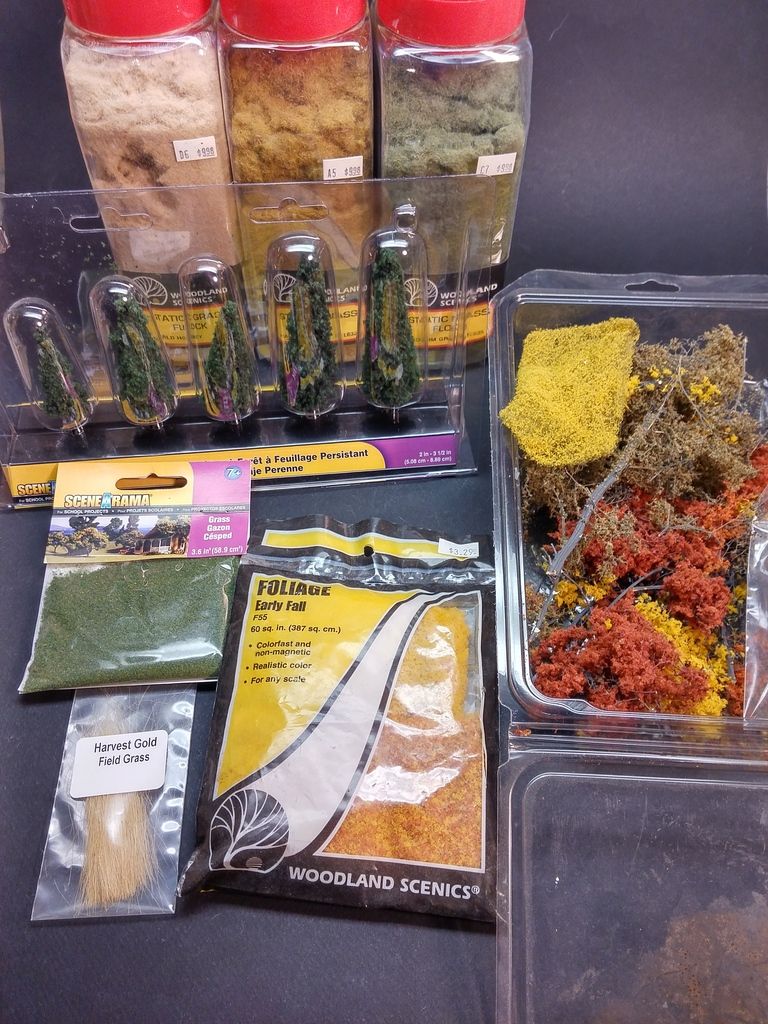
I like the texture you’ve added to the hill but if you cover the thing with trees will it even show that much? And I love the autumn photo, going with fall colours on the trees would look even cooler than the green IMHO.
Donkeyshorts! (that’s German for “thank you”…I think!)[proplr]
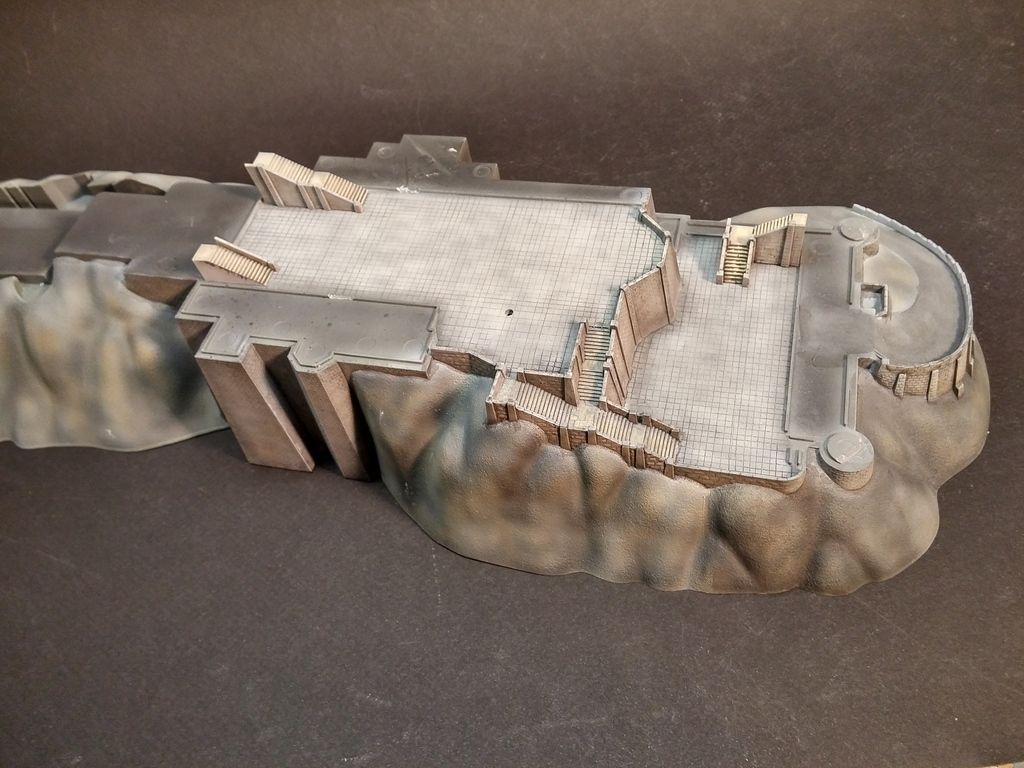
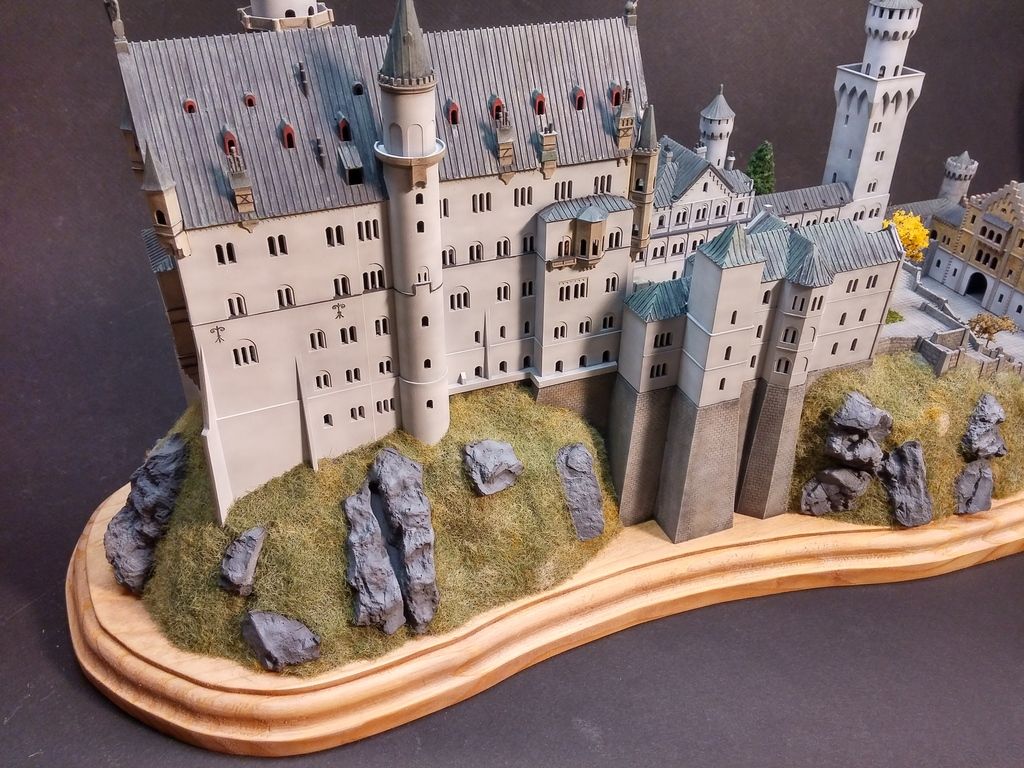
The texture on the hill is all molded. By the time I’m done, only one area of that will be seen.
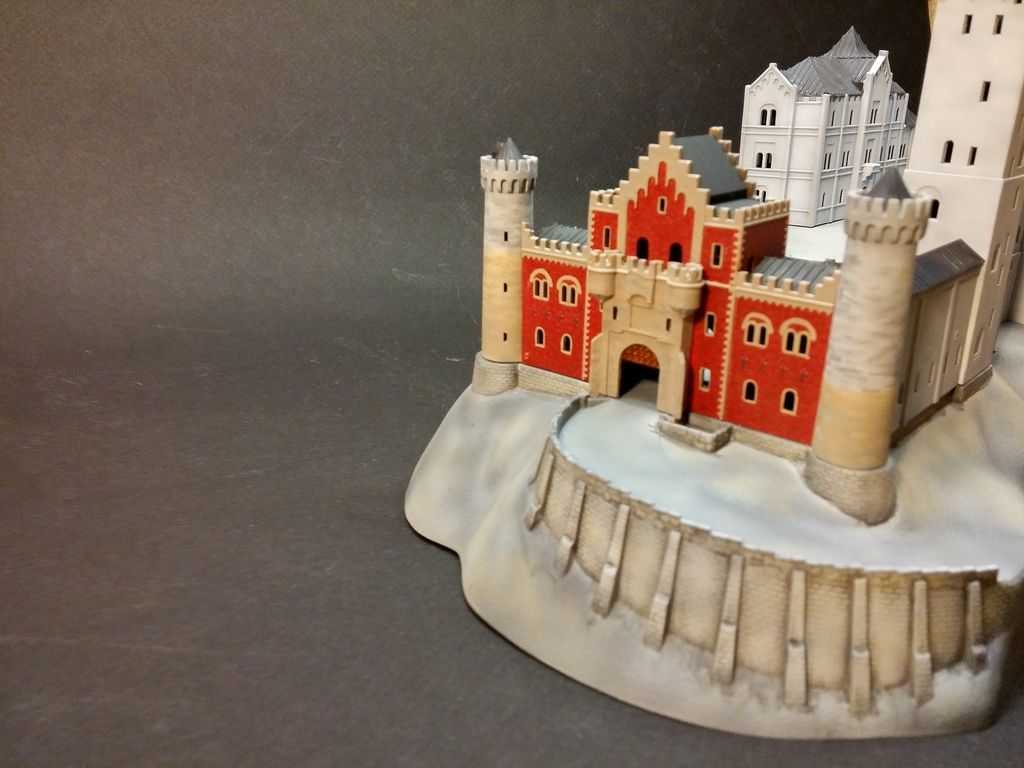
The area below the tower on the gate house is quite smooth…
That area will be paint and washes/weathering. There’s also quite a few rocky outcrops around the place. The molded detail just doesn’t cut it…I have a plan though…involving plaster and some rubber molds! The rest will get covered up with ground cover, shrubs, and trees. We were there in December, and everything was bare…but I am thinking Fall colors would be more fun to look at!
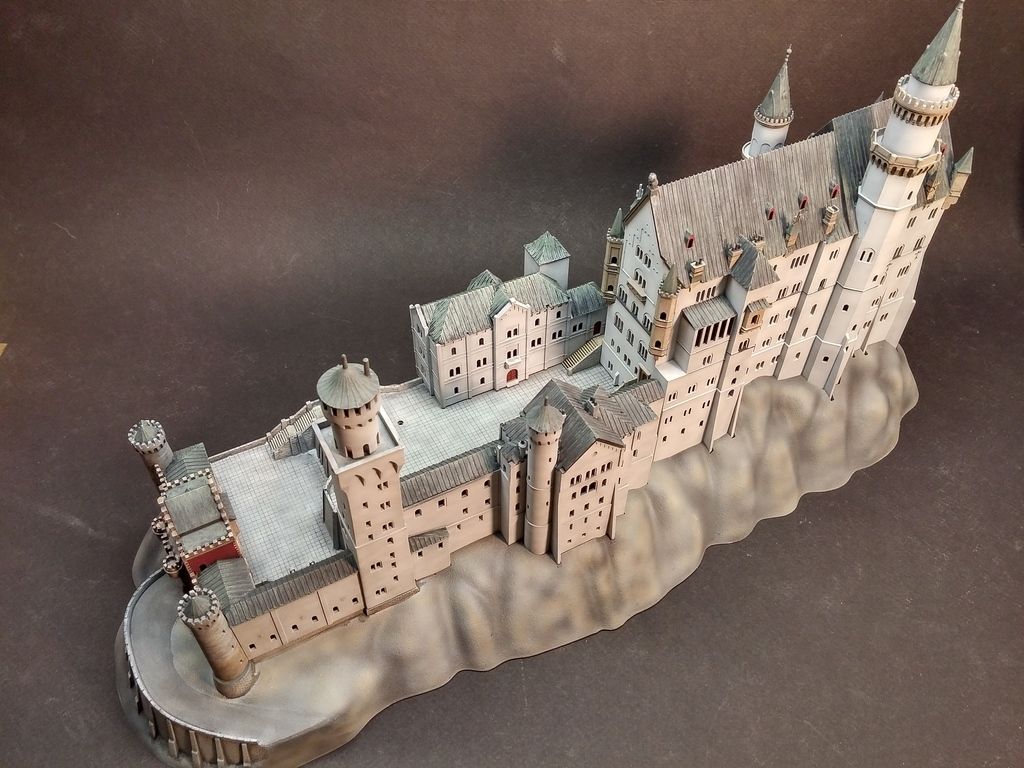
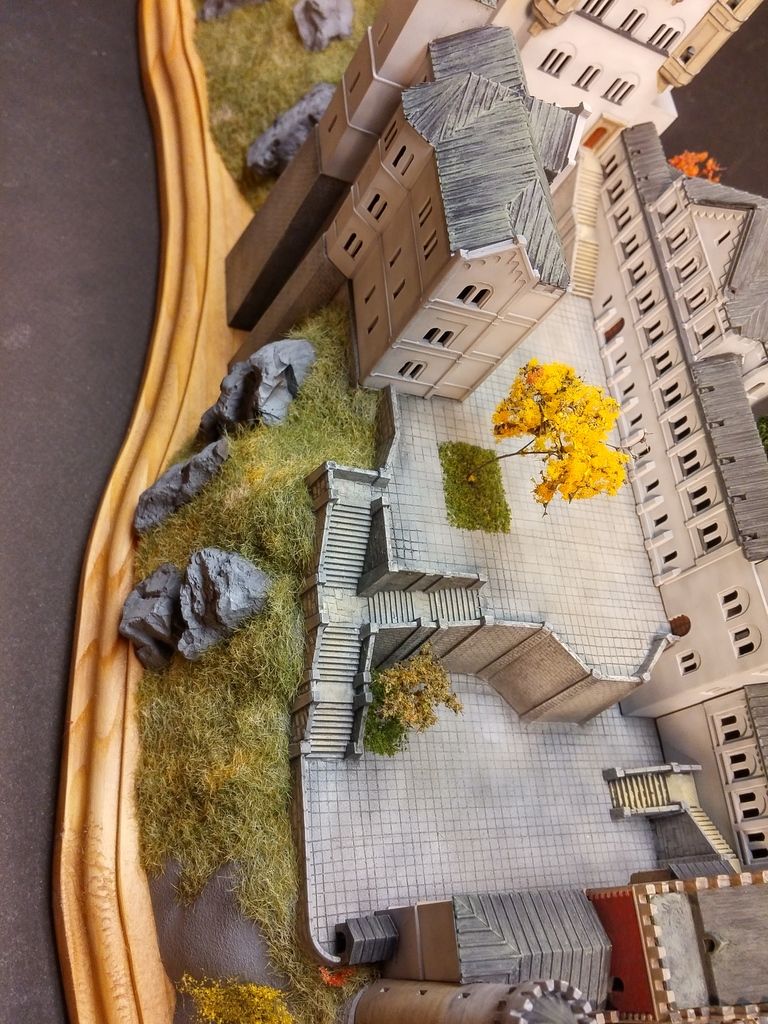
One more thing about this that was bugging me, was the “patio” areas. These areas are molded flat with a rough texture…like asphalt or concrete. The lower area, just inside the gate house had square pavers/cobbles in a stacked bond pattern. Easy enough to scribe that in. The upper area had much smaller cobble stones, in a swirl/arched pattern…NO WAY! I just scribed the same stacked bond pattern as the lower area. Painted and dark “washed”.
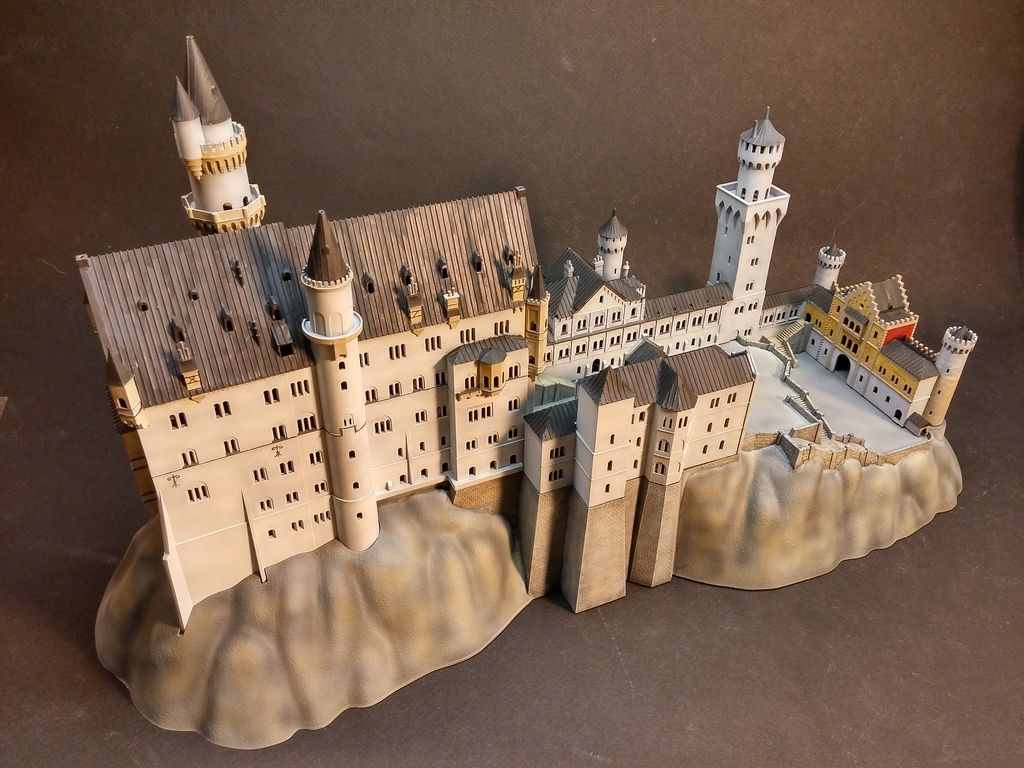
The buildings are pretty much finished. The roofs were painted black, then semi-drybrushed with dark grey, light grey and a mix of medium grey/Russian topside green. Dark wash on those as well. May do a bit with some pastels later.
I’m still debating on painting the paintings on the front side of the main building. I have yet to find a really good picture of them to refer to…I haven’t really been looking for it yet either, though.
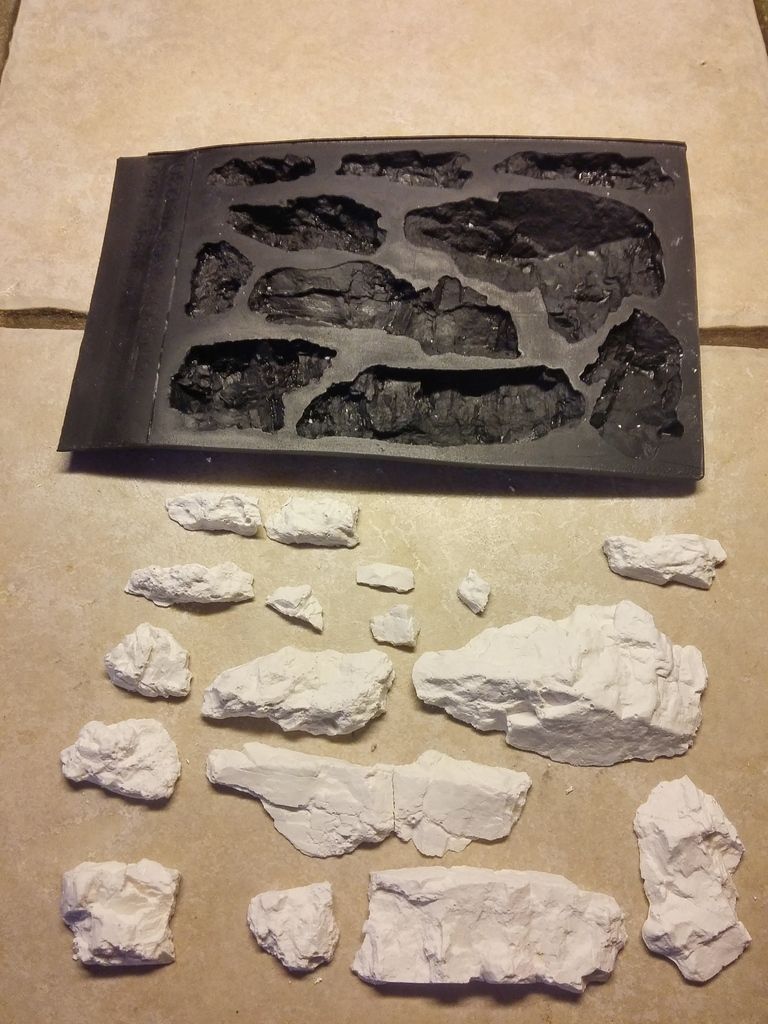
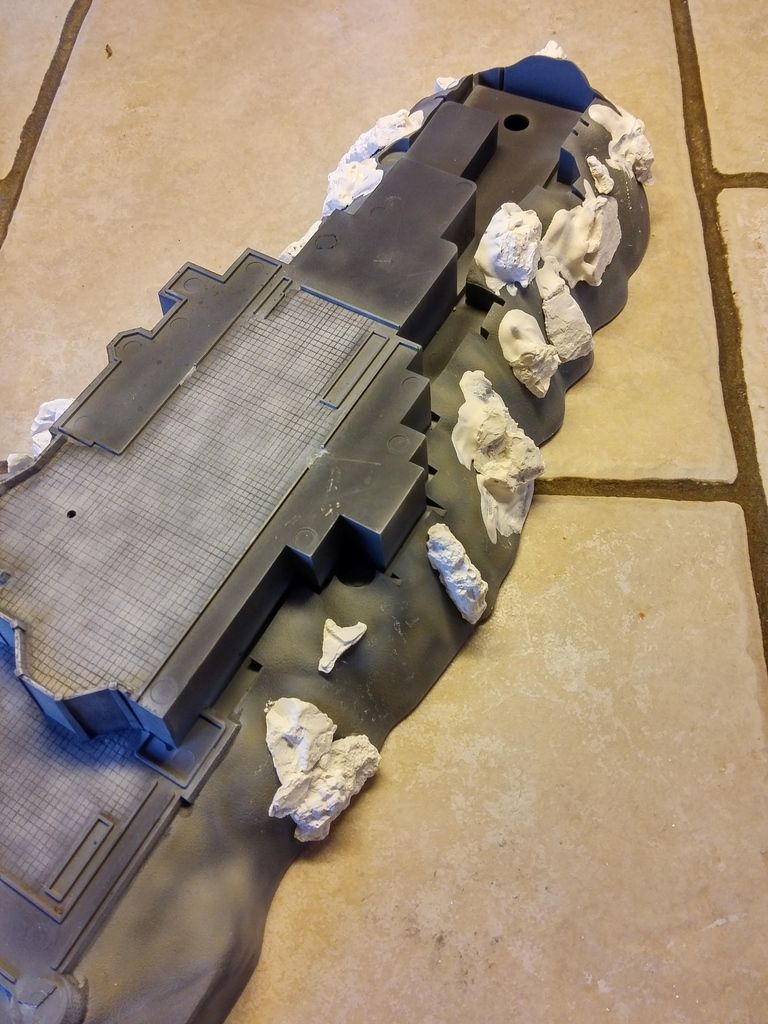
I’ll be adding…or at least attempting to add some of the rocky outcrops around the base. My first attemp came out pretty good, as far as the mold went…
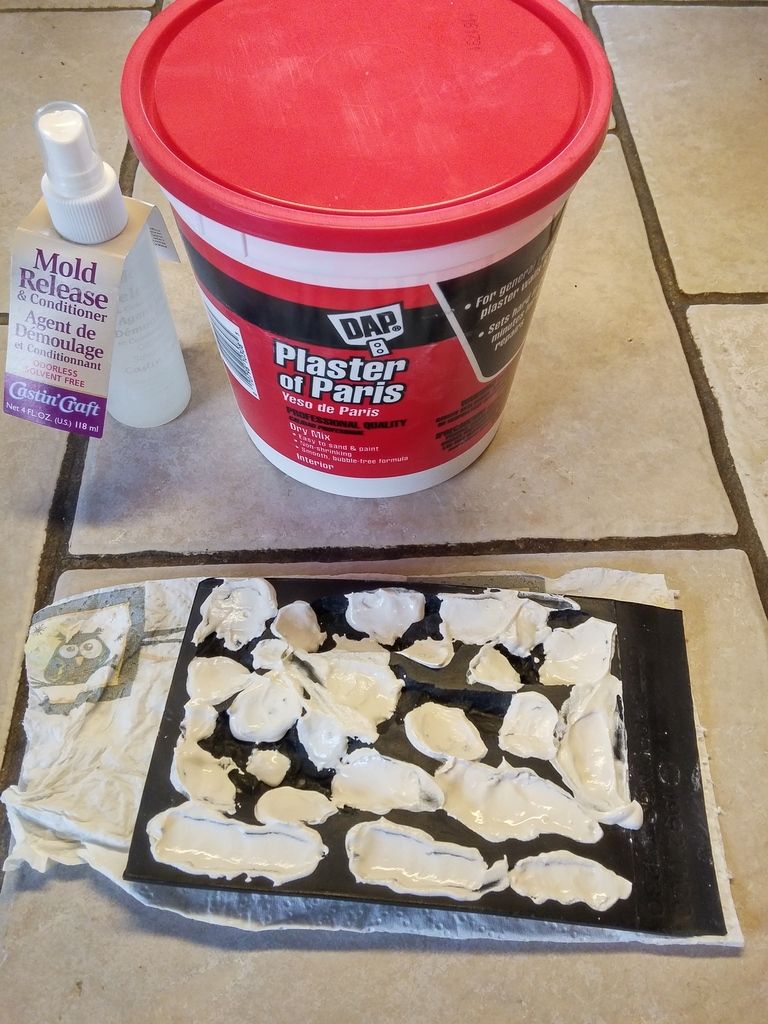
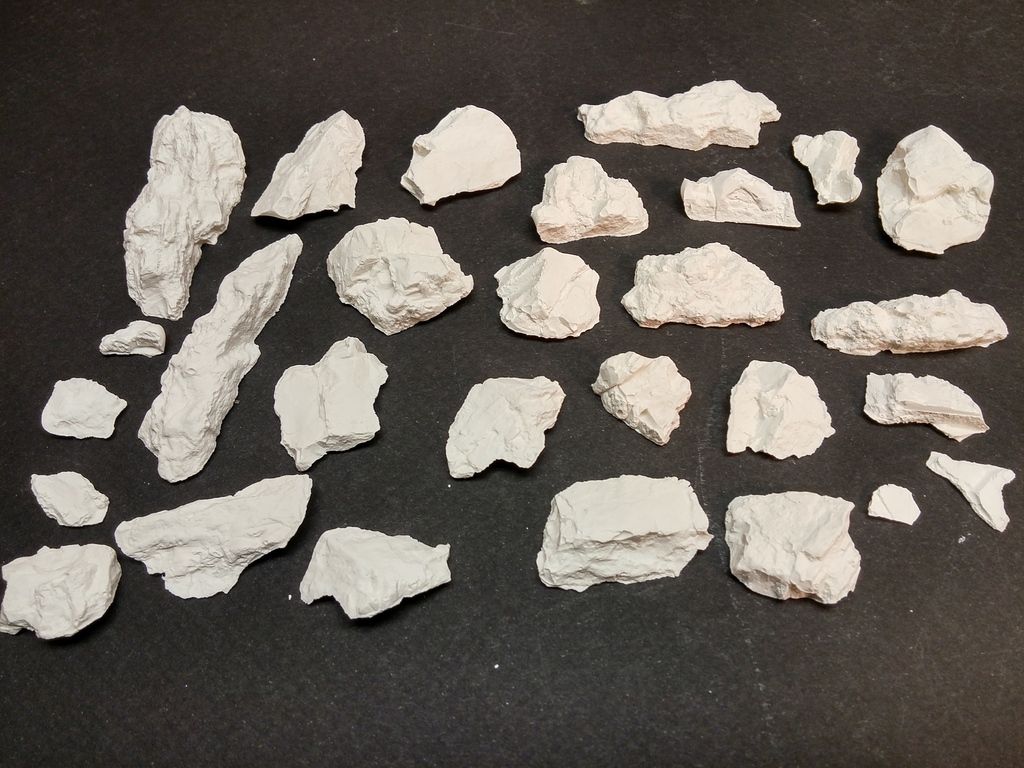
Problem is, I used light weight hydrocal. Not completely useless, but it came out really “chalky” and I have doubts about staying put. So…I went with regular plaster for #2. Four hour later…still wet…trash. Went to the hardware store and got a new batch of plaster. This time, rather than filling up all the spots completely, I made more, smaller rocks, and rounded off the backs of them so that they will be a better fit to the contours of the base.
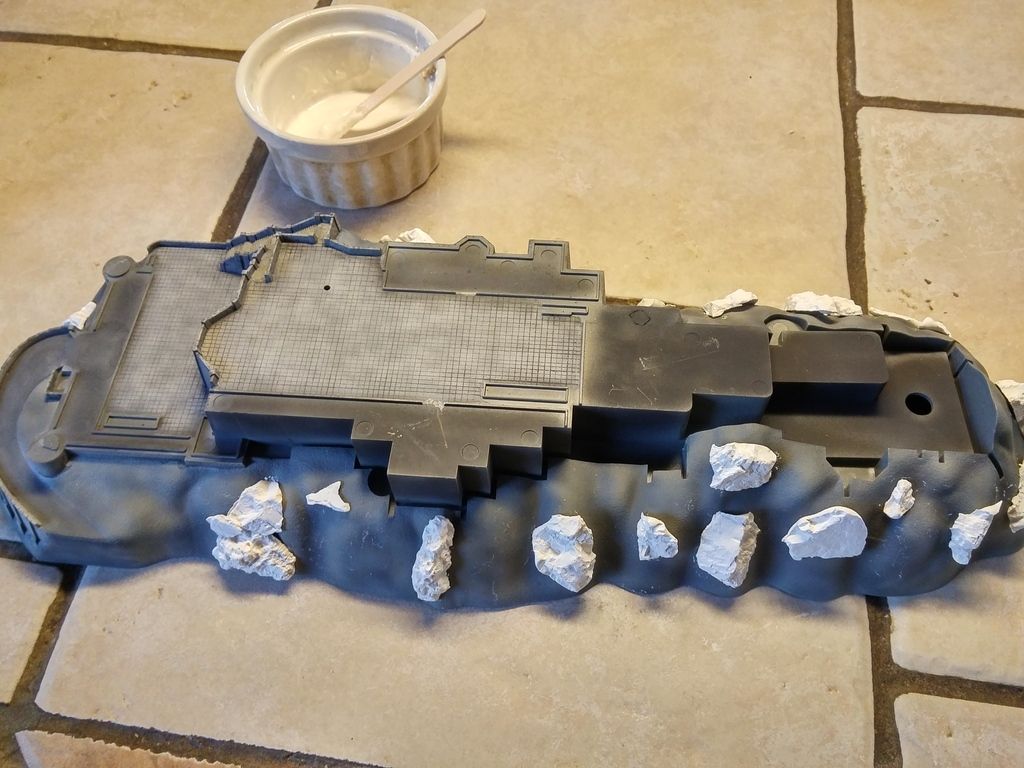
At this time, I think it looks pretty dumb…but, carry on.
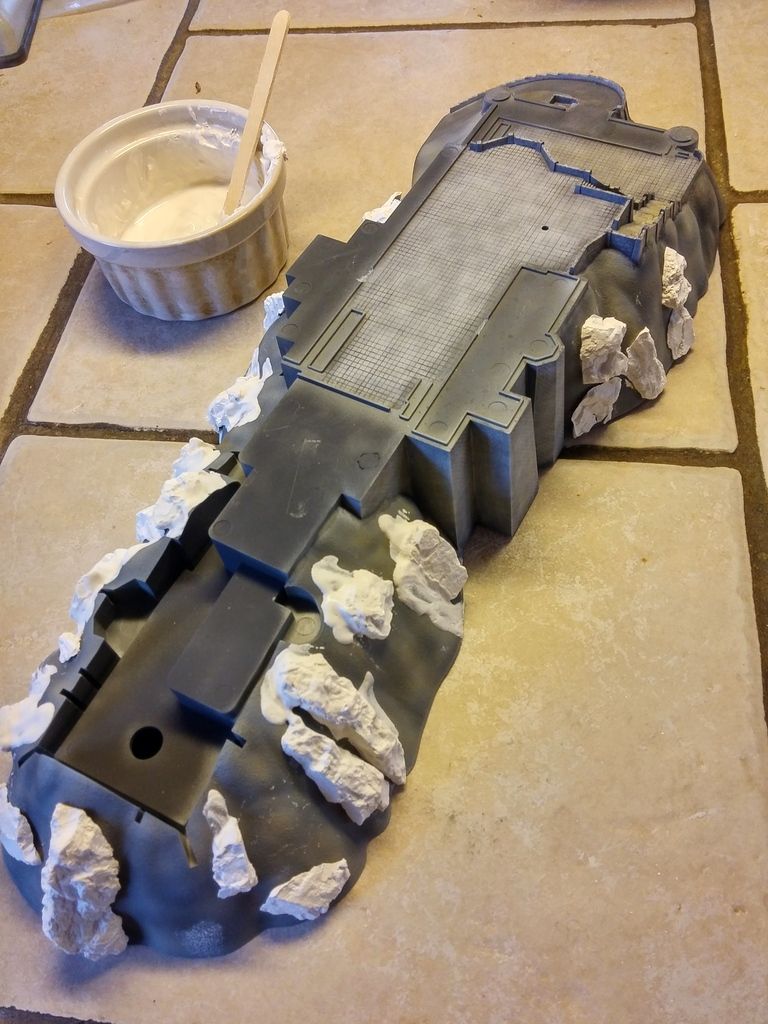
There was a lot of gaps between the rocks and the base, so I whipped up some more plaster to fill those in a bit, plus help to solidify the rocks to the base.
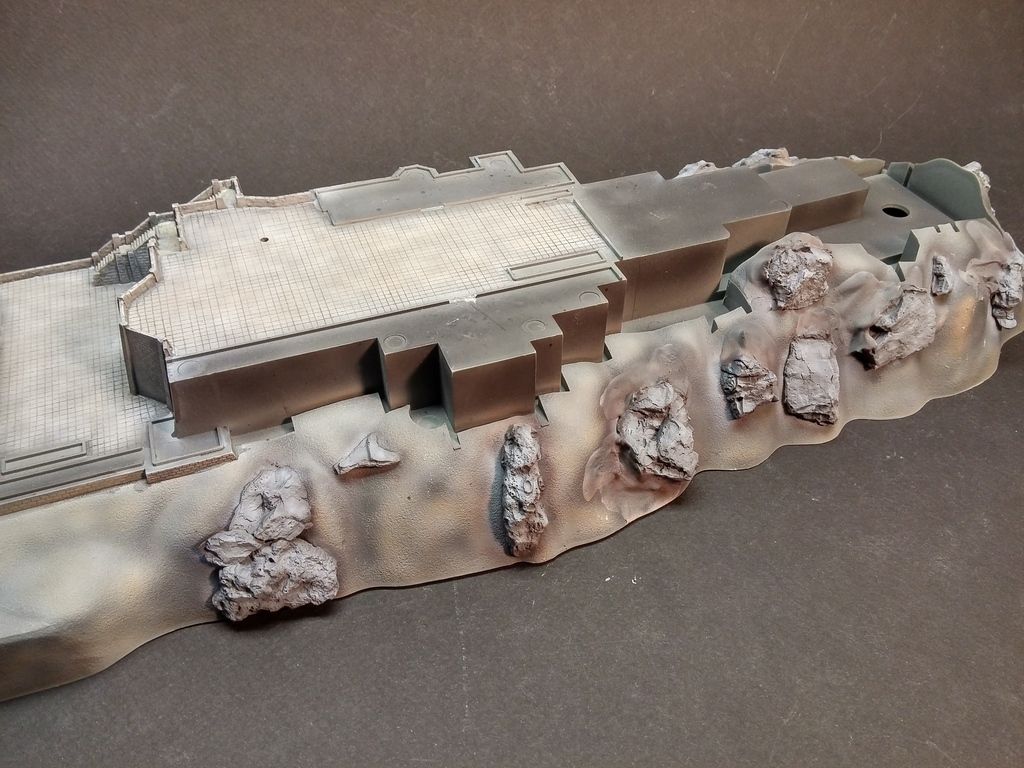
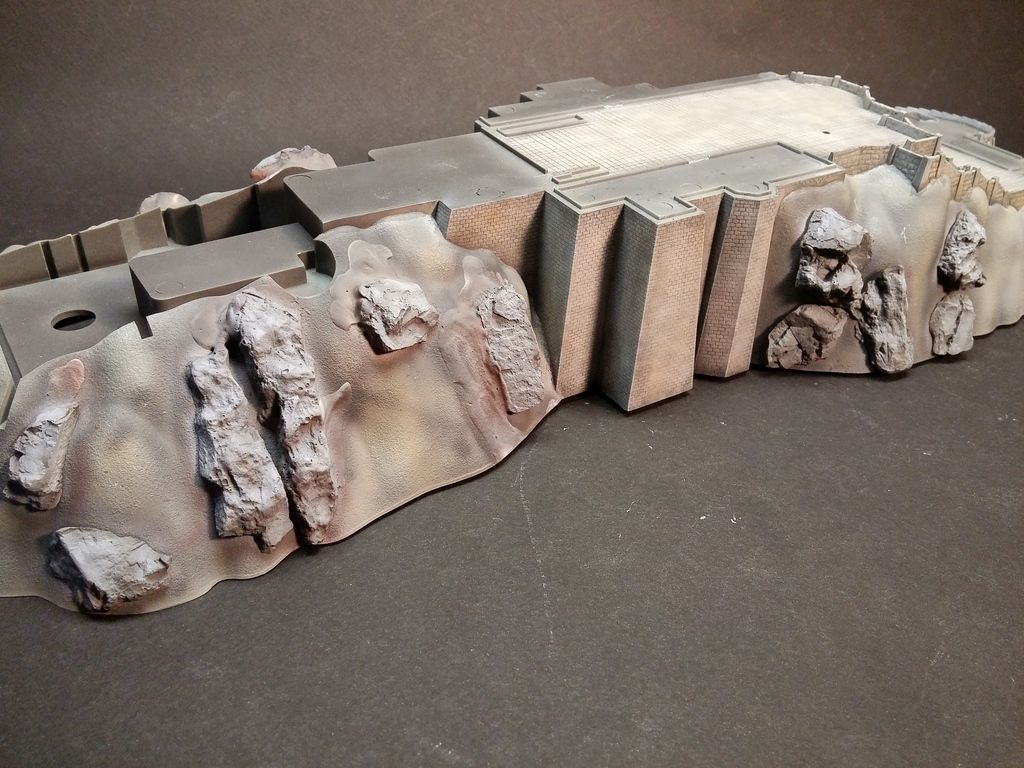
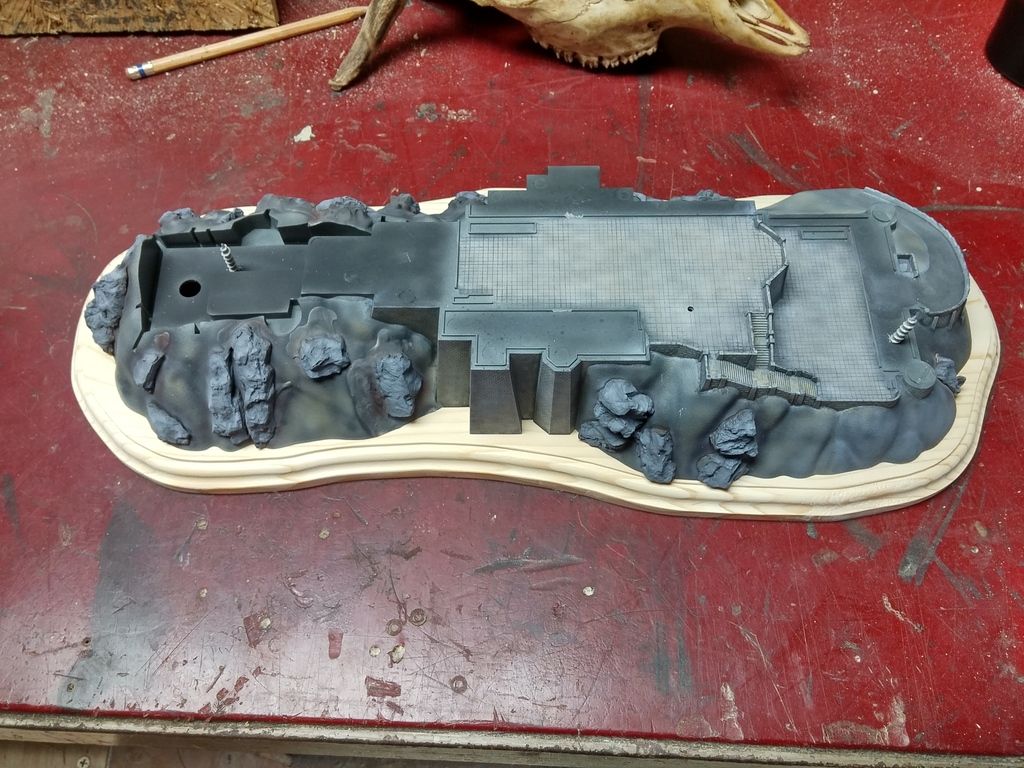
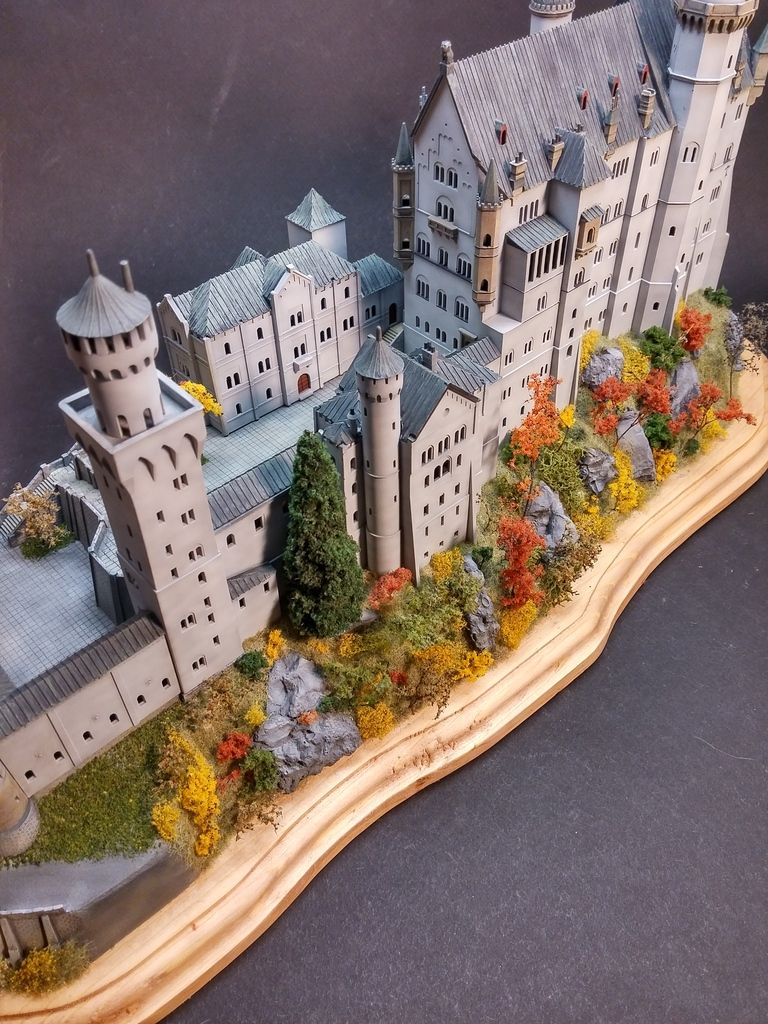
On to painting. I started with a black base, then worked with shades of brown - tan. Based off a pic I found. It looked pretty good. Then I looked at some more pics, along with pics of the surrounding rock/mountain…seems to be a lot more grey. So, back to the paint booth, and this is what I have…
As of now, this is just paint…no washes or weathering.
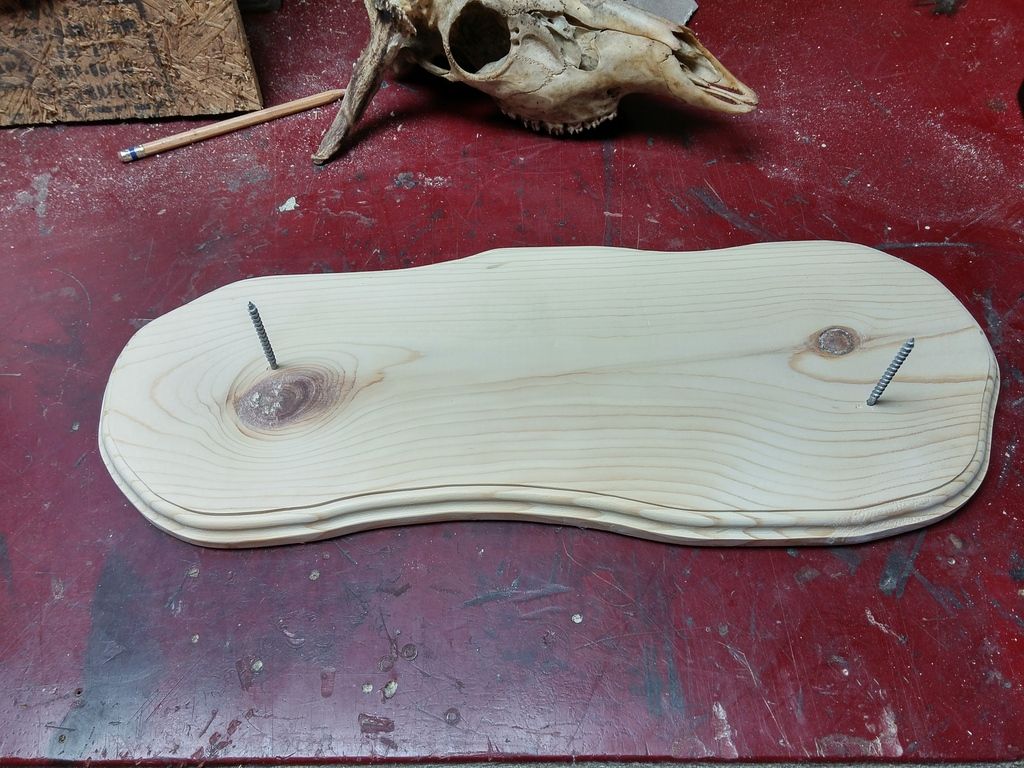
Moving along…took the base out to the garage and cut a base…for the base. This will make handling a lot easier when it comes to doing the ground cover…plus, it’ll give it a nice finishing touch.
Traced around the base for the rough shape…jig saw and a router took care of the rest.
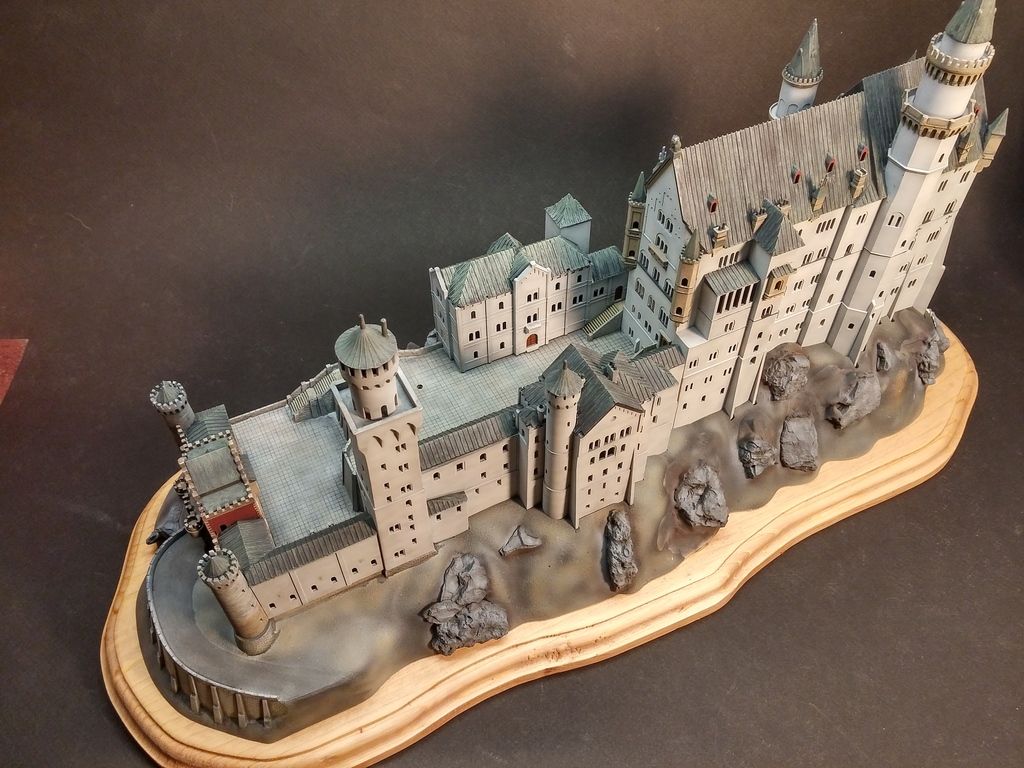
Wow…I was a little sceptical about those rock outcropping, but since you applied the trees and grass I really think you pulled it off…What scale is this thing anyway? How about a nickel or penny pic for comparison?