My "Hun" - Century Series #1 Monogram F-100D Super Sabre Completed

I’ve been wanting to take a step away from World War II and all these radial engines I’ve been doing lately (with multi-engine aircraft like the B-29 and C-47) and the Dauntless … I have a number of jet aircraft in the stash ranging between Korea, Vietnam, and modern day. One of the oldest kits in my stash is Hasegawa’s F-104C Starfighter, which is of course a Century Series aircraft. Well, my OCD says you cannot start a series in the middle of the series, must start at the beginning (I would never have started Star Wars with Episode IV, for instance), so clearly my next choice was the F-100 Super Sabre.

The kit in my stash was this relatively recent re-release of the 1980 Monogram Super Sabre.

I had built this one at the turn of the century as well as one time as a teen. I likely never would have attempted this Monogram kit again had it not been for one disastrous day in 2006 when, while at work, I got a call from my oldest who informed me that the shelves upon which many of my completed builds were displayed upon had collapsed. Smashed plastic all over the floor, including the F-100. My wife graciously suggested that I could replace everything that I had lost, which I proceeded to do. Some time after that, I acquired this kit via eBay, although I suppose had a waited a few years longer, I’d likely have bought the Trumpeter kit so as to build a different kitting of the Super Sabre.

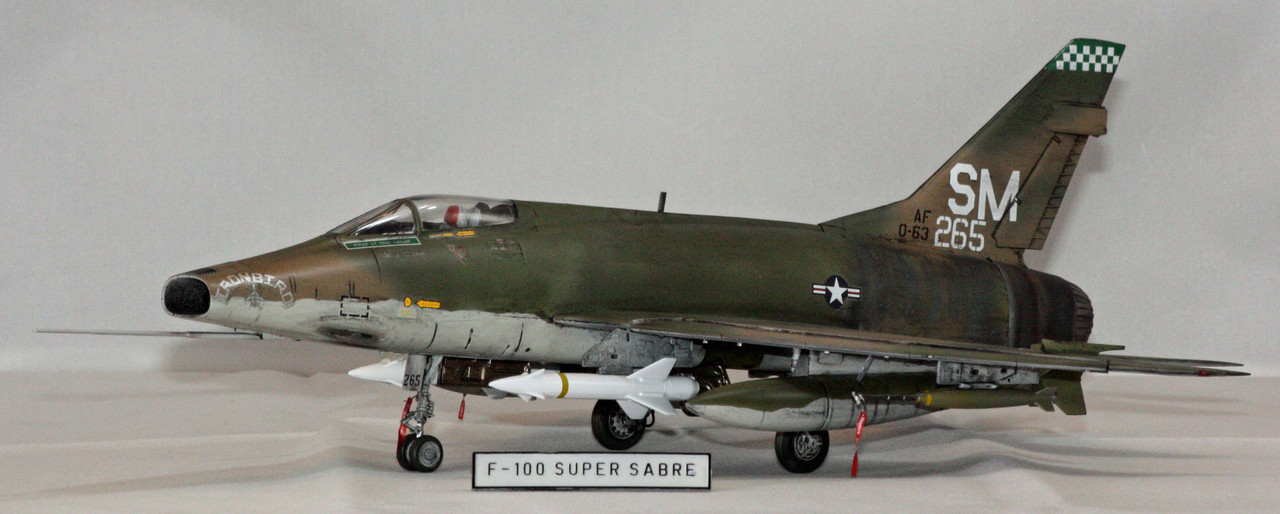
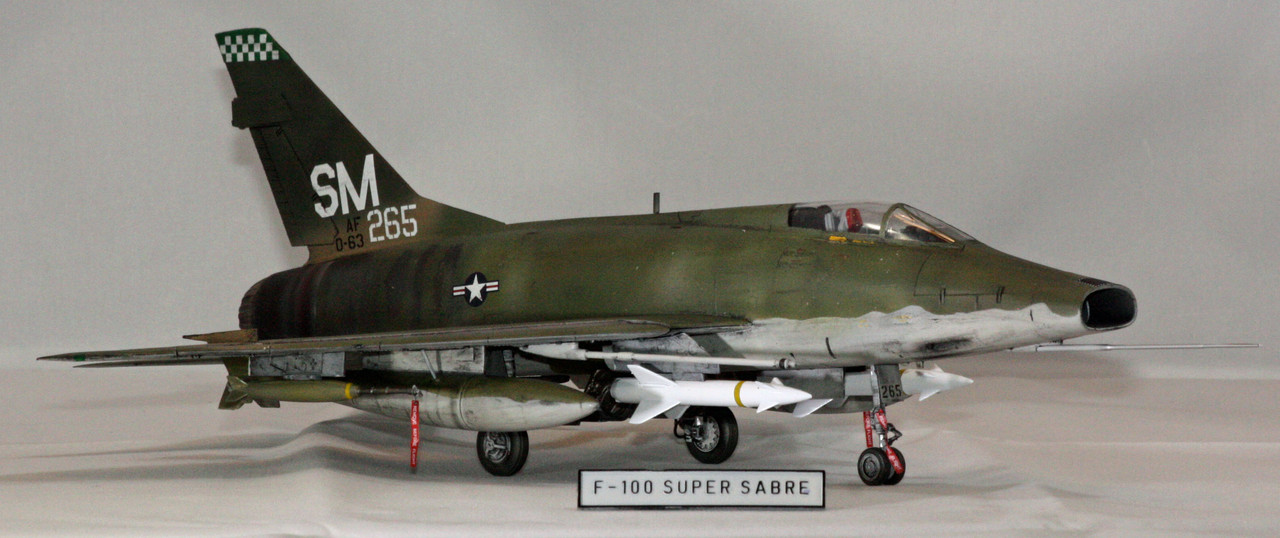
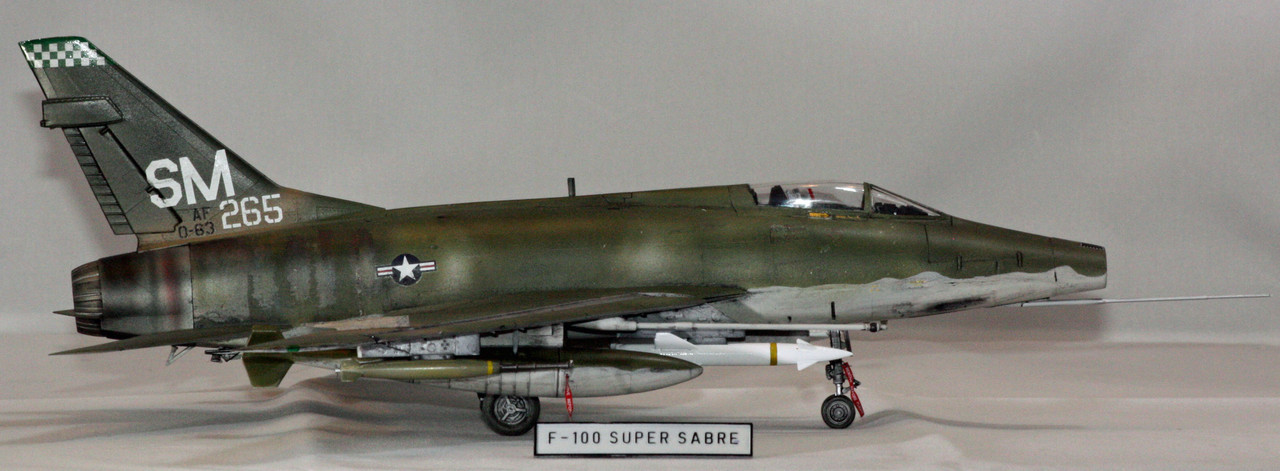
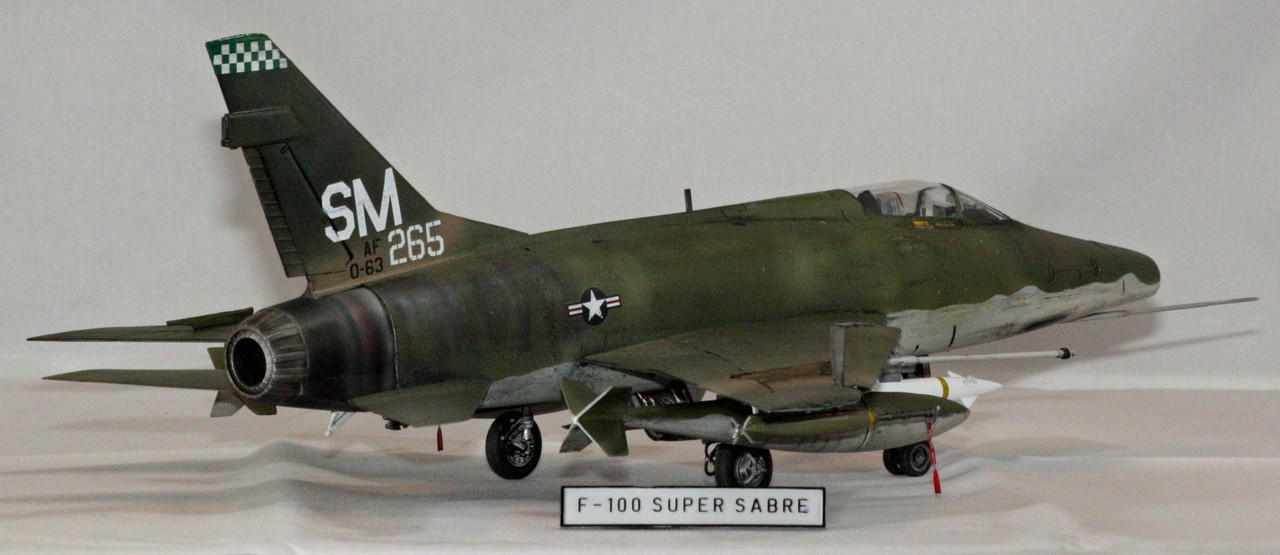
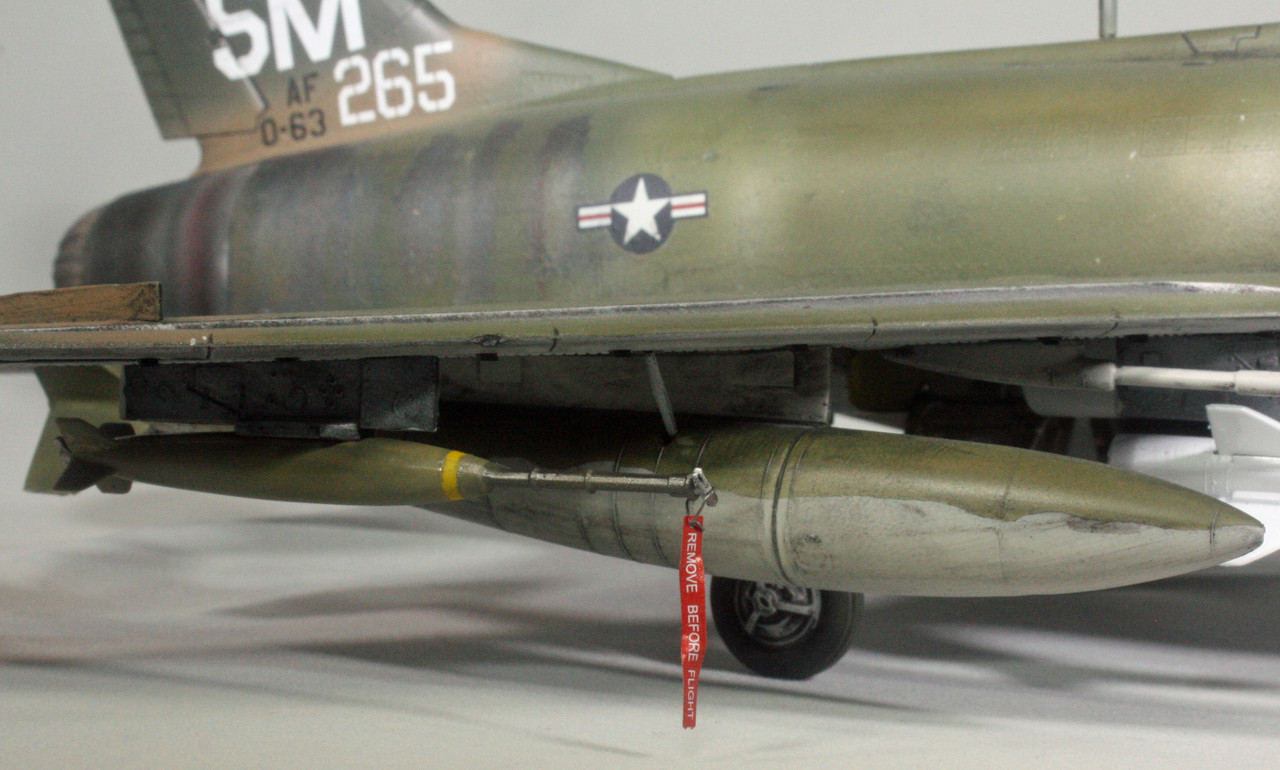
The kit decals were colorful and still in good shape, but those were for natural metal Super Sabres. Having done those two B-29s recently, I didn’t feel terribly enthusiastic about tackling another NMF, so clearly that was leading me to a Southeast Asia camouflaged Hun. Problem was, I needed decals for such a Super Sabre. I found a decal set by Caracal Models, F-100D in Vietnam Part 2, that includes a couple of SEA Huns, one with my initials, SM, on the tail. That was going to be the build.

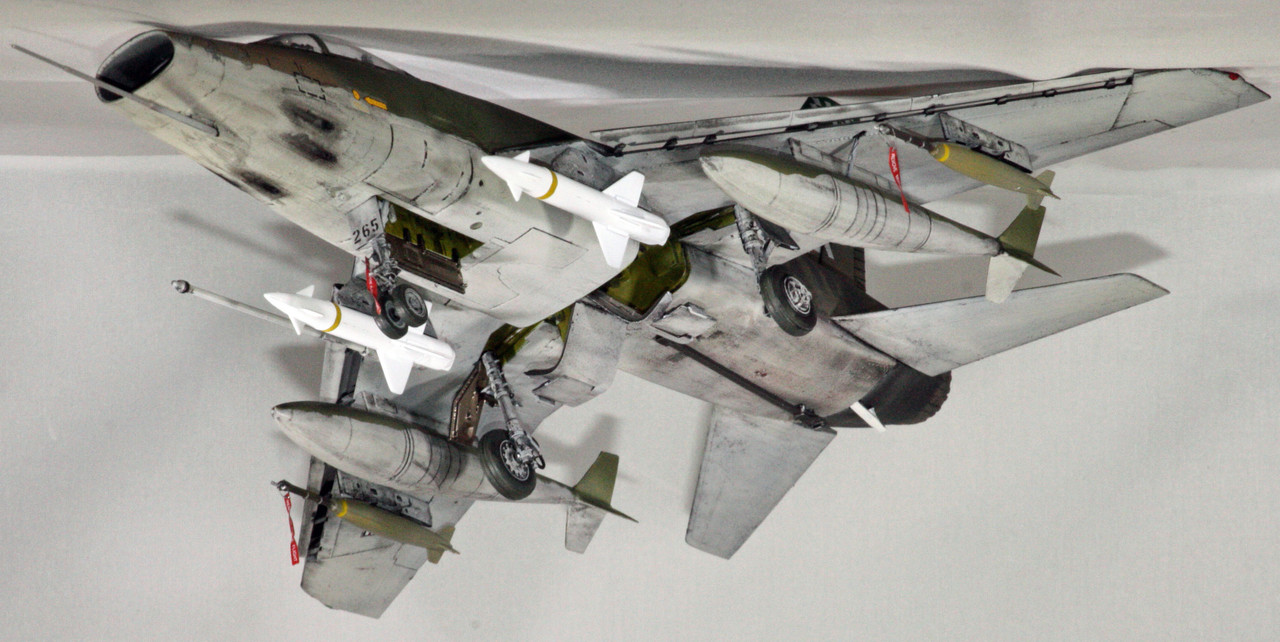
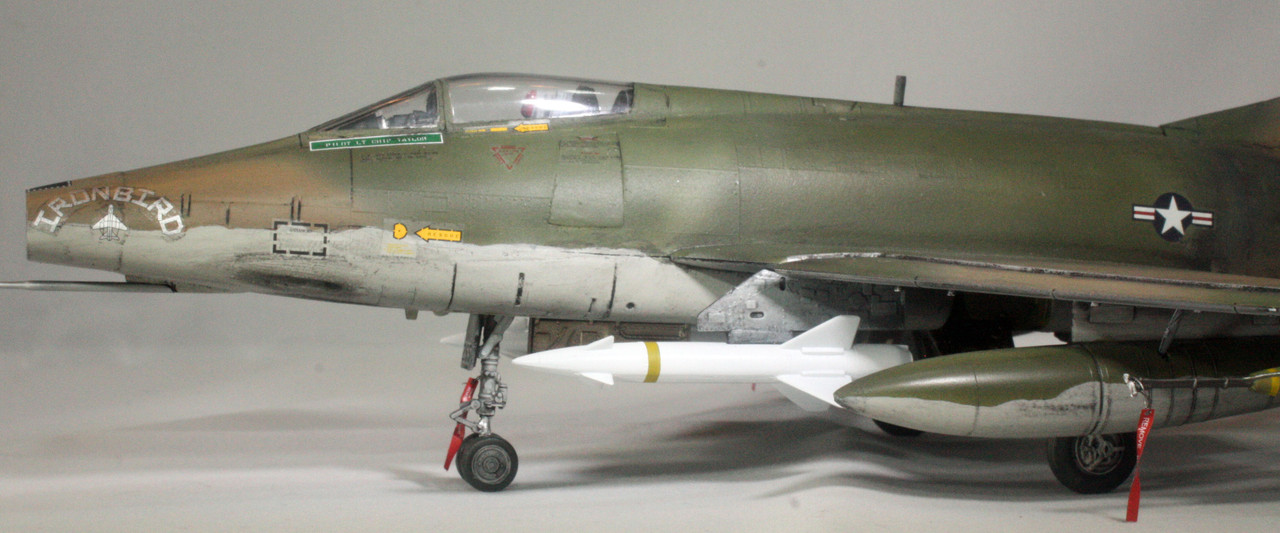
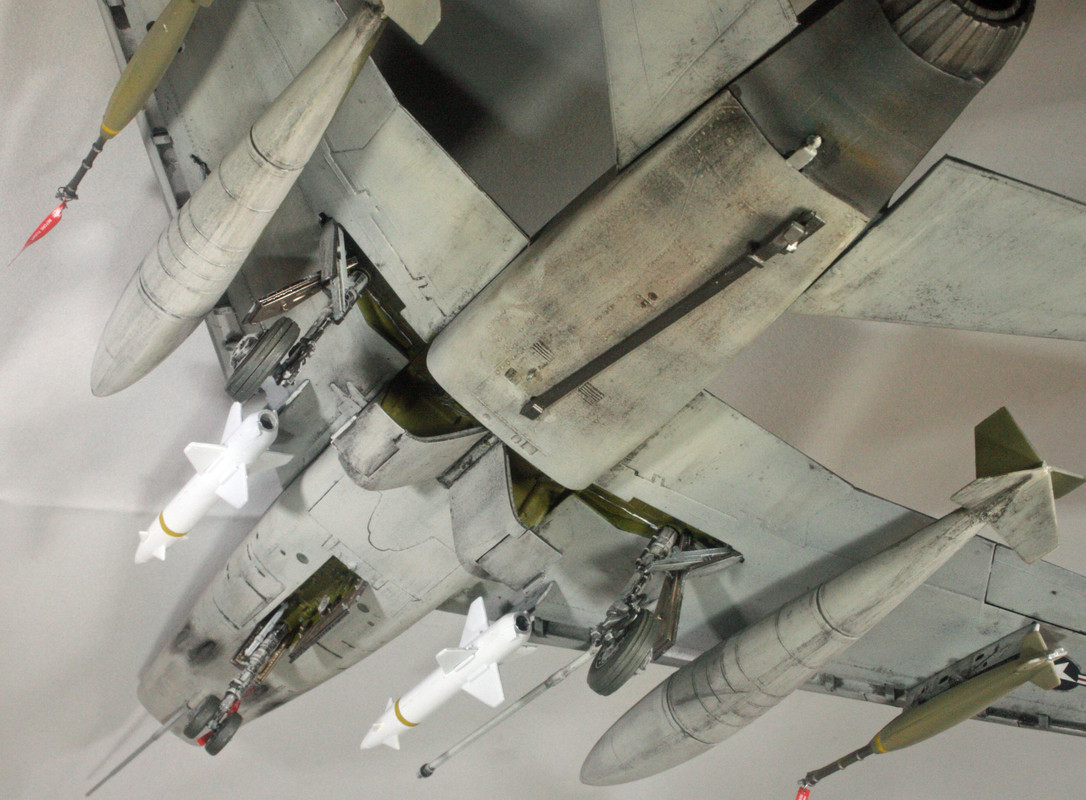
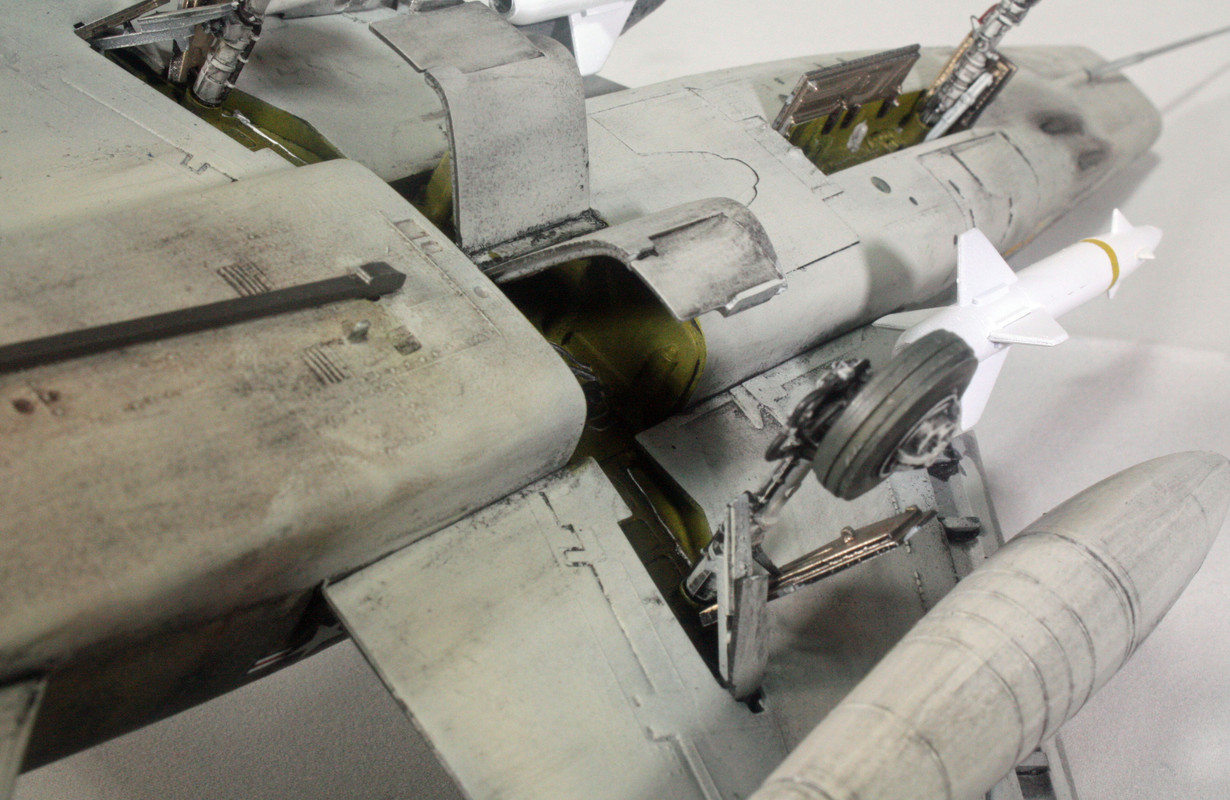
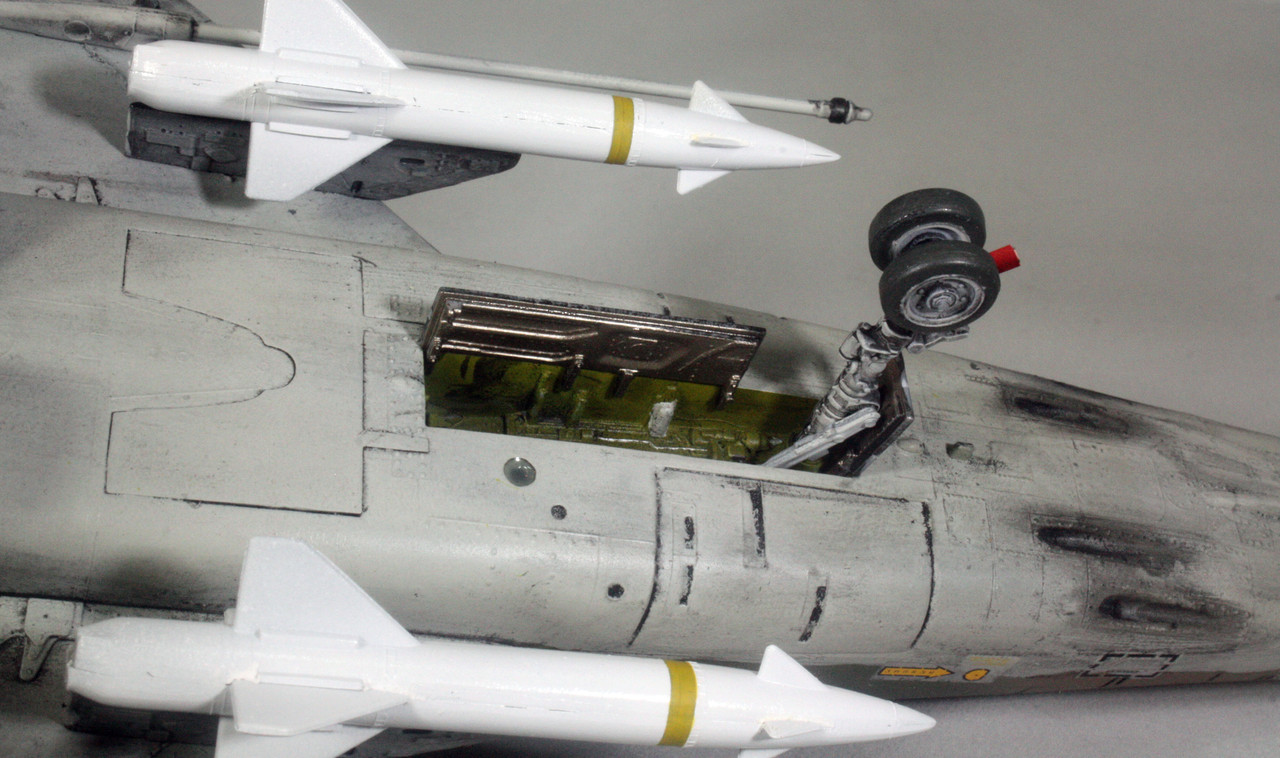
Primary paint came from the Vallejo set, USAF Colors “Vietnam War” Scheme SEA - Dark Green FS34079, Medium Green FS34102, Sierra Tan FS30219, and Camouflage Gray FS36622. I used several shades of Alclad II metallics on the notorious tail section of the Hun (steel, dark aluminum, magnesium, and metallic red). Other paints are Mission Models Interior Green, Tamiya White, Vallejo Insignia Yellow, Model Master Metalizers Steel, Titanium, Exhaust, and Aluminum, Vallejo Tire Black, Model Master Light Ghost Gray, and Model Master Faded Olive Drab.

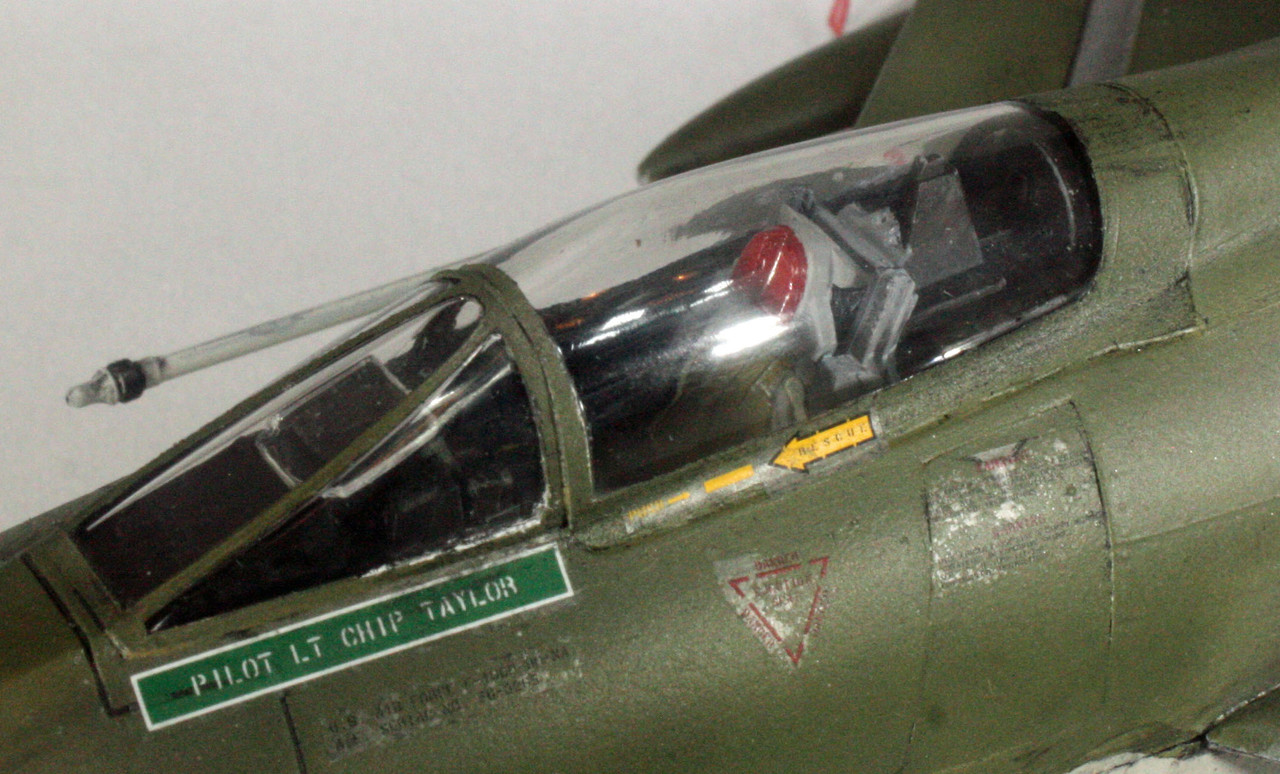
Once I got all the interior parts painted and assembled, I put together the entire airframe and put down a coat of Krylon gloss black. I didn’t look close at the instructions where there are a couple of lights, clear parts, to install from the inside of the fuselage and had assumed I could put those on from the exterior. Nope. So I took care of that near the end of the build by filling those holes with clear canopy glue. It does not look as good as the clear parts would have, but it’s better than a couple of empty holes there.

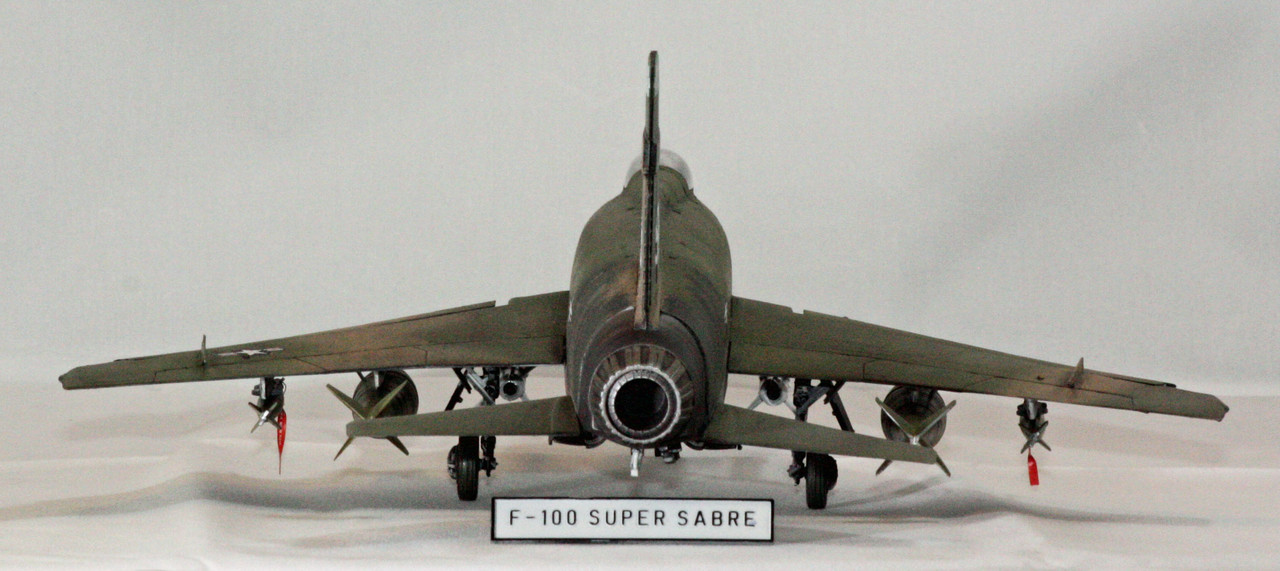
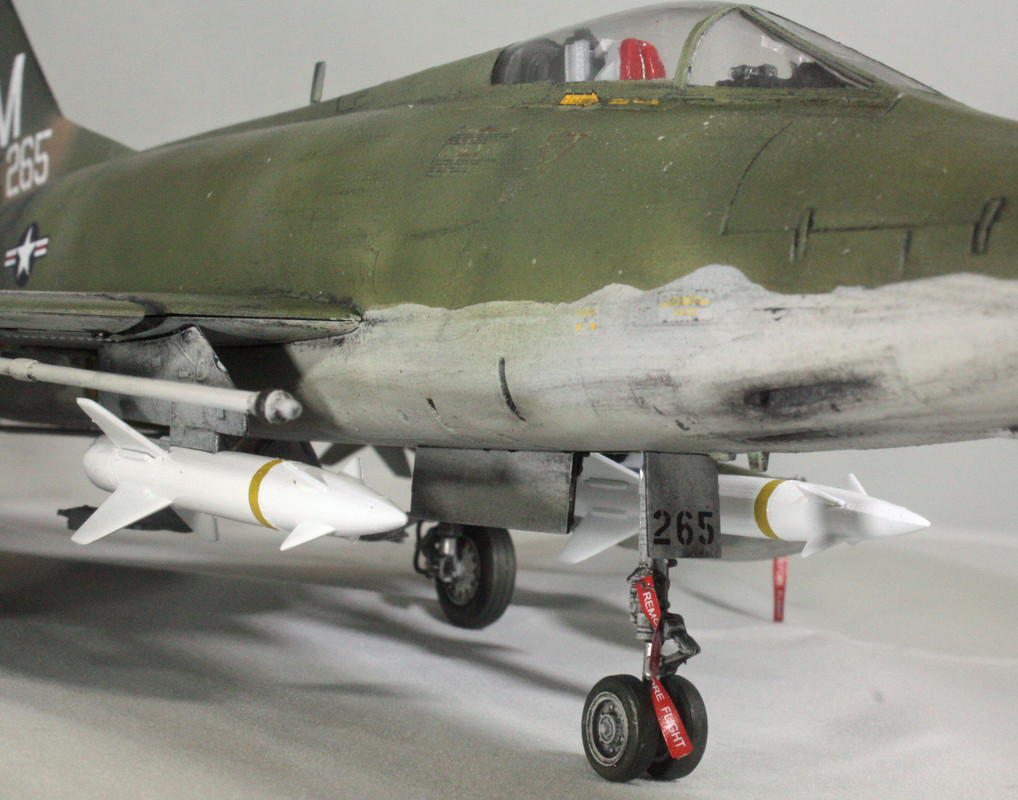
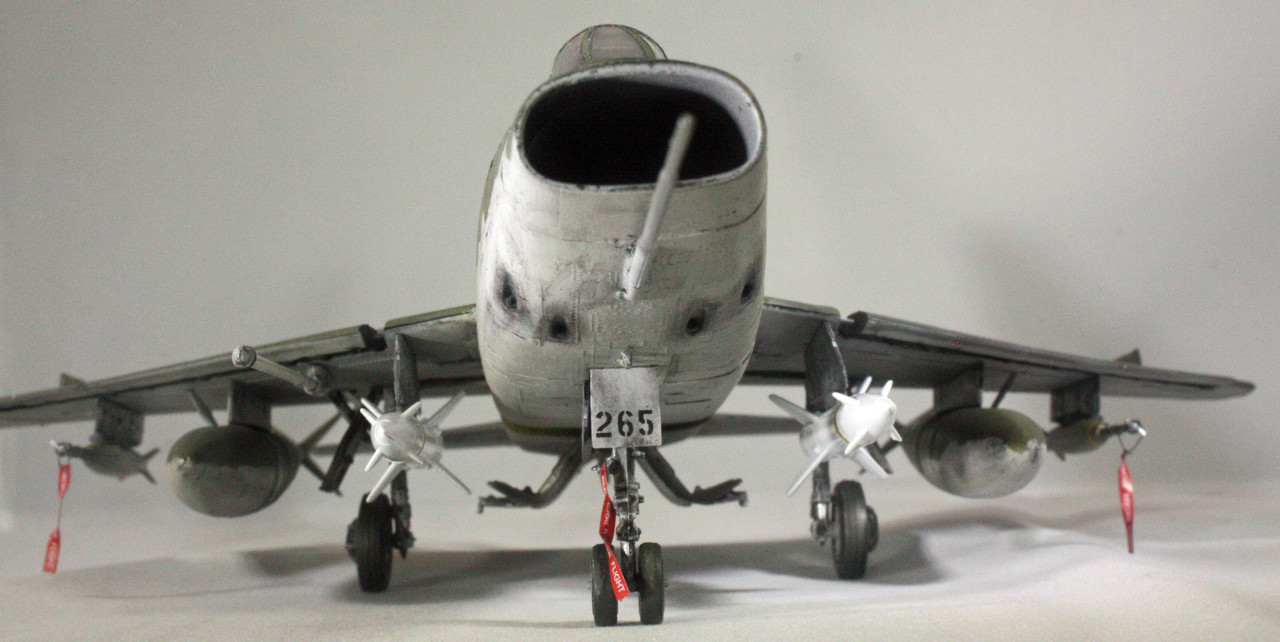
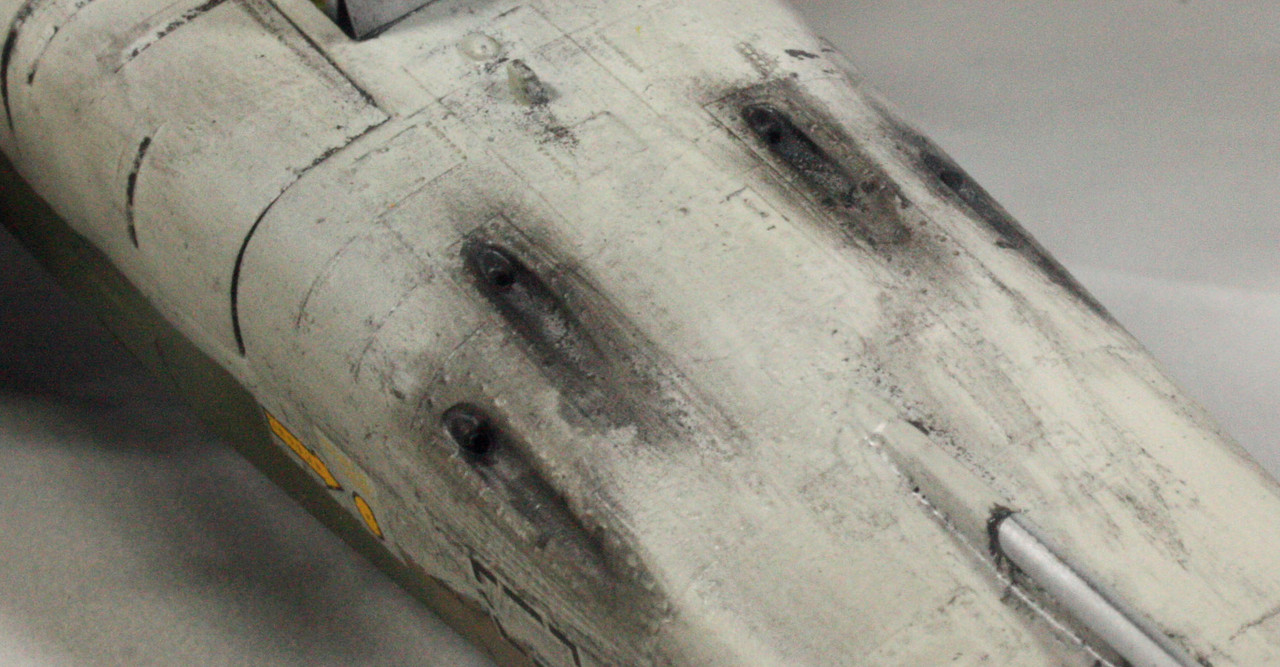
Weathering came via Flory black wash, ground pastels, Tamiya weathering compounds, and AK Interactive streaking grime. The engine area of the Hun was notorious for generating so much heat that the paint in that area would burn away. I replicated that by splotching on some liquid mask, painting as normal that area, and then washing away the masking material. I put down random weathering compound shades, from burned blue to sand to metallic shades, and mixed them as best I could to replicate the burned metal look of this part of the Super Sabre.

Decals performed flawlessly. As an aside, if there is anyone building a Hun in need of the colorful decal sheet, I can send it to you.

So here is my Hun.

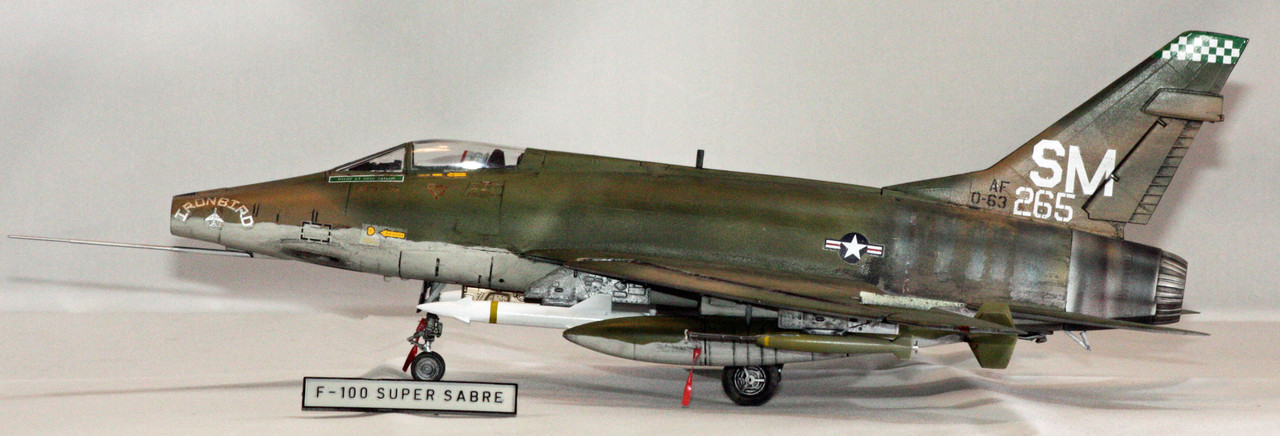
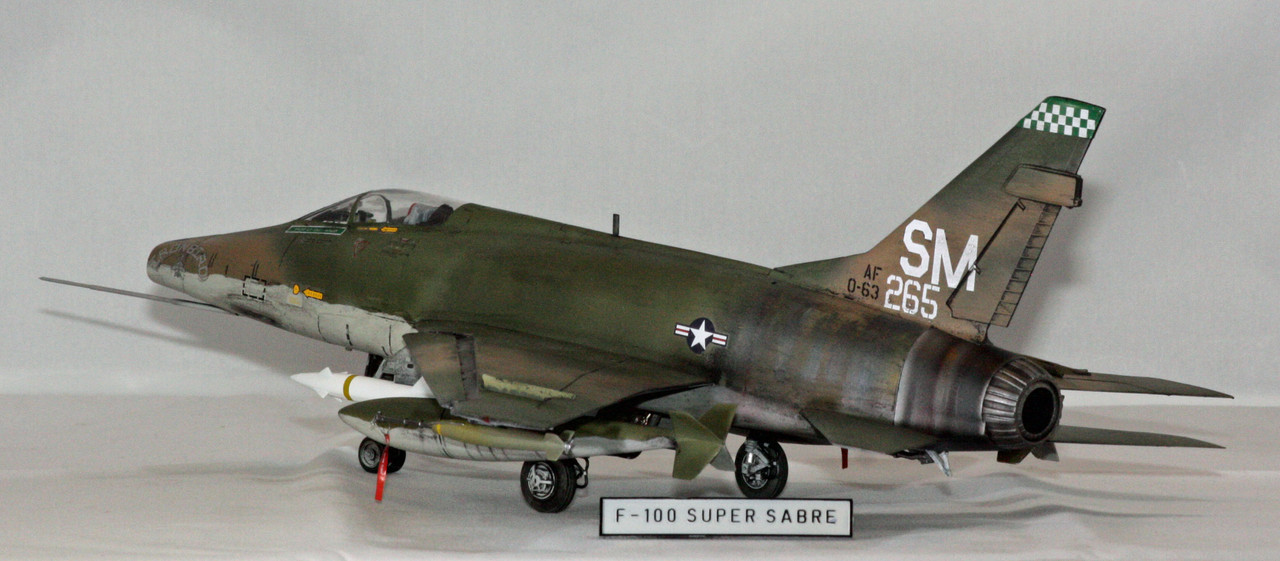
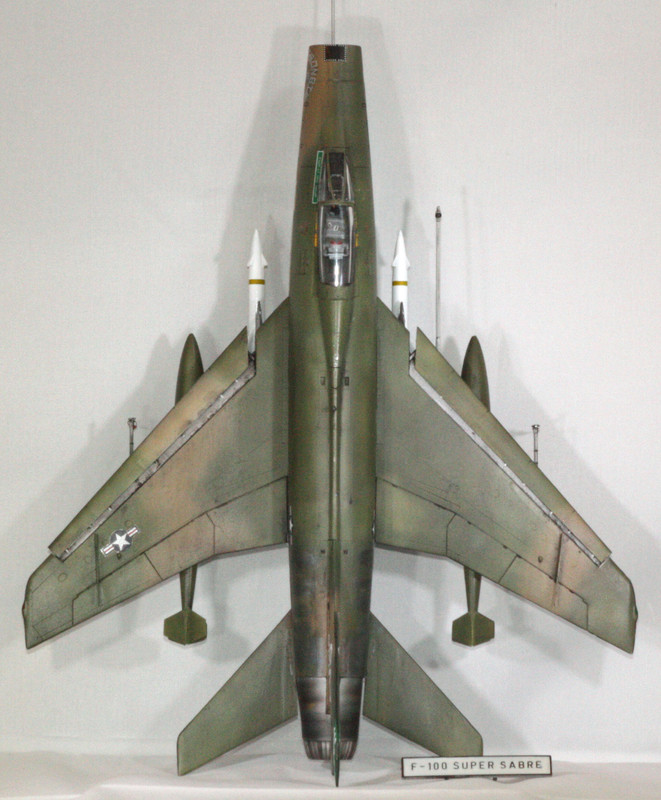
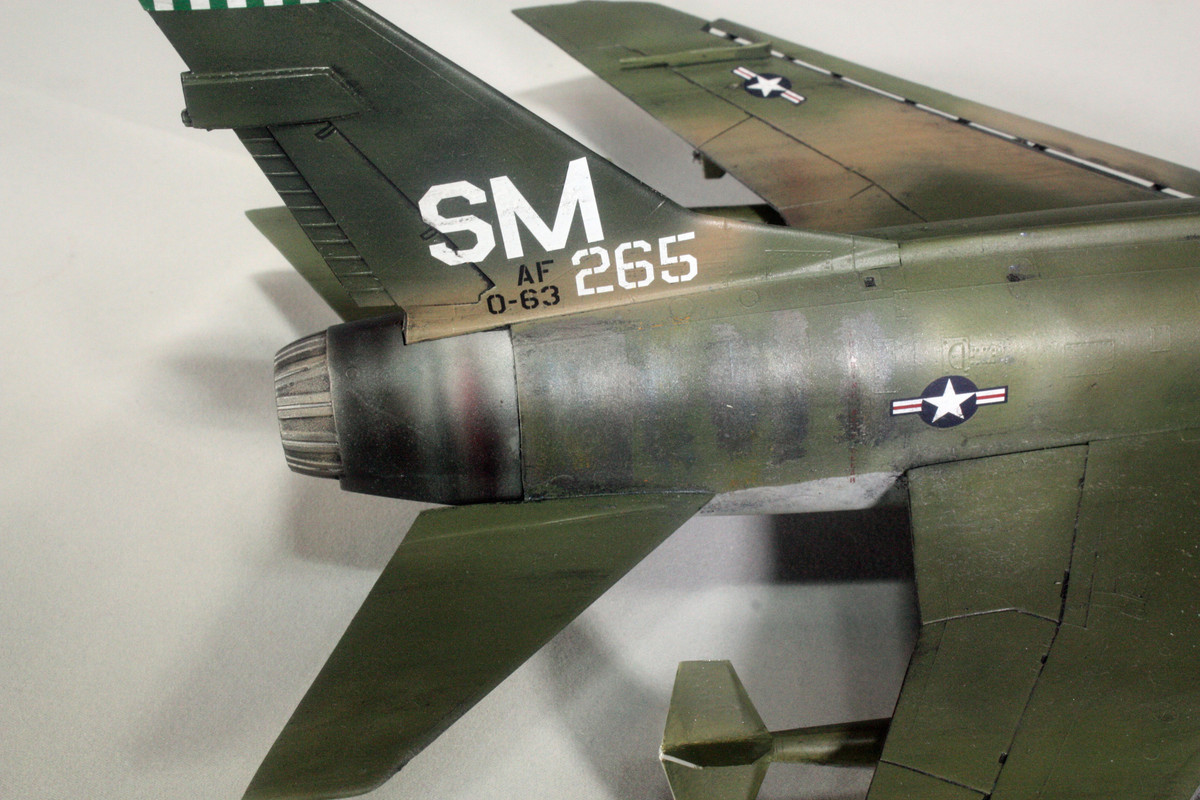
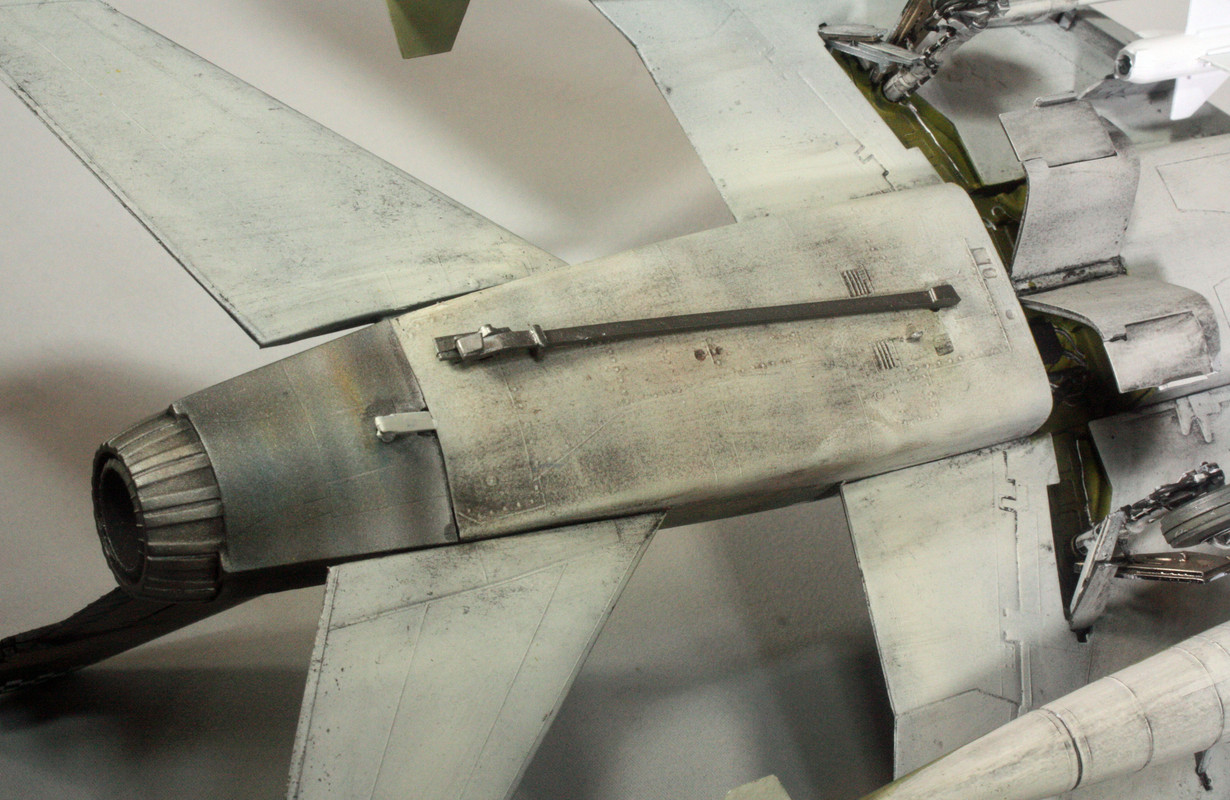
This is a good kit with detail that was very good for the era in which it was produced. I’d kinda like to do the Trumpeter kit to make a comparison. The engine exhaust can did not fit flush all around; I’m not sure if the poor fit was a result of my work or the kit itself, but I didn’t get an impression that I’d fouled up the fuselage in such a way to produce such a poor fit along one the starboard side.

As I was wrapping up my work, I remembered a 1/32 Tamiya F4 Phantom that I did with some REMOVE BEFORE FLIGHT tags I had put on that build. I checked my supplies box and found 1/48 REMOVE BEFORE FLIGHT tags, which I decided to hang off the bombs. I added a third to the nose gear strut when I found a photo depicting this.

I’m going to have to relax a little - just a little, and do some other things before I start my next build, the Monogram F-101B Voodoo. I have a 1/48 scale version, but also the smaller version from the 60s in a baby blue box. I’ll probably do both.

That came out looking very nice Aggie! [y] I do think that you need a NMF Hun alongside as a stablemate.

Excelent!

You shouldn’t tempt me (currently unemployed, so no disposable income).

Thanks for your kind words on the Hun!

A Kramer reference, awesome!

Very cool. I have a thing for those open mouth intake birds. I have the Trumpeter kit to do.

Bookmarked this one for future reference-very well done!

Thanks for your kind words. I’ve always liked the look of this bird. Makes me think of an ant-eater, but an ant-eater with a serious kick. I’m considering that Trumpeter kit for later.

Thank you for your kind words.

I utilized a Detail & Scale book, an In Action book, and all the photos and web sites I could find on the Net to get as many photos as I could for this build.

Tho Monogram Century Series jets may be old but man they are fantastic kits, all having beautiful molded details specially in the pits. I completed this one a while back and the F-101 both done in NMF.

The heat stains and paint came out looking great . Fantastic job done on this classic old Monogram model.

Looks pretty darn good to me! Also glad to know I’m not the only one with odd modeling quirks!

I’m looking forward to seeing your treatment of the century series jets. It’s incredible to see how quickly the technology changed between the F-100 and the F-106.

Thanks for sharing, Aggie!

Thank you for your kind words. I agree that the Century Series kits are great kits. I honestly don’t recall ever doing the -106, relatively certain that I did, and I do remember helping a former neighbor’s kit do one about a decade ago. But I do know that I’ve built the other kits in the series. All really good and full of details, all for a still relatively cheap price compared to Trumpeter or Hasegawa.

I will be doing two -101s next, both Monogram. One is the original kit from back in the late '50s, early '60s, at roughly 1/109 scale, and the other the 1/48 monster kit (it’s a lot bigger than the Hun).

Thank you for your kind words, Rad! Spoiler alert - my 1/48 -101 will be a Texas ANG bird in the standard camouflage gray with the Texas flag on that big tail. Not sure how I’m going to do the 109th scale Voodoo, probably NMF. I will be building former President George W. Bush’s ride for the -102. The -104 will be nice and shiny NMF, not sure of the actual scheme yet. The -105 will be a SEA camouflage Vietnam FB, and the -106 will be done in the camouflage gray paint as will the -102.

Aggie you just reminded me to finish the 102 and 106 that are like 95% done but just forgot to go back to them. I did replace the seats with resin ones and AM decals on one but other than that they are OOB both in polished gloss grey.

Wonderful job on the weathering and paint in general! For me it was the guns and area behind and deside the tail hook that set it apart. I really like this rendition.

Aggie,

Beautiful build sir. I really appreciate the heat distortion on the exhaust. I’ve been trying to figure out to reproduce that effect before I start on a 1/48 Monogram B-58 and a 1/48 Tamiya MiG-15. So any hints or tips would be greatly appreciate.

Steve

Yet another one very well done, Stephen. The only century jet I have done to date is the F-101, it’s here in my build log. There were a few things I did that really helped the fit that are shown there:

http://www.yolo.net/~jeaton/mymodels/f101/1f101/1f101.htm

Thank you for your kind words, Mongoose! I do tend to finish my builds to look like they have been used. If a bird looks like she just came off the factory floor, I can replicate that, but I prefer the look of a warhorse that is covered with grime, smoot, dirt, oil stains, and all that.

Thanks for your kind words, Steve!

As for the exhaust area, I started out with a shiny black undercoat. I used a Krylon spray paint meant for plastic. I then put down a coat of Alclad II aluminum. I followed that up with various metallic shades - clear red, steel, titanium, and magnesium, if I recall right. I used liquid mask to splotch areas of the exhaust for the effect of burned paint, which the -100s were well known for. Once I had all the camouflage painted and the liquid mask removed, I then started in with Tamiya weathering pastels. I primarily used burned blue, tan dirt, and their metallic shades. The key was blending everything together so that not one specific element stands out particularly over all the others. I think I was mostly successful there.

John, thank you for your kind words! I’ve already begun work on both my F-101s. I’m starting to look at the fit of the air intake that you refer to in your blog.