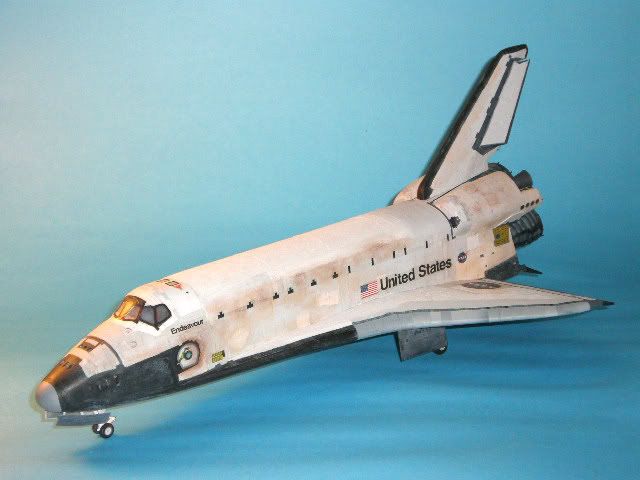
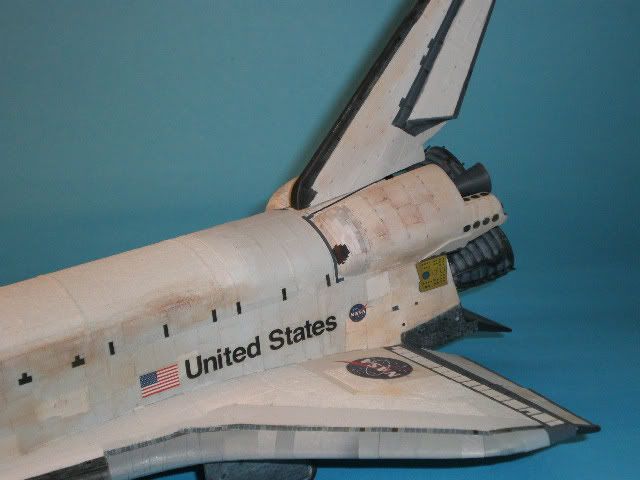
Here’s my 1/100 Shuttle as Endeavour. Now, I’m just getting back into this hobby after a break of many, many years. And this year, so far, I’ve done 4 models (1/144 Shuttle Stack, 1/48 Gemini, Apollo 15 LM and LRV and this one … ) trying out different techniques.
This model is more of a prototype to try out surgical tape as a texture to represent the Thermal Protection System. I figger that if I can work out the problems at this scale, working at 1/72 should be a breeze. I’ve got four 1/72 Shuttles on the workbench, plus a 1/24 Gemini ( not to mention the Spitifres, F-18’s etc ) that I’ve acquired over the past many years.
And I gotta tell ya, I’ve been having a blast doing these. Over the past couple of years I’ve been observing all you other modelers via the internet, and I’m finally making these attempts myself. From airbrushing, to using different types of adhesives to different scratchbuilding techniques to get a good result.
Amazing finish you’ve got there, mate. What I would love to know is how you did those tiles on it’s belly, theyl almost look like painted individually, could you share your technique please ?
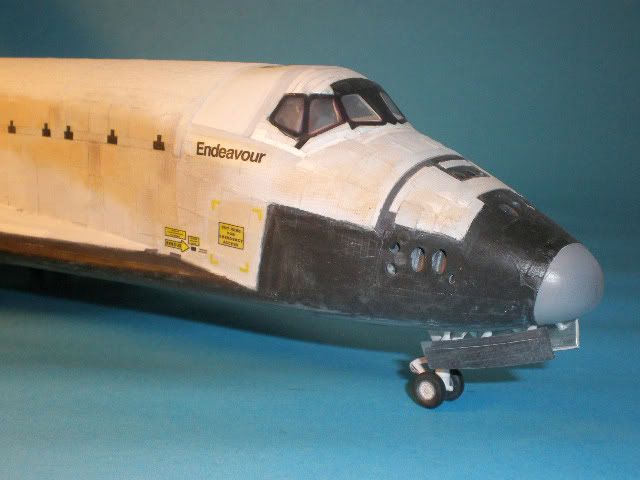
To do the tiles on the belly of the Orbiter, I used the decals from the Cutting Edge 1/72 sheets. I had them reduced on a photocopier at a stationery store (Office Depot) onto Decal film/paper. Applied the decals, let them dry, then I applied a wash of flat black. After that dried, a wash of light grey and I wiped it off to resemble the patterns seen in the in-flight photos of the Shuttle. Another wash of flat black, and a wipe, allowing the tile decals to show through. Then using photo reference, I applied dabs of thinned flat black to represent the individual tiles that look newer, like around the leading edges and the antennas near the nose gear.
Pastels were used to represent the lighter wear areas.
Fantastic Job! I’ve been toying w/ the idea for starting my 1/144 shuttle stack, you’ve certainly got me motivated! Once I tackle that it’ll be off to the 1/72 shuttle sitting on the shelf. How long was the entire process, and were there any bumps along the way?
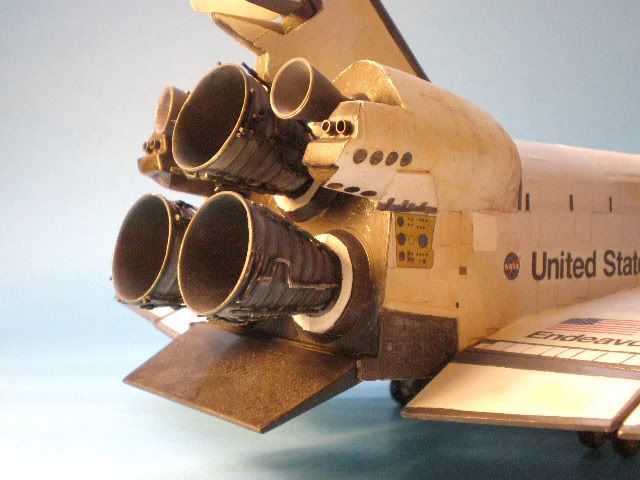
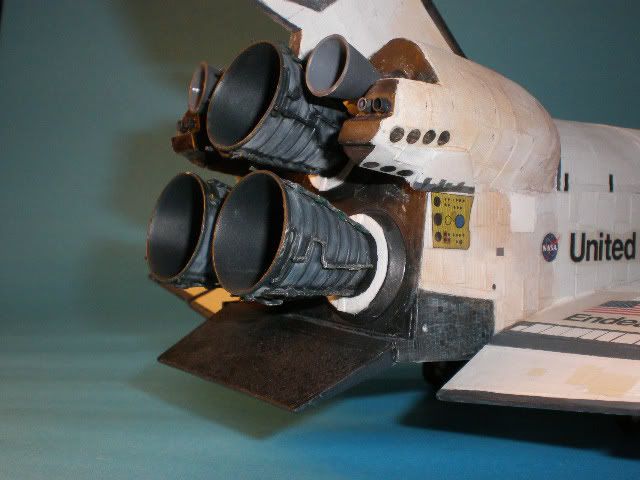
The Engine Bells were from the kit, but I detailed them by scratchbuilding all the lines on them.
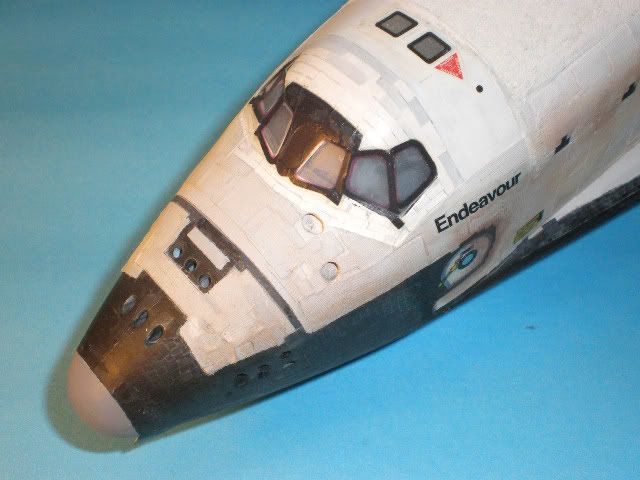
The cockpit windows were from the kit, but I put a second layer ( individually cut, formed and sanded … ) over top of them to try to replicate the actual windows.
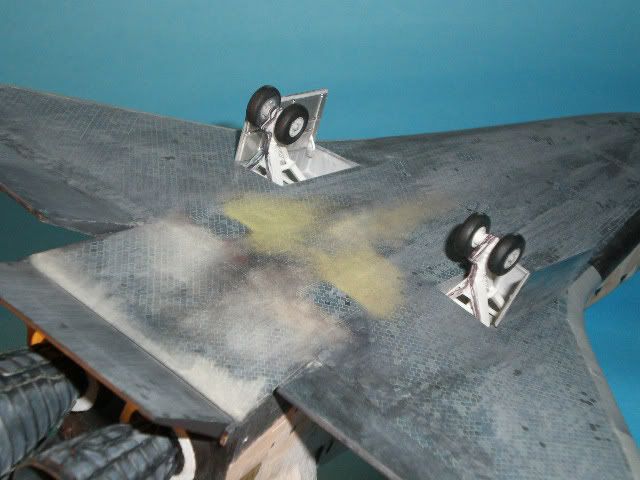
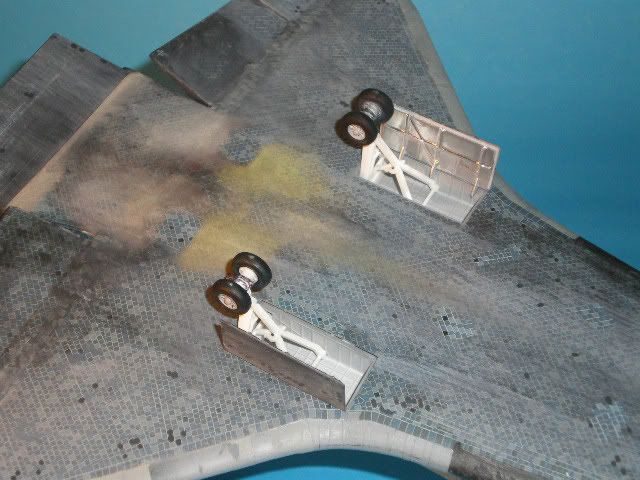
The main landing gear doors were detailed with aluminum foil and styrene strip ( to add some structure ) .
The landing gear have brake lines added to them.
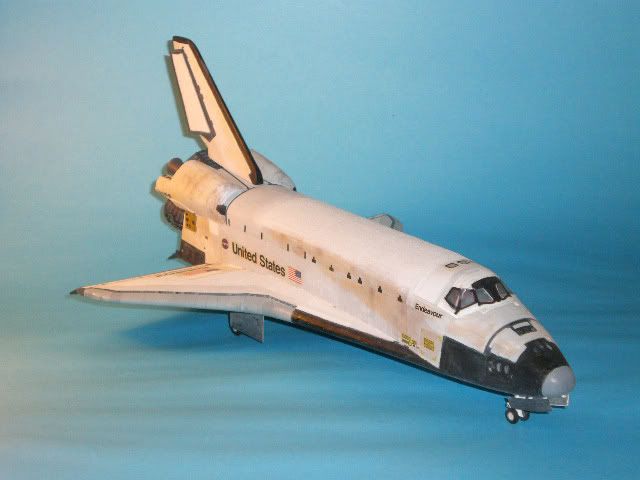
The drogue chute container was added to the tail.
The RCS on the nose were drilled out and replaced by plastic tubes.
The elevons were cut off and replaced in a dropped position.
The StarTracker ports were drilled out and backed with styrene.
So all these little things took some time. I guess the only ‘bump’ along the way was the repeated filling and sanding of the belly. The seam just didn’t want to go away.
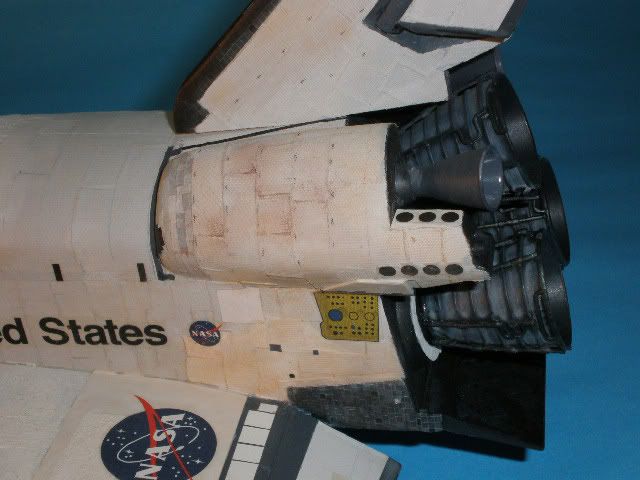
All tolled, I spent about 65 hours on this model … not including research time. The single most time consuming element was applying the ‘white’ tiles. Each one was cut out and applied and this took about 10 hours. I also used small strips of painted aluminum foil on the front of the OMS pods and around the cockpit windows to replicate the thermal tiles.
Working with surgical tape was a lot easier than I thought it would be, and, I think, the scale effect is pretty good.
I do appreciate your positive comments! Thanx very much.
well what a fantastic job mallagoodee ! ive got a revell space shuttle, just getting back into modeling after a few years. so i will prob be asking u questions over the next couple of months if thats ok!
Ask away!
I’ll try to answer any questions you’ve got.
And since I’ve only been back in this hobby for a little over a year, I know what you’re going through. There sure are lot of new techniques and products to learn about.
I’ve got a couple 1/72 Revell and Monogram shuttle to do in the next 12 months too. I’ve got a few new techniques to try out.
The surgical tape was used to try to replicate the white ‘tiles’ on the orbiter. I wanted to use this stuff because there’s a bit of texture on the real thing and I wanted to try to replicate that aspect of 'em.
And it was easy, but time consuming, to do … just cut little ‘squares’ and stick 'em on. However, there are a couple of areas, like on top of the cockpit and the very front of the OMS pods where I used painted aluminum foil squares.
As this was the first time I tried something like this, I learned a great deal and will be using this technique on the bigger 1/72 models.
I also ‘weathered’ these ‘tiles’ with pastel chalks.
Every nice Shuttle Mallagoodee, after watching and now owning the series “When We left Earth” I’m starting to get interested in space models. Great looking Shuttle again. [tup]