MC: Looking forward to seeing paint on her! I know it’ll look great as usually[Y]
ajd3530: Nice looking cockpit. Love the belts! I still have to learn how to make those, they really add to the overall look.
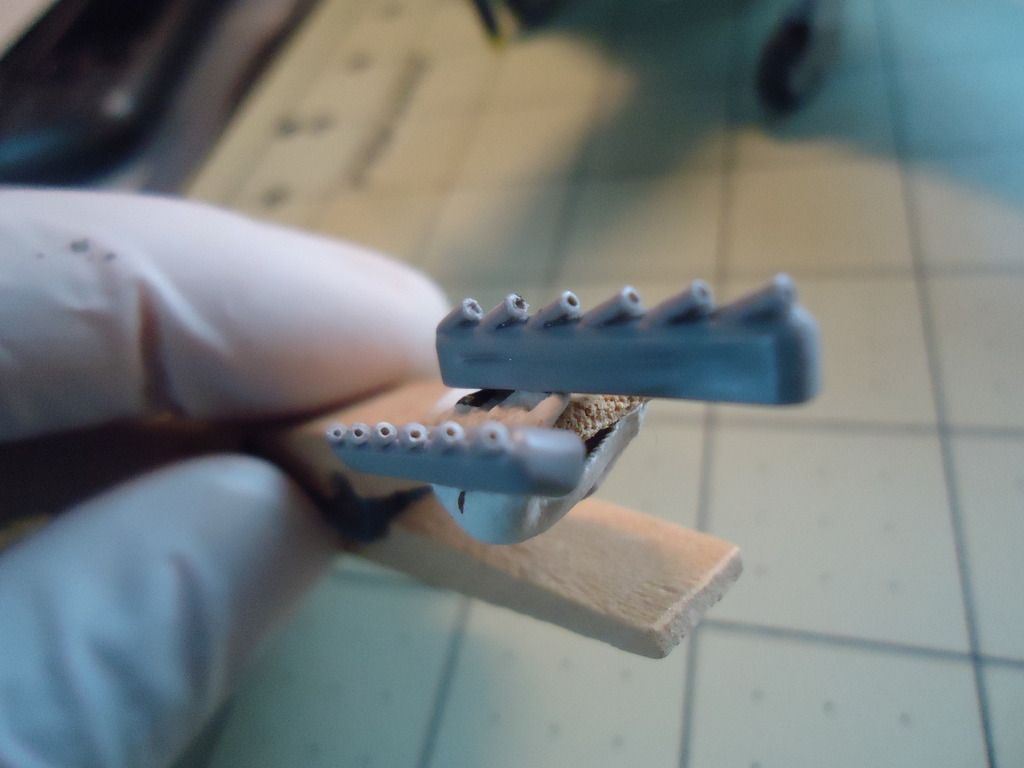
Alright, so I was able to accomplish quite a bit (per my building abilities[:D]) over the weekend, so here goes…First I drilled out the exhaust. Not as good as I was hoping for but should have the desired affect.
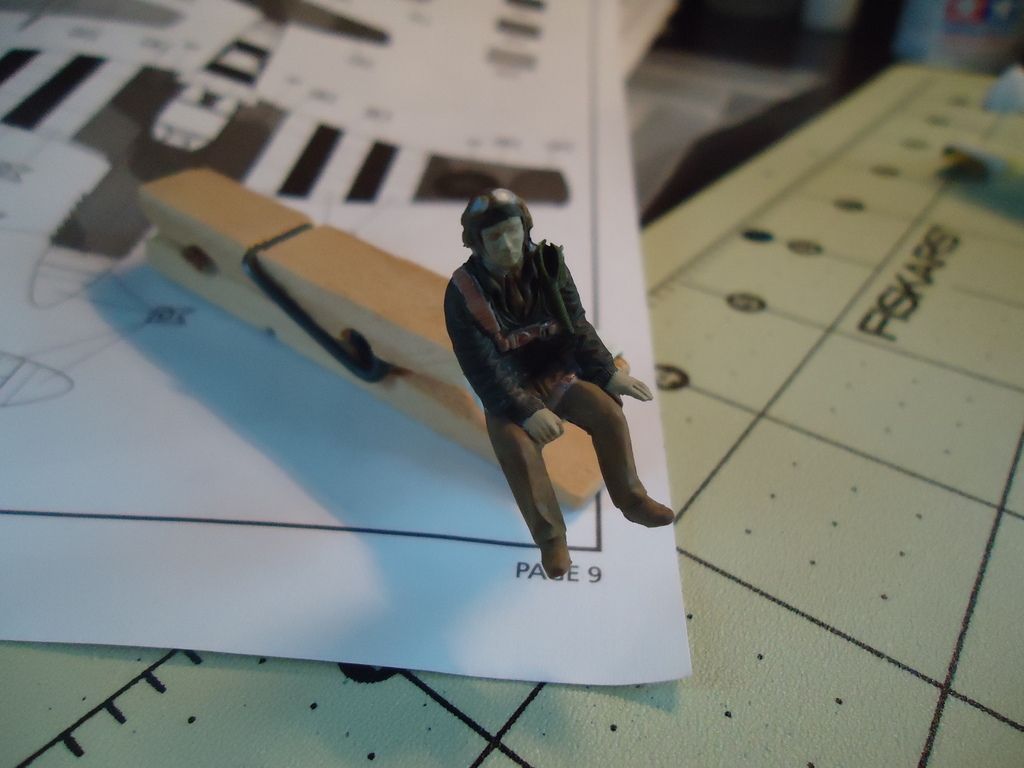
First attempt at figure painting…worked with the colors I had at hand. Looks like he could use some time in the sun[:D]
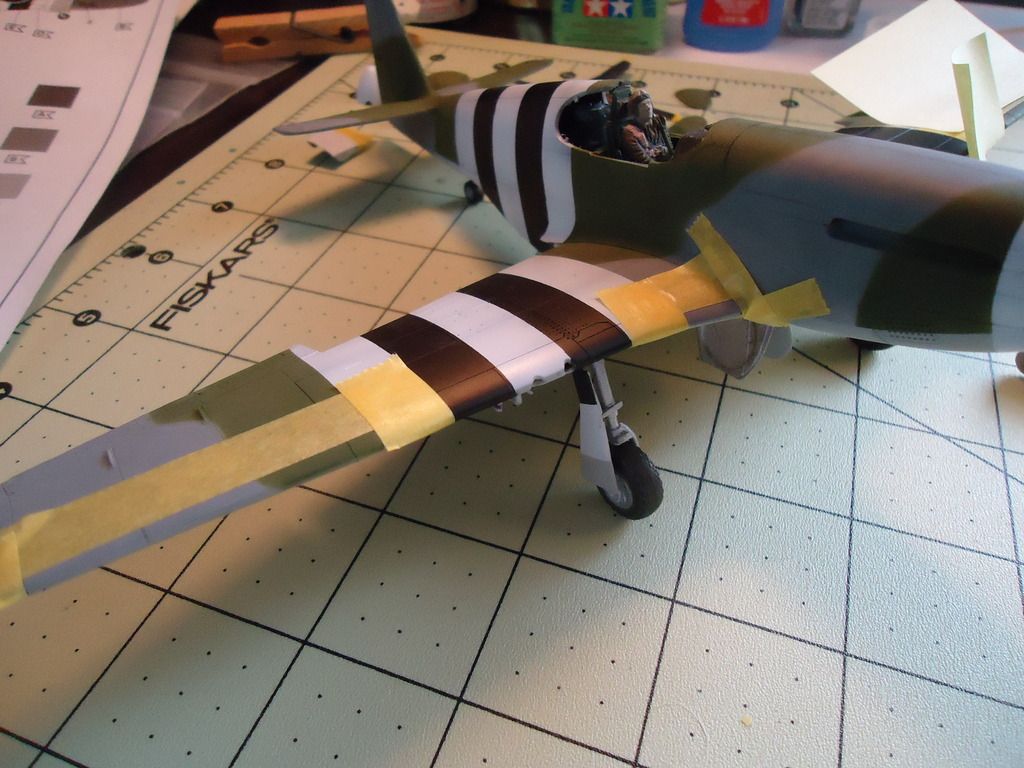
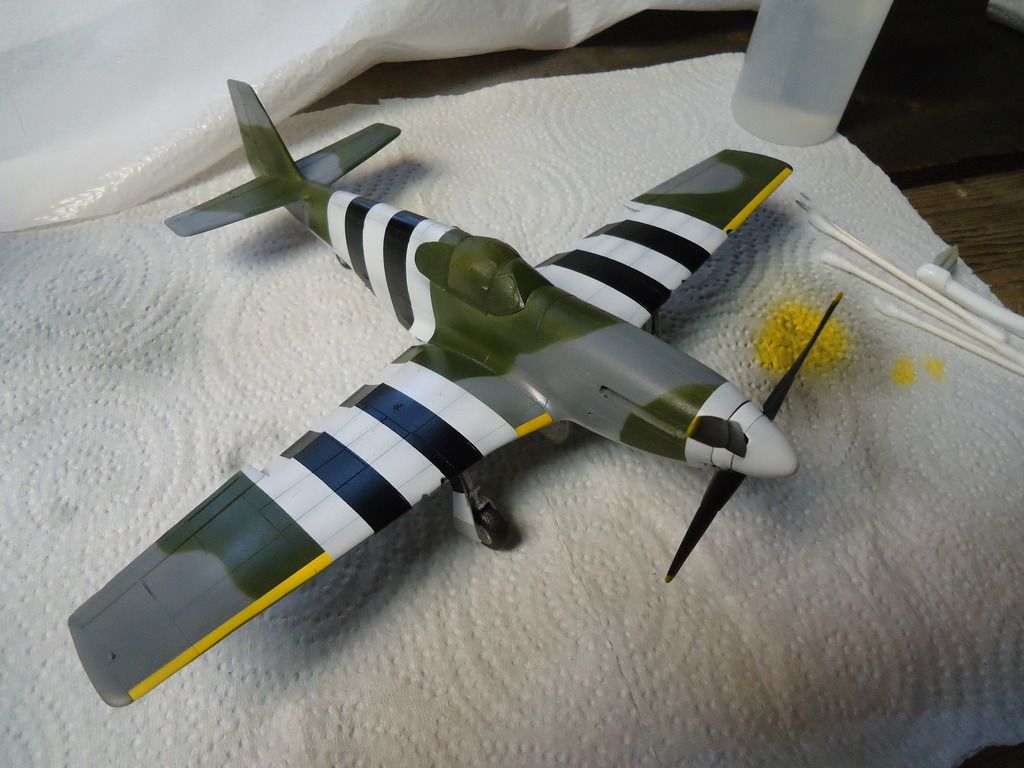
Ok, so I was going to forego the yellow on the leading edges of the wings as this was the reason for the repainting in the first place, but after seeing a few builds on here that had them (jezz’s spitfire and mustang come to mind) and how they just looked so good, I decided to give it another go. So here it is all masked off…I’ll admit that I was a little nervous[:$]
But I’m pretty happy with how they turned out…
Maggie doesn’t seem too impressed though…mans best friend but apparently his hardest critic too[:D]
Sorry just having a little fun with the camera[:D] So back to business…
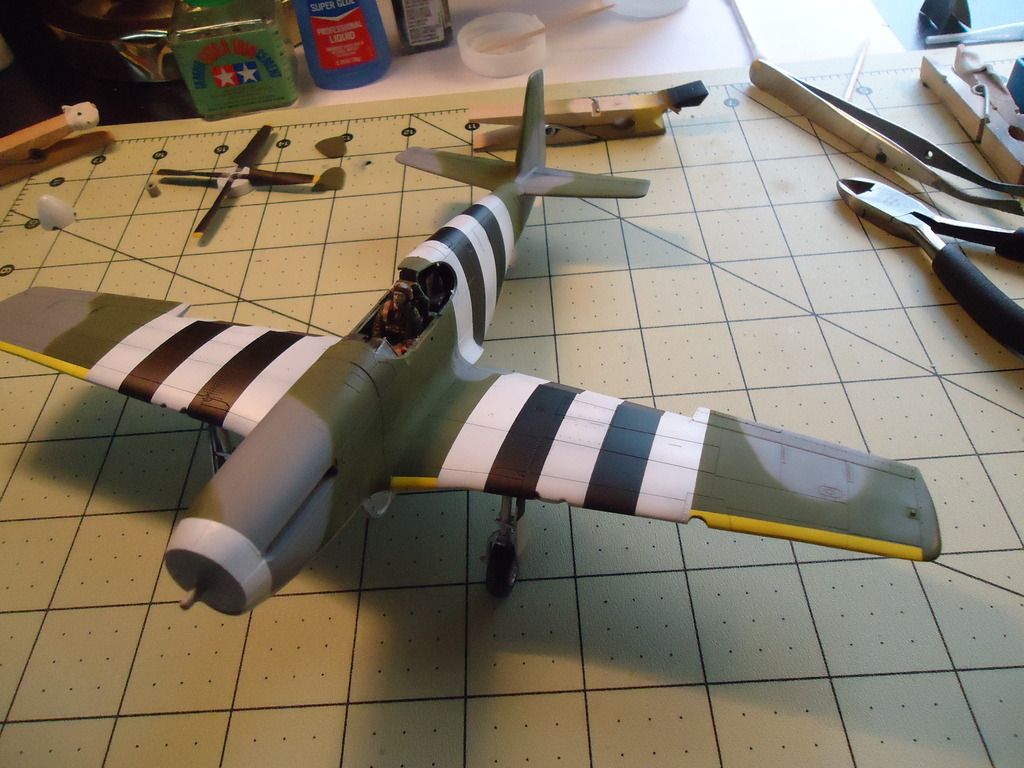
And with pale face all saddled up I attached the canopy and prop. And here is how she sits after a quick gloss coat this morning.
Should be moving on to decals soon! Comments and critiques appreciated!
These are both coming along nicely. With regards to the invasion stripes, how perfectly straight were they? I’ve seen where many were done with actual brushes and done quite hastily. Does anyone have some thoughts on how this would look at a 1:48 or 1:72 scale?
Hmmm, I never really thought about it, but yeah I guess all the invasion stripes, at least just prior to the invasion, would have been hand brushed on [^o)]
I know what you’re saying bvallot. I actually was debating with that myself when doing these, but decided (as I think we do often) to go with the clean/precise look over the perhaps more realistic. But now that you say that, I think next time I will try to make it look more realistic. Off the top of my head I’m thinking cutting the masking tape with a dull blade might give it a slightly ragged edge which should keep the scale in line. Seems like brush painting would give too large of “errors/overpainting” from side to side at this scale, know what I mean. But that may just be my skill level too:) I think it would be another one of those times when an actual picture of the aircraft would be the only way to know for sure.
Well, I think realistic is relative to the subject. I wasn’t harping on your stripes in particular…just that I’ve no doubt some must have been messier. And I’ve no doubt as well (especially with Spits and Mustangs) that certain crews took pride in their planes and would have been more precise with their painting. It seems every depiction of invasion stripes on fighter planes had them pretty as could be. And I have seen in photos where some actual were as such. I think it would be fun to try a pair that looked a little out of sorts, but I couldn’t bring myself to do it unless it was “that way” on the actual plane I’m portraying. =]
I had similar thoughts on pulling it off rooster513. I think a hand torn piece of tape might prove effective. I just haven’t stop to try it yet. So I don’t actually have any experience with how to pull it off. I should think that the broken line would have to be fairly tight still at such a small scale.
I agree that it would have to be tight to stay in scale and would have to be on a plane to plane representation. No worries, I know you were pointing mine out in particular:) I’ve thought about it before so I’m glad you said something so everyone can give input. Honestly the more I think about it the more I want to try it. I think it could look cool and be fun to try. I like the idea of a hand torn piece of tape, gets me thinking, ummmm…great now I’ve gotta go buy another model![:D]
In regards to the invasion stripes, they were, for the most part, applied rather hastily and I would assume pretty sloppy as well in some cases. But when you think of what sloppy is in the full scale, we are probably looking at what? Maybe half an inch, possibly even three quarters of an inch of fudge area? While in full scale, that is pretty apparent, how do we translate that into say 1/48 scale. That scales out to .01 to .015 of an inch. And while we can see that minute of a difference with the Mk. I eyeball (well most of us) I am not sure how we as modelers could really replicate that effect consistently. Now maybe if Eduard could make us a 6 inch paint brush scaled down to 1/48, we might be in business fellas Thanks rooster! I think so as well, this might be my best cockpit to date. And about the belts, I can’t take credit for those. I get them from a gentleman named Kerry McNally in NY. All I do is add a piece of Tamiya tape to the backside to add some thickness, and glue them on the seat. Here is a Tamiya Meteor cockpit I recently finished with these belts.
Thanks for the feedback ajd3530. Those look really handy! Looks like he just prints them off? If he’s around my neck of the woods in NY I may just have to introduce myself[snWcm] I’d love to know how he does them.
Waterloo, NY if I’m not mistaking. I actually first came across these because he sells them on ebay. If you’d like, I can hook you up with his email/ebay page.
You’ve got to be kidding me!!! I’m from Waterloo!! LOL. Prolly lives down the street from me! Truly is a small world. That’d be great if you could hook me up with that info! Thanks!
Rooster513- I wouldn’t have changed a thing, the stripes look fantastic! Looks more like a diecast (an extremely detailed one that is) than a plastic model kit. Shows some major skill when you jump the “that must be metal” line! LOL
Thanks Cody! I can safely say I overachieved this time. So what I was saying about the piece AM calls the “radiator exhaust door.” Its actually the roof to the radiator exaust passage. The door itsself is molded shut. Also, and a bit surprising for AM, you can see clear through the exaust port up into the cockpit. I don’t know about you guys, but I try to avoid being able to see daylight through my models. So I fashioned some crude duct work from the roof of the exaust door up to the radiator with some Evergreen plasticard. I also tried to box in the landing lights on the wing with some Evergreen strip. Now we’re ready to build an airplane. I was so ready in fact that I forgot to take any pictures between then and having the airframe completely put together, including radiator scoop and the carb intake (which is the WORST fitting piece on the entire kit. Have your Mr. Surfacer ready)
Fun fact for all you Mustang fans out there. On the Allison Mustangs, there was a locking mechanism on the inner gear doors. So unless the gear was being cycled through, the inner doors are almost always closed.
Learn somthin new every day. I wonder why They didn’t do that for the B/C/D models. I guess they figured it wasn’t necessary and just one more thing to go wrong.
Only thing I can think of is that the Mustang has a rather low profile, and sits closer to the ground than a P-47 or P-40, and they were worried the open inner doors would be at risk of catching the ground on hard landings. And by the time the Merlin Mustangs came around, it was decided that was a non-issue? Maybe? Idk, I’m just shooting from the hip on this one.
Nice thing. The inner doors close up with hydraulic pressure so that’s not a problem. They bleed down over a period of time. In fact I read somewhere that they intentionally let them bleed down. The flaps, on the other hand are put in the extended position to aid in climbing aboard/exiting.
It’s so cool watching a Stang start up and the inner doors close.