Rob: Looks like you’re coming along as well. Can’t wait to see what you end up with. I like your rendition of that flyover. I generally think in the same scale and never branch out into trying to illustrate some kind of distance. Looking forward to seeing what you have in mind. =]
Joe (lawdog) - another beauty for the case! Just love seeing your work!
Rob - Coming along nicely. Cool to see two of them being done side by side[Y]
Well I’ve got what you might call an update…masked off for the yellow on the leading edge of the wings (realized earlier in painting process that I should have done these in the beginning) and decided to hand paint them instead of breaking out the airbrush for such a small job. As you can guess the results were not the best. Had bleeding under the tape and on the stripes and such. Soooo, I decided to try to clean it up and do spot repairs, right? Well it was going ok until I somehow got paint on my finger (had a glove on so didn’t notice) and put a nice finger smudge on the model. So I’ve decided to strip it down and repaint as I wasn’t completely happy with the way the topside gray went down anyway. I know all the small mistakes would have bothered me. I’m chalking this one up to rookie mistakes and a chance to learn. I’m actually more excited to do better the second time around then I am disappointed:) I’ll take my time and try to get it right this time.
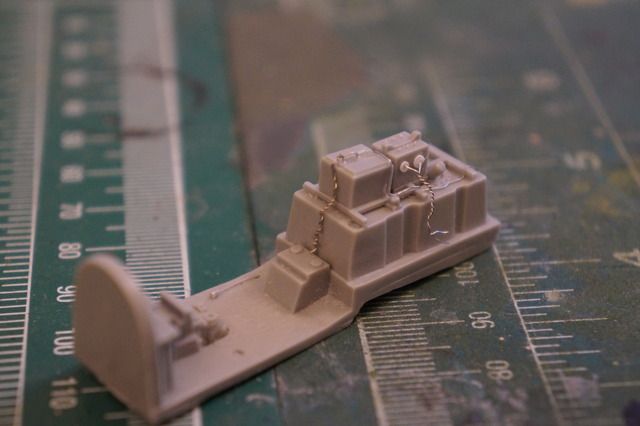
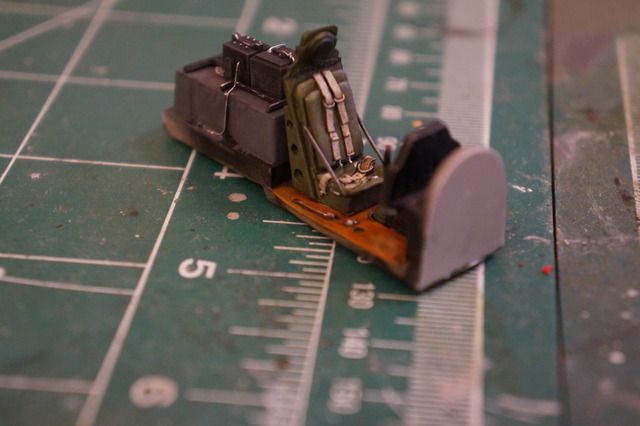
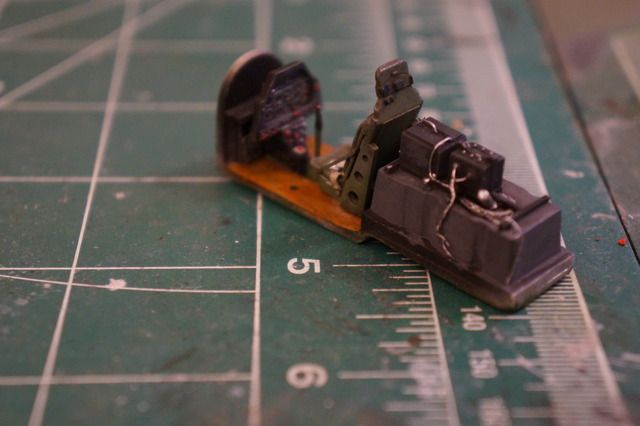
I’ve finally taken some photos of the progress of my build. This is the Tamiya P-51D which I’m building as Ridge Runner III. The kit itself is a beauty. I’ve added the excellent True Details cockpit set as well as Ultra Cast exhausts and Barracuda wheels.
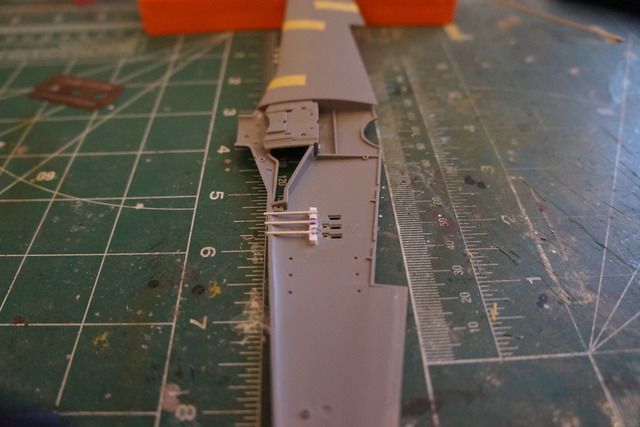
I added a bit of wire to the battery area and used Albion alloys tubing to replace the wing guns. Here are some photos:
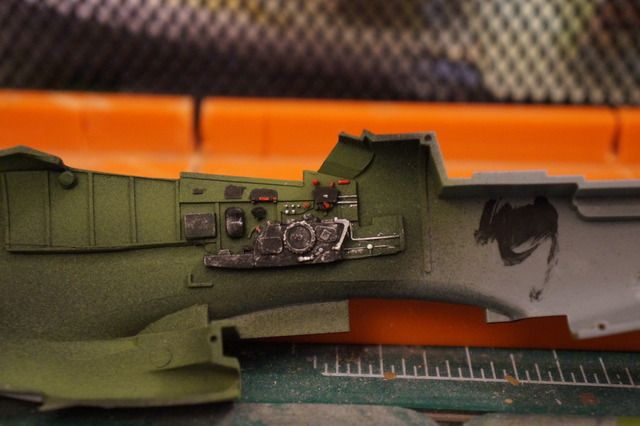
I went a bit heavy with the dry brushing in the next photo, but I toned it down. I don’t have photos of the final result.
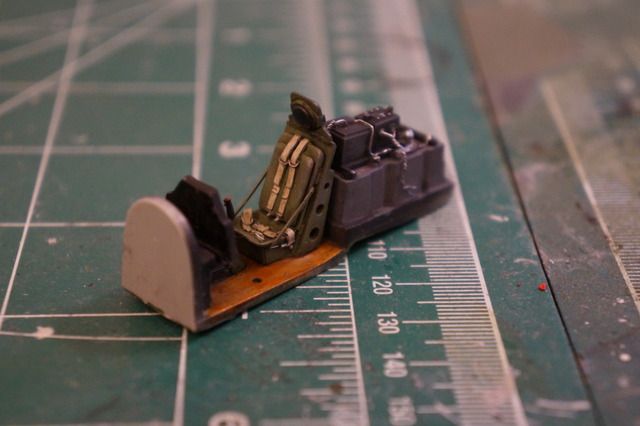
I know that the P-51 had a black floor, but wanted to try my hand a the natural wood finish. I was going to paint it black and weather it to show some of the wood finish, but I liked the wood finish too much and didn’t want to cover it up.
I’ve got some paint down but haven’t taken any photos yet. I’ll post more soon. Thanks for looking.
Oh man Steve, that is looking good [Y] The seat, radio, battery IP, wow just right. What was your process for the wood floor? the coloring looks just right as well.
I actually stole borrowed the process for the wood floor from Joe (Lawdog). Thank you Joe!! It is Tamiya XF-59 Desert Yellow with a light glaze of Tamiya clear orange over it.
I have to say that the big 1/24 Bandai P51 has been a disappointment so far. The Tamiya 1/32 kit engine seems to have heaps more detail, ditto the cockpit. Behind the fuel tank are three long cylinders mounted to the floor. I still have no idea what they are for. Oxygen ? Havent seen them in any other builds or reference photos As an example of the Bandai kit, have a look at the M2 50 cal. While one feed ramp seems fine, the one for the number 2 gun seems to feed into the barrel, not the breech.
It almost looks like they are just throwing the ammo belts in there, not figuring anybody would notice. Ha, they didn’t figure on us did they.
I know what your saying about the lack of quality. My 1/32 Hase kit has fantastic quality, however the flaps are molded retracted and the engine mounting is terrible (there is non, you just glue the engine to the fuselage). It would take a massive scratch building effort to show that beautiful Merlin with all the panels open, and I have to do some fancy footwork to lower the flaps.
Ok Gents, I have not been around for a while but, I have been working on the F-82. So far I have used 2 Monogram P-51s for the cockpits and landing gear. Two Tamiya F-51s for the Props. Here are some progress pictures. As you can see there are some real large gaps to fill. I have just about pounded this thing into submission.
If things go right I should have decals on by next week. I will keep you posted.
Modelcrazy and bvballot thanks for the comments, Groot she has a few warts when you see it close up. Considering how much superglue filler I have used I am not unhappy with the results. I used a rattle can of Krylon metalic silver. I paln on lightly buffing a few panels to give it some variation.