My A-36 is done. I’m out hunting on my days off but I will get pictures add soon as I can.
No worries psycho, we’ll be here when your ready.
Hey all! Finally have some paint on this pony. Underside done and 1st color of the topside camo on. Using Tamiya acrylics. Looks like a mess but it’s coming along…
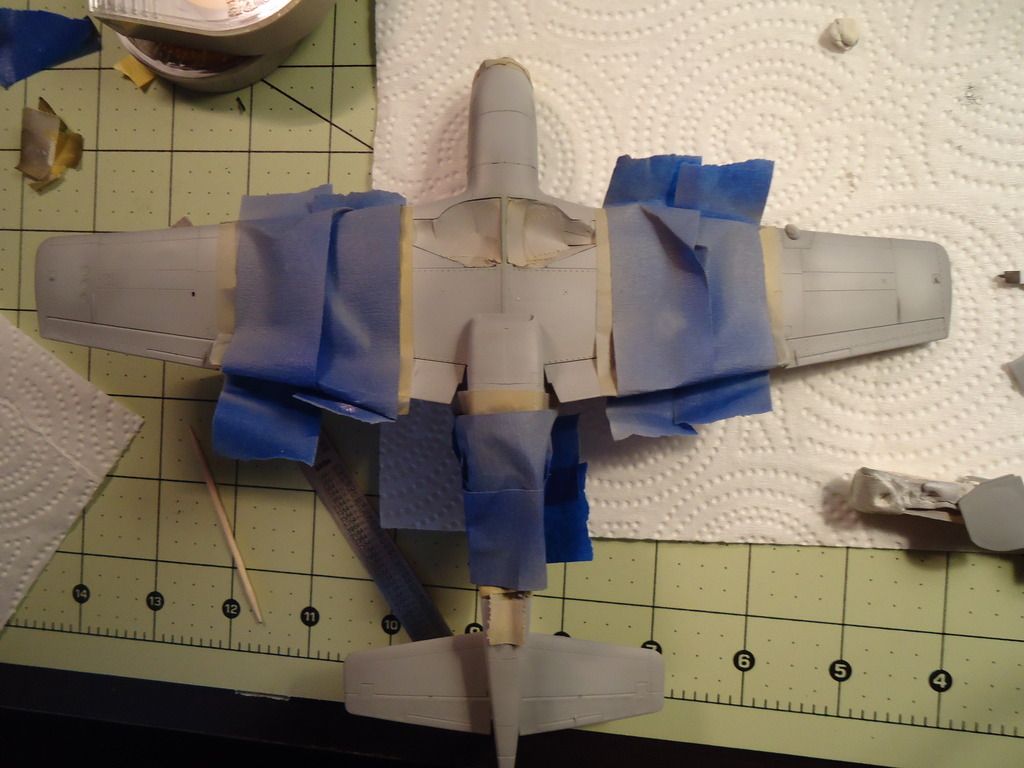
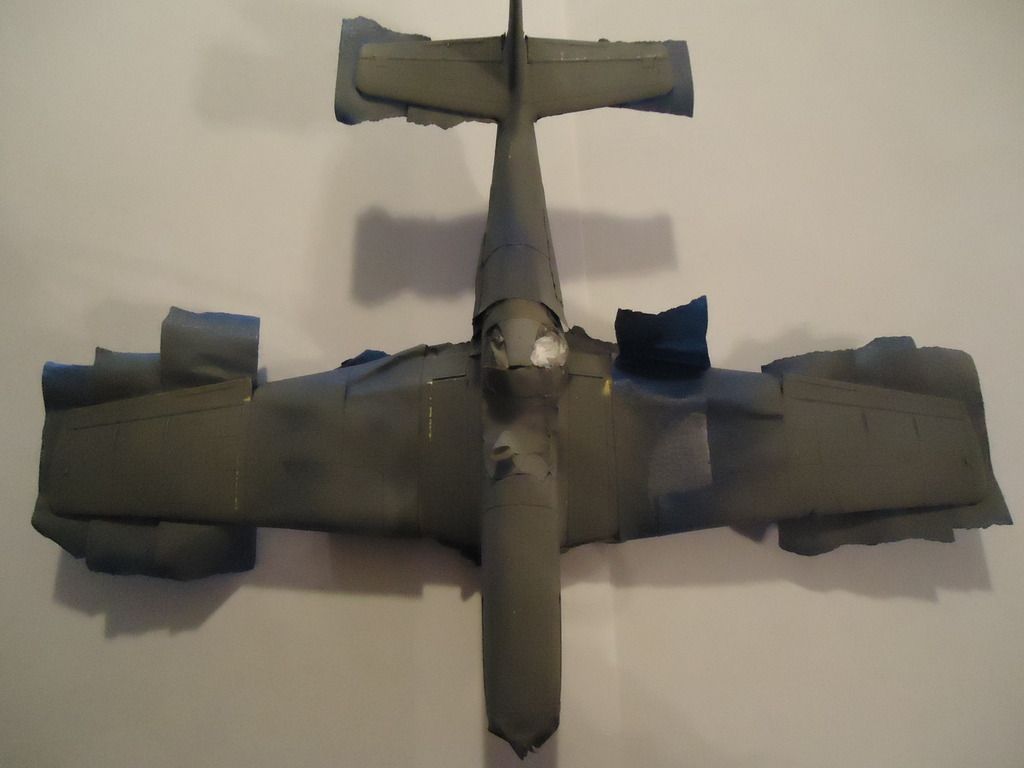
 The invasions stripes are already painted and under all that tape. Over masked…perhaps…but I tend to be a bit of an oversprayer when it comes to airbrushing so better safe than sorry[;)] (I’m getting better though). Keep up the great work everyone!
-Andy
Nice Andy!
Your “B” has the Malcolm Hood, yes? That will be nice if it does as we don’t have one of those on page 2 yet.
Steve
Yeah Steve I’ll be doing the Malcolm Hood. Should be a breeze to mask compared to what the original “B” canopy would be, which will be nice.
-Andy
Bob: Check out my Detroit Miss Thread here. I used a True Details pit in it, It should answer your questions. Get a Dremel if you don’t have one…worth their weight in gold…
http://cs.finescale.com/fsm/modeling_subjects/f/2/t/162455.aspx
Rooster: Coming along nicely…
Well folks, I’ll tell ya, modeling and spring time just don’t mix. Oh so much yard work to do. I did get to sit down at the bench the other day and I got quite alot done. I squeezed the pit between the fuselage without issue.

It wasn’t long before I was here. These are a piece of cake to assemble. I taped off the back windows and glued them in place. I sprayed the area Gunze Interior Green. Note: I also sanded off the bumpy things on top of the wing by the gun ports. Those were apparently not present on war tiime Mustangs.

Now…the area I truly hate about the Tamiya Mustang series…the lower radiator seam. It goes right through all the detail (which is weak to begin with) and the sanding to remove the seam takes off most of it. Very Monogram-like. Not Tamiya’s best design. Here is how I “improvise” with Evergreen stock, a trick I came up with several years ago.


Salem Rep was NMF with Oilve Drab or RAF Dark Green upper wings and fuselage top. I think its a cool scheme. I started by spraying the fuselage and underside Alclad Duraluminum, the perfect war weary shade to my eye. Not too shiny or dull. The prominent panel near the exhausts was sprayed Alclad Magnesium. This panel is always darker on NMF Mustangs. Other panels were taped off and sprayed different shades of Alclad.

I hope to continue painting soon…gotta go plant more grass seed…[:O]
Joe
Joe,
I certainly understand about the yard. We have 3/4 of an acre and a powered push mower (our riding mower broke and we don’t have the funds for a new one). I mow a section of the the yard every night after work and on weekends.
Your doing a great job! The additions to the radiator scoop look fantastic. I’ll have to try that trick. Nice job on the painting as well. I’m anxious to see more.
Some really fantastic work going on in here guys. Thank you for participating.
Steve
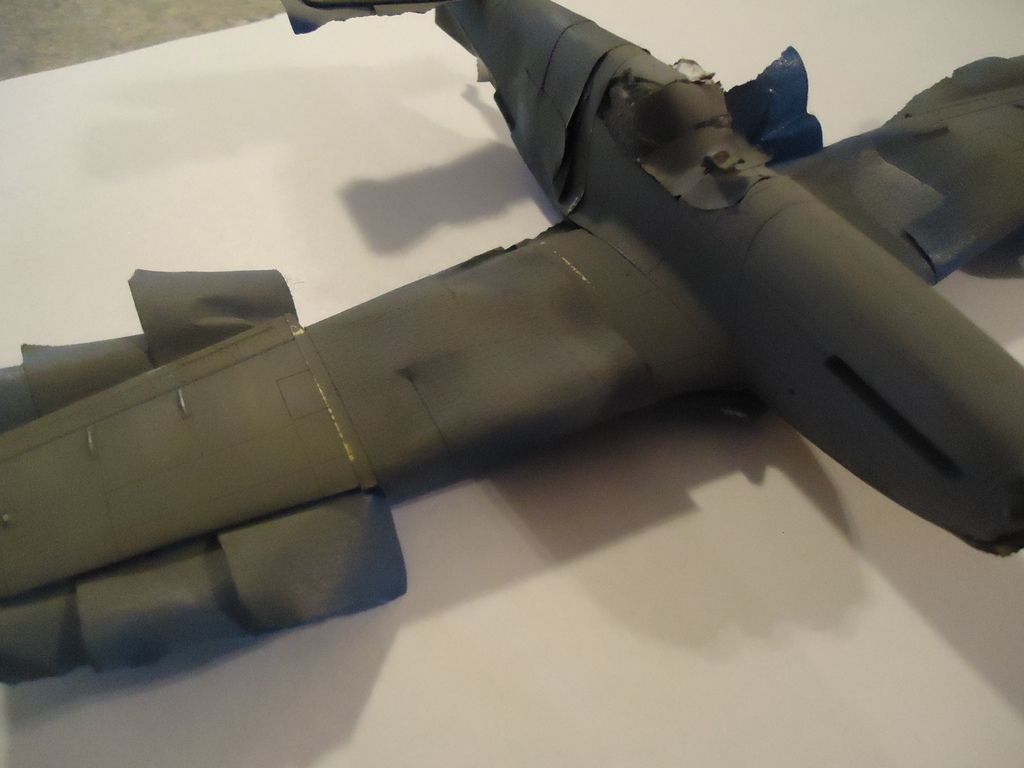
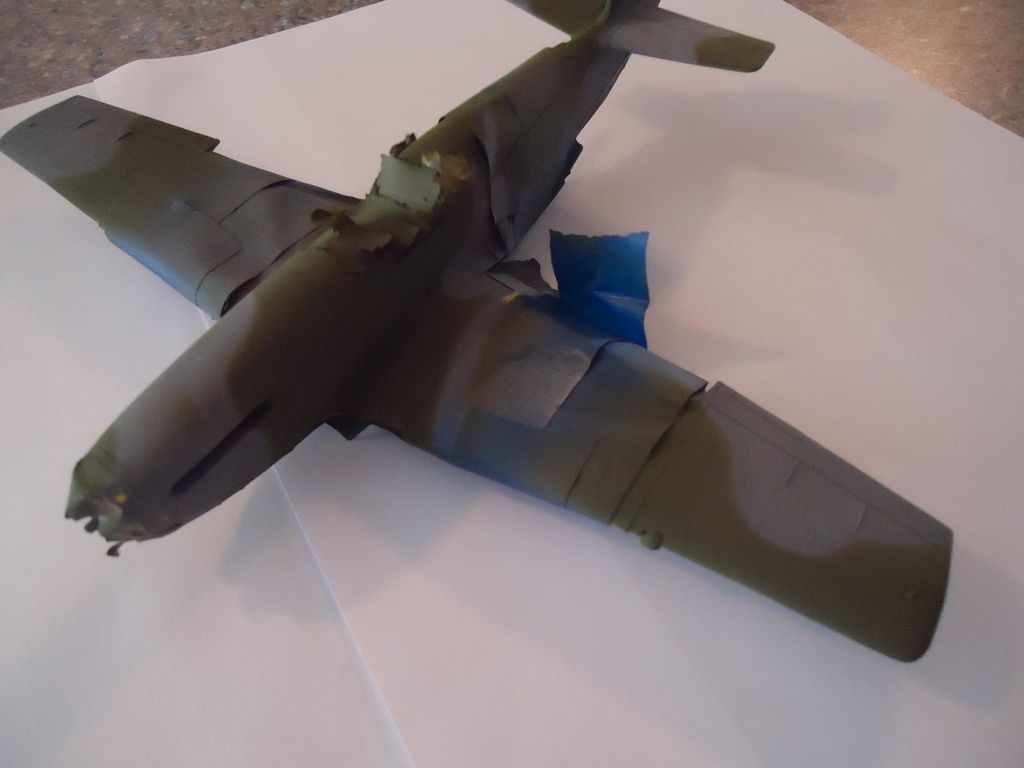
Looking really good lawdog! I was able to sit down and get the 2nd color on the topside this weekend…
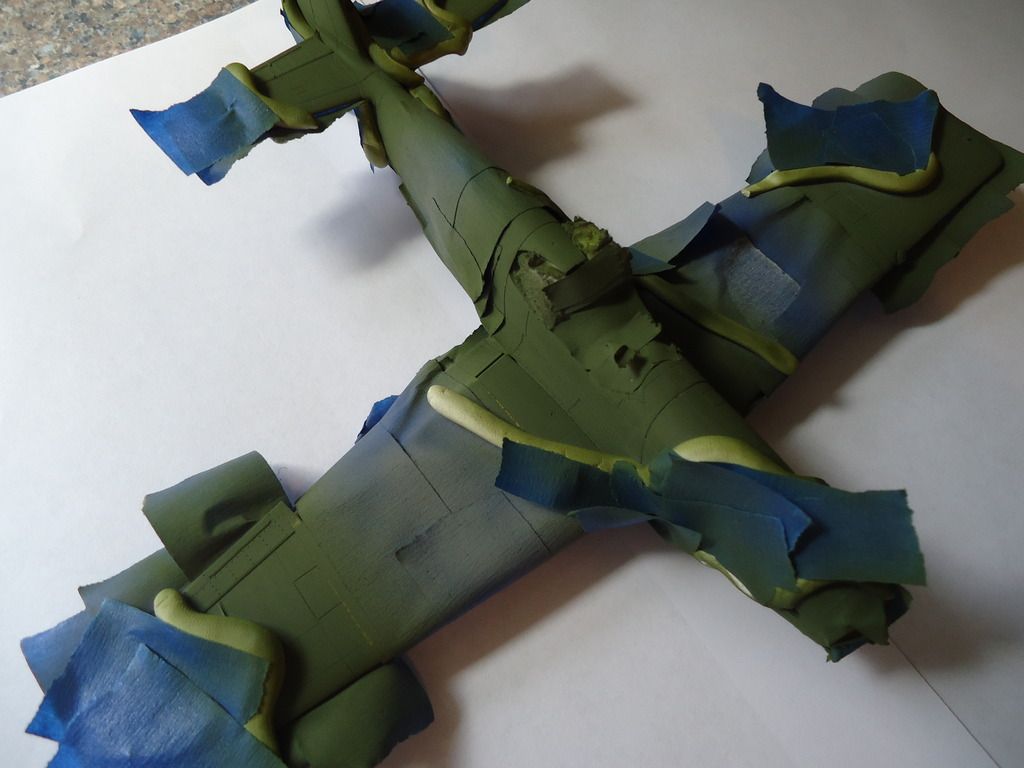
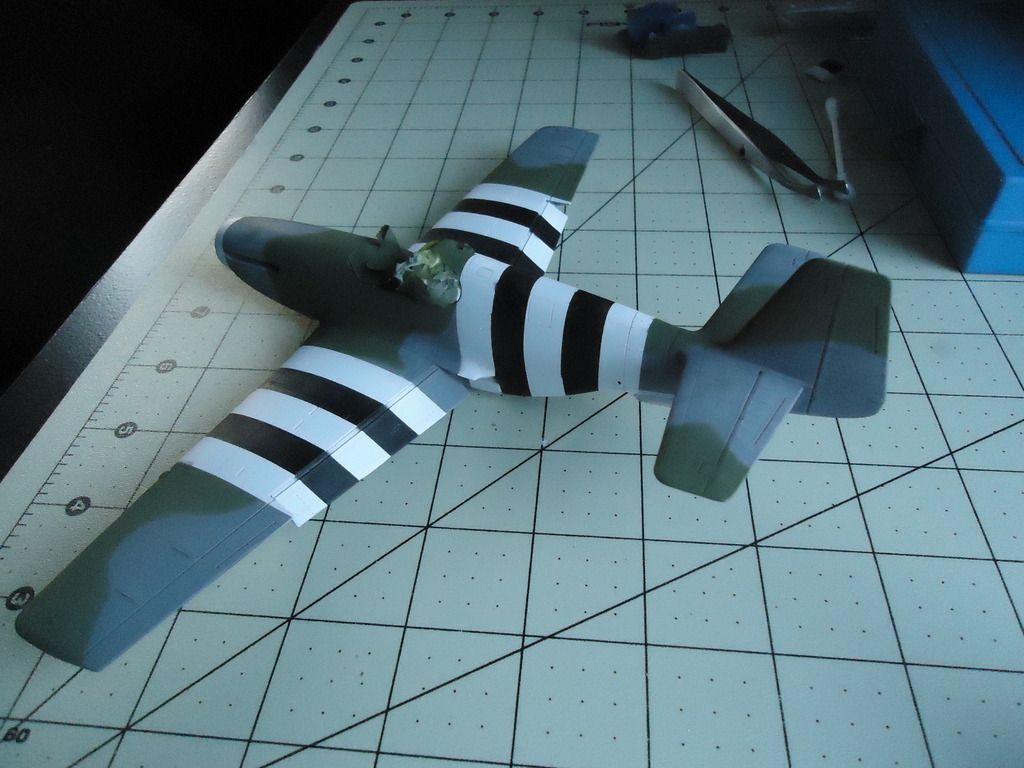
And my favorite part…unmasking it and seeing how she turned out…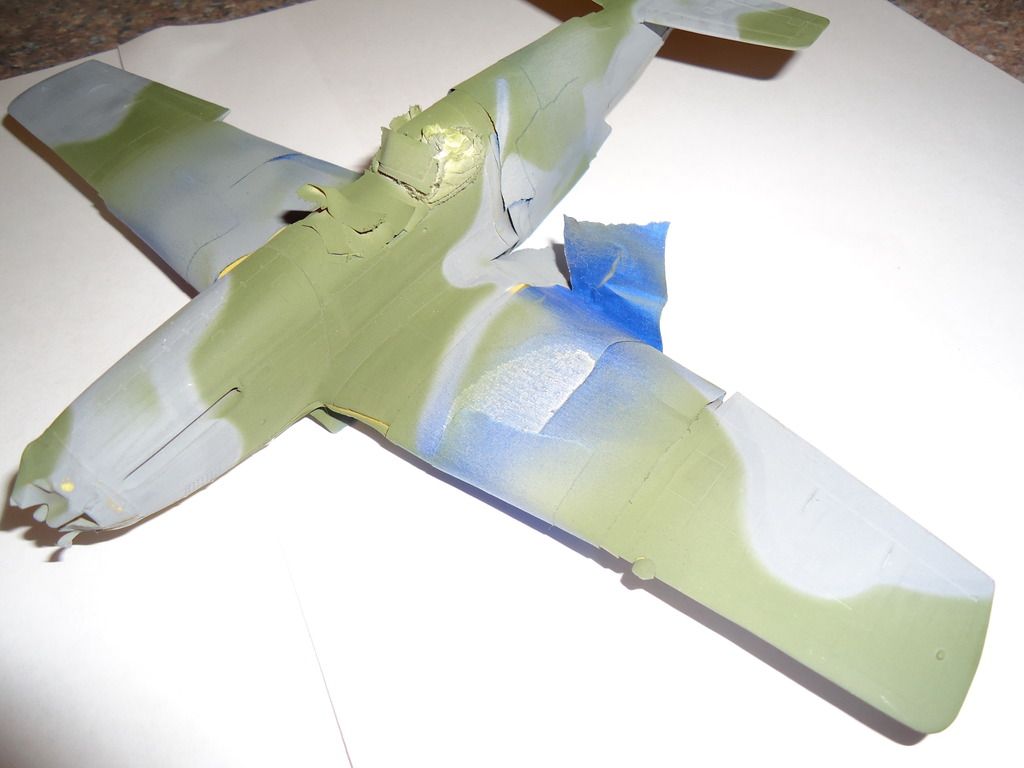
And just this morning I finished unmasking the invasion stripes. Pretty happy with the results for the first time attempting it.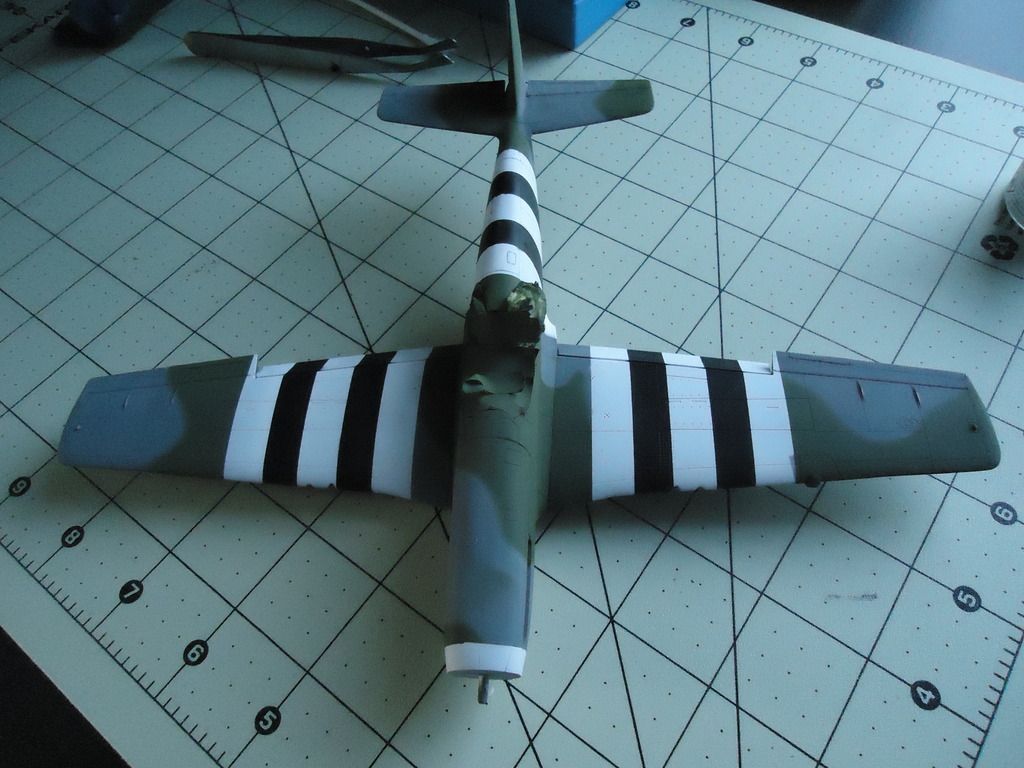
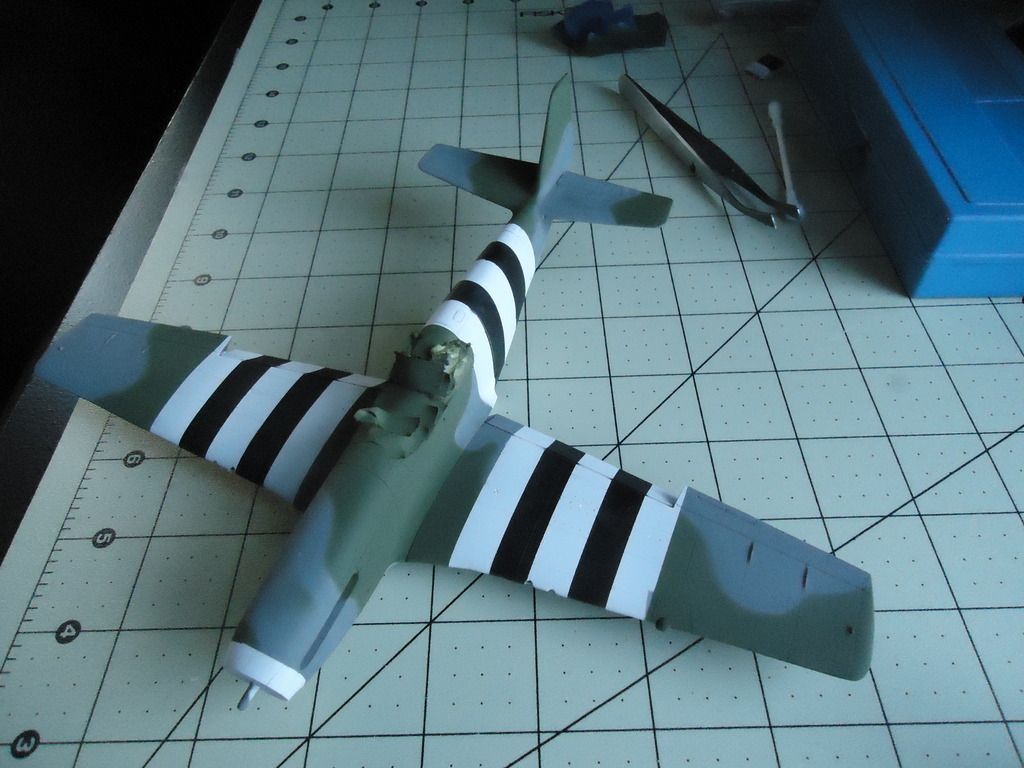
There are a few places where I need to touch up. I did see that the masking putty left a mark where I applied it. Not sure, I may have put it on too soon. Comments and critiques always welcome!
-Andy
Oooo, I really like that [Y]. Not too often you see a Mk III modeled. Man, I’m really jealous of you guys with the kits that have the flaps extended.
Maybe if I wasn’t such a cheapskate, or I did’t have a wife that keeps an eye on everything I get, “how much did that cost?”
Don’t get me wrong, she loves my hobby. She just doesn’t understand the stash.
Thanks Steve. Andy, Those stripes came out great. Thats a scheme we dont see too often…
Well, I have been plugging away at this thing. A little here…a little there. Lets begin with the paint. I poured over as many reference pictures of Salem that I could find and I’ve come to the conclusion it was originally NMF and it was painted OD or RAF Green on the upper wings, upper fuselage,and upper stabs in the field at some point. There was a picture that showed the wing ID strip(s) as black on the bottom, therefore, its more probable than not they were black on top too…not white (same with the tail stripe of course). I painted these stripes on accordingly. It was also reasonable to assume (to me anyway) that the green was sprayed right over the stripes. I then followed suit with Gunze Olive Drab where appropriate (I’m out of RAF Green). I only dusted the OD over the stripes as I wanted them to show through the OD slightly. I think this is about right. I added XF-57 Buff to the paint, then added some sun fading followed by condensation streaks. I then sprayed the 4th FG red nose and tail stripe. Once done, it was sprayed with a few coats of Alclad Gloss.


Kit’s World decals are sort of a sore subject with me. The decals do go down nice, but I’m just not impressed by this company. For one, they charge 15 bucks for these and only offer the scheme specific decals. They tell you to use the kit’s stars and bars and stencil for which everyone knows are lousy and unforgiving. Is it that hard to include these…really? Everyone else does? Lower the damn price then. Also, Kidd Hofer’s plane had the word “Kidd” on the port landing door. They did not include this…poor research? To add insult to injury, I have since discovered Life Like Decals has a sheet with these markings and they even thoughtfully include decals for those snazzy white wall tires! Ugh!. Anyways, they went down nice and I used an old Aeromaster sheet for the rest of the decals. I had no issues. I added the rear opera windows which fit nice. I’m thinking Kits World won’t be getting much more of my hard earned dinero…


It was then time for a Flory wash. I mixed Dark Dirt with Black and left it just a tad grimy. This is one of my favorite parts of modeling. I’m not sure why…Perhaps I’m just a fan of Flory which is fantastic stuff.


It was time to turn my attention to the little stuff. I Ultracast tires (and prop too) and I decided to replicate the white walls. I sprayed the wheel Alclad Aluminum and then hand painted the tires portion XF-24 cut with a tad of XF-1 Flat Black. Tires are one of the only things I still hand brush. If you thin it heavily with 91% Isoprophyl it will go down nice and thin without brush marks. Capillary action will take the paint around the rim too. Once done, and with the aid of a circle template, I cut out a mask for the hub. I then used the appropriate sized circle in the template, held it on top of the tire, then sprayed it Xf-2 Flat White. Decals? We don’t need no stinkin’ decals!..

A Detailer wash to all of the parts and we are almost done…

Time to start putting this turkey together. Should be done soon…
Joe
Fantastic Joe…that 'stang is looking just simply fantastic. The OD colour contrasting on the NM is the real treat for sure.
Joe,
I don’t have any words. …just amazing work! You really put some time and research into it and it really shows. The decal issue looks like it turned out just fine. Thar’s funny, whitewall tires. I had no idea.
This all looks great. I just caught the fever…I think I’m going to have to throw my name in the hat here. Is it too late??
You have plenty of time to jump in. Whatcha thinking of building?
Steve
It’ll be a Pacific Mustang. I’m trying to make a selection between something pretty (not usually my MO) or somebody distinguished in some way. It will be the Tamiya 1:48 P-51D from the 8th Air Force boxing. I’ll have somebody picked out in a few days.
You got it bvallot, I’ll put you down.
Thanks all. I got some bench time in last night and I do believe I’m done. To recap, it’s your basic 1/48 Tamiya P-51 B in the 4th FG markings of Ralph “Kidd” Hofer’s Salem Representative around May of 1944. Hofer has been deemed, whether fair or not, a “screwball ace” and apparently had little use for authority. His tomfoolery and little regard to the inherent danger of air-to-air combat likely contributed to his being KIA in on July 2nd 1944 after tangling with Bf 109s. That said, he was a 15 kill ace and destroyed an FW190 on his first mission.
What can be said about the Tamiya P-51 series, B or D . Aside from a few small issues, they are generally excellent. This one got PE in the cockpit and Ultracast wheels. I drilled out the gun barrels and exhausts then added drop tank plumbing. I’ve heard that the kit props are mishaped, so I added an Ultracast replacement. Truthfully I can’t tell the difference, but I’m no expert here. I prefer the looks of the birdcage version, but Salem Rep had the Malcomb hood. The one thing that shocked me was that the Malcomb canopy cannot be displayed open with this kit. I had to use a Squadron vacuform replacement, which I hate because they are an absolute pain to cut out, at least for me.
The figure and dog came from the Tamiya Spitfire Vb I built which is originally from ICM. I know its not a German Shepard, but I tried to paint it as such. Figure painting is not my forte.
That about sums it up. Thanks for having me…
Joe


Well that’ll be a tough act to follow. Lawdog your build as always looks fantastic!
Here is my humble update as I continue to slowly plod along.
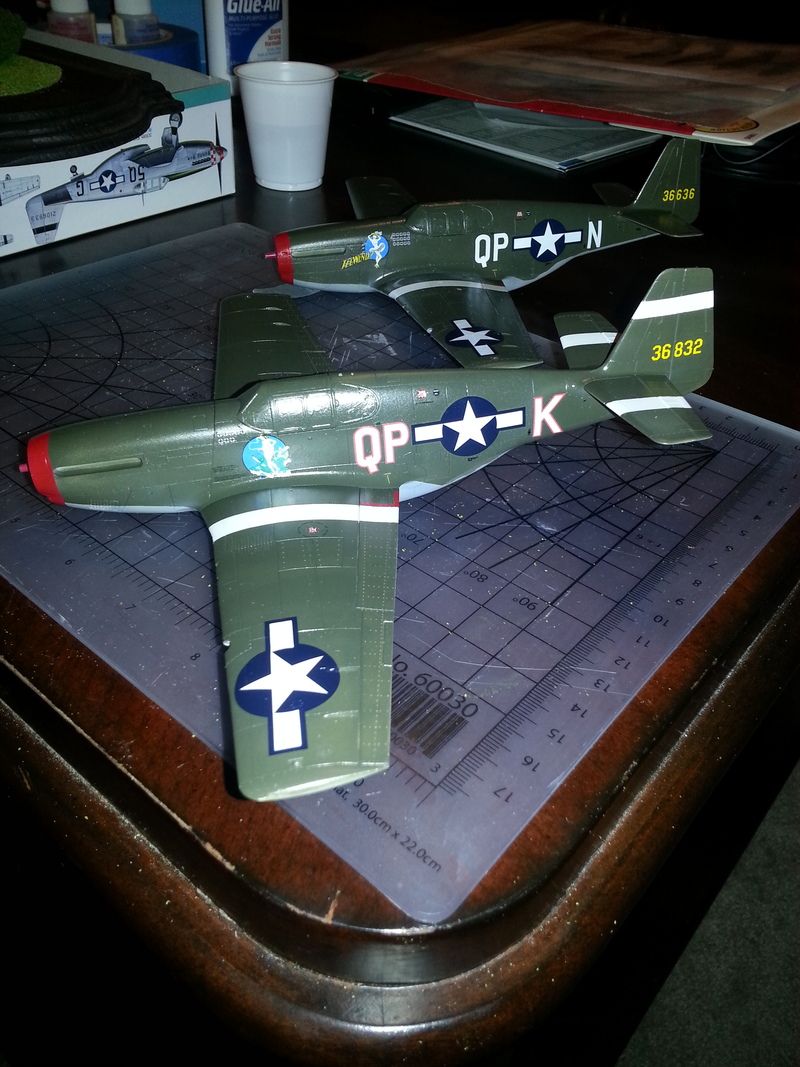
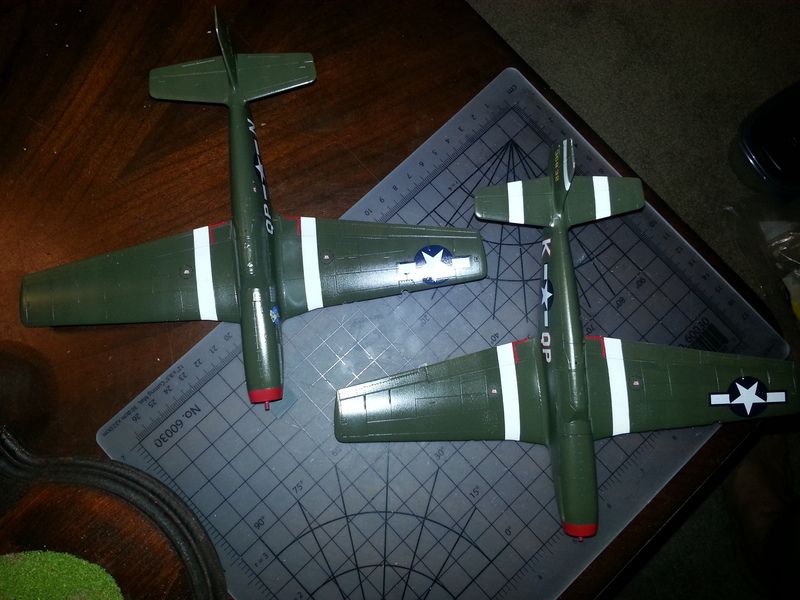
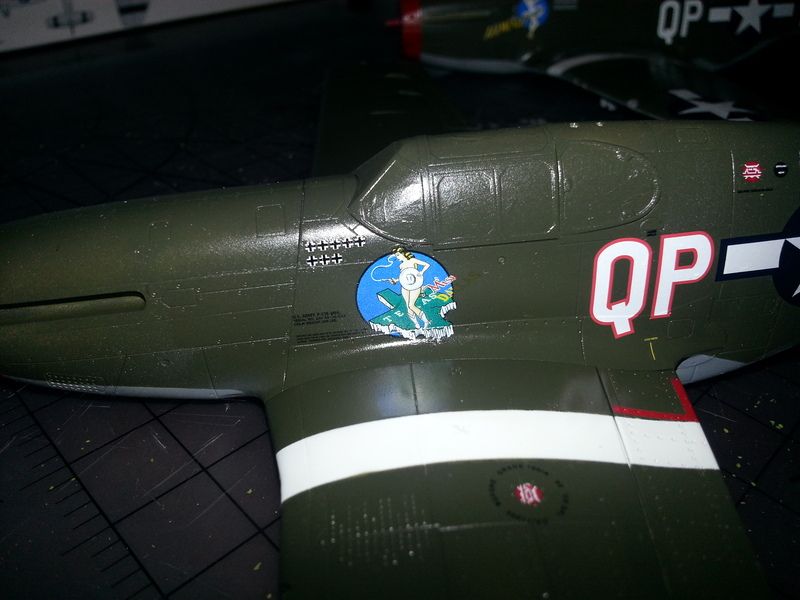
So a quick recap, I’m building 2 Tamiya P-51B’s as Miss Dallas and Ill Wind. Based on what I could find and the Kitsworld decals, Ill Wind (in the back) had her tail stripes painted over and the red outlines for the letters removed earlier than Miss Dallas did hence the differences in the aircraft.
I did make an attempt to do the light streaking to show condensation, not that you can really see it. I also hit the aircraft with a light post-shade. These are both pretty subtle which was kinda where I wanted to keep it for a first attempt. Hopefully final photos with my wife’s nice camera toward the end will look better.
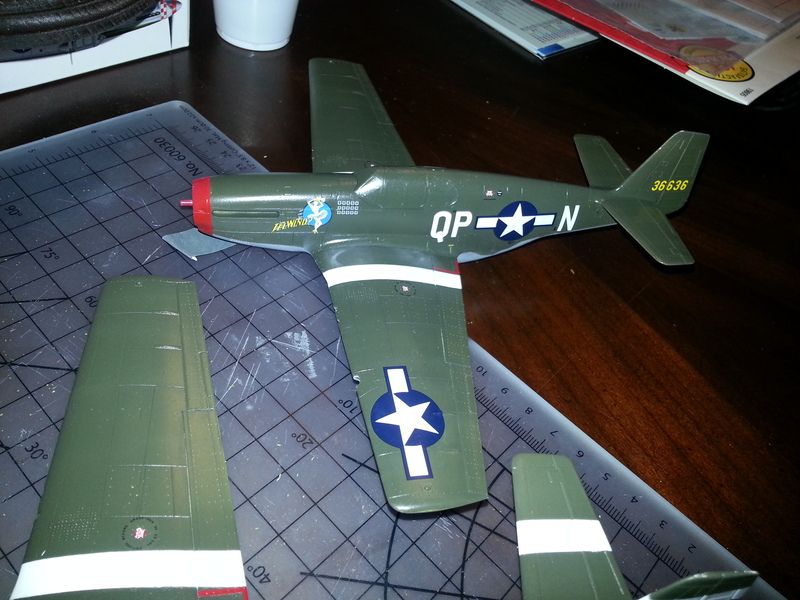
The Kitsworld decals went down really nice, but a little disappointing that they don’t include the insignia and stencils (so you are stuck using the kit ones, which aren’t terrible, but not nearly as nice). The other thing I noticed on the Miss Dallas photo, the latter part of the word “Dallas” can’t be seen. The letters should be bright yellow but aren’t visible to the naked eye. They show up nicely on the sheet, but not at all on the model. Somewhat disappointing.
I am still trying to get the stars and bars on the upper sides of the wings to conform over the raised control linkage for the aileron. I have tried a couple coats of micro sol, may have to reach for the solvaset here shortly.
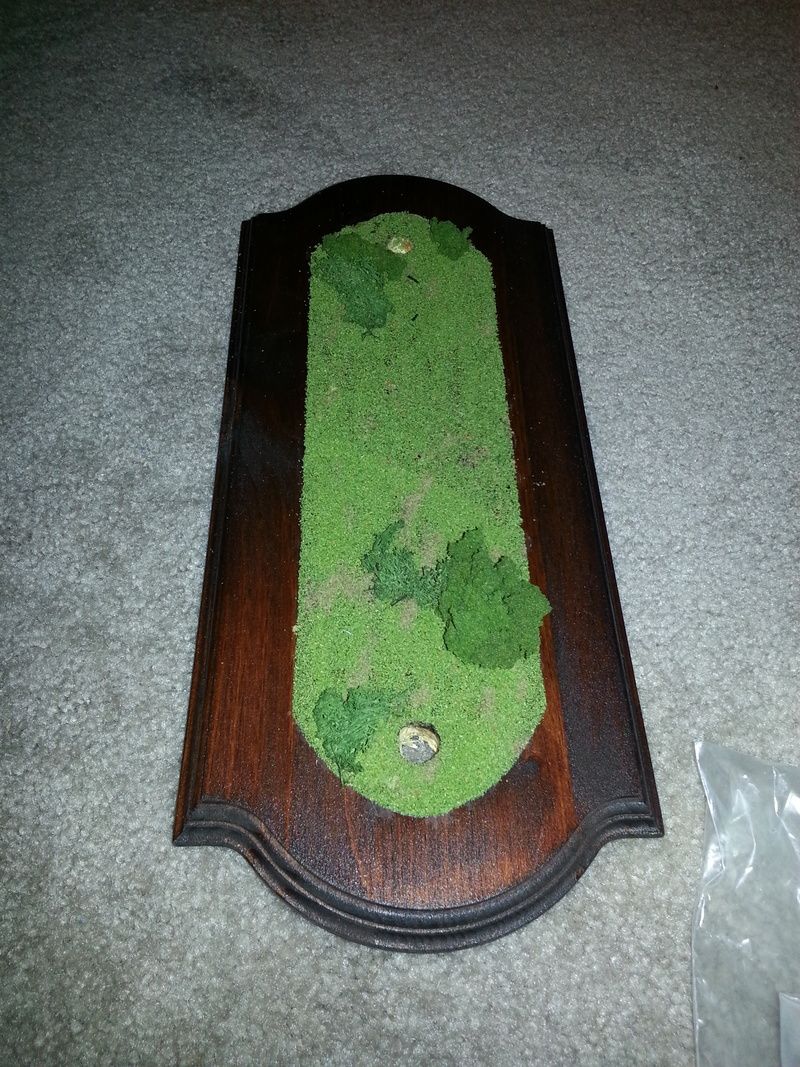 And finally, here’s the base I’ll be mounting these on. I’ve got some acrylic rods that are cut at an angle so that I can show the aircraft banking and diving in flight above the countryside.
Still need to seal the decals and weather before getting the aircraft stuck on the acrylic rods but the end is finally in sight!
Groot
Lawdog,
WOW! That’s freakin sweet man. Fantastic weathering and I love the base. The pilot looks good to me and the dog really adds to the scene. Cody will get your pic up as soon as he can.
Groot,
I like that idea of the base and showing both in formation. Can’t wait to see more.
Steve
Absolute work of ART Joe! Great Photography as well! I will put your plane in the gallery right away! [Y]
Hey Rob you’re right those decals look painted on! Great work! [Y]