Thanks Dave. The kit itself is fairly accurate and just needs a little help. And I am more than happy to bring those improving tweaks to light for all TBD fans.
and now back to the bench on this build…
Thanks Dave. The kit itself is fairly accurate and just needs a little help. And I am more than happy to bring those improving tweaks to light for all TBD fans.
and now back to the bench on this build…
Well here are today’s work updates:
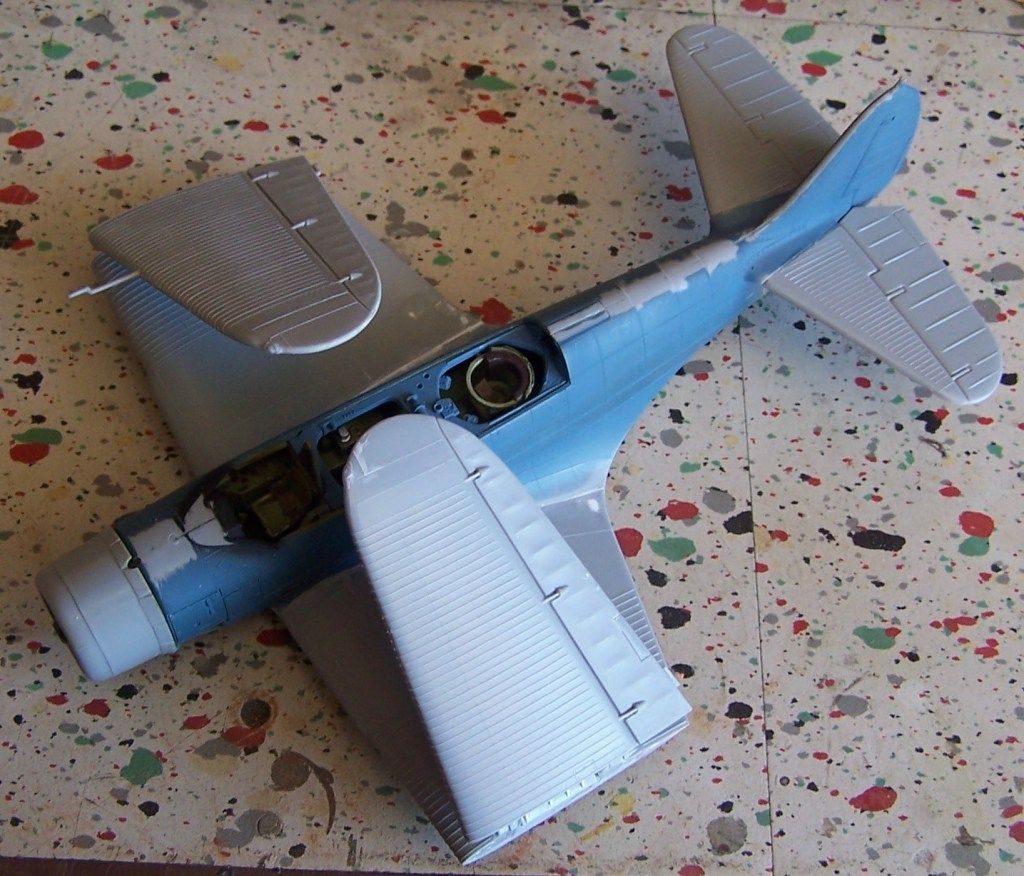
the kit comes with positionable flaps, up or down. But since every photo of TBDs with wings folded shows them with flaps up, I went that route. So flaps up it is…
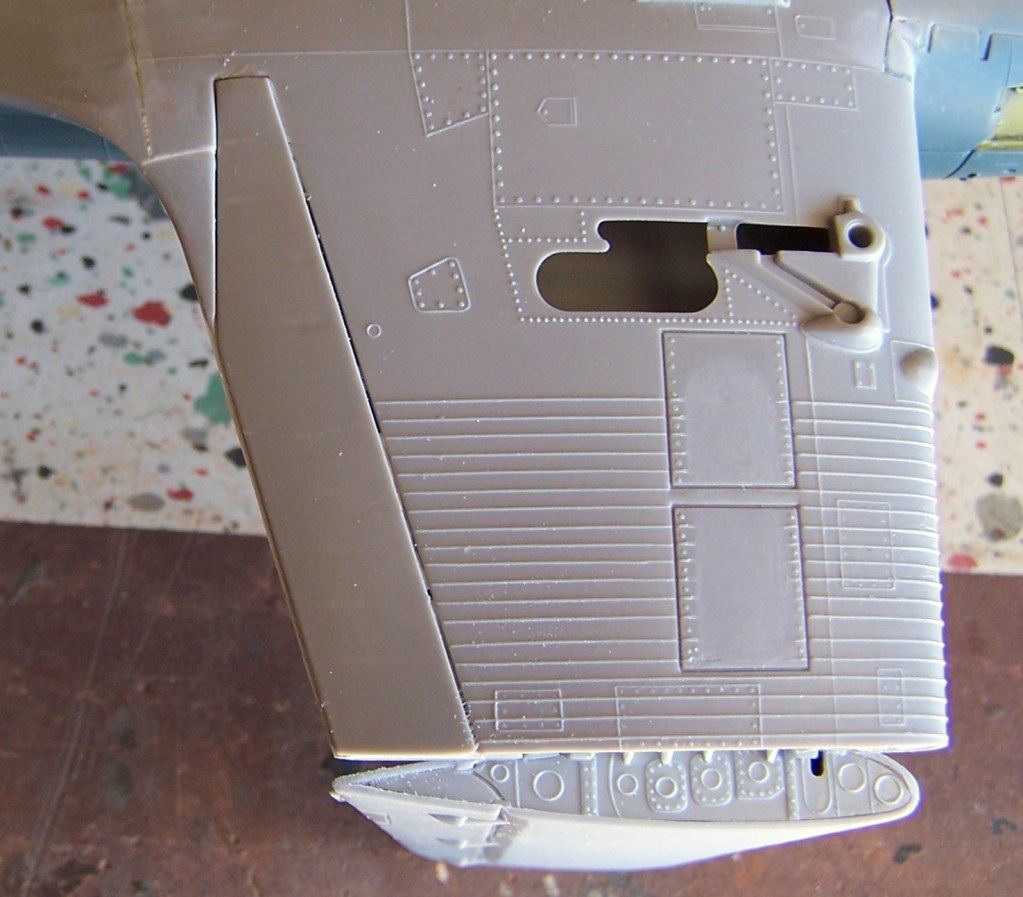
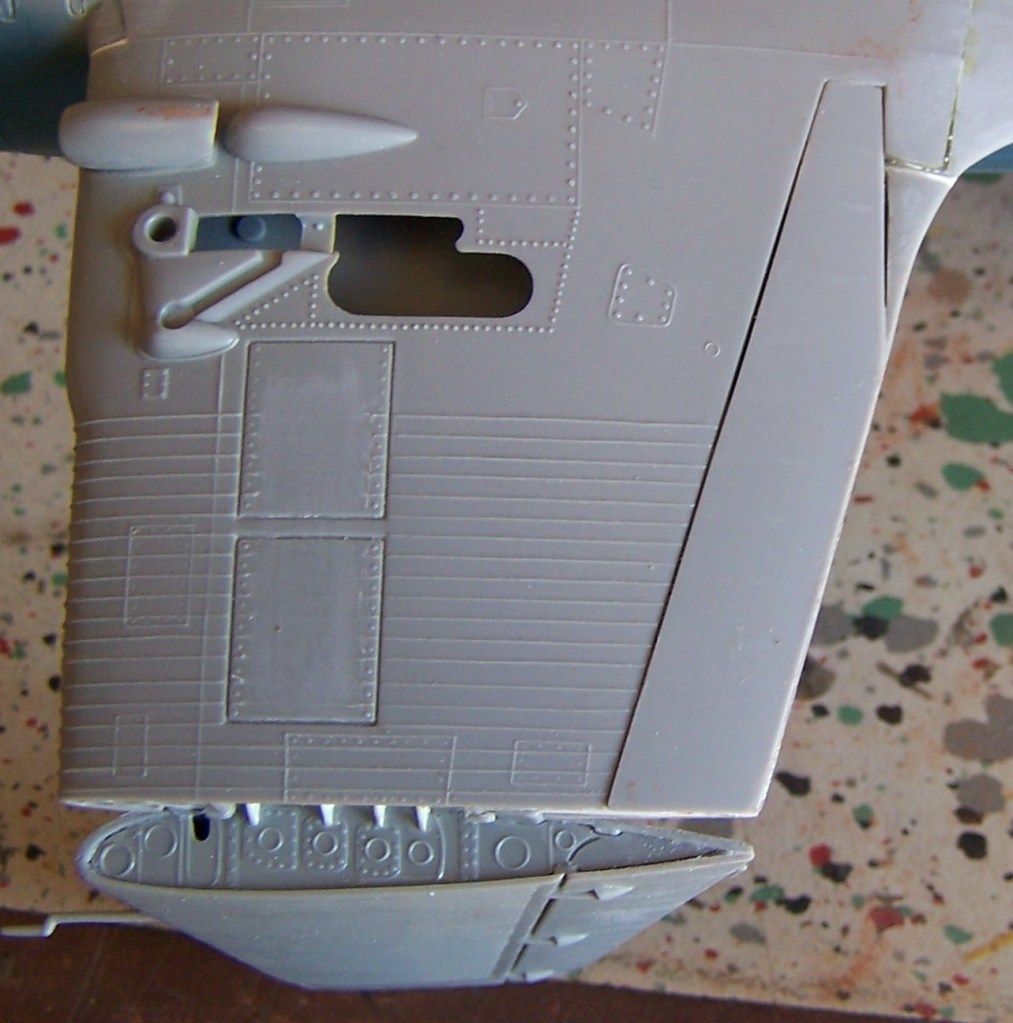
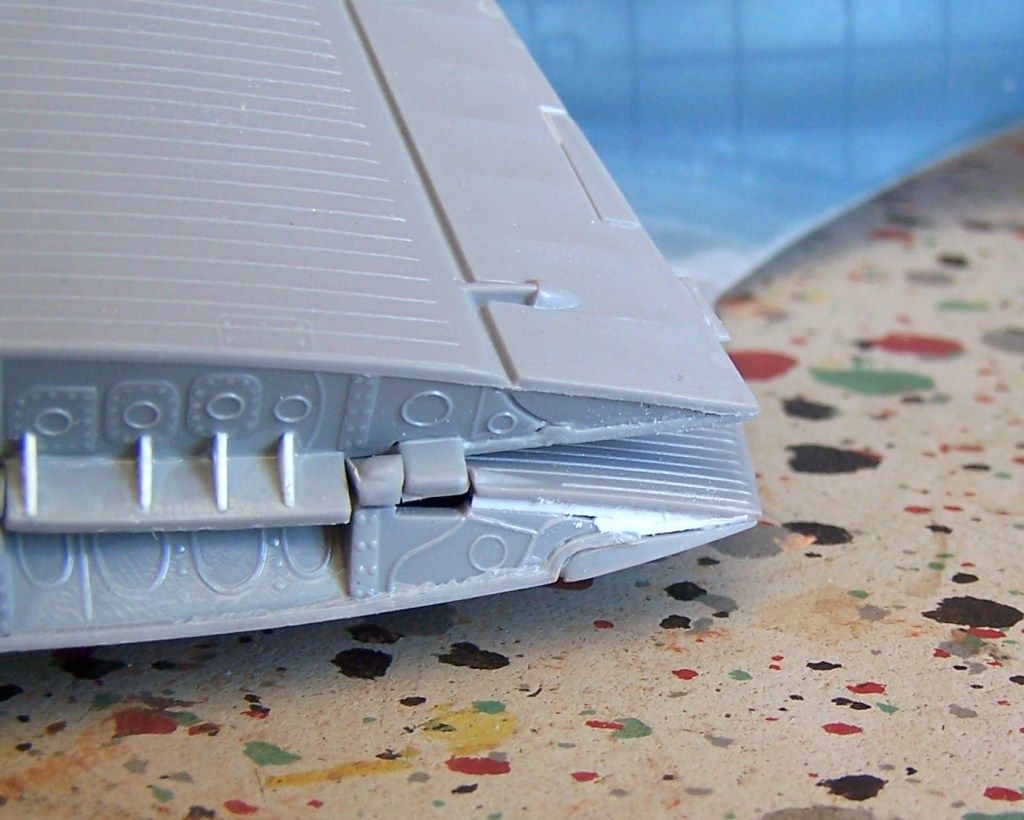
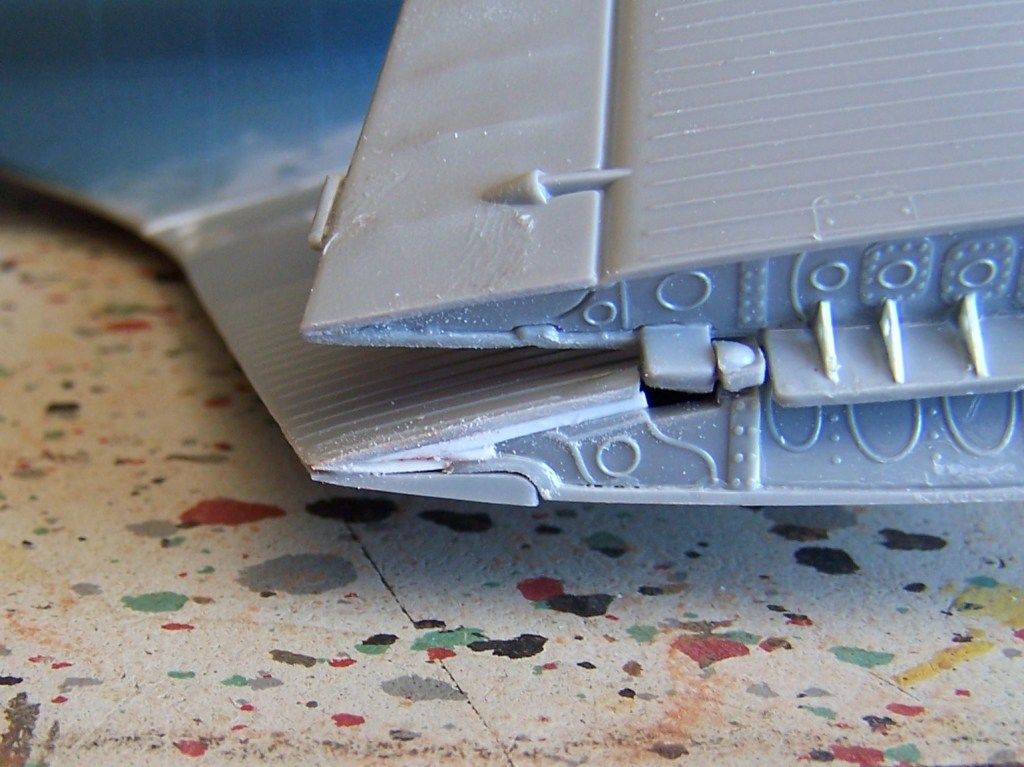
and some cleanup work on the shims at the trailing edge of the wingfolds…
Then I added the horizontal stabilizers and tacked the engine cowling in place for painting… it now looks like a TBD
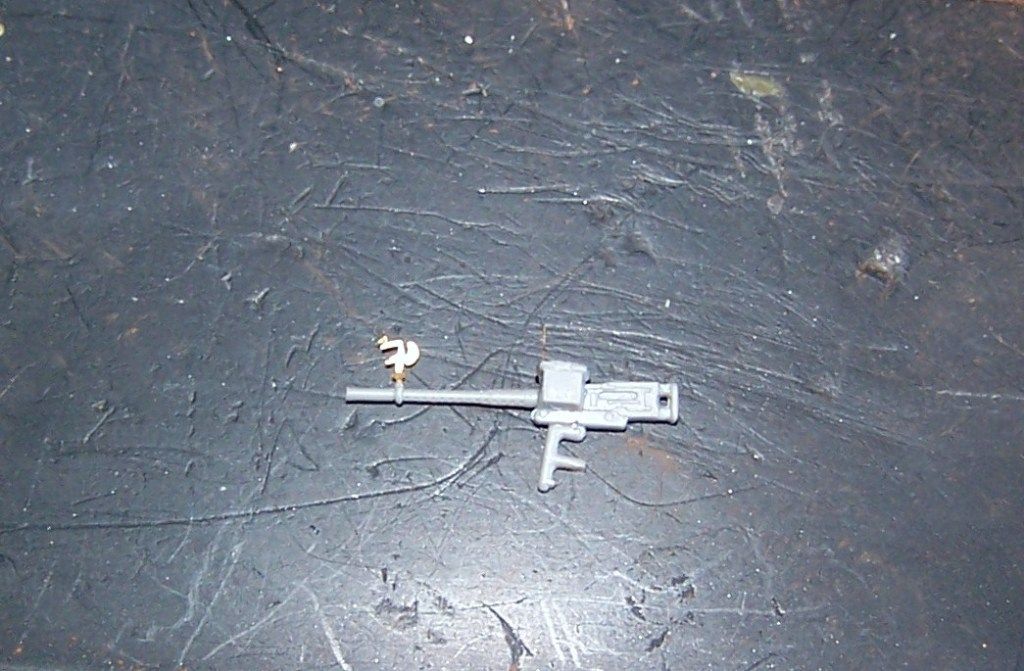
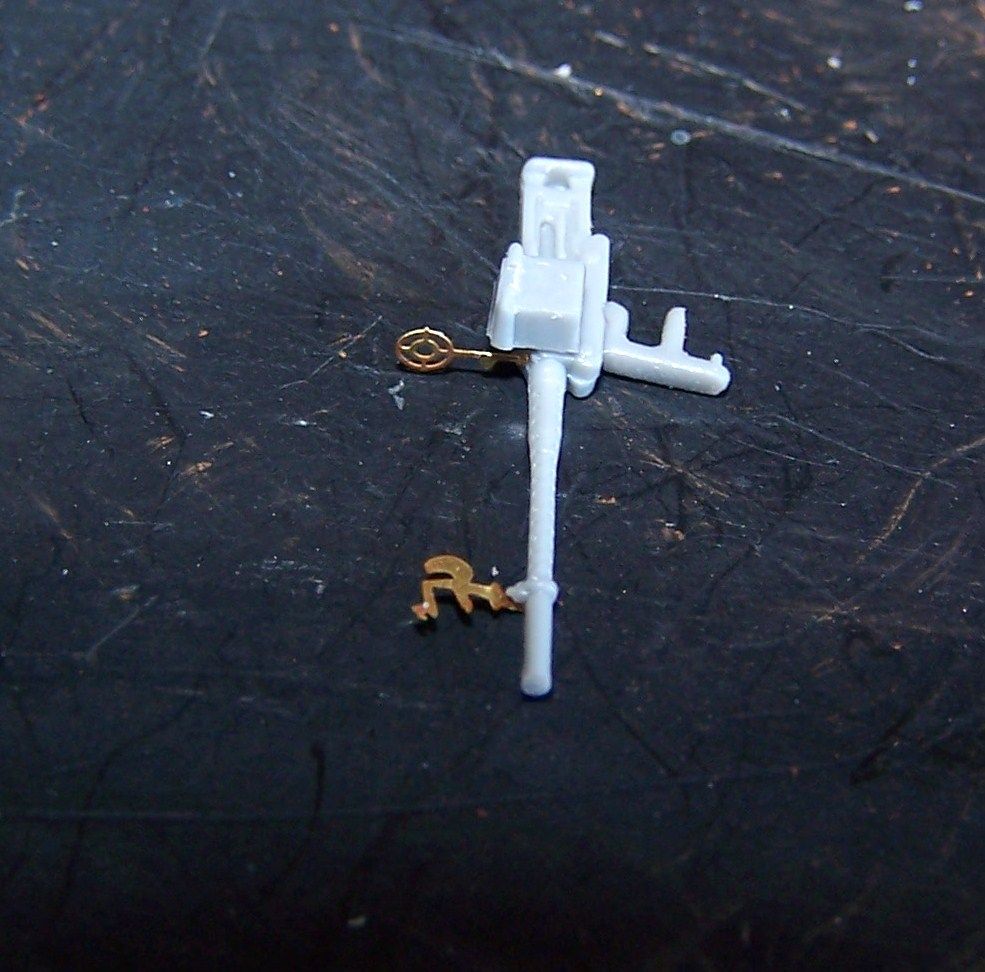
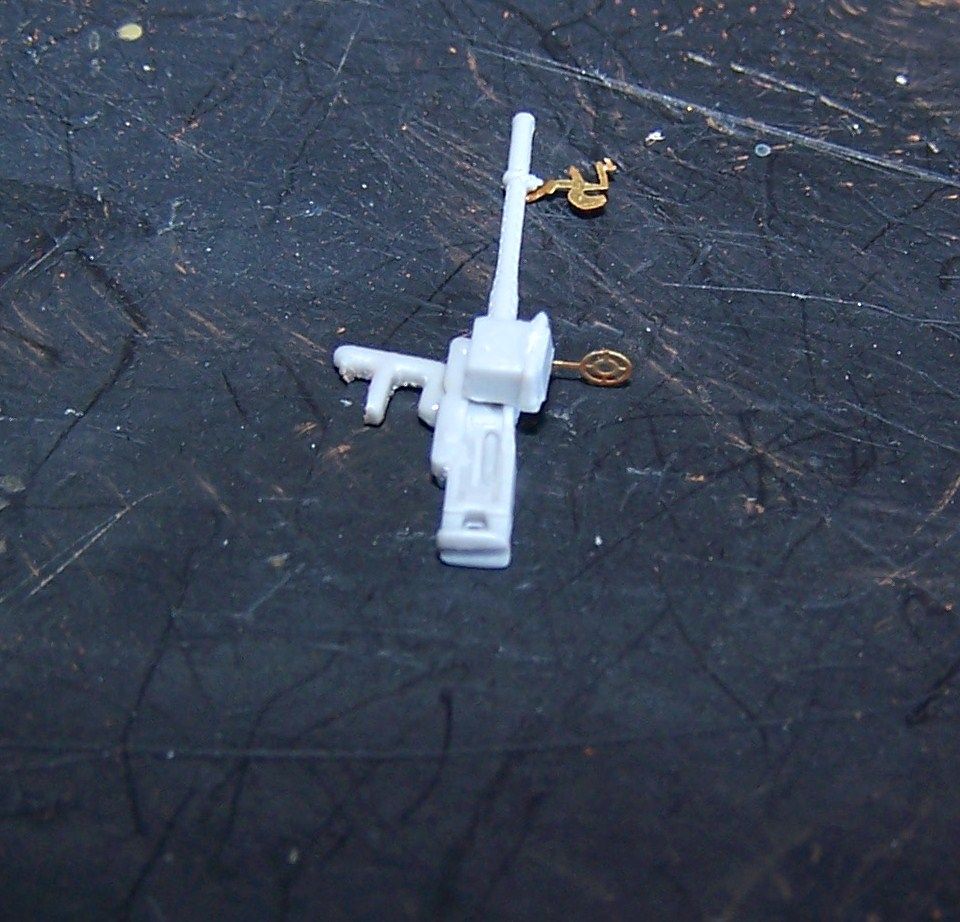
and my last bit of work for the morning was on the gunner’s flex mount .30 cal. First up, I cut it off of the kit pintle mount as it is molded in firing position and I planning on mounting mine as stowed. Then using needle files I cleaned up mold seam lines, an ejector mark on the ammo box, and added a grove to give more definition and somewhat separate the spade grips. And finally using the generic Tom’s Modelworks USN Aircraft PE set, I added sights to the flex mount .30 cal.
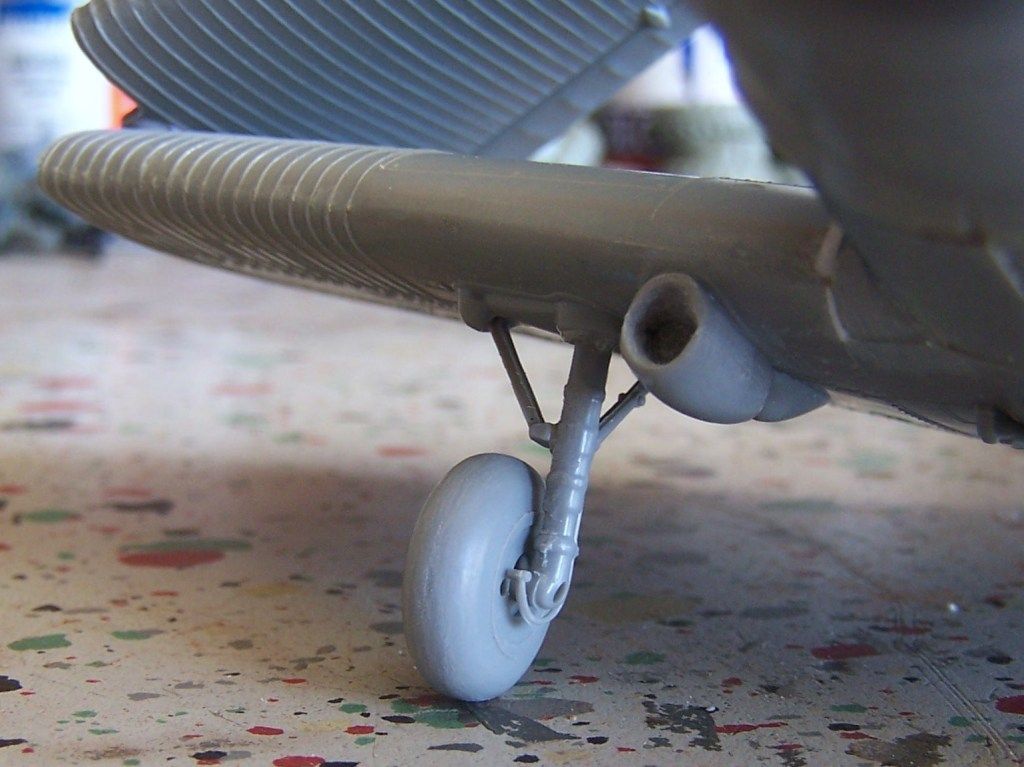
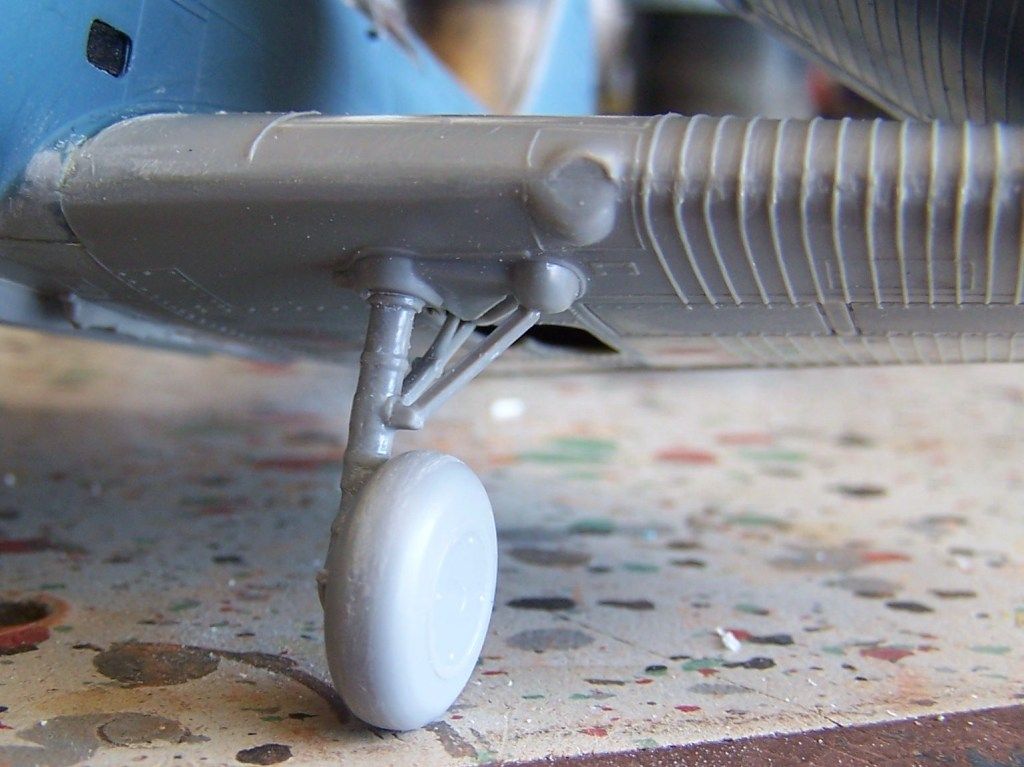
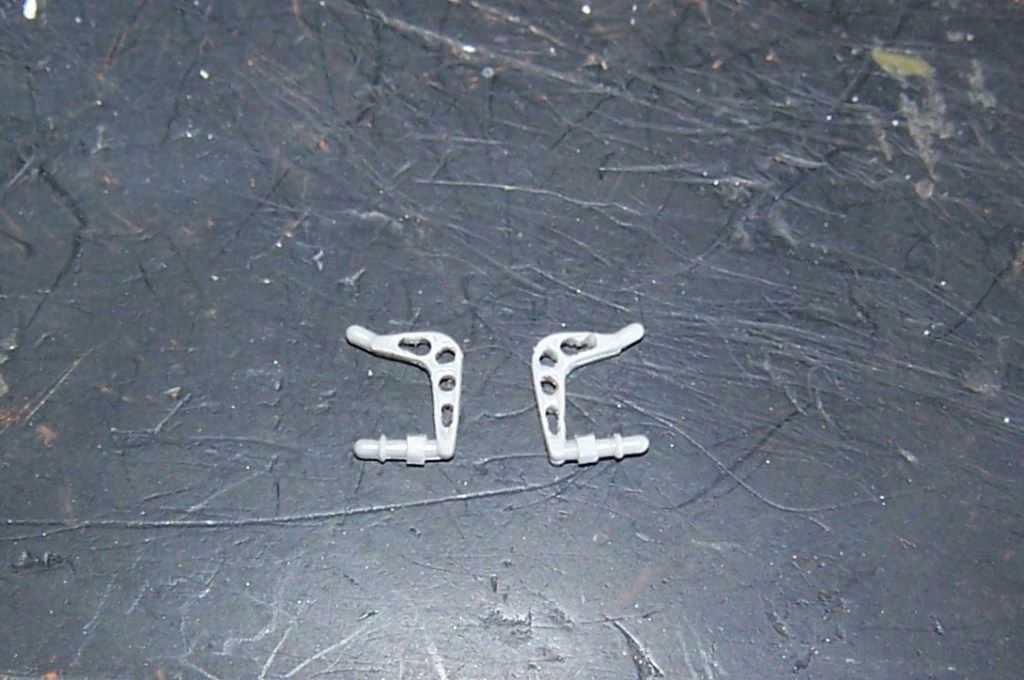
A bit more progress tonite before calling it quittin’ time at the bench. I glued on the landing gear struts, and I hollowed out the lightening holes on the wing fold armatures with a pin vise and various size drill bits. Plus a bunch of mold seam line clean up on fiddly bit parts that need to be painted and then mounted in final construction. It is not pretty much ready for the beginning of painting. That and getting the canopy dipped in Future.
That front sight is a whopper.
Isn’t it though? And once the gun is mounted stowed it will probably not be visible [:S]
well here are the progress photos of my latest work
the landing gear
the drilled out wing fold armatures
and and overall look as of now- with a test fit of the canopy to see if I like the look of it closed. Not really.
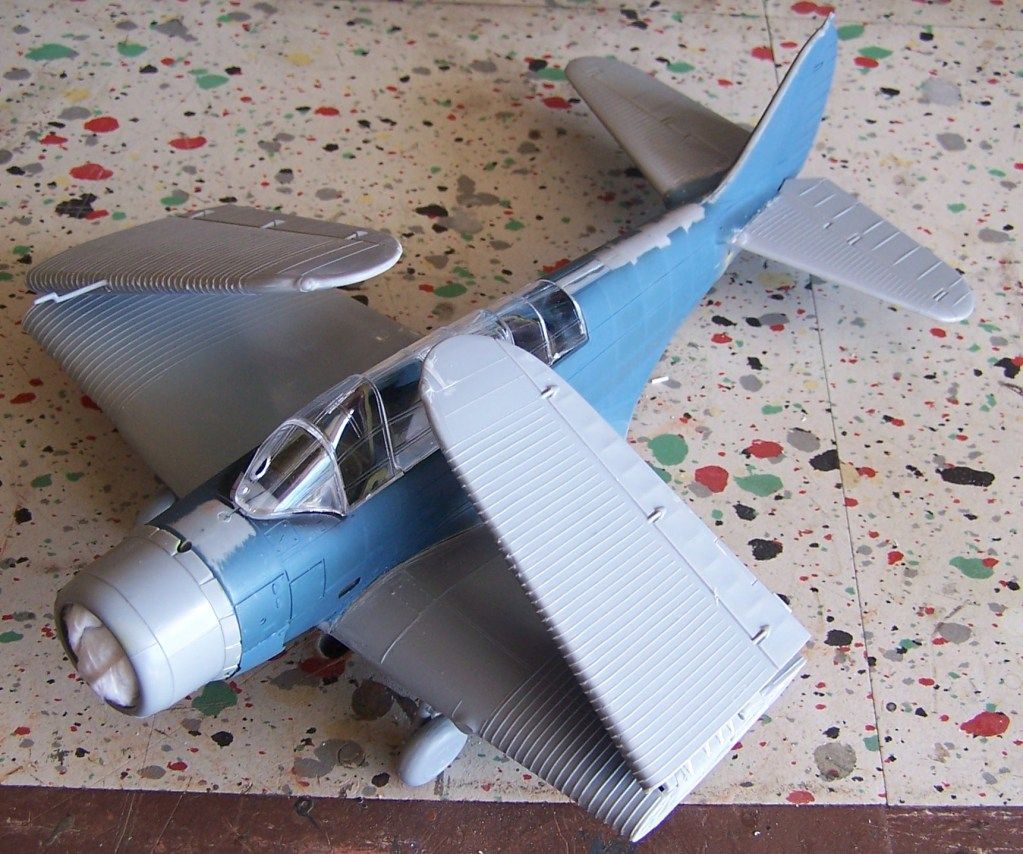
As this is being typed, the canopy is drying after it’s dip in Future. Once that is dry masking will begin for major painting on my days off next week.
Those “ribs” on the wings leading edge would sure present a challenge to get lined up and not wiped-out, looks good Stik!
Thank you sir. Lining them up was not too bad, but clean up was a real beast.
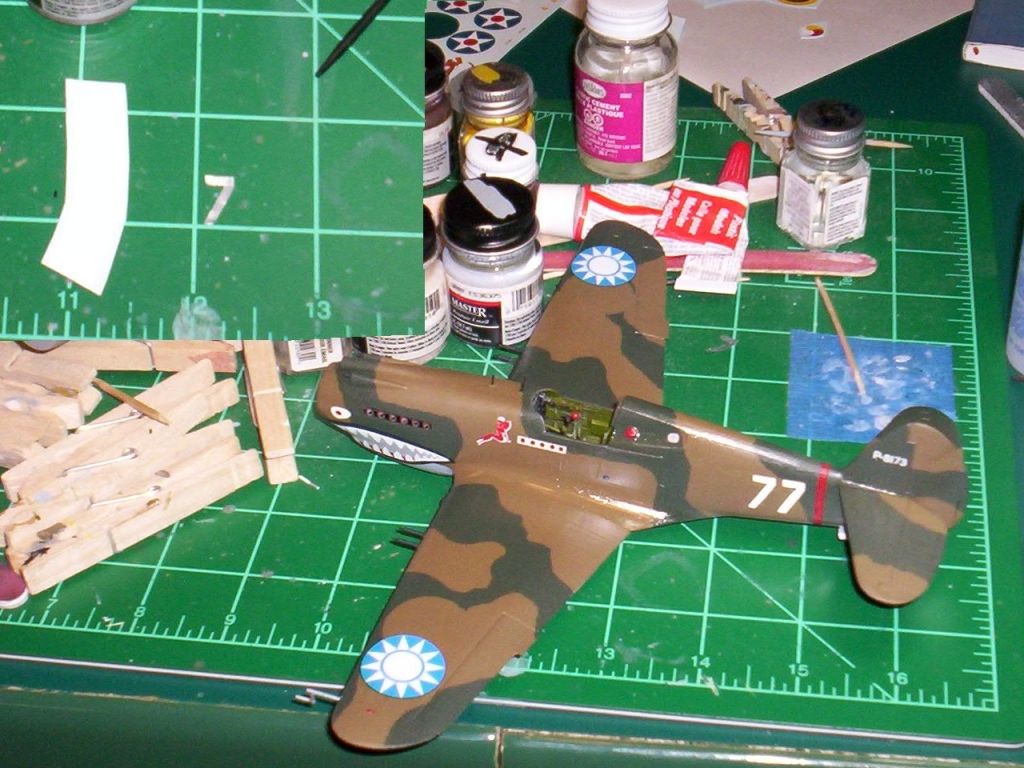
I got the decals on the P-40. I used a second set of decals so I could use what the instructions show as the bottom side decals on top and bottom of the wings. These are just a touch oversized, the larger ones would work for the wing bottoms on a couple of 2nd Pursuit AVG birds but I can’t recall which fuse numbers had these off the top off my head. I also used the 8s from the second set of decals to change the tail number from P-8127 to the correct P-8173. This left coming up with some 7s for the fuselage sides. I took a piece of aluminum can and cut out a 7 that I could trace around with my hobby knife on the white fuselage band from the UK version. This gave me 4 7s that are not exactly perfect but then again neither were the ones on the real AVG planes. I need to let these dry a bit more and then clean a couple of them up a touch with a knife. The Angel’s halo has the red misprinted above the wing so I need to go back and add that in with red paint. Also the eyes on the shark mouth will need a dot of gray added over the red. Next will be weathering and some canopy modifications and the plane part of this will be done.
I’ve come to love the P-39. It looks so sleek. The shark mouth is the most complex decal I’ve ever applied. I think it turned out pretty good.
i47.photobucket.com/…/DSCF1164.jpg
I’m planning to do another one day: Devastating Devil.
Yeah, you really gotta appreciate the lines on the P-39. Both Chuck Yeager and Alexander Pokryshkin thought very highly of it.
I’ll call myself done. I really enjoyed the Airacobra. I didn’t have to fight with it at all, and I’m happy with the way it turned out. I left out the gun bay detail to make sure it wouldn’t sit on it’s tail (I’m a bit paranoid after the P-61). I used a chunk off of a tire balancing weight.
<a href=“s47.photobucket.com/…/models target=”_blank"><img src="i47.photobucket.com/…/DSCF1153.jpg" border=“0” alt=“Photobucket”>
The focus isn’t so good, but I’ll get some better pictures later.
<a href=“s47.photobucket.com/…/models target=”_blank"><img src="i47.photobucket.com/…/DSCF1173.jpg" border=“0” alt=“Photobucket”>
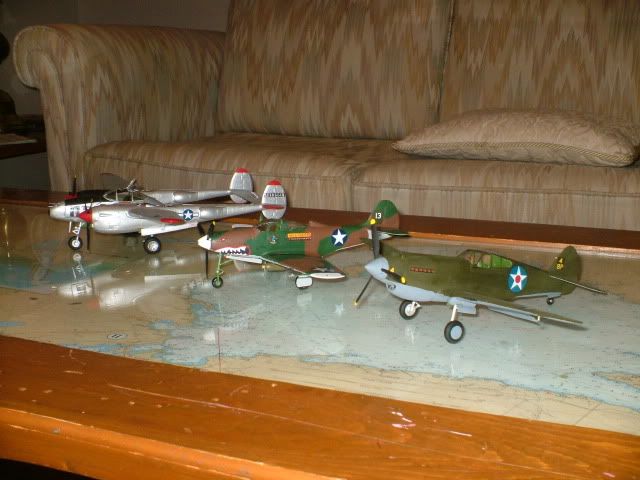
And here’s a group shot of the hattrick. P-39 is definitely the most fun looking.
<a href=“s47.photobucket.com/…/models target=”_blank"><img src="i47.photobucket.com/…/DSCF1179.jpg" border=“0” alt=“Photobucket”>
Those picture links didn’t work.
i47.photobucket.com/…/DSCF1153.jpg
@ Cdn-Colin
I just love The Table Top Trio, Great stuff!
I guess you don`t have young children, cats or a dog with a long tail…[;)]
Actually, I have 3 kids and 2 cats. But this table is in my “hobby room”. The cats aren’t allowed in, and only my oldest spends any time in here working on his own models.
Thanks for the compliments.
LOL! All my finished A/C are hanging from the ceiling in my hobby room and manage to get damaged by my teenagers…oops, I mean…“not me”…the invisible mischievous child we mustve had and not realized....[:D] My wife has "shot down" quite a few cleaning over the years too...youre a lucky man…lol.
Cdn Colin nice work on the Airacobra man !! Like the camo on it a lot. I have to build one someday will look good sitting next to my collection of P-40s and the one P-38 I have done.
Stikpusher man you make any kit you build look good and the TBD is no exception [Y][Y]
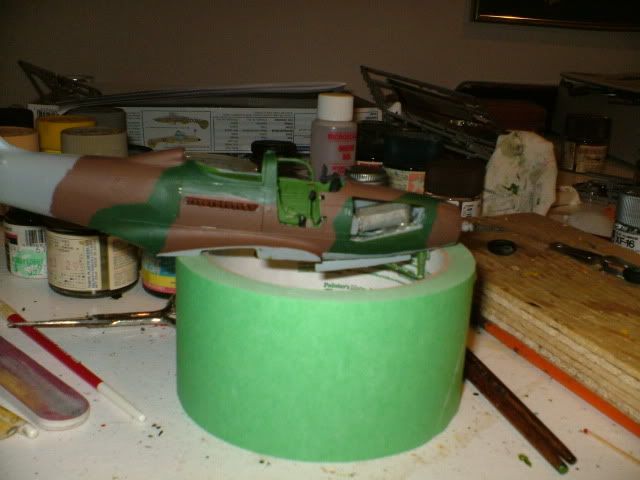
I have a few update pictures of the Stuka I really have been making progress on it. I have discovered it is much, MUCH, easier to both attach and mask the canopy on these birds before attaching the wing. With that said.

Didnt have to do muck filling at the wing roots either as you can see here.

I also sprayed the canopy frames German gray.
Next up I decanted some white Krylon Plastic Primer, tried using it outta the can once and hated it, but I am doing this one in a winter camo and need white as a base. I will say cleaning the air brush was a major PITA, hope it is worth it for that. I am happy with the way the paint went on though, didnt lose any surface detail at all.


Next up is the underside blue, then the fun starts on top. Think I will be breaking out my old Wren air brush for this trick.
Ok so I just finished posting progress pics on my Stuka. Well as I was posting said pictures and comentary it seems a test pilot decided it was time to take it for a test flight.
Test Pilot, Lt Bonehead

It seems she is a bonehead in the true sence of the word, as she over reved the engine and blew it sky high creating an urgent need to make an emergancy landing, which she botched of course. Here are pictures of the Suka after recovery and return to the hanger.


I am going to go to Michaels surplus this week and see if I can get another, I think I have another coupon somewhere. I really want to do one in winter camo looks so cool.
Don Hammer I humbly ask your permission and the approval of the family to place a contract on Lt Bonehead.
I think a one way trip to a local eatery may be in store for Lt Bonehead

You live in “Jersey” by any chance?? I got a guy that loves shooting dogs…[:XX][:XX][:XX]
At least it wasn`t finished…nothing like a completely finished model that you worked hard on, biting the dust…I know that feeling well!
Good thing Revell kit`s are cheap…[:D]
Len