I’m pretty much at a standstill on my modified VW bus build with trying to come up with a suitable seating arrangement and waiting on all the aftermarket engine items that I’ve ordered so I thought I’d throw something on the bench that’s been catching my interest for some time now. I showed pictures of this bad boy last year after I did some repairs on it but thought it deserved more than that…………so here we are a year or so later to do it some real justice.
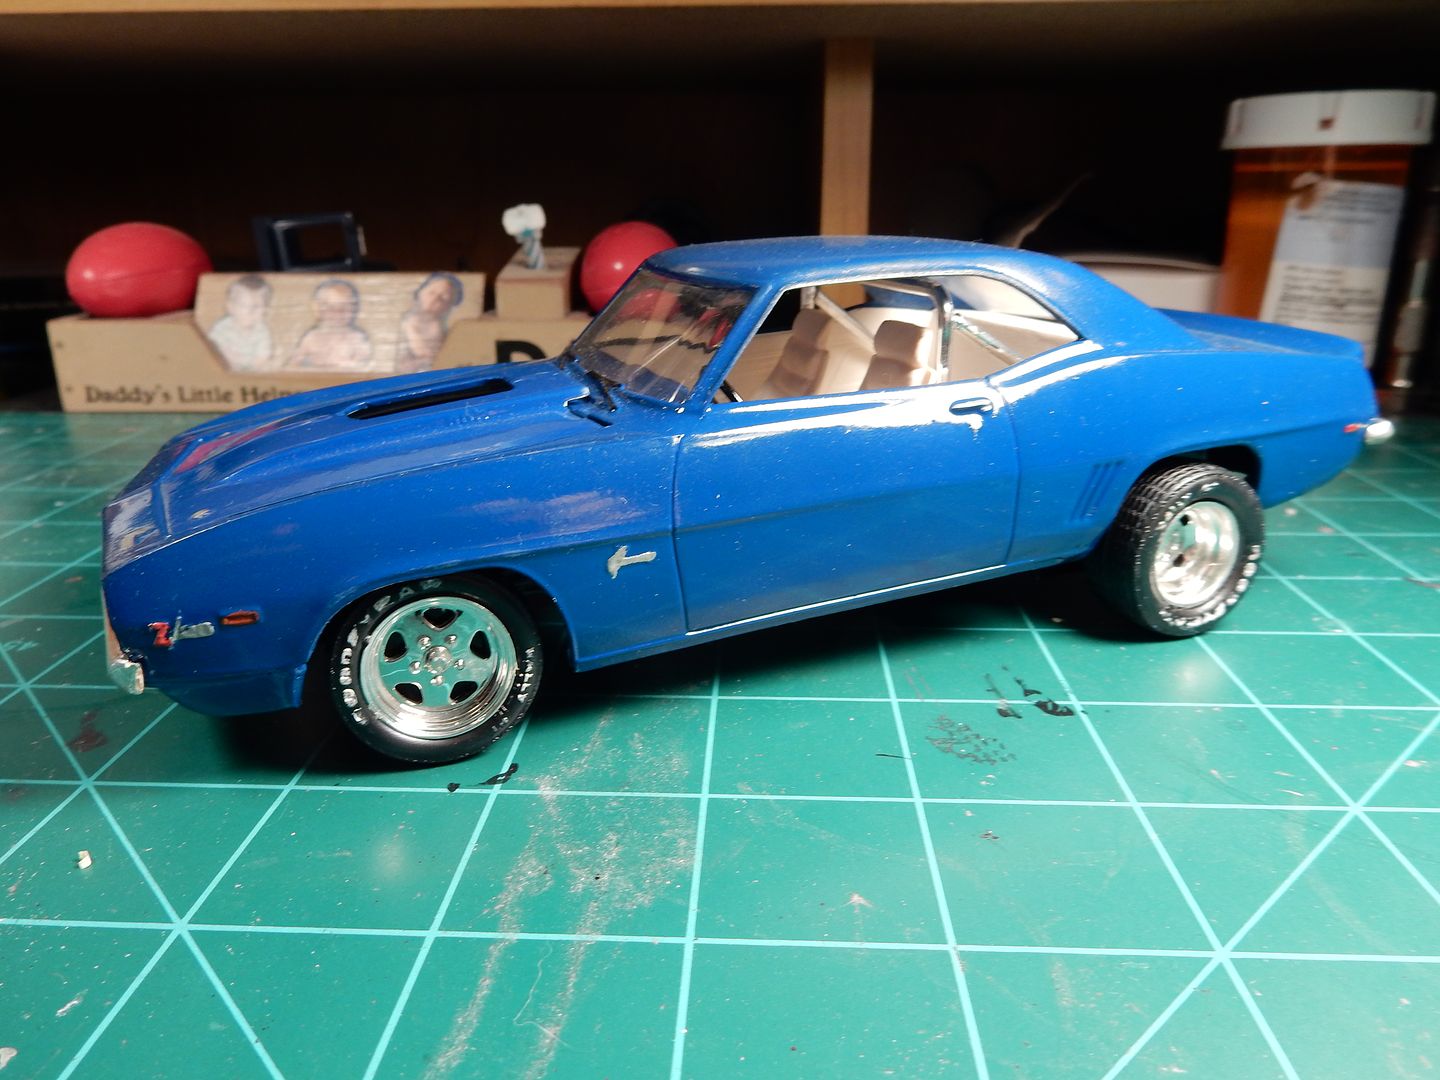
Presented here for rebuild is my 35 year old Monogram 1969 Camaro Z-28 which many of you will know the boxing of this kit back in the late 70’s/ early 80’s:
I’m going to go through this thing I don’t even know how deep I’ll go with it so I aint even going to say that this’ll be a mild rebuild. Anything I touch can’t be done in timely manner it seems like but I’m going to TRY to keep as many original parts as I can in this restoration/ upgrade. There’ll be some definite changes in regards to the interior as well as the exterior. I’ll be changing up the wheel and tire combo and will stay within the boundaries of a street machine using street tires with some Cragar SS wheels and a mildly upgraded Chevrolet 396 with a single four barrel carburetor to top things off.
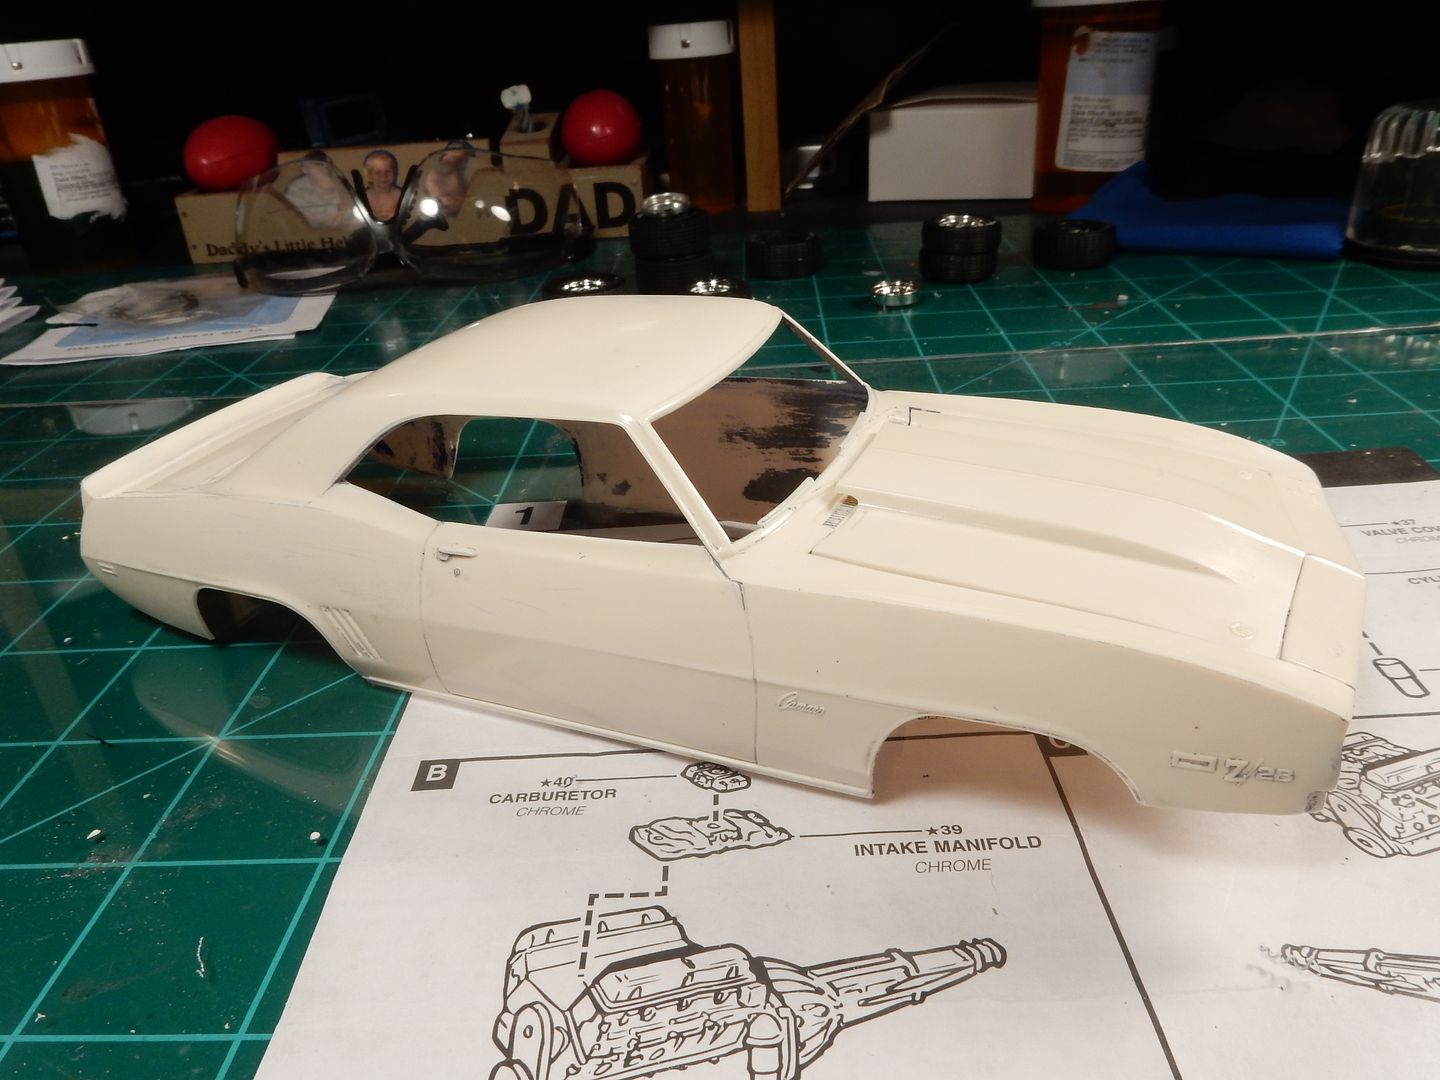
Here’s a picture of what we’re going to start with as it sat on my bench this morning:
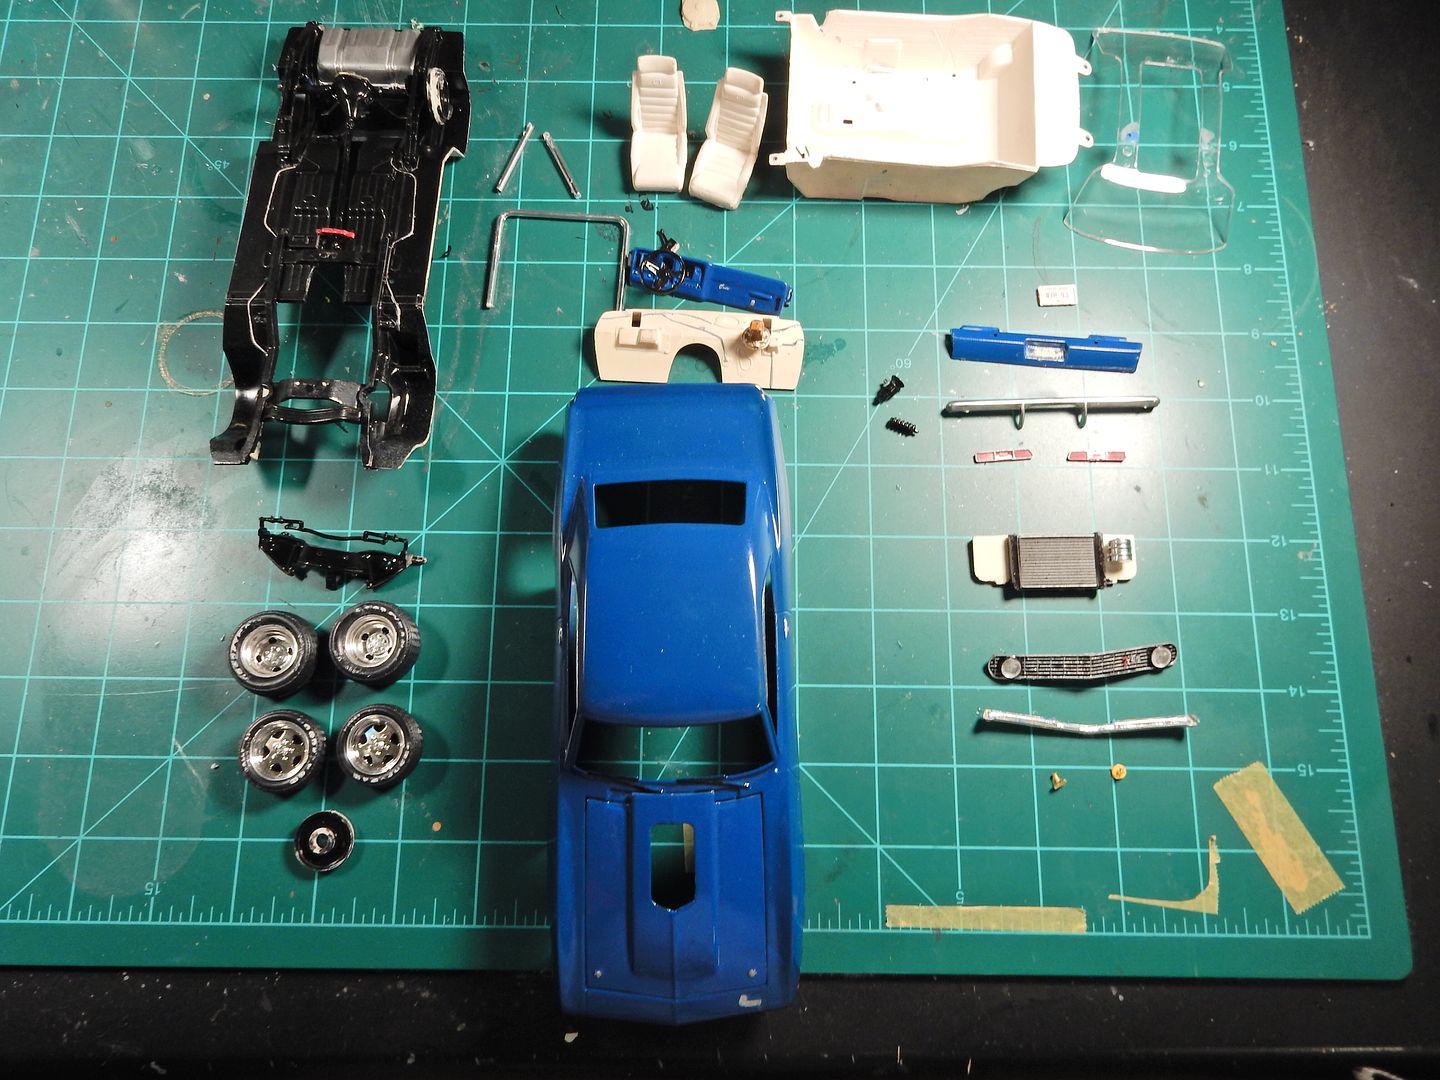
The options were wide open as there hasn’t been anything in the engine compartment in 30 years now:
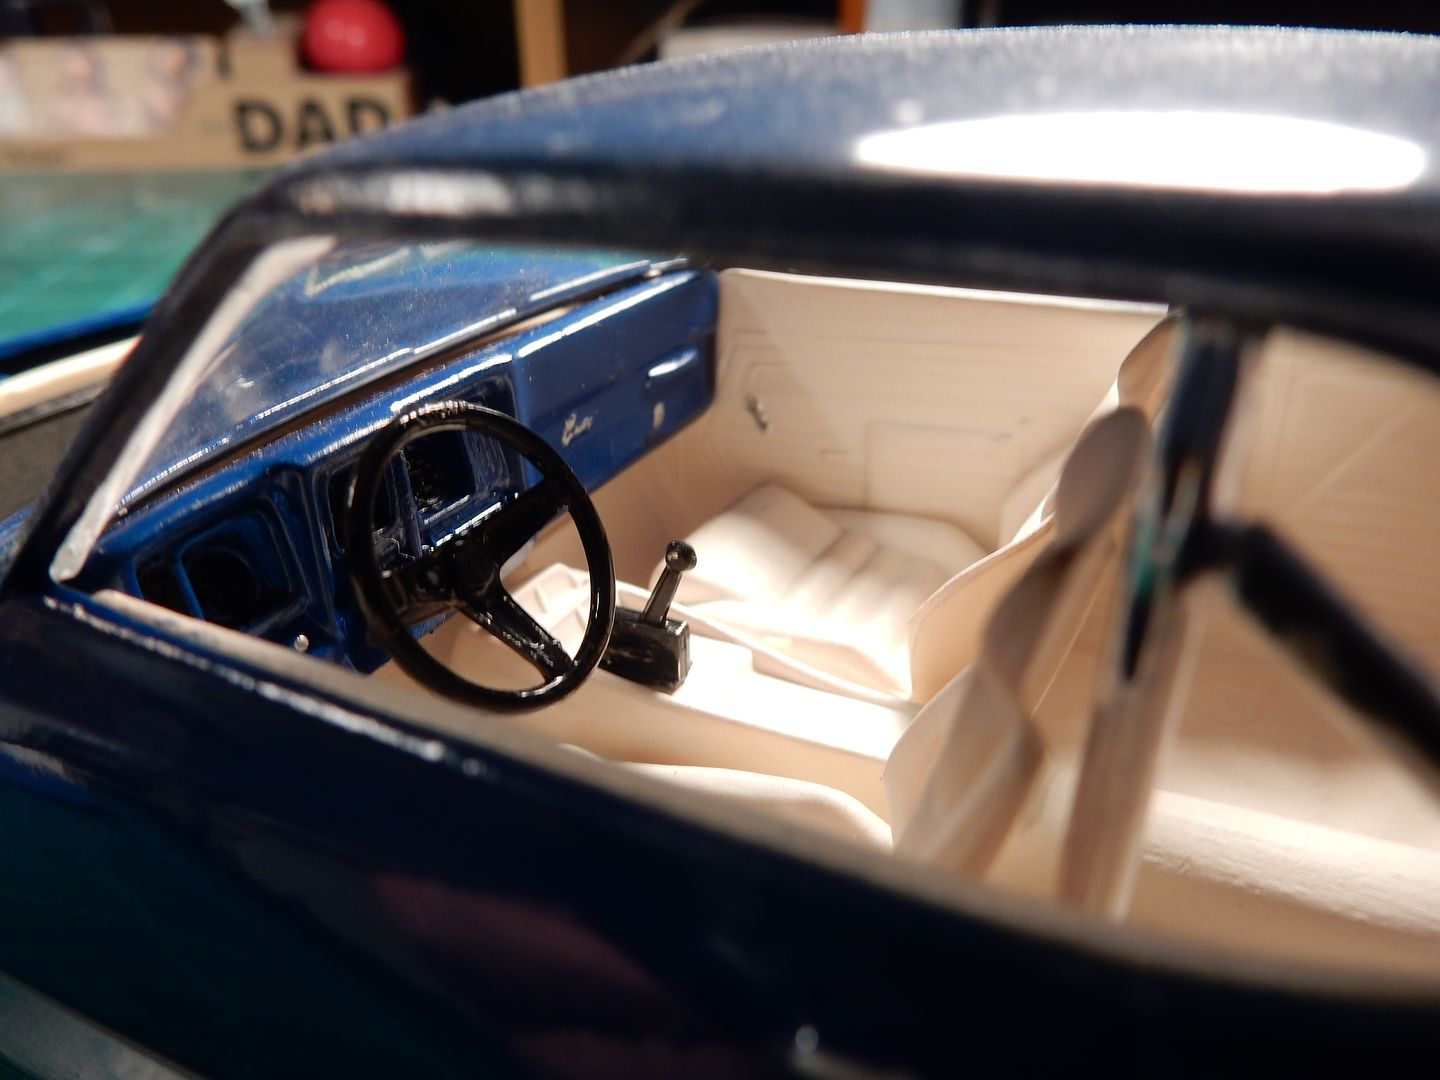
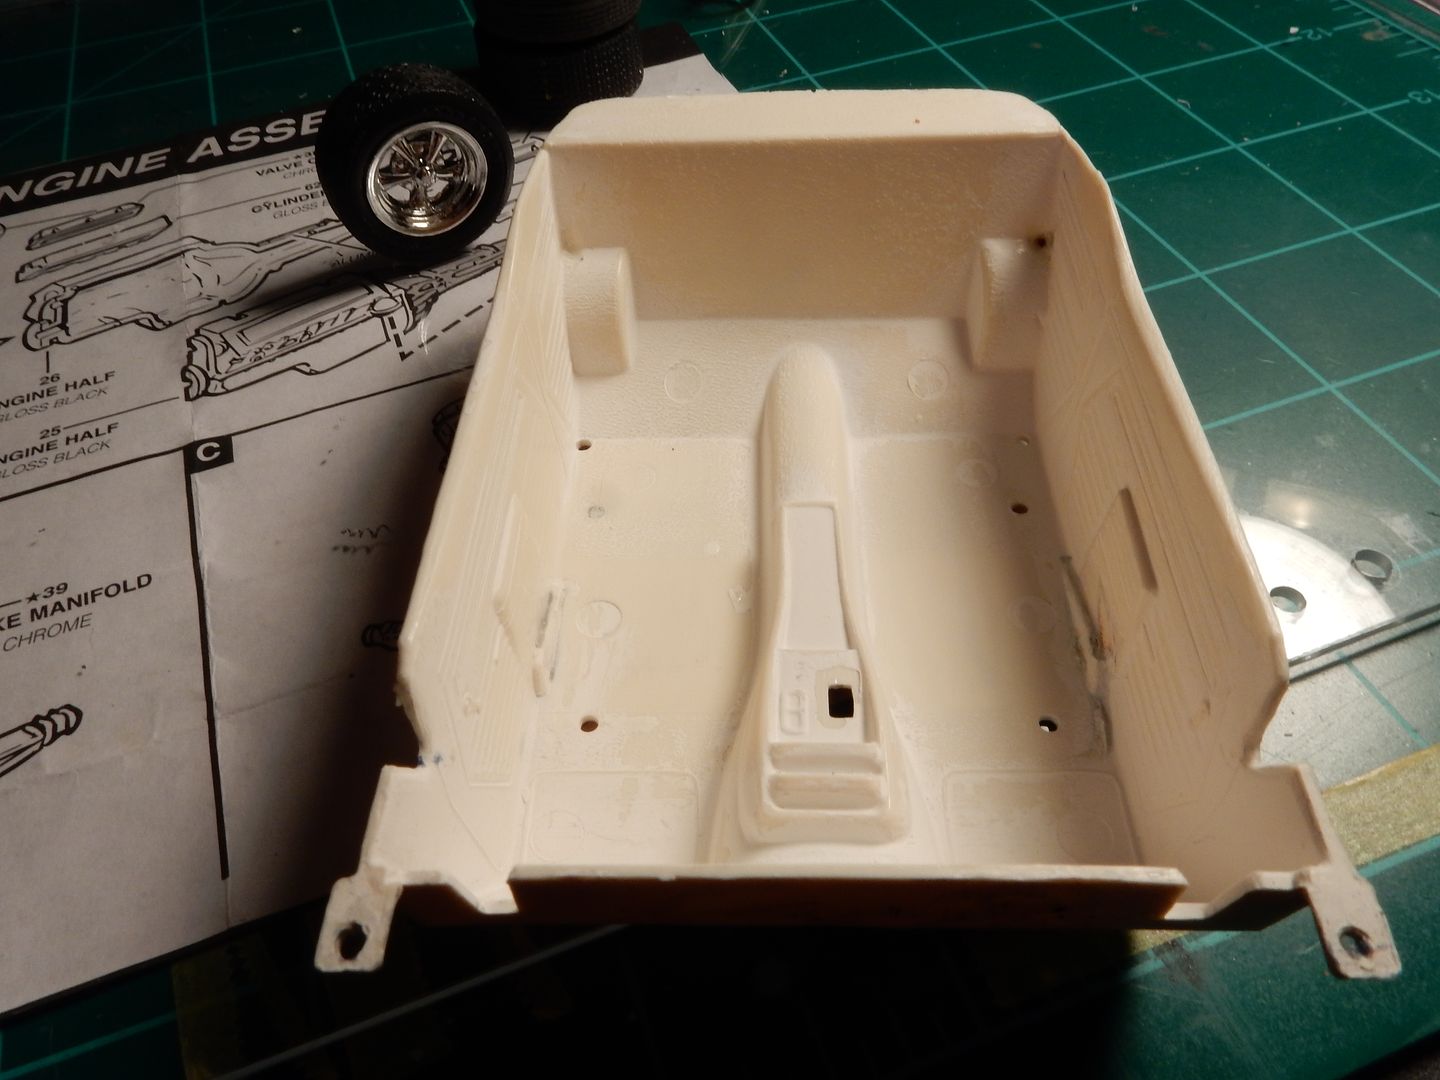
A picture of the interior:
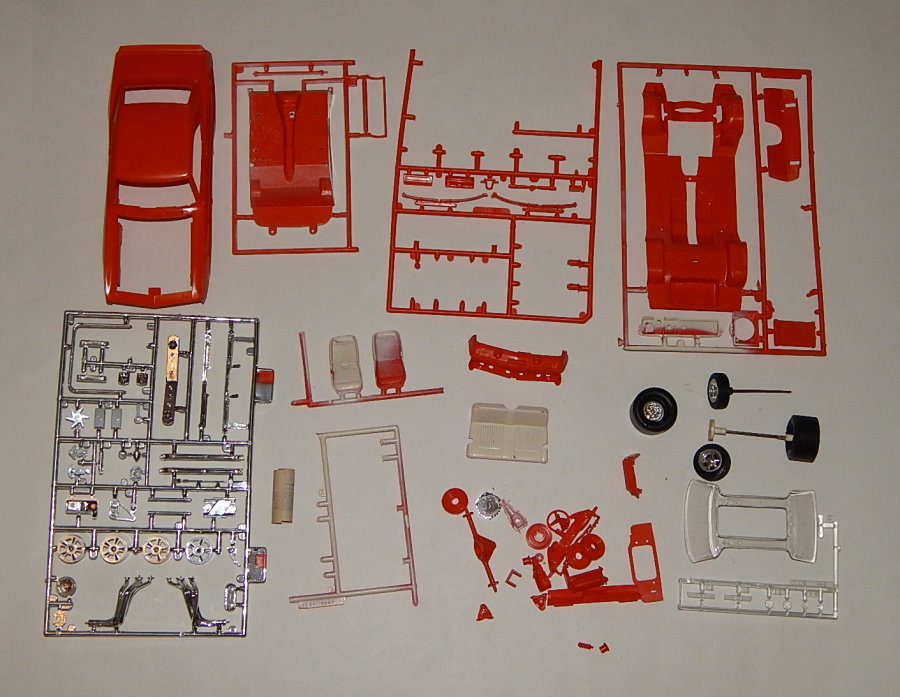
Now apart on the bench:
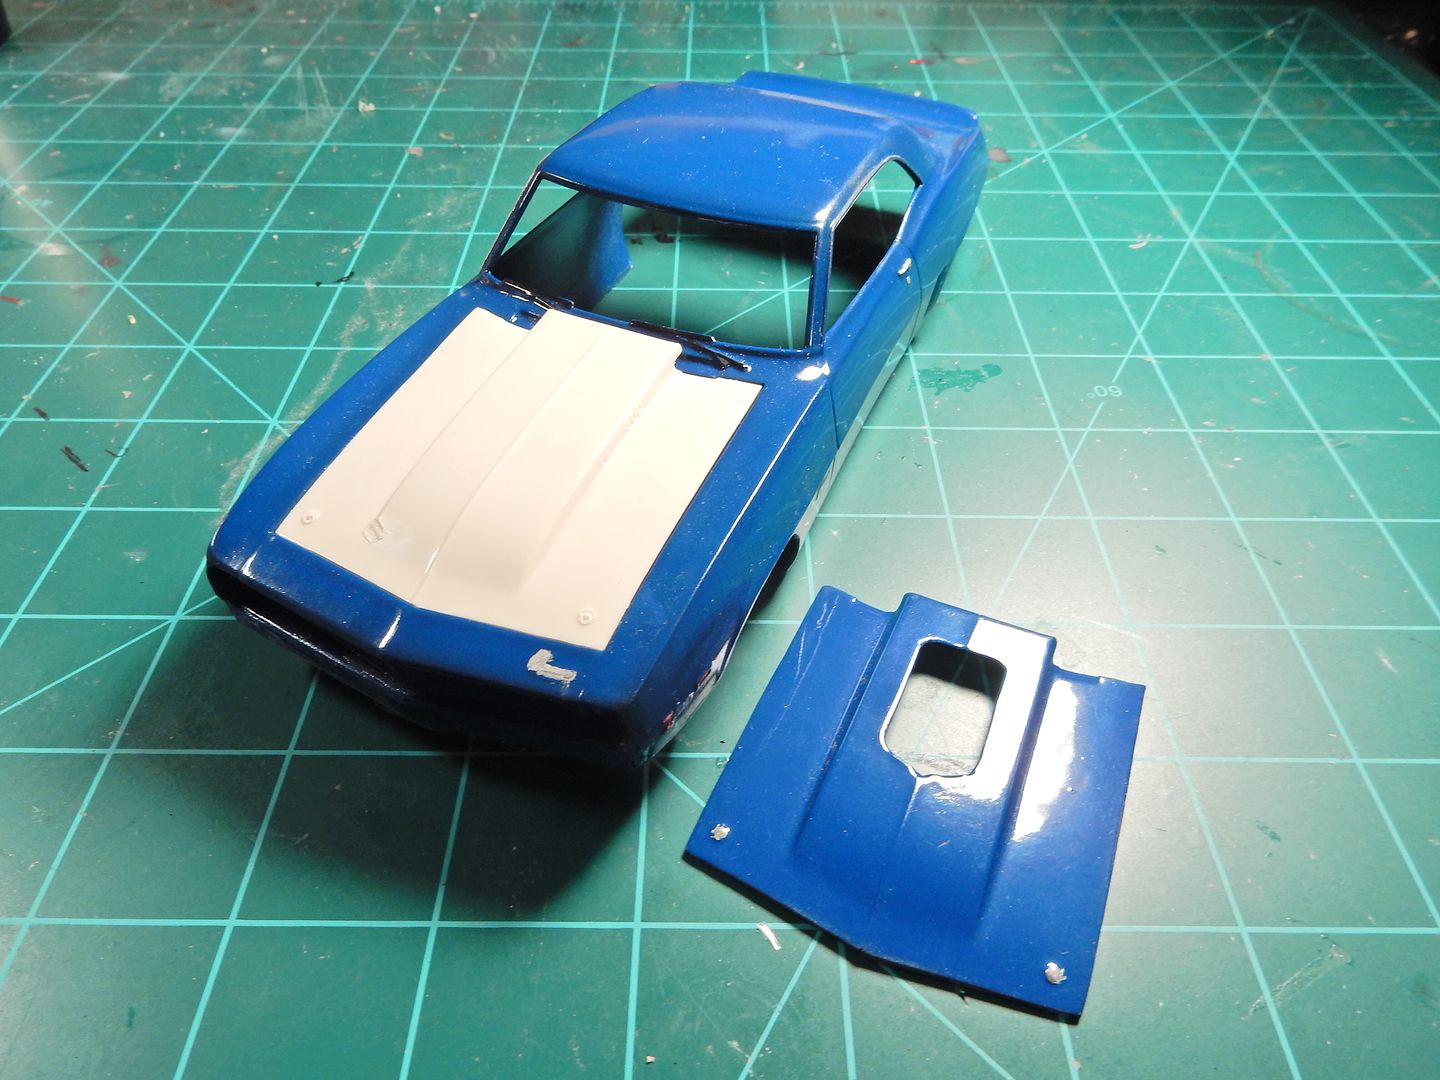
To start with I have managed to come up with another hood thanks to a friend on the forums:
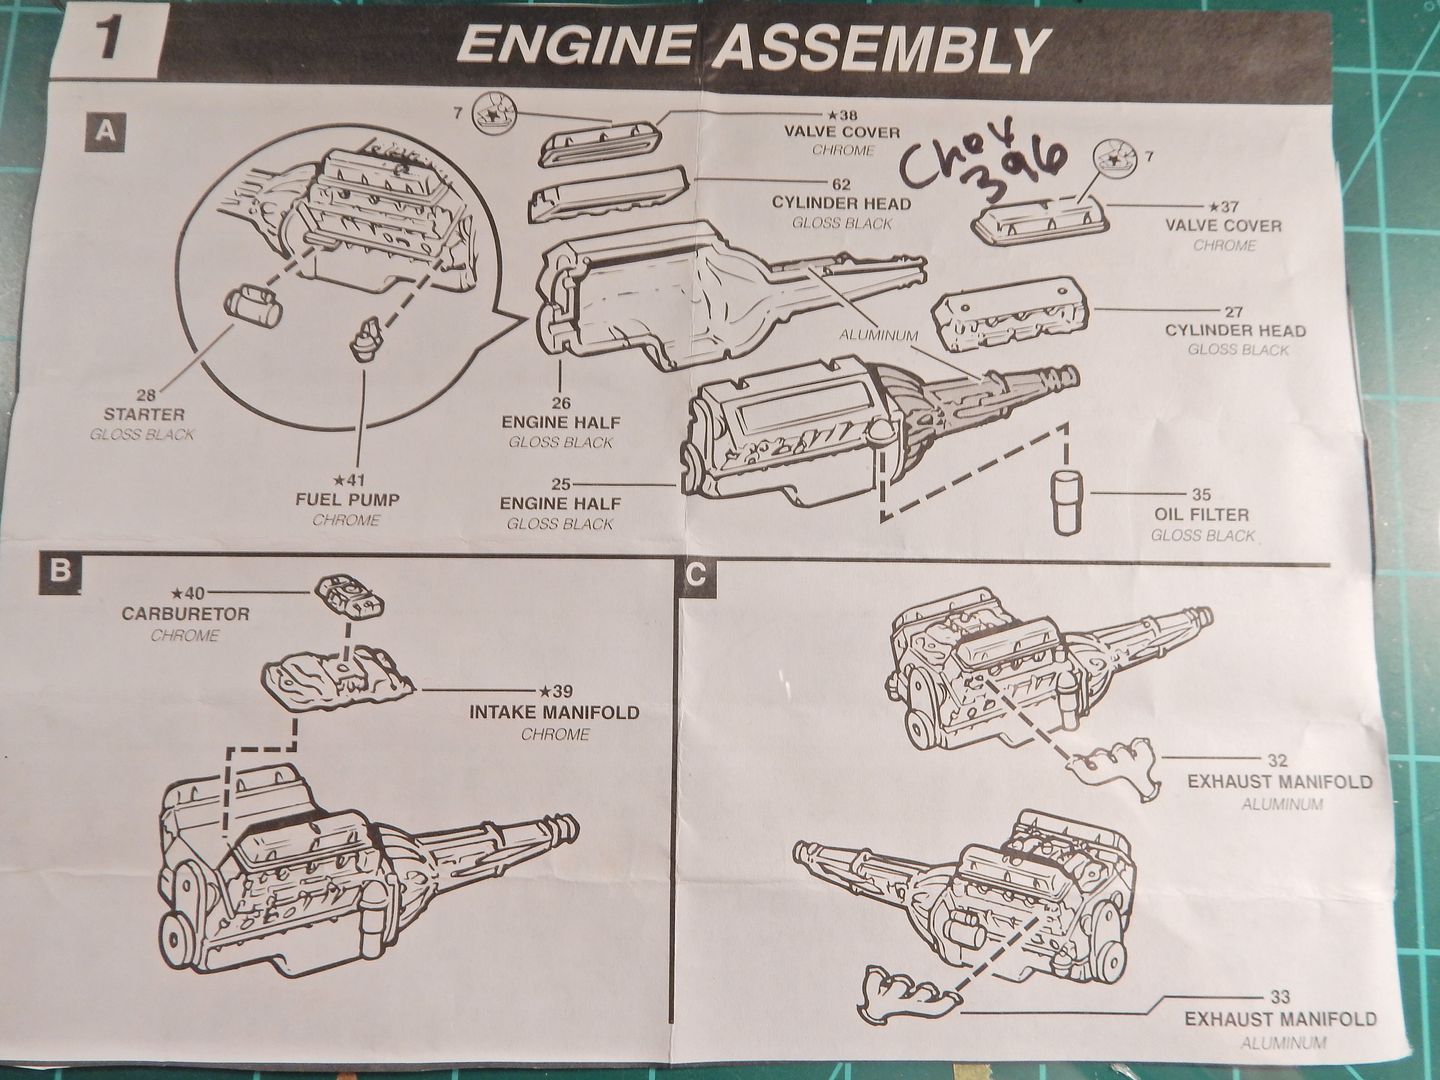
We’ll be going with this 396 from Revell that I had in the parts stash:
Greg: You know I guess I didn’t get everything glued down to the max back then. The only thing that’s been giving me trouble is getting the headlights out of the grille. May have to do some fancy foot work there. Thanks for the good word. [Y]
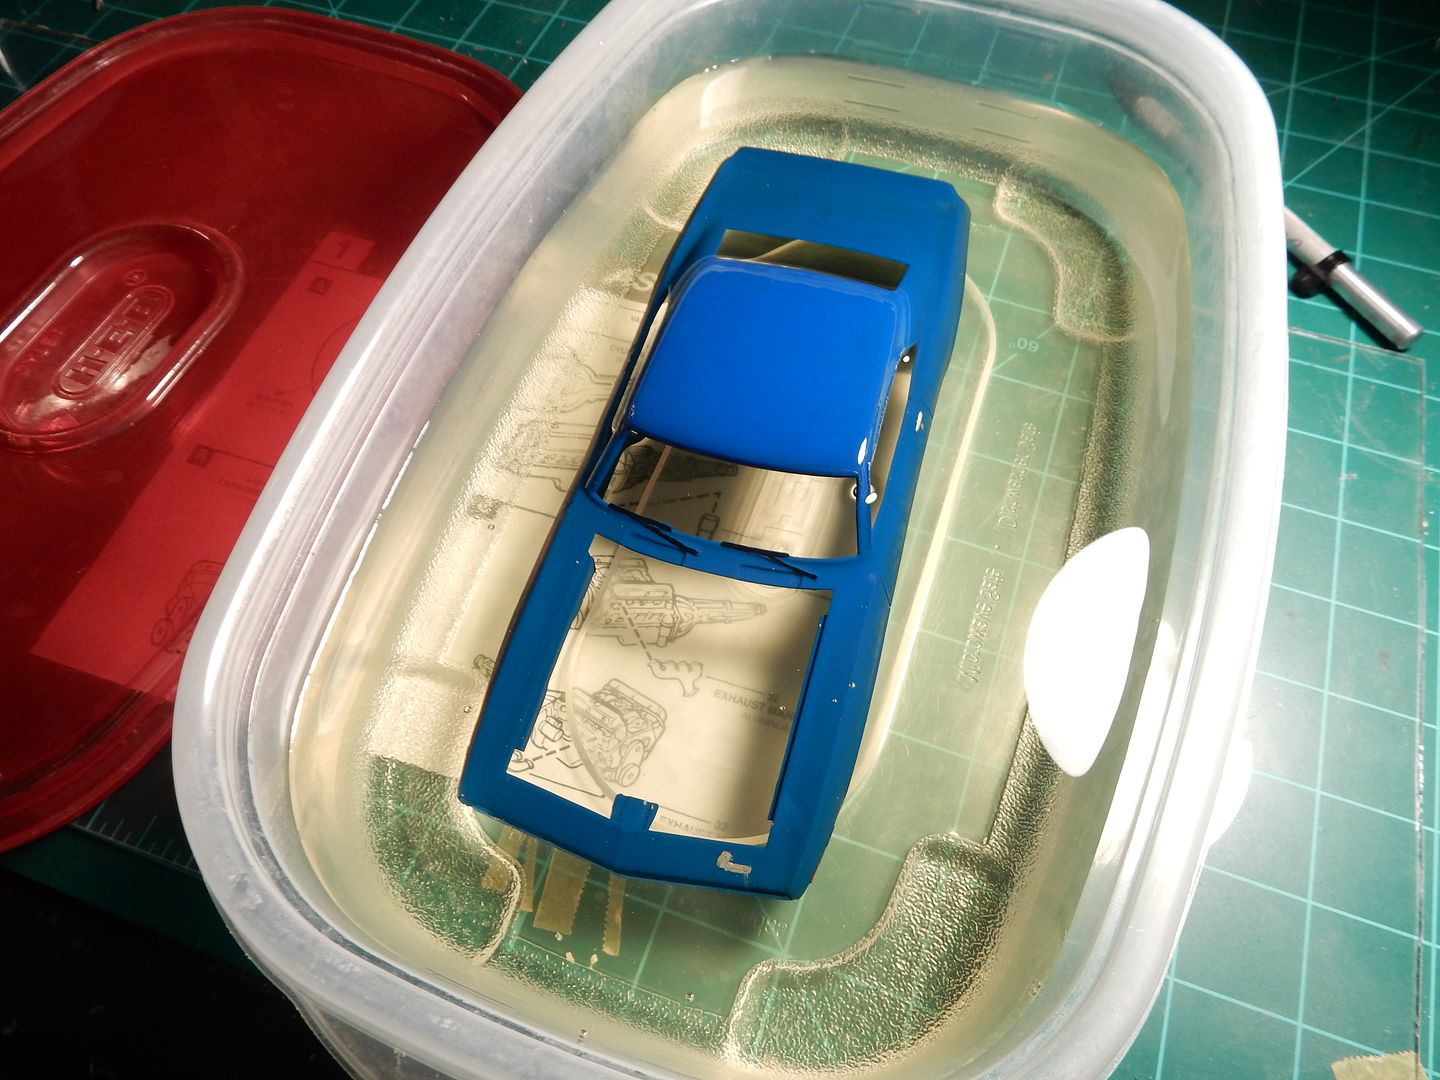
Say good bye to the paint fellas. Currently in a bath of Dot 3 Brake Fluid:
I cleaned up most of the interior parts in regards to excessive flash and sprue joins got most of the small parts separated like the steering wheel and master cylinder and stuff like that. I ordered a spare kit just because I needed some parts that were missing or otherwise deemed unusable just this morning.
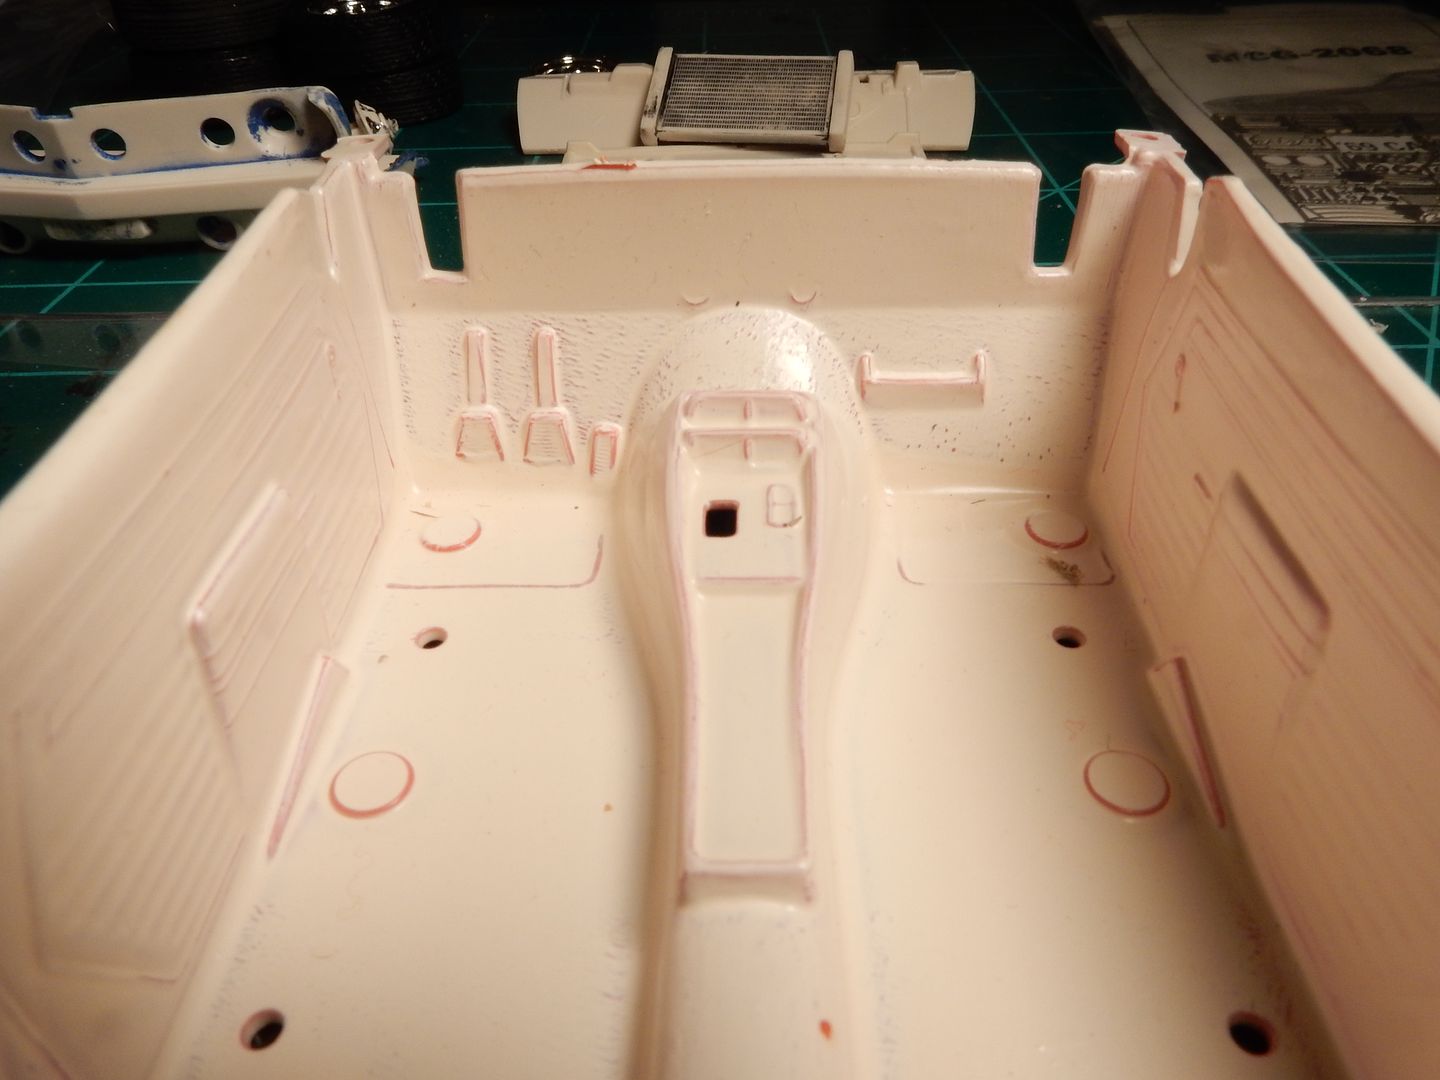
Still on this one fellas. I’ve managed to strip most of the paint from all the parts.
The body turned out pretty good and still needs some cleaning up. I ended up clipping one of the rear tail light openings at the bottom and knocked the thin strip at the bottom of the opening out so I’ll have to work some fancy foot work to get that back in line but it shouldn’t be all that bad.
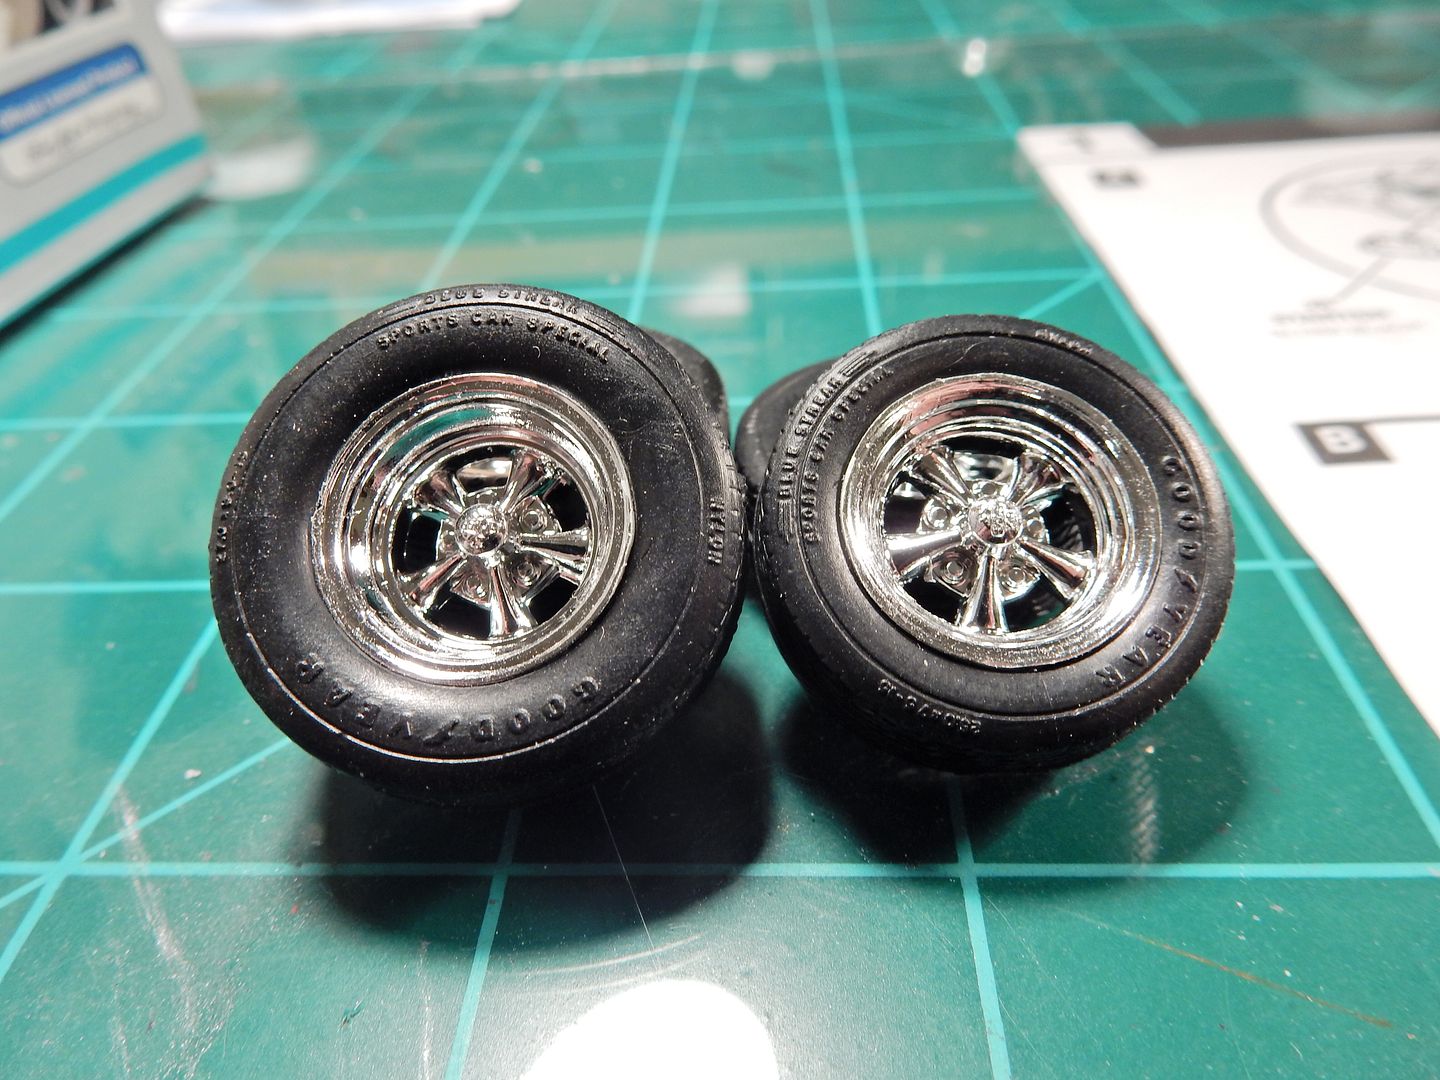
I’ve got the wheels and tires picked out for it now after a few days of searching.
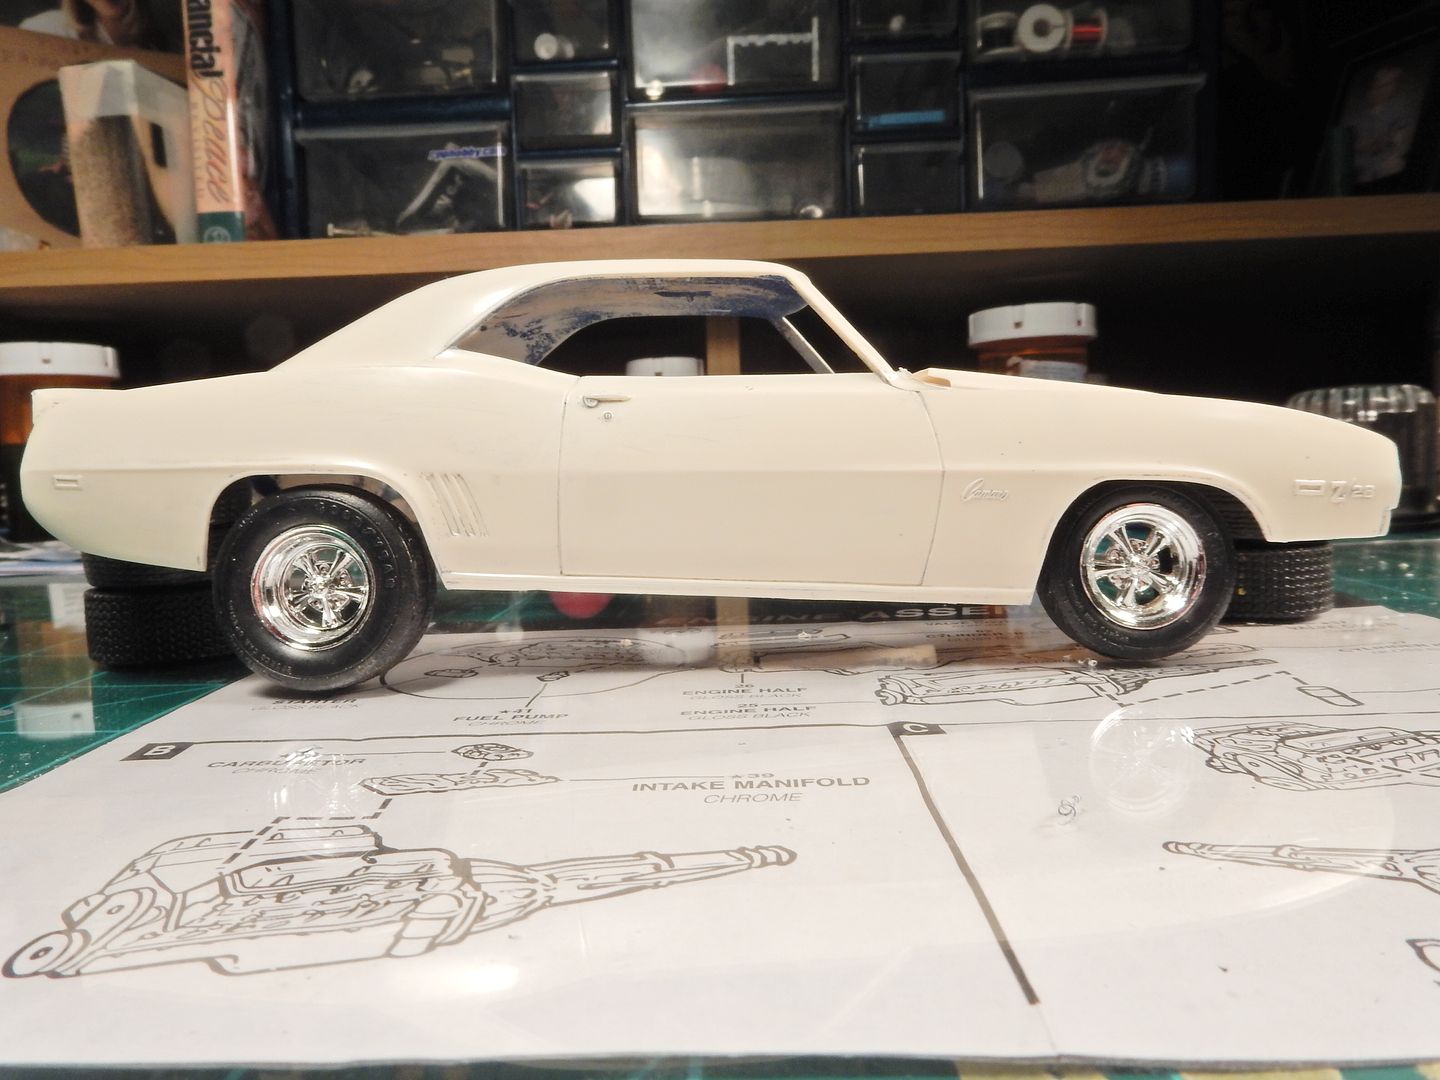
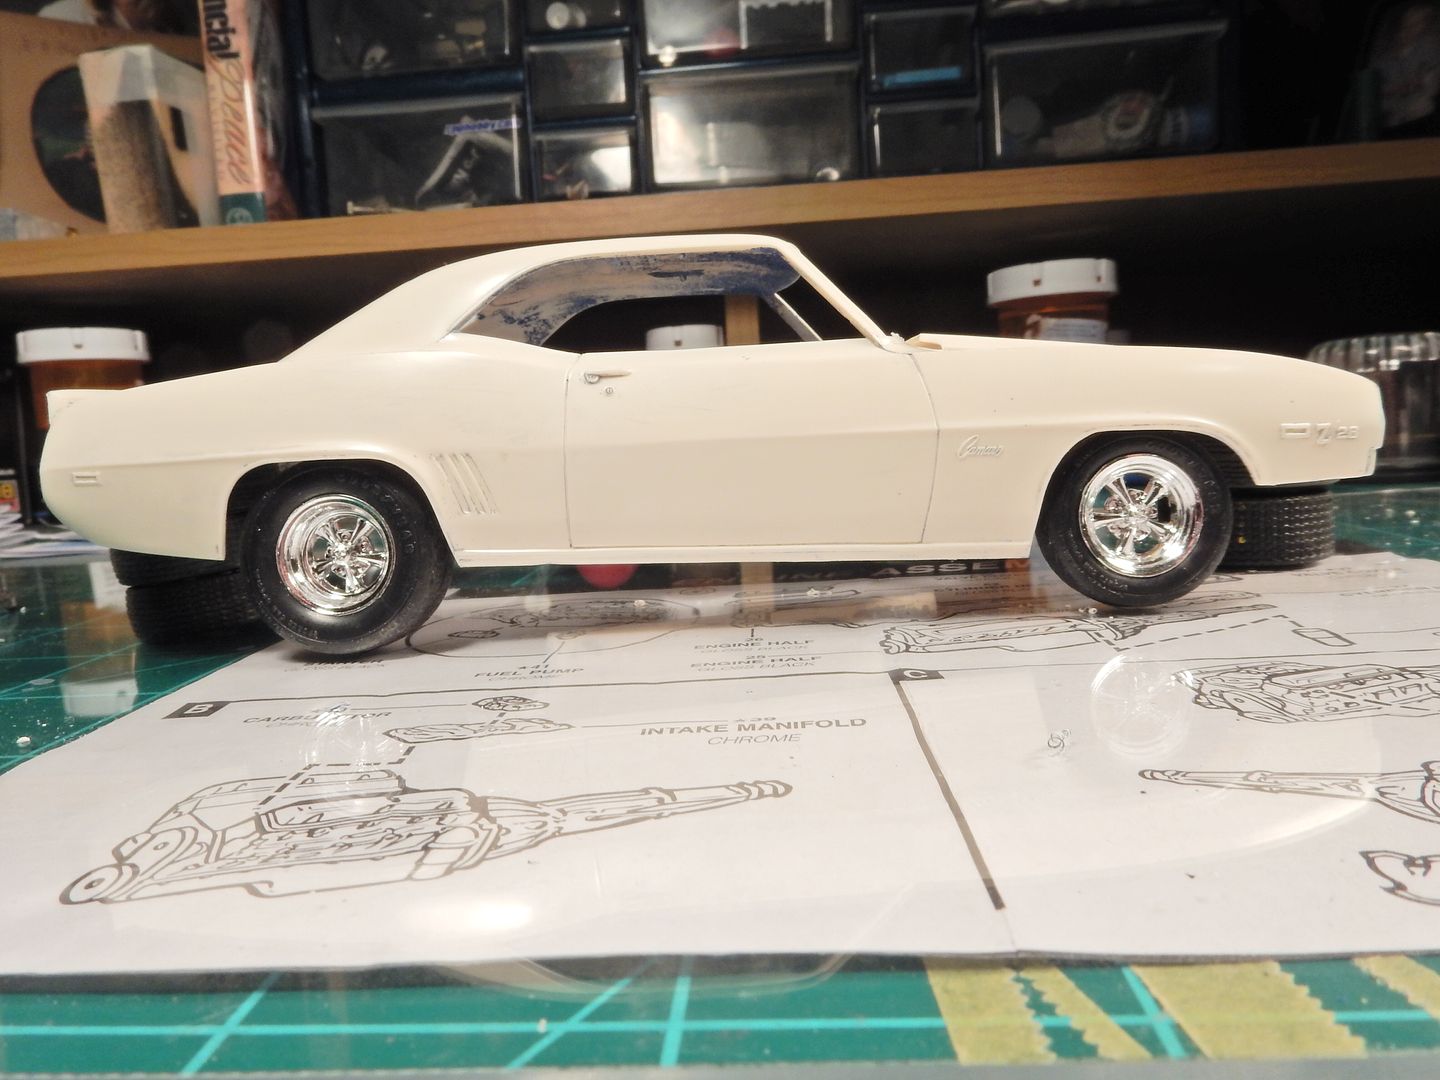
I started setting up two different stances but I like the second one alot better so I think we’ll be going with that one.
This isn’t going to be a “numbers matching Camaro” as I’ll be changing a few things up to more of a mild modified street car. I’m currently looking for a blank grille with no Z/28 or RS emblems in it. I had 'em on ebay just last night and forgot to visit when I was supposed to and lost it. [:|]
Oh, this will be awesome Joe. I really enjoy your “refurbish” builds. They’re a departure from the norm and lend to some quite clever modeling from you. Not to mention that it’s just plain fun to watch the overall transformation. I also like the second stance. glad that you are going with that one. I’ll be following along and offering up a healthy dose of “oohs and aahs” Bring it on!
Ok folks. This is the very best that Monogram could do in the late 70’s and throughout the early 80’s I guess. It’s not very accurate but it’s what I’ve got …so we’ll deal with that.
It’s not going to be perfect but I’m shooting for the best I can do with this interior bucket to transform it into something that somewhat resembles this…minus the wood grain of course. Yuck!
I tried the same thing recently when I’d lashed the paint up on a build, but the brake fluid has been in the garage at least 25 years, since my time building kit cars, and it picks up condensation anyway which waters it down.
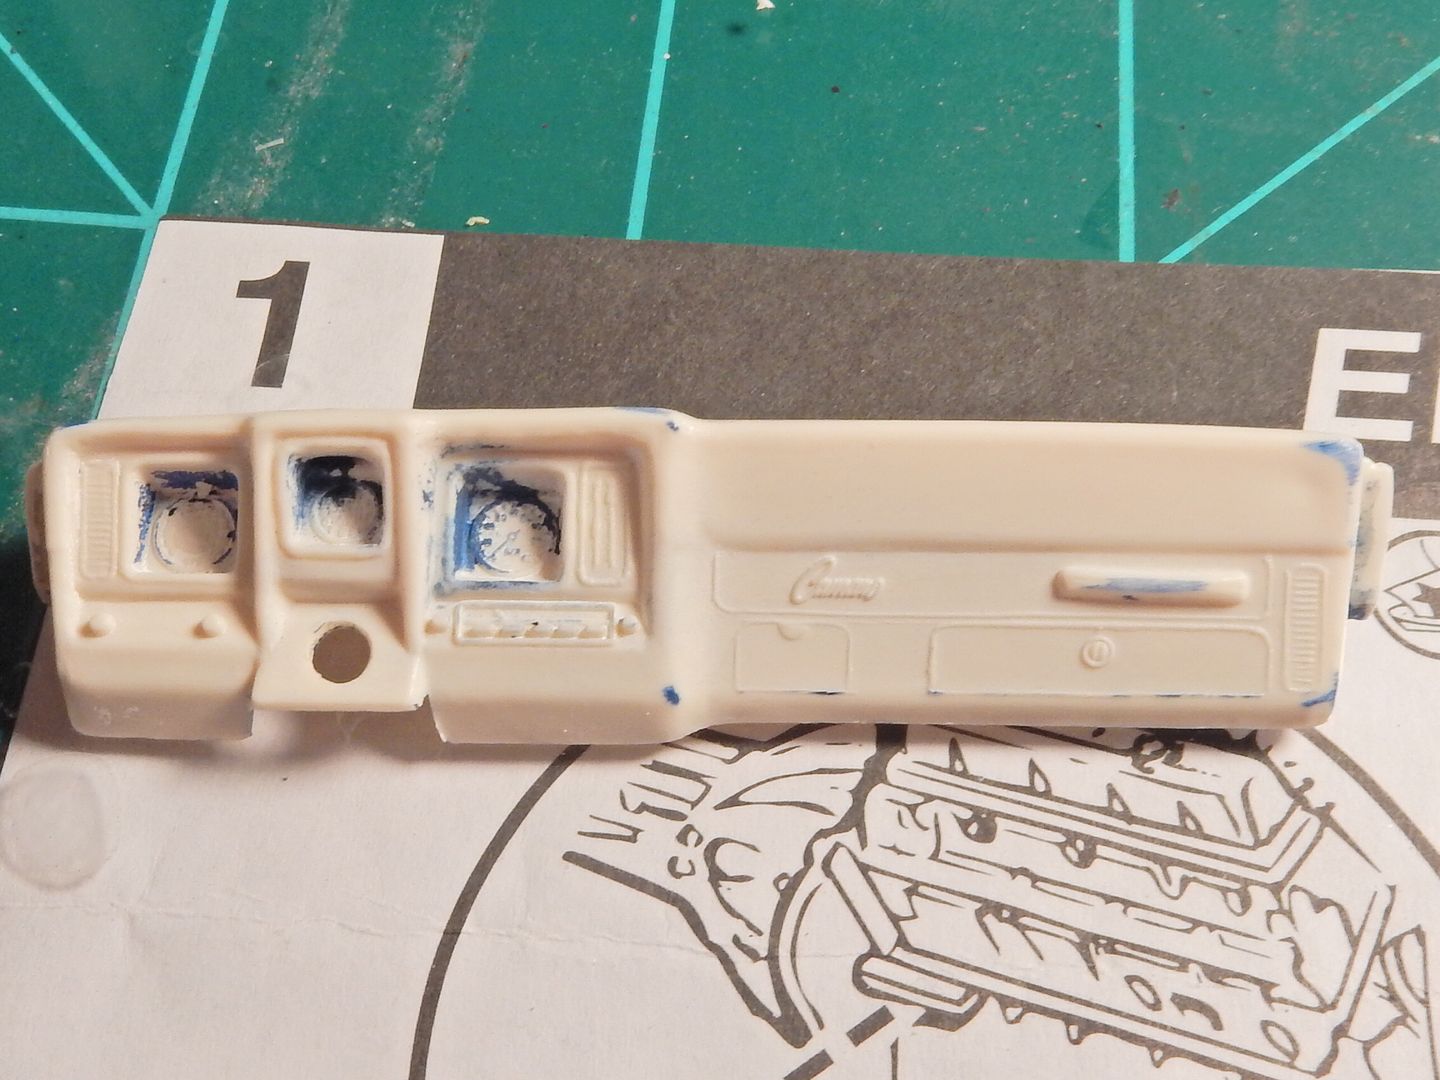
Sorry for the delay in updates everybody. I’ve been working on this thing but there are a lot of corrections to make. First off the PE bezels are NOT going to work with this dash …BUT I’ve got a different plan. Here’s where we start this morning…
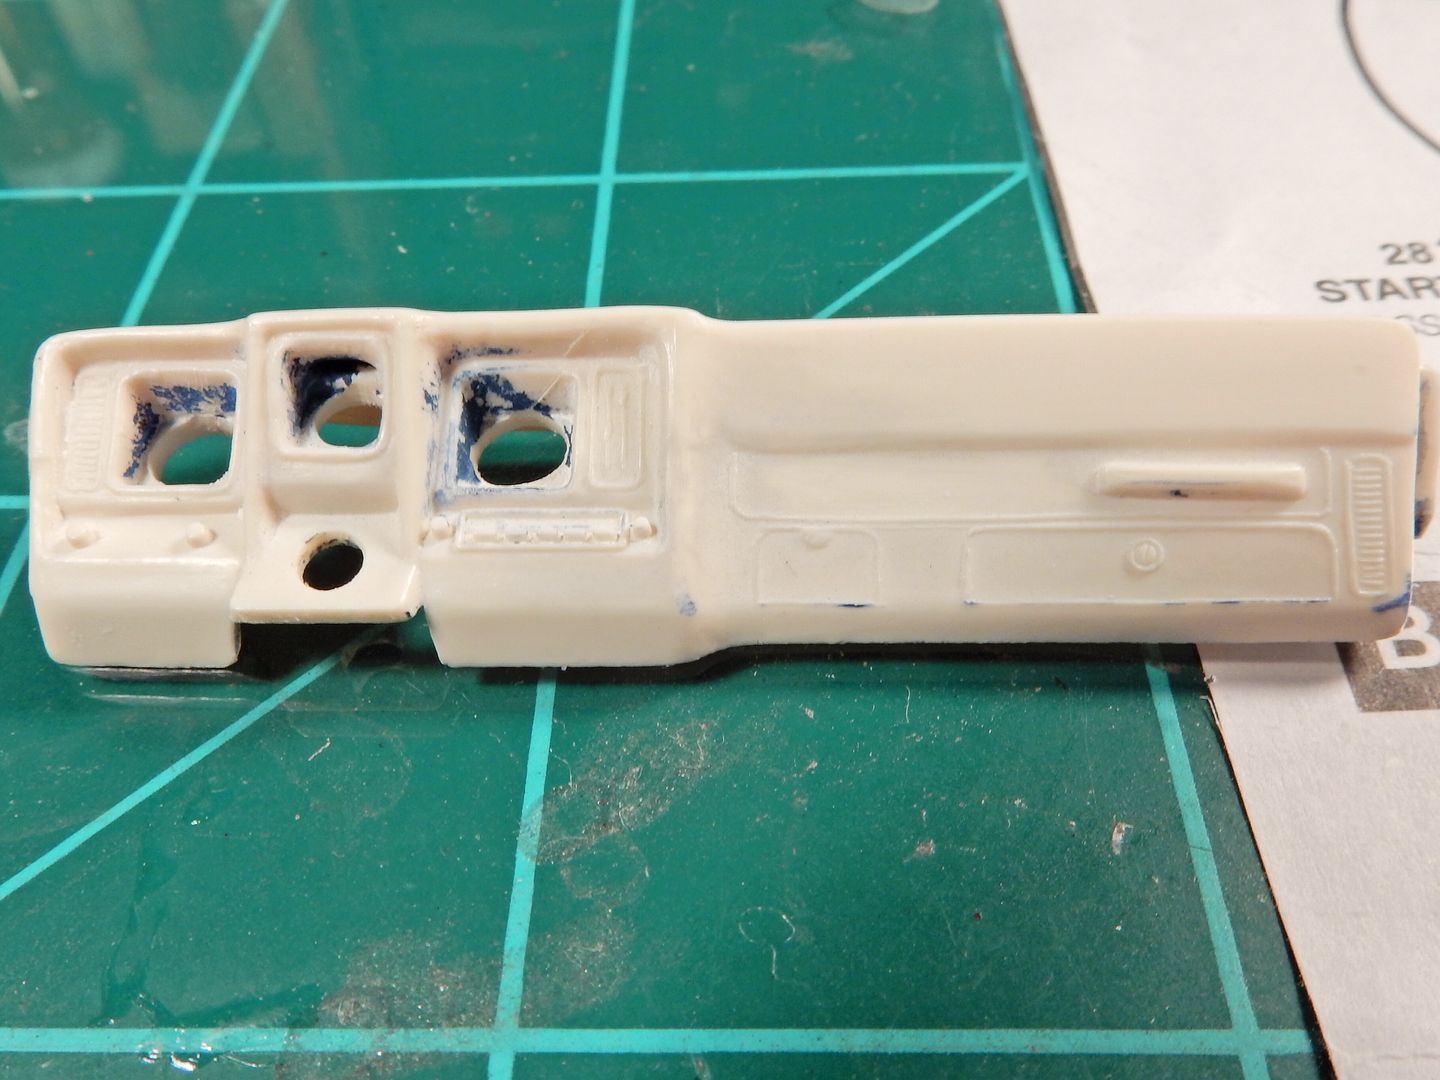
I drilled out the IP gauges and sanded down the back of them for the scale thickness factor and sanded the Camaro emblem off as well as cleaned up a bunch of flash and sinkholes that I found not only on top of the dash but the face of it as well. I also sanded that Camaro script from the dash.
We’ll be slingin’ paint on this thing about anytime now:
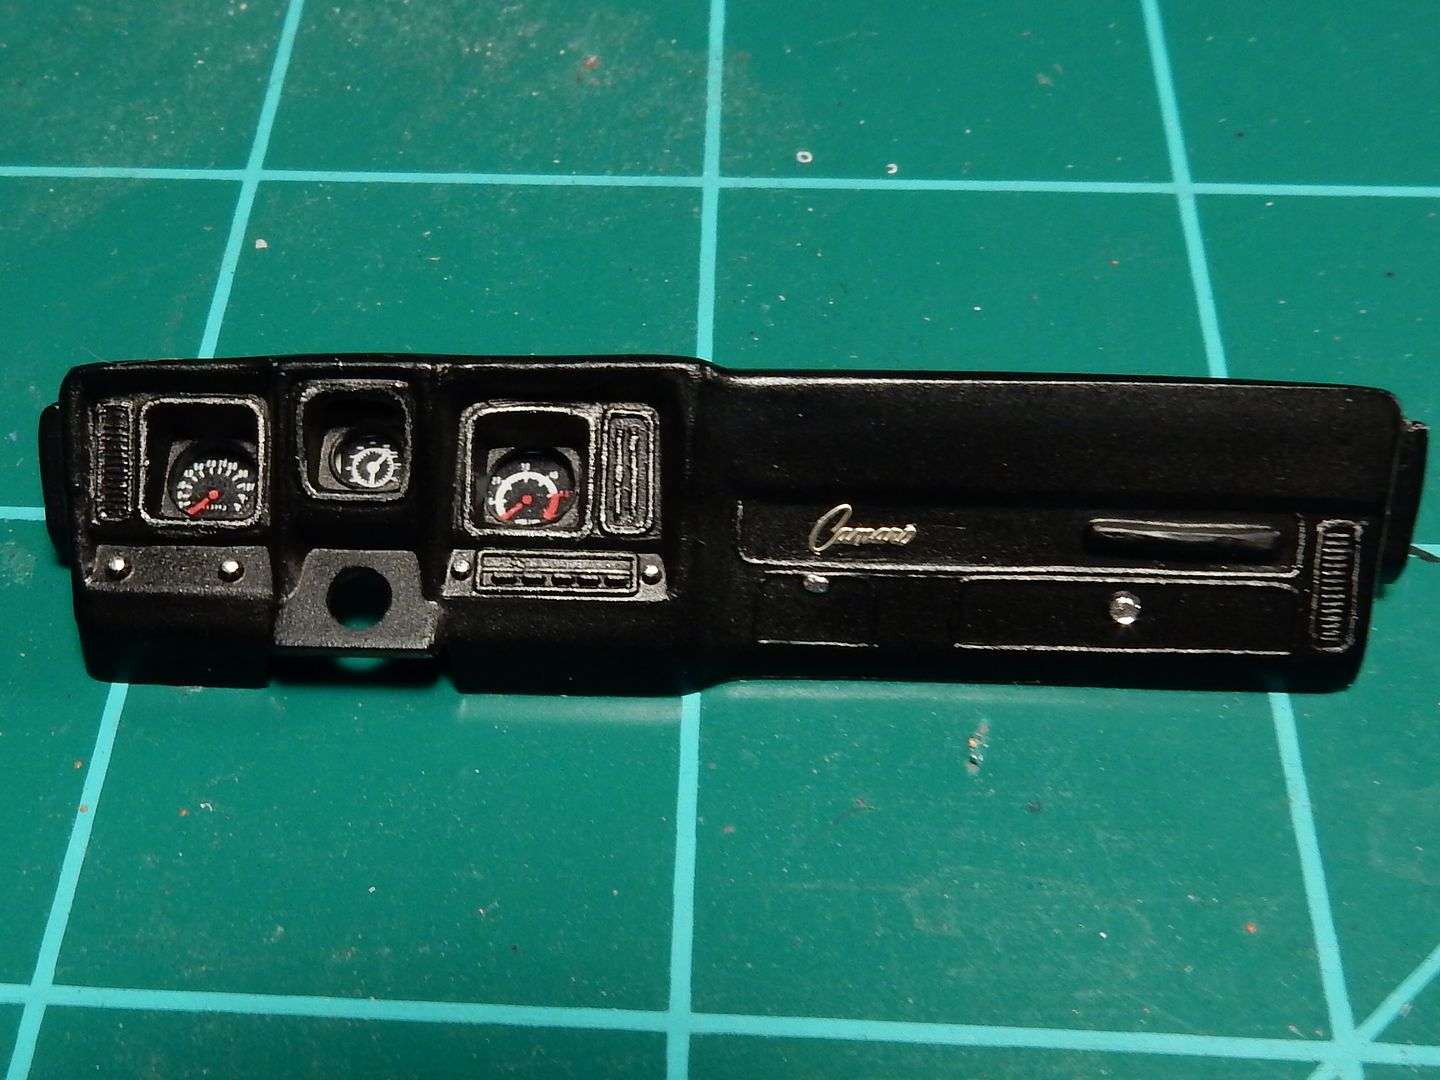
Dash is complete. I got the film instruments and the “Camaro” script from the PE set. All dash trim was brought out with a silver lead pencil. While it’s not the best dash you’ll ever see, it’s a far cry from what it was.
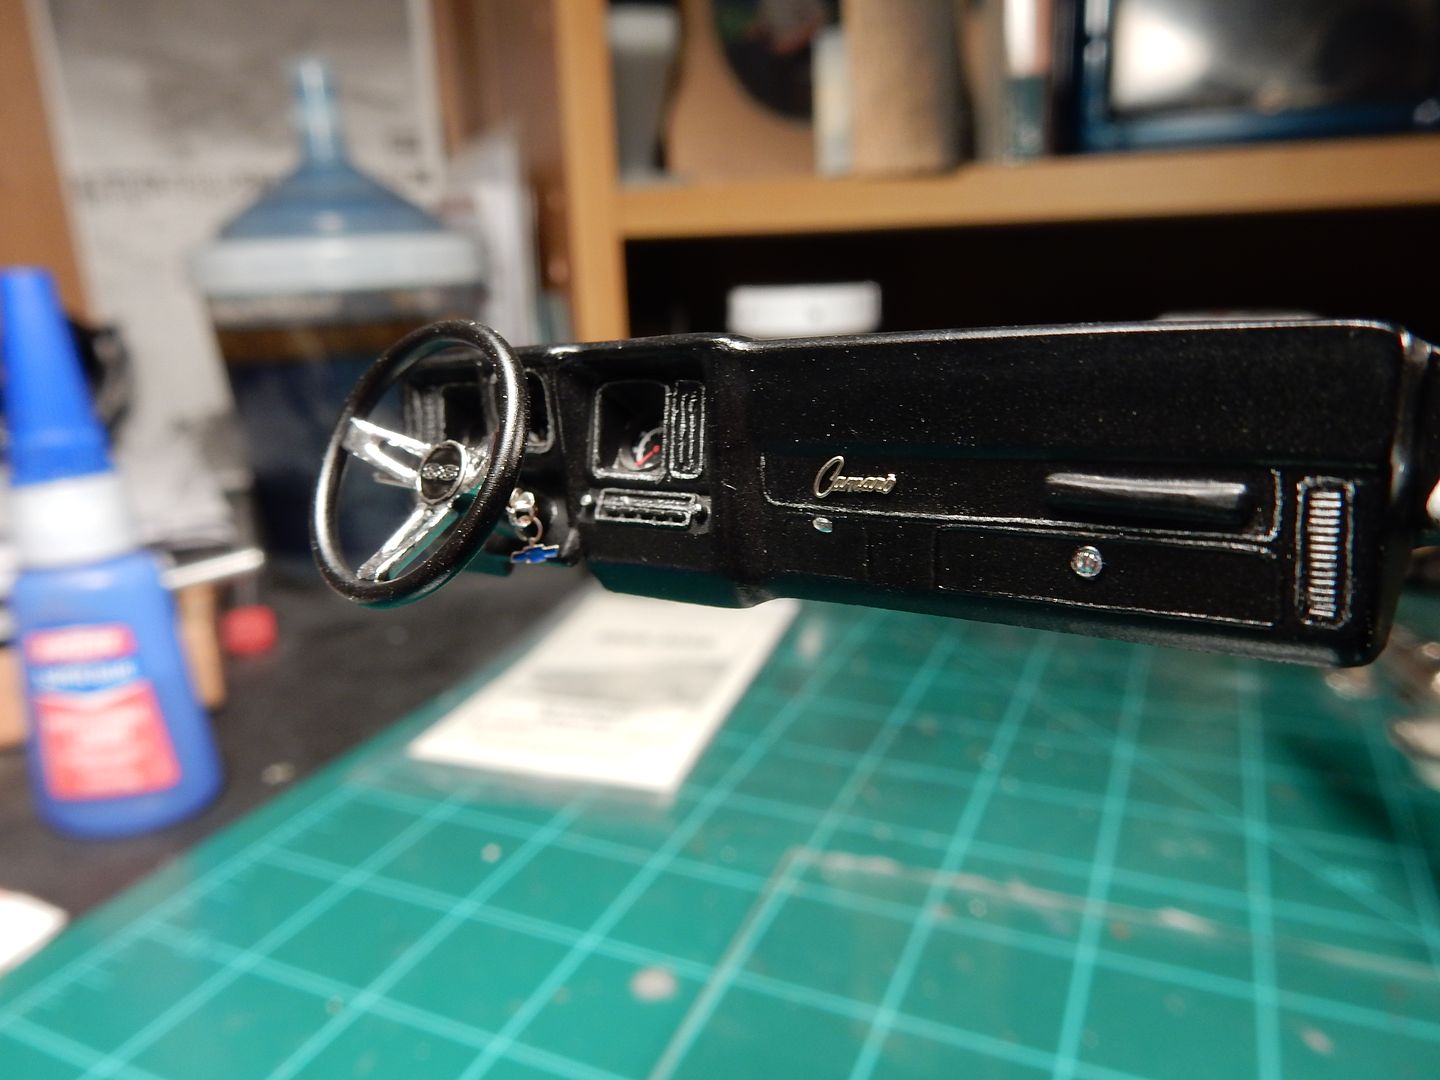
As promised , I’ve been working on the steering column along with the dash for the better part of 3 days. First off I took the OOB steering wheel and cut out the spoke holes and shaved off the horn pad. I then drilled two holes in the column. One on the right for the ignition switch, key and key chain and the one on the left for a turn signal lever. I painted the steering wheel spokes with the newly acquired chrome pen that I just got in the mail and installed a PE “SS” horn pad. I then took a PE key along with a PE ignition switch bezel and a PE key chain with a “Bowtie” on it , made a scratch built key ring and put it all together and installed it into the column. The turn signal lever is made from a .019" needle I had in the spares box and I’ll be painting a black knob on the end of it tomorrow morning. Any ways here it all is. I’ll show the before picture (which I knew I should have taken a more clear “before” picture of the dash beforehand but this is all I’ve got) and then the improvement pics: